Skip to content
Create account
or
Sign in
The Stripe Docs logo
/
Ask AI
Create account
Sign in
Get started
Payments
Revenue
Platforms and marketplaces
Money management
Developer resources
Overview
Versioning
Changelog
Upgrade your API version
Upgrade your SDK version
Essentials
SDKs
API
Testing
Stripe CLI
Tools
Workbench
Developers Dashboard
Stripe Shell
Stripe for Visual Studio Code
Features
Workflows
Event destinations
Stripe health alertsFile uploads
AI solutions
Agent toolkit
Security and privacy
Security
Privacy
Extend Stripe
Build Stripe apps
    Overview
    Get started
    Create an app
    How Stripe Apps work
    Sample apps
    Build an app
    Store secrets
    API authentication methods
    Authorization flows
    Server-side logic
    Listen to events
    Handle different modes
    Enable sandbox support
    App settings page
    Build a UI
    Onboarding
    Distribute your app
    Distribution options
    Upload your app
    Versions and releases
    Test your app
    Publish your app
    Promote your app
    Add deep links
    Create install links
    Assign roles in UI extensions
    Post-install actions
    App analytics
    Embedded components
    Embed third-party Stripe Apps
    Migrating to Stripe Apps
    Migrate or build an extension
    Migrate a plugin to Stripe Apps or Stripe Connect
    Reference
    App manifest
    CLI
    Extension SDK
    Permissions
    Viewports
    Design patterns
      Action buttons
      Activation flow
      Additional context
      Back link
      Communicating state
      Demo content
      Empty state
      Lists
      Loading
      Progress stepping
      Redirects
      Settings sign in
      Sign in template
      Sign out
      Waiting screens
    Components
Use apps from Stripe
Partners
Partner ecosystem
Partner certification
HomeDeveloper resourcesBuild Stripe appsDesign patterns

Settings sign in for Stripe Apps

Learn how to onboard users on a settings page.

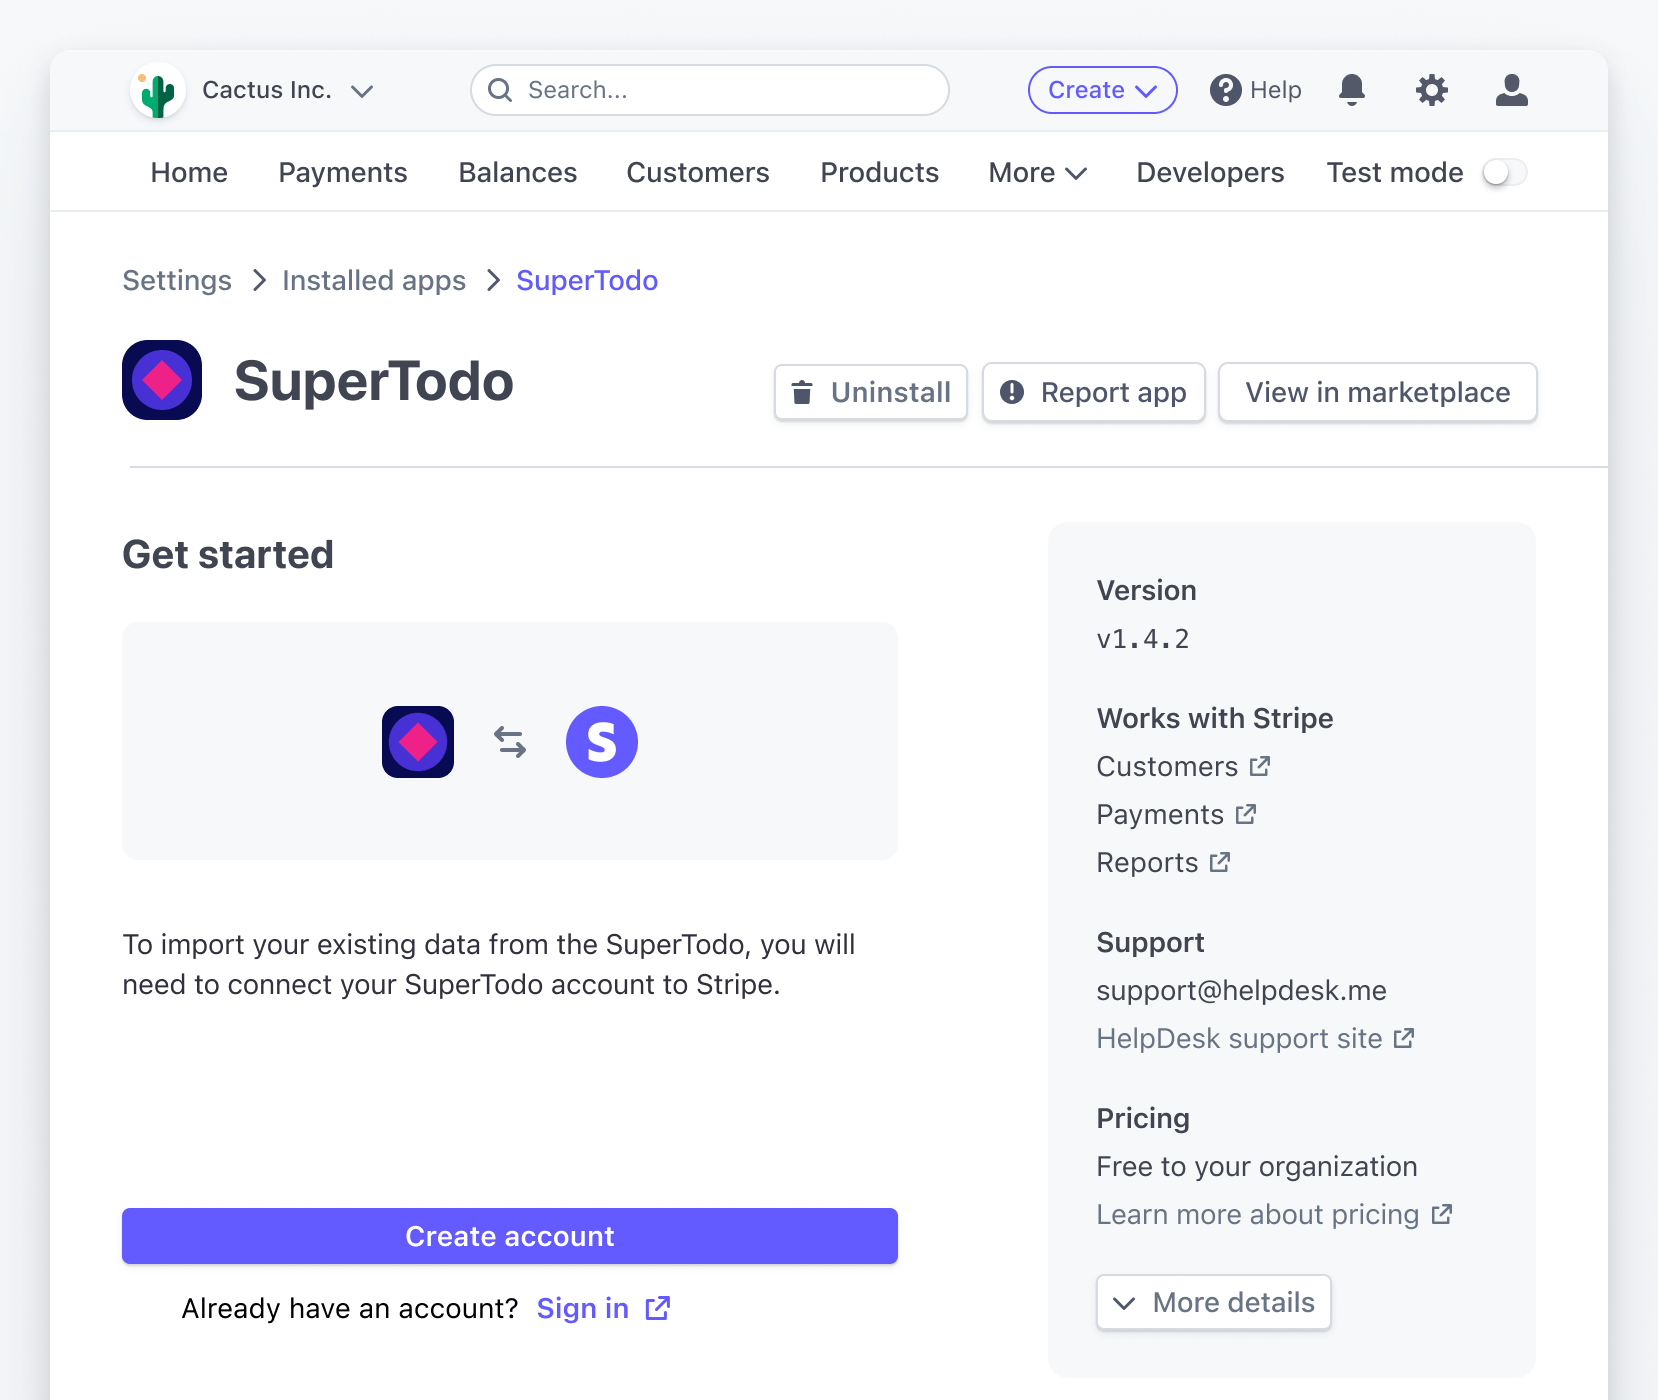
If you’re building a connect extension or a back-end only app, onboard users with a settings page.

Before you begin

Create an app.

Suggested use

  • Use a settings page to sign in users.
  • Apply this design pattern the same way you would in a drawer. Avoid additional context that isn’t helpful when onboarding users. For example:
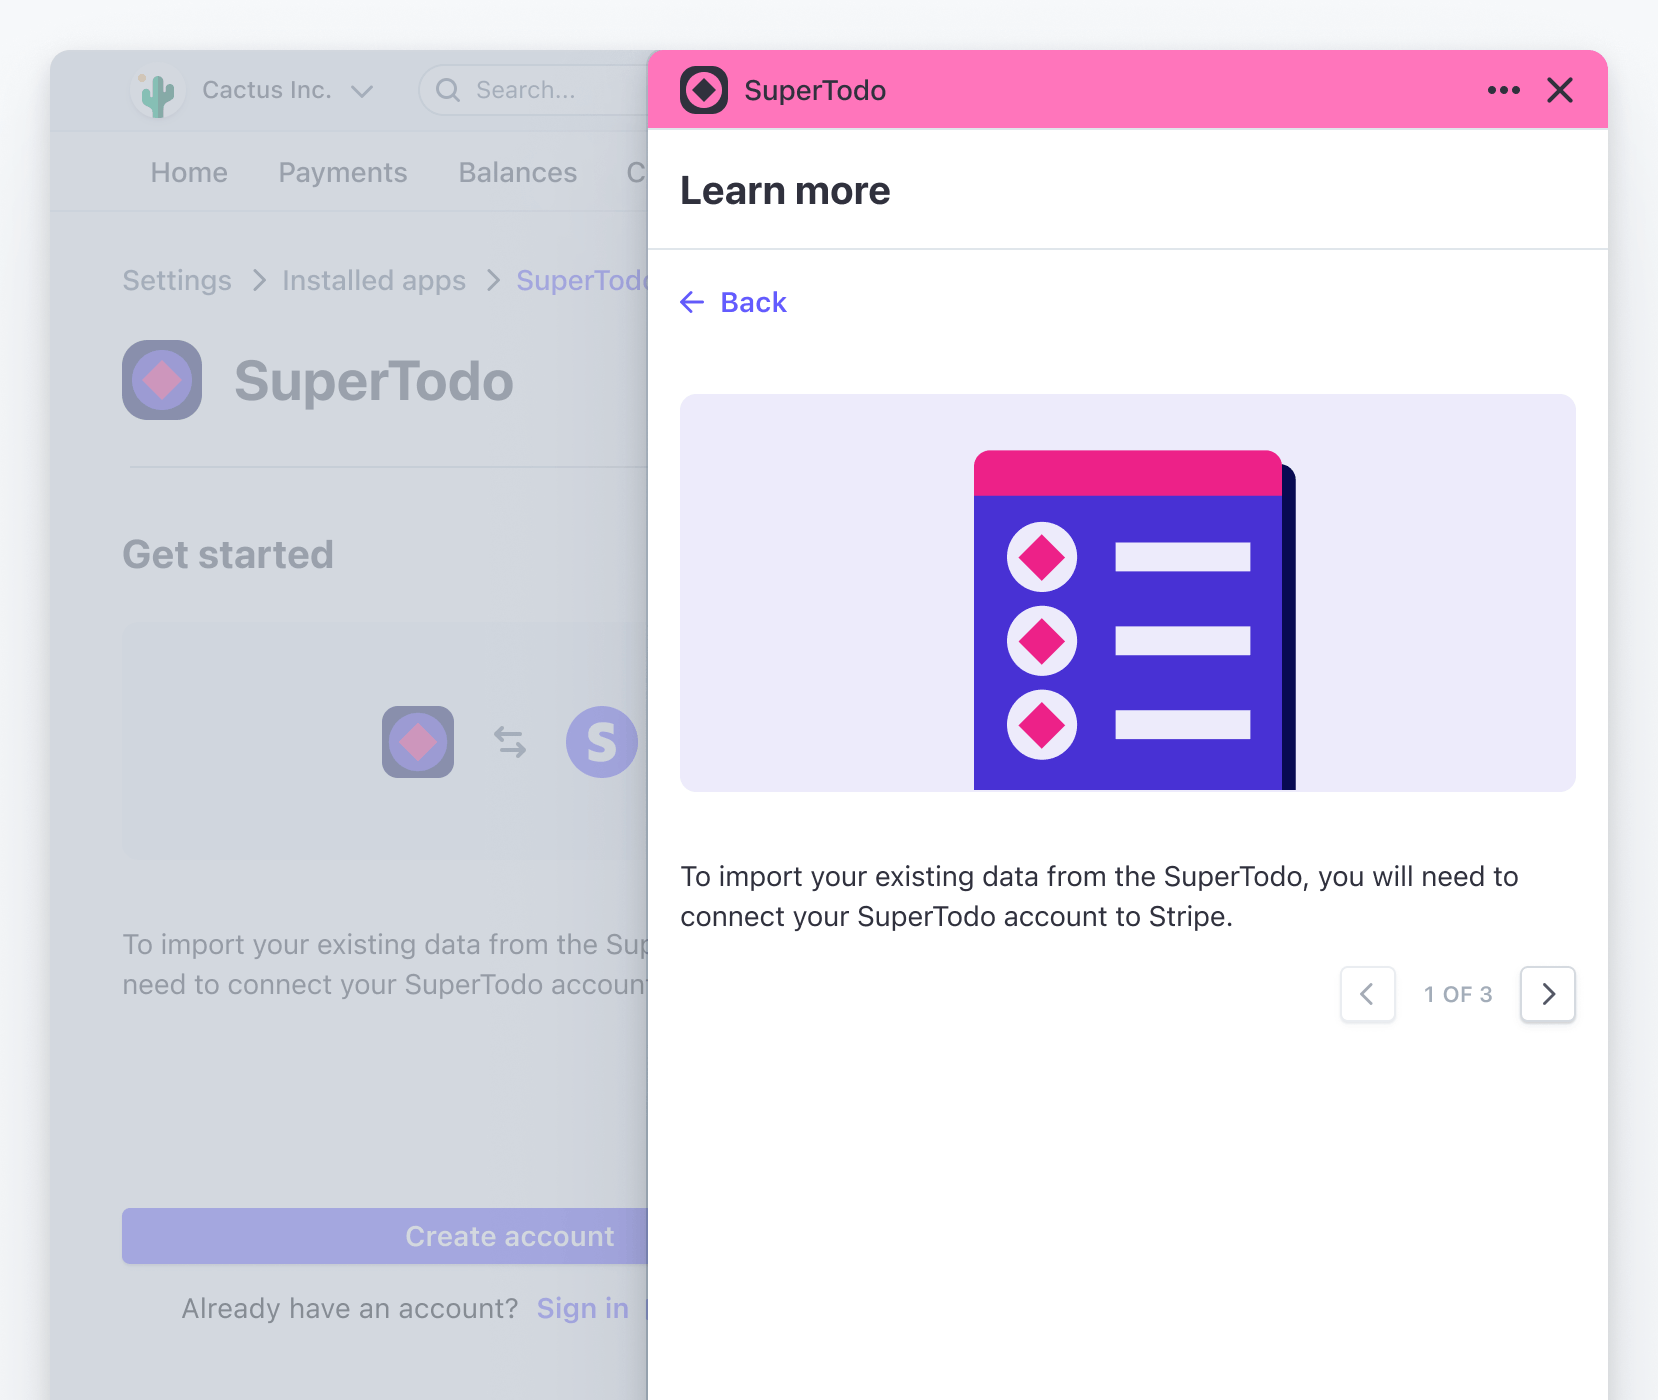
  • When you need to add additional context to users, use a FocusView component to provide the information. For example:

Example

To add the SignInView component to your settings view, display it conditionally with the SettingsView component based on the user’s sign in state:

import {SignInView, SettingsView} from '@stripe/ui-extension-sdk/ui'; import appIcon from './icon.svg'; const AppSettings = () => { // Set this variable based on your app's concept of sign in state const isUserSignedIn = ...; return isUserSignedIn ? ( <SettingsView> {/* Add your settings view content. */} </SettingsView> ) : ( <SignInView description="Connect your SuperTodo account with Stripe." primaryAction={{label: 'Sign in', href: 'https://example.com'}} footerContent={ <> Don't have an account? <Link href="https://example.com">Sign up</Link> </> } brandColor="#635bff" brandIcon={appIcon} /> );
Was this page helpful?
YesNo
Need help? Contact Support.
Join our early access program.
Check out our changelog.
Questions? Contact Sales.
LLM? Read llms.txt.
Powered by Markdoc