# Accettare un pagamento con Satispay
Come configurare l'integrazione con Satispay
# Checkout
> This is a Checkout for when payment-ui is checkout. View the full page at https://docs.stripe.com/payments/satispay/accept-a-payment?payment-ui=checkout.
> Stripe automatically presents your customers payment method options by evaluating their currency, payment method restrictions, and other parameters. We recommend that you configure your payment methods from the Stripe Dashboard using the instructions in [Accept a payment](https://docs.stripe.com/payments/accept-a-payment.md?payment-ui=checkout&ui=stripe-hosted).
>
> Se vuoi continuare a configurare manualmente i metodi di pagamento che mostri ai clienti con Checkout, usa questa guida. In alternativa, aggiornare la tua integrazione per [configurare i metodi di pagamento nella Dashboard](https://docs.stripe.com/payments/dashboard-payment-methods.md).
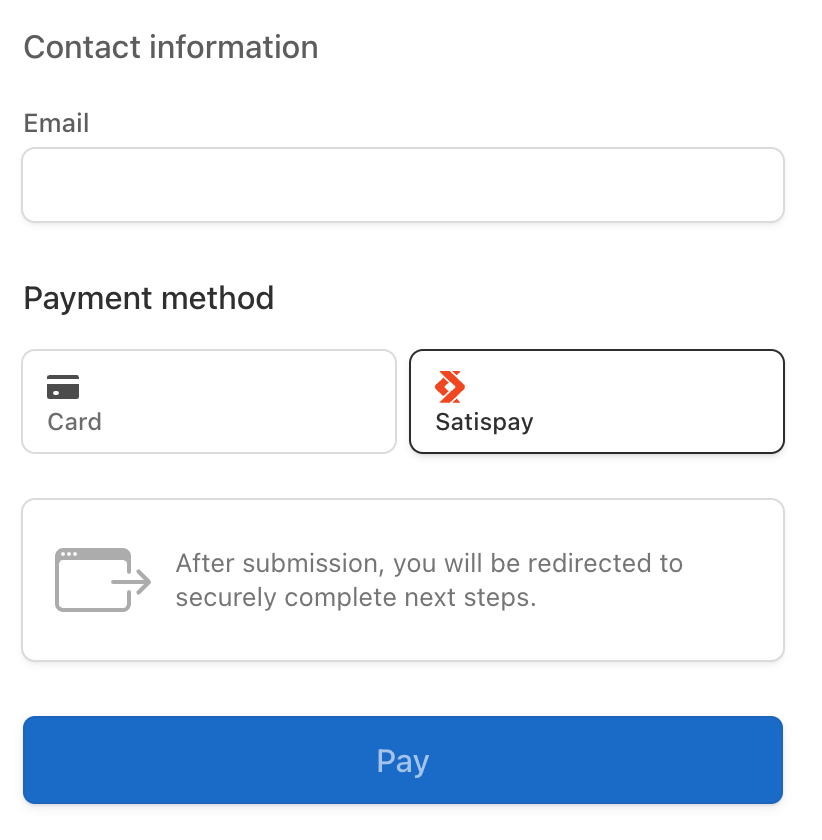
Satispay è una metodo di pagamento [monouso](https://docs.stripe.com/payments/payment-methods.md#usage) in cui i clienti devono [autenticare](https://docs.stripe.com/payments/payment-methods.md#customer-actions) il pagamento. I clienti vengono reindirizzati dal tuo sito web o dalla tua app, autorizzano il pagamento con Satispay, poi tornano sul tuo sito web o sulla tua app. Ricevi una [notifica immediata](https://docs.stripe.com/payments/payment-methods.md#payment-notification) in merito all’esito positivo o negativo del pagamento.
## Determinare la compatibilità
**Sedi aziendali supportate**: Europe
**Valute accettate**: `eur`
**Valute di pagamento**: `eur`
**Metodi di pagamento**: Yes
**Modalità di configurazione**: No
**Modalità di abbonamento**: No
Per supportare i pagamenti con Satispay, una sessione di Checkout deve soddisfare tutte le seguenti condizioni:
- I *prezzi* (Prices define how much and how often to charge for products. This includes how much the product costs, what currency to use, and the interval if the price is for subscriptions) di tutte le voci riga devono essere indicati nella stessa valuta.
- Se hai voci riga in valute diverse, crea sessioni di Checkout distinte per ogni valuta.
## Accettare un pagamento
> Crea un’integrazione per [accettare un pagamento](https://docs.stripe.com/payments/accept-a-payment.md?integration=checkout) con Checkout prima di utilizzare questa guida.
Questa guida descrive come abilitare Satispay e mostra le differenze tra l’accettazione di un pagamento con carta e l’utilizzo di Satispay.
### Abilita Satispay come metodo di pagamento
Quando crei una nuova [sessione di Checkout](https://docs.stripe.com/api/checkout/sessions.md), devi:
1. Aggiungi `satispay` all’elenco di `payment_method_types`.
1. Assicurati che tutte le `line_items` utilizzino la stessa valuta.
#### Ruby
```ruby
client.v1.checkout.sessions.create({
mode: 'payment',payment_method_types: ['card', 'satispay'],
line_items: [{
price_data: {# To accept `satispay`, all line items must have currency:eurcurrency: 'eur',
product_data: {
name: 'T-shirt'
},
unit_amount: 1000
},
quantity: 1
}],
success_url: 'https://example.com/success'
})
```
### Evadere gli ordini
Dopo aver accettato un pagamento, scopri come evadere gli [ordini](https://docs.stripe.com/checkout/fulfillment.md).
## Testare l'integrazione
Quando testi la tua integrazione di Checkout, seleziona Satispay come metodo di pagamento e fai clic sul pulsante **Paga**.
## See also
- [Ulteriori informazioni su Satispay](https://docs.stripe.com/payments/satispay.md)
- [Completamento del pagamento](https://docs.stripe.com/checkout/fulfillment.md)
- [Personalizzazione di Checkout](https://docs.stripe.com/payments/checkout/customization.md)
# Checkout Sessions API
> This is a Checkout Sessions API for when payment-ui is elements and api-integration is checkout. View the full page at https://docs.stripe.com/payments/satispay/accept-a-payment?payment-ui=elements&api-integration=checkout.
To determine which API meets your business needs, see the [comparison guide](https://docs.stripe.com/payments/checkout-sessions-and-payment-intents-comparison.md).
Utilizza [Payment Element](https://docs.stripe.com/payments/payment-element.md) per integrare un modulo di pagamento Stripe personalizzato nel tuo sito web o nella tua applicazione e offrire metodi di pagamento ai clienti. Per configurazioni e personalizzazioni avanzate, consulta la guida all’integrazione [Accettare un pagamento](https://docs.stripe.com/payments/accept-a-payment.md).
## Determinare la compatibilità
**Sedi aziendali supportate**: Europe
**Valute accettate**: `eur`
**Valute di pagamento**: `eur`
**Metodi di pagamento**: Yes
**Modalità di configurazione**: No
**Modalità di abbonamento**: No
Per supportare i pagamenti con Satispay, una sessione di Checkout deve soddisfare tutte le seguenti condizioni:
- I *prezzi* (Prices define how much and how often to charge for products. This includes how much the product costs, what currency to use, and the interval if the price is for subscriptions) di tutte le voci riga devono essere indicati nella stessa valuta.
- Se hai voci riga in valute diverse, crea sessioni di Checkout distinte per ogni valuta.
## Set up the server [Lato server]
Utilizza le librerie ufficiali di Stripe per accedere all’API dalla tua applicazione.
#### Ruby
```bash
# Available as a gem
sudo gem install stripe
```
```ruby
# If you use bundler, you can add this line to your Gemfile
gem 'stripe'
```
## Create a Checkout Session [Lato server]
Aggiungi sul server un endpoint che crei una [sessione di Checkout](https://docs.stripe.com/api/checkout/sessions/create.md) e restituisca la sua [chiave privata client](https://docs.stripe.com/api/checkout/sessions/object.md#checkout_session_object-client_secret) al tuo front-end. Una sessione di Checkout rappresenta la sessione in cui il cliente completa acquisti una tantum o sottoscrive abbonamenti. Le sessioni di Checkout scadono 24 ore dopo la creazione.
Consigliamo di utilizzare [metodi di pagamento dinamici](https://docs.stripe.com/payments/payment-methods/dynamic-payment-methods.md) per mostrare dinamicamente a ciascun cliente i metodi di pagamento idonei più pertinenti per massimizzare la conversione. Puoi anche [elencare manualmente i metodi di pagamento](https://docs.stripe.com/payments/payment-methods/integration-options.md#listing-payment-methods-manually), che disabilitano i metodi di pagamento dinamici.
#### Gestire le modalità di pagamento dalla Dashboard
#### TypeScript
```javascript
import express, {Express} from 'express';
const app: Express = express();
app.post('/create-checkout-session', async (req: Express.Request, res: Express.Response) => {
const session = await stripe.checkout.sessions.create({
line_items: [
{
price_data: {
currency: 'eur',
product_data: {
name: 'T-shirt',
},
unit_amount: 1000,
},
quantity: 1,
},
],
mode: 'payment',
ui_mode: 'elements',
return_url: 'https://example.com/return?session_id={CHECKOUT_SESSION_ID}'
});
res.json({checkoutSessionClientSecret: session.client_secret});
});
app.listen(3000, () => {
console.log('Running on port 3000');
});
```
#### Manually list payment methods
#### TypeScript
```javascript
import express, {Express} from 'express';
const app: Express = express();
app.post('/create-checkout-session', async (req: Express.Request, res: Express.Response) => {
const session = await stripe.checkout.sessions.create({
line_items: [
{
price_data: {
currency: 'eur',
product_data: {
name: 'T-shirt',
},
unit_amount: 1000,
},
quantity: 1,
},
],
mode: 'payment',
ui_mode: 'elements',
payment_method_types: ['satispay'],
return_url: 'https://example.com/return?session_id={CHECKOUT_SESSION_ID}'
});
res.json({checkoutSessionClientSecret: session.client_secret});
});
app.listen(3000, () => {
console.log('Running on port 3000');
});
```
## Configurare il front-end [Lato client]
#### HTML + JS
Includi lo script Stripe.js nella tua pagina di pagamento aggiungendolo all’oggetto `head` del tuo file HTML. Carica sempre Stripe.js direttamente da js.stripe.com per mantenere la conformità alle norme PCI. Non includere lo script in un pacchetto e non ospitarne una copia personale.
Make sure you’re on the latest Stripe.js version by including the following script tag ``. Learn more about [Stripe.js versioning](https://docs.stripe.com/sdks/stripejs-versioning.md).
```html
Checkout
```
> Stripe fornisce un pacchetto npm che puoi utilizzare per caricare Stripe.js come modulo. Consulta il [progetto su GitHub](https://github.com/stripe/stripe-js). È necessaria la versione [7.0.0](https://www.npmjs.com/package/%40stripe/stripe-js/v/7.0.0) o successiva.
Initialize stripe.js.
```js
// Set your publishable key: remember to change this to your live publishable key in production
// See your keys here: https://dashboard.stripe.com/apikeys
const stripe = Stripe(
'<>',
);
```
#### React
Installa [React Stripe.js](https://www.npmjs.com/package/@stripe/react-stripe-js) e il [caricatore Stripe.js](https://www.npmjs.com/package/@stripe/stripe-js) dal registro pubblico npm. È necessaria almeno la versione 5.0.0 per React Stripe.js e la versione 8.0.0 per il caricatore Stripe.js.
```bash
npm install --save @stripe/react-stripe-js@^5.0.0 @stripe/stripe-js@^8.0.0
```
Inizializza un’istanza `stripe` sul front-end con la chiave pubblicabile.
```javascript
import {loadStripe} from '@stripe/stripe-js';
const stripe = loadStripe("<>");
```
## Initialize Checkout [Lato client]
#### HTML + JS
Create either a `clientSecret` promise that resolves with the client secret or set it as the secret directly. Call [initCheckoutElementsSdk](https://docs.stripe.com/js/custom_checkout/init), passing in `clientSecret`. `initCheckoutElementsSdk` returns a [Checkout](https://docs.stripe.com/js/custom_checkout) instance.
The [Checkout](https://docs.stripe.com/js/custom_checkout) object acts as the foundation of your checkout page, and contains data from the Checkout Session and methods to update the Session.
L’oggetto restituito da [actions.getSession()](https://docs.stripe.com/js/custom_checkout/session) contiene le informazioni sui prezzi. Si consiglia di leggere e visualizzare `total`e `lineItems` della sessione nell’interfaccia utente.
In questo modo è possibile attivare nuove funzioni modificando minimamente il codice. Ad esempio, l’aggiunta [manuale di prezzi in valuta](https://docs.stripe.com/payments/custom/localize-prices/manual-currency-prices.md) non richiede modifiche dell’interfaccia utente se visualizzi il `total`.
```javascript
const clientSecret = fetch('/create-checkout-session', {method: 'POST'})
.then((response) => response.json())
.then((json) => json.checkoutSessionClientSecret);
const checkout = stripe.initCheckoutElementsSdk({clientSecret});
const loadActionsResult = await checkout.loadActions();
if (loadActionsResult.type === 'success') {
const session = loadActionsResult.actions.getSession();
const checkoutContainer = document.getElementById('checkout-container');
checkoutContainer.append(JSON.stringify(session.lineItems, null, 2));
checkoutContainer.append(document.createElement('br'));
checkoutContainer.append(`Total: ${session.total.total.amount}`);
}
```
```html
```
#### React
Crea `clientSecret` come `Promise | string` contenente la chiave privata client restituita dal tuo server.
Includi la tua richiesta di registrazione con il componente [CheckoutElementsProvider](https://docs.stripe.com/js/react_stripe_js/checkout/checkout_provider), specificando `clientSecret` e l’istanza `stripe`.
Use the [useCheckoutElements](https://docs.stripe.com/js/react_stripe_js/checkout/use_checkout_elements) hook in your components to get the [Checkout](https://docs.stripe.com/js/custom_checkout) object, which contains data from the Checkout Session and methods to update the Session.
Utilizza l’oggetto `Checkout` come contenitore per i tuoi prezzi. Consigliamo di leggere e visualizzare `total` e `lineItems` dall’oggetto `Checkout` nell’interfaccia utente.
In questo modo è possibile abilitare le funzioni modificando minimamente il codice. Ad esempio, l’aggiunta [manuale di prezzi in valuta](https://docs.stripe.com/payments/custom/localize-prices/manual-currency-prices.md) non richiede modifiche dell’interfaccia utente se visualizzi il `total`.
```jsx
import React from 'react';
import {CheckoutElementsProvider} from '@stripe/react-stripe-js/checkout';
import CheckoutForm from './CheckoutForm';
const clientSecret = fetch('/create-checkout-session', {method: 'POST'})
.then((response) => response.json())
.then((json) => json.checkoutSessionClientSecret);
const App = () => {
return (
);
};
export default App;
```
```jsx
import React from 'react';
import {useCheckoutElements} from '@stripe/react-stripe-js/checkout';
const CheckoutForm = () => {const checkoutState = useCheckoutElements();
switch (checkoutState.type) {
case "loading": return
Loading ...
;
case "error": return
Error: {checkoutState.error.message}
;
case "success":
return (
{JSON.stringify(checkoutState.checkout.lineItems, null, 2)}
          // A formatted total amount
          Total: {checkoutState.checkout.total.total.amount}
);
}
};
```
## Collect customer email [Lato client]
#### HTML + JS
> You can skip this step if you set the customer’s email in one of the following ways:
>
> - Set it directly in [customer_email](https://docs.stripe.com/api/checkout/sessions/create.md#create_checkout_session-customer_email) when creating the Checkout Session.
- Provide a [customer_account](https://docs.stripe.com/api/checkout/sessions/create.md#create_checkout_session-customer_account) or [customer](https://docs.stripe.com/api/checkout/sessions/create.md#create_checkout_session-customer) that has an email when creating the Checkout Session.
- Implement your own email validation and provide the validated email in [email](https://docs.stripe.com/js/custom_checkout/confirm) when confirming the Checkout Session.
Crea un campo di inserimento per raccogliere l’indirizzo email del cliente. Chiama [updateEmail](https://docs.stripe.com/js/custom_checkout/update_email) quando il cliente termina l’inserimento per convalidare e salvare l’indirizzo email.
A seconda del design del tuo modulo di pagamento, puoi chiamare `updateEmail` nei seguenti modi:
- Immediatamente prima di [inviare il pagamento](https://docs.stripe.com/payments/satispay/accept-a-payment.md#submit-payment). Puoi anche chiamare `updateEmail` per eseguire la convalida prima, ad esempio quando l’utente fa clic al di fuori del campo di inserimento.
- Prima di passare alla fase successiva, ad esempio facendo clic sul pulsante **Salva**, se il tuo modulo prevede più passaggi.
```html
```
```javascript
const checkout = stripe.initCheckoutElementsSdk({clientSecret});
const loadActionsResult = await checkout.loadActions();
if (loadActionsResult.type === 'success') {
const {actions} = loadActionsResult;
const emailInput = document.getElementById('email');
const emailErrors = document.getElementById('email-errors');
emailInput.addEventListener('input', () => {
// Clear any validation errors
emailErrors.textContent = '';
});
emailInput.addEventListener('blur', () => {
const newEmail = emailInput.value;actions.updateEmail(newEmail).then((result) => {
if (result.error) {
emailErrors.textContent = result.error.message;
}
});
});
}
```
#### React
> You can skip this step if you set the customer’s email in one of the following ways:
>
> - Set it directly in [customer_email](https://docs.stripe.com/api/checkout/sessions/create.md#create_checkout_session-customer_email) when creating the Checkout Session.
- Provide a [customer_account](https://docs.stripe.com/api/checkout/sessions/create.md#create_checkout_session-customer_account) or [customer](https://docs.stripe.com/api/checkout/sessions/create.md#create_checkout_session-customer) that has an email when creating the Checkout Session.
- Implement your own email validation and pass in the validated email on [confirm](https://docs.stripe.com/js/react_stripe_js/checkout/confirm) for the Checkout Session.
Crea un componente per raccogliere l’indirizzo email del cliente. Chiama [updateEmail](https://docs.stripe.com/js/react_stripe_js/checkout/update_email) quando il cliente termina l’inserimento per convalidare e salvare l’indirizzo email.
A seconda del design del tuo modulo di pagamento, puoi chiamare `updateEmail` nei seguenti modi:
- Immediatamente prima di [inviare il pagamento](https://docs.stripe.com/payments/satispay/accept-a-payment.md#submit-payment). Puoi anche chiamare `updateEmail` per eseguire la convalida prima, ad esempio quando l’utente fa clic al di fuori del campo di inserimento.
- Prima di passare alla fase successiva, ad esempio facendo clic sul pulsante **Salva**, se il tuo modulo prevede più passaggi.
```jsx
import React from 'react';
import {useCheckoutElements} from '@stripe/react-stripe-js/checkout';
const EmailInput = () => {
const checkoutState = useCheckoutElements();
const [email, setEmail] = React.useState('');
const [error, setError] = React.useState(null);
if (checkoutState.type === 'loading') {
return (
Loading...
);
} else if (checkoutState.type === 'error') {
return (
);
};
export default EmailInput;
```
## Raccogliere i dati di pagamento [Lato client]
Raccogli i dati di pagamento sul client con [Payment Element](https://docs.stripe.com/payments/payment-element.md). Payment Element è un componente di interfaccia utente preintegrato che semplifica la raccolta dei dati di pagamento per vari metodi di pagamento.
#### HTML + JS
Innanzitutto, crea un elemento DOM del contenitore per montare [Payment Element](https://docs.stripe.com/payments/payment-element.md). Poi crea un’istanza di `Payment Element` utilizzando [checkout.createPaymentElement](https://docs.stripe.com/js/custom_checkout/create_payment_element) e montala chiamando [element.mount](https://docs.stripe.com/js/element/mount), fornendo un selettore CSS o l’elemento DOM del contenitore.
```html
```
```javascript
const paymentElement = checkout.createPaymentElement();
paymentElement.mount('#payment-element');
```
Consulta la [documentazione Stripe.js](https://docs.stripe.com/js/custom_checkout/create_payment_element#custom_checkout_create_payment_element-options) per visualizzare le opzioni supportate.
Puoi [personalizzare l’aspetto](https://docs.stripe.com/payments/checkout/customization/appearance.md) di tutti gli elementi specificando [elementsOptions.appearance](https://docs.stripe.com/js/custom_checkout/init#custom_checkout_init-options-elementsOptions-appearance) durante l’inizializzazione di Checkout nel front-end.
#### React
Monta il componente [Payment Element](https://docs.stripe.com/payments/payment-element.md) all’interno del [CheckoutElementsProvider](https://docs.stripe.com/js/react_stripe_js/checkout/checkout_provider).
```jsx
import React from 'react';
import {PaymentElement, useCheckoutElements} from '@stripe/react-stripe-js/checkout';
const CheckoutForm = () => {
const checkoutState = useCheckoutElements();
return (
)
};
export default CheckoutForm;
```
Consulta la [documentazione Stripe.js](https://docs.stripe.com/js/custom_checkout/create_payment_element#custom_checkout_create_payment_element-options) per visualizzare le opzioni supportate.
Puoi [personalizzare l’aspetto](https://docs.stripe.com/payments/checkout/customization/appearance.md) di tutti gli Elements specificando [elementsOptions.appearance](https://docs.stripe.com/js/react_stripe_js/checkout/checkout_provider#react_checkout_provider-options-elementsOptions-appearance) in [CheckoutElementsProvider](https://docs.stripe.com/js/react_stripe_js/checkout/checkout_provider).
## Submit the payment [Lato client]
#### HTML + JS
Visualizza un pulsante **Paga** che le chiamate [confermano](https://docs.stripe.com/js/custom_checkout/confirm) dall’istanza di `Checkout` per inviare il pagamento.
```html
```
```js
const checkout = stripe.initCheckoutElementsSdk({clientSecret});
checkout.on('change', (session) => {
document.getElementById('pay-button').disabled = !session.canConfirm;
});
const loadActionsResult = await checkout.loadActions();
if (loadActionsResult.type === 'success') {
const {actions} = loadActionsResult;
const button = document.getElementById('pay-button');
const errors = document.getElementById('confirm-errors');
button.addEventListener('click', () => {
// Clear any validation errors
errors.textContent = '';
actions.confirm().then((result) => {
if (result.type === 'error') {
errors.textContent = result.error.message;
}
});
});
}
```
#### React
Render a **Pay** button that calls [confirm](https://docs.stripe.com/js/custom_checkout/confirm) from [useCheckoutElements](https://docs.stripe.com/js/react_stripe_js/checkout/use_checkout_elements) to submit the payment.
```jsx
import React from 'react';
import {useCheckoutElements} from '@stripe/react-stripe-js/checkout';
const PayButton = () => {
const checkoutState = useCheckoutElements();
const [loading, setLoading] = React.useState(false);
const [error, setError] = React.useState(null);
const handleClick = () => {
setLoading(true);
checkoutState.checkout.confirm().then((result) => {
if (result.type === 'error') {
setError(result.error)
}
setLoading(false);
})
};
return (
{error &&
{error.message}
}
)
};
export default PayButton;
```
## Testare l'integrazione
Per testare la tua integrazione, scegli il metodo di pagamento e tocca **Paga**. In una *sandbox* (A sandbox is an isolated test environment that allows you to test Stripe functionality in your account without affecting your live integration. Use sandboxes to safely experiment with new features and changes), verrai reindirizzato a una pagina di pagamento di test dove potrai approvare o rifiutare il pagamento.
In modalità live, toccando **Paga** verrai reindirizzato al sito web di Satispay, senza potere approvare o rifiutare il pagamento con Satispay.
# Payment Intents API
> This is a Payment Intents API for when payment-ui is elements and api-integration is paymentintents. View the full page at https://docs.stripe.com/payments/satispay/accept-a-payment?payment-ui=elements&api-integration=paymentintents.
Utilizza [Payment Element](https://docs.stripe.com/payments/payment-element.md) per integrare un modulo di pagamento Stripe personalizzato nel tuo sito web o nella tua applicazione e offrire metodi di pagamento ai clienti. Per configurazioni e personalizzazioni avanzate, consulta la guida all’integrazione [Accettare un pagamento](https://docs.stripe.com/payments/accept-a-payment.md).
## Configurare Stripe [Lato server]
Per iniziare, [crea un account Stripe](https://dashboard.stripe.com/register).
Utilizza le nostre librerie ufficiali per accedere all’API Stripe dalla tua applicazione:
#### Ruby
```bash
# Available as a gem
sudo gem install stripe
```
```ruby
# If you use bundler, you can add this line to your Gemfile
gem 'stripe'
```
## Raccogliere i dati di pagamento [Lato client]
A questo punto è tutto pronto per acquisire i dati di pagamento sul client con Payment Element. Payment Element è un componente di interfaccia utente preintegrato che semplifica l’acquisizione dei dati di pagamento per vari metodi di pagamento.
Payment Element contiene un iframe che invia a Stripe le informazioni sul pagamento in modo sicuro tramite una connessione HTTPS. Evita di inserire Payment Element all’interno di un altro iframe, perché alcuni metodi di pagamento richiedono il reindirizzamento a un’altra pagina per la conferma del pagamento.
Affinché l’integrazione funzioni, l’indirizzo della pagina di pagamento deve iniziare con `https://` anziché con `http://`. Puoi testare l’integrazione senza usare HTTPS, ma ricorda di [abilitarlo](https://docs.stripe.com/security/guide.md#tls) quando sarà tutto pronto per accettare i pagamenti in modalità live.
#### HTML + JS
### Configurare Stripe. js
Payment Element è automaticamente disponibile come funzione di Stripe.js. Includi lo script Stripe.js nella tua pagina di pagamento aggiungendolo all’oggetto `head` del tuo file HTML. Carica sempre Stripe.js direttamente da js.stripe.com per mantenere la conformità alle norme PCI. Non includere lo script in un pacchetto e non ospitarne una copia personale.
```html
Checkout
```
Crea un’istanza di Stripe con il seguente JavaScript nella pagina di pagamento:
```javascript
// Set your publishable key: remember to change this to your live publishable key in production
// See your keys here: https://dashboard.stripe.com/apikeys
const stripe = Stripe('<>');
```
### Aggiungi Payment Element alla pagina di pagamento
Il componente Payment Element deve avere uno spazio dedicato nella pagina di pagamento. Crea un nodo DOM (contenitore) vuoto con ID univoco nel modulo di pagamento:
```html
```
#### Controllare i metodi di pagamento dalla Dashboard
Una volta caricato il modulo sopra menzionato, crea un’istanza di Elements con i parametri `mode`, `amount` e `currency`. Questi valori determinano i metodi di pagamento visualizzati dal cliente. Per specificare un nuovo metodo di pagamento nel tuo modulo, assicurati di abilitarlo nella [Dashboard](https://dashboard.stripe.com/settings/payment_methods).
```javascript
const options = {mode:'payment',
amount:1000,
currency: 'eur',
// Fully customizable with appearance API.
appearance: {/*...*/},
};
// Set up Stripe.js and Elements to use in checkout formconst elements = stripe.elements(options);
// Create and mount the Payment Element
const paymentElementOptions = { layout: 'accordion'};
const paymentElement = elements.create('payment', paymentElementOptions);
paymentElement.mount('#payment-element');
```
#### Elencare manualmente i metodi di pagamento
Per elencare manualmente i metodi di pagamento che desideri siano disponibili, aggiungili a`paymentMethodTypes`.
Quindi crea un’istanza di Payment Element e integrala nel nodo DOM del contenitore.
```javascript
const options = {mode:'payment',
amount:1000,
currency: 'eur',
paymentMethodTypes: ['satispay'],
// Fully customizable with appearance API.
appearance: {/*...*/},
};
// Set up Stripe.js and Elements to use in checkout formconst elements = stripe.elements(options);
// Create and mount the Payment Element
const paymentElementOptions = { layout: 'accordion'};
const paymentElement = elements.create('payment', paymentElementOptions);
paymentElement.mount('#payment-element');
```
#### React
### Configurare Stripe. js
Installa [React Stripe.js](https://www.npmjs.com/package/@stripe/react-stripe-js) e il [caricatore Stripe.js](https://www.npmjs.com/package/@stripe/stripe-js) dal registro di sistema pubblico npm.
```bash
npm install --save @stripe/react-stripe-js @stripe/stripe-js
```
### Aggiungi e configura il provider Elements alla pagina di pagamento
Per utilizzare il componente Payment Element, includi il componente della pagina di pagamento in un [provider Elements](https://docs.stripe.com/sdks/stripejs-react.md#elements-provider). Chiama `loadStripe` con la chiave pubblicabile e fornisci il parametro `Promise` restituito al provider `Elements`.
#### Controllare i metodi di pagamento dalla Dashboard
Il provider `Elements` accetta anche i parametri `mode`, `amount` e `currency`. Questi valori determinano i metodi di pagamento visualizzati dal cliente. Per specificare un nuovo metodo di pagamento nel tuo modulo, assicurati di abilitarlo nella [Dashboard](https://dashboard.stripe.com/settings/payment_methods).
```jsx
import React from 'react';
import ReactDOM from 'react-dom';
import {Elements} from '@stripe/react-stripe-js';
import {loadStripe} from '@stripe/stripe-js';
import CheckoutForm from './CheckoutForm';
// Make sure to call `loadStripe` outside of a component’s render to avoid
// recreating the `Stripe` object on every render.
const stripePromise = loadStripe('<>');
function App() {
const options = {mode:'payment',
amount:1000,
currency: 'eur',
// Fully customizable with appearance API.
appearance: {/*...*/},
};
return (
);
};
ReactDOM.render(, document.getElementById('root'));
```
#### Elencare manualmente i metodi di pagamento
```jsx
import React from 'react';
import ReactDOM from 'react-dom';
import {Elements} from '@stripe/react-stripe-js';
import {loadStripe} from '@stripe/stripe-js';
import CheckoutForm from './CheckoutForm';
// Make sure to call `loadStripe` outside of a component’s render to avoid
// recreating the `Stripe` object on every render.
const stripePromise = loadStripe('<>');
function App() {
const options = {mode:'payment',
amount:1000,
currency: 'eur',
paymentMethodTypes: ['satispay'],
// Fully customizable with appearance API.
appearance: {/*...*/},
};
return (
);
};
ReactDOM.render(, document.getElementById('root'));
```
### Aggiungere Payment Element
Utilizza il componente `PaymentElement` per creare il modulo.
```jsx
import React from 'react';
import {PaymentElement} from '@stripe/react-stripe-js';
const CheckoutForm = () => {
return (
);
};
export default CheckoutForm;
```
Puoi personalizzare il componente Payment Element perché si accordi al design del tuo sito specificando l’[oggetto appearance](https://docs.stripe.com/elements/appearance-api.md) in `options` al momento della creazione del provider `Elements`.
### Raccogli indirizzi
By default, the Payment Element only collects the necessary billing address details. Some behavior, such as [calculating tax](https://docs.stripe.com/api/tax/calculations/create.md) or entering shipping details, requires your customer’s full address. You can:
- Utilizza [Address Element](https://docs.stripe.com/elements/address-element.md) per sfruttare le funzioni di completamento automatico e localizzazione per raccogliere l’indirizzo completo dei tuoi clienti. Ciò contribuisce a garantire il calcolo più accurato delle imposte.
- Raccogli i dettagli dell’indirizzo utilizzando il tuo modulo personalizzato.
## Creare un PaymentIntent [Lato server]
> #### Eseguire la logica aziendale personalizzata immediatamente prima della conferma del pagamento
>
> Vai alla [fase 5](https://docs.stripe.com/payments/finalize-payments-on-the-server.md?platform=web&type=payment#submit-payment) della guida ai pagamenti per eseguire la tua logica aziendale personalizzata immediatamente prima della conferma del pagamento. Altrimenti, segui i passaggi riportati di seguito per un’integrazione più semplice, che utilizza `stripe.confirmPayment` sul client per confermare il pagamento e gestire eventuali azioni successive.
#### Controllare i metodi di pagamento dalla Dashboard
Quando il cliente invia il modulo di pagamento, utilizza un *PaymentIntent* (The Payment Intents API tracks the lifecycle of a customer checkout flow and triggers additional authentication steps when required by regulatory mandates, custom Radar fraud rules, or redirect-based payment methods) per facilitare il processo di conferma e pagamento. Crea sul tuo server un PaymentIntent con i parametri `amount` e `currency` abilitati. Decidi sempre quanto addebitare sul lato server, che è un ambiente sicuro, anziché sul lato client. In questo modo impedisci ai client malintenzionati di scegliere un proprio prezzo.
Il `PaymentIntent` include una % glossary term=“payment-intent-secret” %}chiave privata client**. Restituisci questo valore al tuo client affinché Stripe.js lo utilizzi per completare la procedura di pagamento in modo sicuro.
#### Account v2
#### Ruby
```ruby
require 'stripe'
# Don't put any keys in code. See https://docs.stripe.com/keys-best-practices.
client = Stripe::StripeClient.new('<>')
post '/create-intent' do
intent = client.v1.payment_intents.create({
# To allow saving and retrieving payment methods, provide the customer's Account ID.
customer_account: "{{CUSTOMER_ACCOUNT_ID}}",
amount: 1000,
currency: 'eur',
})
{client_secret: intent.client_secret}.to_json
end
```
#### Clienti v1
#### Ruby
```ruby
require 'stripe'
# Don't put any keys in code. See https://docs.stripe.com/keys-best-practices.
client = Stripe::StripeClient.new('<>')
post '/create-intent' do
intent = client.v1.payment_intents.create({
# To allow saving and retrieving payment methods, provide the Customer ID.
customer: customer.id,
amount: 1000,
currency: 'eur',
})
{client_secret: intent.client_secret}.to_json
end
```
#### Elencare manualmente i metodi di pagamento
Quando il cliente invia il modulo di pagamento, utilizza un *PaymentIntent* (The Payment Intents API tracks the lifecycle of a customer checkout flow and triggers additional authentication steps when required by regulatory mandates, custom Radar fraud rules, or redirect-based payment methods) per facilitare la procedura di conferma e pagamento. Crea sul tuo server un PaymentIntent con `amount`, `currency` e uno o più metodi di pagamento utilizzando `payment_method_types`. Decidi sempre quanto addebitare sul lato server, che è un ambiente sicuro, anziché sul lato client. In questo modo impedisci ai client malintenzionati di scegliere un proprio prezzo.
Il PaymentIntent include una *chiave privata client* (The client secret is a unique key returned from Stripe as part of a PaymentIntent. This key lets the client access important fields from the PaymentIntent (status, amount, currency) while hiding sensitive ones (metadata, customer)). Restituisci questo valore al tuo client affinché Stripe.js lo utilizzi per completare la procedura di pagamento in modo sicuro.
#### Account v2
#### Ruby
```ruby
require 'stripe'
# Don't put any keys in code. See https://docs.stripe.com/keys-best-practices.
client = Stripe::StripeClient.new('<>')
post '/create-intent' do
intent = client.v1.payment_intents.create({
# To allow saving and retrieving payment methods, provide the customer's Account ID.
customer_account: customer_account.id,
amount: 1000,
currency: 'eur',
payment_method_types: ['satispay'],
})
{client_secret: intent.client_secret}.to_json
end
```
#### Clienti v1
#### Ruby
```ruby
require 'stripe'
# Don't put any keys in code. See https://docs.stripe.com/keys-best-practices.
client = Stripe::StripeClient.new('<>')
post '/create-intent' do
intent = client.v1.payment_intents.create({
# To allow saving and retrieving payment methods, provide the Customer ID.
customer: customer.id,
amount: 1000,
currency: 'eur',
payment_method_types: ['satispay'],
})
{client_secret: intent.client_secret}.to_json
end
```
## Inviare il pagamento a Stripe [Lato client]
Utilizza [stripe.confirmPayment](https://docs.stripe.com/js/payment_intents/confirm_payment) per completare il pagamento utilizzando i dettagli di Payment Element.
Fornisci un [return_url](https://docs.stripe.com/api/payment_intents/create.md#create_payment_intent-return_url) a questa funzione per indicare dove Stripe deve reindirizzare l’utente dopo il completamento del pagamento. L’utente può essere dapprima reindirizzato su un sito intermedio, come una pagina di autorizzazione della banca, prima di essere reindirizzato al `return_url`. In caso di esito positivo, i pagamenti con carta vengono immediatamente reindirizzati al `return_url`.
Se vuoi impedire il reindirizzamento per i pagamenti con carta una volta completato il pagamento, puoi impostare il [reindirizzamento](https://docs.stripe.com/js/payment_intents/confirm_payment#confirm_payment_intent-options-redirect) su `if_required`. In questo modo vengono reindirizzati solo i clienti che utilizzano metodi di pagamento basati sul reindirizzamento.
#### HTML + JS
```javascript
const form = document.getElementById('payment-form');
const submitBtn = document.getElementById('submit');
const handleError = (error) => {
const messageContainer = document.querySelector('#error-message');
messageContainer.textContent = error.message;
submitBtn.disabled = false;
}
form.addEventListener('submit', async (event) => {
// We don't want to let default form submission happen here,
// which would refresh the page.
event.preventDefault();
// Prevent multiple form submissions
if (submitBtn.disabled) {
return;
}
// Disable form submission while loading
submitBtn.disabled = true;
// Trigger form validation and wallet collection
const {error: submitError} = await elements.submit();
if (submitError) {
handleError(submitError);
return;
}
// Create the PaymentIntent and obtain clientSecret
const res = await fetch("/create-intent", {
method: "POST",
});
const {client_secret: clientSecret} = await res.json();
// Confirm the PaymentIntent using the details collected by the Payment Element
const {error} = await stripe.confirmPayment({
elements,
clientSecret,
confirmParams: {
return_url: 'https://example.com/order/123/complete',
},
});
if (error) {
// This point is only reached if there's an immediate error when
// confirming the payment. Show the error to your customer (for example, payment details incomplete)
handleError(error);
} else {
// Your customer is redirected to your `return_url`. For some payment
// methods like iDEAL, your customer is redirected to an intermediate
// site first to authorize the payment, then redirected to the `return_url`.
}
});
```
#### React
```jsx
import React, {useState} from 'react';
import {useStripe, useElements, PaymentElement} from '@stripe/react-stripe-js';
export default function CheckoutForm() {
const stripe = useStripe();
const elements = useElements();
const [errorMessage, setErrorMessage] = useState();
const [loading, setLoading] = useState(false);
const handleError = (error) => {
setLoading(false);
setErrorMessage(error.message);
}
const handleSubmit = async (event) => {
// We don't want to let default form submission happen here,
// which would refresh the page.
event.preventDefault();
if (!stripe) {
// Stripe.js hasn't yet loaded.
// Make sure to disable form submission until Stripe.js has loaded.
return;
}
setLoading(true);
// Trigger form validation and wallet collection
const {error: submitError} = await elements.submit();
if (submitError) {
handleError(submitError);
return;
}
// Create the PaymentIntent and obtain clientSecret
const res = await fetch("/create-intent", {
method: "POST",
});
const {client_secret: clientSecret} = await res.json();
// Confirm the PaymentIntent using the details collected by the Payment Element
const {error} = await stripe.confirmPayment({
elements,
clientSecret,
confirmParams: {
return_url: 'https://example.com/order/123/complete',
},
});
if (error) {
// This point is only reached if there's an immediate error when
// confirming the payment. Show the error to your customer (for example, payment details incomplete)
handleError(error);
} else {
// Your customer is redirected to your `return_url`. For some payment
// methods like iDEAL, your customer is redirected to an intermediate
// site first to authorize the payment, then redirected to the `return_url`.
}
};
return (
);
}
```
## Optional: Gestire gli eventi successivi al pagamento
Stripe invia un evento [payment_intent.succeeded](https://docs.stripe.com/api/events/types.md#event_types-payment_intent.succeeded) quando il pagamento viene completato. Utilizza la Dashboard, un *webhook* (A webhook is a real-time push notification sent to your application as a JSON payload through HTTPS requests) personalizzato o una soluzione partner per ricevere questi eventi ed eseguire azioni come l’invio della conferma di un ordine al cliente, la registrazione della vendita in un database o l’avvio del flusso di lavoro per una spedizione.
Ascolta questi eventi invece di attendere un callback dal client. Sul client, il cliente potrebbe chiudere la finestra del browser o uscire dall’app prima dell’esecuzione del callback e i client malintenzionati potrebbero manipolare la risposta. La configurazione dell’integrazione per l’ascolto di eventi asincroni ti consente anche di accettare metodi di pagamento diversi in futuro. Ulteriori informazioni sulle [differenze tra tutti i metodi di pagamento supportati](https://stripe.com/payments/payment-methods-guide).
- **Gestisci gli eventi manualmente nella dashboard**
Utilizza la dashboard per [visualizzare i pagamenti di test nella dashboard](https://dashboard.stripe.com/test/payments), inviare le ricevute tramite email, gestire i bonifici o ritentare i pagamenti non riusciti.
- **Crea un webhook personalizzato**
[Crea un gestore webhook personalizzato](https://docs.stripe.com/webhooks/handling-payment-events.md#build-your-own-webhook) per rilevare gli eventi e creare flussi di pagamento asincroni personalizzati. Esegui il test e il debug in locale dell’integrazione webhook con la CLI di Stripe.
- **Integra un’app preimpostata**
Gestisci eventi comuni dell’attività, come l’[automazione](https://stripe.partners/?f_category=automation), il [marketing e i saldi](https://stripe.partners/?f_category=marketing-and-sales), integrando una richiesta di registrazione del partner.
## Optional: Separare l'autorizzazione dall'acquisizione
Puoi separare l’autorizzazione dall’acquisizione per creare un addebito immediatamente, ma acquisire i fondi in un secondo momento. Stripe annulla il PaymentIntent e invia un evento [payment_intent.canceled](https://docs.stripe.com/api/events/types.md#event_types-payment_intent.canceled) se il pagamento non viene acquisito durante la finestra di 7 giorni.
Se sei sicuro di non poter acquisire il pagamento, ti consigliamo di [annullare il PaymentIntent](https://docs.stripe.com/refunds.md#cancel-payment) anziché attendere che trascorrano i 7 giorni.
### Indicare a Stripe di eseguire solo l’autorizzazione
Per indicare che vuoi separare l’autorizzazione dall’acquisizione, imposta [capture_method](https://docs.stripe.com/api/payment_intents/create.md#create_payment_intent-capture_method) su `manual` quando crei il PaymentIntent. Il parametro indica a Stripe di limitarsi ad autorizzare l’importo sul conto Satispay del cliente.
```curl
curl https://api.stripe.com/v1/payment_intents \
-u "<>:" \
-d amount=1000 \
-d confirm=true \
-d currency=eur \
-d "payment_method_types[]=satispay" \
-d "payment_method_data[type]=satispay" \
-d capture_method=manual \
--data-urlencode "return_url=https://www.example.com/checkout/done"
```
### Acquisire i fondi
Dopo l’avvenuta autorizzazione, lo [stato del PaymentIntent](https://docs.stripe.com/api/payment_intents/object.md#payment_intent_object-status) diventa `requires_capture`. Per acquisire i fondi autorizzati, crea una richiesta di [acquisizione](https://docs.stripe.com/api/payment_intents/capture.md) del PaymentIntent.
```curl
curl -X POST https://api.stripe.com/v1/payment_intents/{PAYMENT_INTENT_ID}/capture \
-u "<>:"
```
Stripe acquisisce l’importo totale autorizzato per impostazione predefinita. Puoi anche specificare che `amount_to_capture` sia minore o uguale al totale.
### (Facoltativo) Annullare l’autorizzazione
Per annullare un’autorizzazione, puoi [annullare il PaymentIntent](https://docs.stripe.com/api/payment_intents/cancel.md).
## Testare l'integrazione
Per testare la tua integrazione, scegli il metodo di pagamento e tocca **Paga**. In una *sandbox* (A sandbox is an isolated test environment that allows you to test Stripe functionality in your account without affecting your live integration. Use sandboxes to safely experiment with new features and changes), verrai reindirizzato a una pagina di pagamento di test dove potrai approvare o rifiutare il pagamento.
In modalità live, toccando **Paga** verrai reindirizzato al sito web di Satispay, senza potere approvare o rifiutare il pagamento con Satispay.
## Codici di errore
La tabella seguente illustra in dettaglio i codici di errore comuni e le azioni consigliate:
| Codice di errore | Azione consigliata |
| --------------------------------------------------------- | --------------------------------------------------------------------------------------------------------------------------------------------------------------------------------------------------------------------------------------------------------------------------------------------------------------------------------------------------------------------------------------------------------------------------- |
| `payment_intent_invalid_currency` | Inserisci una valuta supportata. |
| `missing_required_parameter` | Controlla il messaggio di errore per sapere di più sul parametro richiesto. |
| `payment_intent_payment_attempt_failed` | Questo codice può essere visualizzato nel campo [last_payment_error.code](https://docs.stripe.com/api/payment_intents/object.md#payment_intent_object-last_payment_error-code) di un PaymentIntent. Consulta il messaggio di errore per informazioni dettagliate sul motivo dell’errore e suggerimenti su come gestirlo. |
| `payment_intent_authentication_failure` | Questo codice può apparire nella sezione [last_payment_error.code](https://docs.stripe.com/api/payment_intents/object.md#payment_intent_object-last_payment_error-code) campo di un PaymentIntent. Controlla se il messaggio di errore ha un motivo dettagliato dell’errore e suggerimenti sulla gestione degli errori. Questo errore si verifica quando si attiva manualmente un errore durante il test dell’integrazione. |
| `payment_intent_redirect_confirmation_without_return_url` | Specifica un `return_url` quando confermi un PaymentIntent. |
# API diretta
> This is a API diretta for when payment-ui is direct-api. View the full page at https://docs.stripe.com/payments/satispay/accept-a-payment?payment-ui=direct-api.
Satispay è una metodo di pagamento [monouso](https://docs.stripe.com/payments/payment-methods.md#usage) in cui i clienti devono [autenticare](https://docs.stripe.com/payments/payment-methods.md#customer-actions) il pagamento. I clienti vengono reindirizzati dal tuo sito web o dalla tua app, autorizzano il pagamento con Satispay, poi tornano sul tuo sito web o sulla tua app. Ricevi una [notifica immediata](https://docs.stripe.com/payments/payment-methods.md#payment-notification) in merito all’esito positivo o negativo del pagamento.
## Configurare Stripe [Lato server]
Per iniziare, [crea un account Stripe](https://dashboard.stripe.com/register).
Utilizza le nostre librerie ufficiali per accedere all’API Stripe dalla tua applicazione:
#### Ruby
```bash
# Available as a gem
sudo gem install stripe
```
```ruby
# If you use bundler, you can add this line to your Gemfile
gem 'stripe'
```
## Creare un PaymentIntent [Lato server]
Un [PaymentIntent](https://docs.stripe.com/api/payment_intents/object.md) è un oggetto che rappresenta la tua intenzione di riscuotere un pagamento dal cliente e monitora il ciclo di vita della procedura di pagamento. Crea un `PaymentIntent` sul tuo server e specifica l’importo da riscuotere e una valuta supportata. Se hai già un’integrazione con [Payment Intents](https://docs.stripe.com/payments/payment-intents.md), aggiungi `satispay` all’elenco dei [tipi di metodi di pagamento](https://docs.stripe.com/api/payment_intents/create.md#create_payment_intent-payment_method_types).
```curl
curl https://api.stripe.com/v1/payment_intents \
-u "<>:" \
-d "payment_method_types[]=satispay" \
-d amount=1000 \
-d currency=eur
```
Il `PaymentIntent` include una *chiave privata client* (The client secret is a unique key returned from Stripe as part of a PaymentIntent. This key lets the client access important fields from the PaymentIntent (status, amount, currency) while hiding sensitive ones (metadata, customer)). Invia la chiave privata client al tuo client per completare la procedura di pagamento in modo sicuro anziché specificare tutto l’oggetto `PaymentIntent`.
### Recuperare la chiave privata client
L’oggetto PaymentIntent contiene una *chiave privata client* (The client secret is a unique key returned from Stripe as part of a PaymentIntent. This key lets the client access important fields from the PaymentIntent (status, amount, currency) while hiding sensitive ones (metadata, customer)), che il lato client usa per completare la procedura di pagamento in modo sicuro. Per specificare la chiave privata sul lato client, puoi utilizzare approcci diversi.
#### Applicazione a pagina singola
Recupera la chiave privata client dall’endpoint sul server utilizzando la funzione `fetch`del browser. Questo approccio è più adatto quando il lato client è un’applicazione con un’unica pagina, in particolare creata con un framework front-end moderno come React. Crea l’endpoint server che invia la chiave privata client:
#### Ruby
```ruby
get '/secret' do
intent = # ... Create or retrieve the PaymentIntent
{client_secret: intent.client_secret}.to_json
end
```
Quindi recupera la chiave privata client con JavaScript sul lato client:
```javascript
(async () => {
const response = await fetch('/secret');
const {client_secret: clientSecret} = await response.json();
// Render the form using the clientSecret
})();
```
#### Rendering lato server
Trasmetti la chiave privata client al client dal server. Questo approccio è più adatto se l’applicazione genera contenuti statici sul server prima di inviarli al browser.
Aggiungi la [client_secret](https://docs.stripe.com/api/payment_intents/object.md#payment_intent_object-client_secret) nel modulo di pagamento. Nel codice lato server, recupera la chiave privata client da PaymentIntent:
#### Ruby
```erb
```
```ruby
get '/checkout' do
@intent = # ... Fetch or create the PaymentIntent
erb :checkout
end
```
## Reindirizzare a Satispay [Lato client]
Quando un cliente fa clic per pagare con Satispay, utilizza Stripe.js per inviare il pagamento a Stripe. [Stripe.js](https://docs.stripe.com/payments/elements.md) è la libreria JavaScript di base per creare i flussi di pagamento. Gestisce automaticamente le operazioni complesse, come il reindirizzamento descritto di seguito. Inoltre ti consente di estendere la tua integrazione ad altri metodi di pagamento. Per includere lo script di Stripe.js nella tua pagina di pagamento, aggiungilo nella posizione `head` del file HTML.
```html
Checkout
```
Crea un’istanza di Stripe.js con il seguente JavaScript nella pagina di pagamento.
```javascript
// Set your publishable key. Remember to change this to your live publishable key in production!
// See your keys here: https://dashboard.stripe.com/apikeys
const stripe = Stripe('<>');
```
Utilizza la [chiave privata client](https://docs.stripe.com/api/payment_intents/object.md#payment_intent_object-client_secret) del `PaymentIntent` e chiama `stripe.confirmPayment` per gestire il reindirizzamento a Satispay. Aggiungi un `return_url` per determinare dove Stripe deve reindirizzare il cliente dopo il completamento del pagamento.
```javascript
const form = document.getElementById('payment-form');
form.addEventListener('submit', async function(event) {
event.preventDefault();
// Set the clientSecret of the PaymentIntent
const { error } = await stripe.confirmPayment({
clientSecret: clientSecret,
confirmParams: {
payment_method_data: {
type: 'satispay',
},
// Return URL where the customer should be redirected after the authorization
return_url: `${window.location.href}`,
},
});
if (error) {
// Inform the customer that there was an error.
const errorElement = document.getElementById('error-message');
errorElement.textContent = result.error.message;
}
});
```
Il `return_url` corrisponde a una pagina del tuo sito web che mostra il risultato del pagamento. Puoi decidere cosa visualizzare [verificando lo stato](https://docs.stripe.com/payments/payment-intents/verifying-status.md#checking-status) del `PaymentIntent`. Per verificare lo stato, il reindirizzamento di Stripe al `return_url` include i seguenti parametri di query dell’URL. Puoi anche aggiungere i tuoi parametri di query al `return_url`, che saranno mantenuti durante la procedura di reindirizzamento.
| Parametro | Descrizione |
| ------------------------------ | ------------------------------------------------------------------------------------------------------------------------------------------------ |
| `payment_intent` | Identificativo univoco per il `PaymentIntent` |
| `payment_intent_client_secret` | [Chiave privata client](https://docs.stripe.com/api/payment_intents/object.md#payment_intent_object-client_secret) dell’oggetto `PaymentIntent`. |
## Optional: Gestire il reindirizzamento manualmente [Lato server]
Il modo migliore per gestire i reindirizzamenti è utilizzare Stripe.js con `confirmPayment`. Se devi reindirizzare manualmente i tuoi clienti:
1. Fornisci l’URL a cui reindirizzare i clienti una volta completato il pagamento.
```curl
curl https://api.stripe.com/v1/payment_intents/pi_1DRuHnHgsMRlo4MtwuIAUe6u/confirm \
-u "<>:" \
-d payment_method=pm_1EnPf7AfTbPYpBIFLxIc8SD9 \
--data-urlencode "return_url=https://shop.example.com/crtA6B28E1"
```
1. Verifica che lo stato di `PaymentIntent` sia `requires_action`. Il tipo per `next_action` sarà `redirect_to_url`.
```json
"next_action": {
"type": "redirect_to_url",
"redirect_to_url": {
"url": "https://hooks.stripe.com/...",
"return_url": "https://example.com/checkout/complete"
}
}
```
1. Reindirizza il cliente all’URL specificato nella proprietà `next_action`.
Al termine della procedura di pagamento, il cliente viene indirizzato alla destinazione `return_url`. I parametri di query dell’URL `payment_intent` e `payment_intent_client_secret` sono inclusi e puoi specificare i tuoi come descritto sopra.
## Optional: Gestire gli eventi successivi al pagamento
Stripe invia un evento [payment_intent.succeeded](https://docs.stripe.com/api/events/types.md#event_types-payment_intent.succeeded) quando il pagamento viene completato. Utilizza la Dashboard, un *webhook* (A webhook is a real-time push notification sent to your application as a JSON payload through HTTPS requests) personalizzato o una soluzione partner per ricevere questi eventi ed eseguire azioni come l’invio della conferma di un ordine al cliente, la registrazione della vendita in un database o l’avvio del flusso di lavoro per una spedizione.
Ascolta questi eventi invece di attendere un callback dal client. Sul client, il cliente potrebbe chiudere la finestra del browser o uscire dall’app prima dell’esecuzione del callback e i client malintenzionati potrebbero manipolare la risposta. La configurazione dell’integrazione per l’ascolto di eventi asincroni ti consente anche di accettare metodi di pagamento diversi in futuro. Ulteriori informazioni sulle [differenze tra tutti i metodi di pagamento supportati](https://stripe.com/payments/payment-methods-guide).
- **Gestisci gli eventi manualmente nella dashboard**
Utilizza la dashboard per [visualizzare i pagamenti di test nella dashboard](https://dashboard.stripe.com/test/payments), inviare le ricevute tramite email, gestire i bonifici o ritentare i pagamenti non riusciti.
- **Crea un webhook personalizzato**
[Crea un gestore webhook personalizzato](https://docs.stripe.com/webhooks/handling-payment-events.md#build-your-own-webhook) per rilevare gli eventi e creare flussi di pagamento asincroni personalizzati. Esegui il test e il debug in locale dell’integrazione webhook con la CLI di Stripe.
- **Integra un’app preimpostata**
Gestisci eventi comuni dell’attività, come l’[automazione](https://stripe.partners/?f_category=automation), il [marketing e i saldi](https://stripe.partners/?f_category=marketing-and-sales), integrando una richiesta di registrazione del partner.
Puoi creare pagamenti Satispay nelle valute associate al tuo Paese. La valuta locale predefinita per Satispay è `eur`.
- eur: AT, BE, CY, DE, EE, ES, FI, FR, GR, HR, IE, IT, LT, LU, LV, MT, NL, PT, SI, SK
- eur: BG
- eur: CZ
- eur: DK
- eur: HU
- eur: NO
- eur: PL
- eur: RO
- eur: SE
- eur: CH, LI
- eur: GB
- eur: US
- eur: CA
- eur: AU
- eur: SG
## Codici di errore
La tabella seguente illustra in dettaglio i codici di errore comuni e le azioni consigliate:
| Codice di errore | Azione consigliata |
| --------------------------------------------------------- | --------------------------------------------------------------------------------------------------------------------------------------------------------------------------------------------------------------------------------------------------------------------------------------------------------------------------------------------------------------------------------------------------------------------------- |
| `payment_intent_invalid_currency` | Inserisci una valuta supportata. |
| `missing_required_parameter` | Controlla il messaggio di errore per sapere di più sul parametro richiesto. |
| `payment_intent_payment_attempt_failed` | Questo codice può essere visualizzato nel campo [last_payment_error.code](https://docs.stripe.com/api/payment_intents/object.md#payment_intent_object-last_payment_error-code) di un PaymentIntent. Consulta il messaggio di errore per informazioni dettagliate sul motivo dell’errore e suggerimenti su come gestirlo. |
| `payment_intent_authentication_failure` | Questo codice può apparire nella sezione [last_payment_error.code](https://docs.stripe.com/api/payment_intents/object.md#payment_intent_object-last_payment_error-code) campo di un PaymentIntent. Controlla se il messaggio di errore ha un motivo dettagliato dell’errore e suggerimenti sulla gestione degli errori. Questo errore si verifica quando si attiva manualmente un errore durante il test dell’integrazione. |
| `payment_intent_redirect_confirmation_without_return_url` | Specifica un `return_url` quando confermi un PaymentIntent. |
# iOS
> This is a iOS for when payment-ui is mobile and platform is ios. View the full page at https://docs.stripe.com/payments/satispay/accept-a-payment?payment-ui=mobile&platform=ios.
Utilizza [Mobile Payment Element](https://docs.stripe.com/payments/accept-a-payment.md?=ios), un modulo di pagamento incorporabile, per aggiungere Satispay e altri metodi di pagamento alla tua integrazione con il minimo sforzo.
Satispay è una metodo di pagamento [monouso](https://docs.stripe.com/payments/payment-methods.md#usage) in cui i clienti devono [autenticare](https://docs.stripe.com/payments/payment-methods.md#customer-actions) il pagamento. I clienti vengono reindirizzati dal tuo sito web o dalla tua app, autorizzano il pagamento con Satispay, poi tornano sul tuo sito web o sulla tua app. Ricevi una [notifica immediata](https://docs.stripe.com/payments/payment-methods.md#payment-notification) in merito all’esito positivo o negativo del pagamento.
## Configura Stripe [Lato server] [Lato client]
Innanzitutto, devi creare un account Stripe. [Registrati ora](https://dashboard.stripe.com/register).
### Lato server
Per questa integrazione sono necessari endpoint sul server che comunicano con l’API Stripe. Utilizza le nostre librerie ufficiali per accedere all’API Stripe dal tuo server:
#### Ruby
```bash
# Available as a gem
sudo gem install stripe
```
```ruby
# If you use bundler, you can add this line to your Gemfile
gem 'stripe'
```
### Lato client
L’[SDK per iOS di Stripe](https://github.com/stripe/stripe-ios) è open source, [completamente documentato](https://stripe.dev/stripe-ios/index.html) e compatibile con le app che supportano iOS 13 o versioni successive.
#### Swift Package Manager
Per installare l’SDK, segui questi passaggi:
1. In Xcode, seleziona **File** > **Aggiungi dipendenze pacchetto…** e inserisci `https://github.com/stripe/stripe-ios-spm` come URL repository.
1. Seleziona il numero dell’ultima versione dalla nostra [pagina delle release](https://github.com/stripe/stripe-ios/releases).
1. Aggiungi il prodotto **StripePaymentsUI** al [target della tua app](https://developer.apple.com/documentation/swift_packages/adding_package_dependencies_to_your_app).
#### CocoaPods
1. Se non l’hai ancora fatto, installa la versione più recente di [CocoaPods](https://guides.cocoapods.org/using/getting-started.html).
1. Se non hai un [Podfile](https://guides.cocoapods.org/syntax/podfile.html), esegui il seguente comando per crearne uno:
```bash
pod init
```
1. Aggiungi questa riga al tuo `Podfile`:
```podfile
pod 'StripePaymentsUI'
```
1. Esegui il seguente comando:
```bash
pod install
```
1. Ricordati di utilizzare d’ora in poi il file `.xcworkspace` per aprire il progetto in Xcode, anziché il file `.xcodeproj` file.
1. In futuro, per eseguire l’aggiornamento alla versione più recente dell’SDK, esegui questo comando:
```bash
pod update StripePaymentsUI
```
#### Carthage
1. Se non l’hai ancora fatto, installa la versione più recente di [Carthage](https://github.com/Carthage/Carthage#installing-carthage).
1. Aggiungi questa riga al tuo `Cartfile`:
```cartfile
github "stripe/stripe-ios"
```
1. Segui le [istruzioni per l’installazione di Carthage](https://github.com/Carthage/Carthage#if-youre-building-for-ios-tvos-or-watchos). Assicurati di integrare tutti i framework necessari elencati [qui](https://github.com/stripe/stripe-ios/tree/master/StripePaymentsUI/README.md#manual-linking).
1. In futuro, per eseguire l’aggiornamento alla versione più recente del nostro SDK, esegui il seguente comando:
```bash
carthage update stripe-ios --platform ios
```
#### Framework manuale
1. Vai alla [pagina delle versioni di GitHub](https://github.com/stripe/stripe-ios/releases/latest) e scarica e decomprimi **Stripe.xcframework.zip**.
1. Trascina **StripePaymentsUI.xcframework** nella sezione **Embedded Binaries** (File binari incorporati) delle impostazioni **General** (Generali) nel tuo progetto Xcode. Assicurati che sia selezionato **Copy items if needed** (Copia elementi se necessario).
1. Ripeti il passaggio 2 per tutti i framework necessari elencati [qui](https://github.com/stripe/stripe-ios/tree/master/StripePaymentsUI/README.md#manual-linking).
1. In futuro, per eseguire l’aggiornamento alla versione più recente del nostro SDK, ripeti i passaggi 1-3.
> Per ulteriori informazioni sulla versione più recente e su quelle precedenti dell’SDK, consulta la pagina [Versioni](https://github.com/stripe/stripe-ios/releases) su GitHub. Per ricevere notifiche quando viene pubblicata una nuova versione, [guarda le versioni](https://help.github.com/en/articles/watching-and-unwatching-releases-for-a-repository#watching-releases-for-a-repository) del repository.
Configura l’SDK con la tua [chiave pubblicabile](https://dashboard.stripe.com/test/apikeys) di Stripe all’avvio dell’app. In questo modo l’app può inviare le richieste all’API Stripe.
#### Swift
```swift
import UIKitimportStripePaymentsUI
@main
class AppDelegate: UIResponder, UIApplicationDelegate {
func application(_ application: UIApplication, didFinishLaunchingWithOptions launchOptions: [UIApplication.LaunchOptionsKey: Any]?) -> Bool {StripeAPI.defaultPublishableKey = "<>"
// do any other necessary launch configuration
return true
}
}
```
> Usa le [chiavi di test](https://docs.stripe.com/keys.md#obtain-api-keys) durante i test e le chiavi della [modalità live](https://docs.stripe.com/keys.md#test-live-modes) quando pubblichi l’app.
## Creare un PaymentIntent [Lato server] [Lato client]
### Lato server
Stripe utilizza un oggetto [PaymentIntent](https://docs.stripe.com/api/payment_intents.md) per rappresentare la tua intenzione di riscuotere un pagamento da un cliente, monitorando i tentativi di addebito e le modifiche dello stato del pagamento durante tutta la procedura.
> Decidi sempre quanto addebitare sul lato server, che è un ambiente sicuro, anziché sul client. In questo modo impedisci ai clienti di scegliere i prezzi.
#### Gestire i metodi di pagamento nella Dashboard
Crea un PaymentIntent sul tuo server con un importo e una valuta. Nell’ultima versione dell’API, specificare il parametro `automatic_payment_methods` è facoltativo perché Stripe ne abilita la funzionalità per impostazione predefinita. Puoi gestire i metodi di pagamento dalla [Dashboard](https://dashboard.stripe.com/settings/payment_methods). Stripe determina il reindirizzamento ai metodi di pagamento idonei in base a fattori quali l’importo della transazione, la valuta e il flusso di pagamento. Assicurati che **Satispay** sia attivato nella pagina delle [impostazioni dei metodi di pagamento](https://dashboard.stripe.com/settings/payment_methods).
```curl
curl https://api.stripe.com/v1/payment_intents \
-u "<>:" \
-d amount=1000 \
-d currency=eur \
-d "automatic_payment_methods[enabled]=true"
```
Nell’ultima versione dell’API, specificare il parametro `automatic_payment_methods` è facoltativo perché Stripe ne abilita la funzionalità per impostazione predefinita.
#### Elencare manualmente i metodi di pagamento
Se non vuoi utilizzare la Dashboard o se preferisci specificare manualmente i metodi di pagamento, puoi elencarli utilizzando l’attributo `payment_method_types`.
Crea sul tuo server un PaymentIntent con un importo, una valuta e un elenco di metodi di pagamento. Decidi sempre quanto addebitare sul lato server, che è un ambiente sicuro, anziché sul client. In questo modo impedisci ai client malintenzionati di scegliere un proprio prezzo.
```curl
curl https://api.stripe.com/v1/payment_intents \
-u "<>:" \
-d "payment_method_types[]=satispay" \
-d amount=1000 \
-d currency=eur
```
### Lato client
Sul client, richiedi un PaymentIntent dal server e memorizza la sua *chiave privata client* (The client secret is a unique key returned from Stripe as part of a PaymentIntent. This key lets the client access important fields from the PaymentIntent (status, amount, currency) while hiding sensitive ones (metadata, customer)).
#### Swift
```swift
class CheckoutViewController: UIViewController {
var paymentIntentClientSecret: String?
// ...continued from previous step
override func viewDidLoad() {
// ...continued from previous step
startCheckout()
}
func startCheckout() {
// Request a PaymentIntent from your server and store its client secret
// Click View full sample to see a complete implementation
}
}
```
## Inviare il pagamento a Stripe [Lato client]
Quando un cliente tocca per pagare con Satispay, conferma il `PaymentIntent` per completare il pagamento. Configura un oggetto `STPPaymentIntentParams` con la [chiave privata client](https://docs.stripe.com/api/payment_intents/object.md#payment_intent_object-client_secret) `PaymentIntent`.
La chiave privata client è diversa dalle chiavi API che eseguono l’autenticazione delle richieste dell’API Stripe. Gestisci la chiave privata client con attenzione in quanto può effettuare l’addebito. Non devi registrarla, inserirla negli URL né mostrarla a nessuno se non al cliente.
### Configurare un URL di ritorno
L’SDK iOS presenta una WebView nella tua app per completare il pagamento con Satispay. Al termine dell’autenticazione, la WebView può chiudersi automaticamente senza l’intervento del cliente. Per abilitare questo comportamento, configura uno schema URL personalizzato o un link universale e imposta la classe AppDelegate per inoltrare l’URL all’SDK.
#### Swift
```swift
// This method handles opening custom URL schemes (for example, "your-app://stripe-redirect")
func application(_ app: UIApplication, open url: URL, options: [UIApplication.OpenURLOptionsKey: Any] = [:]) -> Bool {
let stripeHandled = StripeAPI.handleURLCallback(with: url)
if (stripeHandled) {
return true
} else {
// This was not a Stripe url – handle the URL normally as you would
}
return false
}
// This method handles opening universal link URLs (for example, "https://example.com/stripe_ios_callback")
func application(_ application: UIApplication, continue userActivity: NSUserActivity, restorationHandler: @escaping ([UIUserActivityRestoring]?) -> Void) -> Bool {
if userActivity.activityType == NSUserActivityTypeBrowsingWeb {
if let url = userActivity.webpageURL {
let stripeHandled = StripeAPI.handleURLCallback(with: url)
if (stripeHandled) {
return true
} else {
// This was not a Stripe url – handle the URL normally as you would
}
}
}
return false
}
```
Specifica l’URL come `return_url` quando confermi il PaymentIntent. Al termine dell’autenticazione basata sulla WebView, Stripe reindirizza l’utente al `return_url`.
### Confermare il pagamento Satispay
Completa il pagamento chiamando `STPPaymentHandler.confirmPayment`. Verrà visualizzata una WebView in cui il cliente potrà completare il pagamento con Satispay. Dopo il completamento, Stripe chiama il blocco di completamento con il risultato del pagamento.
#### Swift
```swift
let paymentIntentParams = STPPaymentIntentParams(clientSecret: paymentIntentClientSecret)
// Satispay does not require additional parameters so we only need to pass the initialized
// STPPaymentMethodSatispayParams instance to STPPaymentMethodParams
let satispay = STPPaymentMethodSatispayParams()
let paymentMethodParams = STPPaymentMethodParams(satispay: satispay, billingDetails: nil, metadata: nil)
paymentIntentParams.paymentMethodParams = paymentMethodParams
paymentIntentParams.returnURL = "payments-example://stripe-redirect"
STPPaymentHandler.shared().confirmPayment(paymentIntentParams,
with: self)
{ (handlerStatus, paymentIntent, error) in
switch handlerStatus {
case .succeeded:
// Payment succeeded
// ...
case .canceled:
// Payment canceled
// ...
case .failed:
// Payment failed
// ...
@unknown default:
fatalError()
}
}
```
Puoi creare pagamenti Satispay nelle valute associate al tuo Paese. La valuta locale predefinita per Satispay è `eur`.
- eur: AT, BE, CY, DE, EE, ES, FI, FR, GR, HR, IE, IT, LT, LU, LV, MT, NL, PT, SI, SK
- eur: BG
- eur: CZ
- eur: DK
- eur: HU
- eur: NO
- eur: PL
- eur: RO
- eur: SE
- eur: CH, LI
- eur: GB
- eur: US
- eur: CA
- eur: AU
- eur: SG
## Optional: Gestire gli eventi successivi al pagamento
Stripe invia un evento [payment_intent.succeeded](https://docs.stripe.com/api/events/types.md#event_types-payment_intent.succeeded) quando il pagamento viene completato. Utilizza la Dashboard, un *webhook* (A webhook is a real-time push notification sent to your application as a JSON payload through HTTPS requests) personalizzato o una soluzione partner per ricevere questi eventi ed eseguire azioni come l’invio della conferma di un ordine al cliente, la registrazione della vendita in un database o l’avvio del flusso di lavoro per una spedizione.
Ascolta questi eventi invece di attendere un callback dal client. Sul client, il cliente potrebbe chiudere la finestra del browser o uscire dall’app prima dell’esecuzione del callback e i client malintenzionati potrebbero manipolare la risposta. La configurazione dell’integrazione per l’ascolto di eventi asincroni ti consente anche di accettare metodi di pagamento diversi in futuro. Ulteriori informazioni sulle [differenze tra tutti i metodi di pagamento supportati](https://stripe.com/payments/payment-methods-guide).
- **Gestisci gli eventi manualmente nella dashboard**
Utilizza la dashboard per [visualizzare i pagamenti di test nella dashboard](https://dashboard.stripe.com/test/payments), inviare le ricevute tramite email, gestire i bonifici o ritentare i pagamenti non riusciti.
- **Crea un webhook personalizzato**
[Crea un gestore webhook personalizzato](https://docs.stripe.com/webhooks/handling-payment-events.md#build-your-own-webhook) per rilevare gli eventi e creare flussi di pagamento asincroni personalizzati. Esegui il test e il debug in locale dell’integrazione webhook con la CLI di Stripe.
- **Integra un’app preimpostata**
Gestisci eventi comuni dell’attività, come l’[automazione](https://stripe.partners/?f_category=automation), il [marketing e i saldi](https://stripe.partners/?f_category=marketing-and-sales), integrando una richiesta di registrazione del partner.
# Android
> This is a Android for when payment-ui is mobile and platform is android. View the full page at https://docs.stripe.com/payments/satispay/accept-a-payment?payment-ui=mobile&platform=android.
Utilizza [Mobile Payment Element](https://docs.stripe.com/payments/accept-a-payment.md?=android), un modulo di pagamento incorporabile, per aggiungere Satispay e altri metodi di pagamento alla tua integrazione con il minimo sforzo.
Satispay è una metodo di pagamento [monouso](https://docs.stripe.com/payments/payment-methods.md#usage) in cui i clienti devono [autenticare](https://docs.stripe.com/payments/payment-methods.md#customer-actions) il pagamento. I clienti vengono reindirizzati dal tuo sito web o dalla tua app, autorizzano il pagamento con Satispay, poi tornano sul tuo sito web o sulla tua app. Ricevi una [notifica immediata](https://docs.stripe.com/payments/payment-methods.md#payment-notification) in merito all’esito positivo o negativo del pagamento.
## Configura Stripe [Lato server] [Lato client]
Innanzitutto, devi creare un account Stripe. [Registrati ora](https://dashboard.stripe.com/register).
### Lato server
Per questa integrazione sono necessari endpoint sul server che comunicano con l’API Stripe. Utilizza le nostre librerie ufficiali per accedere all’API Stripe dal tuo server:
#### Ruby
```bash
# Available as a gem
sudo gem install stripe
```
```ruby
# If you use bundler, you can add this line to your Gemfile
gem 'stripe'
```
### Lato client
L’[SDK per Android di Stripe](https://github.com/stripe/stripe-android) è open source e [completamente documentato](https://stripe.dev/stripe-android/).
Per installare l’SDK, aggiungi `stripe-android` al blocco `dependencies` del tuo file [app/build.gradle](https://developer.android.com/studio/build/dependencies):
#### Kotlin
```kotlin
plugins {
id("com.android.application")
}
android { ... }
dependencies {
// ...
// Stripe Android SDK
implementation("com.stripe:stripe-android:23.9.0")
// Include the financial connections SDK to support US bank account as a payment method
implementation("com.stripe:financial-connections:23.9.0")
}
```
> Per ulteriori informazioni sulla versione più recente e su quelle precedenti dell’SDK, consulta la pagina [Releases](https://github.com/stripe/stripe-android/releases) su GitHub. Per ricevere una notifica quando viene pubblicata una nuova versione, [imposta il controllo delle versioni per il repository](https://docs.github.com/en/github/managing-subscriptions-and-notifications-on-github/configuring-notifications#configuring-your-watch-settings-for-an-individual-repository).
Configura l’SDK con la tua [chiave pubblicabile](https://dashboard.stripe.com/apikeys) di Stripe in modo che possa inviare le richieste all’API Stripe, ad esempio nella sottoclasse `Application`:
#### Kotlin
```kotlin
import com.stripe.android.PaymentConfiguration
class MyApp : Application() {
override fun onCreate() {
super.onCreate()
PaymentConfiguration.init(
applicationContext,
"<>"
)
}
}
```
> Usa le [chiavi di test](https://docs.stripe.com/keys.md#obtain-api-keys) durante i test e le chiavi della [modalità live](https://docs.stripe.com/keys.md#test-live-modes) quando pubblichi l’app.
I nostri esempi di codice Stripe utilizzano inoltre [OkHttp](https://github.com/square/okhttp) e [GSON](https://github.com/google/gson) per inviare richieste HTTP a un server.
## Creare un PaymentIntent [Lato server] [Lato client]
### Lato server
Stripe utilizza un oggetto [PaymentIntent](https://docs.stripe.com/api/payment_intents.md) per rappresentare la tua intenzione di riscuotere un pagamento da un cliente, monitorando i tentativi di addebito e le modifiche dello stato del pagamento durante tutta la procedura.
> Decidi sempre quanto addebitare sul lato server, che è un ambiente sicuro, anziché sul client. In questo modo impedisci ai clienti di scegliere i prezzi.
#### Gestire i metodi di pagamento nella Dashboard
Crea un PaymentIntent sul tuo server con un importo e una valuta. Nell’ultima versione dell’API, specificare il parametro `automatic_payment_methods` è facoltativo perché Stripe ne abilita la funzionalità per impostazione predefinita. Puoi gestire i metodi di pagamento dalla [Dashboard](https://dashboard.stripe.com/settings/payment_methods). Stripe determina il reindirizzamento ai metodi di pagamento idonei in base a fattori quali l’importo della transazione, la valuta e il flusso di pagamento. Assicurati che **Satispay** sia attivato nella pagina delle [impostazioni dei metodi di pagamento](https://dashboard.stripe.com/settings/payment_methods).
```curl
curl https://api.stripe.com/v1/payment_intents \
-u "<>:" \
-d amount=1000 \
-d currency=eur \
-d "automatic_payment_methods[enabled]=true"
```
Nell’ultima versione dell’API, specificare il parametro `automatic_payment_methods` è facoltativo perché Stripe ne abilita la funzionalità per impostazione predefinita.
#### Elencare manualmente i metodi di pagamento
Se non vuoi utilizzare la Dashboard o se preferisci specificare manualmente i metodi di pagamento, puoi elencarli utilizzando l’attributo `payment_method_types`.
Crea sul tuo server un PaymentIntent con un importo, una valuta e un elenco di metodi di pagamento. Decidi sempre quanto addebitare sul lato server, che è un ambiente sicuro, anziché sul client. In questo modo impedisci ai client malintenzionati di scegliere un proprio prezzo.
```curl
curl https://api.stripe.com/v1/payment_intents \
-u "<>:" \
-d "payment_method_types[]=satispay" \
-d amount=1000 \
-d currency=eur
```
### Lato client
Sul client, richiedi un PaymentIntent dal server e memorizza la sua *chiave privata client* (The client secret is a unique key returned from Stripe as part of a PaymentIntent. This key lets the client access important fields from the PaymentIntent (status, amount, currency) while hiding sensitive ones (metadata, customer)).
#### Kotlin
```kotlin
class CheckoutActivity : AppCompatActivity() {
private lateinit var paymentIntentClientSecret: String
override fun onCreate(savedInstanceState: Bundle?) {
super.onCreate(savedInstanceState)
// ...
startCheckout()
}
private fun startCheckout() {
// Request a PaymentIntent from your server and store its client secret in paymentIntentClientSecret
// Click View full sample to see a complete implementation
}
}
```
## Inviare il pagamento a Stripe [Lato client]
Quando un cliente tocca per pagare con Satispay, conferma il `PaymentIntent` per completare il pagamento. Configura un oggetto `STPPaymentIntentParams` con la [chiave privata client](https://docs.stripe.com/api/payment_intents/object.md#payment_intent_object-client_secret) `PaymentIntent`.
La chiave privata client è diversa dalle chiavi API che eseguono l’autenticazione delle richieste dell’API Stripe. Gestisci la chiave privata client con attenzione in quanto può effettuare l’addebito. Non devi registrarla, inserirla negli URL né mostrarla a nessuno se non al cliente.
### Confermare il pagamento Satispay
Completa il pagamento chiamando `PaymentHandler.confirmPayment`. Verrà visualizzata una WebView in cui il cliente potrà completare il pagamento con Satispay. Dopo il completamento, Stripe chiama il blocco di completamento con il risultato del pagamento.
#### Kotlin
```kotlin
class CheckoutActivity : AppCompatActivity() {
// ...
private val paymentLauncher: PaymentLauncher by lazy {
val paymentConfiguration = PaymentConfiguration.getInstance(applicationContext)
PaymentLauncher.create(
activity = this,
publishableKey = paymentConfiguration.publishableKey,
stripeAccountId = paymentConfiguration.stripeAccountId,
callback = ::onPaymentResult,
)
}
// …
private fun startCheckout() {
// ...
val satispayParams = PaymentMethodCreateParams.createSatispay()
val confirmParams = ConfirmPaymentIntentParams
.createWithPaymentMethodCreateParams(
paymentMethodCreateParams = satispayParams,
clientSecret = paymentIntentClientSecret,
// Add a mandate ID or MandateDataParams if you
// want to set this up for future use…
)
paymentLauncher.confirm(confirmParams)
}
private fun onPaymentResult(paymentResult: PaymentResult) {
// Handle the payment result…
}
}
```
Puoi creare pagamenti Satispay nelle valute associate al tuo Paese. La valuta locale predefinita per Satispay è `eur`.
- eur: AT, BE, CY, DE, EE, ES, FI, FR, GR, HR, IE, IT, LT, LU, LV, MT, NL, PT, SI, SK
- eur: BG
- eur: CZ
- eur: DK
- eur: HU
- eur: NO
- eur: PL
- eur: RO
- eur: SE
- eur: CH, LI
- eur: GB
- eur: US
- eur: CA
- eur: AU
- eur: SG
## Optional: Gestire gli eventi successivi al pagamento
Stripe invia un evento [payment_intent.succeeded](https://docs.stripe.com/api/events/types.md#event_types-payment_intent.succeeded) quando il pagamento viene completato. Utilizza la Dashboard, un *webhook* (A webhook is a real-time push notification sent to your application as a JSON payload through HTTPS requests) personalizzato o una soluzione partner per ricevere questi eventi ed eseguire azioni come l’invio della conferma di un ordine al cliente, la registrazione della vendita in un database o l’avvio del flusso di lavoro per una spedizione.
Ascolta questi eventi invece di attendere un callback dal client. Sul client, il cliente potrebbe chiudere la finestra del browser o uscire dall’app prima dell’esecuzione del callback e i client malintenzionati potrebbero manipolare la risposta. La configurazione dell’integrazione per l’ascolto di eventi asincroni ti consente anche di accettare metodi di pagamento diversi in futuro. Ulteriori informazioni sulle [differenze tra tutti i metodi di pagamento supportati](https://stripe.com/payments/payment-methods-guide).
- **Gestisci gli eventi manualmente nella dashboard**
Utilizza la dashboard per [visualizzare i pagamenti di test nella dashboard](https://dashboard.stripe.com/test/payments), inviare le ricevute tramite email, gestire i bonifici o ritentare i pagamenti non riusciti.
- **Crea un webhook personalizzato**
[Crea un gestore webhook personalizzato](https://docs.stripe.com/webhooks/handling-payment-events.md#build-your-own-webhook) per rilevare gli eventi e creare flussi di pagamento asincroni personalizzati. Esegui il test e il debug in locale dell’integrazione webhook con la CLI di Stripe.
- **Integra un’app preimpostata**
Gestisci eventi comuni dell’attività, come l’[automazione](https://stripe.partners/?f_category=automation), il [marketing e i saldi](https://stripe.partners/?f_category=marketing-and-sales), integrando una richiesta di registrazione del partner.
## Codici di errore
La tabella seguente illustra in dettaglio i codici di errore comuni e le azioni consigliate:
| Codice di errore | Azione consigliata |
| --------------------------------------------------------- | --------------------------------------------------------------------------------------------------------------------------------------------------------------------------------------------------------------------------------------------------------------------------------------------------------------------------------------------------------------------------------------------------------------------------- |
| `payment_intent_invalid_currency` | Inserisci una valuta supportata. |
| `missing_required_parameter` | Controlla il messaggio di errore per sapere di più sul parametro richiesto. |
| `payment_intent_payment_attempt_failed` | Questo codice può essere visualizzato nel campo [last_payment_error.code](https://docs.stripe.com/api/payment_intents/object.md#payment_intent_object-last_payment_error-code) di un PaymentIntent. Consulta il messaggio di errore per informazioni dettagliate sul motivo dell’errore e suggerimenti su come gestirlo. |
| `payment_intent_authentication_failure` | Questo codice può apparire nella sezione [last_payment_error.code](https://docs.stripe.com/api/payment_intents/object.md#payment_intent_object-last_payment_error-code) campo di un PaymentIntent. Controlla se il messaggio di errore ha un motivo dettagliato dell’errore e suggerimenti sulla gestione degli errori. Questo errore si verifica quando si attiva manualmente un errore durante il test dell’integrazione. |
| `payment_intent_redirect_confirmation_without_return_url` | Specifica un `return_url` quando confermi un PaymentIntent. |