SignInView-Komponente für Stripe-Apps
Verwenden Sie SignInView, damit Apps einen Anmeldebildschirm rendern können.
Mit der SignInView-Komponente können Sie neben dem App-Symbol von Stripe Ihr eigenes Symbol sowie eine kurze Beschreibung Ihres Anmeldevorgangs, der Aktionsschaltflächen usw. einfügen. Müssen sich Ihre Nutzer/innen bei Ihrer App anmelden, so ist die SignInView-Komponente erforderlich – dadurch wissen die Nutzer/innen, dass sie sich mit Stripe verbinden.
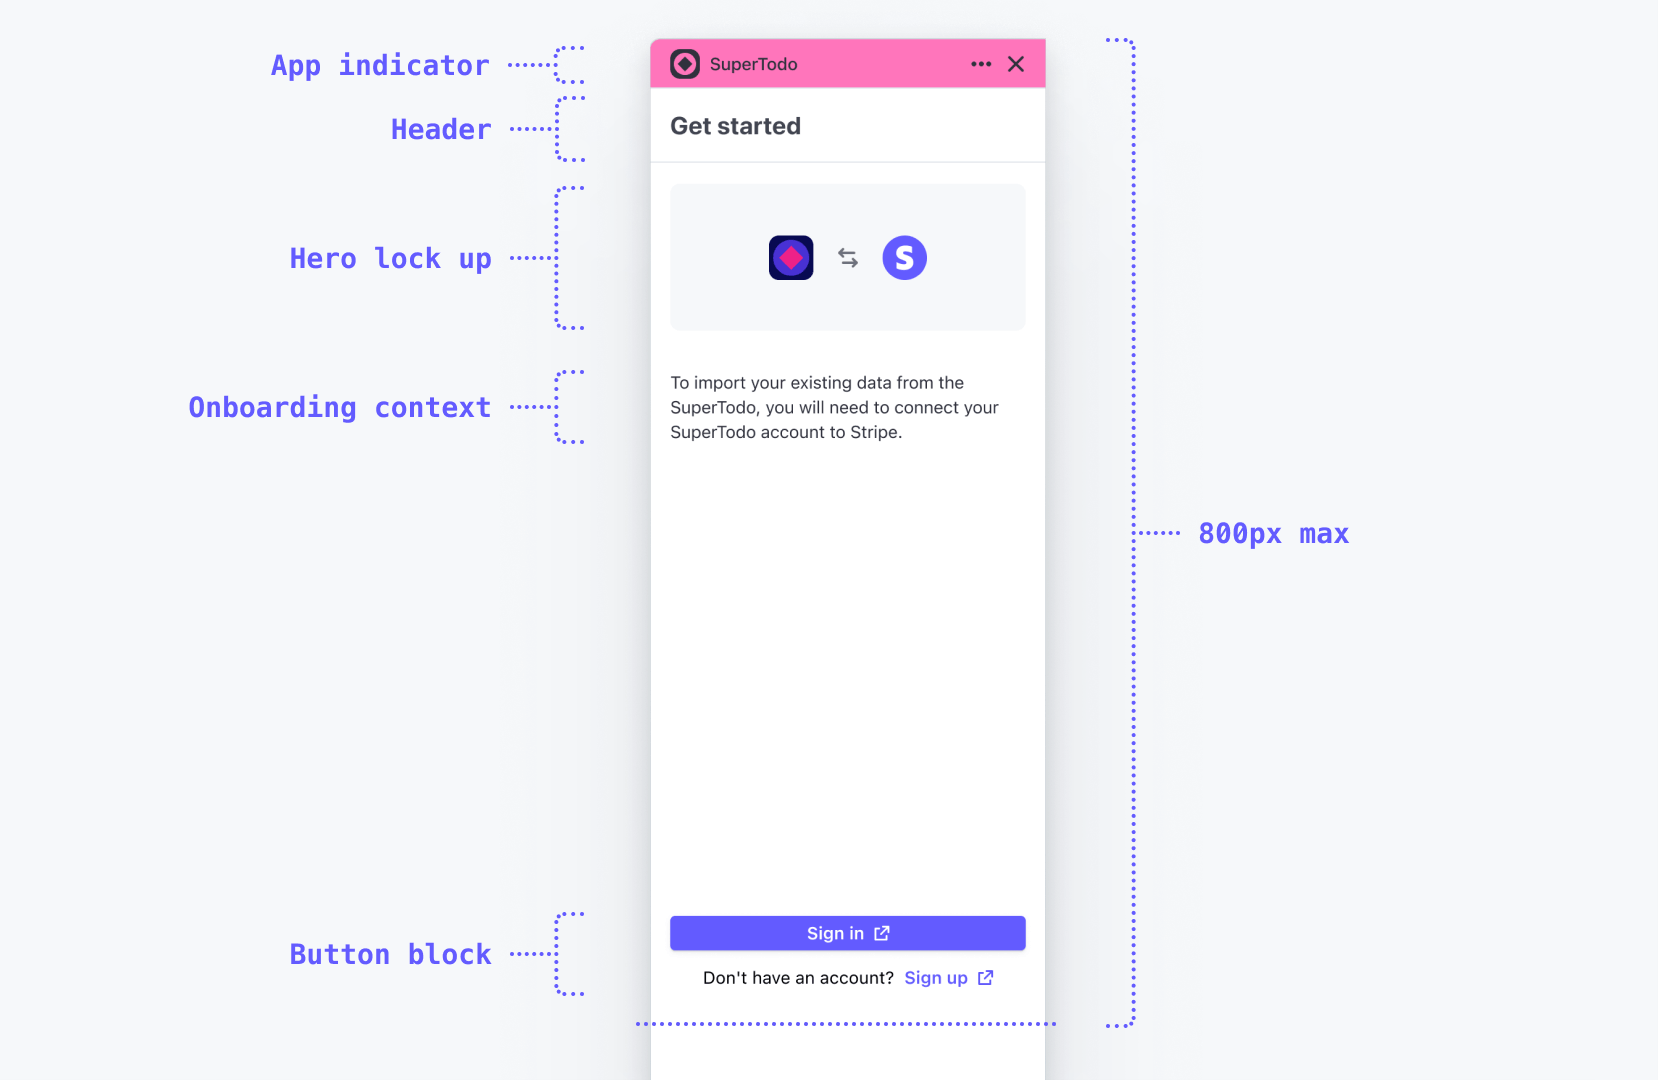
Ein SignInView-Beispiel, das in der Schublade angezeigt wird.
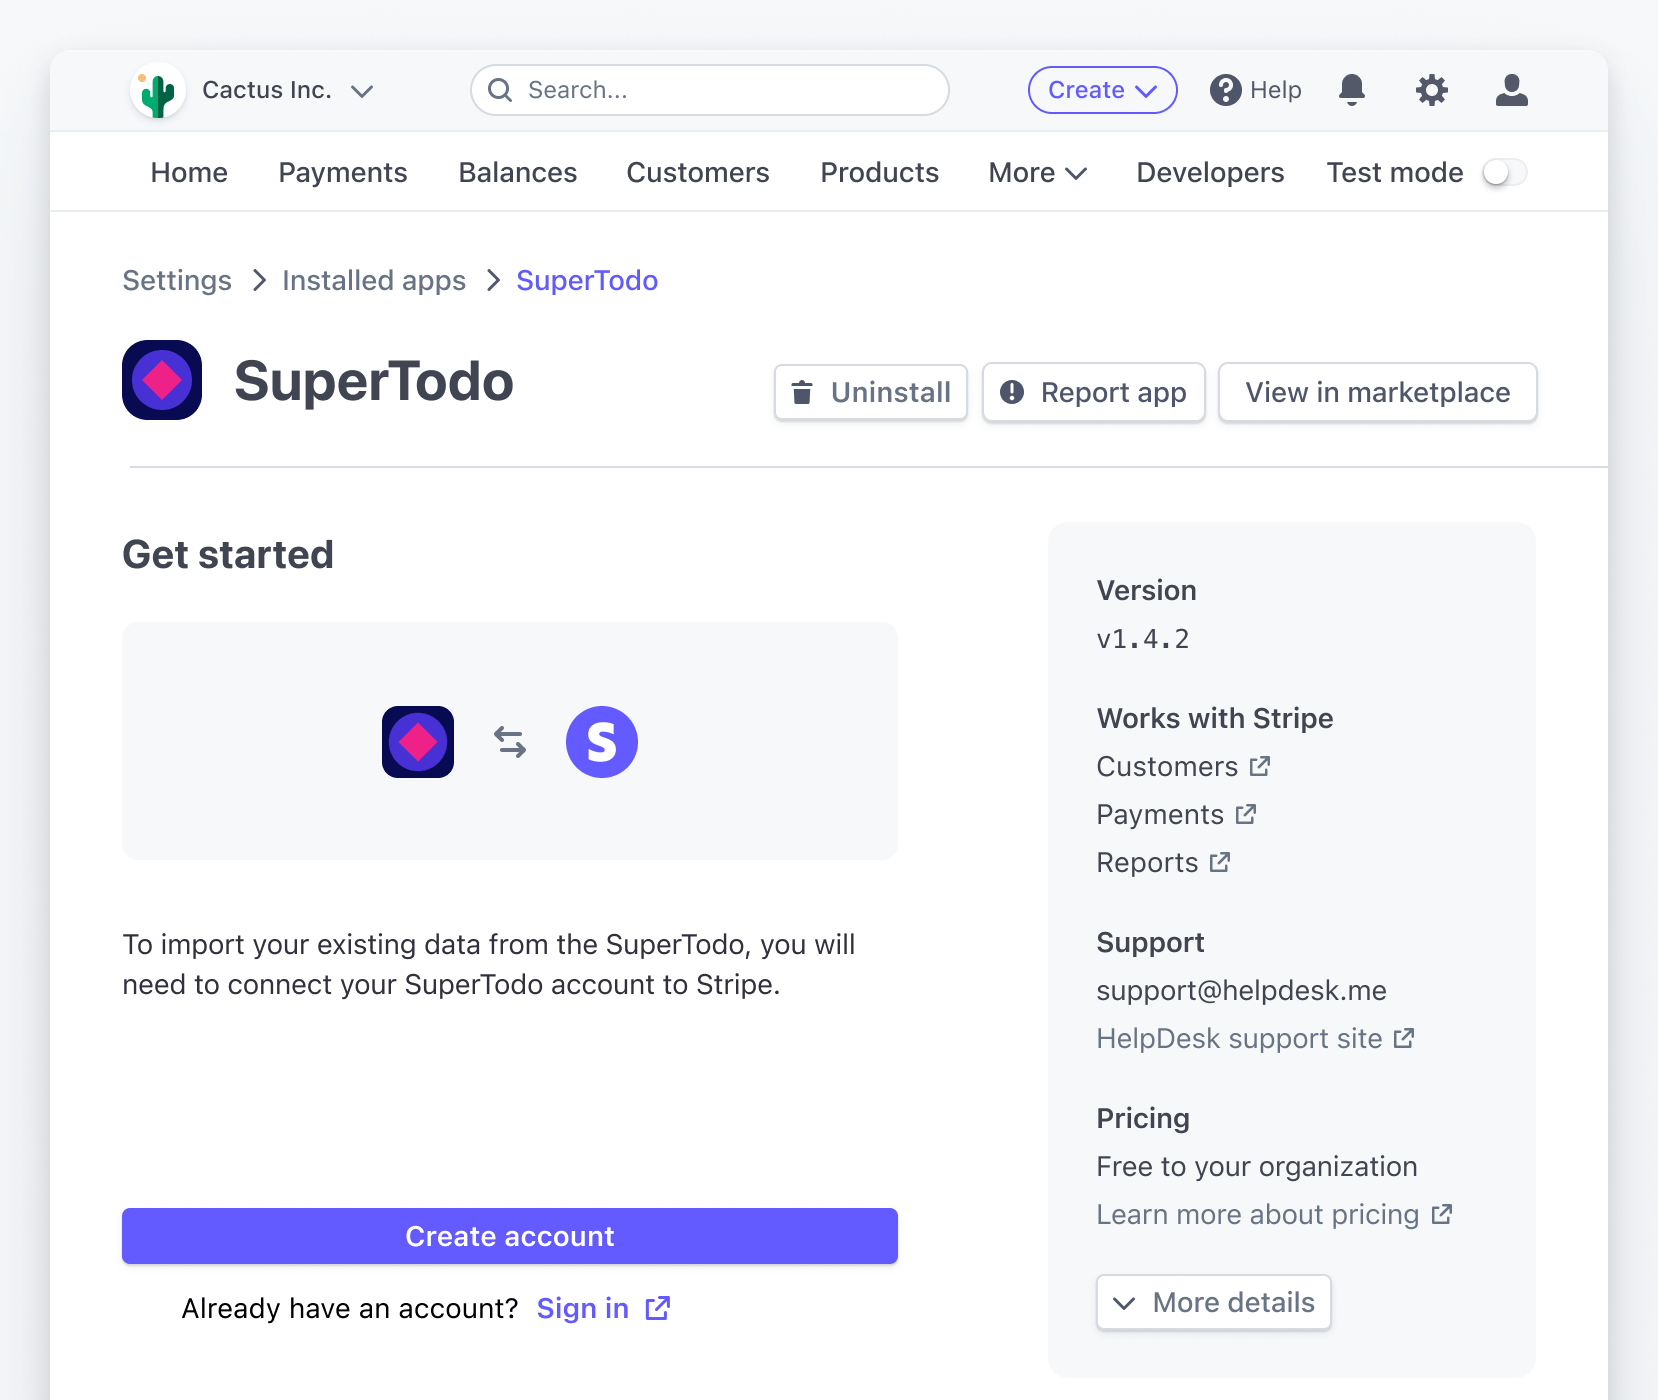
Auf der Einstellungsseite verwendetes SignInView.
SignInView-Eigenschaften
| Eigenschaft | Typ |
|---|---|
| Optional
Eine CSS-Farbe, die sich gut von |
| Optional
Ein quadratischer, 1-farbiger SVG, der sich gut von der |
| Optional
Eine Absatzbeschreibung der App und ihrer Funktionen. |
| Optional
Beschreibung von Aktionsinhalten, die in einer |
| Optional
Ein Aktionslabel (z. B. „Mehr erfahren“ oder „Demo anzeigen“) unter der Beschreibung. |
| Optional
Der Titel in der |
| Optional
React Node unterhalb der primären Aktion in der Fußzeile. |
| Optional
Verwandte Typen: SignInActionWithHref, SignInActionWithOnPress. |
| Optional
Verwandte Typen: SignInActionWithHref, SignInActionWithOnPress. |
SignInActionWithHref
| Eigenschaft | Typ |
|---|---|
| Pflichtfeld
|
| Pflichtfeld
|
| Optional
|
| Optional
|
SignInActionWithOnPress
| Eigenschaft | Typ |
|---|---|
| Pflichtfeld
|
| Pflichtfeld
|
| Optional
|
| Optional
|
Beispiel
import {Link, SignInView} from '@stripe/ui-extension-sdk/ui';
import appIcon from './icon.svg';

const Onboarding = (
  <SignInView
    description="Connect your SuperTodo account with Stripe."
    primaryAction={{label: 'Sign in', href: 'https://example.com'}}
    footerContent={
      <>
        Don't have an account? <Link href="https://example.com">Sign up</Link>
      </>
    }
    brandColor="#635bff"
    brandIcon={appIcon}
  />
);
Weitere Inhalte
Vor der Anmeldung durch Nutzer/innen sollten Sie diesen eine Demo, eine detaillierte Beschreibung Ihrer App oder auch Screenshots der Erfahrung zeigen. Denken Sie daran, dass Nutzer/innen zu diesem Zeitpunkt Ihre App bereits installiert haben – eine Anmeldung ist also wahrscheinlich. Wenn Sie jedoch zusätzliche Inhalte anzeigen möchten, können Sie dies in einer fokussierten Ansicht mit den Eigenschaften descriptionActionLabel, descriptionActionTitle und descriptionActionContents tun. Zum Beispiel:
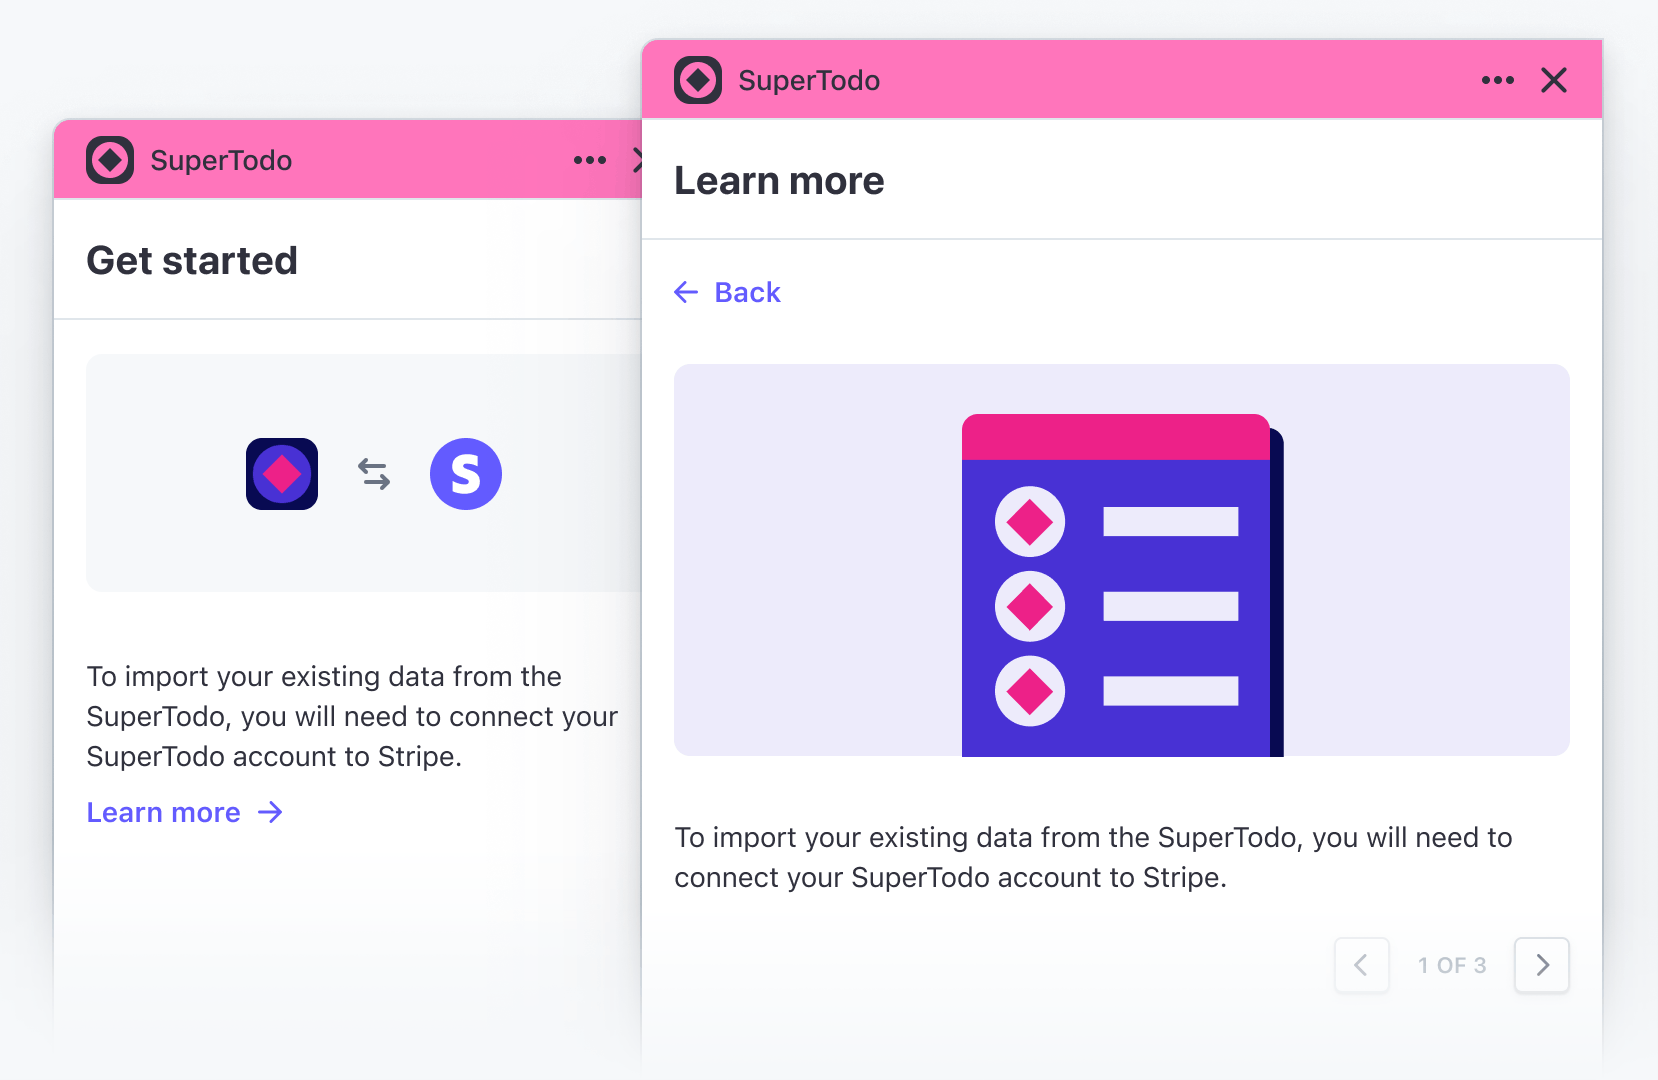
import {Img, Link, SignInView} from '@stripe/ui-extension-sdk/ui';
import appIcon from './icon.svg';

const Onboarding = () => (
  <SignInView
    description="Connect your SuperTodo account with Stripe."
    primaryAction={{label: 'Sign in', href: 'https://example.com'}}
    footerContent={
      <>
        Don't have an account? <Link href="https://example.com">Sign up</Link>
      </>
    }
    brandColor="#635bff"
    brandIcon={appIcon}
    descriptionActionLabel="Learn more"
    descriptionActionTitle="Learn more"
    descriptionActionContents={
      <>
        <Img src="https://example.com/screenshot.png" />
        To import existing data from SuperTodo, you will need to connect your
        SuperTodo account to Stripe.
      </>
    }
  />
);