OAuth 2.0
Use the industry standard OAuth 2.0 to authenticate requests to the Stripe API on behalf of your users.
A user authenticating with OAuth follows these steps.
- On your site, the user clicks a link that redirects them to Stripe.
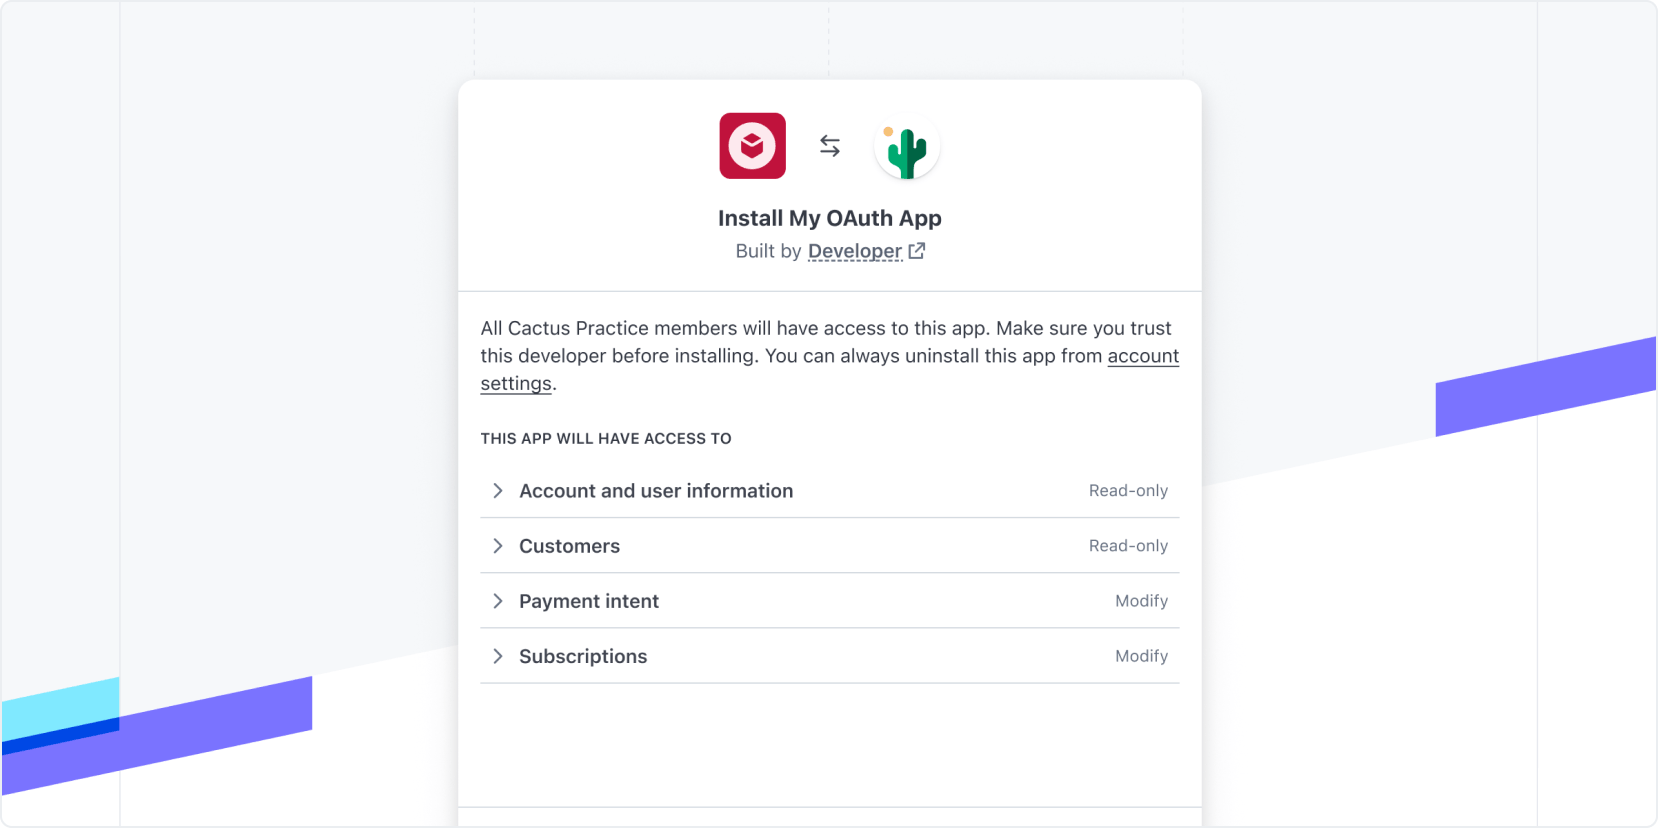
- On Stripe, the user selects the appropriate account and accepts permissions for installing the app.
- After the app is installed, authentication is complete and the user is redirected to a defined URI.

Develop your app
Create your Stripe App by running
stripe apps create <app-name>in the CLI.Edit the following fields in the app manifest:
- Set
stripe_toapi_ access_ type oauth. - Set
distribution_totype public. - Set your
allowed_. These are the URLs that users are redirected to after installing your app using OAuth. The first one in the list is used as the default redirect.redirect_ uris
Your app manifest should look like this:
stripe-app.json{ "id": "com.example.my-app", "version": "0.0.1", "name": "Your Stripe App", "icon": "./[YOUR_APP]_icon_32.png", "permissions": [ // Your app permissions here ], "stripe_api_access_type": "oauth", "distribution_type": "public", "allowed_redirect_uris": [ // Your redirect URIs here ] }- Set
Add all the permissions that your app requires.
(Optional) Add UI extensions to your app. We recommend adding a settings view to allow your users to configure settings or to link to your app’s documentation.
Upload your app to Stripe.
Command Linestripe apps upload
Test your app
- Navigate to your app’s details page.
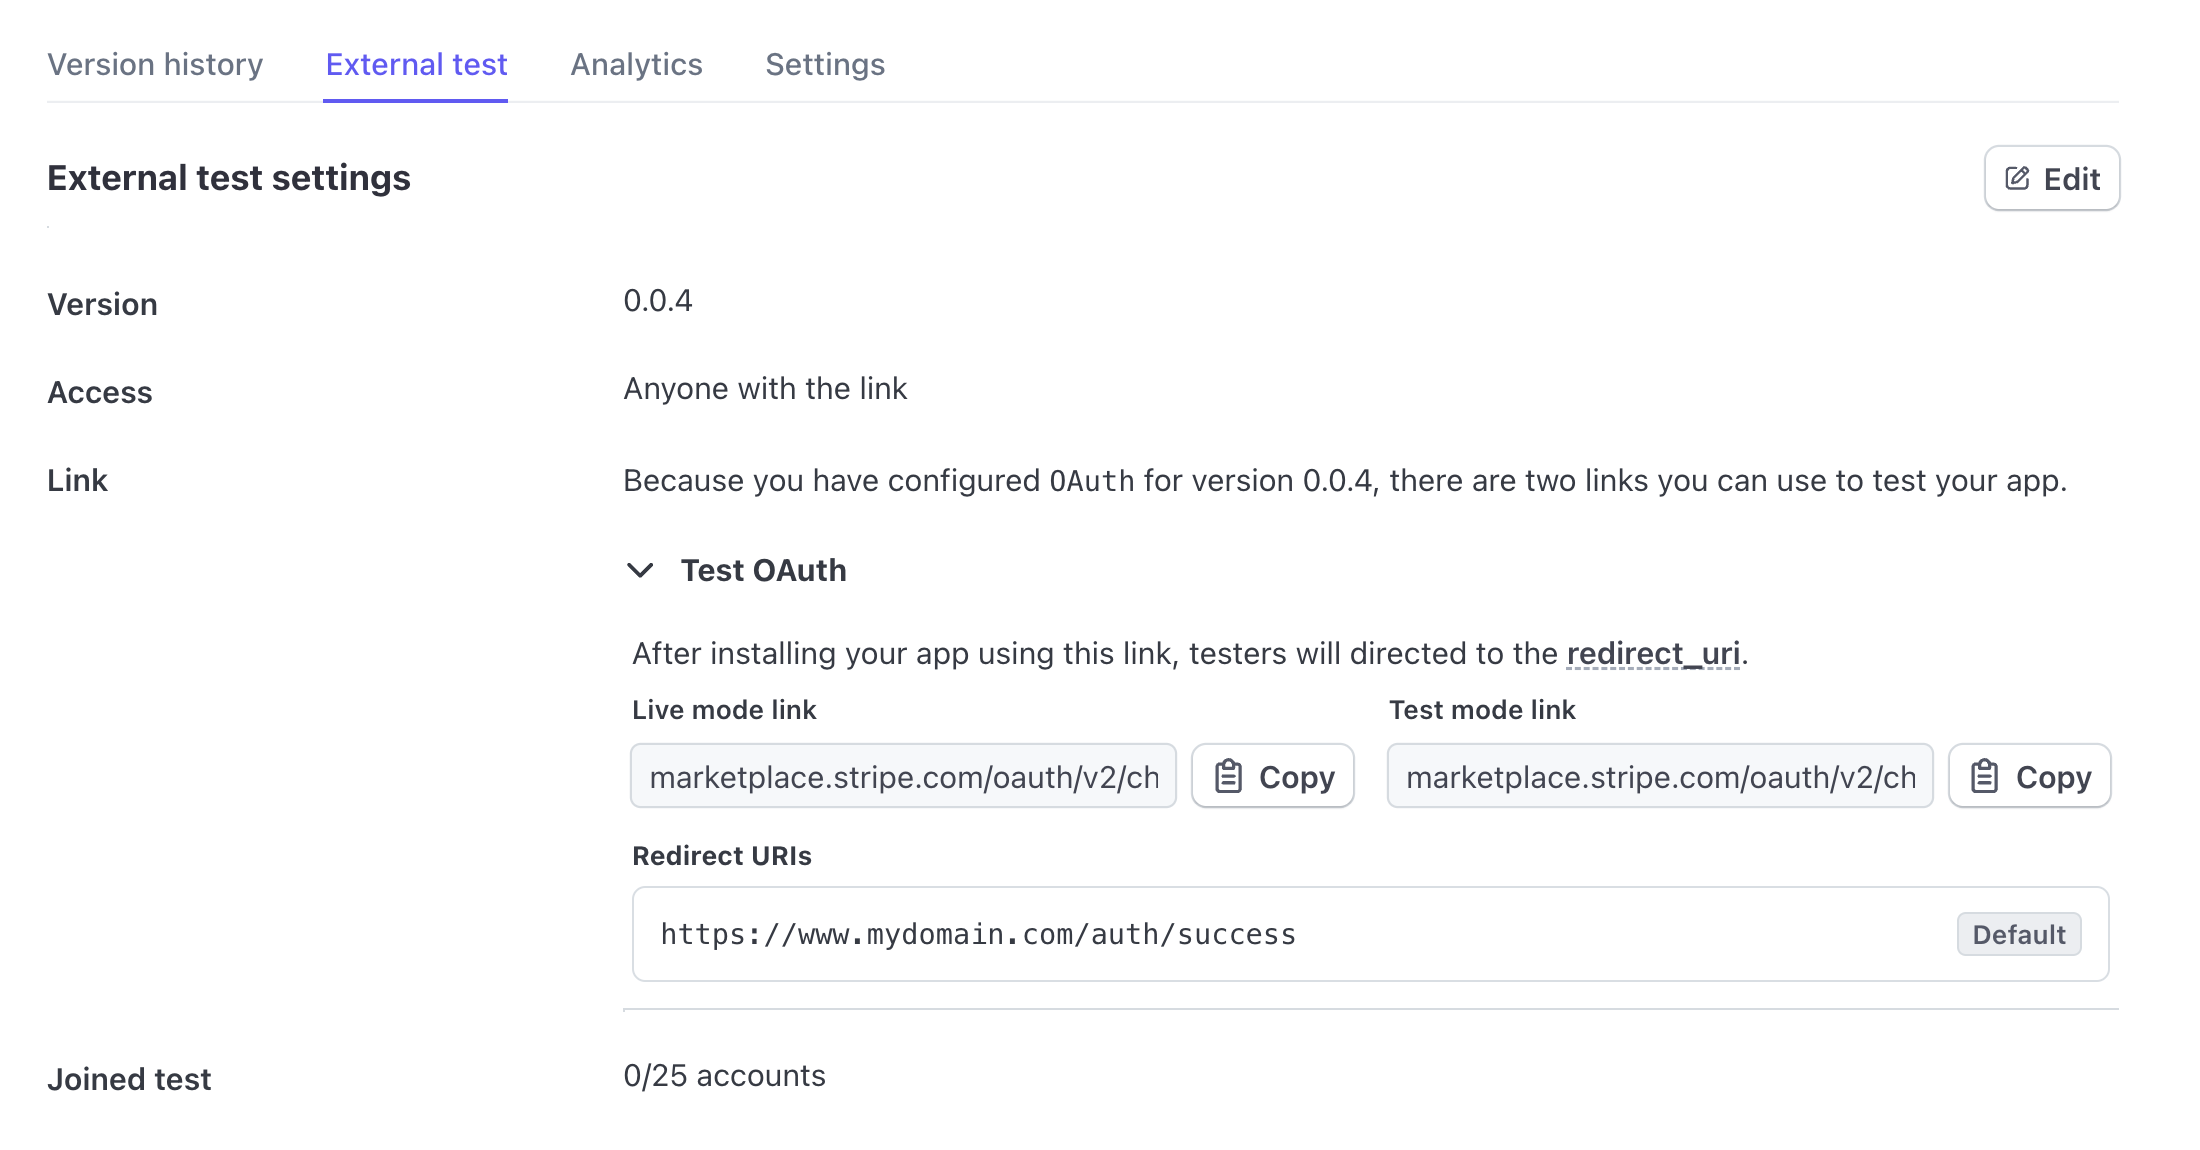
- Open the External test tab and click Get started to set up an external test.
- Access the authorize links in the Test OAuth section. You can use this link to test with different accounts.
Create your OAuth install link
From your webpage, redirect to your OAuth install link with the following parameters: https://marketplace..
Stripe generates separate links for both live and test modes. You can find the links in the External test tab.

Dica de segurança
To prevent CSRF attacks, add the recommended state parameter and pass along a unique token as the value. We include the state you provide when redirecting users to your site. Your site can confirm that the state parameter hasn’t been modified. See URL parameters for more information.
Publish your app
Submit your app for review when you are ready to publish it to the Stripe App Marketplace
When submitting an OAuth app for review, you need to provide the Marketplace install URL. This URL must link to a page that can initiate the onboarding and installation process with clear instructions using OAuth install links from the previous step.
Make sure the install URL you provide to App Review uses the public OAuth links from the Settings tab. This link isn’t the same as the link from the External test tab.

Observação
The public OAuth install links don’t work until the app is published. However, our app review team can install and test your app through this link.
Install your app and authorize
- In your browser, open your OAuth install link. You can adjust the query parameters to change the redirect URL to one supported by the app.
- View and accept the permissions to install the app. When the installation is complete, the user is redirected to the first callback URL you’ve defined in the app manifest, unless you’ve specified a URL parameter.
Exchange the authorization code for an access token
Your callback URL receives an OAuth authorization code parameter that your backend needs to exchange for an API access token and the refresh token. This authorization code is one-time use only and valid only for 5 minutes, in which your backend needs to exchange the code for the access token. Below is the command that your backend code needs to implement using an OAuth client library.
curl -X POST https://api.stripe.com/v1/oauth/token \
  -u sk_live_***: \
  -d code=ac_*** \
  -d grant_type=authorization_code
Observação
You’ll need to use the app developer API Key for the relevant mode. To enable this, pass the relevant mode within the state.
Here’s an example response for the above curl command.
{
  "access_token": "{{ ACCESS_TOKEN }}",
  "livemode": true,
  "refresh_token": "{{ REFRESH_TOKEN }}",
  "scope": "stripe_apps",
  "stripe_publishable_key": "pk_live_***",
  "stripe_user_id": "acct_***",
  "token_type": "bearer"
}
Refresh your access token
Access tokens expire in 1 hour, and refresh tokens expire after 1 year. Refresh tokens are also rolled on every exchange, so the expiration time for the new refresh tokens is always a year from the date that it was generated or rolled. If you exchange a refresh token for an access token within one year, you should never hit the refresh token expiration date.
Here is the equivalent curl command to exchange the access token for a refresh token using your secret key:
curl -X POST https://api.stripe.com/v1/oauth/token \
  -u sk_live_***: \
  -d refresh_token={{ REFRESH_TOKEN }} \
  -d grant_type=refresh_token
Here’s an example response.
{
  "access_token": "{{ ACCESS_TOKEN }}",
  "livemode": true,
  "refresh_token": "{{ REFRESH_TOKEN }}",
  "scope": "stripe_apps",
  "stripe_publishable_key": "pk_live_***",
  "stripe_user_id": "acct_***",
  "token_type": "bearer"
}
You’ll get a new refresh token and the previous refresh token expires. You must securely store the refresh token in your backend and use the refresh token to obtain a fresh access token anytime you want to access the Stripe API on behalf of the Stripe User.
Erro comum
When you refresh the access token you may see an error that says you do not have the required permissions. If you see this, confirm that you’re using the secret key for your account to authorize the API call and that you’re not accidentally using a refresh token, access token, or a restricted key.
You can verify the access token by making a request to the Stripe API. For example:
curl https://api.stripe.com/v1/customers \
  -u "{{ ACCESS_TOKEN }}"