Stripe Payment Element
安全で埋め込み可能な UI コンポーネントで、世界中の支払い方法を受け付けます。
Payment Element は、100 以上の決済手段を受け付け、入力内容を検証し、エラーに対処する、ウェブのための UI コンポーネントです。単独で使用するか、ウェブアプリのフロントエンドの他の Elements とともに使用します。
互換性のある API
Stripe は、Elements と互換性のある 2 つのコア決済 API を提供しており、顧客からのさまざまな種類の決済を柔軟に受け入れることができます。これらの API は、Stripe の事前構築済みの決済インターフェースに連結できます。API は、決済フローの構成方法と必要な制御の程度に応じて、さまざまなユースケースに対応します。ほとんどのユースケースでは、Checkout Sessionsを使用することをお勧めします。
決済セッション API を使用すると、購入のラインアイテム、請求書と配送先住所、適用される税率、クーポンや割引など、顧客の決済フロー全体をモデル化できます。決済セッションでは、一度の導入でサブスクリプションの作成、Stripe Tax による税率の計算、決済の開始が可能です。
Checkout Sessions API で決済ページ を構築します。
Payment Intents APIを使用して、決済ステップのみをモデル化し、より詳細な制御を行います。Checkout Sessions API では、項目の詳細が必要であり、請求する最終的な金額のみを渡します。これは、最終的な金額を手動で計算するアドバンス決済フローに適しています。Payment Intents を使用する場合、Stripeを使用して適用される税金を計算する場合は Stripe Tax API と、Stripe を使用してサブスクリプションを作成する場合は Subscriptions API を使用して、個別の導入を構築する必要があります。
Elements を組み合わせる
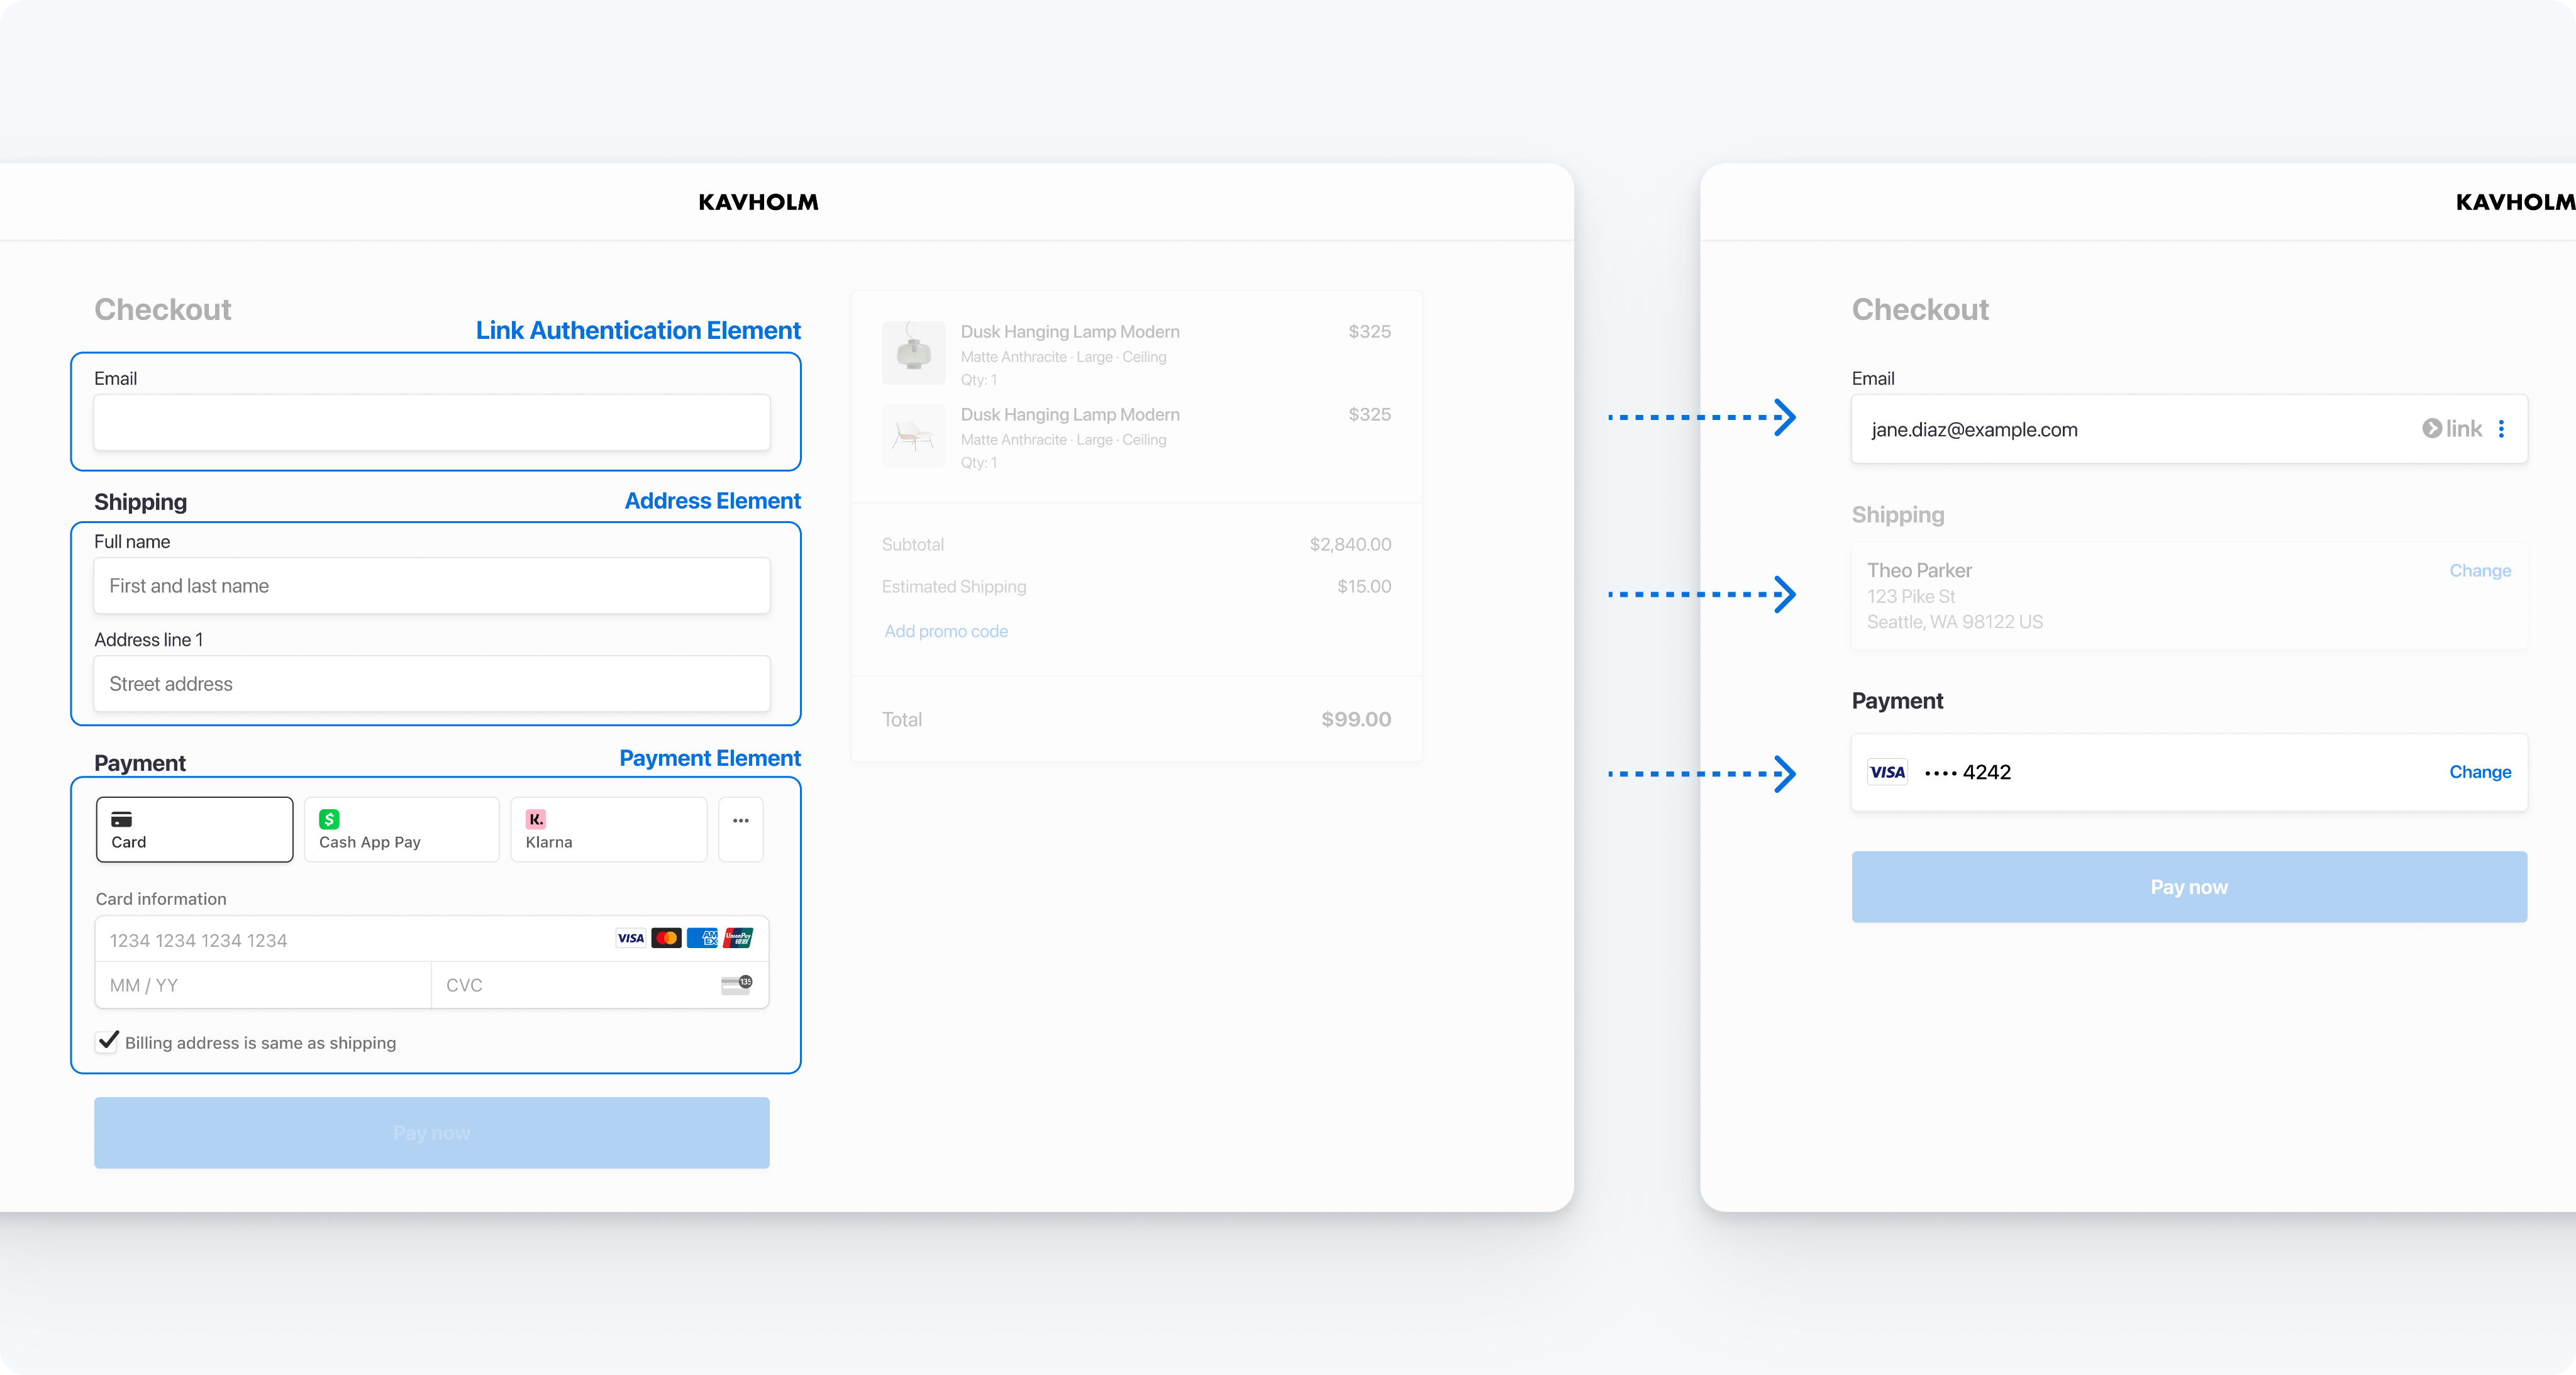
Payment Element はその他の Element と連携します。たとえば、このフォームは支払い情報の自動入力に 1 つの追加エレメント、配送先住所の収集にもう 1 つの追加エレメントを使用しています。
メモ
Link の法的合意書は、利用規約やプライバシーポリシーに対する適切なユーザー意識の遵守を保証するために必要なものであるため、削除することはできません。terms オブジェクトは、Link の法的合意書には適用されません。
 複数の Elements を組み合わせた決済フォーム
この例の全体のコードについては、Elementsの組み込みに Link を追加する をご覧ください。
Payment Element を Express Checkout Element と組み合わせることもできます。この場合、Apple Pay や Google Pay などのウォレットの支払い方法は、重複を避けるために Express Checkout Element でのみ表示されます。
決済手段
Stripe は、特定の支払い方法をデフォルトで有効にします。また、通知後に追加の支払い方法を有効にする場合があります。ダッシュボードを使用すると、いつでも支払い方法を有効または無効にできます。Payment Elemen では、動的な支払い方法を使用して以下を行うことができます。
- ダッシュボードを使用してノーコードで支払い方法を管理する
- 所在地、通貨、取引金額などの要素に基づいて、最も関連性の高い支払いオプションを動的に表示する
たとえば、ドイツの顧客が EUR で支払う場合、EUR を受け付ける有効なすべての支払い方法が、ドイツで広く普及しているものから順に表示されます。

顧客への関連性の高い順に支払い方法を表示する
決済手段の表示方法決済手段のカスタマイズをご覧ください。Stripe 以外で連携された決済手段を追加するには、Custom決済手段を使用できます。
貴社で構築済みの Stripe システムで支払い方法を手動で一覧表示する必要がある場合は、支払い方法を手動でリストアップするをご覧ください。
レイアウト
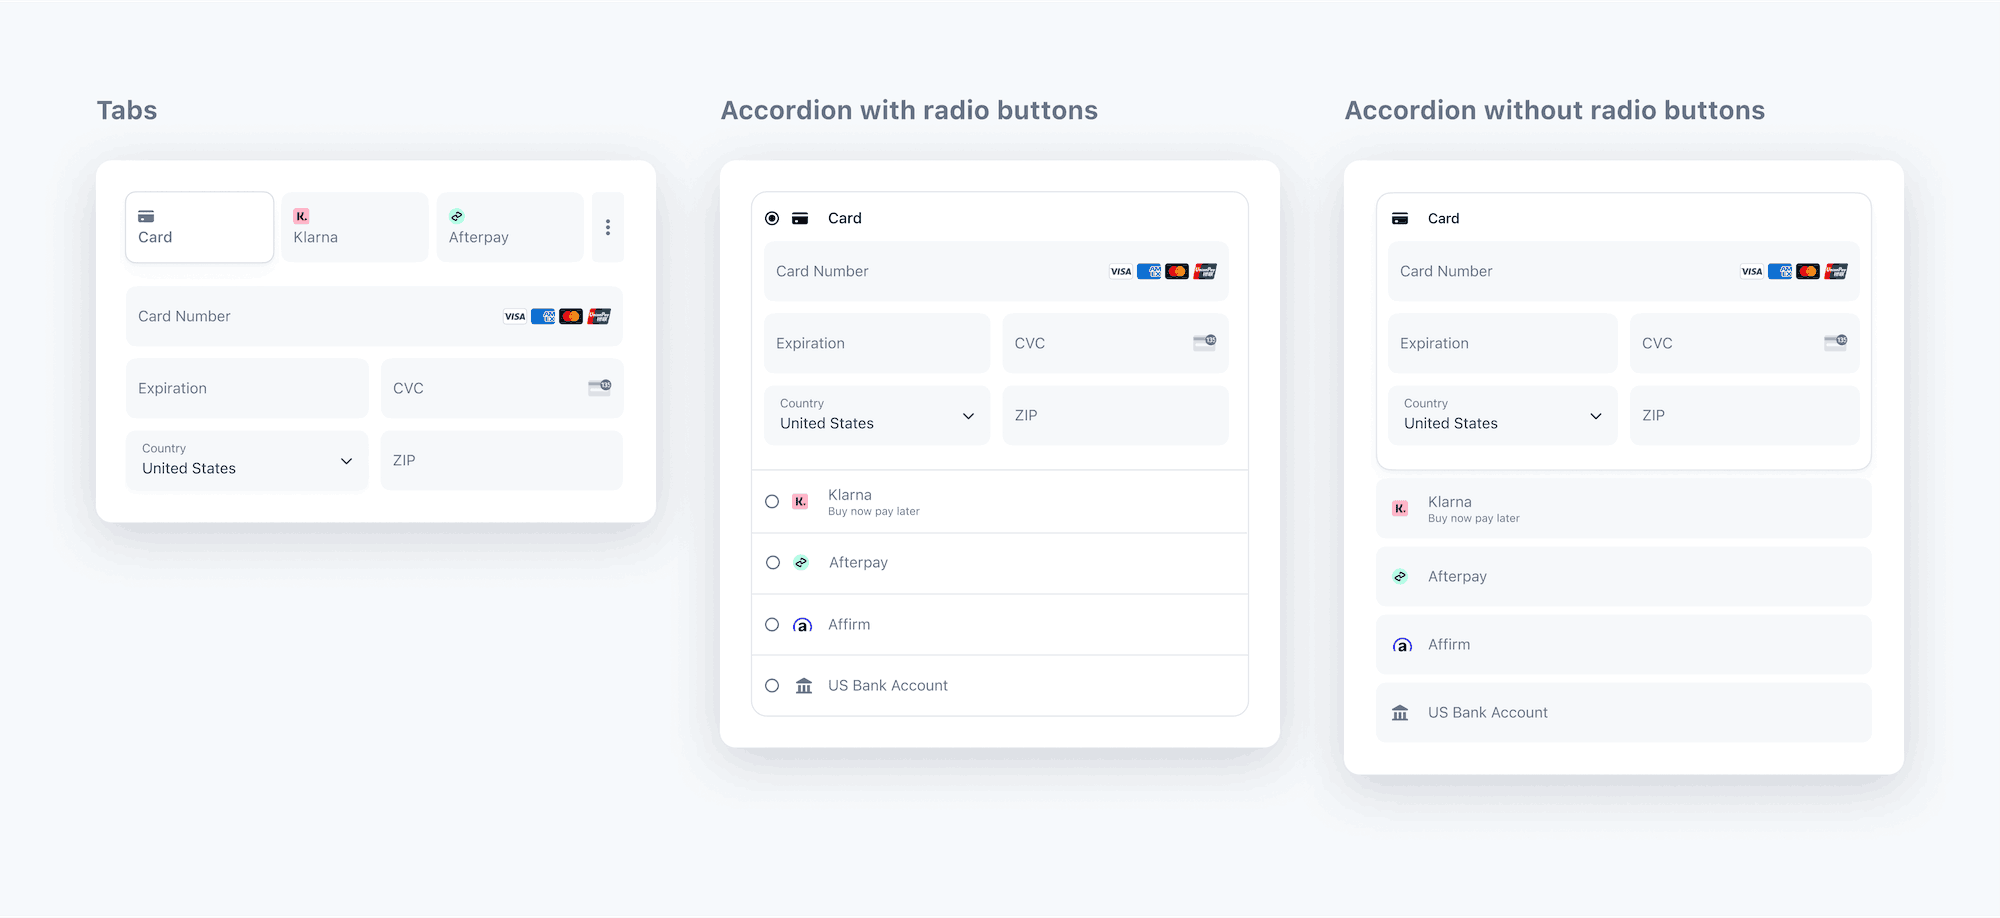
決済フローに合わせて Payment Element のレイアウトをカスタマイズできます。以下の画像は、同じ Payment Element を異なるレイアウト設定を使用して描写した場合を示しています。

さまざまなレイアウトの Payment Element。
デザイン
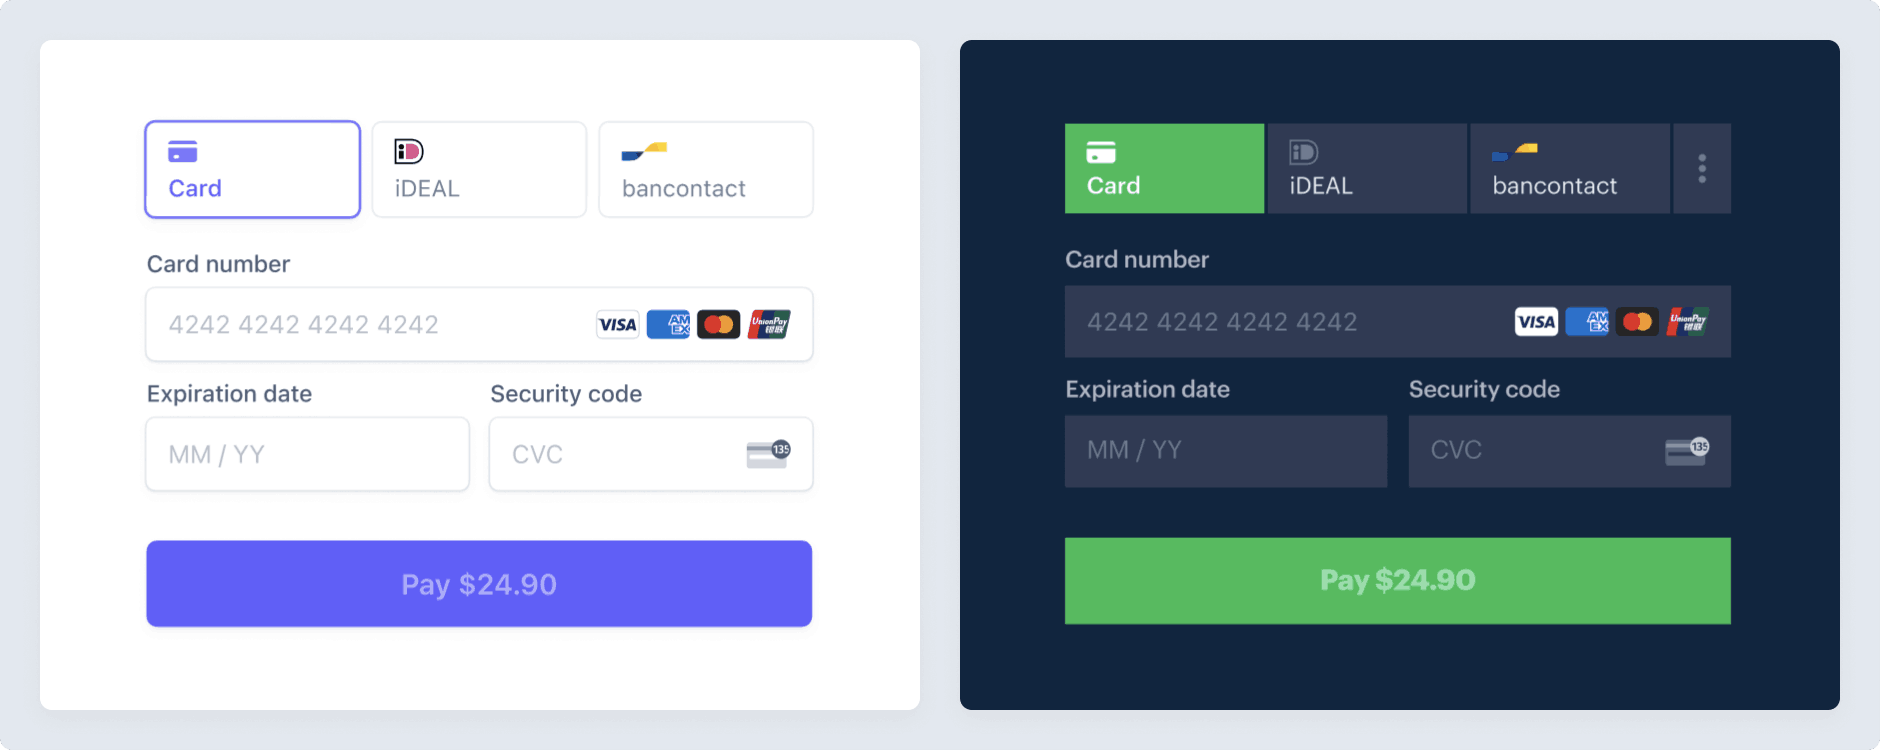
Appearance API を使用して、すべての Elements のスタイルを管理します。テーマを選択するか、特定の詳細を更新します。

たとえば、「flat」のテーマを選択して、主要なテキストの色を上書きします。
const stripe = Stripe(); const appearance = { theme: 'flat', variables: { colorPrimaryText: '#262626' } };'pk_test_TYooMQauvdEDq54NiTphI7jx'
テーマと変数の一覧については、Appearance API のドキュメントをご覧ください。
オプション
Stripe Elements はこれより多くのオプションをサポートします。たとえば、business オプションを使用して、ビジネス名を表示します。
const stripe = Stripe(); const appearance = { /* appearance */}; const options = { business: { name: "RocketRides" } };'pk_test_TYooMQauvdEDq54NiTphI7jx'
Payment Element は以下のオプションをサポートします。詳細については、各オプションのリファレンス項目をご覧ください。
| layout | Payment Element のレイアウト。 |
| defaultValues | Payment Element に表示する顧客の初期情報。 |
| business | Payment Element に表示するビジネスに関する情報。 |
| paymentMethodOrder | 支払い方法が表示される順序。 |
| fields | 特定のフィールドを表示するかどうか。 |
| readOnly | 支払いの詳細を変更できるかどうか。 |
| terms | 同意書や法的な契約書を Payment Element に表示するかどうか。デフォルトの動作では、必要な場合にのみ表示します。 |
| wallets | Apple Pay や Google Pay のようなウォレットを表示するかどうか。デフォルトでは、可能な場合には表示します。 |
エラー
決済 Element は、クライアント確認中に、次の支払いの失敗コードのローカライズされた顧客向けエラーメッセージを自動的に表示します。
generic_decline insufficient_funds incorrect_zip incorrect_cvc invalid_cvc invalid_expiry_ month invalid_expiry_ year expired_card fraudulentlost_card stolen_card card_velocity_ exceeded