Auszahlungen tätigen
Fügen Sie Ihrem Stripe-Guthaben Geld hinzu und zahlen Sie Verkäufer/innen oder Dienstleister aus.
In diesem Leitfaden erfahren Sie, wie Sie Gelder in Ihr Kontoguthaben einzahlen und auf die Bankkonten Ihrer Nutzer/innen überweisen, ohne Zahlungen über Stripe abzuwickeln. Zur Veranschaulichung verwenden wir das Beispiel eines Frage-Antwort-Portals, das seinen Autorinnen und Autoren einen Teil der mit ihren Antworten generierten Werbeeinnahmen auszahlt. Die Plattform und die verbundenen Konten befinden sich in den USA.
Bei Unternehmen, die automatische Auszahlungen verwenden, werden Gelder, die dem Zahlungsguthaben hinzugefügt werden und das Mindestguthaben überschreiten, mit der nächsten Auszahlung ausgezahlt. Sie können Ihren Auszahlungszeitplan und die Einstellungen für das Mindestguthaben in Ihren Auszahlungseinstellungen konfigurieren.
Hinweis
Nur Teammitglieder mit Administratorzugriff auf das Stripe-Konto der Plattform, die die Zwei-Faktor-Authentifizierung aktiviert haben, können Gelder einzahlen.
Voraussetzungen
- Registrieren Sie Ihre Plattform.
- Fügen Sie Unternehmensdetails hinzu, um Ihr Konto zu aktivieren.
- Vervollständigen Sie Ihr Plattform-Profil.
- Passen Sie Ihre Markeneinstellungen an. Fügen Sie einen Firmennamen, ein Symbol und eine Markenfarbe hinzu.
Verbundenes Konto erstellen
Wenn sich ein/e Nutzer/in (Verkäufer/in oder Dienstleister/in) auf Ihrer Plattform anmeldet, erstellen Sie ein Nutzerkonto (auch connected account genannt), damit Sie Zahlungen einziehen und anschließend an die Nutzer/innen auszahlen können. Verbundene Konten entsprechen in der Stripe-API Ihren Nutzer/innen und helfen, die für die Identitätsprüfung der Nutzer/innen erforderlichen Informationen zu erfassen. In unserem Beispiel mit dem Frage-Antwort-Portal ist das verbundene Konto der/die Autor/in.
Hinweis
In diesem Leitfaden thematisieren wir Express-Konten, für die gewisse Einschränkungen gelten. Als Alternative können auch Custom-Konten in Betracht gezogen werden.
Anmeldeformular anpassen
Ihr Express-Registrierformular passen Sie in Ihren Plattform-Einstellungen an. Sie können zum Beispiel die Farben und Logos ändern, die Nutzer/innen sehen, wenn sie auf Ihren Connect-Link klicken.
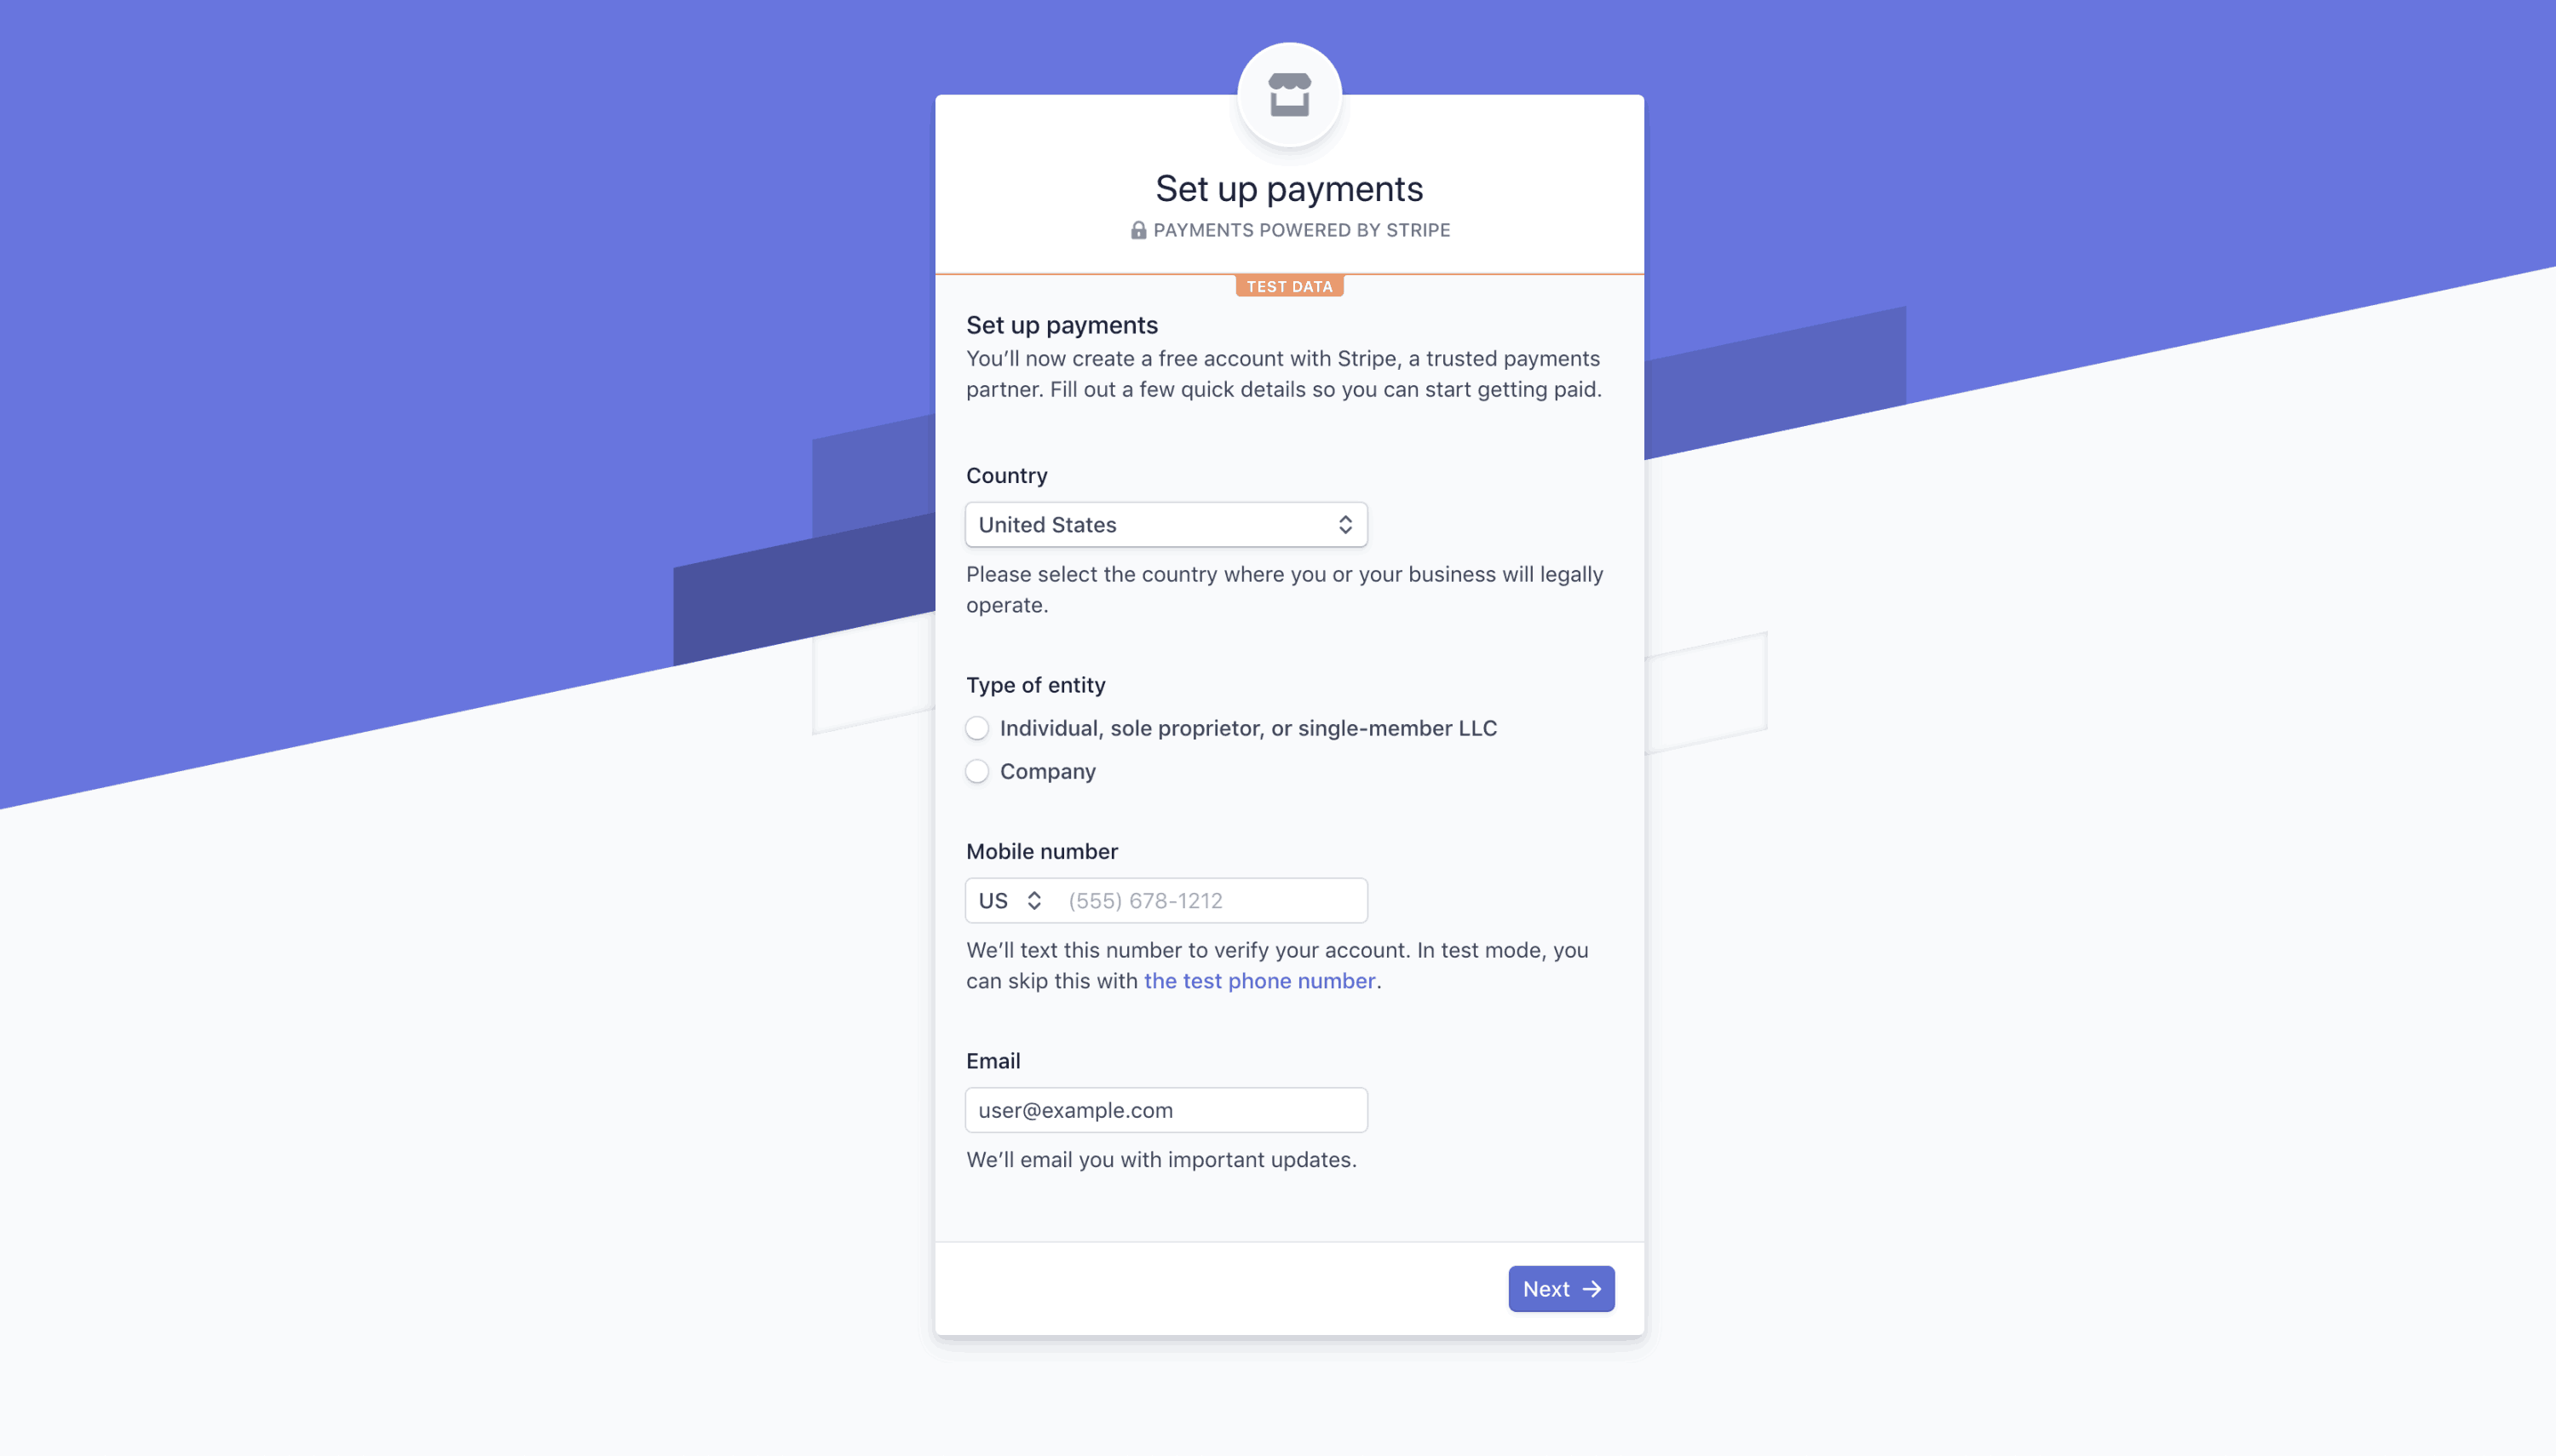
Standard-Anmeldeformular für Express
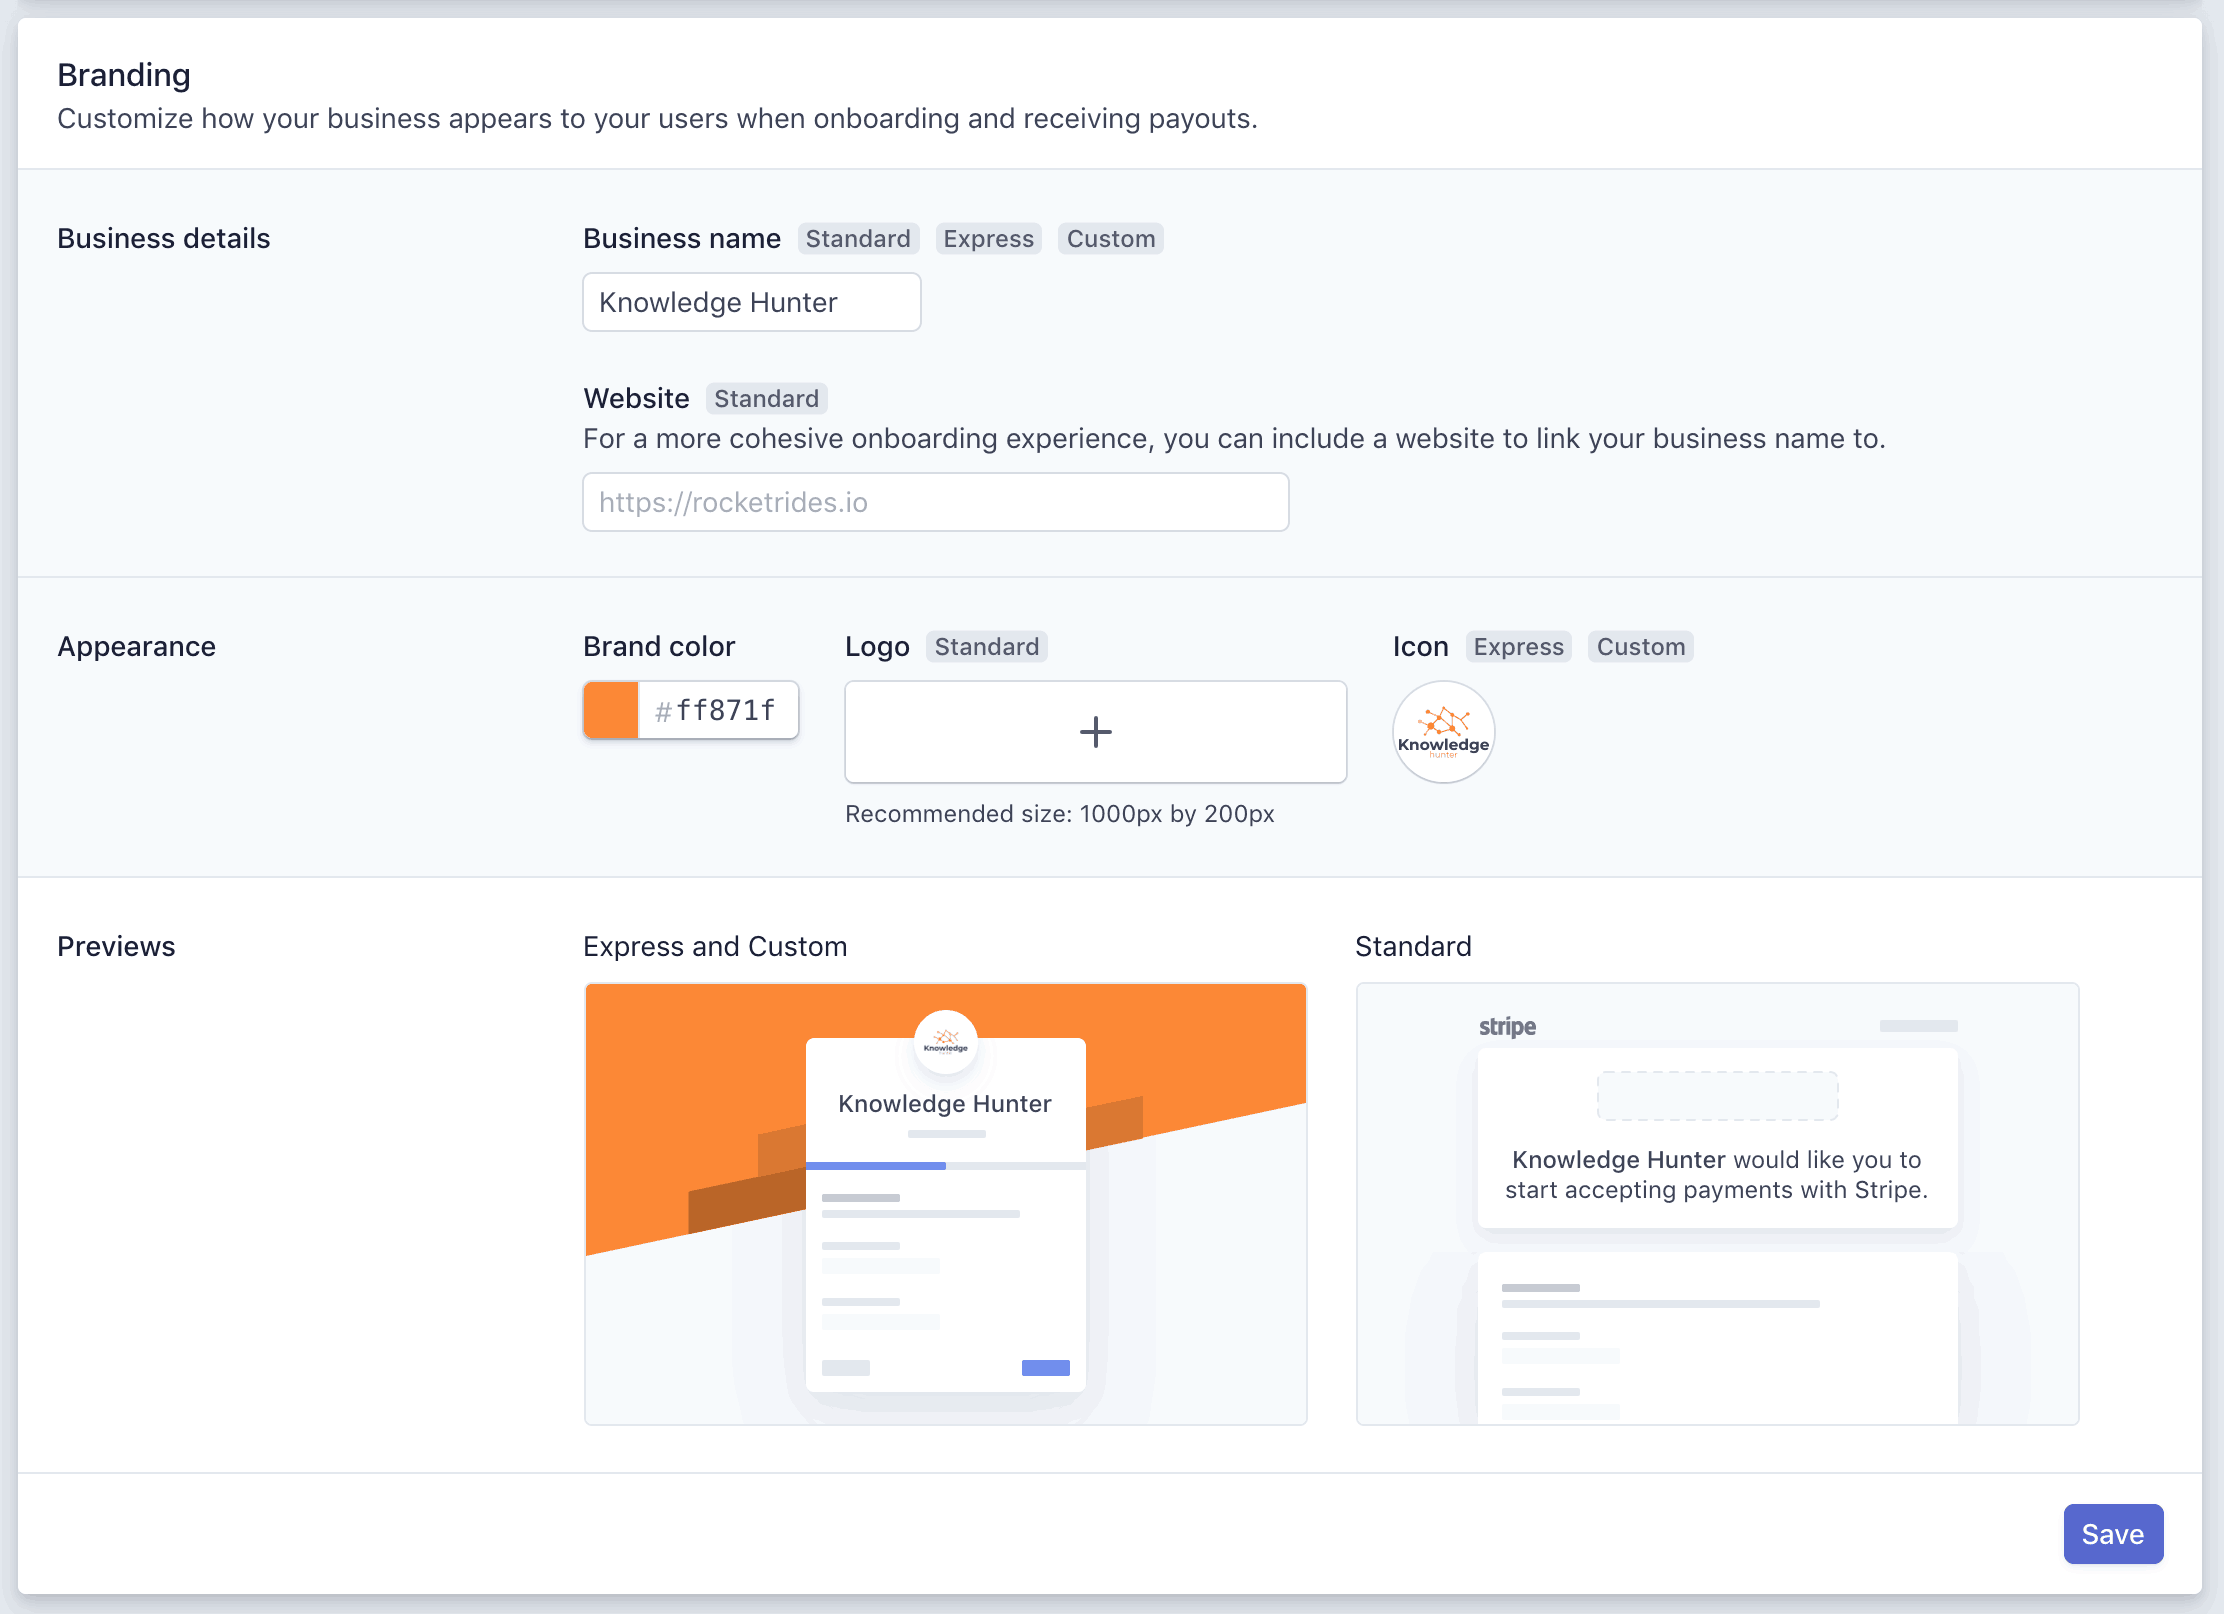
Branding-Einstellungen
Link für verbundenes Konto erstellen
Sie können einen neuen Link für ein verbundenes Konto erstellen, indem Sie auf der Seite Verbundene Konten auf die Schaltfläche + Erstellen klicken und Express als Kontotyp zusammen mit der Funktion Transfers auswählen. Klicken Sie auf Weiter, um einen Link für den/die Nutzer/in zu generieren, den/die Sie einbinden möchten.
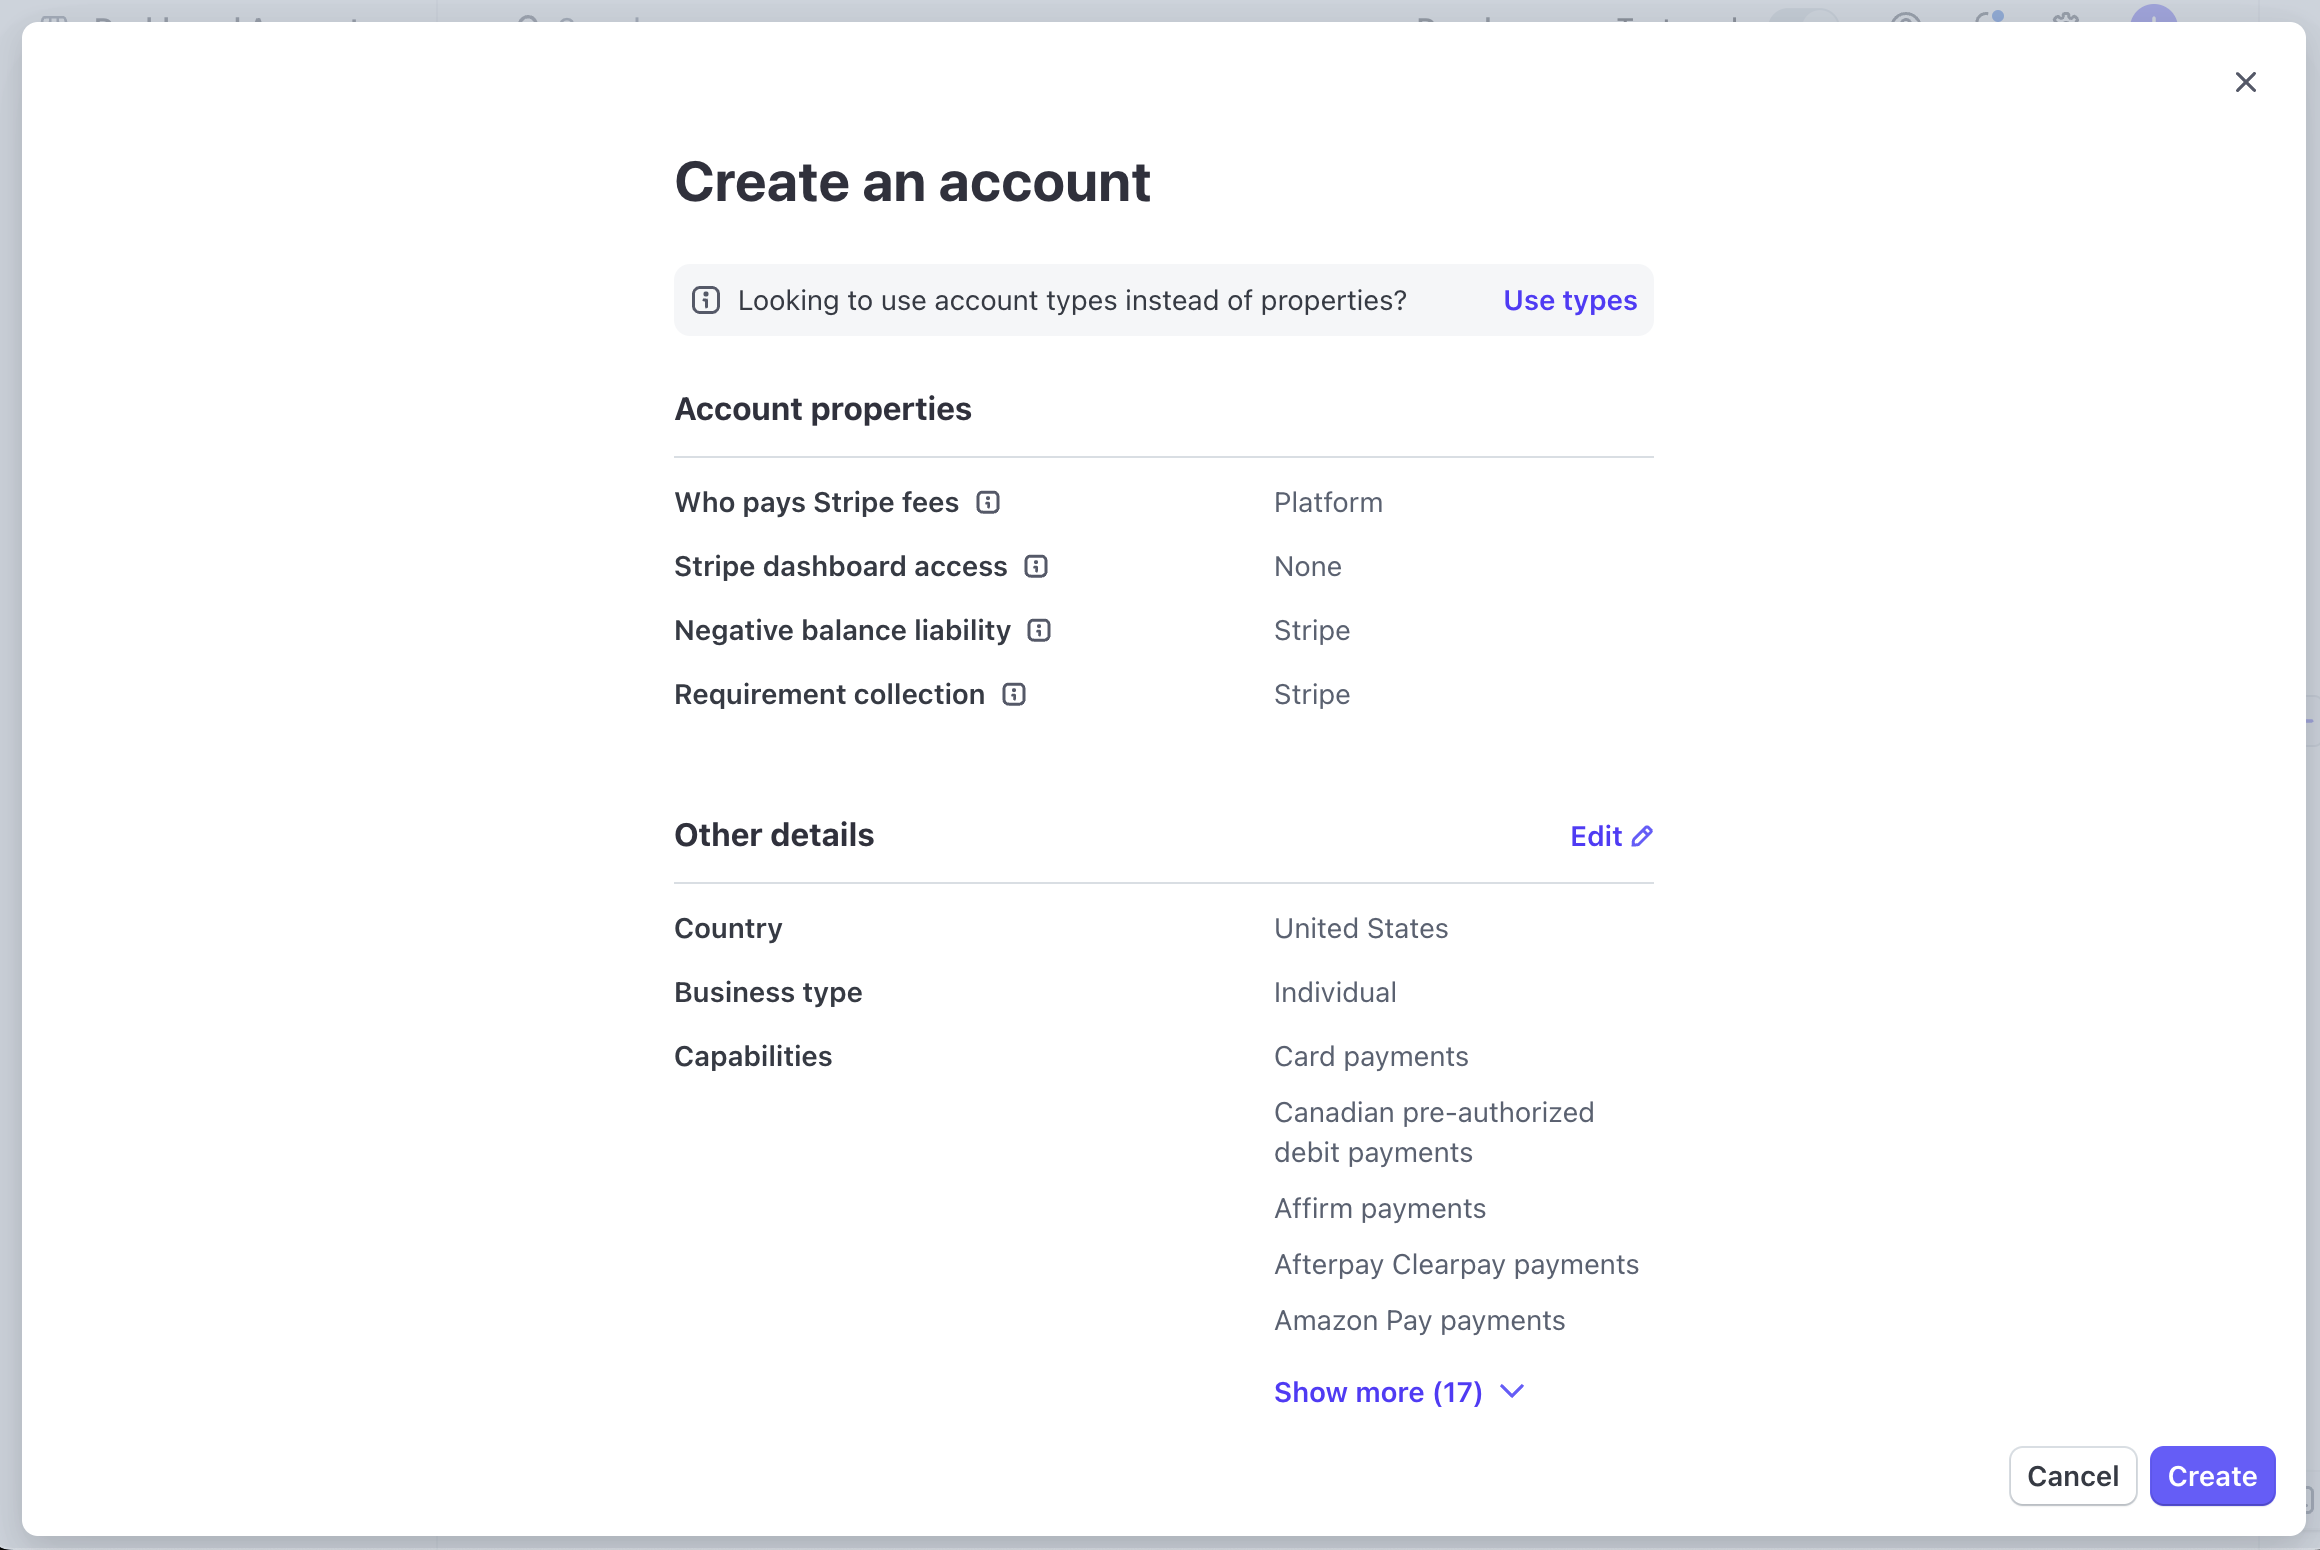
Verbundenes Konto erstellen
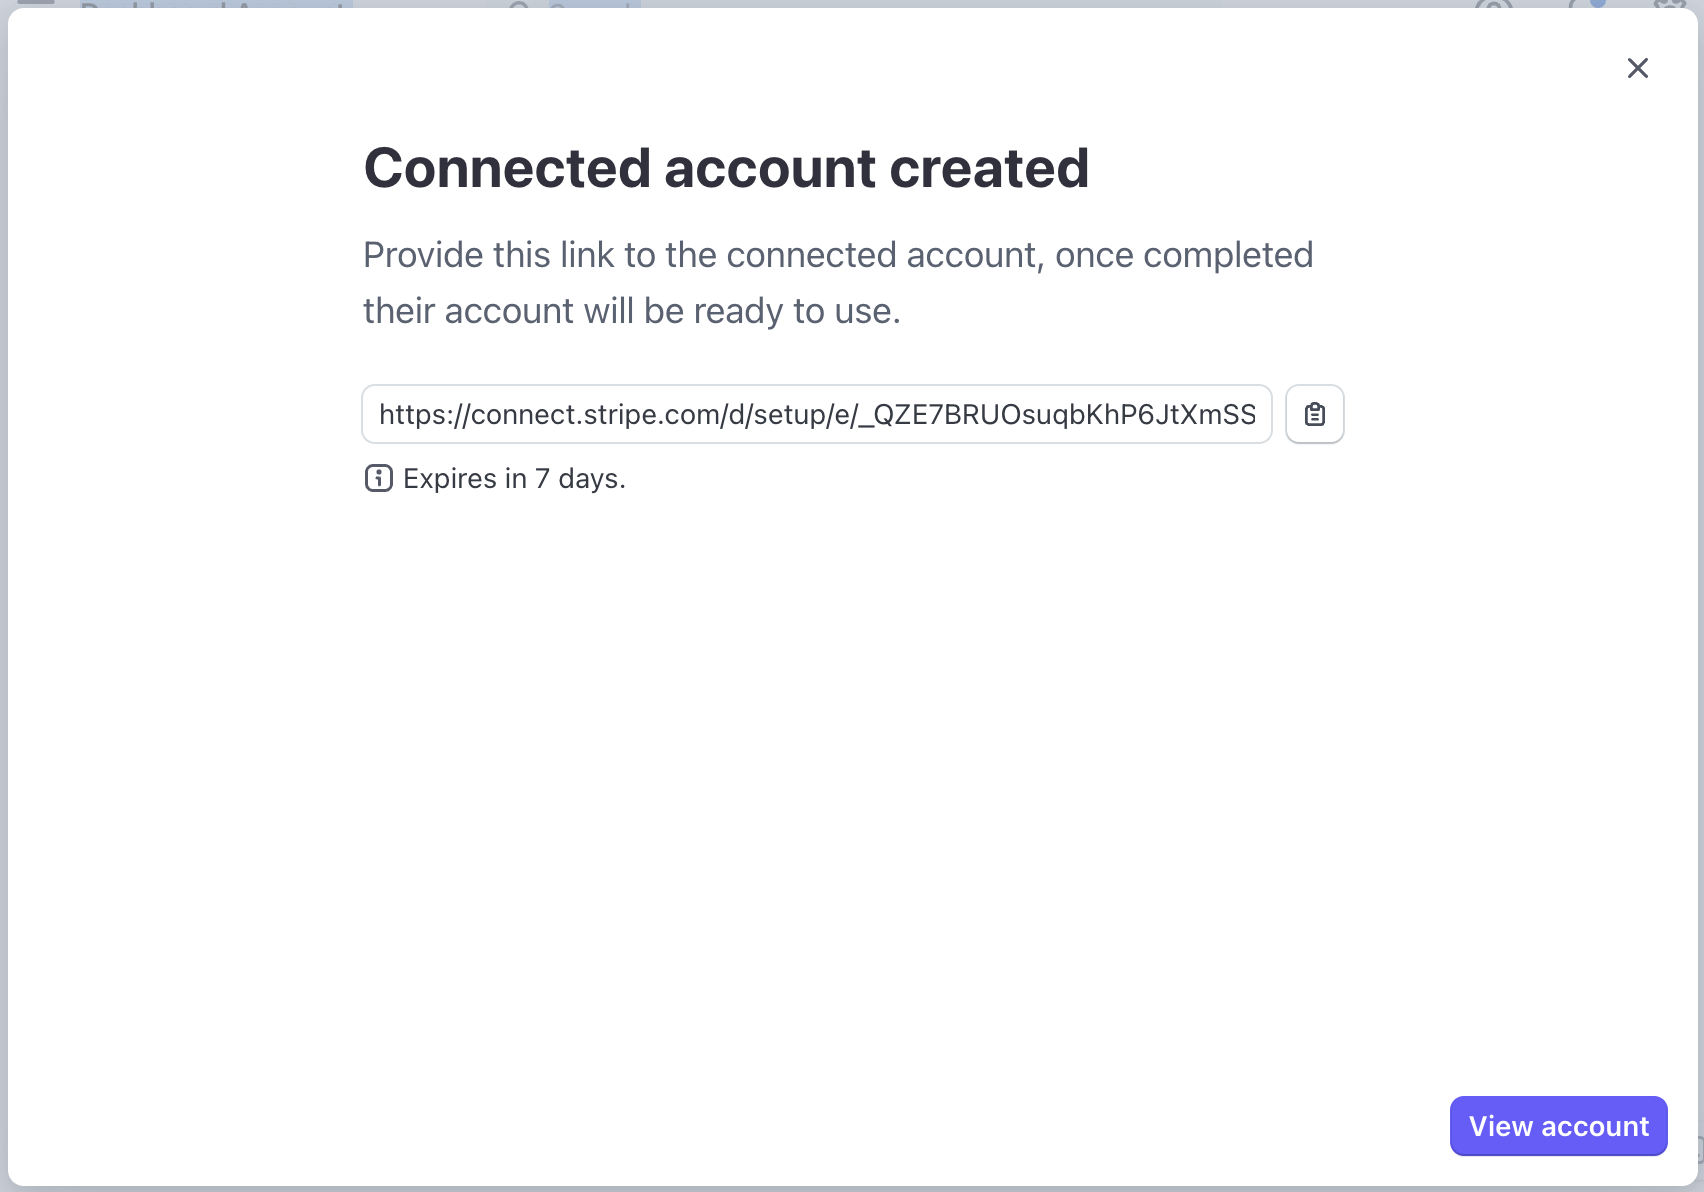
Onboarding-Link erstellen
Über diesen Link gelangen die Nutzer/innen zu einem Formular, das sie ausfüllen müssen, um sich mit Ihrer Plattform zu verbinden. Wenn Sie beispielsweise eine Frage-Antwort-Plattform haben, können Sie einen Link für Autor/innen bereitstellen, um sich mit der Plattform zu verbinden. Dieser Link ist nur für ein verbundenes Konto gedacht, das Sie erstellt haben. Nachdem Ihr/e Nutzer/in den Onboarding-Prozess abgeschlossen hat, können Sie ihn/sie in Ihrer Kontoliste anzeigen.

Gelder auf Ihr Guthaben einzahlen
Um Gelder hinzuzufügen, gehen Sie zum Abschnitt Guthaben im Dashboard. Klicken Sie auf Zum Guthaben hinzufügen und wählen Sie ein Guthaben aus, zu dem Sie Gelder hinzufügen möchten.
Wählen Sie Zahlungsguthaben, um Gelder hinzuzufügen, die auf Ihre verbundenen Konten ausgezahlt werden. Sie können die zum Zahlungsguthaben hinzugefügten Gelder auch zur Deckung zukünftiger Rückerstattungen und Zahlungsanfechtungen oder zur Rückzahlung des negativen Guthabens Ihrer Plattform verwenden. Weitere Informationen über Rückerstattungen und Zahlungsanfechtungen finden Sie unter Guthaben zu Ihrem Stripe-Guthaben hinzufügen.
Bankkonto verifizieren
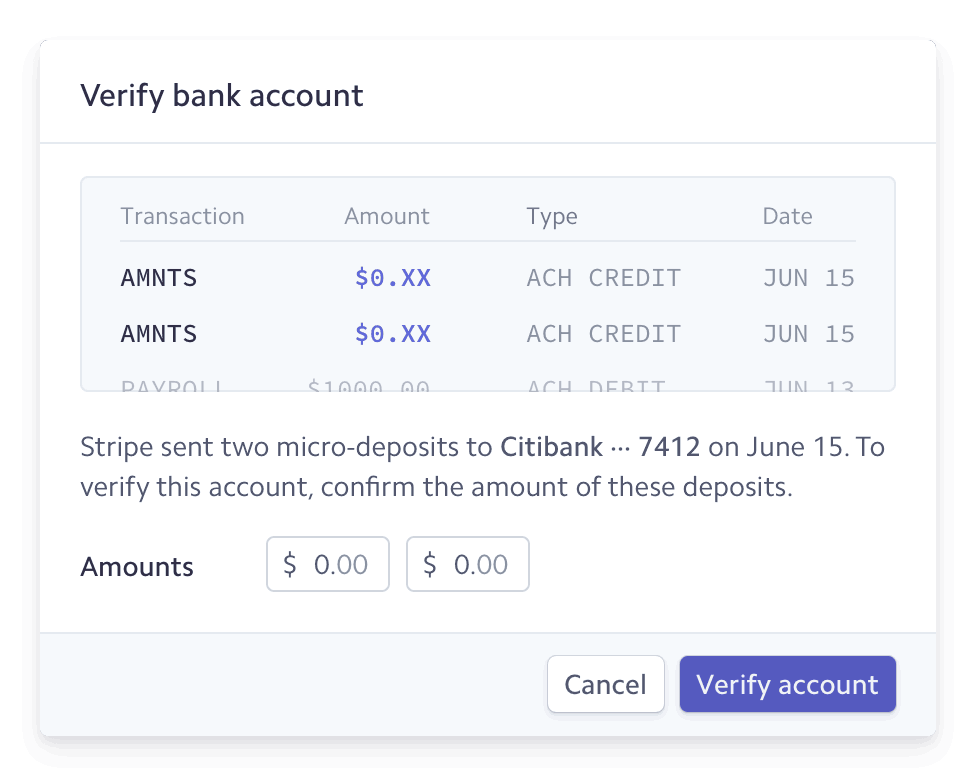
Wenn Sie versuchen, Gelder von einem nicht verifizierten Bankkonto hinzuzufügen, durchlaufen Sie beim ersten Mal den Verifizierungsvorgang im Dashboard. Wenn Ihr Bankkonto nicht verifiziert ist, müssen Sie zwei Mikroeinzahlungen von Stripe bestätigen. Diese Einzahlungen erscheinen innerhalb von 1 bis 2 Werktagen auf Ihrem Online-Kontoauszug. Auf dem Auszug sehen Sie ACCTVERIFY als Zahlungsbeschreibung.
Stripe benachrichtigt Sie im Dashboard und per E-Mail über den Eingang der Mikroeinzahlungen auf Ihrem Konto. Um den Verifizierungsvorgang abzuschließen, klicken Sie auf die Dashboard-Benachrichtigung im Abschnitt Salden. Geben Sie dort die Beträge der beiden Mikroeinzahlungen ein und klicken Sie auf Konto verifizieren.
Gelder hinzufügen
Sobald Sie verifiziert sind, verwenden Sie das Dashboard, um Gelder auf Ihr Konto einzuzahlen.
- Gehen Sie im Dashboard zum Abschnitt Guthaben.
- Klicken Sie auf Zu Guthaben hinzufügen und wählen Sie dann Zahlungsguthaben.
- Geben Sie den Aufstockungsbetrag ein.
- Wählen Sie gegebenenfalls eine Zahlungsmethode aus dem Dropdown-Menü aus (Banklastschrift, Überweisung oder Banküberweisung).
- Bei Banklastschriften überprüfen Sie den Betrag und klicken auf Gelder hinzufügen. Für Banküberweisungen verwenden Sie die Stripe-Bankdaten, um eine Überweisung oder eine Banküberweisung von Ihrer Bank zu veranlassen.
- Das daraus resultierende Objekt wird als Aufstockung bezeichnet, das Sie im Abschnitt Aufstockungen des Dashboards sehen können. Bei Banküberweisungen wird die Aufstockung erst erstellt, wenn die Gelder eingegangen sind.
Gelder anzeigen
Zeigen Sie Ihre Gelder auf der Registerkarte Aufstockungen unter der Seite Guthaben an. Jedes Mal, wenn Sie Gelder aufstocken, erstellen wir ein top-up-Objekt mit einer eindeutigen ID in folgendem Format: tu_XXXXXX. Sie können dies in der Detailansicht der Aufstockung sehen.
Dauer der Abwicklung
In den USA können Plattformen Einzahlungen durch ACH-Lastschrift vornehmen. Es kann 5–6 Werktage dauern, bis diese in Ihrem Stripe-Saldo verfügbar sind. Sie können eine Überprüfung Ihres Kontos anfordern, um die Zahlungsabwicklung zu beschleunigen, indem Sie sich an den Stripe-Support wenden.
Sobald wir mehr über Ihr Konto wissen, kann Stripe Ihre Abwicklungsdauer ggf. automatisch verkürzen.
Für künftige Rückerstattungen und Zahlungsanfechtungen oder zum Ausgleichen negativer Kontostände können Gelder per Banküberweisung eingezahlt werden. Sie sind dann innerhalb von 1 bis 2 Werktagen verfügbar.
Ihre Nutzer/innen auszahlen
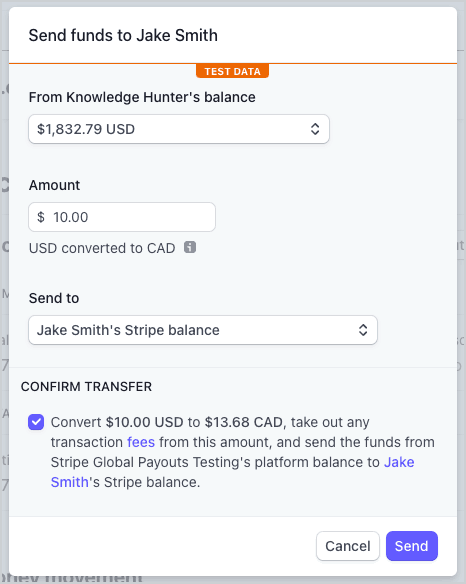
Wenn die/der Nutzer/in den Onboarding Prozess abgeschlossen hat und Sie Geldbeträge in Ihr Guthaben eingezahlt haben, können Sie einen Teil Ihres Guthabens an Ihre verbundenen Konten auszahlen. In unserem Beispiel wird Geld aus dem Guthaben des Frage-Antwort-Portals an eine/n einzelne/n Autor/in überwiesen.
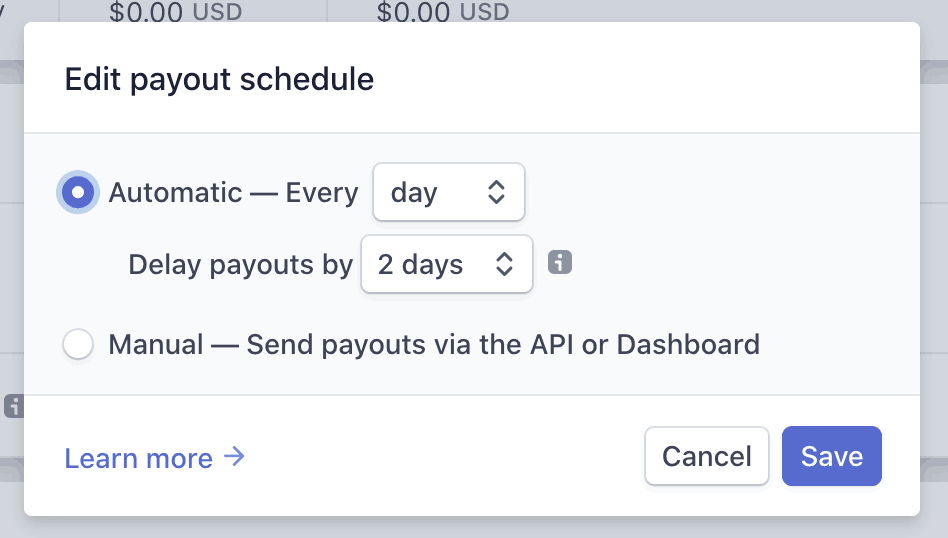
Um Ihre Nutzer/innen auszuzahlen, klicken Sie im Abschnitt Guthaben auf der Detailseite eines Kontos auf Gelder hinzufügen. Jede Zahlung, die Sie an ein verbundenes Konto übertragen, fließt standardmäßig in das Stripe-Guthaben des verbundenen Kontos und wird täglich fortlaufend ausgezahlt. Sie können die Häufigkeit der Auszahlungen ändern, indem Sie im Abschnitt Salden auf die Schaltfläche ganz rechts klicken und Auszahlungsplan bearbeiten auswählen.
Gelder an Nutzer/innen senden
Auszahlungsplan bearbeiten