Collecte des données saisies à l'écran
Utilisez Terminal pour collecter les données saisies par vos clients.
Lecteurs : Stripe Reader S700 et BBPOS WisePOS E
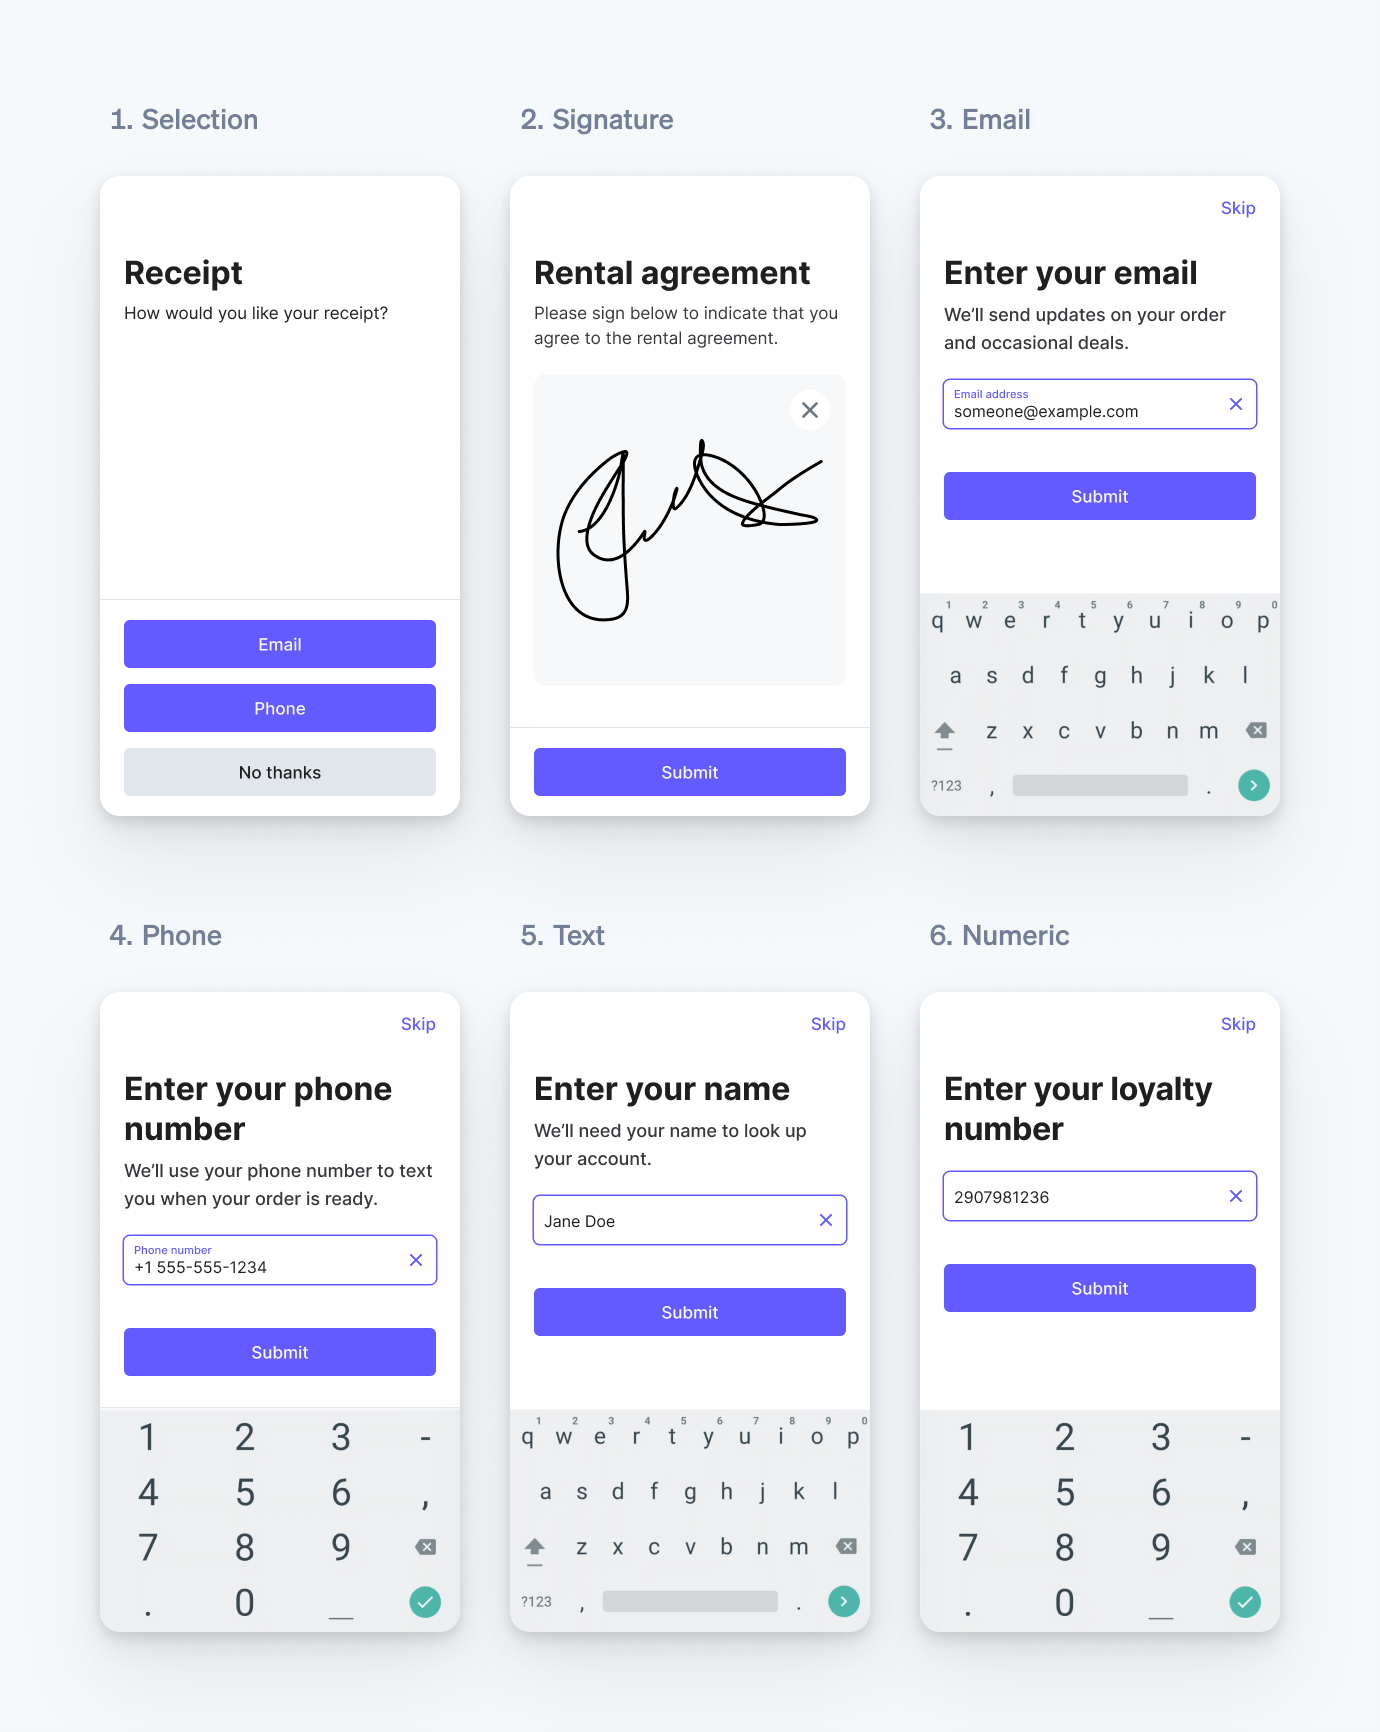
Avec les lecteurs intelligents Terminal, vous pouvez afficher les formulaires de saisie et collecter des informations auprès de vos clients. Vous pouvez choisir parmi six types d’entrée et ils peuvent être utilisés dans de nombreux cas d’utilisation.
- Recueillez votre identifiant client pour l’échange de fidélisation avec la saisie
phoneouemailet traitez-le sur votre back-end. - Demandez à votre client d’accepter une renonciation ou un accord avec la saisie
signature. - Demandez à votre client de remplir un questionnaire avec la saisie
selectionoutext.
Vous pouvez afficher les formulaires de saisie à tout moment avant le paiement, après le paiement et en dehors d’un cycle de paiement.

Types de saisie pris en charge.
Remarque
N’utilisez pas collect_ pour collecter des informations sensibles (notamment des données de santé relevant du secret médical et les coordonnées de carte bancaire du client), ou des informations protégées par la loi.
Collecter les données saisies
Vous pouvez collecter des informations sur les clients même lorsque le lecteur intelligent fonctionne hors ligne.
Pour collecter des saisies à l’aide des lecteurs intelligents Terminal, appelez collectInputs avec le SDK Terminal, le SDK communique avec le lecteur pour afficher une interface utilisateur préconfigurée. Vous pouvez spécifier jusqu’à 5 entrées à la fois, et le lecteur les collecte dans l’ordre. Une fois que le client a saisi ses données, le SDK renvoie les données collectées avec un rappel.
Personnalisation
Vous pouvez personnaliser l’apparence et le comportement de tous les types de saisie :
- Définissez les saisies importantes comme
requiredpour vous assurer qu’elles seront collectées. Le bouton Ignorer est masqué lorsque la saisie est obligatoire. - Fournissez un contexte à votre client en précisant le texte que vous souhaitez afficher sur l’écran du lecteur pour chaque saisie à l’aide des champs
titleetdescription.
Nom du champ | Nombre maximal de caractères |
title | 40 |
description | 500 lorsqu’il est utilisé avec le formulaire selection, 100 lorsqu’il est utilisé avec tout autre type de formulaire |
submit_ | 30 |
skip_ | 14 |
- Utilisez des sauts de ligne
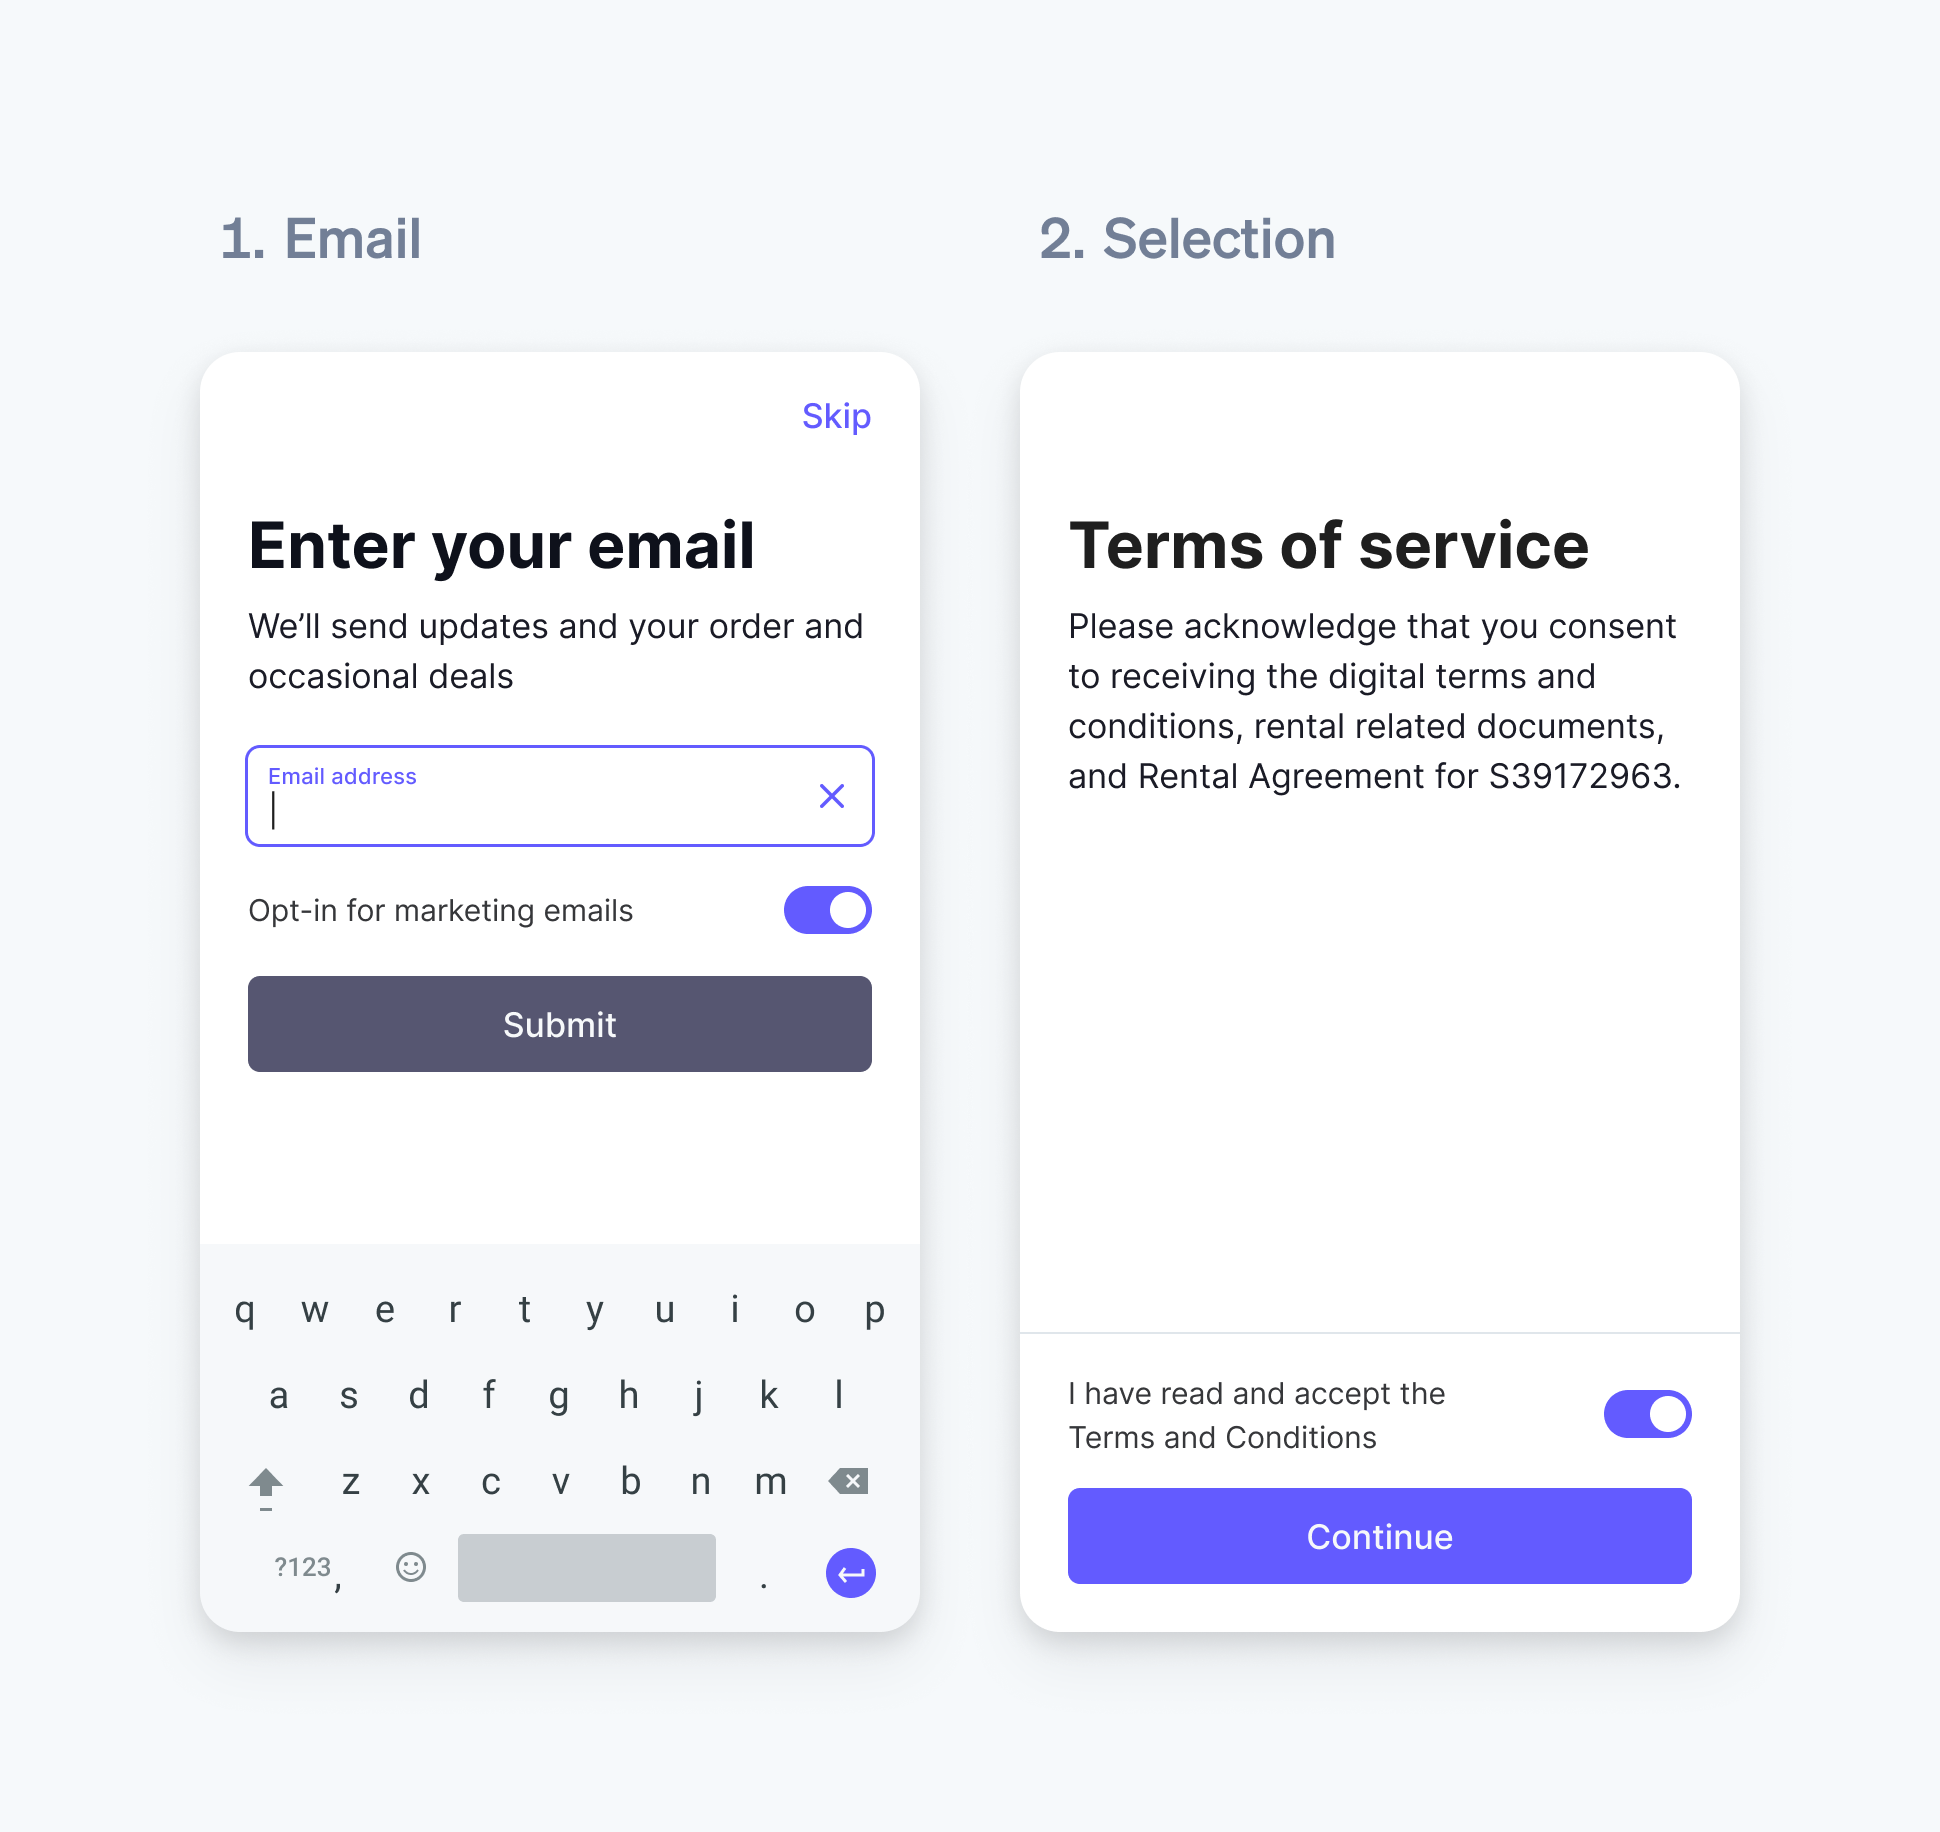
- Ajoutez jusqu’à 4 boutons d’activation que les clients peuvent activer ou désactiver pour les options booléennes, les contrats ou les adhésions.

Formulaire d’e-mail et de sélection avec bouton d’activation
Nom du champ | Nombre maximal de caractères |
title | 50, 25 lorsqu’il est utilisé avec le bouton de description |
description | 50, 25 lorsqu’il est utilisé avec le bouton de titre |
- Pour les saisies de type
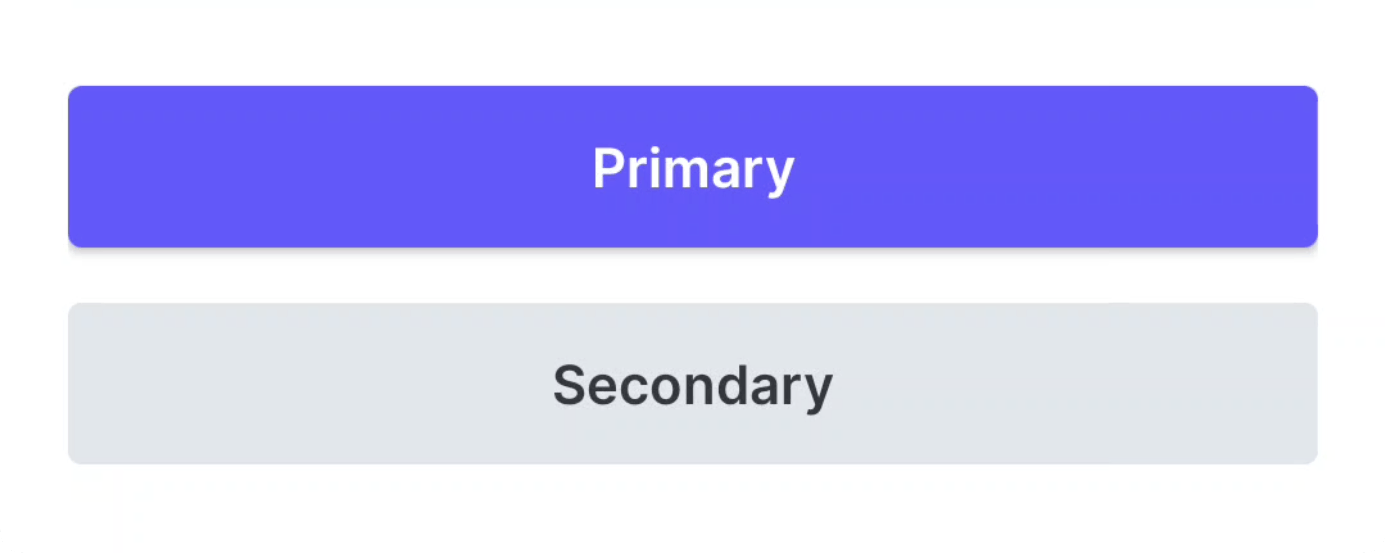
selection, vous pouvez mettre l’accent ou non surchoicesà l’aide du paramètrestyle.

Styles principal et secondaire des options du type de saisie « selection »
Interaction avec le client
Lorsque le lecteur commence à collecter des données saisies, il affiche la première donnée de la liste.
Une fois que le client a terminé toutes les saisies, le lecteur passe à un état transitoire pendant 3 secondes, en attendant une nouvelle demande. Si aucune requête n’est effectuée après 3 secondes, le lecteur revient à l’écran d’accueil.
Remarque
Il vous incombe de connaître et de respecter toutes les lois et réglementations applicables régissant votre utilisation de cette fonctionnalité, et vous devez, dans le cadre d’une telle utilisation, obtenir, le cas échéant, l’ensemble des consentements, licences, droits et autorisations nécessaires. Si vous utilisez les données collectées par un lecteur intelligent Terminal ou les résultats affichés pour conclure des contrats avec vos clients ou leur adresser des notifications, il vous incombe de vous assurer de la validité juridique et du caractère exécutoire de ces contrats ou notifications.
Recevoir les données saisies
Lorsque toutes les entrées ont été collectées ou ignorées, le SDK Terminal renvoie les données collectées.
- Pour les saisies de type signature, les données renvoyées sont une chaîne au format SVG.
- Pour les saisies de type sélection, les données renvoyées sont les champs
textetiddu bouton sélectionné. - Pour les saisies de type numéro de téléphone, adresse e-mail, texte et chiffres, la valeur renvoyée est la chaîne de la réponse du client.
- Si une saisie facultative est ignorée par le client, la valeur booléenne
skippedest définie surtrue. - Pour chaque bouton d’activation, l’option
enabled,disabledouskippedest renvoyée en fonction de l’index de la liste d’entrée des boutons d’activation.
Le SDK Terminal renvoie une erreur en cas d’action annulée, d’encaissement expiré ou de toute autre erreur.
Tester votre intégration
Vous pouvez tester votre intégration à l’aide du lecteur de simulation du SDK. Avant de pouvoir tester la collecte des données saisies, vous devez d’abord vous connecter à un lecteur Internet simulé.
Le lecteur de simulation permet de simuler les scénarios suivants :
- Collecte des données saisies réussie sans omettre aucune saisie
- Collecte des données saisies réussie en ignorant toutes les saisies non requises
- Échec de la collecte des données saisies en raison d’un délai d’attente
Lors de la simulation d’une collecte réussie des entrées, le SDK renvoie une valeur codée en dur pour chaque entrée en fonction du type.