Zahlungen für bestehende Kundinnen/Kunden
Erfahren Sie, wie Sie eine bestehende Zahlungsmethode belasten, während ein Kunde/eine Kundin On-Session ist.
Eine Bezahlvorgang ermöglicht es Käuferinnen und Käufern, ihre Zahlungen einzugeben. Wenn der/die Käufer/in ein/e bestehende/r Kunde/Kundin ist, können Sie den Bezahlvorgang so konfigurieren, dass die Angaben mit einer der gespeicherten Karten des Kunden/der Kundin vorausgefüllt werden. Bei der Bezahlvorgangs-Sitzung werden bis zu 50 gespeicherte Karten angezeigt, mit denen der Kunde zahlen kann.
Vergleichen Sie die Referenzen von Customers v1 und Accounts v2
Wenn Ihre Connect-Plattform von Kunden/Kundinnen konfigurierte Konten verwendet, nutzen Sie bitte unseren Leitfaden, um Customer- und Ereignisreferenzen in Ihrem Code durch die entsprechende API-Dokumentation von Accounts v2 zu ersetzen.
Checkout-Sitzung erstellenServerseitig
Checkout unterstützt die Wiederverwendung bestehender Kundenobjekte über den customer-Parameter. Bei der Wiederverwendung bestehender Kundinnen und Kunden werden alle von Checkout erstellten Objekte, wie PaymentIntents und Subscriptions, mit diesem Customer-Objekt verknüpft.
Erstellen Sie von Ihrem Server aus eine Checkout-Sitzung und setzen Sie den ui_mode-Endpoint auf embedded.
Um Kundinnen/Kunden zu einer nutzerdefinierten Seite zurückzuleiten, die Sie auf Ihrer Website hosten, geben Sie die URL dieser Seite im Parameter return_url an. Fügen Sie die Vorlagenvariable {CHECKOUT_ in die URL ein, um den Status der Sitzung auf der Rückgabeseite abzurufen. Checkout ersetzt die Variable vor der Weiterleitung automatisch durch die Checkout-Sitzungs-ID.
Erfahren Sie mehr über die Konfiguration der Rückgabeseite und andere Optionen zum Anpassen des Weiterleitungsverhaltens.
Nachdem Sie die Checkout-Sitzung erstellt haben, verwenden Sie das client_, das in der Antwort auf Checkout verbinden zurückgegeben wurde.
OptionalWeitere gespeicherte Zahlungsmethoden anzeigenServerseitig
Compliance
Sie sind für die Einhaltung aller geltenden Gesetze, Vorschriften und Netzwerkregeln verantwortlich, wenn Sie die Zahlungsdaten eines Kunden/einer Kundin speichern. Wenn Sie einem Kunden/einer Kundin zuvor genutzte Zahlungsmethoden für zukünftige Einkäufe anzeigen, stellen Sie sicher, dass Sie die Zustimmung eingeholt haben, um die Details der Zahlungsmethode für diese spezifische zukünftige Verwendung zu speichern.
Standardmäßig werden nur Zahlungsmethoden angezeigt, die auf Erneute Anzeige immer zulassen eingestellt sind.
Apple Pay und Google Pay können während einer Checkout-Sitzung nicht wiederverwendet werden, daher erscheinen diese Zahlungsmethoden nicht in der Liste der gespeicherten Optionen. Sie müssen die Nutzeroberfläche von Google Pay und Apple Pay sowie die Nutzeroberfläche der Zahlungsanforderung jedes Mal anzeigen, wenn die Checkout-Sitzung aktiv ist.
Sie können andere zuvor gespeicherte Zahlungsmethoden anzeigen, indem Sie weitere Werte für die erneute Anzeige in die Checkout-Sitzung aufnehmen oder die Einstellung allow_ einer Zahlungsmethode auf always setzen.
Verwenden Sie den
allow_Parameter, um anzugeben, welche gespeicherten Zahlungsmethoden in Checkout angezeigt werden sollen. Sie können jeden der gültigen Werte festlegen:redisplay_ filters limited,unspecifiedundalways.Wenn Sie in Ihrer Checkout-Sitzung die Filterung für die erneute Anzeige angeben, wird das Standardverhalten außer Kraft gesetzt. Sie müssen daher den Wert
alwaysangeben, um die gespeicherten Zahlungsmethoden anzuzeigen.- Aktualisieren Sie die Zahlungsmethode, um den Wert
allow_für einzelne Zahlungsmethoden festzulegen.redisplay
Checkout verbindenClientseitig
Checkout wird in einem iFrame gerendert, der Zahlungsdaten sicher über eine HTTPS-Verbindung an Stripe sendet.
Häufiger Fehler
Vermeiden Sie es, Checkout in einem anderen iFrame zu platzieren, da bei einigen Zahlungsmethoden die Weiterleitung an eine andere Seite zur Zahlungsbestätigung erforderlich ist.
Erscheinungsbild anpassen
Passen Sie Checkout an das Design Ihrer Website an, indem Sie Hintergrundfarbe, Schaltflächenfarbe, Rahmenradius und Schriftarten in den Branding-Einstellungen Ihres Kontos festlegen.
Checkout wird standardmäßig ohne externes Padding oder Ränder gerendert. Um Ihren gewünschten Rand hinzuzufügen (z. B. 16px auf allen Seiten), empfehlen wir, ein Container-Element zu verwenden.
Felder auf der Zahlungsseite vorab ausfüllen
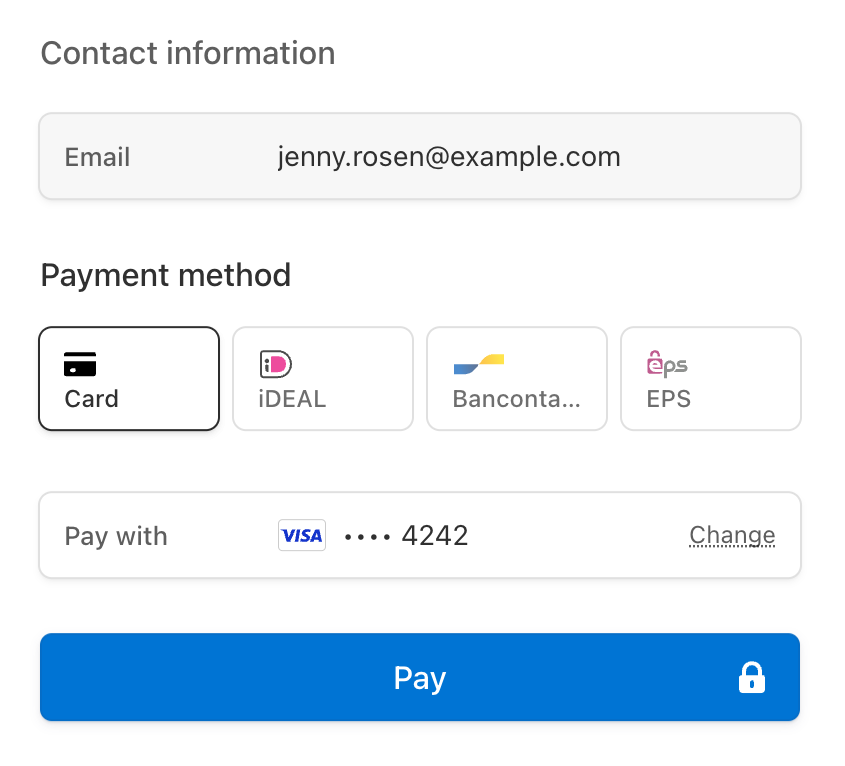
Wenn alle folgenden Bedingungen zutreffen, füllt Checkout die Felder E-Mail-Adresse, Name, Karte und Rechnungsadresse auf der Zahlungsseite automatisch mit den Angaben von der gespeicherten Karte der Kundin/des Kunden aus:
- Checkout befindet sich im Modus
paymentodersubscription. Im Modussetupwird das Vorausfüllen von Feldern nicht unterstützt. - Die Kundin/der Kunde verfügt über eine gespeicherte Karte. Checkout unterstützt nur das Vorabausfüllen von Kartenzahlungsmethoden.
- Bei der gespeicherten Karte ist
allow_aufredisplay alwaysfestgelegt oder Sie haben die Standardeinstellung für die Anzeige angepasst. - Die Zahlungsmethode beinhaltet
billing_, die vom Wertdetails billing_der Checkout-Sitzung benötigt werden:address_ collection autoerfordert Werte füremail,nameundaddress[country]. Für Rechnungsadressen in den USA, Kanada und Großbritannien ist auchaddress[postal_erforderlich.code] requirederfordert Werte füremail,nameund alleaddress-Felder.
Wenn Ihre Kundin/Ihr Kunde mehrere Karten gespeichert hat, füllt Checkout die Kartendaten gemäß der folgenden Priorisierung aus:
- Im
payment-Modus füllt Stripe die Felder mit der zuletzt gespeicherten Karte der Kundin/des Kunden vorab aus. - Im Modus
Abonnementfüllt Stripe die Standard-Zahlungsmethode der Kundin/des Kunden im Voraus aus, wenn es sich um eine Karte handelt. Andernfalls pflegt Stripe die neueste gespeicherte Karte ein.
Wenn Checkout eine Versandadresse erfasst, werden die Felder für die Versandadresse vorausgefüllt, wenn sich die Versandadresse der Kundin/des Kunden in einem der von der Checkout-Session unterstützten Länder befindet.
Damit Ihre Kundschaft gespeicherte Karten während eines Bezahlvorgangs entfernen kann, setzen Sie save_payment_method_options[payment_method_remove] auf enabled.
Zeitüberschreitung beim vorab Ausfüllen
Die vorausgefüllte Zahlungsmethode wird nach Erstellung der Checkout-Sitzung 30 Minuten lang angezeigt. Nach Ablauf wird die Zahlungsmethode aus Sicherheitsgründen nicht mehr vorab ausgefüllt, wenn dieselbe Checkout-Sitzung geladen wird.
Ereignisse nach der Zahlung verarbeitenServerseitig
Stripe sendet das Ereignis checkout.session.completed, wenn ein Kunde/eine Kundin eine Zahlung in der Checkout-Sitzung abschließt. Verwenden Sie das Webhook-Tool des Dashboards oder befolgen Sie die Webhook-Anleitung, um diese Ereignisse zu empfangen und zu verarbeiten. Dies kann zu Folgendem führen:
- Senden Sie eine Bestellbestätigung per E-Mail an Ihre Kundinnen/Kunden.
- Protokollieren Sie den Verkauf in einer Datenbank.
- Starten Sie einen Versand-Workflow.
Überwachen Sie diese Ereignisse, anstatt darauf zu warten, dass Ihre Kundinnen/Kunden auf Ihre Website zurückgeleitet werden. Es ist unzuverlässig, die Ausführung nur über die Landingpage Ihrer Zahlungsseite auszulösen. Wenn Sie Ihre Integration so einrichten, dass sie asynchrone Ereignisse überwacht, können Sie verschiedene Arten von Zahlungsmethoden mit einer einzelnen Integration akzeptieren.
Weitere Informationen finden Sie in unserem Fulfillment-Leitfaden für Checkout.
Verarbeiten Sie die folgenden Ereignisse, wenn Sie Zahlungen mit Checkout einziehen:
| Ereignis | Beschreibung | Aktion |
|---|---|---|
| checkout.session.completed | Wird gesendet, wenn ein Kunde/eine Kundin eine Checkout-Sitzung erfolgreich abschließt. | Senden Sie den Kundinnen/Kunden eine Auftragsbestätigung und wickeln Sie die Bestellung ab. |
| checkout.session.async_payment_succeeded | Wird gesendet, wenn eine Zahlung mit einer Zahlungsmethode mit Verzögerung, wie z. B. ACH-Lastschriftverfahren, erfolgreich ausgeführt wird. | Senden Sie den Kundinnen/Kunden eine Auftragsbestätigung und wickeln Sie die Bestellung ab. |
| checkout.session.async_payment_failed | Wird gesendet, wenn eine Zahlung mit einer Zahlungsmethode mit Verzögerung, wie z. B. ACH-Lastschriftverfahren, fehlschlägt. | Benachrichtigen Sie die Kundin/den Kunden über den Fehler und bitten Sie ihn/sie, für einen erneuten Zahlungsversuch zur Sitzung zurückzukehren. |