Ventes croisées
Permettez aux clients d'acheter des produits complémentaires lors du paiement au moyen des ventes croisées.

Une vente croisée est un produit que vous pouvez ajouter à une commande Checkout.
Les ventes croisées permettent aux clients d’acheter d’autres produits connexes à l’aide de Checkout. Les ventes croisées peuvent augmenter la valeur moyenne de vos commandes et votre chiffre d’affaires. Pour que Checkout propose un produit dans le cadre d’une vente croisée, ce dernier doit répondre aux critères suivants :
- Le produit doit être associé à un tarif unique.
- Le tarif du produit faisant l’objet d’une vente croisée doit être exprimé dans la même devise que les autres tarifs de la session Checkout.
- Si le type de tarif du produit faisant l’objet d’une vente croisée est défini sur
recurring, la session Checkout doit être en mode abonnement et avoir la même récurrence que les autres tarifs de la session. - Si vous utilisez les mises à niveau d’abonnements, les ventes croisées ne prennent en charge que les produits dont les tarifs sont non récurrents. Par exemple, vous pouvez proposer en vente croisée des frais d’installation ponctuels lors de la mise à niveau d’un abonnement mensuel vers un abonnement annuel.
- Si vous utilisez les taxes automatiques, les ventes croisées ne prennent en charge que les produits dont les tarifs présentent un comportement fiscal spécifié. Vous pouvez soit définir un comportement fiscal pour un tarif, soit définir le comportement fiscal par défaut pour tous les tarifs sous Tax Settings dans le Dashboard Stripe.
Créer une vente croisée

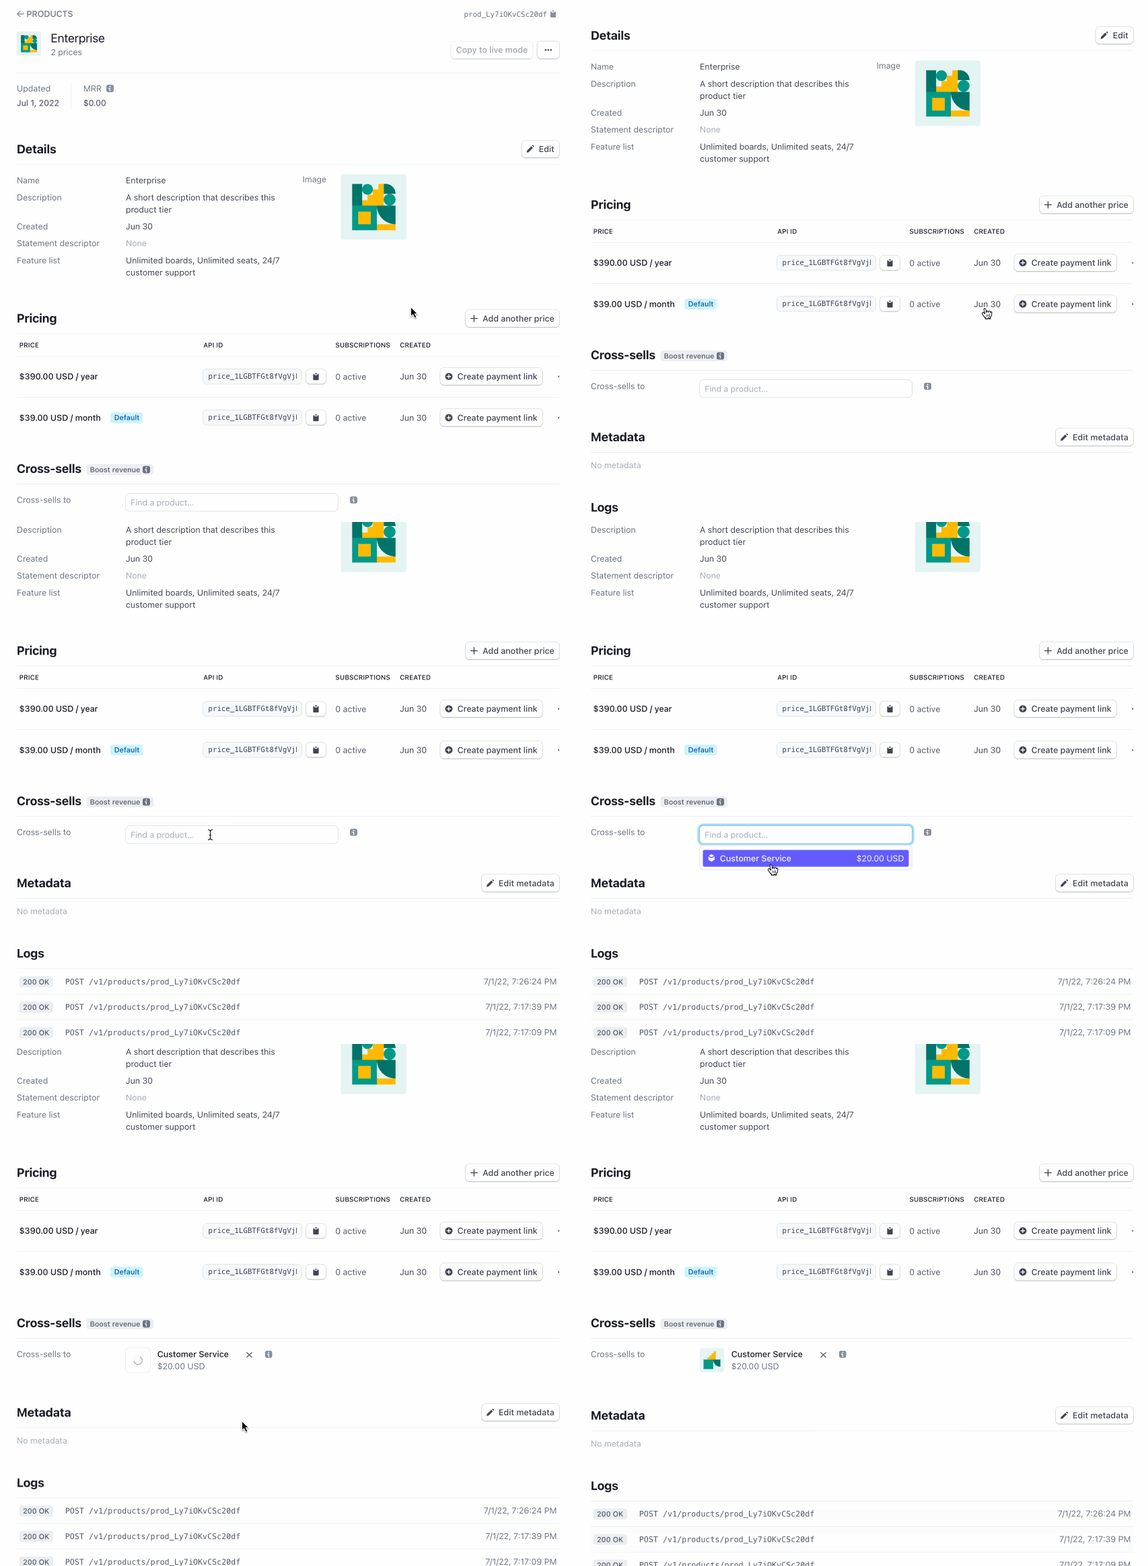
Configurez une vente croisée sur la page relative aux informations sur les produits.
Vous pouvez configurer une vente croisée dans le Dashboard sur la page relative aux informations sur un produit. Visitez cette page du produit à partir duquel vous souhaitez effectuer une vente croisée d’un autre produit complémentaire. Elle comporte une section Ventes croisées avec un menu déroulant contenant vos autres produits. Sélectionnez un produit avec un tarif unique. Une fois que vous l’avez configuré, toutes les sessions de paiement éligibles proposent une vente croisée du produit sélectionné dans le menu déroulant. Par exemple, un client qui achète un abonnement de niveau « Professional » bénéficiera de la vente croisée du produit « Professional Services: Deployment ».
Tunnel de paiement
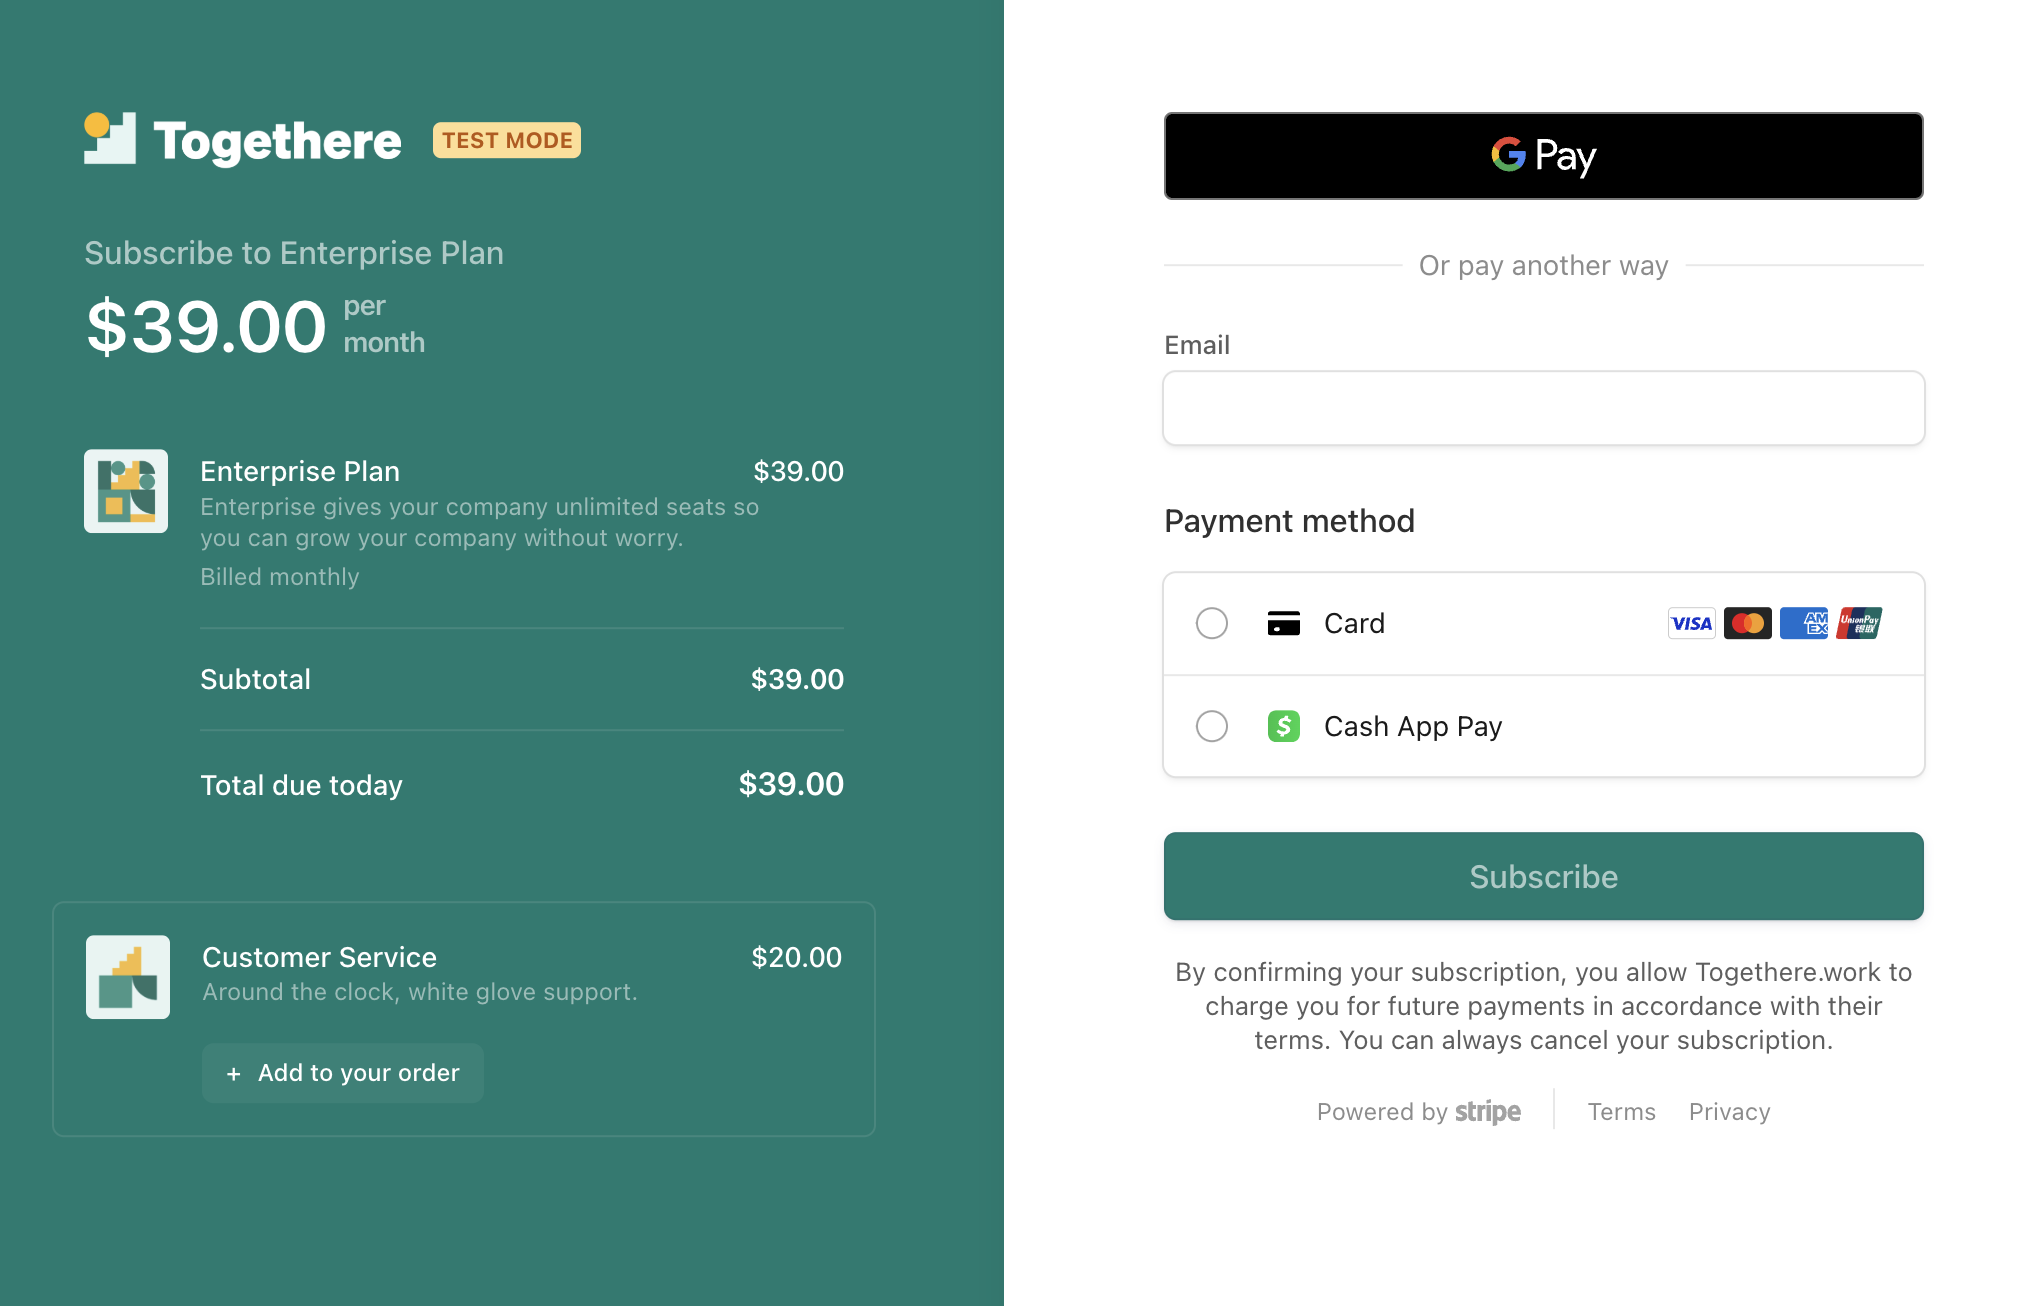
Au moment du paiement, les acheteurs voient une option pour ajouter la vente croisée à leur achat. S’ils ajoutent la vente croisée à la session Checkout, ils peuvent également la supprimer. S’ils la suppriment, l’option d’ajout de vente croisée réapparaît.
Remarque
La quantité de postes de facture pour la vente croisée ne peut pas être ajustée. La valeur maximum actuelle est fixée à 1.
Affichage client.
Récupérer les postes de facture de la session Checkout
Une fois qu’un client sélectionne une vente croisée, les line_ de la session Checkout sont mis à jour pour refléter l’ajout. Pour la réalisation de votre commande à l’aide du webhook checkout., veillez à récupérer les postes de facture.
Supprimer une vente croisée
Vous pouvez supprimer une vente croisée sur la page relative aux informations sur les produits. Une fois supprimé, le produit ne sera plus proposé dans les nouvelles sessions Checkout.

Supprimez une vente croisée.