# Créer un bouton d'achat intégrable
Utilisez Payment Links pour créer un bouton d'achat intégrable sur votre site Web.
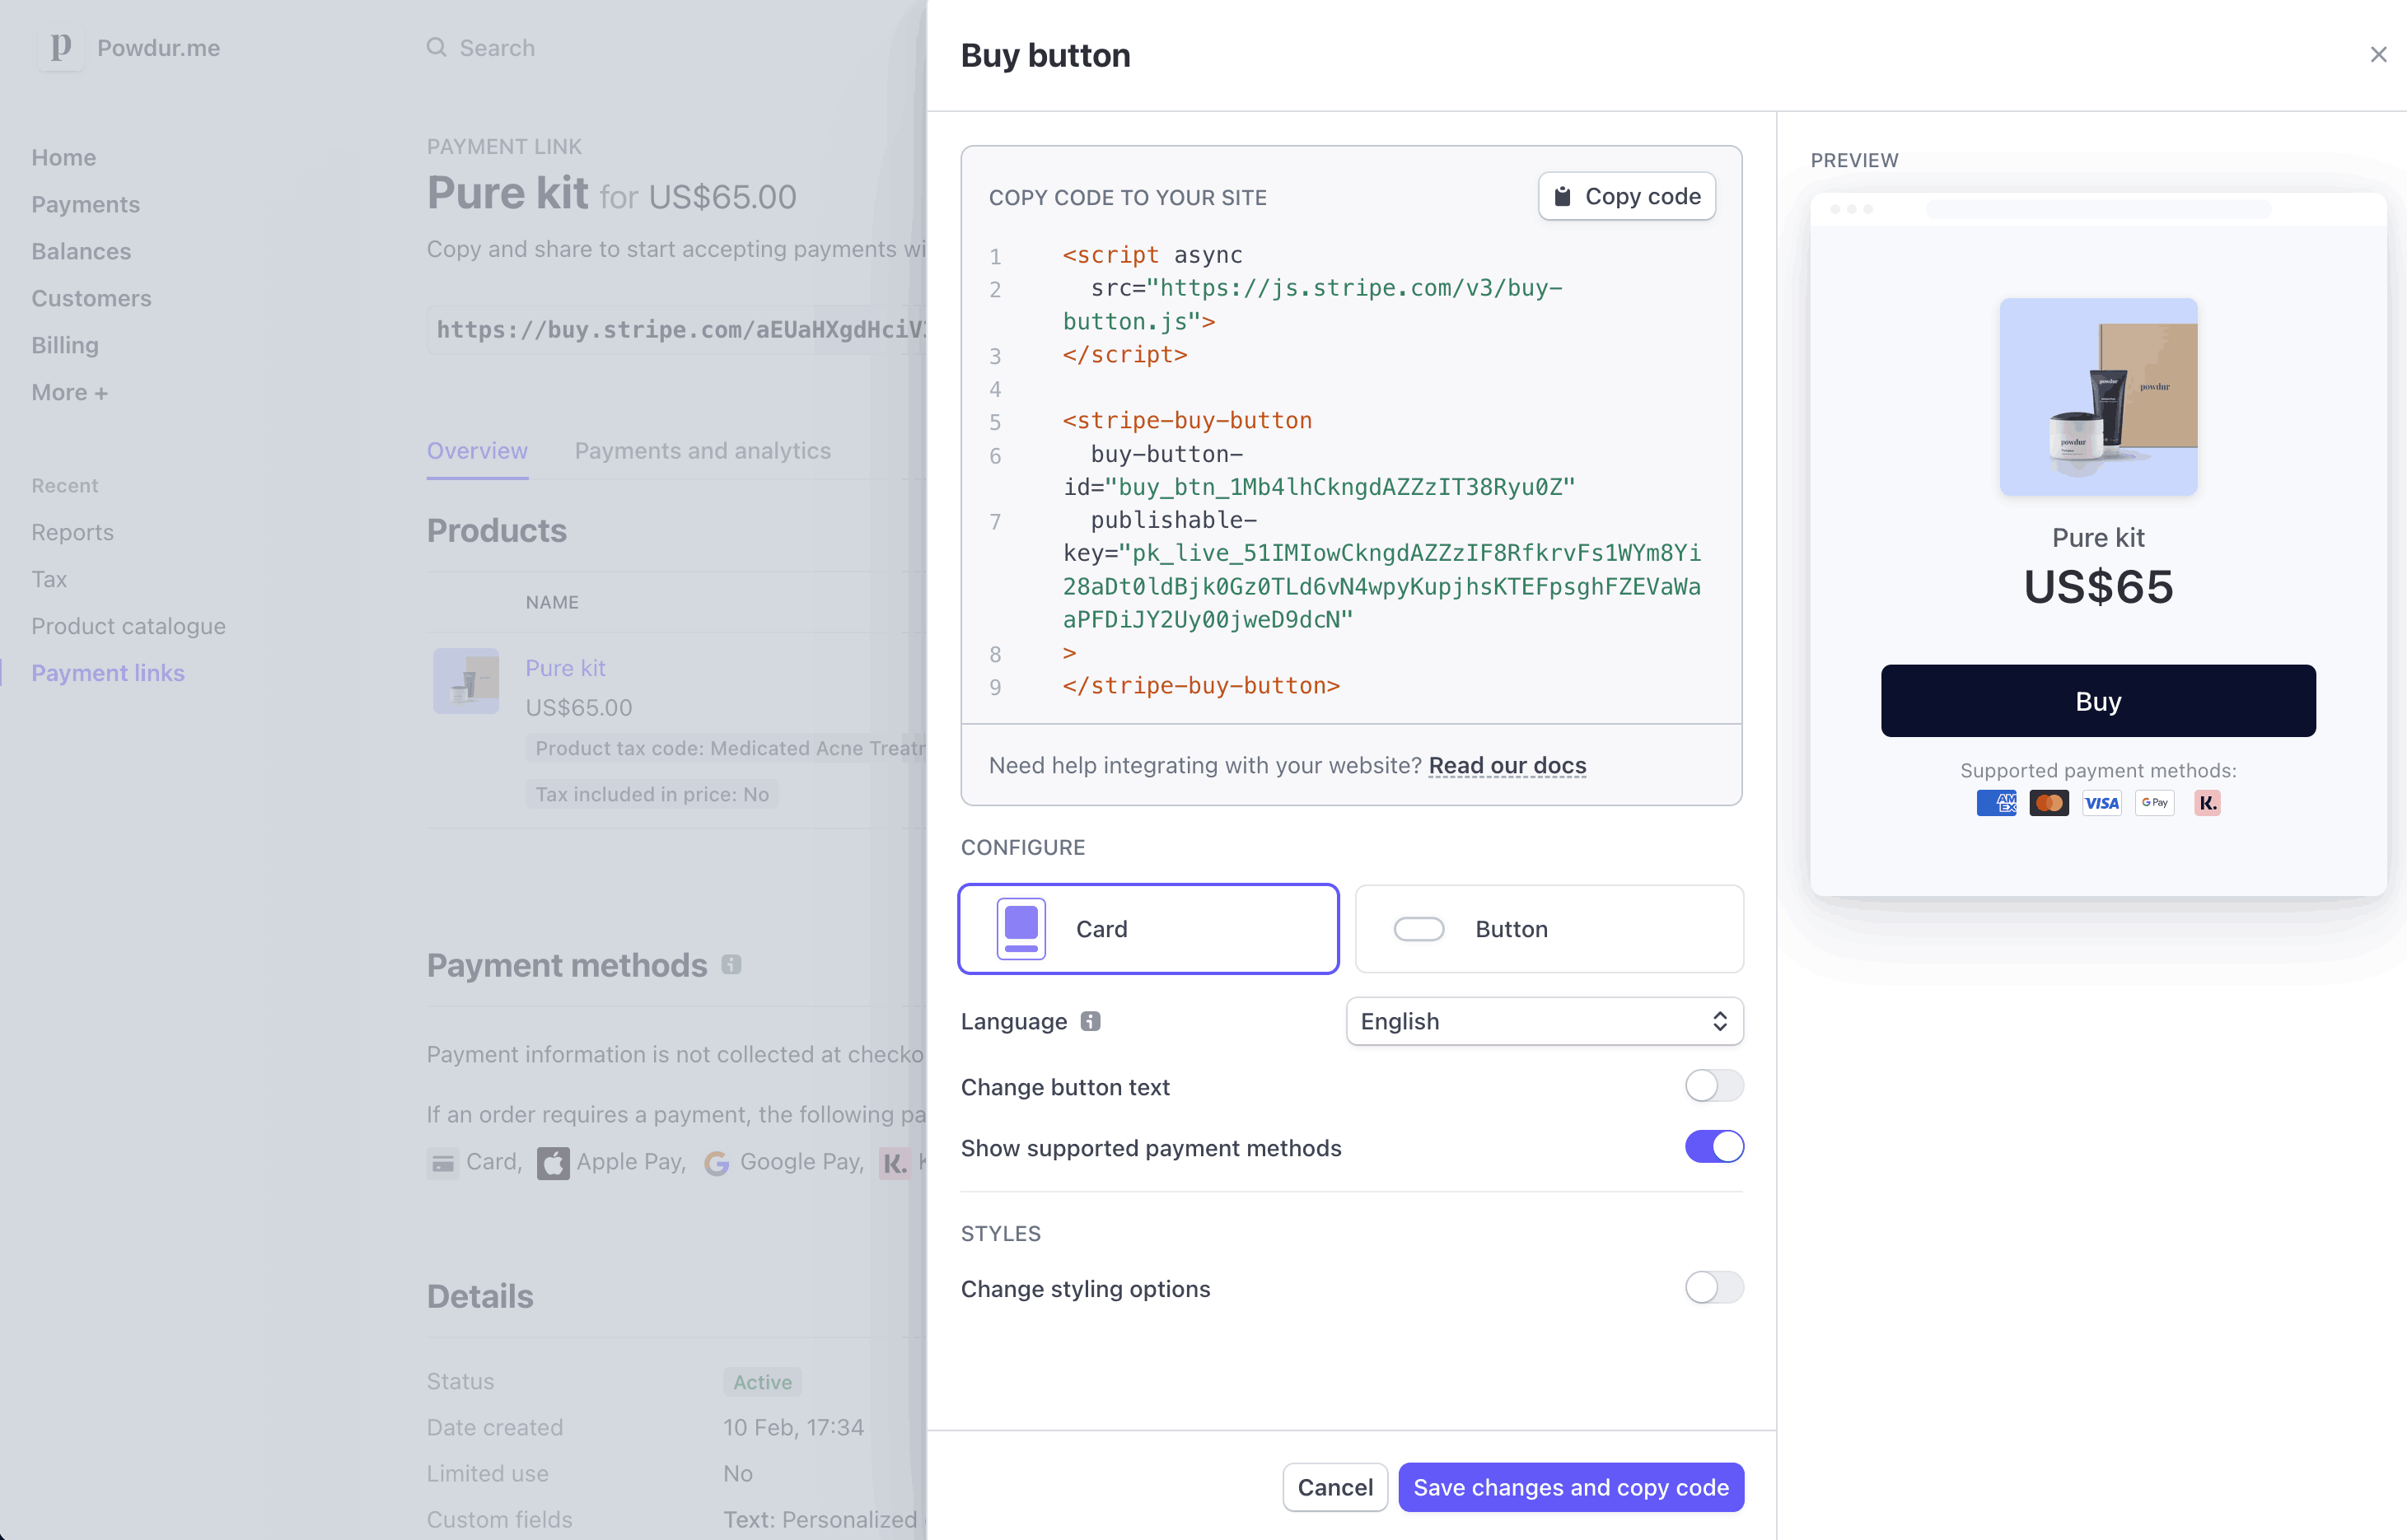
Créez un bouton d’achat intégrable pour vendre un produit ou un abonnement, ou accepter un paiement sur votre site Web. Commencez par sélectionner un lien existant dans la [liste des liens de paiement](https://dashboard.stripe.com/payment-links) ou par [créer un lien](https://dashboard.stripe.com/payment-links/create), ce qui vous permettra de décider des produits à vendre et de personnaliser l’interface utilisateur de paiement. Une fois votre lien créé, cliquez sur le **bouton Acheter** pour configurer le style du bouton d’achat et générer un code que vous pourrez copier et coller sur votre site Web.
## Personnaliser le bouton
Par défaut, votre bouton d’achat utilise les mêmes attributs de marque et le même appel à l’action que ceux configurés pour votre lien de paiement. Vous pouvez :
- Choisissez entre un bouton simple et un widget de carte.
- Définissez des couleurs, formes et polices de caractères adaptées à votre site Web.
- Définissez la langue du bouton et de la page de paiement pour qu’elle corresponde à celle de votre site Web.
- Personnalisez l’appel à l’action de votre bouton.
Personnaliser le bouton d’achat
## Intégrer le bouton
Stripe fournit un code intégré composé d’une balise `
```
## Attributs pour personnaliser le paiement
| Paramètre | Description | Syntaxe |
| --- | --- | --- |
| `client-reference-id` | Utilisez `client-reference-id` pour associer une chaîne unique de votre choix à la `CheckoutSession`. La chaîne peut être un ID de client ou un ID de panier (ou similaire) que vous utilisez pour rapprocher la `CheckoutSession` de vos systèmes internes. Si vous transmettez ce paramètre à votre `