Issuing and Financial Accounts for platforms sample app
Learn how to onboard customers, issue cards, and make outbound payments.
To see how you can use Issuing and Financial Accounts for platforms APIs in your integration, try our sample app. It lets you onboard as a customer, create cards, test authorizations, and make outbound payments from a financial account.
Without writing any code, you can also copy the sample app to use with your platform, following the API logs generated by your actions.
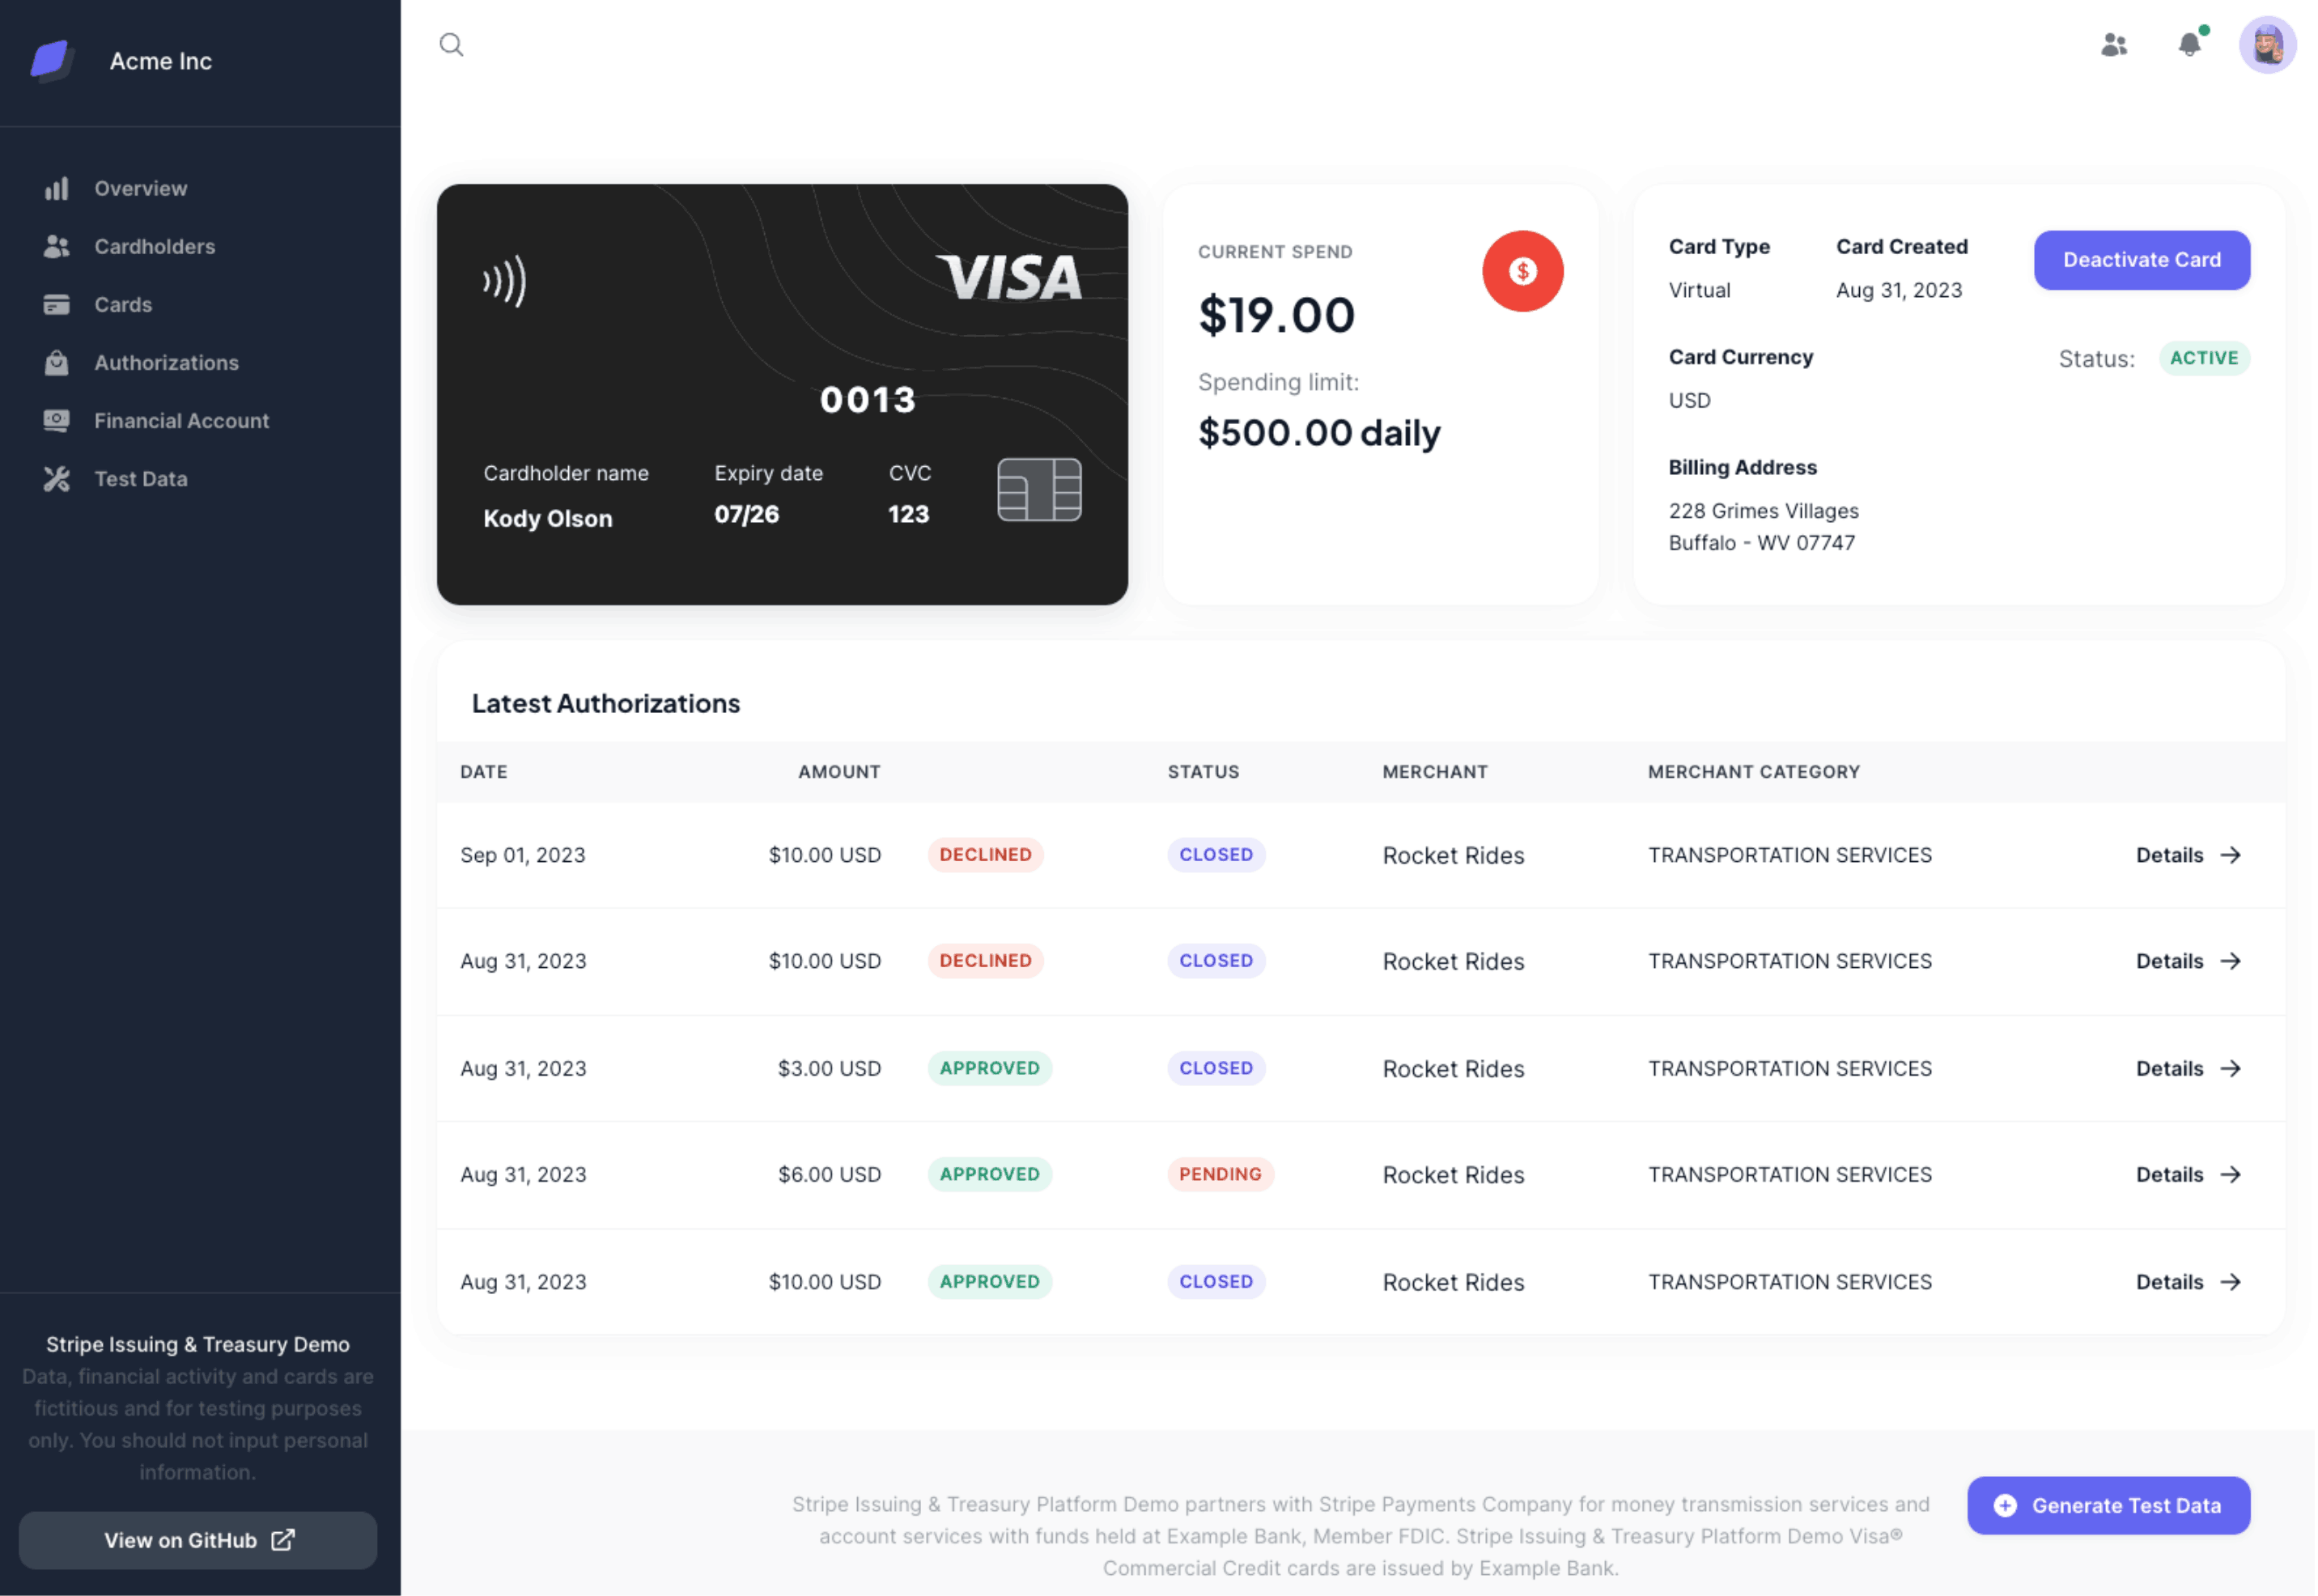
The Issuing and Financial Accounts for platforms sample app card details page
This app is for platforms onboarding business customers. If you only need cards for yourself or your own employees, use Issuing in the Dashboard instead.
Create an account with the platform
To use the sample app, first create an account to onboard as a customer of the platform.
After you provide an email and password, the app’s backend creates a connected account and requests the card_ and treasury capabilities.
Accounts v2 API compatibility
The Accounts v2 API doesn’t support Issuing and Financial Accounts workflows. If you have accounts created with Accounts v2, you can use Accounts v1 to manage the treasury and card_ capabilities. For details, see Use Accounts as customers.
(Optional) Simulate hosted onboarding to provide full account details
To simulate hosted onboarding, complete the following steps using test tokens to prevent errors. We’ve pre-filled the account data for this app.
Uncheck Skip the rest of onboarding.
Click Confirm on the Test data dialog.
Click Continue to be redirected to Stripe’s hosted onboarding flow.
On the Let’s get started screen, enter:
- Mobile number: 000-000-0000
- Email: Any fake email address
At Verify your mobile number, click Use test code.
At Verify your identity, click Skip this step.
After you submit the form, you’re redirected back to the app dashboard.
See the code and API logs for these steps
After you complete the steps to onboard your first account in your copy of the sample app, review the corresponding API logs. The following code snippets happen in the backend when onboarding an account.
Create a connected account with the following capabilities:
transfers,card_, andissuing treasury. Issuing only supports connected accounts that don’t use a Stripe-hosted Dashboard, and where your platform is responsible for requirements collection and loss liability, also known as a Custom connected account. Learn how to create connected accounts that work with Issuing. Copy our app to view the API logs, and find: POST to /v1/accounts.register.tsconst account = await stripe.accounts.create({ controller: { stripe_dashboard: { type: "none" }, fees: { payer: "application" }, losses: { payments: "application" }, requirement_collection: "application", }, country: "US", email: email, capabilities: { transfers: { requested: true }, treasury: { requested: true }, card_issuing: { requested: true }, }, });Create a financial account. Copy our app to view the API logs, and find: POST to /v1/treasury/financial_accounts.
register.tsconst financialAccount = await stripe.treasury.financialAccounts.create( { supported_currencies: ["usd"], features: { card_issuing: { requested: true }, deposit_insurance: { requested: true }, financial_addresses: { aba: { requested: true } }, inbound_transfers: { ach: { requested: true } }, intra_stripe_flows: { requested: true }, outbound_payments: { ach: { requested: true }, us_domestic_wire: { requested: true }, }, outbound_transfers: { ach: { requested: true }, us_domestic_wire: { requested: true }, }, }, }, { stripeAccount: account.id } );Create a Connect Onboarding link and use it to redirect new users to collect the necessary profile information for the requested capabilities. Copy our app to view the API logs, and find: POST to /v1/account_links. The response to the Account Links request includes a value for the
urlused to redirect the user into the onboarding flow.onboarding-helpers.tsconst { url } = await stripe.accountLinks.create({ type: "account_onboarding", account:, refresh_url: connectOnboardingRedirectUrl + "/onboard", return_url: connectOnboardingRedirectUrl + "/onboard", });"{{CONNECTED_ACCOUNT_ID}}"After you complete onboarding, the account’s capabilities status changes from
inactivetoactive. View theaccount.event on the connected account at https://dashboard.stripe.com/updated /test/events?type=account.updated. You can find the connected account’s ID in the response to step 1.'{{CONNECTED_ACCOUNT_ID}}'
Add funds to the financial account
On the Overview page, click Generate test data, and then click Simulate received credit in the drawer.
The transaction appears as a received credit (an incoming ACH) for 500 USD, and appears in the transaction receipt.
Go to the Financial account page to view your account number.
See the code and API logs for these steps
Use the following code samples and API logs to learn more about these steps.
ReceivedCredit test helper
In testing environments, you can add funds to a financial account using the ReceivedCredit test helpers. This test helper simulates receiving a transfer from an external bank account into your financial account. Copy our app to view the API logs, and find: POST to /v1/test_helpers/treasury/received_credits.
const receivedCredit = await stripe.testHelpers.treasury.receivedCredits.create( { amount: 50000, currency: "usd", financial_account:, network: "ach", }, { stripeAccount:"{{FINANCIAL_ACCOUNT_ID}}"} );"{{CONNECTED_ACCOUNT_ID}}"
Make an outbound ACH payment
- On the Financial account page, click Send money.
- Select ACH, then enter the recipient’s information and the amount to send.
- Select
POSTEDas the transaction result to simulate a completed payment. - The transaction appears as an outbound payment.
See the code and API logs for these steps
Use the following code samples and API logs to learn more about these steps.
Send money interface
The money sending feature in the sample app uses the Financial Accounts for platforms OutboundPayment feature. You can use OutboundPayments to send money to a third party’s external account. Copy our app to view the API logs, and find: POST to /v1/treasury/outbound_payments. The response should show the payments status is processing.
const outboundPayment = await stripe.treasury.outboundPayments.create( { financial_account:, amount: 100, currency: "usd", statement_descriptor: req.descriptor, destination_payment_method_data: { type: "us_bank_account", us_bank_account: { account_holder_type: "company", routing_number: "110000000", account_number: "000000000009", }, }, }, { stripeAccount:"{{FINANCIAL_ACCOUNT_ID}}", } );"{{CONNECTED_ACCOUNT_ID}}"
Set the transaction result with a test helper
After you select the transaction result in the web app, the outbound payments status is updated through a test helper endpoint. Copy our app to view the API logs, and find: POST to /v1/test_helpers/treasury/outbound_payments/{{OUTBOUND_PAYMENT_ID}}/post. The response should show the payments status is posted.
const outboundPayment = await stripe.testHelpers.treasury.outboundPayments.post(, );'{{OUTBOUND_PAYMENT_ID}}'
Create a cardholder, card, and make a test purchase
- On the Cardholder page, click Create a new cardholder.
- Enter the cardholder’s information, then click Issue card to create a virtual card.
- You’re redirected to the Cards page. Click Details on the card row to view the new virtual card.
- Click Generate test data, then Simulate test purchase.
See the code and API logs for these steps
Use the following code samples and API logs to learn more about these steps.
Create a cardholder
Create a Cardholder through the Stripe Issuing create cardholder API:
const cardholder = await stripe.issuing.cardholders.create( { type: "individual", name: firstName + " " + lastName, email: email, individual: { first_name: firstName, last_name: lastName, card_issuing: { user_terms_acceptance: { date: Date.now(), ip: ip, }, }, }, billing: { address: { city: city, line1: address1, state: state, postal_code: postalCode, country: country, }, }, }, { stripeAccount:, } );"{{CONNECTED_ACCOUNT_ID}}"
Create a card
After you create a Cardholder, you can issue a card to the Cardholder using the create card API. Set the card’s financial_ to the ID of the financial account you created in step 2.
const card = await stripe.issuing.cards.create( { cardholder: cardholderId, financial_account:, currency: 'usd', type: 'virtual', status: 'active', }, { stripeAccount:'{{FINANCIAL_ACCOUNT_ID}}'}, );"{{CONNECTED_ACCOUNT_ID}}"
Create a test purchase
After you create the authorization from the Dashboard, find the API log: POST to /v1/test_helpers/issuing/authorizations. And after you capture the authorization from the Dashboard, find the API log: POST to /v1/test_helpers/issuing/authorizations/{{AUTHORIZATION_ID}}.
OptionalTemporarily pause spending on a card
- On the Cards page, click Details for a card.
- Click Deactivate Card. Below this button, the status changes to
inactive. - Click Generate test data and follow the link to view the card from the Dashboard.
- In the Dashboard, click Create a test purchase. On the next page, the authorization is declined.
- Return to the web app to view details of the declined authorization.
- Click Activate Card to change the card’s status from
inactiveback toactive.
Copy the sample app to complete steps 3-6
When you copy the sample app and use it with your own Stripe API keys, you can use your Dashboard to create a test purchase.
See the code and API logs for these steps
Use the following code samples and API logs to learn more about these steps.
Switch a card’s status to inactive
After you click Deactivate, the card status is switched to inactive. Copy our app to view the API logs, and find: POST to /v1/issuing/cards/{{CARD_ID}}.
const card = await stripe.issuing.cards.update(, { status: 'inactive', } );'{{CARD_ID}}'
Test authorization declined because the card wasn’t active
After you create the authorization from the Dashboard, find the API log: POST to /v1/issuing/cards/{{CARD_ID}}/test/authorizations. The authorization’s approval is false.
Then, view the issuing_ event on the connect account at https://dashboard.stripe.com/'approved: false, 'reason': 'card_
OptionalPay out from the account's payments balance into the financial account
On the Test data page, click Create PaymentLink, and then Go to PaymentLink.
Enter any email, name, and postal code, using
4000 0000 0000 0077as the card number.- With this test card, funds are added to the account’s available balance immediately.
Complete the payment, then return to the web app Test Data page and refresh the page.
Under Create Payout, the connected account’s available balance shows 9.41 USD.
Click Add Financial Account as External Account to set the connected account’s default external account for payouts to the financial account created through Financial Accounts for platforms. See Payouts and topups from Stripe payments for more information.
Click Create Payout, then go to the Overview page to view the transaction details.
See the code and API logs for these steps
Use the following code samples and API logs to learn more about these steps.
Receive a payment
You can use payment links to receive a test payment and then transfer the payment balance to the connected account associated Financial Account:
Create a
Pricethat determines the amount paid to the connected account after payment completes.create_paymentlinks.tsconst prices = await stripe.prices.list( { limit: 1, active: true, type: "one_time", }, { stripeAccount:, }, ); const price = prices.data.length < 1 ? await stripe.prices.create( { unit_amount: 1000, currency: "usd", product_data: { name: "Some Product", }, }, { stripeAccount:"{{CONNECTED_ACCOUNT_ID}}", }, ) : prices.data[0];"{{CONNECTED_ACCOUNT_ID}}"After obtaining the price, the sample app creates a
PaymentLink, and redirects the user to complete the payment. Use the priceidfrom the previous step to set the value for thepriceparameter. Alternatively, you can exclude the parameter to use a default value instead.create_paymentlinks.tsconst paymentLink = await stripe.paymentLinks.create( { line_items: [ { price: price.id, quantity: 1, adjustable_quantity: { enabled: true }, }, ], }, { stripeAccount:, }, );"{{CONNECTED_ACCOUNT_ID}}"
Payout from the connected account payments balance
Payouts can send funds from a connected account’s payments balance to their financial account. Complete the following steps to execute a payout:
Check if there’s an external account configured for the connected account. To do so, use the accounts.retrieve API to obtain the account object and verify if the
external_property is populated.account create_paymentlinks.tsconst responseAccount = await stripe.accounts.retrieve(); const hasExternalAccount = responseAccount.external_accounts?.data[0] != undefined;"{{CONNECTED_ACCOUNT_ID}}"If there isn’t an existing external account, the user can set up the financial account as the connected account’s external account.
test-data.tsxconst financialAccounts = await stripe.treasury.financialAccounts.list( { expand: ["data.financial_addresses.aba.account_number"] }, { stripeAccount:, }, ); const financialAccount = financialAccounts.data[0]; const aba = financialAccount.financial_addresses[0]?.aba; // ... const token = await stripe.tokens.create( { bank_account: { account_number: aba.account_number, country: "US", currency: "usd", routing_number: aba.routing_number, }, }, undefined, ); await stripe.accounts.createExternalAccount("{{CONNECTED_ACCOUNT_ID}}", { external_account: token.id, });"{{CONNECTED_ACCOUNT_ID}}"Initiate a payout to the connected account’s external account. In this case, the external account is the financial account. Find the API log: POST to /v1/payouts.
create_payout.tsconst balance = await stripe.balance.retrieve( { stripeAccount:, } ); const payout = await stripe.payouts.create( { amount: balance.available[0].amount, currency: 'usd', }, { stripeAccount:"{{CONNECTED_ACCOUNT_ID}}", } );"{{CONNECTED_ACCOUNT_ID}}"
View the treasury. event on the connect account at https://dashboard.stripe.com/{{CONNECT_ACCOUNT_ID}}/test/events?type=treasury.received_credit.created. You can find the connected account’s ID in the response to step 1.