Gérer les destinations d'événements
Utilisez Workbench pour configurer des destinations d'événements et recevoir des événements de Stripe.
Ce guide décrit comment configurer une destination d’événement à l’aide de Workbench.
Si vous souhaitez avoir une vue d’ensemble et connaître les bonnes pratiques en matière de réception d’événements concernant votre compte Stripe, consultez le guide des événements de webhook.
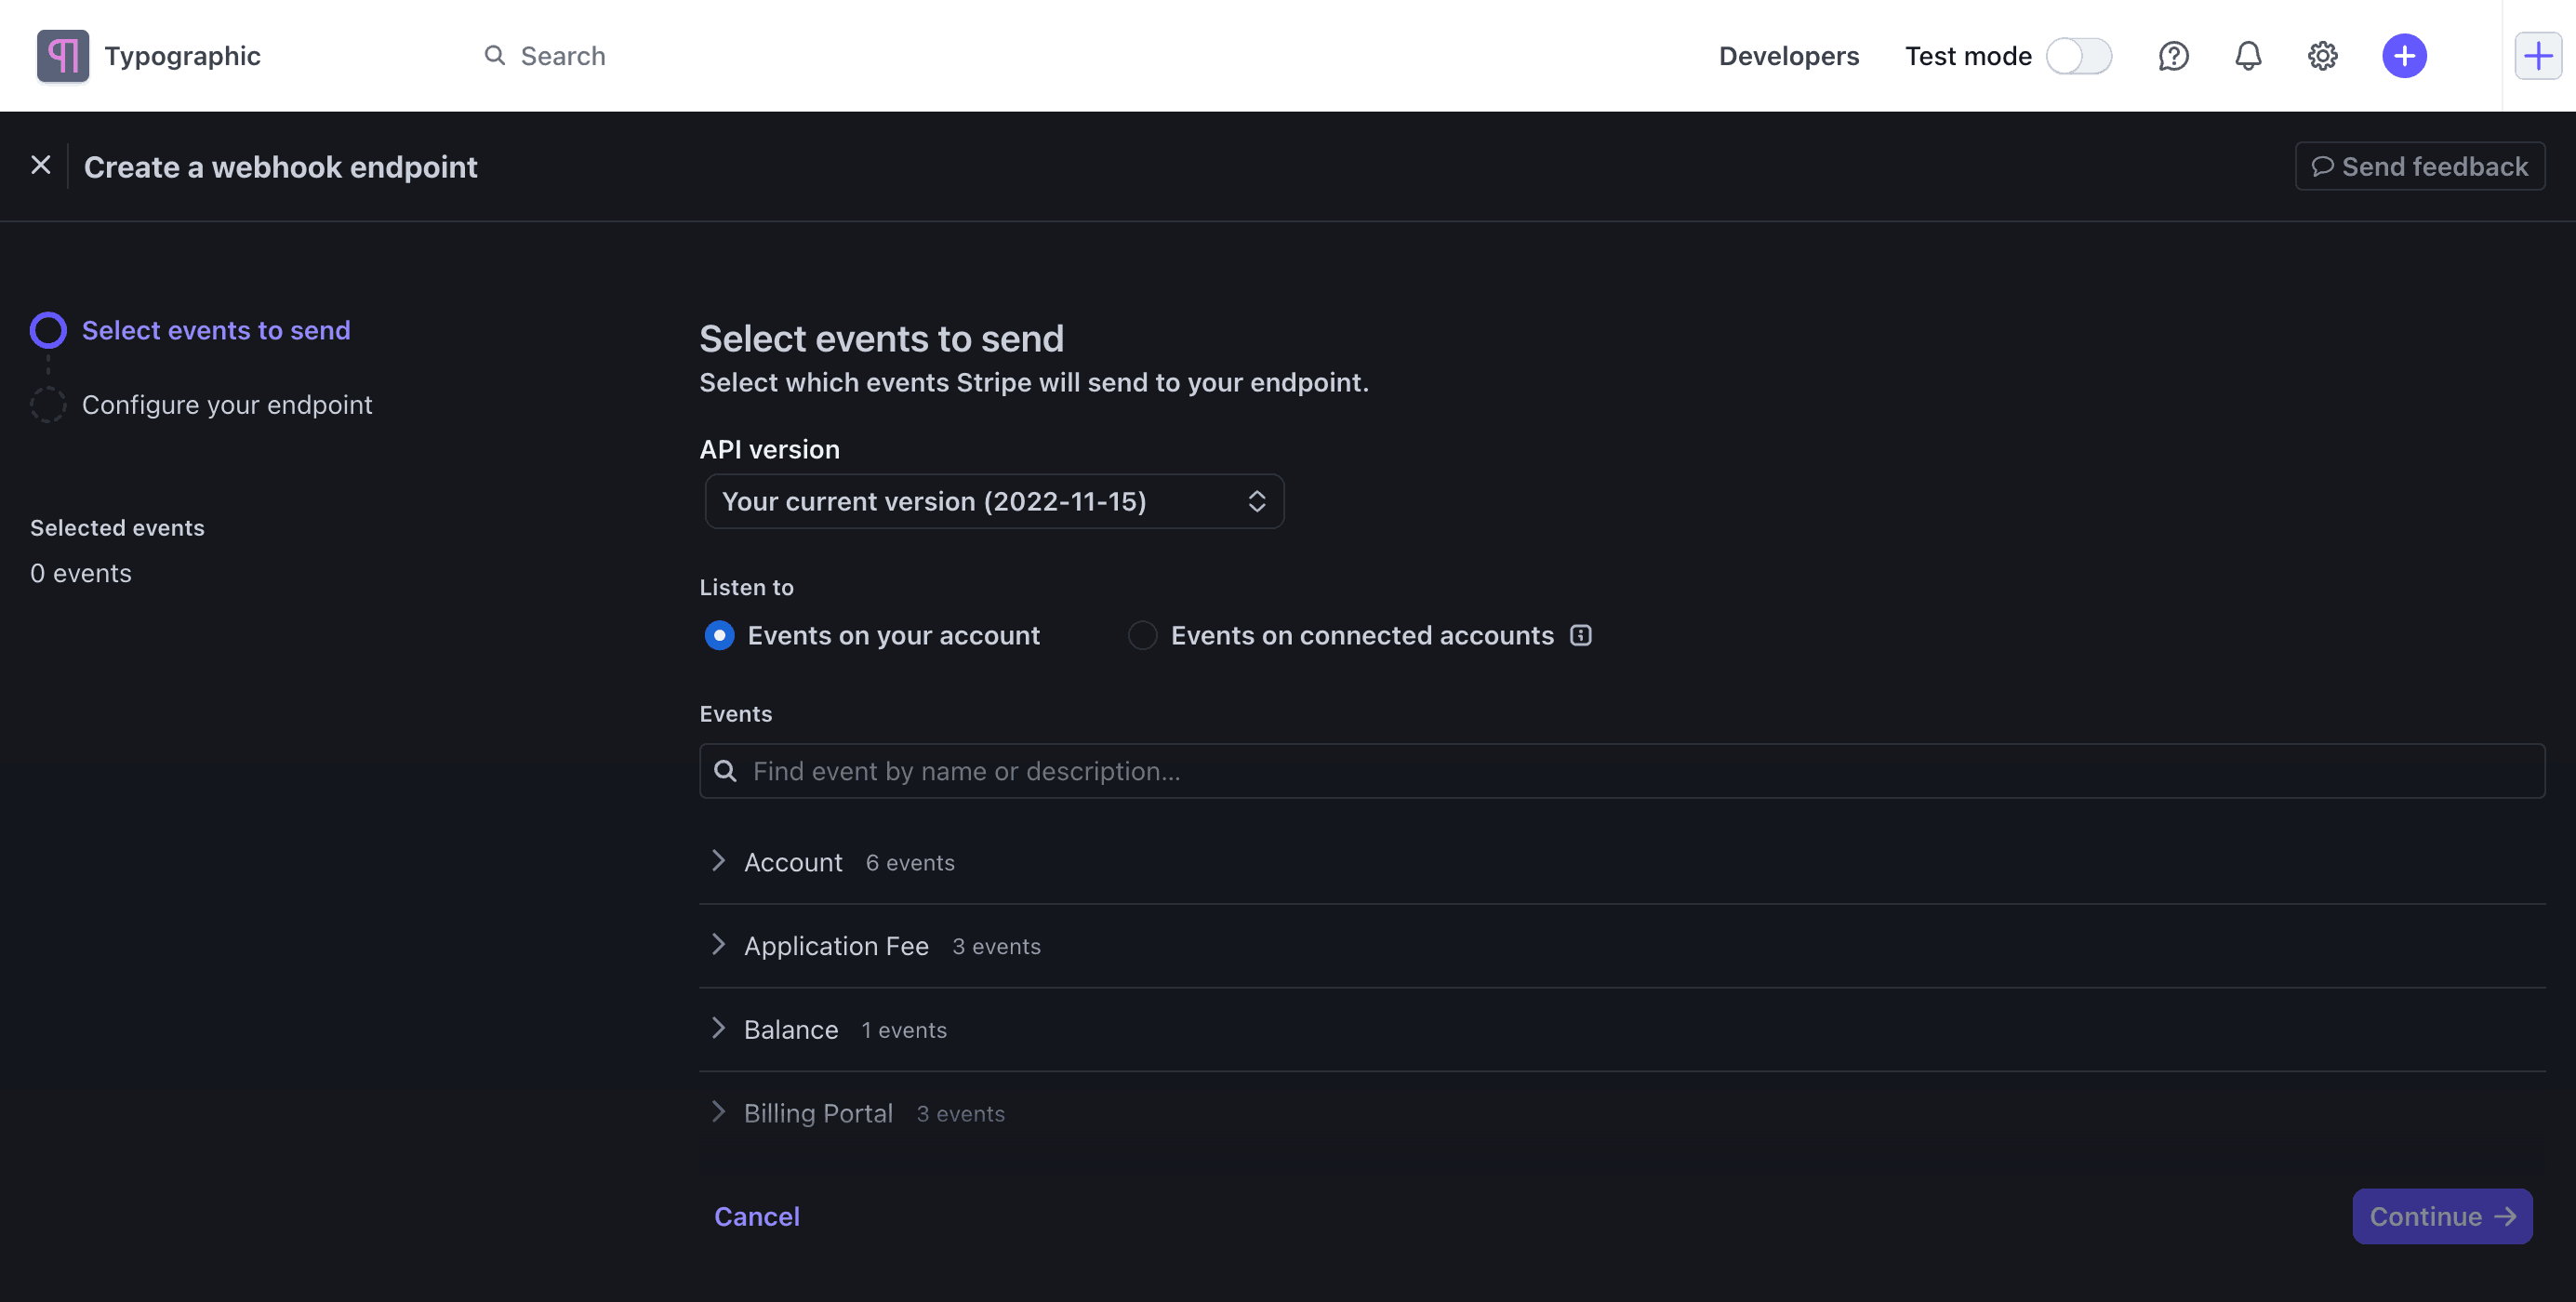
Créer une nouvelle destination d’événements
Vous pouvez créer de nouvelles destinations d’événements pour les endpoints de webhook et les destinations AWS EventBridge.

Configurer une destination d’événements existante
Vous pouvez mettre à jour ou supprimer des destinations d’événements dans l’onglet Webhooks. Vous pouvez aussi temporairement désactiver une destination. Stripe ne tentera pas de renvoyer les événements générés si la destination est désactivée. Vous pouvez également gérer les destinations d’événements de manière programmatique.
Afficher les événements remis
Pour consulter les envois d’événements :
- Ouvrez l’onglet Webhooks dans Workbench.
- Sélectionnez la destination de l’événement.
- Cliquez sur l’onglet Envois d’événements.
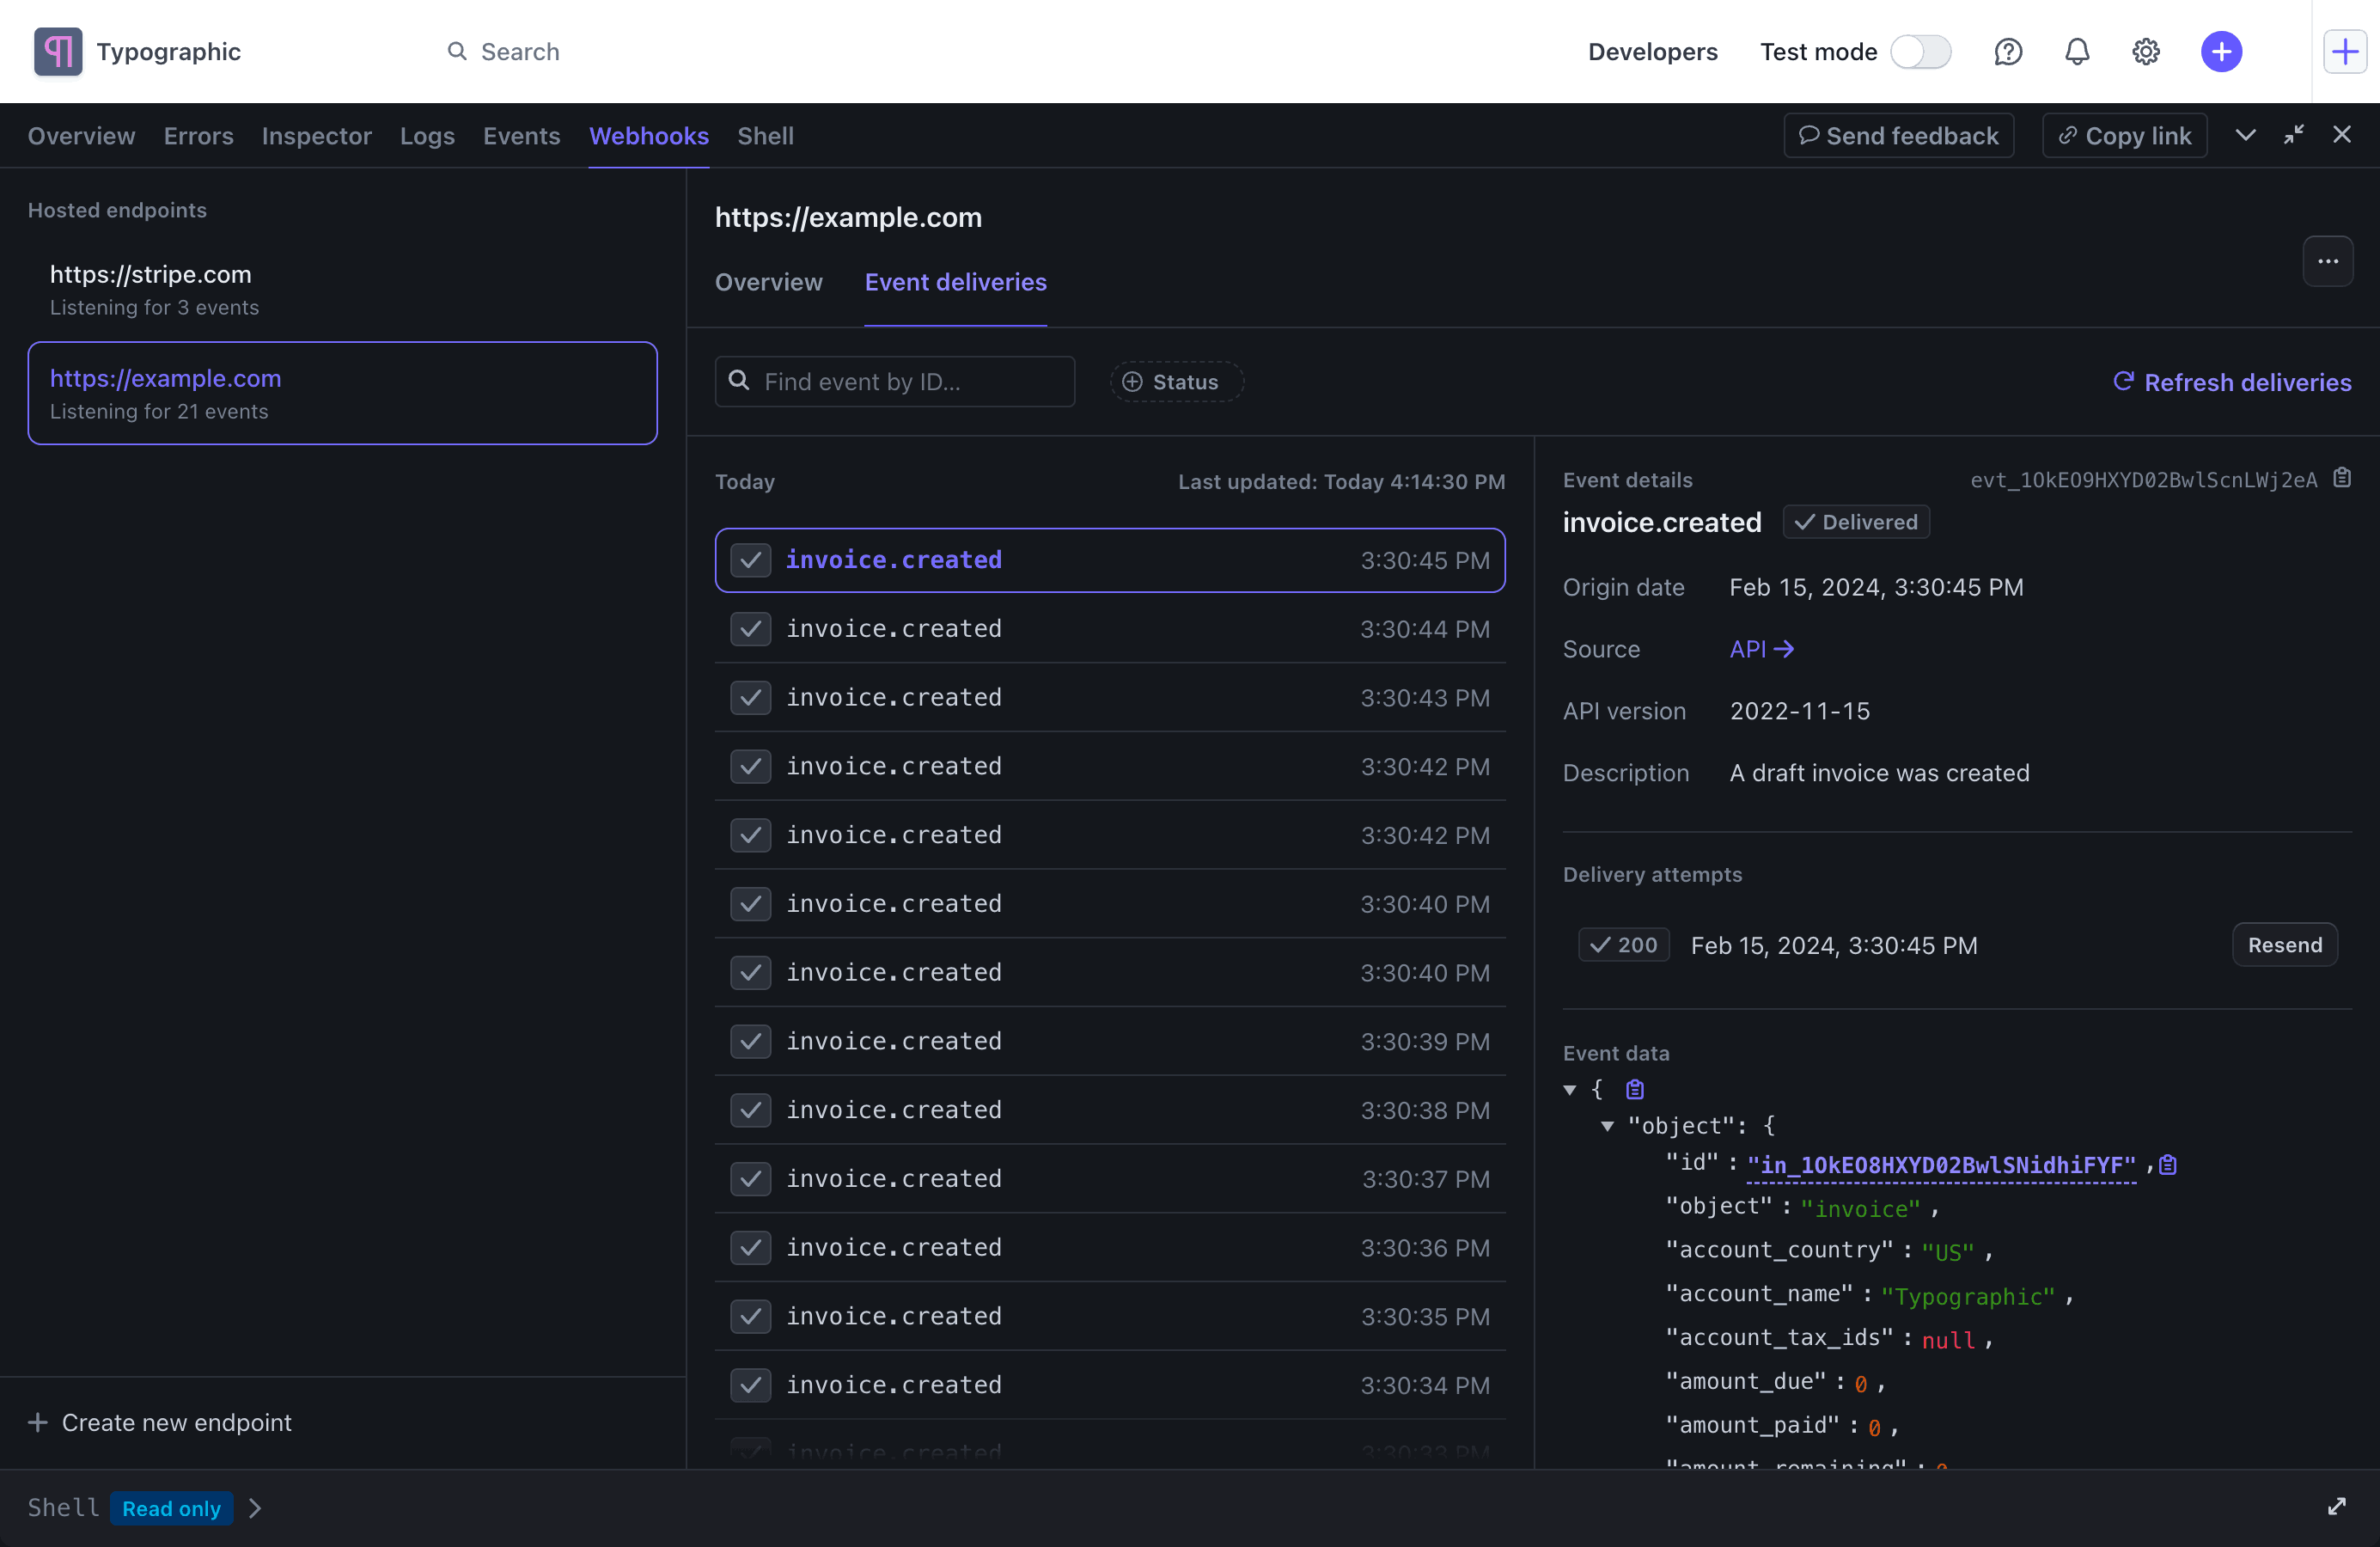
L’onglet Événements envoyés fournit une liste d’événements et indique s’ils sont à l’état Delivered, Pending ou Failed. Cliquez sur un événement pour afficher les tentatives d’envoi, qui comprennent le code d’état HTTP des précédentes tentatives d’envoi et l’heure des envois à venir en attente.

Affichez les tentatives d’envoi d’événements dans l’onglet Envois d’événements d’un endpoint de webhook.
Relancer l’envoi d’un événement
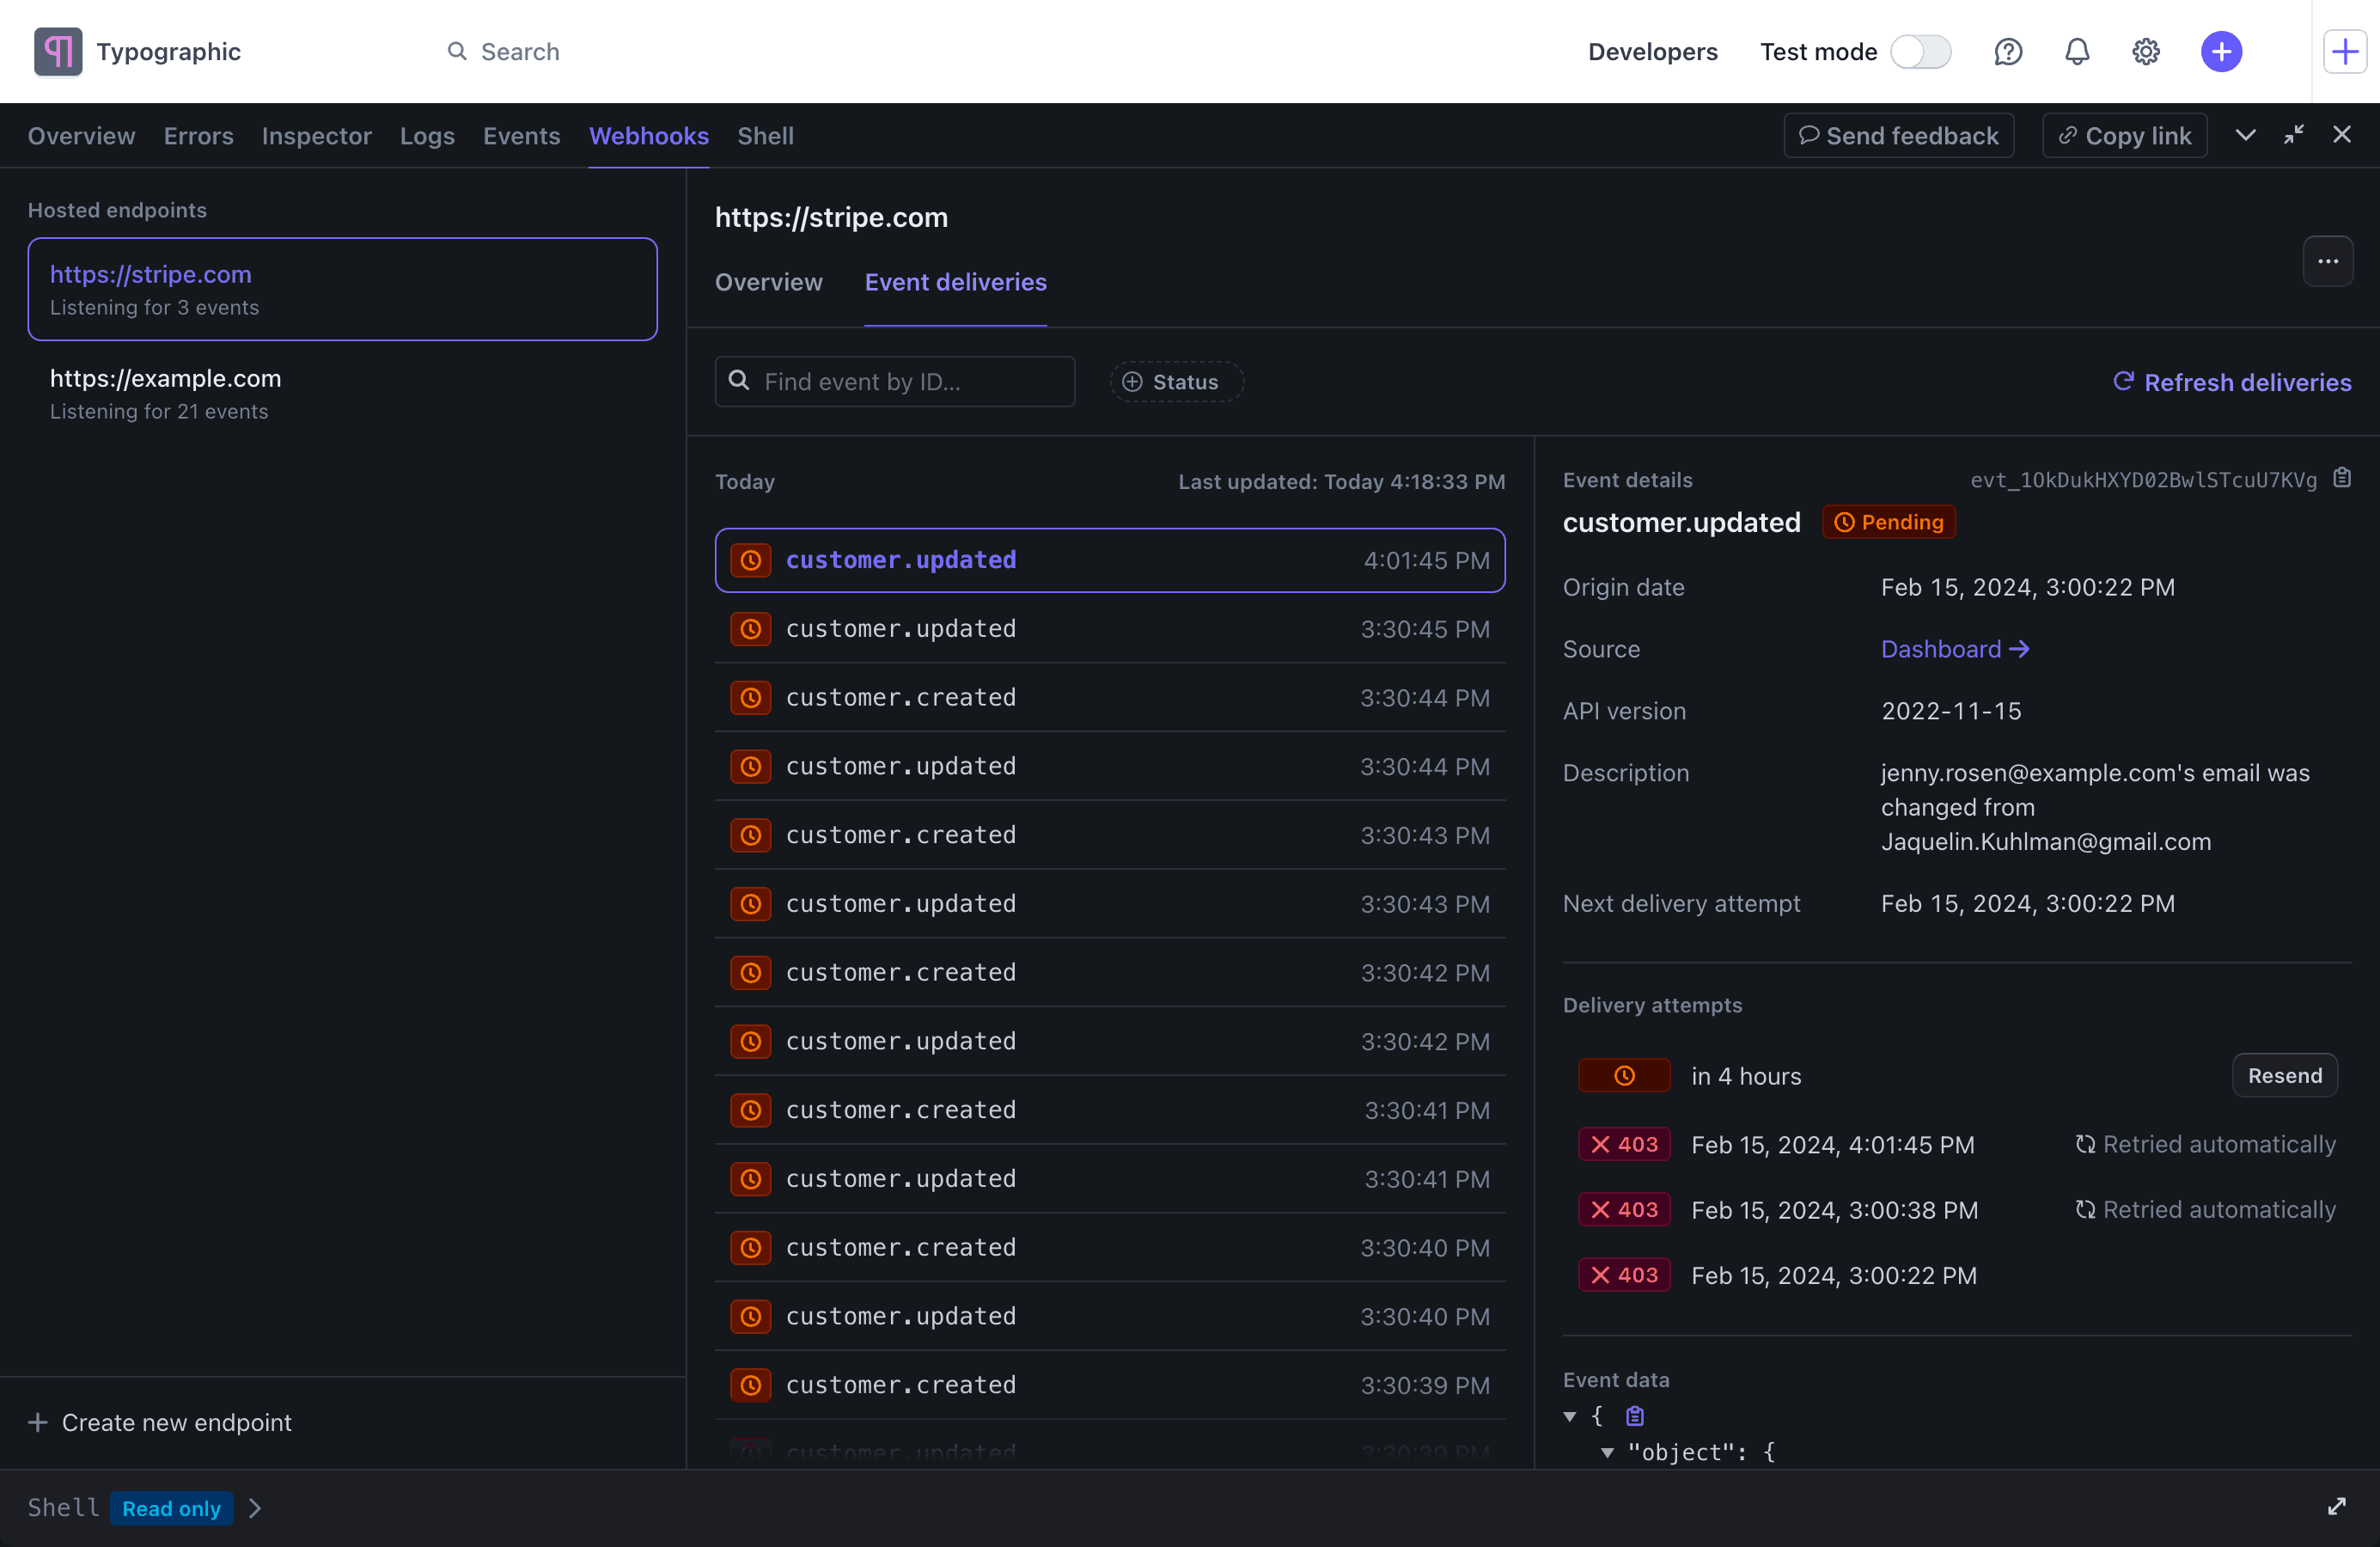
En mode production, Stripe tente d’envoyer un événement donné à votre endpoint de webhook pendant 3 jours maximum, avec un allongement exponentiel du délai entre chaque tentative. Dans la section Envois d’événements de votre endpoint de webhook répertorié dans Workbench, vous pouvez voir à quel moment la prochaine tentative aura lieu.
Dans un environnement de test, Stripe procède à trois tentatives sur une période de quelques heures. Passé ce délai, vous pouvez retenter manuellement l’envoi d’événements individuels à votre endpoint de webhook à l’aide de l’onglet Webhooks de Workbench, en accédant aux Événements envoyés répertoriés pour l’endpoint de votre choix. Vous pouvez également envoyer une requête portant sur les événements manqués pour rapprocher les données sur n’importe quelle période.

Réessayez d’envoyer les événements via l’onglet Envois d’événements à l’aide d’un endpoint de webhook.