Stripe app for Salesforce Platform のインストール
Stripe Connector for Salesforce Platform をインストールして設定を行います。
はじめに
- アプリをインストールする環境を決定します。Stripe は、テスト環境用と本番環境用に別々のインストールオプションを提供しています。
- このアプリケーションは、Salesforce AppExchange からインストールできます。
- 日本国内のユーザー向けに、AppExchange Japan もご利用いただけます。
Lightning Web Security
を有効にしてください。これを行うには、Setup (設定) > Session Management (セッション管理) > Session Settings (セッションの設定) に移動します。
- パッケージをインストールする Salesforce 組織にログインします。
- ログインすると、インストールページに誘導されます。続行をクリックしてインストールプロセスを開始します。
- Stripe は、Install for Admins Only (管理者のみのインストール) でのインストールをお勧めしています。このオプションでは、パッケージがインストールされた後で、アクセスと権限をコントロールできます。
- Approve Third-Party Access (サードパーティーアクセスを承認) ボックスにチェックを入れて Continue (続行) をクリックし、モーダルが表示されたときにパッケージのインストールを開始します。名前が示すように、これは Salesforce 組織と Stripe PBO 間でのデータのやり取りを許可します。
権限セットを設定する
The package incorporates both the Stripe app Integration User and the Stripe app Data User permission sets. These sets enable different users within your organization to access specific application features.
Stripe app integration user 
The Stripe app Integration User permission set must be assigned to any non-system administrator persona designated to manage setup log cleanup settings and event subscriptions. However, since system permissions are unable to be packaged due to limitations with Salesforce AppExchange apps. You must add additional permissions manually by cloning the permission set, in order for these users to access setup features.
- 権限セットの複製 権限セットを複製するには、Setup (設定) > User (ユーザー) > Permission Sets (権限セット) に移動します。
- Next to the Stripe app Integration User permission set, click Clone.
- 新しい一意の Label (ラベル) と API Name (API 名) を入力して、Save (保存) をクリックします。
- 権限セットの修正 Setup (設定) > Users (ユーザー) > Permission Sets (権限セット) に移動して、複製された権限セットを選択します。
- System Permissions (システム権限) を選択します。
- Edit (編集) をクリックして Download AppExchange Packages (AppExchange パッケージのダウンロード) 権限を選択し、Save (保存) をクリックします。
- もう一度 Save (保存) をクリックして、変更内容を確定します。
- [設定] > [ユーザー] > [権限セット] に移動して、ユーザに権限セットを割り当てます。
- 複製された権限セットを選択します。
- 権限セットの概要ページから、Manage Assignments (割り当ての管理) をクリックします。
- Add Assignments (割り当ての追加) をクリックします。
- 権限セットを割り当てるユーザの横にあるチェックボックスをオンにして、ページ下部の [次へ] をクリックします。
Stripe app data user 
The Stripe app Data User has the ability to perform operations on the Stripe_
object records, which the Webhook Handler class creates. To provide non-admin users access to Stripe Event records, you must assign a data user permission set to their user profile.
- Setup (設定) > User (ユーザー) > Permission Sets (権限セット) に移動して、ユーザーに権限セットを割り当てます。
- Select the Stripe app Data User permission set.
- Permission Set Overview (権限セットの概要) ページから、Manage Assignments (割り当ての管理) をクリックします。
- Add Assignments (割り当ての追加) をクリックします。
- ユーザーの横のボックスにチェックを入れて、権限セットを割り当てます。
- ページ下部にある Next (次へ) をクリックします。
Stripe for Salesforce Platform のセットアップウィザード
When users first access the Stripe app for Salesforce app, they must complete an Initial Setup flow. This guided wizard flow helps users authorize an org, add a Stripe account, and configure sync preferences. After completing the initial setup, the Account Management tab becomes the users’ landing page. Here, they can add more Stripe accounts or navigate to other tabs to edit configuration settings.
セットアップウィザードを使用して Stripe アカウントを追加する
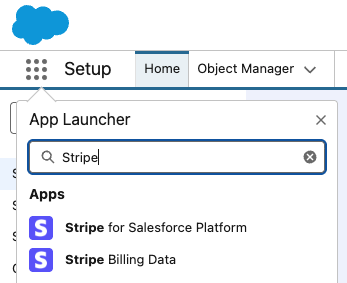
- 初期セットアップウィザードを立ち上げ、App Launcher (アプリケーションランチャー) > Stripe for Salesforce Platform に移動します。
- Get Started (始める) ボタンをクリックします。
- Authorize (承認) ボタンをクリックします。
- 新しいウィンドウが開いたら、Allow (許可) をクリックして組織へのアクセスを付与します。
- Next (次へ) ボタンをクリックします。
- Stripe の公開キーと制限付きアクセスキーを入力し、Add Account (アカウントの追加) をクリックして Stripe アカウントを追加します。
- アカウントを選択したら、Next (次へ) ボタンをクリックします。
- (オプション) Stripe Event と Sync Log クリーンアップを有効にするには、トグルボタンをクリックします。
- クリーンアップトリガーが有効な場合、入力ボックスに数値を入れて、Salesforce 組織に保持する対象のレコード数を設定します。
- Next (次へ) ボタンをクリックします。
- Stripe API Version (Stripe API バージョン) ドロップダウンをクリックします。
- インストールする Stripe API バージョンを選択します。
- Install Package (パッケージのインストール) ボタンをクリックすると、拡張機能パッケージのインストールを完了するために使用する必要がある、別のウィンドウが起動します。
- Finish (完了) をクリックします。