Installation der Stripe-App für die Salesforce-Plattform
Installieren und konfigurieren Sie die Stripe-App für die Salesforce Platform.
Vorsicht
Für bestehende Nutzer/innen, die ein Upgrade auf die neueste Version in Betracht ziehen: Seit Version 1. der Stripe-App für die Salesforce-Plattform wird keine OAuth-basierte Authentifizierung mehr angeboten. Um Ihr Stripe-Konto von OAuth auf die API-Key-Authentifizierung umzustellen, wählen Sie einfach Erneut mit API-Key autorisieren unter Kontoverwaltung und geben Sie Ihre Stripe-API-Schlüssel ein.
Bevor Sie loslegen
- Identifizieren Sie die Umgebung, in der Sie Ihre App installieren möchten. Wir bieten getrennte Installationsmöglichkeiten für Test- und Produktionsumgebungen.
- Sie können diese Anwendung über Salesforce AppExchange installieren.
- Für Nutzer/innen in Japan ist AppExchange Japan ebenfalls verfügbar.
- Stellen Sie sicher, dass Sie
Lightning Web Securityaktivieren. Gehen Sie dazu zu Setup > Sitzungsverwaltung > Sitzungseinstellungen.
- Melden Sie sich bei der Salesforce-Organisation an, in der Sie das Paket installieren möchten.
- Nach der Anmeldung werden Sie zur Installationsseite weitergeleitet. Klicken Sie auf Weiter, um den Installationsvorgang zu starten.
- Wir empfehlen die Installation der Option Install for Admins Only (Nur für Administratoren installieren). Mit dieser Option können Sie den Zugriff und die Berechtigungen nach der Installation des Pakets steuern.

- Aktivieren Sie das Kontrollkästchen Drittanbieterzugriff genehmigen und klicken Sie auf Weiter, um die Paketinstallation zu starten, wenn das Modal angezeigt wird. So können Daten zwischen Ihrer Salesforce-Organisation und dem Stripe PBO ausgetauscht werden.

Einrichtungsassistent für Stripe for Salesforce Platform
Wenn Nutzer/innen zum ersten Mal auf die Stripe Connector for Salesforce-Anwendung zugreifen, müssen sie eine Ersteinrichtung durchführen. Dieser geführte Assistent hilft Nutzer/innen, eine Organisation zu autorisieren, ein Stripe-Konto hinzuzufügen und Synchronisierungseinstellungen zu konfigurieren. Nach Abschluss der Ersteinrichtung wird die Registerkarte „Kontoverwaltung“ zur Zielseite der Nutzer/innen. Hier können sie weitere Stripe-Konten hinzufügen oder zu anderen Registerkarten navigieren, um die Konfigurationseinstellungen zu bearbeiten.
Stripe-Konto mit dem Einrichtungsassistenten hinzufügen
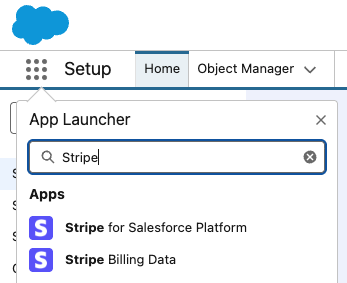
- Starten Sie den Ersteinrichtungsassistenten und gehen Sie zu App Launcher > Stripe for Salesforce Platform .
- Klicken Sie auf die Schaltfläche Erste Schritte.

- Klicken Sie auf die Schaltfläche Autorisieren.

- Nachdem sich das neue Fenster geöffnet hat, klicken Sie auf Zulassen, um Zugriff für Ihre Organisation zu gewähren.
- Klicken Sie auf die Schaltfläche Weiter.

- Geben Sie Ihren veröffentlichbaren Schlüssel und Ihren eingeschränkten Zugriff von Stripe ein und klicken Sie auf Add account (Konto hinzufügen), um das Stripe-Konto hinzuzufügen.

- Nachdem Sie ein Konto ausgewählt haben, klicken Sie auf die Schaltfläche Weiter.

- (Optional) Klicken Sie auf die Umschaltfläche, wenn Sie die Bereinigung der Stripe-Ereignisse und Synchronisierungsprotokollen aktivieren möchten.
- Wenn der Bereinigungsauslöser aktiv ist, geben Sie den numerischen Wert in das Eingabefeld ein, um die gewünschte Anzahl der Datensätze festzulegen, die in der Salesforce-Organisation beibehalten werden sollen.
- Klicken Sie auf die Schaltfläche Weiter.

- Klicken Sie auf das Dropdown-Menü Stripe API-Version und installieren Sie die Version
2025-04-30 - Klicken Sie auf die Schaltfläche Paket installieren. Dadurch wird ein weiteres Fenster geöffnet, in dem Sie die Installation des Erweiterungspakets abschließen müssen.
- Klicken Sie auf Finish (Fertigstellen)