Stripe app for Salesforce Platform installation
Install and configure the Stripe app for Salesforce Platform.
Caution
For existing users considering an upgrade to the latest version: As of version 1. of the Stripe app for Salesforce Platform, OAuth-based authentication is no longer offered. To migrate your Stripe account from OAuth to API key authentication, simply choose Reauthorize using API key under Account Management and enter your Stripe API keys.
Before you begin
- Identify the environment where you want to install your app. We provide separate installation options for test and production environments.
- You can install this application from the Salesforce AppExchange.
- For users in Japan, AppExchange Japan is also available.
- Make sure to enable
Lightning Web Security. To do so, go to Setup > Session Management > Session Settings.
- Log into the Salesforce organization where you want to install the package.
- After logging in, you’re directed to the installation page. Click Continue to begin the installation process.
- We recommend installing Install for Admins Only. This option allows for controlling access and permissions after the package has been installed.

- Approve Third-Party Access check off the box and click Continue to start the package installation when the modal appears. As it states, this is to allow data to be sent back and forth between your Salesforce org and the Stripe PBO.

Stripe for Salesforce Platform setup wizard
When users first access the Stripe app for Salesforce app, they must complete an Initial Setup flow. This guided wizard flow helps users authorize an org, add a Stripe account, and configure sync preferences. After completing the initial setup, the Account Management tab becomes the users’ landing page. Here, they can add more Stripe accounts or go to other tabs to edit configuration settings.
Add a Stripe account using the setup wizard
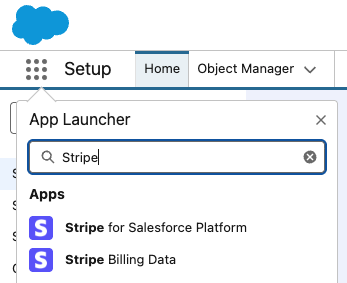
- Launch the initial setup wizard, and go to App Launcher > Stripe for Salesforce Platform

- Click the Get Started button.

- Click the Authorize button.

- After the new window opens, click Allow to grant access for your org.
- Click the Next button.

- Input your Stripe publishable key and restricted access key, and click Add Account to add the Stripe account.

- After you select an account, click the Next button.

- (Optional) Click the toggle if you wish to enable the Stripe Events and Sync Logs cleanup.
- If the cleanup trigger is active, enter the numerical value in the input box to set the desired amount of records to be retained in the Salesforce org.
- Click the Next button.

- Click the Stripe API Version dropdown and install the
2025-04-30version - Click the Install Package button, which launches another window that you need to use to complete the installation of the extension package.
- Click Finish