Revenue Recognition accounting period control
Learn how to configure accounting periods for Stripe Revenue Recognition.
Accounting period control allows you to manage and customize your accounting calendar. By default, your accounting calendar and accounting periods follow calendar months. You can switch to the 4-4-5 calendar for custom accounting periods with a specified start date.
You can also control how to close accounting periods. You can either manually close the books after reviewing your data and completing any adjustments each month, or you can let Stripe automate closing the books.
You can also reopen past accounting periods using accounting period control. Use this method when you first start using revenue recognition because it allows you to make adjustments to past data without creating corrections in the current period. For example, when you apply rules to fit revenue recognition with your own business model, it’s likely to change the history of closed accounting periods. You can decide on whether to reopen the closed accounting periods or make adjustments in the current accounting period.
Setting accounting periods
You can find the accounting periods section on the Revenue Recognition controls page.
Select the mode for accounting periods
To get started, select the mode for your accounting periods. The default is automatic.
| Mode | Descriptions |
|---|---|
| Calendar month | Aligns with calendar months. |
| 4-4-5 | Divides the year into 4 quarters, each with 3 periods of 4, 4, 5 weeks. |
Choose the start date in 4-4-5 mode
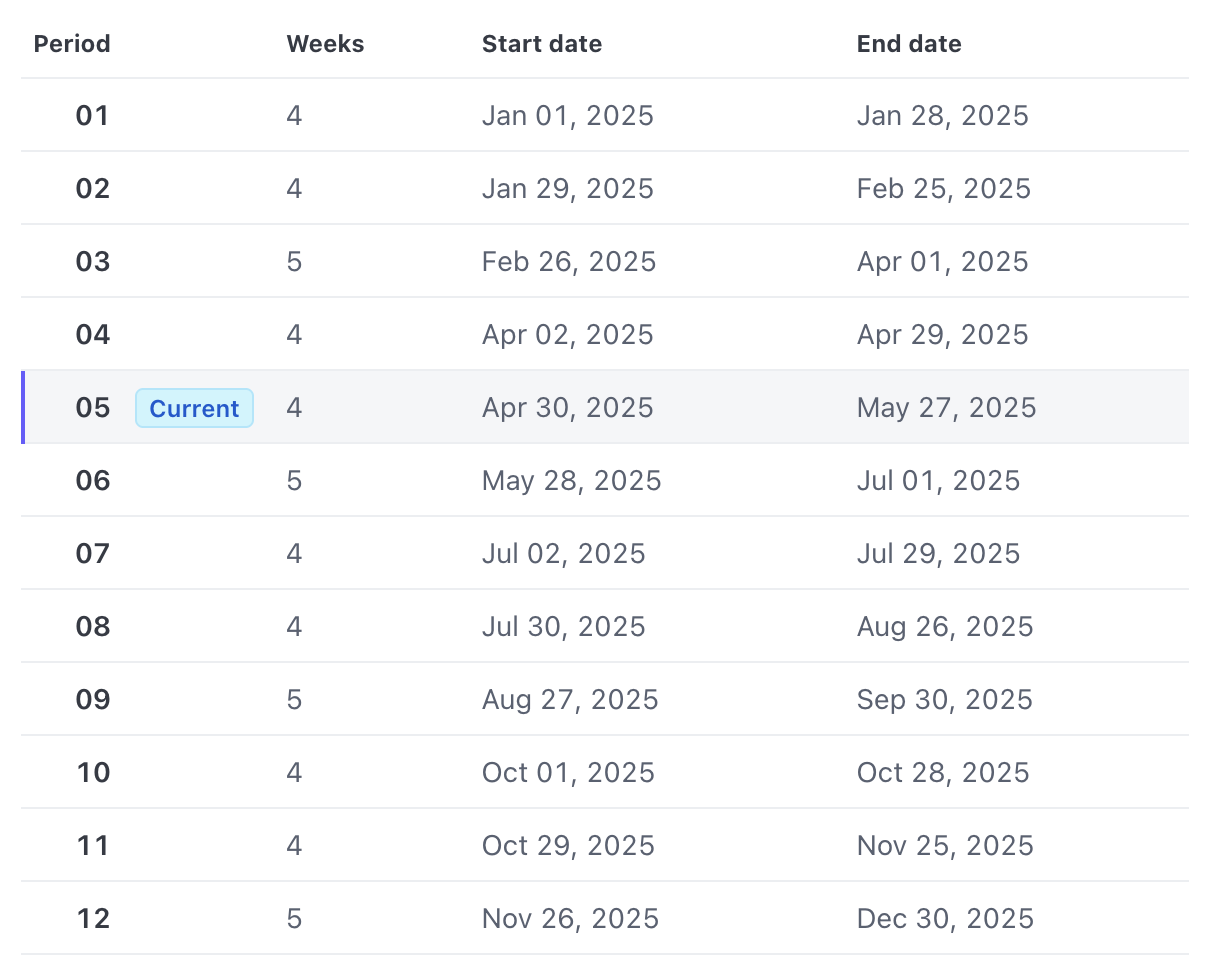
When configuring the 4-4-5 accounting periods, you need to choose a start date. From this date forward, the accounting periods transition to the 4-4-5 format, while any periods prior to the start date continue to follow the monthly period. You can choose your desired start date and click the preview link to view your 4-4-5 accounting periods. For example, when you choose the start date of Jan 1, 2025, your accounting periods look like the following example, and your current accounting period is highlighted:

Additionally, to accommodate leap years, we add an extra week to the last period every sixth year, ensuring that the calendar remains in alignment.
Setting how to close accounting periods
You can find the close books section on the Revenue Recognition controls page.
Select the mode for closing books
To get started, select the mode for your close books. The default is automatic.
| Mode | Descriptions |
|---|---|
| Automatic | Accounting periods automatically close at the end of each month. |
| Manual | You control when to close the accounting periods. |
Choose the latest closed accounting period in manual mode
When you set latest closed accounting period, you close the selected accounting period along with all previous accounting periods, and you open all following periods. You can choose one of the periods in the past 24 months, and you can also choose no closed accounting periods. For example, when you choose the latest closed accounting period to be February in manual mode, the accounting period looks like the following example:
| Before Jan | Jan | Feb | Mar | Apr | May | Jun |
| Closed | Closed | Closed | Open | Open | Open | Open |
How accounting period and close books control works
Manage your accounting calendar
Accounting period control enables you to manage your accounting calendar by allowing you to choose between the default monthly calendar and the 4-4-5 accounting calendar.
When you adjust the accounting period control, you can also reopen previously closed accounting periods using close book control. It allows you to make the adjustments without creating corrections in the current period.
Control the closing process for your accounting period cycle
The close books control allows you to configure the closing process with your own workflow for the accounting period cycle. You can choose the manual mode, and check all terms and fix the human errors before closing the accounting periods manually, or you can automate closing your revenue recognition book using the automatic mode.
Getting started with revenue recognition
If you’re new to revenue recognition, use the close books control to get started. For example, when you apply rules to fit revenue recognition with your own business model, you can set manual mode with no closed accounting periods. In this way, all the changes go into the original accounting periods, which can help you understand your books.
You can open accounting periods after setting revenue recognition rules, unless you need to issue corrections. In that case, you must close the accounting period before setting any rules.
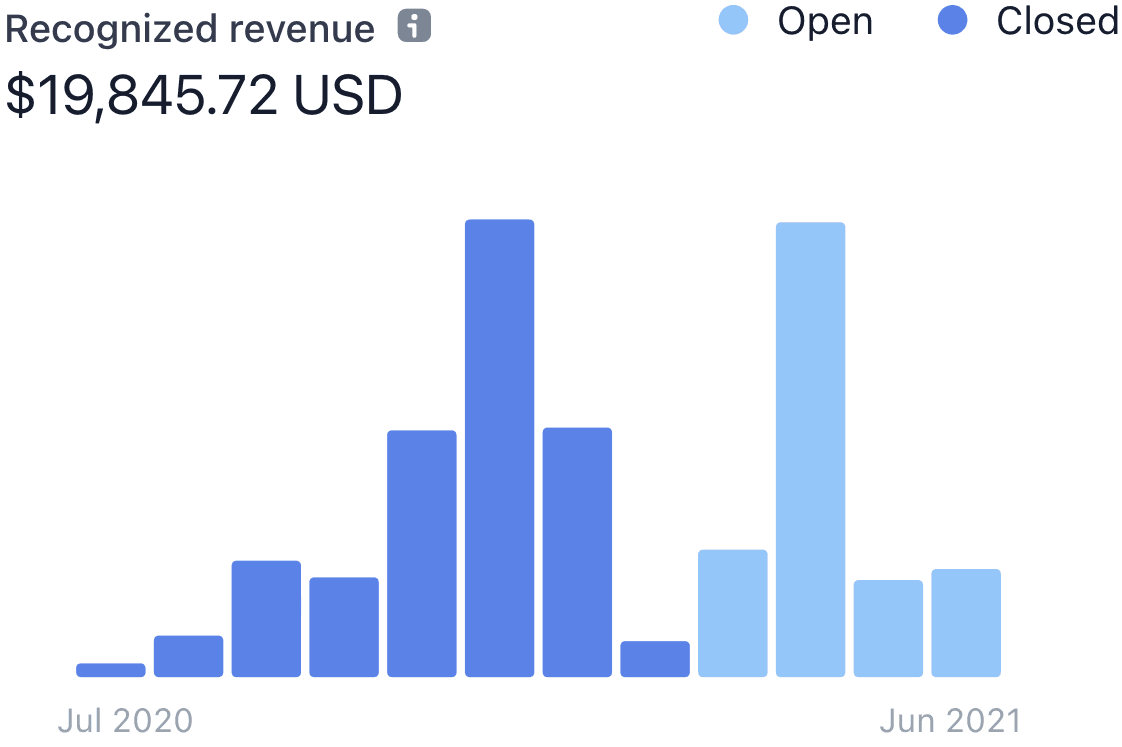
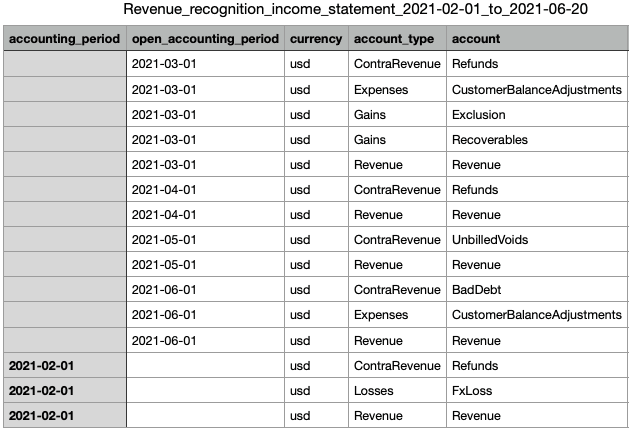
Adjustments for accounting periods take up to 24 hours to complete. When completed, you can see the setting in monthly summary charts and CSV-only reports in the Dashboard. For example, when you choose the latest closed accounting period to be February in manual mode, you can see it in the charts and reports.

