Bulk account mapping
Simultaneously upload multiple chart of accounts mappings to simplify your Stripe to general ledger setup.
The Bulk Account Mapping feature lets you simultaneously upload multiple chart of accounts mappings, simplifying how you connect Stripe’s default accounts to your General Ledger (GL) structure. By using a CSV file, you can create hundreds of mapping rules in a single operation, which:
- Eliminates the time-consuming manual creation of individual mappings.
- Ensures consistency across large product catalogs.
- Reduces repetitive work when adding new products or entities.
Upload your mappings
Step 1: Access the bulk upload feature
- Go to Revenue Recognition > Chart of Accounts.
- Click Map chart of accounts.
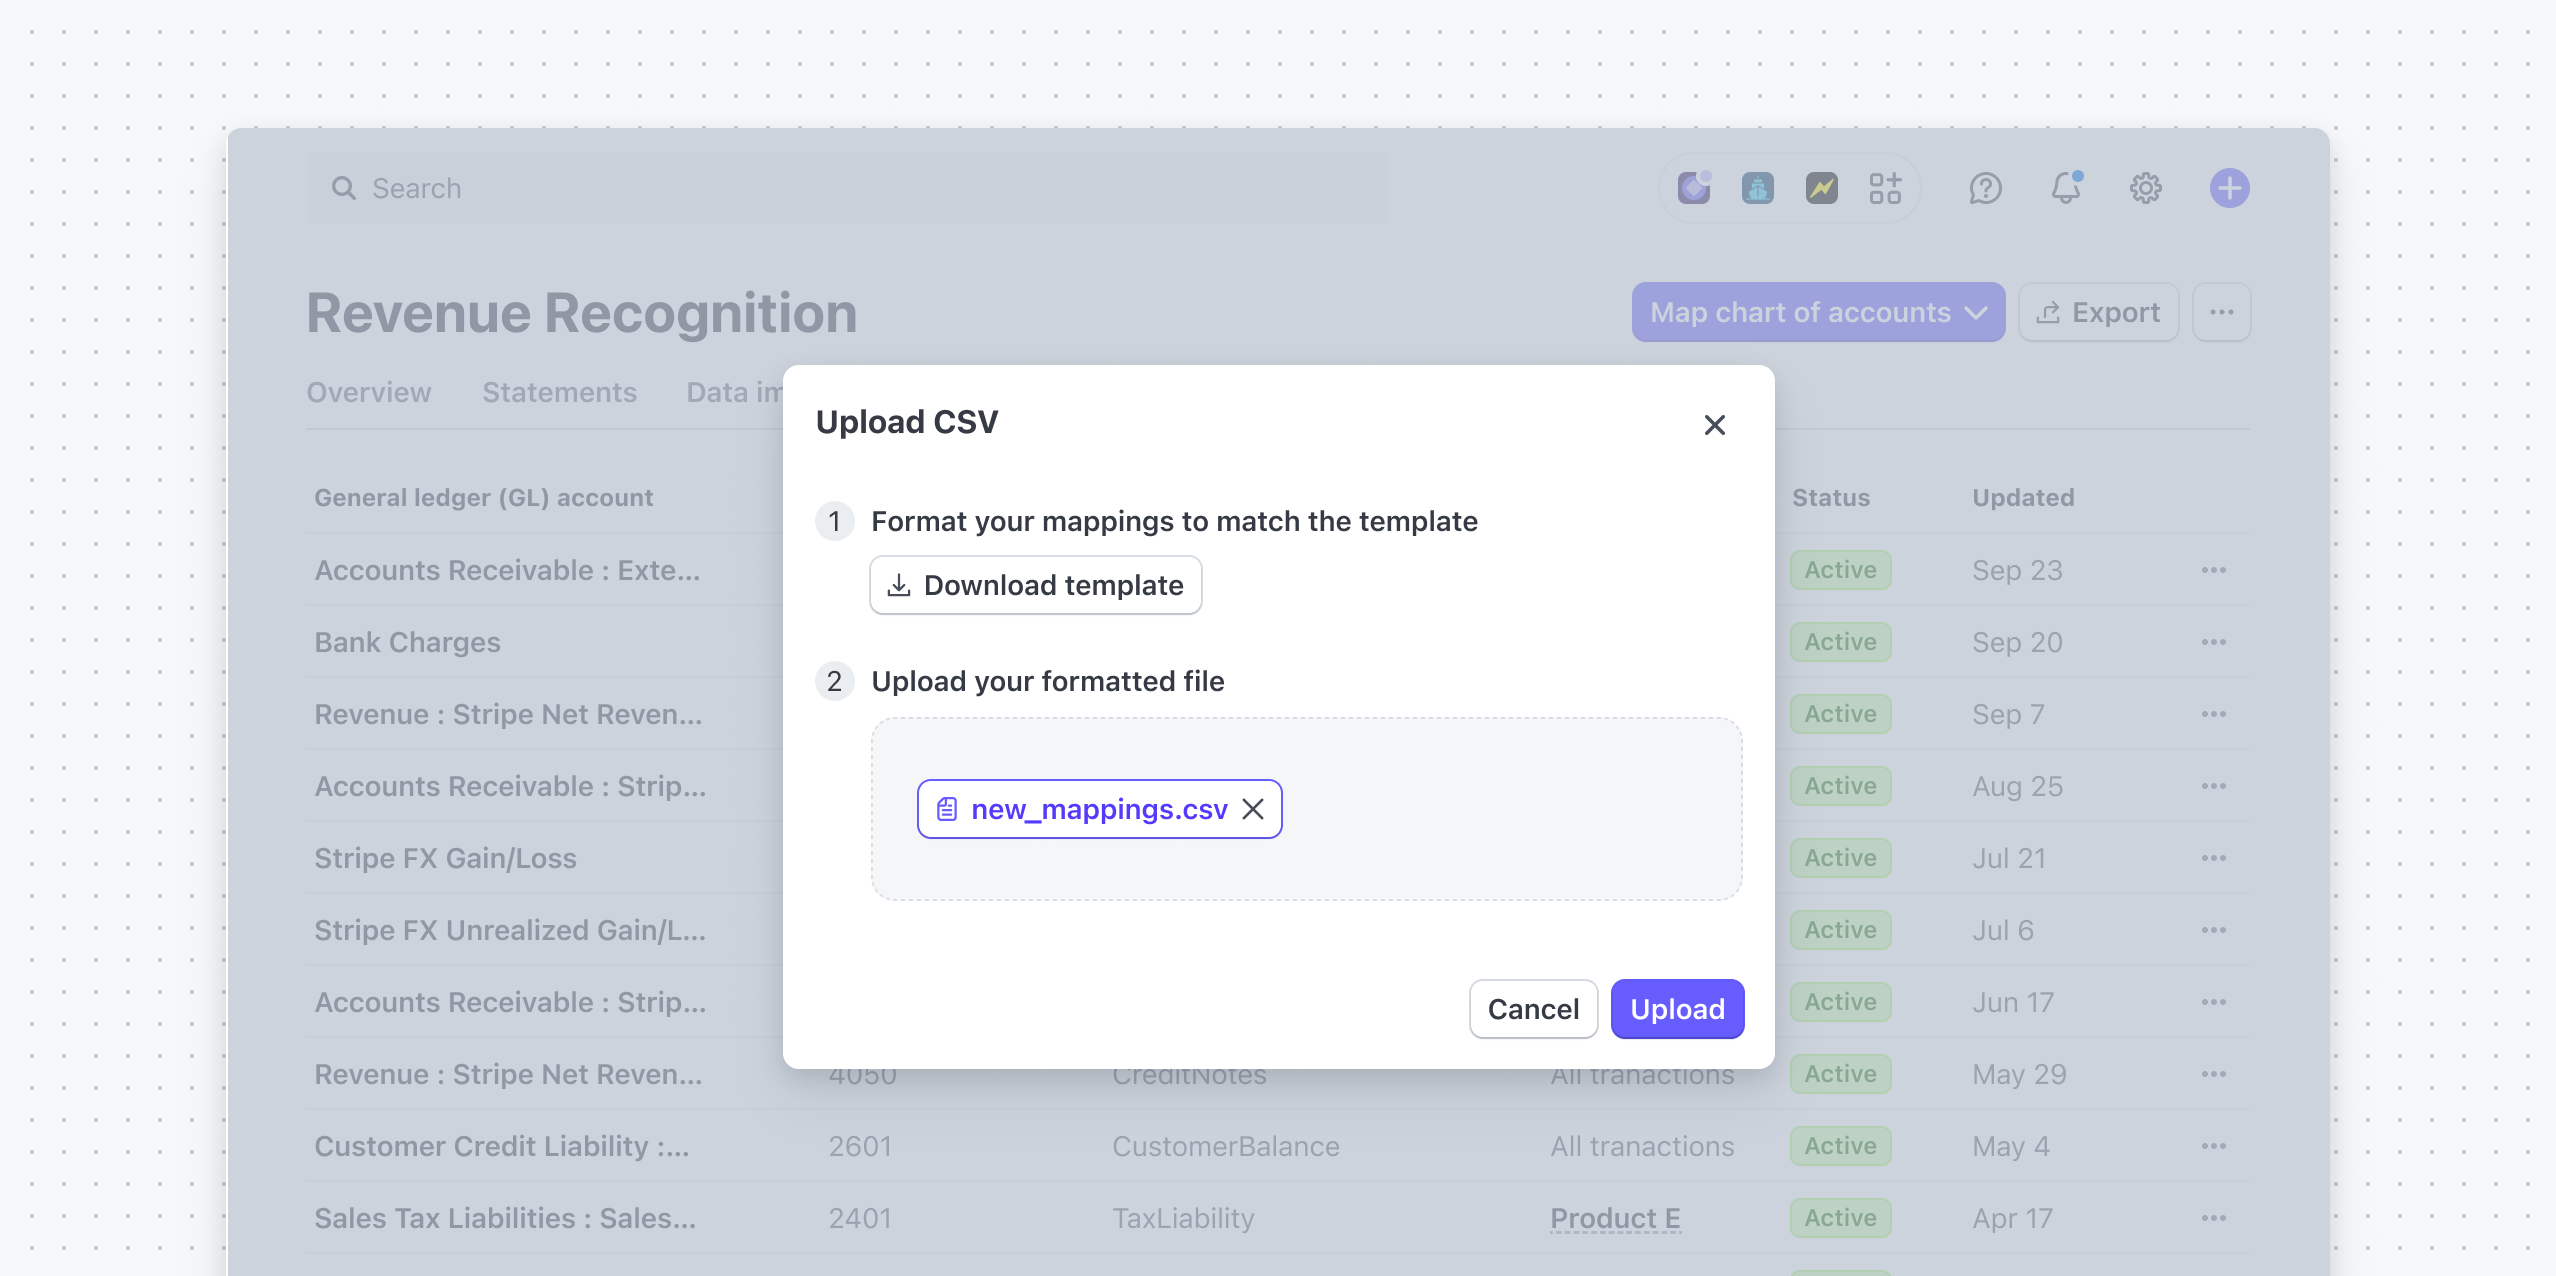
- Select Upload CSV from the dropdown menu.

Step 2: Download and prepare the CSV template
- In the upload dialog, click Download template.
- Open the template in a spreadsheet application.
- Add your mappings.
Use the following columns when adding your mappings:
| CSV column | Description | Required or optional |
|---|---|---|
| Stripe Account | The default Stripe account in camel case that you want to override (“Revenue”, “AccountsReceivable”) | Required |
| General Ledger Account | The name of your GL account | Required |
| GL Account number | The number corresponding to the GL account | Optional |
| Effective Start Date | Start date (YYYY-MM-DD) | Required |
| Effective End Date | End date (YYYY-MM-DD) | Required |
| Product ID | Product IDs for products that you have configured in the Stripe Dashboard | Optional |
| Invoice Metadata Key and Invoice Metadata Value | Create a rule by selecting a key and adding a value. The keys are from metadata you created in past invoices.1 | Optional |
| Shipping Region Country and Shipping Region State | Specify the shipping region to map transactions. Only ISO-compliant country and state codes are supported. | Optional |
| Price | Price IDs for prices that you configured in the Stripe Dashboard | Optional |
| Credit note | The credit note line item description to map transactions to the relevant GL account. | Optional |
| Coupon | Coupon IDs for coupons that you configured in the Stripe Dashboard | Optional |
If you don’t specify a condition (product, shipping region, or invoice metadata), the mapping applies to all transactions involving the configured Stripe account to the GL account.
Step 3: Upload your CSV file
After you complete these steps, the system starts processing your mappings:
- In the upload dialog, click Browse or drag and drop your completed CSV file.
- Review the file details.
- Click Upload.

Step 4: Monitor processing status
After you upload your CSV, processing typically completes within minutes, depending on the file size. While the system processes your file, a progress notification banner appears in the Dashboard. When finished, the banner updates to show you the results. You can find the mapping on the Accounts mapping tab.
Error handling
If we can process a mapping, the system provides tools to identify and correct these issues.
Understand error notifications
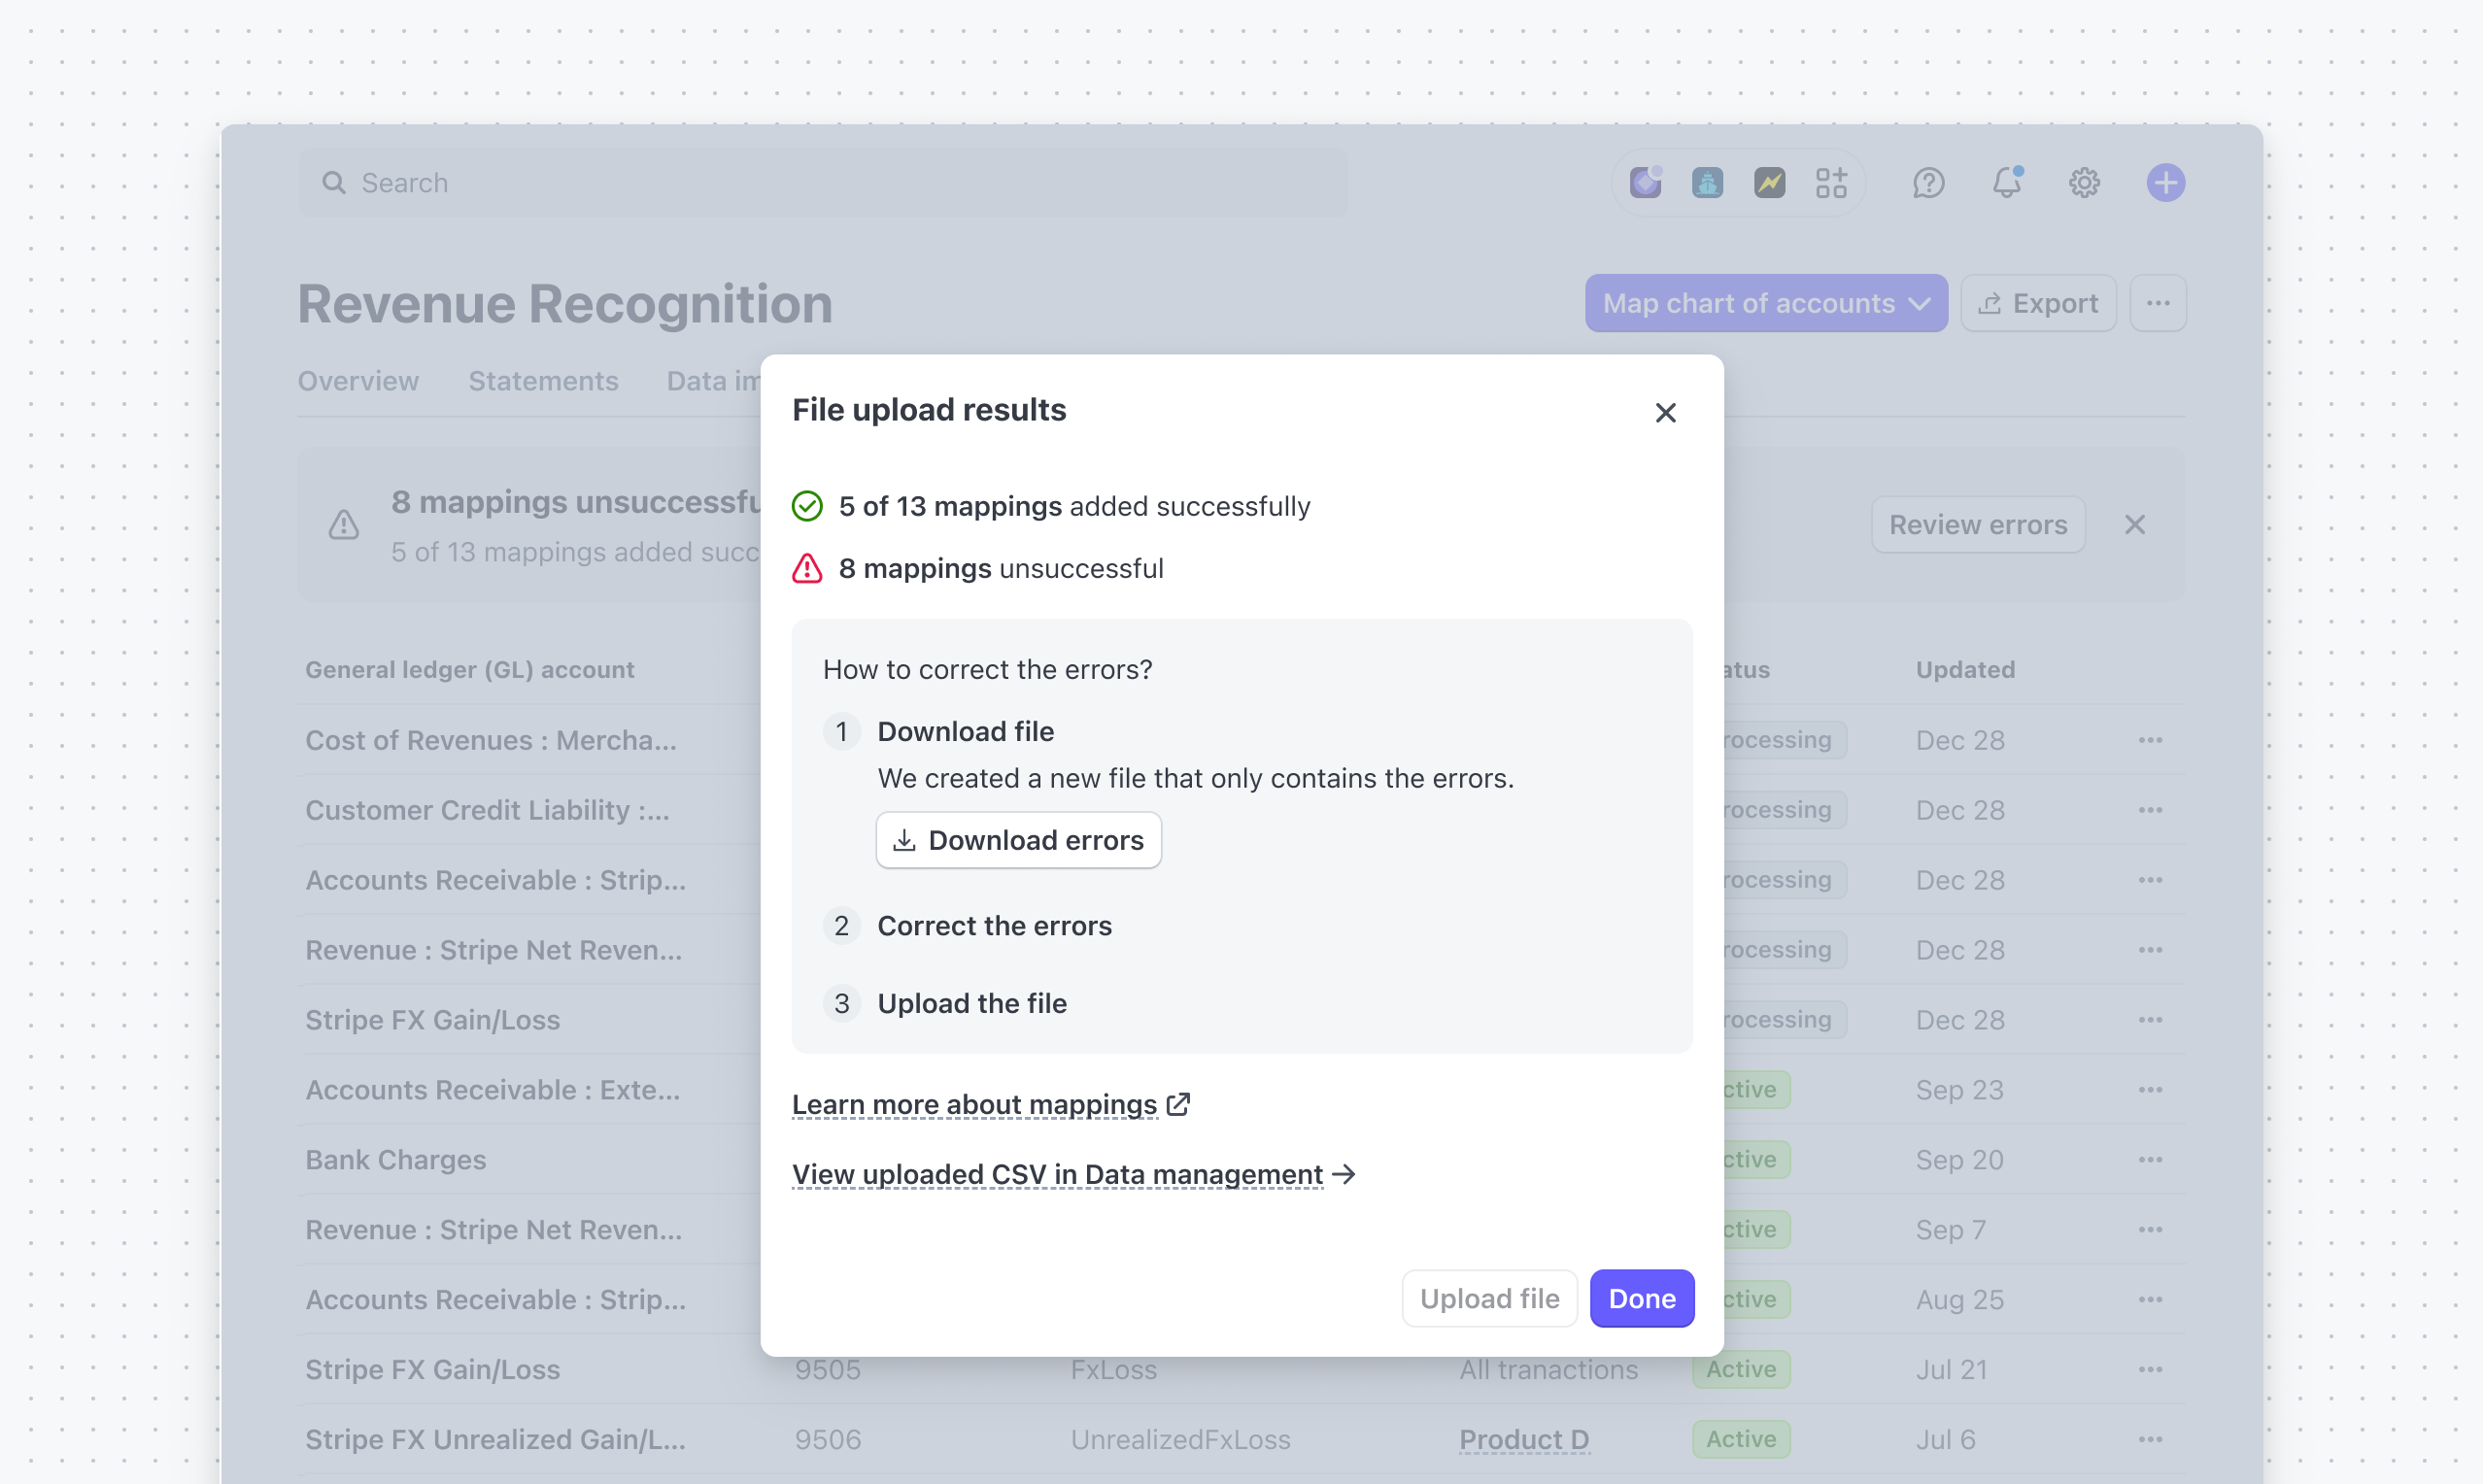
Based on the processing results, you see one of these messages:
- Complete success: “[X] of [Y] mappings added successfully. Mappings will appear in your reports within 24 hours.”
- Partial success: “[X] of [Y] mappings added successfully. Mappings will appear in your reports within 24 hours.”
- Complete failure: “Review errors and re-upload the file.”

Review and fix errors
- For partial or failed uploads, click Review errors in the banner.
- In the File upload results dialog, click Download error report.
- The error report includes each failed mapping row with:
- The original row data.
- The specific error message explaining why the mapping failed.

Reupload corrected mappings
- Fix the identified errors in your CSV file.
- Return to Map chart of accounts > Upload CSV.
- Upload your corrected file.
- Monitor the processing status.
1 Don’t import any personally identifiable information (PII) or protected health information.