收集物理地址和电话号码
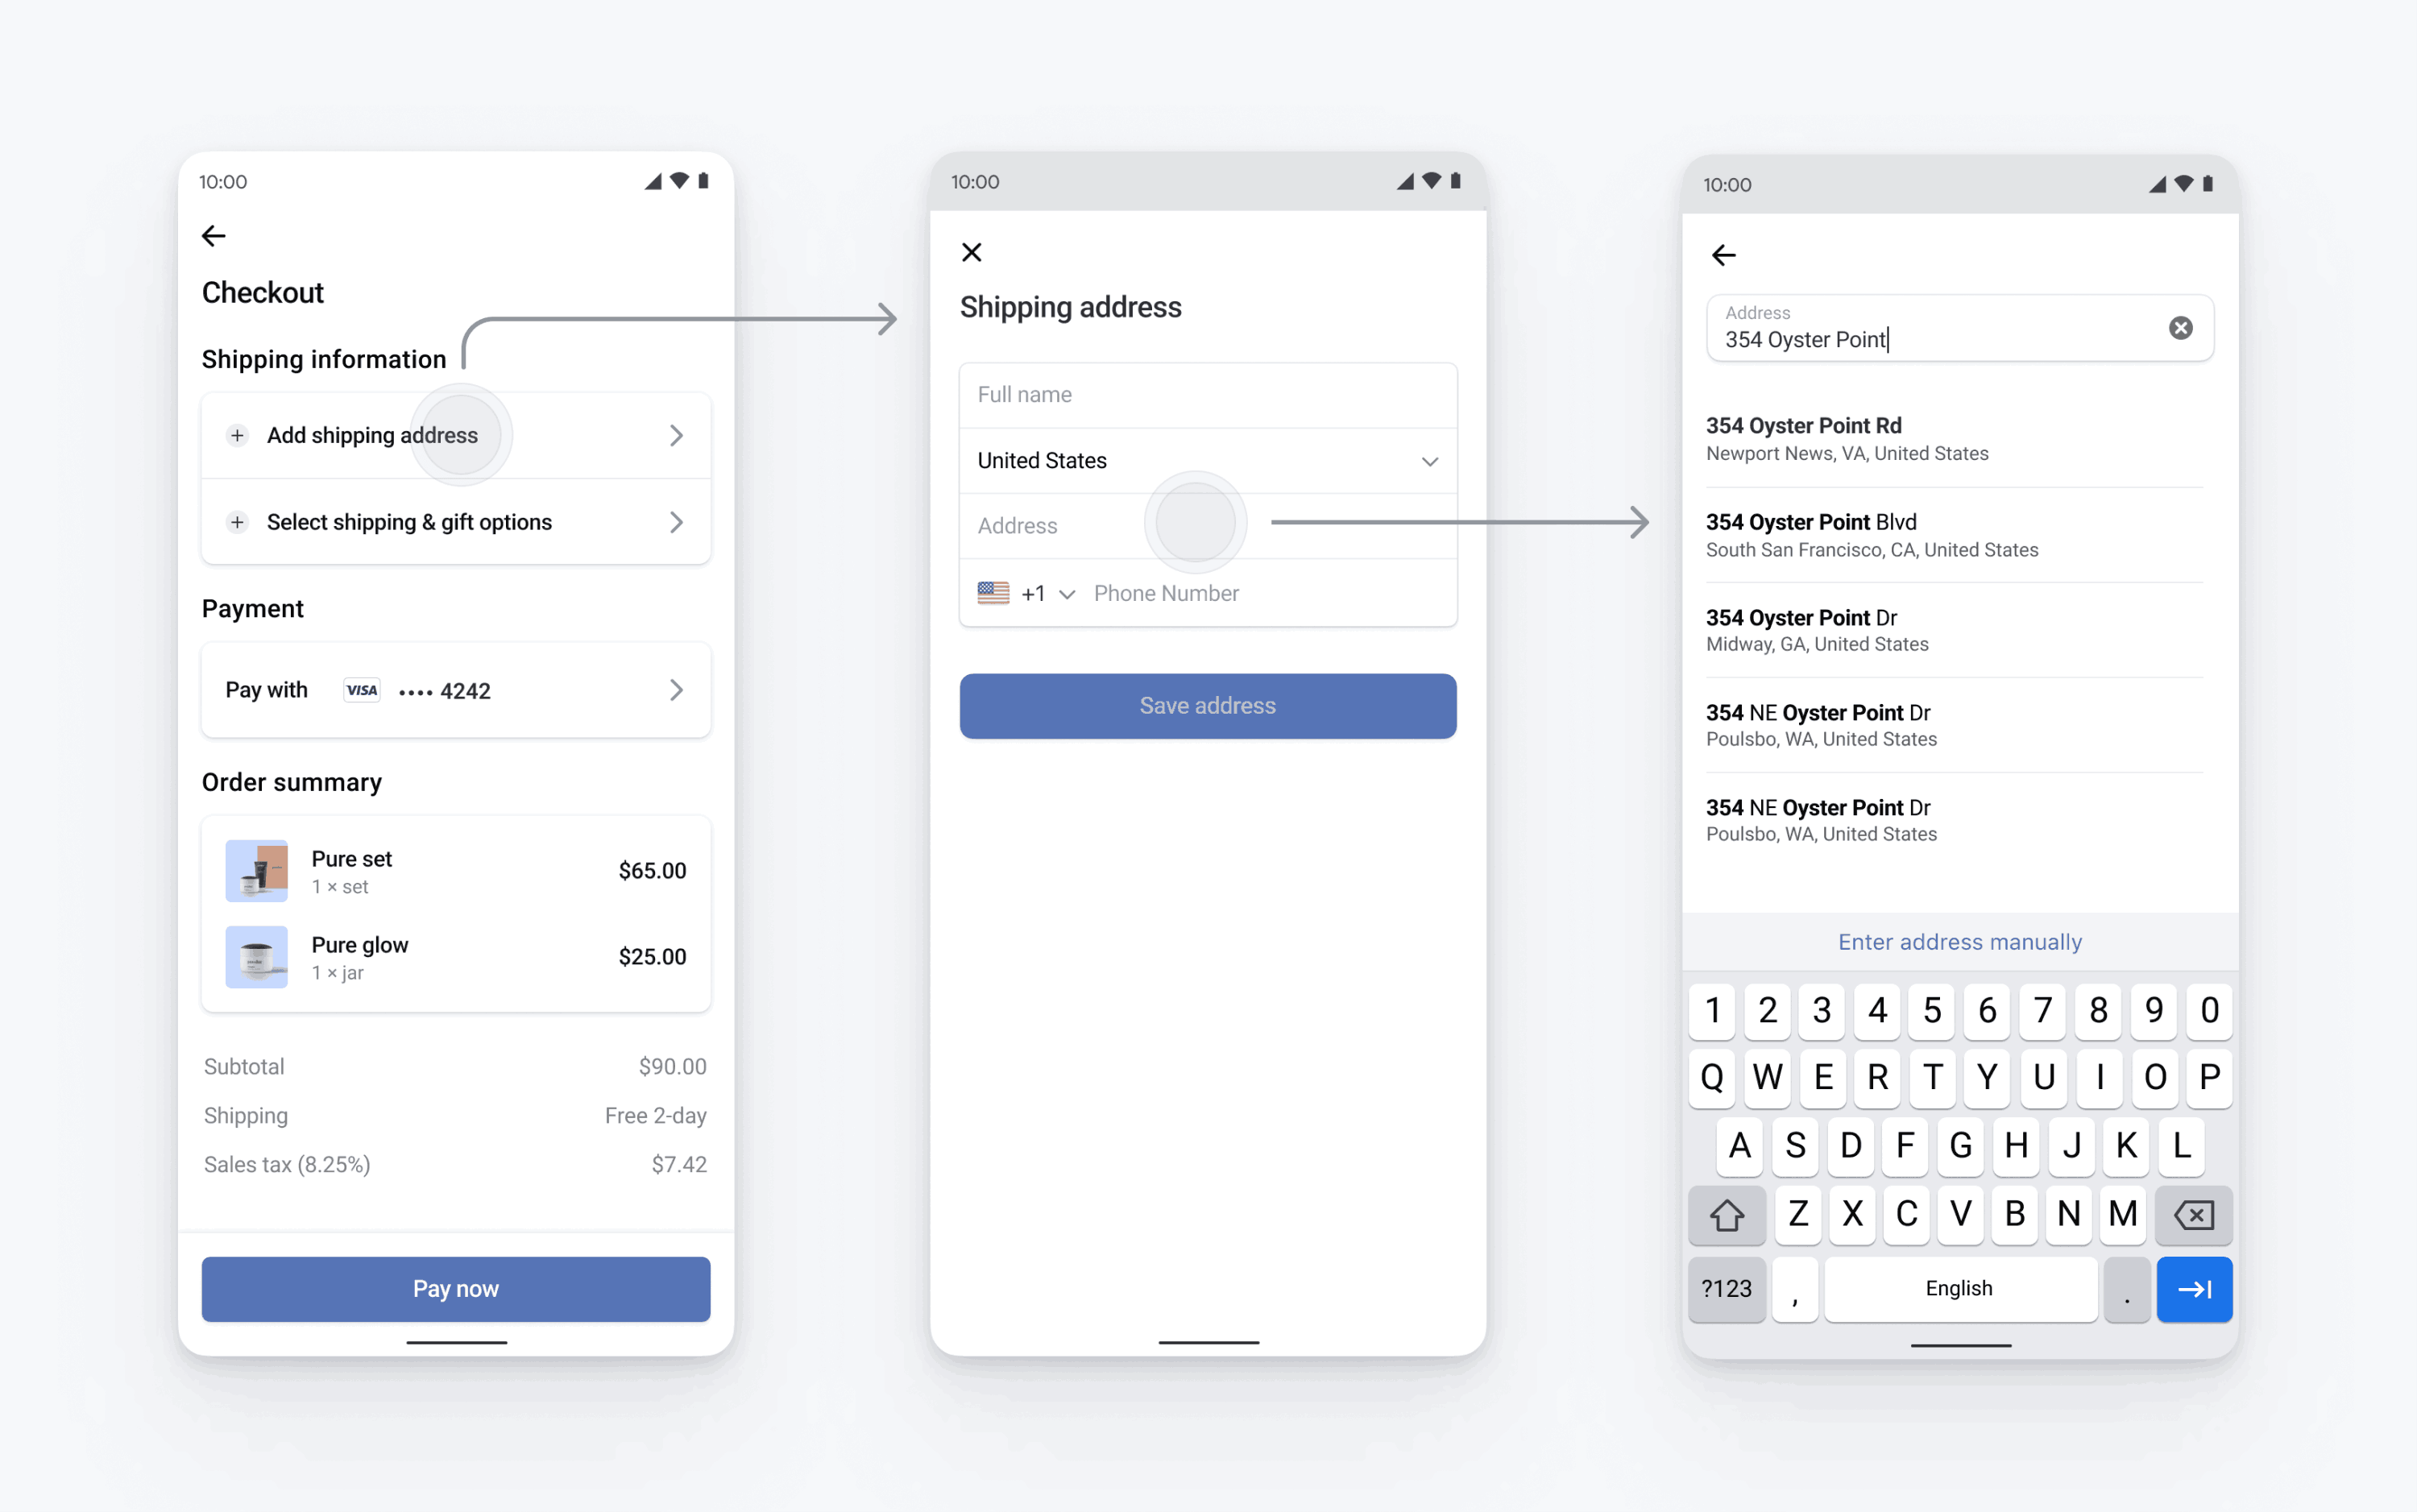
了解如何使用 Address Element 在移动端应用中收集客户地址和电话号码。
要收集完整的地址以进行计费或送货,请使用 Address Element。
还可以使用 Address Element 执行以下作:
Stripe 将收集的地址信息和支付方式合在一起来创建 PaymentIntent。

设置 Stripe服务器端客户端
首先,您需要有 Stripe 账户。立即注册。
Stripe Android SDK 是开源的,且有完整的文档。
安装 SDK 时,将 stripe-android 添加到您的 app/build.gradle 文件的 dependencies 块中:
用您的 Stripe 公钥配置 SDK,以便它可以向 Stripe API 发送请求,例如在您的 Application 子类中:
设置地址自动完成建议
Address Element 使用 Google Places SDK 来获取地址自动完成建议。要启用自动完成建议,您需要在应用的 build. 中包含 Google Places SDK 依赖项。
地址自动完成建议需要 Google Places API 密钥。请按照 Google Places SDK 设置指南生成您的 API 密钥。
配置 Address Element
可以使用显示默认值、设置允许的国家/地区、自定义外观等详细信息来配置 Address Element。有关配置选项的完整列表,请参阅 AddressLauncher.Configuration。
val addressConfiguration = AddressLauncher.Configuration(
  additionalFields: AddressLauncher.AdditionalFieldsConfiguration(
    phone: AdditionalFieldsConfiguration.FieldConfiguration.Required
  ),
  allowedCountries: setOf("US", "CA", "GB"),
  title: "Shipping Address",
  googlePlacesApiKey = "(optional) YOUR KEY HERE"
)
检索地址详情
通过在 Activity 或 Fragment 的 onCreate 生命周期方法中创建 AddressLauncher 实例,并创建实现 AddressLauncherResultCallback 接口的回调方法来检索地址详细信息。
private lateinit var addressLauncher: AddressLauncher
private var shippingDetails: AddressDetails? = null

override fun onCreate(savedInstanceState: Bundle?) {
    addressLauncher = AddressLauncher(this, ::onAddressLauncherResult)
}

private fun onAddressLauncherResult(result: AddressLauncherResult) {
    // TODO: Handle result and update your UI
    when (result) {
        is AddressLauncherResult.Succeeded -> {
            shippingDetails = result.address
        }
        is AddressLauncherResult.Canceled -> {
            // TODO: Handle cancel
        }
    }
}
AddressLauncherResult 可以是 Succeeded 或 Canceled。请参阅更多实现细节。
注意
Stripe 要求您在 onCreate 生命周期事件期间(而不是之后)实例化 AddressLauncher。否则,回调无法正确注册,您的应用将崩溃。
显示 Address Element
使用地址启动器和先前步骤中的配置来展示 Address Element。
addressLauncher.present(
   publishableKey = publishableKey,
   configuration = addressConfiguration
)
可选在 Payment Element 中预填充收货地址
如果使用移动端 Payment Element,请将PaymentSheet.Configuration.shippingDetails 设置为地址元素收集的地址。当 shippingDetails 被填入时,用户的账单地址会被预填,他们会看到一个账单地址与收货地址相同的复选框。当确认 PaymentIntent 时,已填充 shippingDetails 的已确认 PaymentIntents 也会填充 shipping intent 属性
val configuration = PaymentSheet.Configuration.Builder("Example, Inc.")
  // ...
  .shippingDetails(shippingDetails)
  .build()
可选自定义外观
您已向您的应用程序中添加了 Address Element,现在可以自定义它的外观,使其适合您的应用程序其他部分的设计了。您可以使用 AddressLauncher.Configuration.appearance 通过Appearance API 配置外观。
可选设置默认账单详情
要为支付表单中收集的账单详情设置默认值,请配置 defaultBillingDetails 属性。paymentSheet 会用您提供的值预先填充其字段。
可选自定义账单地址信息的收集
配置账单详情的收集
使用 BillingDetailsCollectionConfiguration 指定您希望如何在 PaymentSheet 中收集账单详情。
可以收集客户的姓名、邮件地址、电话号码和地址。
如果希望将默认账单详情关联到 PaymentMethod 对象(即使 UI 中未收集这些字段),请将 billingDetailsCollectionConfiguration. 设置为 true。
注意
请咨询律师,了解与收集信息有关的法律。仅在需要收集号码来完成交易时,才收集手机号码。