Raccogliere gli indirizzi fisici e i numeri di telefono
Scopri come raccogliere gli indirizzi e i numeri di telefono dei clienti nella tua applicazione mobile con Address Element.
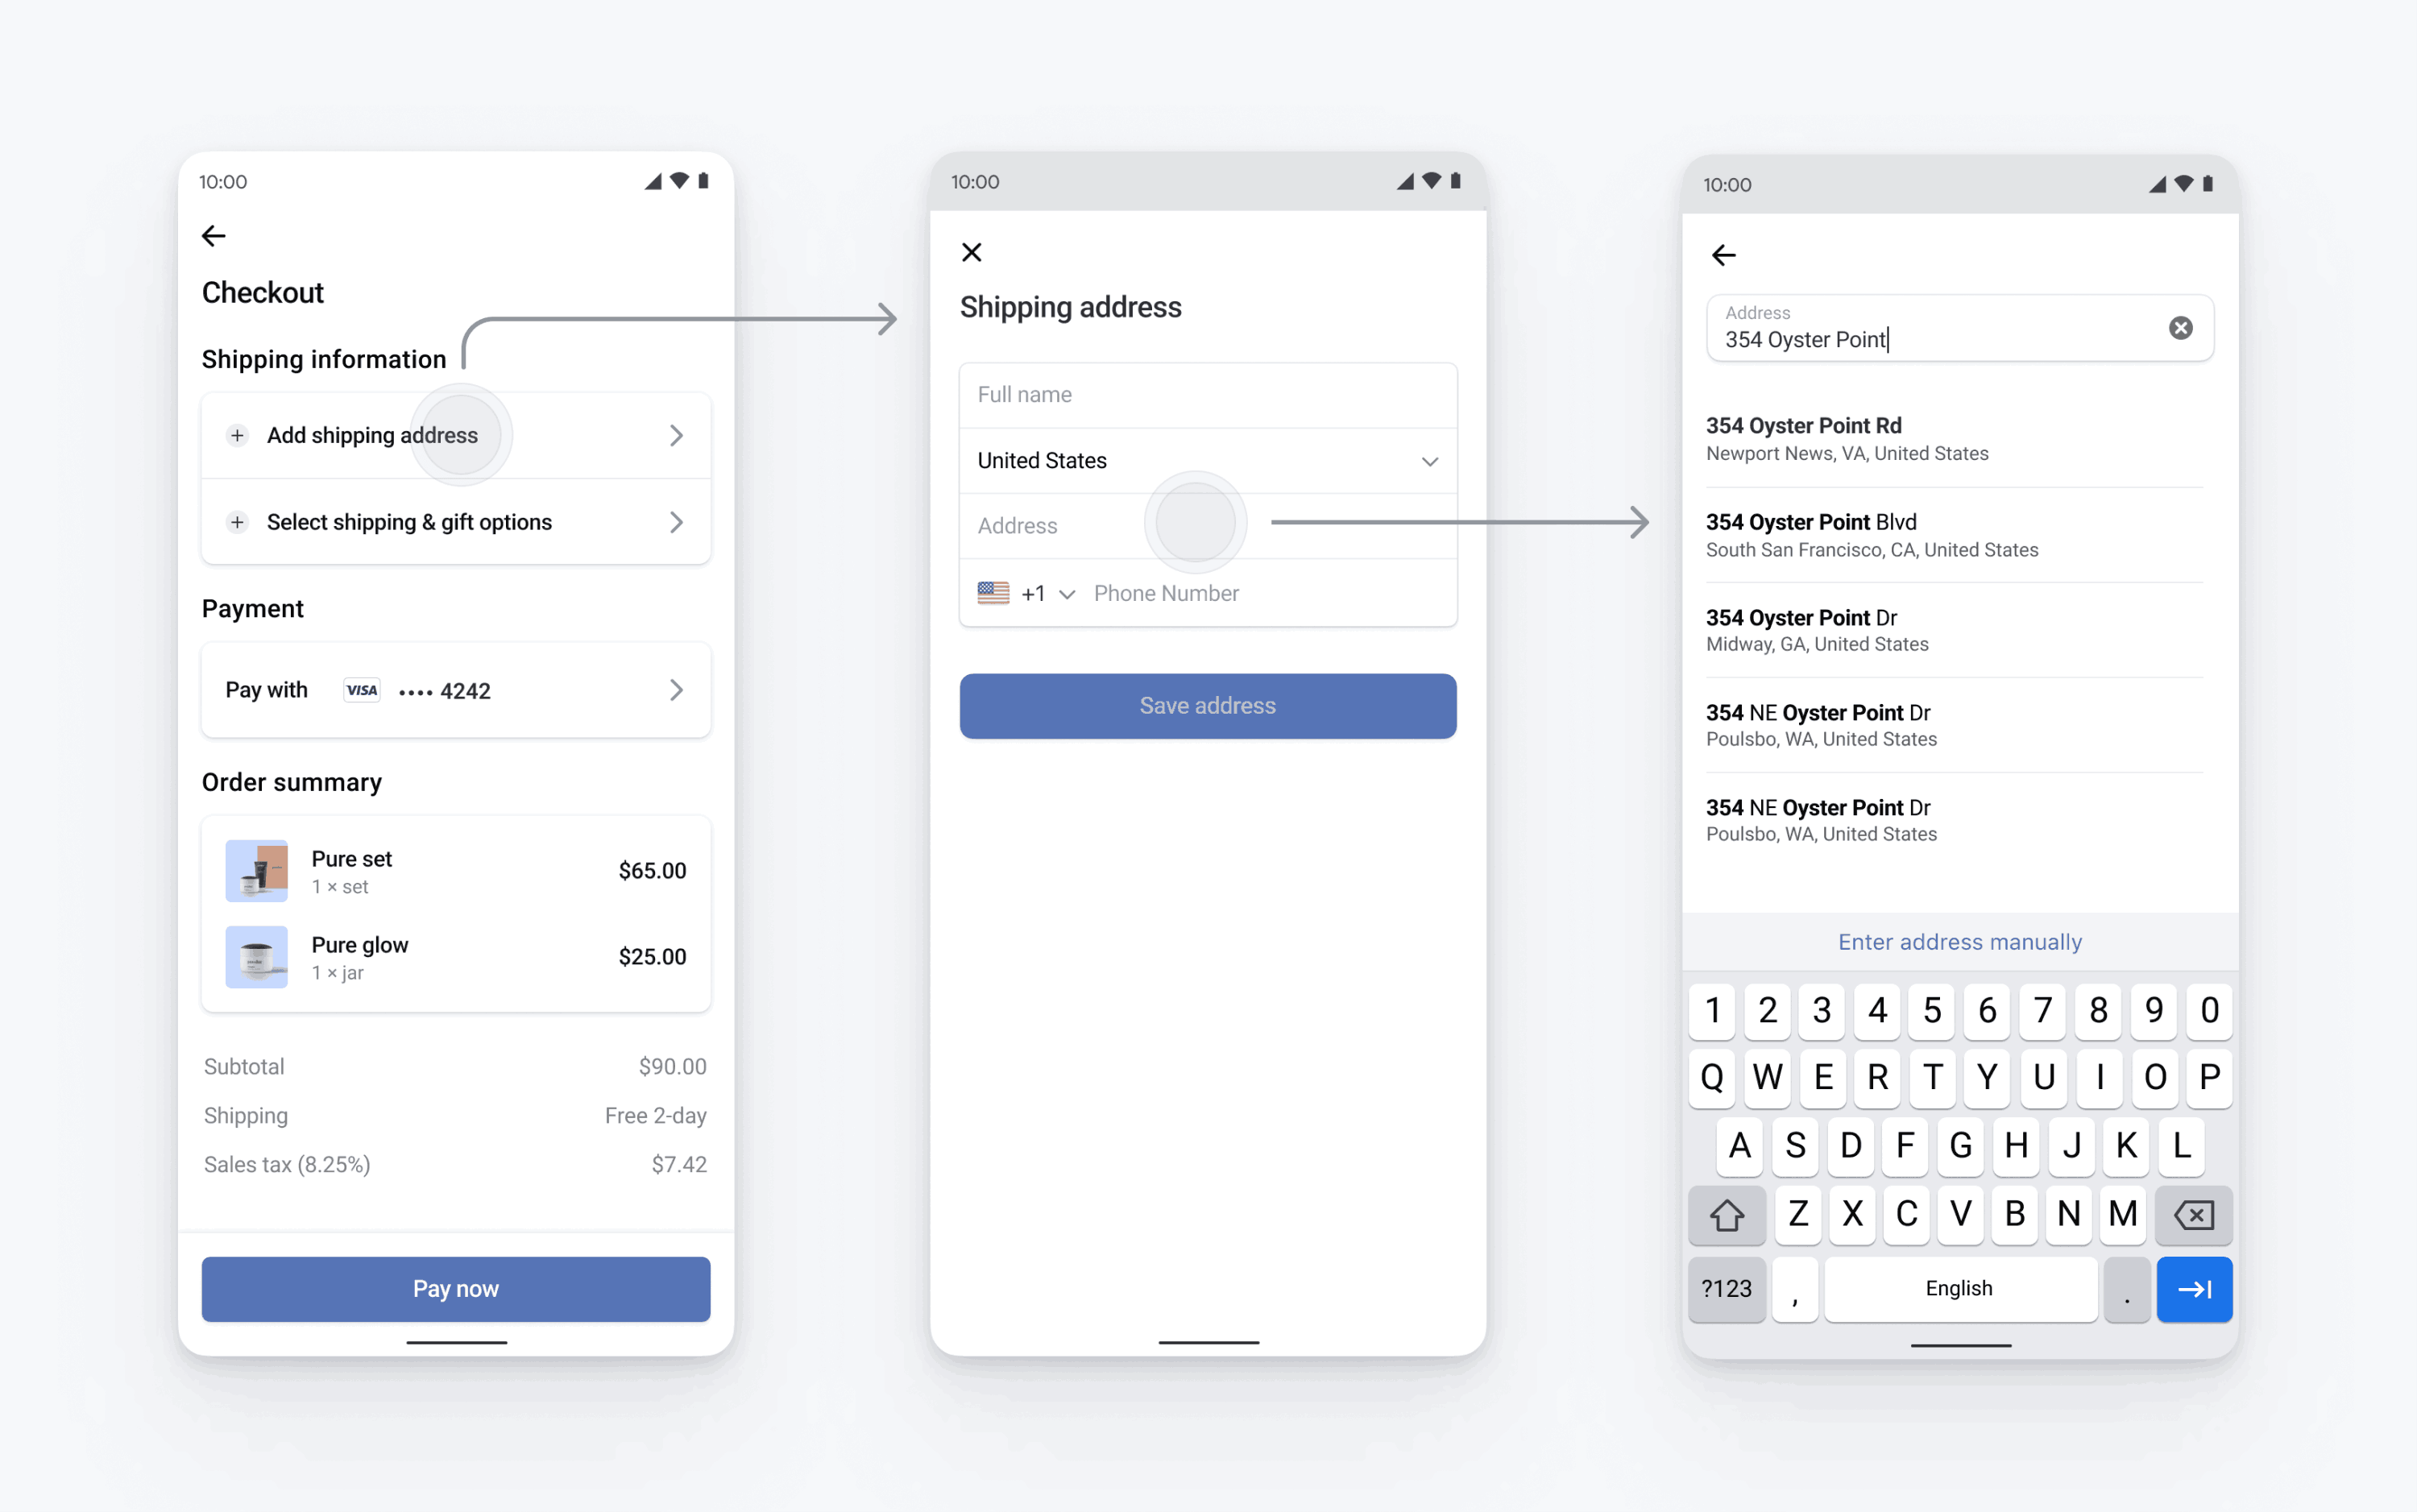
Per raccogliere indirizzi completi per la fatturazione o la spedizione, utilizzare Address Element.
Puoi utilizzare Address Element anche per:
- Raccogliere i numeri di telefono dei clienti
- Abilitare il completamento automatico
- Precompilare i dati di fatturazione in Payment Element specificando un indirizzo di spedizione
Stripe combina le informazioni raccolte sull’indirizzo e sul metodo di pagamento per creare un PaymentIntent.
Configura StripeLato serverLato client
Innanzitutto, devi creare un account Stripe. Registrati ora.
L’SDK per Android di Stripe è open source e completamente documentato.
Per installare l’SDK, aggiungi stripe-android al blocco dependencies del tuo file app/build.gradle:
Nota
Per ulteriori informazioni sulla versione più recente e su quelle precedenti dell’SDK, consulta la pagina Releases su GitHub. Per ricevere una notifica quando viene pubblicata una nuova versione, imposta il controllo delle versioni per il repository.
Configura l’SDK con la tua chiave pubblicabile di Stripe in modo che possa inviare le richieste all’API Stripe, ad esempio nella sottoclasse Application:
Nota
Usa le chiavi di test durante i test e le chiavi della modalità live quando pubblichi l’app.
Impostare i suggerimenti di completamento automatico dell'indirizzo
Address Element utilizza Google Places SDK per recuperare i suggerimenti di completamento automatico dell’indirizzo. Per abilitare i suggerimenti di completamento automatico, devi includere la dipendenza di Google Places SDK nel file build. dell’app.
I suggerimenti di completamento automatico dell’indirizzo richiedono una chiave API Google Places. Segui la guida alla configurazione di Google Places SDK per generare la tua chiave API.
Configurare Address Element
Puoi configurare Address Element con informazioni quali la visualizzazione dei valori predefiniti, l’impostazione dei Paesi consentiti, la personalizzazione dell’aspetto e così via. Per l’elenco completo delle opzioni di configurazione, fai riferimento a AddressLauncher.Configuration.
val addressConfiguration = AddressLauncher.Configuration(
  additionalFields: AddressLauncher.AdditionalFieldsConfiguration(
    phone: AdditionalFieldsConfiguration.FieldConfiguration.Required
  ),
  allowedCountries: setOf("US", "CA", "GB"),
  title: "Shipping Address",
  googlePlacesApiKey = "(optional) YOUR KEY HERE"
)
Recuperare i dati relativi all'indirizzo
Recupera i dettagli dell’indirizzo creando un’istanza di AddressLauncher nel metodo del ciclo di vita onCreate di Activity o Fragment e creando un metodo di callback che implementi l’interfaccia AddressLauncherResultCallback.
private lateinit var addressLauncher: AddressLauncher
private var shippingDetails: AddressDetails? = null

override fun onCreate(savedInstanceState: Bundle?) {
    addressLauncher = AddressLauncher(this, ::onAddressLauncherResult)
}

private fun onAddressLauncherResult(result: AddressLauncherResult) {
    // TODO: Handle result and update your UI
    when (result) {
        is AddressLauncherResult.Succeeded -> {
            shippingDetails = result.address
        }
        is AddressLauncherResult.Canceled -> {
            // TODO: Handle cancel
        }
    }
}
Lo stato del parametro AddressLauncherResult può essere Succeeded or Canceled. Scopri di più sui dettagli dell’implementazione.
Nota
Stripe richiede di creare un’istanza di AddressLauncher durante l’evento del ciclo di vita onCreate e non dopo. In caso contrario, il callback non potrà essere registrato correttamente e l’app si arresterà in modo anomalo.
Presentare Address Element
Presenta l’Address Element utilizzando l’utilità di avvio degli indirizzi e la configurazione dei passaggi precedenti.
addressLauncher.present(
   publishableKey = publishableKey,
   configuration = addressConfiguration
)
FacoltativoPrecompilare gli indirizzi di spedizione in Payment Element
Se utilizzi Payment Element su dispositivo mobile, imposta PaymentSheet.Configuration.shippingDetails sull’indirizzo raccolto dall’elemento indirizzo. Quando shippingDetails è compilato, l’indirizzo di fatturazione viene pre-compilato per gli utenti e vedono una casella di controllo L’indirizzo di fatturazione è lo stesso dell’indirizzo di spedizione. I PaymentIntents confermati con shippingDetails compilato hanno anche la proprietà shipping intent compilata quando il PaymentIntent è confermato
val configuration = PaymentSheet.Configuration.Builder("Example, Inc.")
  // ...
  .shippingDetails(shippingDetails)
  .build()
FacoltativoPersonalizza l'aspetto
Now that you’ve added the Address Element to your app, you can customize the appearance to fit with the design of the rest of your app. You can configure the appearance with the Appearance API using AddressLauncher.Configuration.appearance.
FacoltativoImpostare i dati di fatturazione predefiniti
Per impostare i valori predefiniti per i dettagli di addebito raccolti nella scheda di pagamento, configura la proprietà defaultBillingDetails. PaymentSheet precompila i campi della scheda con i valori che fornisci.
FacoltativoPersonalizzare la raccolta dei dati per gli addebiti
Configura la raccolta dei dati di fatturazione
Utilizza BillingDetailsCollectionConfiguration per specificare la modalità di raccolta dei dati di fatturazione nel PaymentSheet.
Puoi acquisire il nome, l’indirizzo email, il numero di telefono e l’indirizzo del cliente.
Se vuoi associare i dati di fatturazione predefiniti all’oggetto PaymentMethod anche quando tali campi non sono raccolti nell’interfaccia utente, imposta billingDetailsCollectionConfiguration. su true.
Nota
Rivolgiti al tuo consulente legale per sapere quali sono le leggi applicabili alla raccolta di informazioni. Richiedi i numeri di telefono solo se necessari per la transazione.