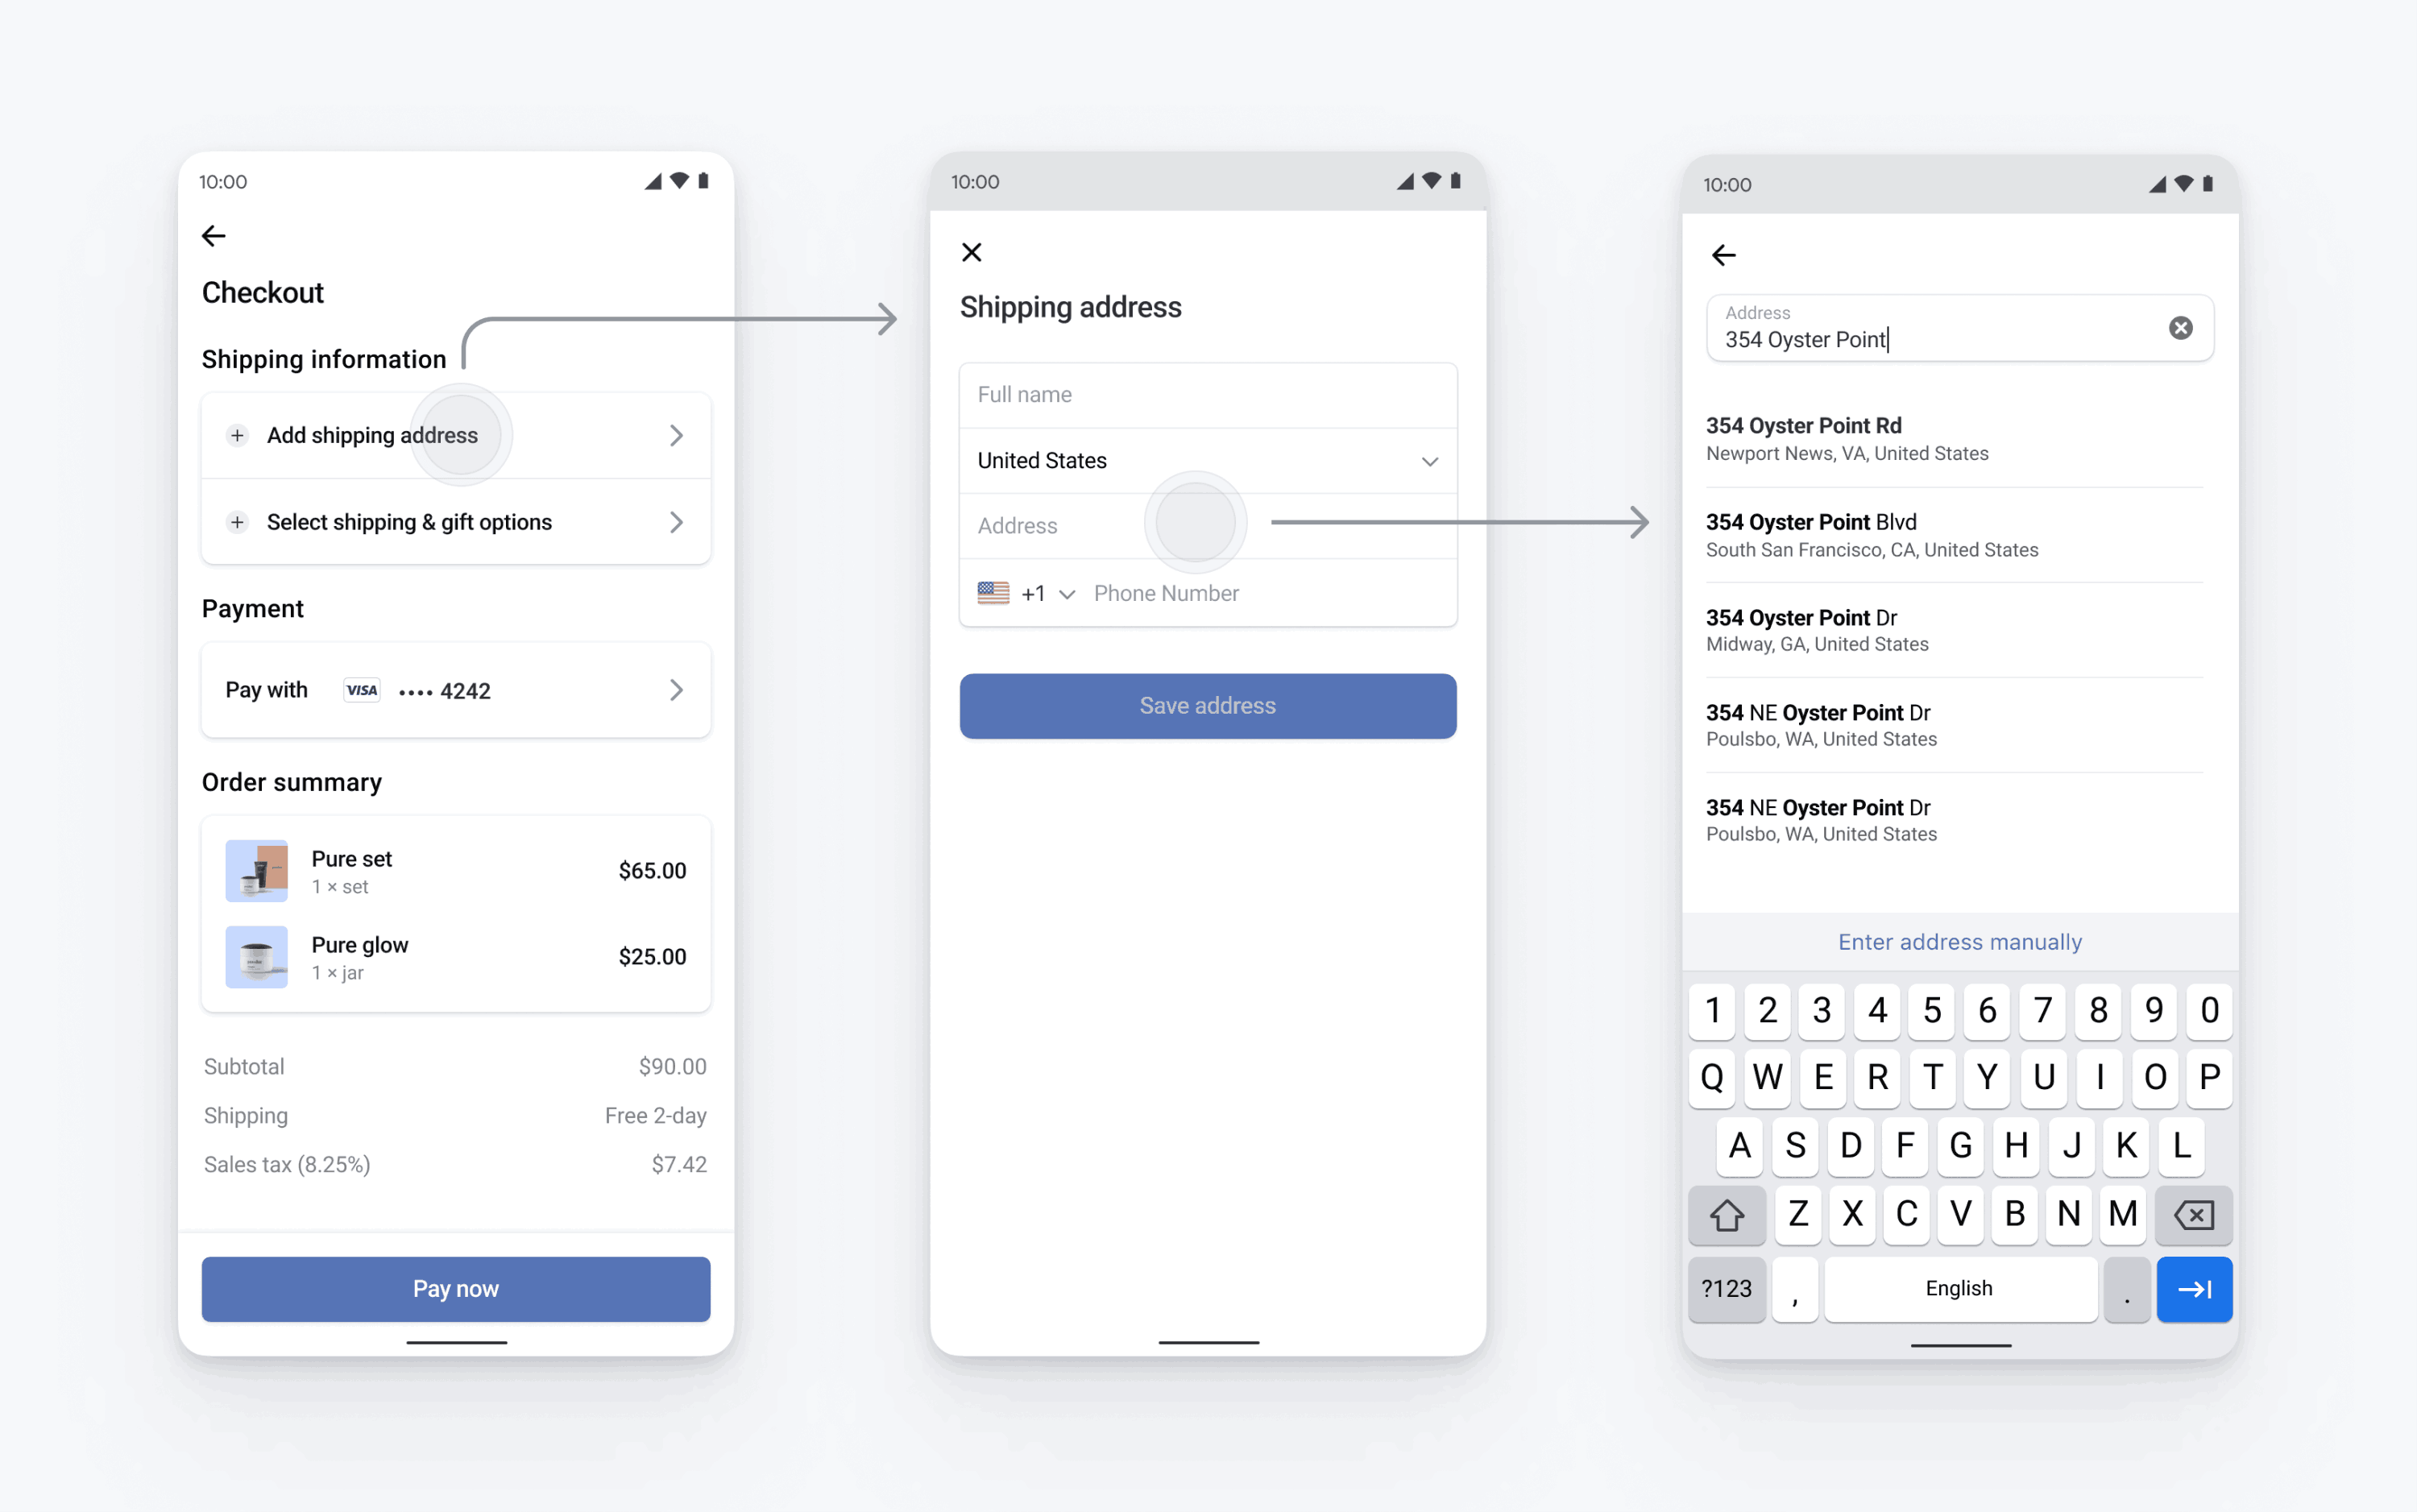
Recopila las direcciones físicas y los números de teléfono
Descubre cómo recopilar las direcciones y los números de teléfono de los clientes en tu aplicación móvil con el Address Element.
Para cobrar direcciones completas para facturaciones o envíos, usa el Address Element en SwiftUI.
También puedes usar el Address Element para:
- Recopila los números de teléfono de los clientes
- Habilita la función de autocompletar
- Rellena automáticamente los datos de facturación en el Payment Element introduciendo una dirección de envío
Stripe combina la información recopilada sobre la dirección y el método de pago para crear un PaymentIntent.

Configura StripeLado del servidorLado del cliente
Primero, necesitas una cuenta de Stripe. Regístrate ahora.
El SDK para Android de Stripe es de código abierto y está completamente documentado.
Para instalar el SDK, añade stripe-android al bloque dependencies de tu archivo app/build.gradle:
Nota
Para conocer detalles de la última versión y de versiones anteriores del SDK, consulta la página Versiones de GitHub. Para recibir una notificación cuando se publique una nueva versión, mira las versiones del repositorio.
Configura el SDK con tu clave publicable de Stripe para que pueda hacer solicitudes a la API de Stripe, así como en tu subclase Application:
Nota
Usa las claves de prueba durante las pruebas y las tareas de desarrollo, y las claves del modo activo cuando publiques tu aplicación.
Configura sugerencias para autocompletar la dirección
El elemento dirección utiliza el SDK de Google Places para obtener sugerencias de autocompletado de direcciones. Para habilitar las sugerencias de autocompletado, debes incluir la dependencia del SDK de Google Places en el archivo build. de tu aplicación.
Las sugerencias para autocompletar direcciones requieren una clave API de Google Places. Sigue la guía de configuración del SDK de Google Places para generar tu clave API.
Configura el Address Element
Puedes configurar el Address Element con detalles como la visualización de los valores predeterminados, la configuración de los países permitidos, la personalización de la apariencia, etc. Consulta AddressLauncher.Configuration para obtener la lista completa de opciones de configuración.
val addressConfiguration = AddressLauncher.Configuration(
  additionalFields: AddressLauncher.AdditionalFieldsConfiguration(
    phone: AdditionalFieldsConfiguration.FieldConfiguration.Required
  ),
  allowedCountries: setOf("US", "CA", "GB"),
  title: "Shipping Address",
  googlePlacesApiKey = "(optional) YOUR KEY HERE"
)
Recupera los datos de la dirección
Recupera los datos de la dirección creando una instancia de AddressLauncher en el método de ciclo de vida onCreate de tu Activity o Fragment y creando un método de devolución de llamada que implemente la interfaz AddressLauncherResultCallback.
private lateinit var addressLauncher: AddressLauncher
private var shippingDetails: AddressDetails? = null

override fun onCreate(savedInstanceState: Bundle?) {
    addressLauncher = AddressLauncher(this, ::onAddressLauncherResult)
}

private fun onAddressLauncherResult(result: AddressLauncherResult) {
    // TODO: Handle result and update your UI
    when (result) {
        is AddressLauncherResult.Succeeded -> {
            shippingDetails = result.address
        }
        is AddressLauncherResult.Canceled -> {
            // TODO: Handle cancel
        }
    }
}
El AddressLauncherResult puede ser Succeeded o Canceled. Consulta más detalles de implementación.
Nota
Stripe requiere que crees una instancia del AddressLauncher durante el evento del ciclo de vida onCreate y no después. De lo contrario, la devolución de llamada no se puede registrar correctamente y la aplicación se bloqueará.
Presenta el Address Element
Presenta el Address Element con el lanzador de direcciones y la configuración de los pasos anteriores.
addressLauncher.present(
   publishableKey = publishableKey,
   configuration = addressConfiguration
)
OpcionalRellena automáticamente las direcciones de envío en el Payment Element
Si usas el Payment Element en el móvil, indica los PaymentSheet.Configuration.shippingDetails en la dirección del elemento dirección. Cuando se cubren los shippingDetails, se indica previamente la dirección de facturación de los usuarios y se ve una casilla de verificación La dirección de facturación es la misma que la de envío. Los pagos confirmados con los shippingDetails cubiertos también tienen la propiedad intento de envío cubierta cuando se confirma el PaymentIntent
val configuration = PaymentSheet.Configuration.Builder("Example, Inc.")
  // ...
  .shippingDetails(shippingDetails)
  .build()
OpcionalPersonaliza el diseño
Ahora que has añadido el Address Element a tu aplicación, puedes personalizar la apariencia para que se ajuste al diseño del resto de tu aplicación. Puedes configurar la apariencia con la API Appearance usando AddressLauncher.Configuration.appearance.
OpcionalEstablece datos de facturación predeterminados
Para establecer los valores predeterminados para los datos de facturación recopilados en la hoja de pago, configura la propiedad defaultBillingDetails. Los campos de la PaymentSheet se rellenan automáticamente con los valores que proporcionas.
OpcionalPersonalizar la recopilación de datos de facturación
Configura la recopilación de los datos de facturación
Utiliza BillingDetailsCollectionConfiguration para especificar cómo quieres recoger los detalles de facturación en el PaymentSheet.
Puedes recopilar el nombre, el correo electrónico, el número de teléfono y la dirección del cliente.
Si quieres adjuntar datos de facturación predeterminados al objeto PaymentMethod aun cuando esos campos no se recopilen en la interfaz de usuario, establece billingDetailsCollectionConfiguration. en true.
Nota
Consulta a tu asesor legal sobre las leyes que se aplican a la recopilación de información. Recopila los números de teléfono solo si los necesitas para la transacción.