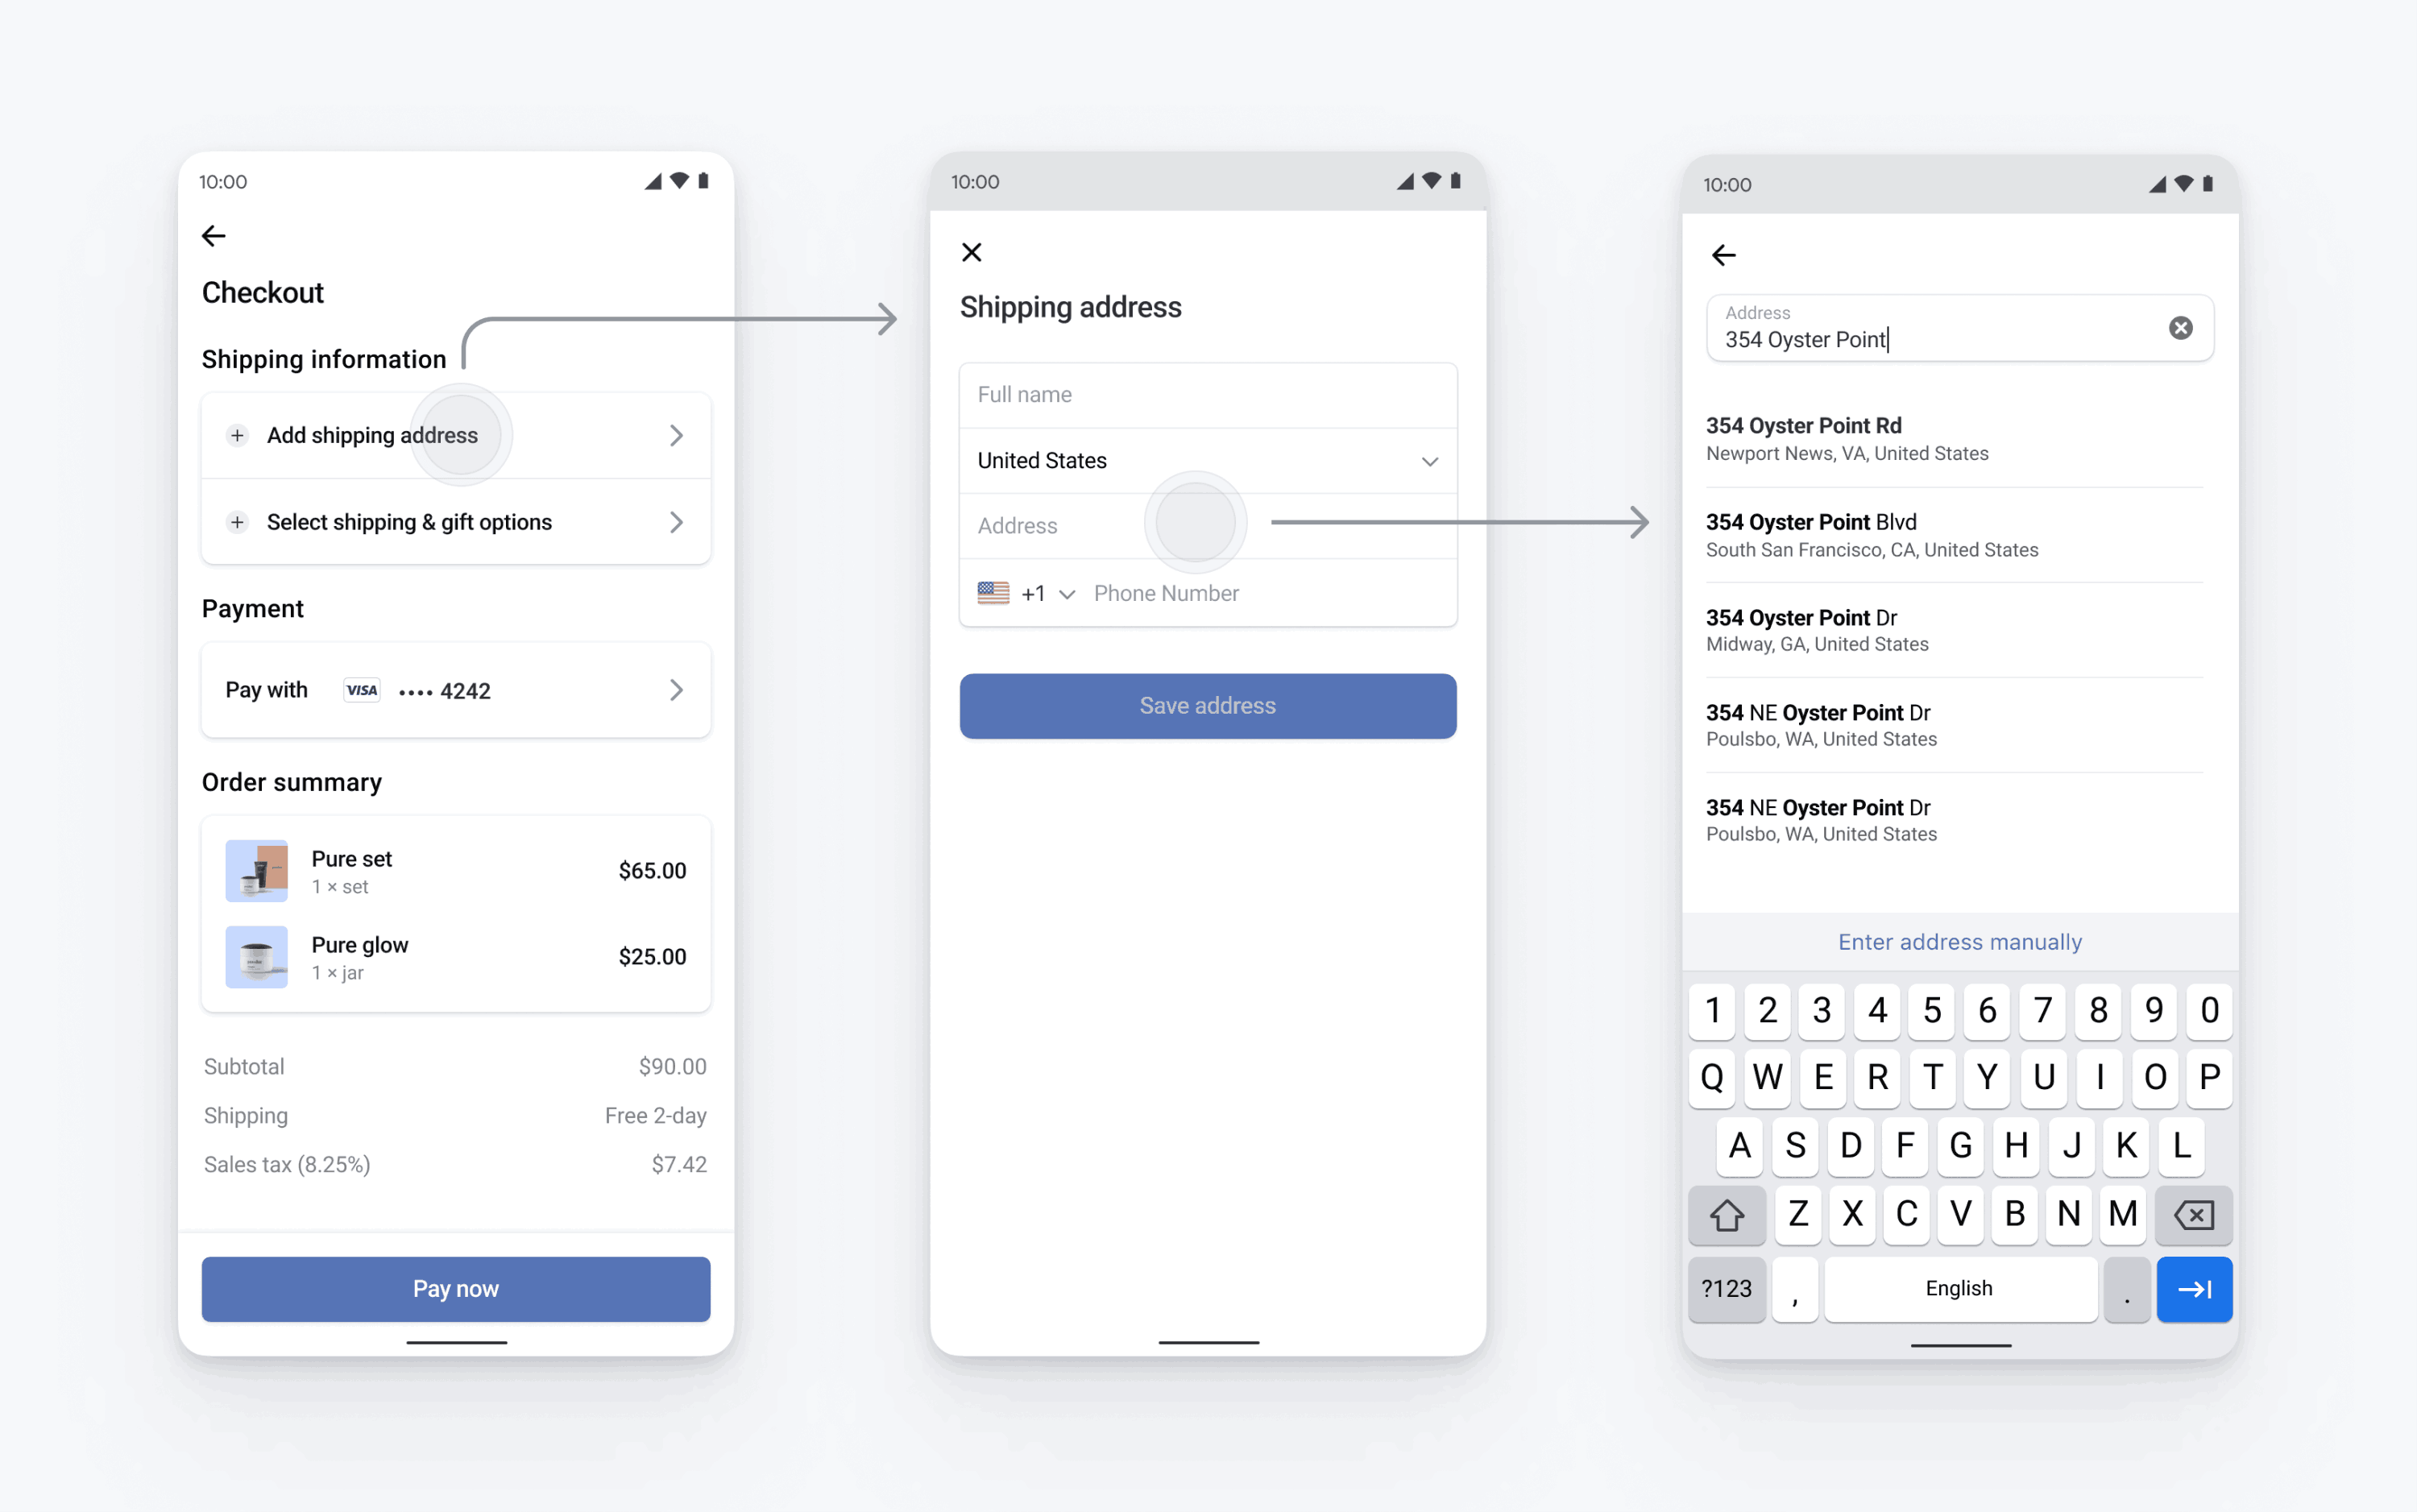
Collect physical addresses and phone numbers
Learn how to collect customer addresses and phone numbers in your mobile app with the Address Element.
To collect complete addresses for billing or shipping, use the Address Element.
You can also use the Address Element to:
- Collect customer phone numbers
- Enable autocomplete
- Prefill billing information in the Payment Element by passing in a shipping address
Stripe combines the collected address information and the payment method to create a PaymentIntent.

Set up StripeServer-sideClient-side
First, you need a Stripe account. Register now.
The Stripe Android SDK is open source and fully documented.
To install the SDK, add stripe-android to the dependencies block of your app/build.gradle file:
Note
For details on the latest SDK release and past versions, see the Releases page on GitHub. To receive notifications when a new release is published, watch releases for the repository.
Configure the SDK with your Stripe publishable key so that it can make requests to the Stripe API, such as in your Application subclass:
Set up address autocomplete suggestions
The address element uses the Google Places SDK to fetch address autocomplete suggestions. To enable autocomplete suggestions, you need to include the Google Places SDK dependency to your app’s build..
Address autocomplete suggestions requires a Google Places API key. Follow the Google Places SDK setup guide to generate your API key.
Configure the Address Element
You can configure the Address Element with details such as displaying default values, setting allowed countries, customising the appearance, and so on. Refer to AddressLauncher.Configuration for the complete list of configuration options.
val addressConfiguration = AddressLauncher.Configuration(
  additionalFields: AddressLauncher.AdditionalFieldsConfiguration(
    phone: AdditionalFieldsConfiguration.FieldConfiguration.Required
  ),
  allowedCountries: setOf("US", "CA", "GB"),
  title: "Shipping Address",
  googlePlacesApiKey = "(optional) YOUR KEY HERE"
)
Retrieve address details
Retrieve the address details by creating an instance of AddressLauncher in the onCreate lifecycle method of your Activity or Fragment and creating a callback method that implements the AddressLauncherResultCallback interface.
private lateinit var addressLauncher: AddressLauncher
private var shippingDetails: AddressDetails? = null

override fun onCreate(savedInstanceState: Bundle?) {
    addressLauncher = AddressLauncher(this, ::onAddressLauncherResult)
}

private fun onAddressLauncherResult(result: AddressLauncherResult) {
    // TODO: Handle result and update your UI
    when (result) {
        is AddressLauncherResult.Succeeded -> {
            shippingDetails = result.address
        }
        is AddressLauncherResult.Canceled -> {
            // TODO: Handle cancel
        }
    }
}
The AddressLauncherResult can be Succeeded or Canceled. See more implementation details.
Note
Stripe requires that you instantiate the AddressLauncher during the onCreate lifecycle event and not after. Otherwise, the callback can’t be registered properly, and your app will crash.
Present the Address Element
Present the address element using the address launcher and configuration from the previous steps.
addressLauncher.present(
   publishableKey = publishableKey,
   configuration = addressConfiguration
)
OptionalPre-fill shipping addresses in the Payment Element
If you use the mobile Payment Element, set PaymentSheet.Configuration.shippingDetails to the address collected by the address element. When shippingDetails is populated, users have their billing address prefilled and they see a Billing address is the same as shipping tick box. Confirmed PaymentIntents with shippingDetails populated also have the shipping intent property populated when the PaymentIntent is confirmed
val configuration = PaymentSheet.Configuration.Builder("Example, Inc.")
  // ...
  .shippingDetails(shippingDetails)
  .build()
OptionalCustomise the appearance
Now that you’ve added the Address Element to your app, you can customise the appearance to fit with the design of the rest of your app. You can configure the appearance with the Appearance API using AddressLauncher.Configuration.appearance.
OptionalSet default billing details
To set default values for billing details collected in the payment sheet, configure the defaultBillingDetails property. The PaymentSheet pre-populates its fields with the values that you provide.
OptionalCustomise billing details collection
Configure collection of billing details
Use BillingDetailsCollectionConfiguration to specify how you want to collect billing details in the PaymentSheet.
You can collect your customer’s name, email, phone number, and address.
If you want to attach default billing details to the PaymentMethod object even when those fields aren’t collected in the UI, set billingDetailsCollectionConfiguration. to true.
Note
Consult with your legal counsel regarding laws that apply to collecting information. Only collect phone numbers if you need them for the transaction.