コンテンツにスキップ
アカウントを作成
または
サインイン
Stripe ドキュメントのロゴ
/
AI に質問する
アカウントを作成
サインイン
始める
支払い
売上
プラットフォームおよびマーケットプレイス
資金管理
開発者向けのツール
概要
Stripe Payments について
構築済みのシステムをアップグレード
支払いの分析
オンライン決済
概要ユースケースを見つけるManaged Payments
Payment Links を使用する
決済ページを構築
高度なシステムを構築
アプリ内実装を構築
    概要
    Payment Sheet
      アプリ内での決済を受け付け
      カスタムの支払い方法を追加する
      デザインをカスタマイズする
      サーバーで支払いを確定する
      支払い中に支払い詳細を保存する
      将来の支払いを設定する
      カードブランドを絞り込む
    Embedded Payment Element
    アプリ内購入のリンク
    住所を収集
    アメリカとカナダのカード
決済手段
決済手段を追加
決済手段を管理
Link による購入の迅速化
支払いインターフェイス
Payment Links
Checkout
Web Elements
アプリ内 Elements
決済シナリオ
カスタムの決済フロー
柔軟なアクワイアリング
オーケストレーション
店頭支払い
端末
他の Stripe プロダクト
Financial Connections
仮想通貨
Climate
ホーム支払いBuild an in-app integrationPayment Sheet

注

このページはまだ日本語ではご利用いただけません。より多くの言語で文書が閲覧できるように現在取り組んでいます。準備が整い次第、翻訳版を提供いたしますので、もう少しお待ちください。

アプリ内決済を受け付ける

Payment Sheet を使用して、iOS、Android、または React Native アプリにカスタムの決済システムを構築します。

ページをコピー

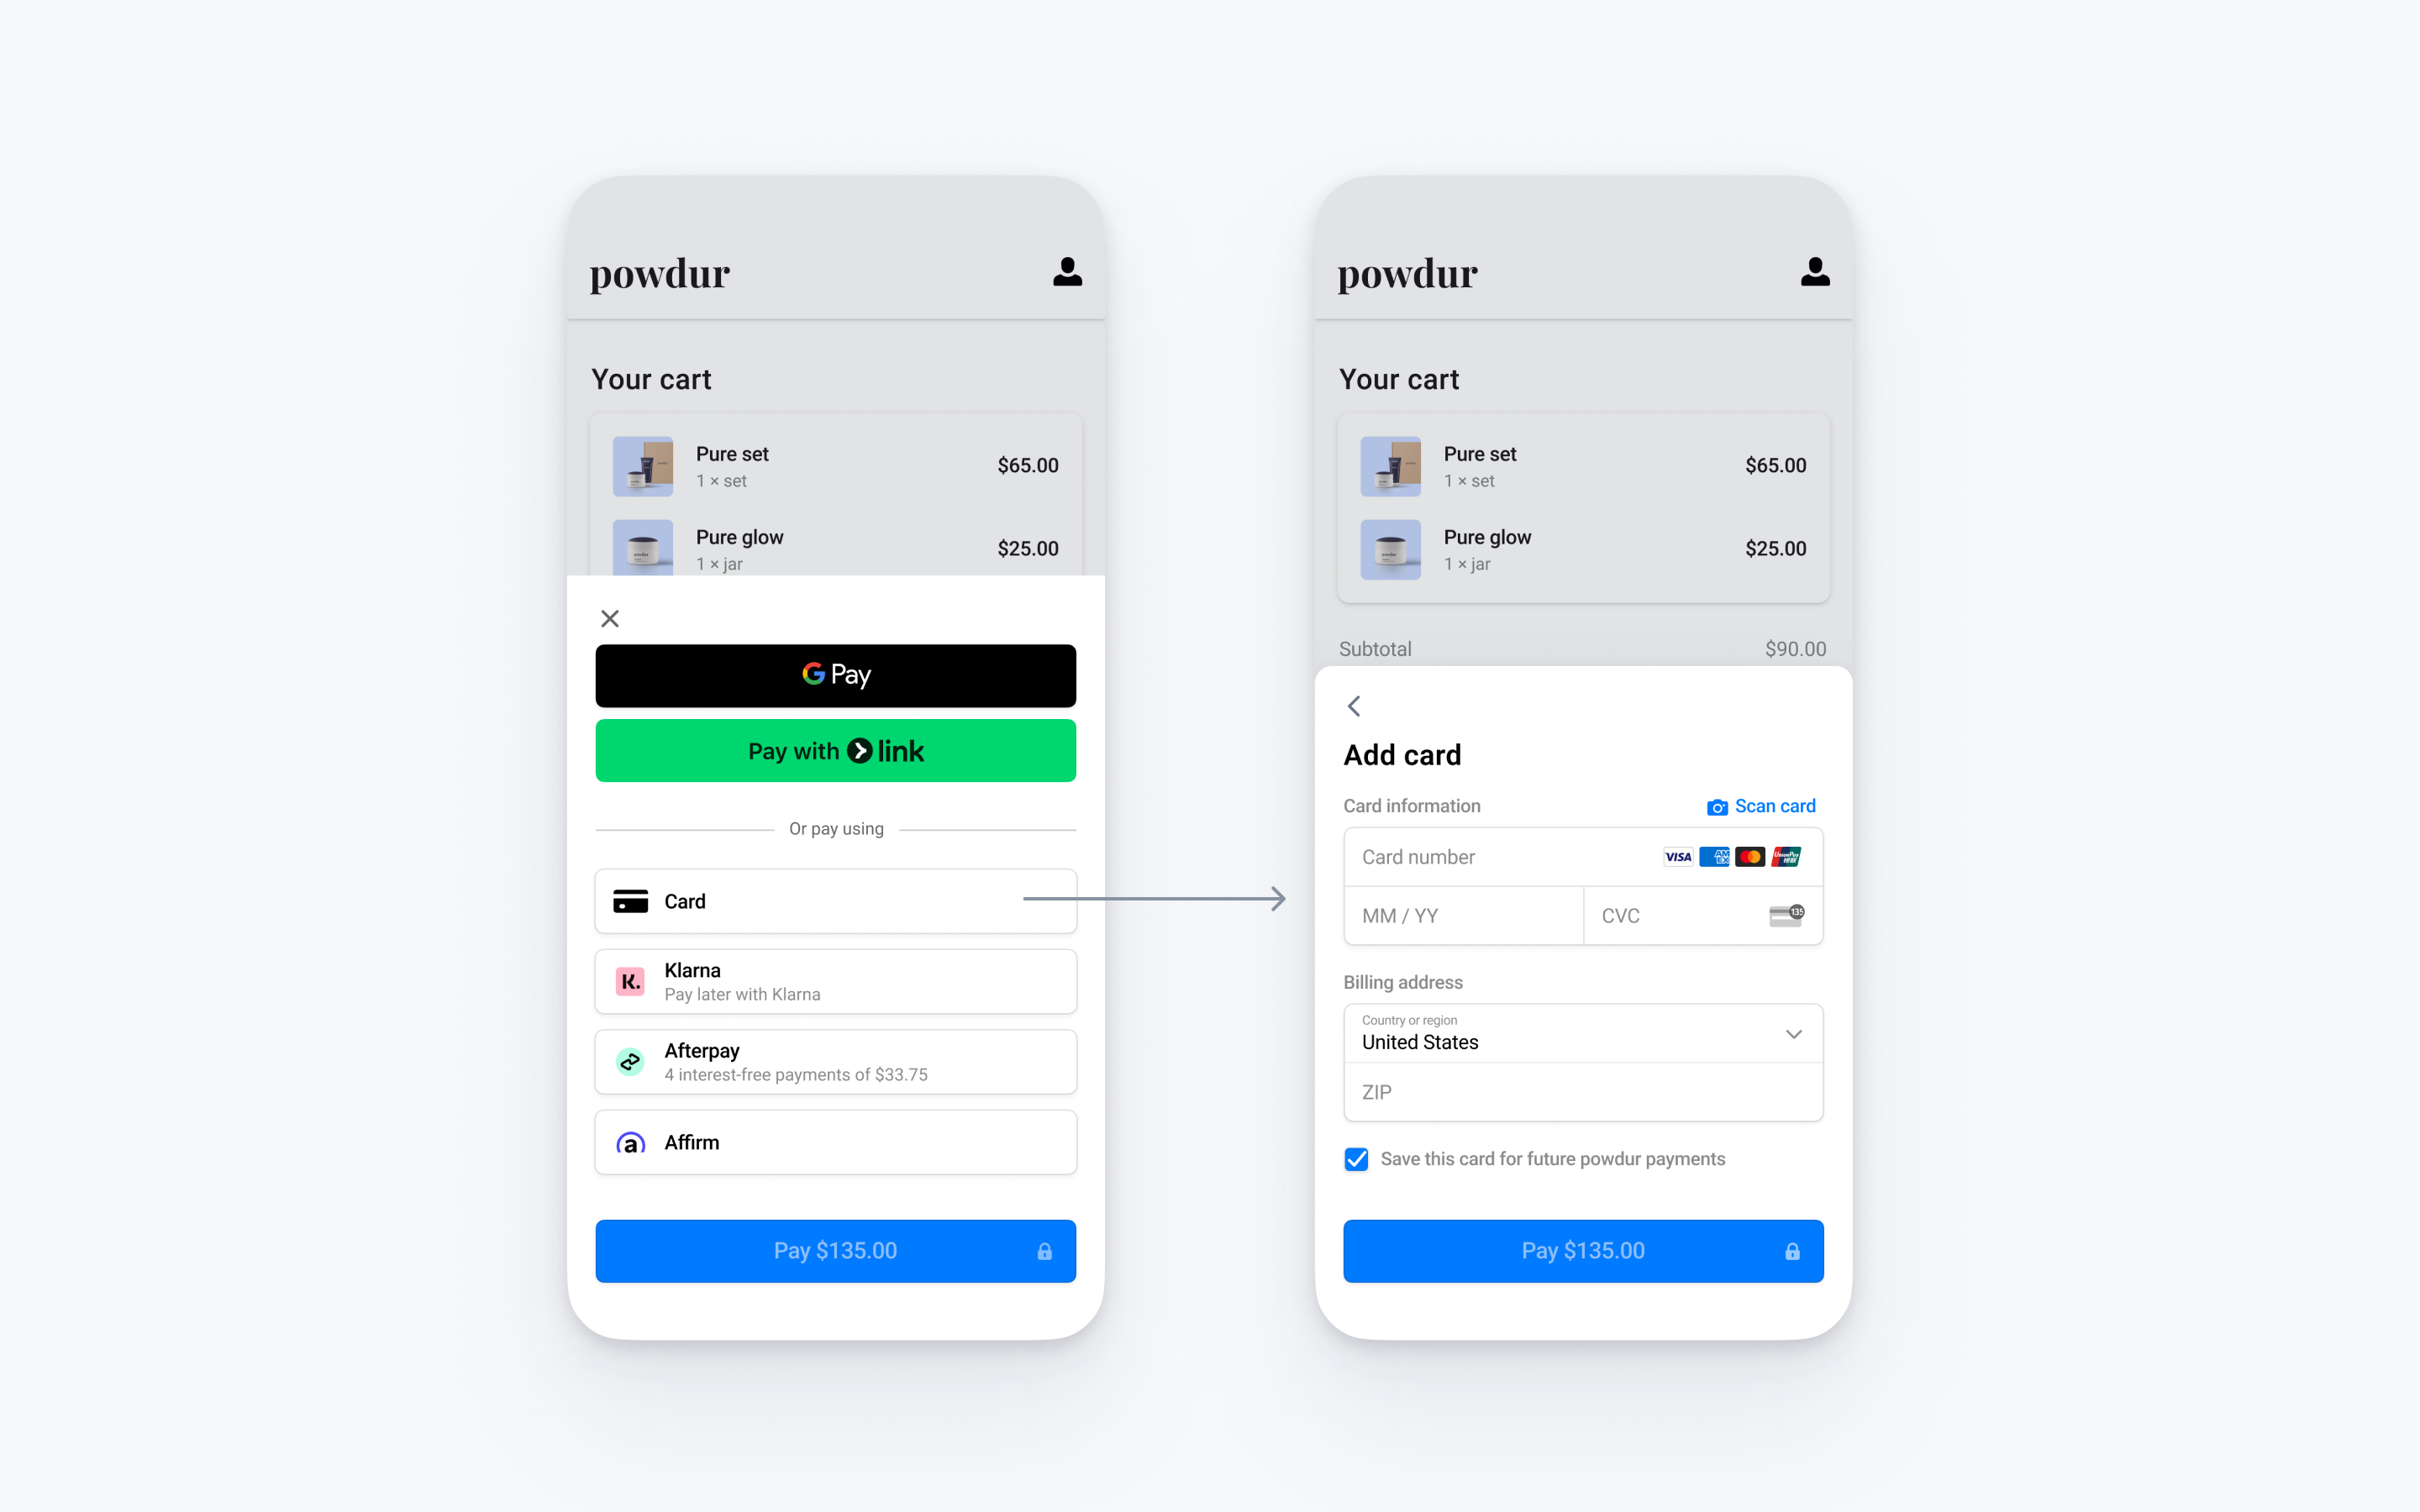
Payment Sheet はカスタマイズ可能なコンポーネントであり、アプリ内でボトムシートを使用して決済手段リストを表示し、支払い情報を収集します。

Payment Element を使用すると、一度の導入で複数の決済手段を受け付けることができます。この実装では、Payment Element をレンダリングし、PaymentIntent を作成して、購入者のアプリで支払いを確定するカスタム決済フローを構築します。代わりに、サーバーで支払いを確定する場合は、サーバーで支払いを確定するをご覧ください。

Stripe を設定する
サーバー側
クライアント側

まず、Stripe アカウントが必要です。今すぐ登録してください。

サーバー側

この組み込みは、Stripe API と通信するサーバー上にエンドポイントを必要とします。サーバーから Stripe API へのアクセスには、Stripe の公式ライブラリを使用します。

Command Line
Ruby
# Available as a gem sudo gem install stripe
Gemfile
Ruby
# If you use bundler, you can add this line to your Gemfile gem 'stripe'

クライアント側

Stripe Android SDK はオープンソースであり、詳細なドキュメントが提供されています。

To install the SDK, add stripe-android to the dependencies block of your app/build.gradle file:

build.gradle.kts
Kotlin
plugins { id("com.android.application") } android { ... } dependencies { // ... // Stripe Android SDK implementation("com.stripe:stripe-android:21.17.0") // Include the financial connections SDK to support US bank account as a payment method implementation("com.stripe:financial-connections:21.17.0") }

注

SDK の最新リリースおよび過去バージョンの詳細については、GitHub の Releases ページをご覧ください。新しいリリースの公開時に通知を受け取るには、リポジトリのリリースを確認してください。

You also need to set your publishable key so that the SDK can make API calls to Stripe. To get started quickly, you can hardcode this on the client while you’re integrating, but fetch the publishable key from your server in production.

// Set your publishable key: remember to change this to your live publishable key in production // See your keys here: https://dashboard.stripe.com/apikeys PaymentConfiguration.init(context, publishableKey =
"pk_test_TYooMQauvdEDq54NiTphI7jx"
)

支払い方法を有効にする

支払い方法の設定を表示して、サポートする支払い方法を有効にします。PaymentIntent を作成するには、少なくとも 1 つは支払い方法を有効にする必要があります。

By default, Stripe enables cards and other prevalent payment methods that can help you reach more customers, but we recommend turning on additional payment methods that are relevant for your business and customers. See Payment method support for product and payment method support, and our pricing page for fees.

支払い情報を収集する
クライアント側

We offer two styles of integration.

PaymentSheetPaymentSheet.FlowController
PaymentSheet
PaymentSheet.FlowController
Displays a sheet to collect payment details and complete the payment. The button label is Pay and the amount. Clicking the button completes the payment. Displays a sheet to only collect payment details. The button label is Continue. Clicking it returns the customer to your app, where your own button completes the payment.

Initialize the PaymentSheet

Initialize the PaymentSheet and pass in a CreateIntentCallback. For now, leave the implementation empty.

class MyCheckoutActivity : AppCompatActivity() { private lateinit var paymentSheet: PaymentSheet override fun onCreate(savedInstanceState: Bundle?) { super.onCreate(savedInstanceState) // ... paymentSheet = PaymentSheet.Builder( paymentResultCallback = ::onPaymentSheetResult, createIntentCallback = { _, _ -> TODO() // You'll implement this later }, ).build(this) } fun onPaymentSheetResult(paymentSheetResult: PaymentSheetResult) { // You'll implement this later } }

Present the PaymentSheet

Next, present the PaymentSheet by calling presentWithIntentConfiguration() and passing in an IntentConfiguration. The IntentConfiguration contains details about the specific PaymentIntent, like the amount and currency.

class MyCheckoutActivity : AppCompatActivity() { // ... private fun handleCheckoutButtonPressed() { val intentConfig = PaymentSheet.IntentConfiguration( mode = PaymentSheet.IntentConfiguration.Mode.Payment( amount = 1099, currency = "usd", ), // Other configuration options... ) paymentSheet.presentWithIntentConfiguration( intentConfiguration = intentConfig, // Optional configuration - See the "Customize the sheet" section in this guide configuration = PaymentSheet.Configuration.Builder( merchantDisplayName = "Example Inc.", ).build() ) } }

Confirm the Intent

When the customer taps the Pay button in PaymentSheet, it calls the CreateIntentCallback you passed above with a PaymentMethod object representing the customer’s payment details.

このメソッドを実装してサーバーにリクエストを送信します。サーバーは、PaymentIntent を作成して、その client secret を返します。

When the response returns, return the response’s client secret or an error. The PaymentSheet confirms the PaymentIntent using the client secret, or displays the error in its UI.

class MyCheckoutActivity : AppCompatActivity() { private lateinit var paymentSheet: PaymentSheet override fun onCreate(savedInstanceState: Bundle?) { super.onCreate(savedInstanceState) // ... paymentSheet = PaymentSheet.Builder( paymentResultCallback = ::onPaymentSheetResult, createIntentCallback = { _, _ -> // Make a request to your server to create a PaymentIntent and return its client secret val networkResult = myNetworkClient.createIntent( ) if (networkResult.isSuccess) { CreateIntentResult.Success(networkResult.clientSecret) } else { CreateIntentResult.Failure(networkResult.exception) } }, ).build(this) } fun onPaymentSheetResult(paymentSheetResult: PaymentSheetResult) { // You'll implement this later } }

After the customer completes the payment, the sheet closes and the PaymentSheetResultCallback is called with a PaymentSheetResult.

class MyCheckoutActivity : AppCompatActivity() { // ... fun onPaymentSheetResult(paymentSheetResult: PaymentSheetResult) { when(paymentSheetResult) { is PaymentSheetResult.Canceled -> { // Customer canceled - you should probably do nothing. } is PaymentSheetResult.Failed -> { print("Error: ${paymentSheetResult.error}") // PaymentSheet encountered an unrecoverable error. You can display the error to the user, log it, etc. } is PaymentSheetResult.Completed -> { // Display, for example, an order confirmation screen print("Completed") } } } }

PaymentIntent を作成する
サーバー側

サーバー側で、金額と通貨を指定して PaymentIntent を作成します。支払い方法はダッシュボードで管理できます。Stripe は取引額、通貨、決済フローなどの要素に基づいて、適切な支払い方法が返されるように処理します。悪意のある顧客が金額を恣意的に選択できないようにするために、請求額はクライアント側ではなく、常にサーバー側 (信頼性の高い環境) で指定してください。

コールが成功した場合は、PaymentIntent client secret を返します。コールが失敗した場合は、エラーを処理して、エラーメッセージと顧客向けの簡単な説明を返します。

注

Verify that all IntentConfiguration properties match your PaymentIntent (for example, setup_future_usage, amount, and currency).

main.rb
Ruby
require 'stripe' Stripe.api_key =
'sk_test_BQokikJOvBiI2HlWgH4olfQ2'
post '/create-intent' do data = JSON.parse request.body.read params = { amount: 1099, currency: 'usd', # In the latest version of the API, specifying the `automatic_payment_methods` parameter is optional because Stripe enables its functionality by default. automatic_payment_methods: {enabled: true}, } begin intent = Stripe::PaymentIntent.create(params) {client_secret: intent.client_secret}.to_json rescue Stripe::StripeError => e {error: e.error.message}.to_json end end

支払い後のイベントを処理する
サーバー側

支払いが完了すると、Stripe は payment_intent.succeeded イベントを送信します。ダッシュボードの Webhook ツールを使用するか Webhook のガイドに従ってこれらのイベントを受信し、顧客への注文確認メールの送信、データベースでの売上の記録、配送ワークフローの開始などのアクションを実行します。

クライアントからのコールバックを待つのではなく、これらのイベントをリッスンします。クライアントでは、コールバックが実行される前に顧客がブラウザーのウィンドウを閉じたり、アプリを終了する場合、また悪意を持つクライアントがレスポンスを不正操作する場合もあります。非同期型のイベントをリッスンするよう組み込みを設定すると、単一の組み込みで複数の異なるタイプの支払い方法を受け付けることができます。

Payment Element を使用して支払いを回収する場合は、payment_intent.succeeded イベントのほかにこれらのイベントを処理することをお勧めします。

イベント説明アクション
payment_intent.succeeded顧客が正常に支払いを完了したときに送信されます。顧客に注文の確定を送信し、顧客の注文のフルフィルメントを実行します。
payment_intent.processing顧客が正常に支払いを開始したが、支払いがまだ完了していない場合に送信されます。このイベントは、多くの場合、顧客が口座引き落としを開始するときに送信されます。その後、payment_intent.succeeded イベント、また、失敗の場合は payment_intent.payment_failed イベントが送信されます。顧客に注文確認メールを送信し、支払いが保留中であることを示します。デジタル商品では、支払いの完了を待たずに注文のフルフィルメントを行うことが必要になる場合があります。
payment_intent.payment_failed顧客が支払いを試みたが、支払いに失敗する場合に送信されます。支払いが processing から payment_failed に変わった場合は、顧客に再度支払いを試すように促します。

実装をテストする

カード番号シナリオテスト方法
カード支払いは成功し、認証は必要とされません。クレジットカード番号と、任意の有効期限、セキュリティコード、郵便番号を使用してクレジットカードフォームに入力します。
カード支払いには認証が必要です。クレジットカード番号と、任意の有効期限、セキュリティコード、郵便番号を使用してクレジットカードフォームに入力します。
カードは、insufficient_funds などの拒否コードで拒否されます。クレジットカード番号と、任意の有効期限、セキュリティコード、郵便番号を使用してクレジットカードフォームに入力します。
UnionPay カードは、13 ~ 19 桁の可変長です。クレジットカード番号と、任意の有効期限、セキュリティコード、郵便番号を使用してクレジットカードフォームに入力します。

実装内容をテストするためのその他の情報については、テストをご覧ください。

オプション保存済みのカードを有効にする
サーバー側
クライアント側

オプション遅延型の支払い方法を許可する
クライアント側

オプションGoogle Pay を有効にする

オプションカードのスキャンを有効にする

オプション画面をカスタマイズする

オプションEnable CVC recollection on confirmation

このページはお役に立ちましたか。
はいいいえ
お困りのことがございましたら 、サポートにお問い合わせください。
早期アクセスプログラムにご参加ください。
変更ログをご覧ください。
ご不明な点がございましたら、お問い合わせください。
LLM ですか?llms.txt を読んでください。
Powered by Markdoc