Text und Richtlinien anpassen
Passen Sie den Text an, den Ihre Kundinnen und Kunden sehen, und die Richtlinien, die beim Bezahlvorgang angezeigt werden.
Wenn Kundinnen und Kunden mit Stripe Checkout über eine gehostete Bezahlseite oder ein eingebettetes Zahlungsformular bezahlen, können Sie zusätzliche Informationen wie Versand- und Bearbeitungszeiten anzeigen.
Warnung
Es ist Ihnen nicht gestattet, diese Funktion zu verwenden, um nutzerdefinierten Text zu erstellen, der gegen den von Stripe generierten Text für Checkout, Ihre Verpflichtungen aus Ihrer Vereinbarung mit Stripe, die Richtlinien von Stripe und geltende Gesetze verstößt oder Unklarheiten hervorruft.

Benutzerdefinierter Text neben den Feldern zur Erfassung der Versandadresse

Benutzerdefinierter Text über der Schaltfläche Bezahlen

Benutzerdefinierter Text nach der Schaltfläche Bezahlen
Ihr nutzerdefinierter Text kann bis zu 1200 Zeichen lang sein. Stripe Checkout ist jedoch auf Konversion ausgerichtet und das Hinzufügen zusätzlicher Informationen kann sich auf Ihre Konversionsrate auswirken. Sie können wichtige Informationen per Fettdruck hervorheben oder über die Markdown-Syntax einen Link einfügen.
Die Schaltfläche „Absenden“ anpassen
Um Checkout besser auf Ihr Geschäftsmodell abzustimmen, konfigurieren Sie den Text, der auf der Checkout-Schaltfläche „Absenden“ für einmalige Käufe angezeigt wird.
Definieren Sie einen submit_ in Ihrer Sitzung. In diesem Beispiel (für eine Spende von 5 USD) zeigt Ihre benutzerdefinierter Checkout-Schaltfläche „Absenden“ 5,00 $ spenden an. Siehe dieAPI-Dokumentation für eine vollständige Liste vonsubmit_-Optionen.
Lokalisierung und unterstützte Sprachen
Standardmäßig stellt Checkout den Standort des Browsers Ihrer Kundin/Ihres Kunden fest und zeigt eine übersetzte Version der Seite in deren/dessen Sprache an, sofern Stripe dies unterstützt. Sie können das Browser-Gebietsschema für Checkout überschreiben, indem Sie beim Erstellen einer Checkout-Sitzung den Parameter locale übergeben.
Checkout nutzt das Gebietsschema auch zur Formatierung von Zahlen und Währungen. Wenn Sie beispielsweise ein Produkt verkaufen, dessen Preis in EUR festgelegt wurde und die Region auf auto festgelegt ist, zeigt ein auf Englisch (en) konfigurierter Browser 25.00 € an, ein auf Deutsch (de) konfigurierter Browser stattdessen 25,00 €.
Richtlinien und Kontaktinformationen anpassen
In Checkout können Sie Ihren Kundinnen und Kunden Ihre Richtlinien für Rückgabe und Rückerstattung und sonstige rechtliche Hinweise sowie Ihre Support-Kontaktinformationen anzeigen lassen. In den Checkout-Einstellungen können Sie unter anderem folgende Anzeigeeinstellungen konfigurieren:
- Details zu Ihren Richtlinien für Rückgabe und Rückerstattung
- Ihre Support-Telefonnummer, E-Mail-Adresse und Website
- Links zu Ihren Allgemeinen Geschäftsbedingungen und Ihrer Datenschutzerklärung
Wenn Sie diese Informationen anzeigen lassen, können Sie das Vertrauen potenzieller Käuferinnen und Käufer gewinnen und Kaufabbrüche minimieren.
Support-Informationen und Richtlinien konfigurieren
Fügen Sie in den Checkout-Einstellungen Support-Kontaktinformationen zu Ihren Sitzungen hinzu, indem Sie Kontaktinformationen aktivieren. Auf ähnliche Weise fügen Sie Links zu Ihren Allgemeinen Geschäftsbedingungen und Ihrer Datenschutzerklärung zu Ihren Sitzungen hinzu, indem Sie die Rechtlichen Hinweise aktivieren. Wenn Kundinnen/Kunden nach Durchführung des Bezahlvorgangs implizit Ihren rechtlichen Hinweisen zustimmen müssen, aktivieren Sie das Kontrollkästchen Zustimmung zu rechtlichen Bedingungen anzeigen.
Sie müssen Ihre Support-Kontaktinformationen und Links zu rechtlichen Richtlinien in Ihren Einstellungen für öffentliche Details hinzufügen.
In der folgenden Vorschau sehen Sie, wie Checkout ein Dialogfeld mit den Support-Kontaktinformationen, Links zu den rechtlichen Hinweisen des Geschäfts und Informationen zu den Zahlungsbedingungen anzeigt.
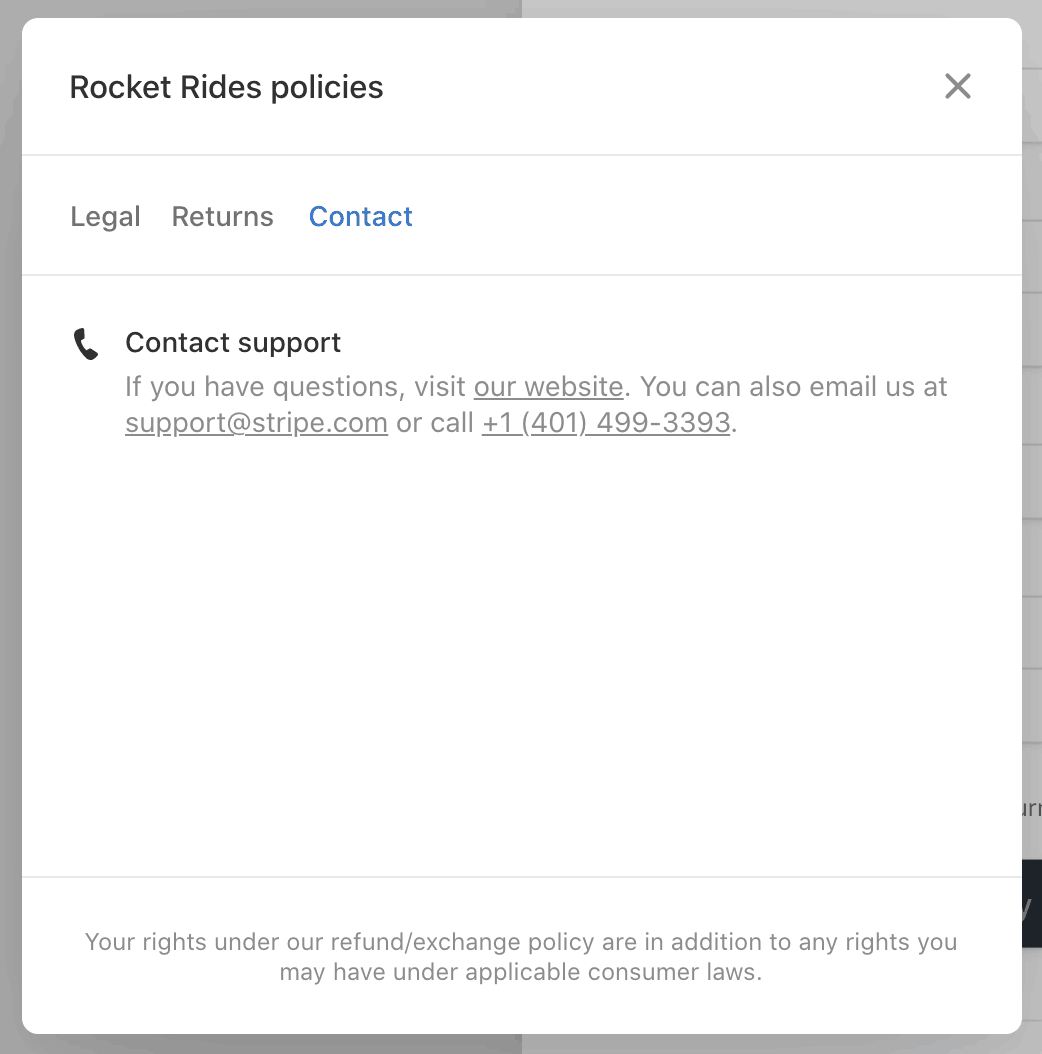
Vorschau der Kontaktinformationen in Checkout.
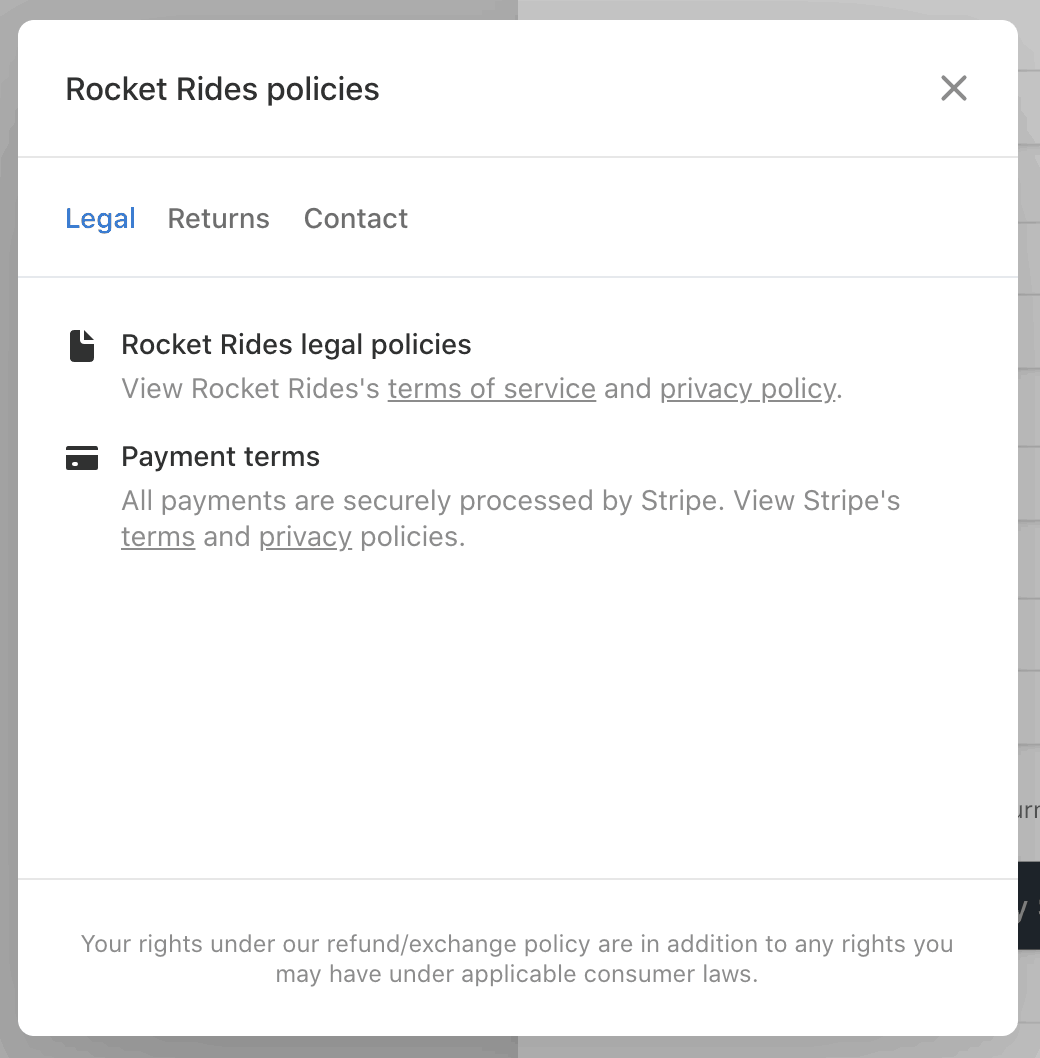
Vorschau der rechtlichen Hinweise in Checkout.
Richtlinien für Rückgabe und Rückerstattung konfigurieren
Sie können Ihre Richtlinien für Rückgabe, Rückerstattung oder Umtausch anzeigen lassen, indem Sie Rückgabe- und Rückerstattungsrichtlinien aktivieren. Unternehmen, die physische Waren verkaufen, haben in den meisten Fällen Rückgaberichtlinien, Unternehmen mit digitalen Artikeln oder kundenspezifischen physischen Produkten in der Regel Rückerstattungsrichtlinien. Da sie sich nicht gegenseitig ausschließen, können Sie beide Optionen auswählen, wenn Ihr Unternehmen Waren beider Kategorien verkauft. Sie können unter anderem folgende Rückgabe- und Rückerstattungsdetails bearbeiten:
- Ob Sie Rückgabe, Rückerstattung oder Umtausch akzeptieren
- Ob Rückgabe, Rückerstattung oder Umtausch kostenlos ist oder eine Gebühr fällig wird
- Wie viele Tage nach dem Kauf Rückgaben, Rückerstattungen oder Umtausch möglich ist
- Wie Kundinnen/Kunden Artikel zurückgeben können
- Ob Sie Rückgaben im Geschäft akzeptieren
- Link zur vollständigen Richtlinie für Rückgabe und Rückerstattung
- Eine individuelle Benachrichtigung
Wenn Sie Rückgabe, Rückerstattung oder Umtausch akzeptieren, hebt Checkout die Richtlinie für Kundinnen/Kunden hervor.
In der folgenden Vorschau sehen Sie, wie Checkout eine Rückgaberichtlinie anzeigt. In diesem Beispiel deckt die Richtlinie Käufe ab, die 60 Tage lang gegen Erstattung oder Umtausch zurückgesendet oder im Geschäft zurückgegeben werden können. Ähnliche Informationen können Sie für Rückerstattungen anzeigen.
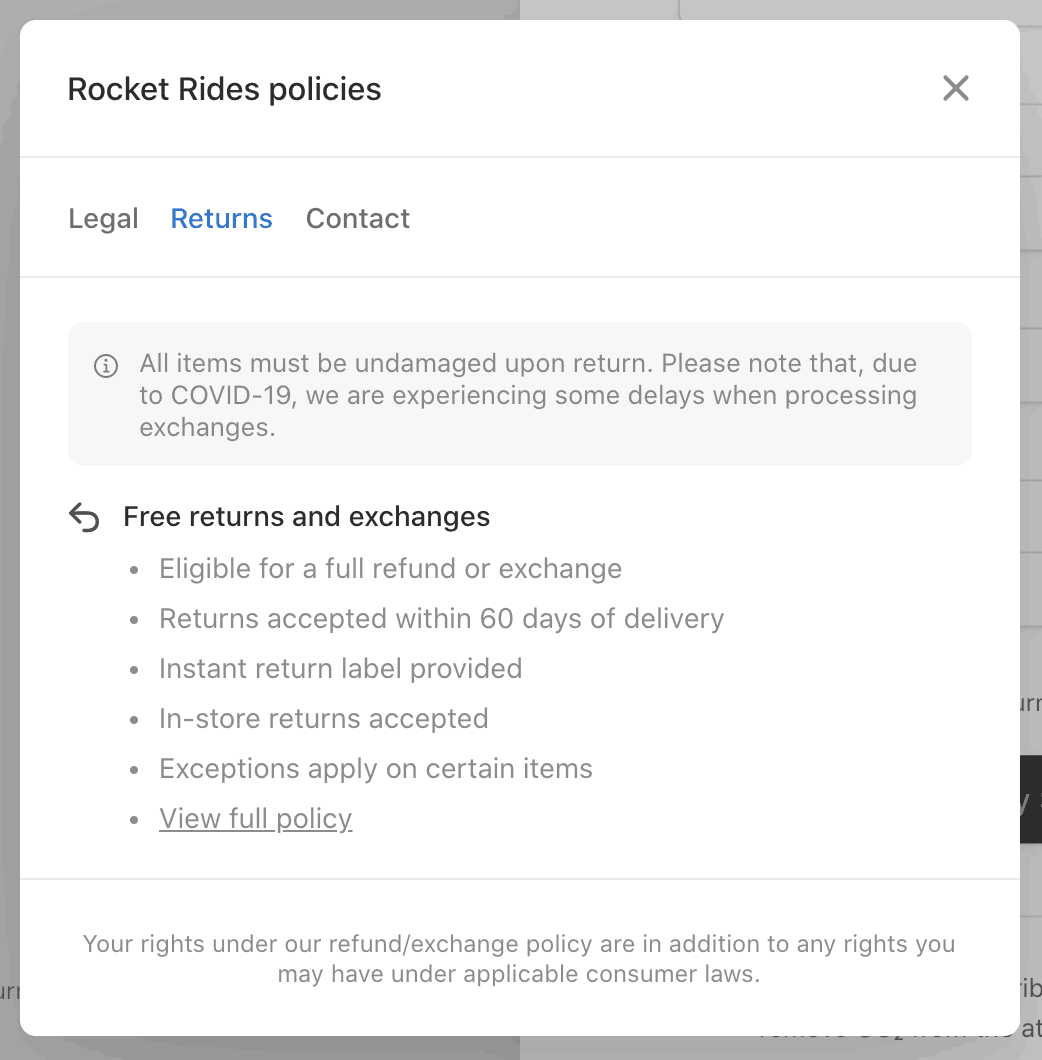
Vorschau der Rückgaberichtlinien in Checkout.
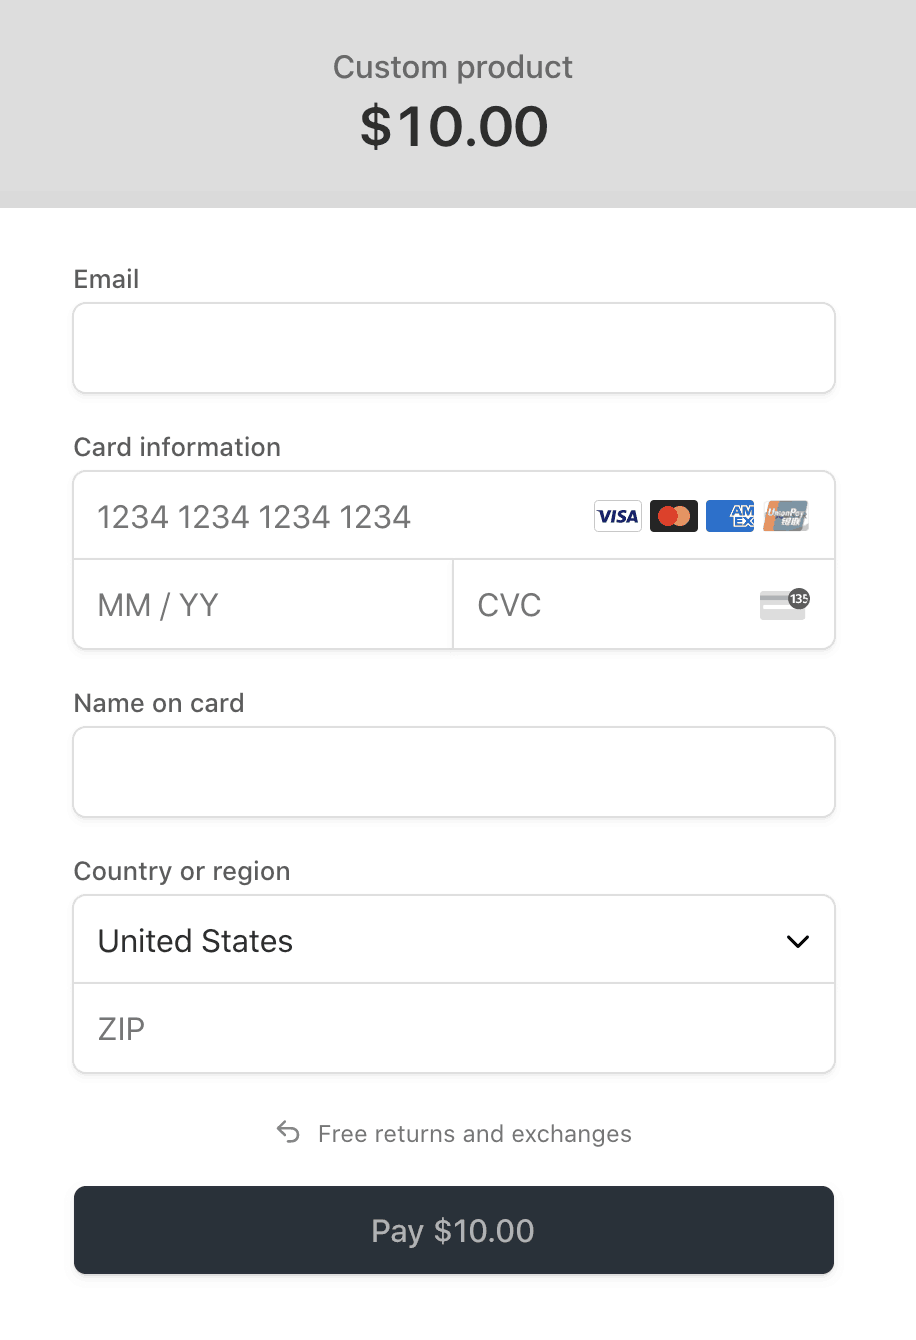
Vorschau der hervorgehobenen Richtlinien in Checkout.
Vereinbarung über die Allgemeinen Geschäftsbedingungen einholen
Unternehmen verlangen oft von ihren Kundinnen/Kunden, dass sie deren Nutzungsbedingungen zustimmen, bevor sie bezahlen können. Dies kann von der Art des Produkts oder Abonnements abhängen. Checkout hilft Ihnen, die erforderliche Zustimmung einzuholen, indem Kund/innen aufgefordert werden, Ihre Bedingungen vor der Zahlung zu akzeptieren.

Vereinbarung über die Nutzungsbedingungen erfassen
Sie können eine Vereinbarung über die allgemeinen Geschäftsbedingungen mit Stripe Checkout abschließen, wenn Sie eine Sitzung erstellen:
Wenn consent_, zeigt Checkout dynamisch ein Kontrollkästchen zur Erfassung der Vereinbarung über die Nutzungsbedingungen des/der Kund/in an. Wenn consent_ ist, zeigt Checkout das Kontrollkästchen nicht an und fordert die Kundinnen/Kunden nicht auf, die Allgemeinen Geschäftsbedingungen zu akzeptieren. Bevor Sie die Zustimmung zu Ihren Bedingungen einholen, legen Sie die URL Ihrer allgemeinen Geschäftsbedingungen in den öffentlichen Details Ihres Unternehmens fest. Das Festlegen einer URL für die Datenschutzerklärung ist optional. Checkout verweist auch auf Ihre Datenschutzerklärung, wenn in Ihren öffentlichen Details eine URL zu Ihrer Datenschutzerklärung festgelegt ist.
Nachdem der Bezahlvorgang kundenseitig abgeschlossen ist, können Sie überprüfen, ob Ihre allgemeinen Geschäftsbedingungen akzeptiert wurden, indem Sie das Session-Objekt im Webhook checkout. anzeigen oder die Sitzung über die API abrufen. Wenn die Bedingungen akzeptiert wurden, wird das Feld consent.terms_of_service der Sitzung auf accepted gesetzt.
Sie können den Text, der neben dem Kontrollkästchen angezeigt wird, mithilfe von custom_ anpassen. Sie müssen consent_ festlegen. Um Ihre eigenen Bedingungen zu verwenden, fügen Sie einen Markdown-Link ein. Beispiel: I agree to the [Terms of Service](https://example.
Warnung
Wenden Sie sich an Ihre Rechts- und Compliance-Beratung, bevor Sie Änderungen an diesem Text vornehmen. Sie dürfen diese Funktion nicht verwenden, um benutzerdefinierten Text anzuzeigen, der gegen den von Stripe generierten Text für Checkout, Ihre Verpflichtungen aus Ihrer Vereinbarung mit Stripe, die Richtlinien von Stripe und geltende Gesetze verstößt oder Unklarheiten hervorruft.
Zustimmung für Werbe-E-Mails einholen
Sie können Werbe-E-Mails versenden, um Kundinnen/Kunden über neue Produkte zu informieren und Gutscheine und Rabatte zu teilen. Bevor Sie dies tun, müssen Sie ihre Zustimmung zum Erhalt von Werbe-E-Mails einholen.
Wiederverwendungsvereinbarung und Abonnementbedingungen für Zahlungsmethoden anpassen
Wenn sich eine Sitzung entweder im Modus setup oder im Modus subscription befindet oder wenn sie sich im Modus payment mit festgelegtem setup_ befindet, zeigt Checkout eine Meldung über die Wiederverwendung der Zahlungsmethode des Kunden/der Kundin an. Die Meldung kann Informationen speziell für die ausgewählte Zahlungsmethode enthalten. Sie können den Standardtext ausblenden oder anpassen, nicht jedoch den Text speziell für die Zahlungsmethode.
Bei einem Abonnement kann der nutzerdefinierte Text beispielsweise folgende Informationen enthalten:
- Ein Link zu Ihren Abonnementbedingungen
- Ein Link zu Ihrem Kundenportal
- Stornomechanismen und -richtlinien

Standardmäßige Wiederverwendungsvereinbarung für Zahlungsmethoden im Abonnementmodus
Warnung
Wenn Sie diesen Text anpassen, sind Sie für die Einhaltung jeglicher Vorschriften verantwortlich. Dies umfasst auch die Aktualisierung dieses Textes, wenn sich die Regeln der Kartennetzwerke und lokale Vorschriften ändern. Verwenden Sie diese Funktion nur, wenn Sie sich mit Ihrer Rechtsabteilung beraten oder nutzerdefinierten Text festgelegt haben, der Informationen zur Wiederverwendung der Zahlungsmethode enthält. Stellen Sie sicher, dass Ihr benutzerdefinierter Text alle Modi abdeckt, die Sie unterstützen möchten.
Um den Text der Wiederverwendungsvereinbarung für Zahlungsmethoden auszublenden, legen Sie consent_ fest. Checkout nicht die Standardsprache für die Wiederverwendung der Zahlungsmethode an. Wenn Sie Ihren eigenen Text anstelle der Standardsprache von Stripe festlegen möchten, legen Sie custom_ fest. Sie können auch custom_ oder custom_ verwenden, um Ihre eigene Version dieser Sprache anzuzeigen.