コンテンツにスキップ
アカウントを作成
または
サインイン
Stripe ドキュメントのロゴ
/
AI に質問する
アカウントを作成
サインイン
始める
支払い
売上
プラットフォームおよびマーケットプレイス
資金管理
開発者向けリソース
概要
Stripe Payments について
構築済みのシステムをアップグレード
支払いの分析
オンライン決済
概要ユースケースを見つけるUse Managed Payments
Payment Links を使用する
構築済みの決済ページを使用する
Build a custom integration with Elements
    概要
    Compare Checkout Sessions and PaymentIntents
    Quickstart guides
    高度なシステムを設計
    デザインをカスタマイズする
    決済手段を管理
    追加情報を収集する
    サブスクリプションの実装
    Dynamic updates
    割引を追加する
    支払いで税金を徴収
    顧客が現地通貨で支払いできるようにする
    顧客の支払い方法を保存および取得する
    領収書と支払い済みの請求書を送信する
    サーバーで支払いを手動で承認する
    支払いのオーソリとキャプチャーを分離する
    Elements with Checkout Sessions API ベータ版の変更ログ
アプリ内実装を構築
決済手段
決済手段を追加
決済手段を管理
Link による購入の迅速化
支払いインターフェイス
Payment Links
Checkout
Web Elements
アプリ内決済
決済シナリオ
複数の通貨を扱う
カスタムの決済フロー
柔軟なアクワイアリング
オーケストレーション
店頭支払い
端末
決済にとどまらない機能
会社を設立する
仮想通貨
Financial Connections
Climate
不正利用について
Radar の不正防止
不審請求の申請の管理
本人確認
ホーム支払いBuild a custom integration with Elements

注

このページはまだ日本語ではご利用いただけません。より多くの言語で文書が閲覧できるように現在取り組んでいます。準備が整い次第、翻訳版を提供いたしますので、もう少しお待ちください。

Build a subscriptions integration with Elements

Create and manage subscriptions to accept recurring payments with Elements.

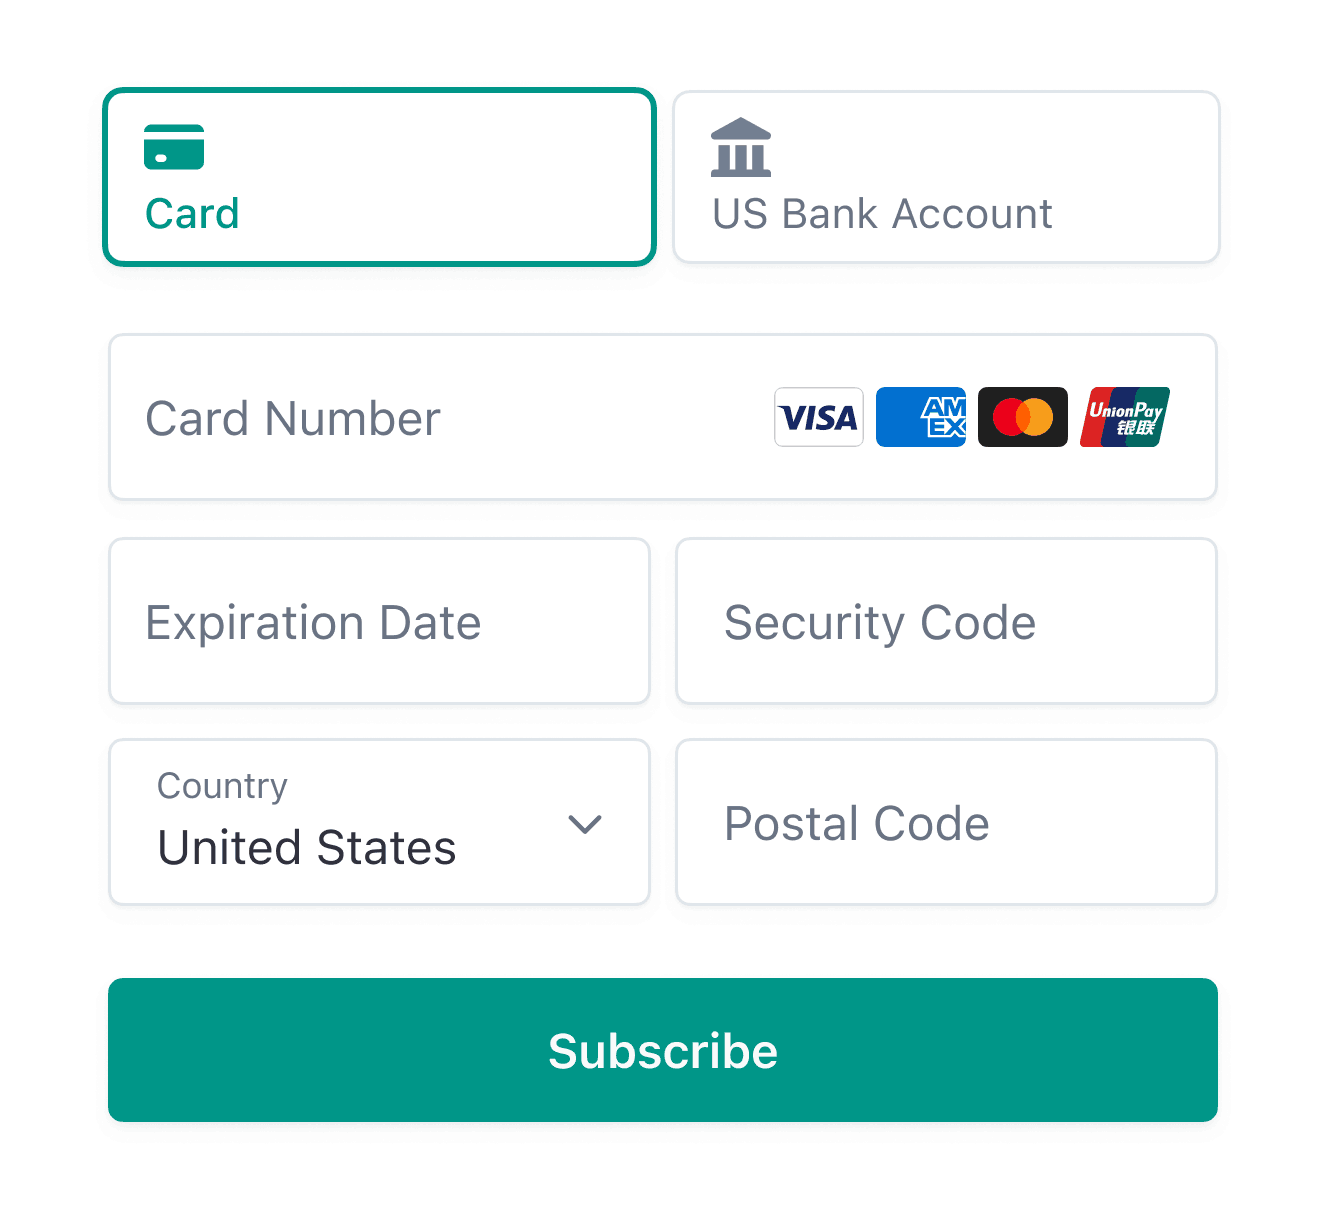
Fixed-price subscription page with the Payment Element
ローコード

Customize with the Appearance API.

Use this guide to learn how to sell fixed-price subscriptions. You’ll use the Payment Element with Checkout Sessions API to create a custom payment form that you embed in your application.

If you don’t want to build a custom payment form, you can integrate with hosted checkout. For an immersive version of that end-to-end integration guide, see the Billing quickstart.

If you aren’t ready to code an integration, you can set up basic subscriptions manually in the Dashboard. You can also use Payment Links to set up subscriptions without writing any code. Learn more about designing an integration to understand the decisions you need to make and the resources you need.

What you’ll build

This guide shows you how to:

  • Model your business by building a product catalog.
  • Build a registration process that creates a customer.
  • Create subscriptions and collect payment information.
  • Test and monitor payment and subscription status.
  • Let customers change their plan or cancel the subscription.

API object definitions

リソース定義
Customer (顧客)サブスクリプションを購入する顧客を表します。サブスクリプションに関連付けられた Customer オブジェクトを使用して、継続支払いを作成して追跡し、顧客が登録する商品を管理します。
Entitlement (エンタイトルメント)顧客が登録したサービス商品に含まれる機能への顧客のアクセスを表します。顧客の商品の継続購入のサブスクリプションを作成すると、その商品に関連付けられた機能ごとに、有効な権利が自動的に作成されます。顧客がサービスにアクセスするときに、その有効な資格を使用して、サブスクリプションに含まれる機能を有効にします。
Feature (機能)顧客がサービス商品に登録すると利用できる機能や機能を表します。ProductFeatures を作成することで、商品に機能を含めることができます。
Invoice (請求書)顧客が支払うべき金額の明細書であり、下書きから支払い済み、またはその他の方法で確定された支払いステータスを追跡します。サブスクリプションでは請求書が自動的に生成されます。
PaymentIntent動的な支払いフローを構築する方法です。Payment Intent は、顧客の決済フローのライフサイクルを追跡し、規制で必須とされる同意書、Radar のカスタムの不正利用ルール、またはリダイレクトベースの支払い方法によって要求されたときに、追加の認証ステップを開始します。Payment Intent は、請求書によって自動的に作成されます。
PaymentMethod顧客が商品の支払いに使用する決済手段。たとえば、クレジットカードを Customer オブジェクトに保存して、その顧客の継続支払いに使用できます。通常、Payment Intents API または Setup Intents API とともに使用されます。
Price (価格)商品の単価、通貨、請求期間を定義します。
Product (商品)お客様のビジネスが販売する商品またはサービス。サービス商品には 1 つ以上の機能を含めることができます。
ProductFeature1 つの商品に 1 つの機能が含まれることを表します。各商品は、含まれる各機能の ProductFeature に関連付けられ、各機能は、それを含む各商品の ProductFeature に関連付けられます。
Subscription (サブスクリプション)顧客の商品の継続的な購入を表します。サブスクリプションを使用して、支払いを回収し、商品の繰り返し提供や継続的なアクセスを提供します。

製品、機能、利用権がどのように連携するかの例をご紹介します。例えば、基本機能を提供する標準プランと、拡張機能を追加した上位プランの 2 つのプランを持つ定期サービスを設定するとします。

  1. basic_features と extended_features の 2 つの機能を作成します。
  2. standard_product と advanced_product の 2 つの商品を作成します。
  3. 標準商品の場合、basic_features を standard_product に関連付ける ProductFeature を 1 つ作成します。
  4. 高度な商品の場合、2 つの ProductFeatures を作成します。1 つは basic_features を advanced_product に関連付け、もう 1 つは extended_features を advanced_product に関連付けます。

顧客の first_customer は、標準商品に登録します。サブスクリプションを作成すると、Stripe は、first_customer を basic_features に関連付けるエンタイトルメントを自動的に作成します。

別の顧客no second_customer は高度な商品に登録します。 サブスクリプションを作成すると、Stripe は自動的に 2 つのエンタイトルメントを作成します。1 つは second_customer を basic_features に関連付け、もう 1 つは second_customer を extended_features に関連付けます。

有効なエンタイトルメントを取得するか、有効なエンタイトルメントのサマリーイベントをリッスンすることで、顧客に提供する機能を決定できます。顧客のサブスクリプション、商品、機能を取得する必要はありません。

Set up Stripe

Install the Stripe client of your choice:

Command Line
Ruby
Python
PHP
Java
Node.js
Go
.NET
No results
# Available as a gem sudo gem install stripe
Gemfile
Ruby
Python
PHP
Java
Node.js
Go
.NET
No results
# If you use bundler, you can add this line to your Gemfile gem 'stripe'

And then install the Stripe CLI. The CLI provides webhook testing and you can run it to make API calls to Stripe. This guide shows how to use the CLI to set up a pricing model in a later section.

Command Line
homebrew
ソースからインストールする
No results
# Install Homebrew to run this command: https://brew.sh/ brew install stripe/stripe-cli/stripe # Connect the CLI to your dashboard stripe login

その他のインストールオプションについては、Stripe CLI を使ってみるをご覧ください。

Create the pricing model
Stripe CLI or Dashboard

ダッシュボードまたは Stripe CLI で商品とその価格を作成します。

この例では、「基本」と「プレミアム」という 2 つのサービスレベルオプションがある固定価格のサービスを使用しています。サービスレベルオプションごとに、1 つの商品と 1 つの継続価格を作成する必要があります (初期費用のような 1 回限りの支払いを追加する場合は、1 回限りの価格で 3 つ目の商品を作成します。わかりやすくするために、この例には 1 回限りの支払いを含めていません)。

この例では、各商品が 1 カ月間隔で請求されます。基本商品の価格は 5 USD で、プレミアム商品の価格は 15 USD です。

商品を追加ページに移動し、2 つの商品を作成します。商品ごとに 1 つの価格を追加し、それぞれに毎月の継続請求期間を設定します。

  • プレミアム商品: 追加機能を備えたプレミアムサービス

    • 価格:定額 | 15 USD
  • 基本商品: 最低限の機能を備えた基本サービス

    • 価格:定額 | 5 USD

価格を作成したら、価格 ID を記録しておき、他のステップで使用できるようにします。価格 ID は、price_G0FvDp6vZvdwRZ のように表示されます。

準備が完了したら、ページ右上の本番環境にコピーボタンを使用して、サンドボックスから本番環境に商品を複製します。

Create the Customer
Client and Server

Stripe では各サブスクリプションに対して 顧客が必要です。 アプリケーションのフロントエンドで、ユーザーから必要な情報を収集し、それをバックエンドに渡します。

住所の詳細を収集する必要がある場合は、Address Element を使用することで顧客の配送先住所または請求先住所を収集できます。Address Element の詳細については、Address Element ページをご覧ください。

register.html
<form id="signup-form"> <label> Email <input id="email" type="email" placeholder="Email address" value="test@example.com" required /> </label> <button type="submit"> Register </button> </form>
register.js
const emailInput = document.querySelector('#email'); fetch('/create-customer', { method: 'post', headers: { 'Content-Type': 'application/json', }, body: JSON.stringify({ email: emailInput.value, }), }).then(r => r.json());

サーバー上で、Stripe Customer オブジェクトを作成します。

注

Checkout セッションで使用するために、顧客 ID を必ず保存してください

Command Line
cURL
Stripe CLI
Ruby
Python
PHP
Java
Node.js
Go
.NET
No results
curl https://api.stripe.com/v1/customers \ -u "
sk_test_BQokikJOvBiI2HlWgH4olfQ2
:"
\ -d email={{CUSTOMER_EMAIL}} \ -d name={{CUSTOMER_NAME}} \ -d "shipping[address][city]"=Brothers \ -d "shipping[address][country]"=US \ -d "shipping[address][line1]"="27 Fredrick Ave" \ -d "shipping[address][postal_code]"=97712 \ -d "shipping[address][state]"=CA \ -d "shipping[name]"={{CUSTOMER_NAME}} \ -d "address[city]"=Brothers \ -d "address[country]"=US \ -d "address[line1]"="27 Fredrick Ave" \ -d "address[postal_code]"=97712 \ -d "address[state]"=CA

Create a Checkout Session
Server

On the back end of your application, define an endpoint that creates the session for your front end to call. You’ll need the price ID of the subscription the customer is signing up for—your front end passes this value.

If you created a one-time price in step 2, pass that price ID also. After creating a Checkout Session, make sure you pass the client secret back to the client in the response.

注

You can use lookup_keys to fetch prices rather than Price IDs. See the sample application for an example.

Ruby
Python
.NET
PHP
Java
Node.js
Go
No results
require 'stripe' require 'sinatra' # This test secret API key is a placeholder. Don't include personal details in requests with this key. # To see your test secret API key embedded in code samples, sign in to your Stripe account. # You can also find your test secret API key at https://dashboard.stripe.com/test/apikeys. Stripe.api_key =
'sk_test_BQokikJOvBiI2HlWgH4olfQ2'
Stripe.api_version = '2025-08-27.basil' set :static, true set :port, 4242 YOUR_DOMAIN = 'http://localhost:3000' post '/create-checkout-session' do content_type 'application/json' session = Stripe::Checkout::Session.create({ ui_mode: 'custom', # Provide the customer ID of the customer you previously created customer: '{{CUSTOMER_ID}}', line_items: [{ # Provide the exact Price ID (for example, price_1234) of the product you want to sell price: '{{PRICE_ID}}', quantity: 1, }], mode: 'subscription', return_url: YOUR_DOMAIN + '/return?session_id={CHECKOUT_SESSION_ID}', }) { clientSecret: session.client_secret }.to_json end

From your Dashboard, enable the payment methods you want to accept from your customers. Checkout supports several payment methods.

Initialize Checkout
Client

fetchClientSecret 関数を作成してください。この関数は、サーバーからクライアントシークレットを取得し、そのクライアントシークレットで解決される Promise を返します。fetchClientSecret を渡してinitCheckout を呼び出します。initCheckout は、checkout インスタンスで解決されるPromiseを返します。

checkout オブジェクトは、チェックアウトページの基盤として機能し、Checkout Session のデータや Session を更新するためのメソッドを含みます。

checkout.session() によって返されるオブジェクトには、料金情報が含まれています。セッションから total と lineItems を読み取り、UI に表示することをお勧めします。

This lets you turn on new features with minimal code changes. For example, adding manual currency prices requires no UI changes if you display the total.

checkout.js
const fetchClientSecret = () => { return fetch('/create-checkout-session', {method: 'POST'}) .then((response) => response.json()) .then((json) => json.checkoutSessionClientSecret); }; stripe.initCheckout({fetchClientSecret}) .then((checkout) => { const checkoutContainer = document.getElementById('checkout-container'); checkoutContainer.append(JSON.stringify(checkout.lineItems, null, 2)); checkoutContainer.append(document.createElement('br')); checkoutContainer.append(`Total: ${checkout.session().total.total.amount}`); });
index.html
<div id="checkout-container"></div>

Collect payment information
Client

Payment Element を使用して、クライアントで支払い情報を収集します。Payment Element は、さまざまな決済手段で支払い情報の収集を簡略化する事前構築済みの UI コンポーネントです。

まず、コンテナーの DOM 要素を作成して、Payment Element をマウントします。次に、checkout.createPaymentElement を使用して Payment Element のインスタンスを作成し、element.mount を呼び出してマウントし、CSS セレクターまたはコンテナーの DOM 要素を指定します。

index.html
<div id="payment-element"></div>
checkout.js
const paymentElement = checkout.createPaymentElement(); paymentElement.mount('#payment-element');

対応しているオプションについては、Stripe.js のドキュメント をご覧ください。

フロントエンドで Checkout を初期化するときに elementsOptions.appearance を渡すことで、すべての Elements のデザインをカスタマイズできるようになります。

Submit the payment
Client-side

チェックアウト インスタンスから confirm を呼び出す支払うボタンをレンダリングして、決済を送信します。

index.html
<button id="pay-button">Pay</button> <div id="confirm-errors"></div>
checkout.js
stripe.initCheckout({fetchClientSecret}).then((checkout) => { const button = document.getElementById('pay-button'); const errors = document.getElementById('confirm-errors'); button.addEventListener('click', () => { // Clear any validation errors errors.textContent = ''; checkout.confirm().then((result) => { if (result.type === 'error') { errors.textContent = result.error.message; } }); }); });

Listen for webhooks
Server

To complete the integration, you need to process webhooks sent by Stripe. These events are triggered whenever the status in Stripe changes, such as subscriptions creating new invoices. In your application, set up an HTTP handler to accept a POST request containing the webhook event, and verify the signature of the event:

server.rb
Ruby
Python
PHP
Java
Node.js
Go
.NET
No results
# Set your secret key. Remember to switch to your live secret key in production. # See your keys here: https://dashboard.stripe.com/apikeys Stripe.api_key =
'sk_test_BQokikJOvBiI2HlWgH4olfQ2'
post '/webhook' do # You can use webhooks to receive information about asynchronous payment events. # For more about our webhook events check out https://stripe.com/docs/webhooks. webhook_secret = ENV['STRIPE_WEBHOOK_SECRET'] payload = request.body.read if !webhook_secret.empty?

During development, use the Stripe CLI to observe webhooks and forward them to your application. Run the following in a new terminal while your development app is running:

Command Line
stripe listen --forward-to localhost:4242/webhook

For production, set up a webhook endpoint URL in the Dashboard, or use the Webhook Endpoints API.

You need to listen to a few events to complete the remaining steps in this guide. See Subscription events for more details about subscription-specific webhooks.

Provision access to your service
Client and Server

Now that the subscription is active, give your user access to your service. To do this, listen to the customer.subscription.created, customer.subscription.updated, and customer.subscription.deleted events. These events pass a subscription object that contains a status field indicating whether the subscription is active, past due, or canceled. See the subscription lifecycle for a complete list of statuses.

In your webhook handler:

  1. Verify the subscription status. If it’s active then your user has paid for your product.
  2. Check the product the customer subscribed to and grant access to your service. Checking the product instead of the price gives you more flexibility if you need to change the pricing or billing period.
  3. Store the product.id, subscription.id and subscription.status in your database along with the customer.id you already saved. Check this record when determining which features to enable for the user in your application.

The status of a subscription might change at any point during its lifetime, even if your application doesn’t directly make any calls to Stripe. For example, a renewal might fail because of an expired credit card, which puts the subscription into a past due status. Or, if you implement the customer portal, a user might cancel their subscription without directly visiting your application. Implementing your handler correctly keeps your application status in sync with Stripe.

Cancel the subscription
Client and Server

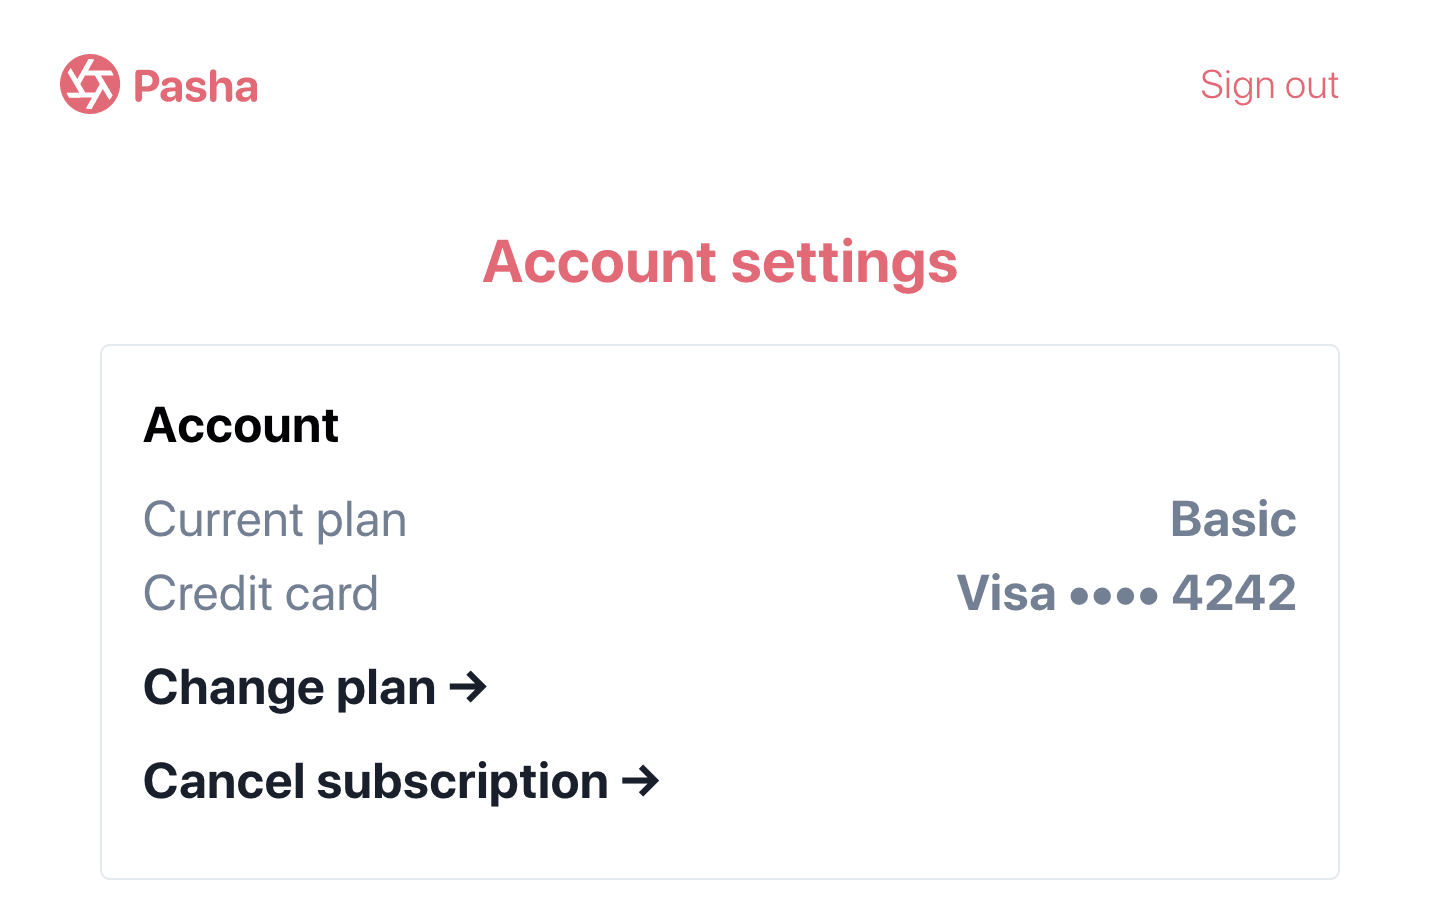
It’s common to allow customers to cancel their subscriptions. This example adds a cancellation option to the account settings page.

Sample subscription cancelation interface.

Account settings with the ability to cancel the subscription

script.js
function cancelSubscription(subscriptionId) { return fetch('/cancel-subscription', { method: 'post', headers: { 'Content-Type': 'application/json', }, body: JSON.stringify({ subscriptionId: subscriptionId, }), }) .then(response => { return response.json(); }) .then(cancelSubscriptionResponse => { // Display to the user that the subscription has been canceled. }); }

On the back end, define the endpoint for your front end to call.

server.rb
Ruby
Python
PHP
Java
Node.js
Go
.NET
No results
# Set your secret key. Remember to switch to your live secret key in production. # See your keys here: https://dashboard.stripe.com/apikeys Stripe.api_key =
'sk_test_BQokikJOvBiI2HlWgH4olfQ2'
post '/cancel-subscription' do content_type 'application/json' data = JSON.parse request.body.read deleted_subscription = Stripe::Subscription.cancel(data['subscriptionId']) deleted_subscription.to_json end

Your application receives a customer.subscription.deleted event.

After the subscription cancels, update your database to remove the Stripe subscription ID you previously stored, and limit access to your service.

When a subscription cancels, you can’t reactivate it. Instead, collect updated billing information from your customer, update their default payment method, and create a new subscription with their existing customer record.

Test your integration

支払い方法をテストする

次の表を使用して、さまざまな支払い方法とシナリオをテストします。

決済手段シナリオテスト方法
BECS ダイレクトデビット顧客が BECS ダイレクトデビットによる支払いに成功します。アカウント番号900123456と BSB000000を使用して、フォームに入力します。確定された PaymentIntent のステータスは、まずprocessingに移行し、3 分後にsucceededステータスに移行します。
BECS ダイレクトデビット顧客の支払いが account_closed エラーコードで失敗します。アカウント番号 111111113と BSB 000000を使用して、フォームに入力します。
クレジットカードカード支払いは成功し、認証は必要とされません。クレジットカード番号 4242 4242 4242 4242 と、任意の有効期限、セキュリティコード、郵便番号を使用してクレジットカードフォームに入力します。
クレジットカードカード決済で認証が要求されます。クレジットカード番号 4000 0025 0000 3155 と、任意の有効期限、セキュリティコード、郵便番号を使用してクレジットカードフォームに入力します。
クレジットカードカードが insufficient_funds などの拒否コードで支払い拒否されます。クレジットカード番号 4000 0000 0000 9995 と、任意の有効期限、セキュリティコード、郵便番号を使用してクレジットカードフォームに入力します。
SEPA ダイレクトデビット顧客が SEPA ダイレクトデビットによる支払いに成功します。口座番号 AT321904300235473204 を使用して、フォームに入力します。確定された PaymentIntent のステータスはまず、processing に移行し、3 分後に succeeded ステータスに移行します。
SEPA ダイレクトデビット顧客の PaymentIntent ステータスが processing から requires_payment_method に移行します。口座番号 AT861904300235473202 を使用して、フォームに入力します。

Monitor events

Set up webhooks to listen to subscription change events, such as upgrades and cancellations. Learn more about subscription webhooks. You can view events in the Dashboard or with the Stripe CLI.

For more details, see testing your Billing integration.

オプションLet customers change their plans
Client and Server

To let your customers change their subscription, collect the price ID of the option they want to change to. Then send the new price ID from the front end to a back-end endpoint. This example also passes the subscription ID, but you can retrieve it from your database for your logged in user.

script.js
function updateSubscription(priceId, subscriptionId) { return fetch('/update-subscription', { method: 'post', headers: { 'Content-type': 'application/json', }, body: JSON.stringify({ subscriptionId: subscriptionId, newPriceId: priceId, }), }) .then(response => { return response.json(); }) .then(response => { return response; }); }

On the backend, define the endpoint for your frontend to call, passing the subscription ID and the new price ID. The subscription is now Premium, at 15 USD per month, instead of Basic at 5 USD per month.

server.rb
Ruby
Python
PHP
Java
Node.js
Go
.NET
No results
# Set your secret key. Remember to switch to your live secret key in production. # See your keys here: https://dashboard.stripe.com/apikeys Stripe.api_key =
'sk_test_BQokikJOvBiI2HlWgH4olfQ2'
post '/update-subscription' do content_type 'application/json' data = JSON.parse request.body.read subscription = Stripe::Subscription.retrieve(data['subscriptionId']) updated_subscription = Stripe::Subscription.update( data['subscriptionId'], cancel_at_period_end: false, items: [ { id: subscription.items.data[0].id, price: 'price_H1NlVtpo6ubk0m' } ] ) updated_subscription.to_json end

Your application receives a customer.subscription.updated event.

オプションPreview a price change
Client and Server

When your customer changes their subscription, there’s often an adjustment to the amount they owe, known as a proration. You can use the create preview invoice endpoint to display the adjusted amount to your customers.

On the front end, pass the create preview invoice details to a back-end endpoint.

script.js
function createPreviewInvoice( customerId, subscriptionId, newPriceId, trialEndDate ) { return fetch('/create-preview-invoice', { method: 'post', headers: { 'Content-type': 'application/json', }, body: JSON.stringify({ customerId: customerId, subscriptionId: subscriptionId, newPriceId: newPriceId, }), }) .then(response => { return response.json(); }) .then((invoice) => { return invoice; }); }

On the back end, define the endpoint for your front end to call.

server.rb
Ruby
Python
PHP
Java
Node.js
Go
.NET
No results
# Set your secret key. Remember to switch to your live secret key in production. # See your keys here: https://dashboard.stripe.com/apikeys Stripe.api_key =
'sk_test_BQokikJOvBiI2HlWgH4olfQ2'
post '/create-preview-invoice' do content_type 'application/json' data = JSON.parse request.body.read subscription = Stripe::Subscription.retrieve(data['subscriptionId']) invoice = Stripe::Invoice.create_preview( customer: data['customerId'], subscription: data['subscriptionId'], subscription_details: { items: [ { id: subscription.items.data[0].id, deleted: true }, { price: ENV[data['newPriceId']], deleted: false } ] } ) invoice.to_json end

オプションDisplay the customer payment method
Client and Server

Displaying the brand and last four digits of your customer’s card can help them know which card is being charged, or if they need to update their payment method.

On the front end, send the payment method ID to a back-end endpoint that retrieves the payment method details.

script.js
function retrieveCustomerPaymentMethod(paymentMethodId) { return fetch('/retrieve-customer-payment-method', { method: 'post', headers: { 'Content-type': 'application/json', }, body: JSON.stringify({ paymentMethodId: paymentMethodId, }), }) .then((response) => { return response.json(); }) .then((response) => { return response; }); }

On the back end, define the endpoint for your front end to call.

server.rb
Ruby
Python
PHP
Java
Node.js
Go
.NET
No results
# Set your secret key. Remember to switch to your live secret key in production. # See your keys here: https://dashboard.stripe.com/apikeys Stripe.api_key =
'sk_test_BQokikJOvBiI2HlWgH4olfQ2'
post '/retrieve-customer-payment-method' do content_type 'application/json' data = JSON.parse request.body.read payment_method = Stripe::PaymentMethod.retrieve(data['paymentMethodId']) payment_method.to_json end

Example response:

{ "id": "pm_1GcbHY2eZvKYlo2CoqlVxo42", "object": "payment_method", "billing_details": { "address": { "city": null, "country": null, "line1": null, "line2": null, "postal_code": null,

注

We recommend that you save the paymentMethod.id and last4 in your database, for example, paymentMethod.id as stripeCustomerPaymentMethodId in your users collection or table. You can optionally store exp_month, exp_year, fingerprint, billing_details as needed. This is to limit the number of calls you make to Stripe, for performance efficiency and to avoid possible rate limiting.

顧客に Stripe を開示する

Stripe は顧客の Elements とのやり取りに関する情報を収集して、サービスを提供し、不正利用を防止し、サービスを向上します。これには、Cookie と IP アドレスを使用して、1 つの決済フローセッションで顧客に表示する Elements を特定することが含まれます。Stripe がこのような方法でデータを使用するために必要なすべての権利と同意について開示し、これらを取得することはお客様の責任です。詳細については、プライバシーセンターをご覧ください。

このページはお役に立ちましたか。
はいいいえ
  • お困りのことがございましたら 、サポートにお問い合わせください。
  • 早期アクセスプログラムにご参加ください。
  • 変更ログをご覧ください。
  • ご不明な点がございましたら、お問い合わせください。
  • LLM ですか?llms.txt を読んでください。
  • Powered by Markdoc