Embeddable pricing table for subscriptions
Display a subscription pricing table on your website and take customers directly to Stripe Checkout.
You can use the Stripe Dashboard to create a table that displays different subscription pricing levels to your customers. You don’t need to write any custom code to create or embed a pricing table. This guide describes how to:
- Use the Stripe Dashboard to configure the UI component
- Copy the generated code from the Dashboard
- Embed the code on your website to show your customers pricing information and take them to a payment page
Overview 
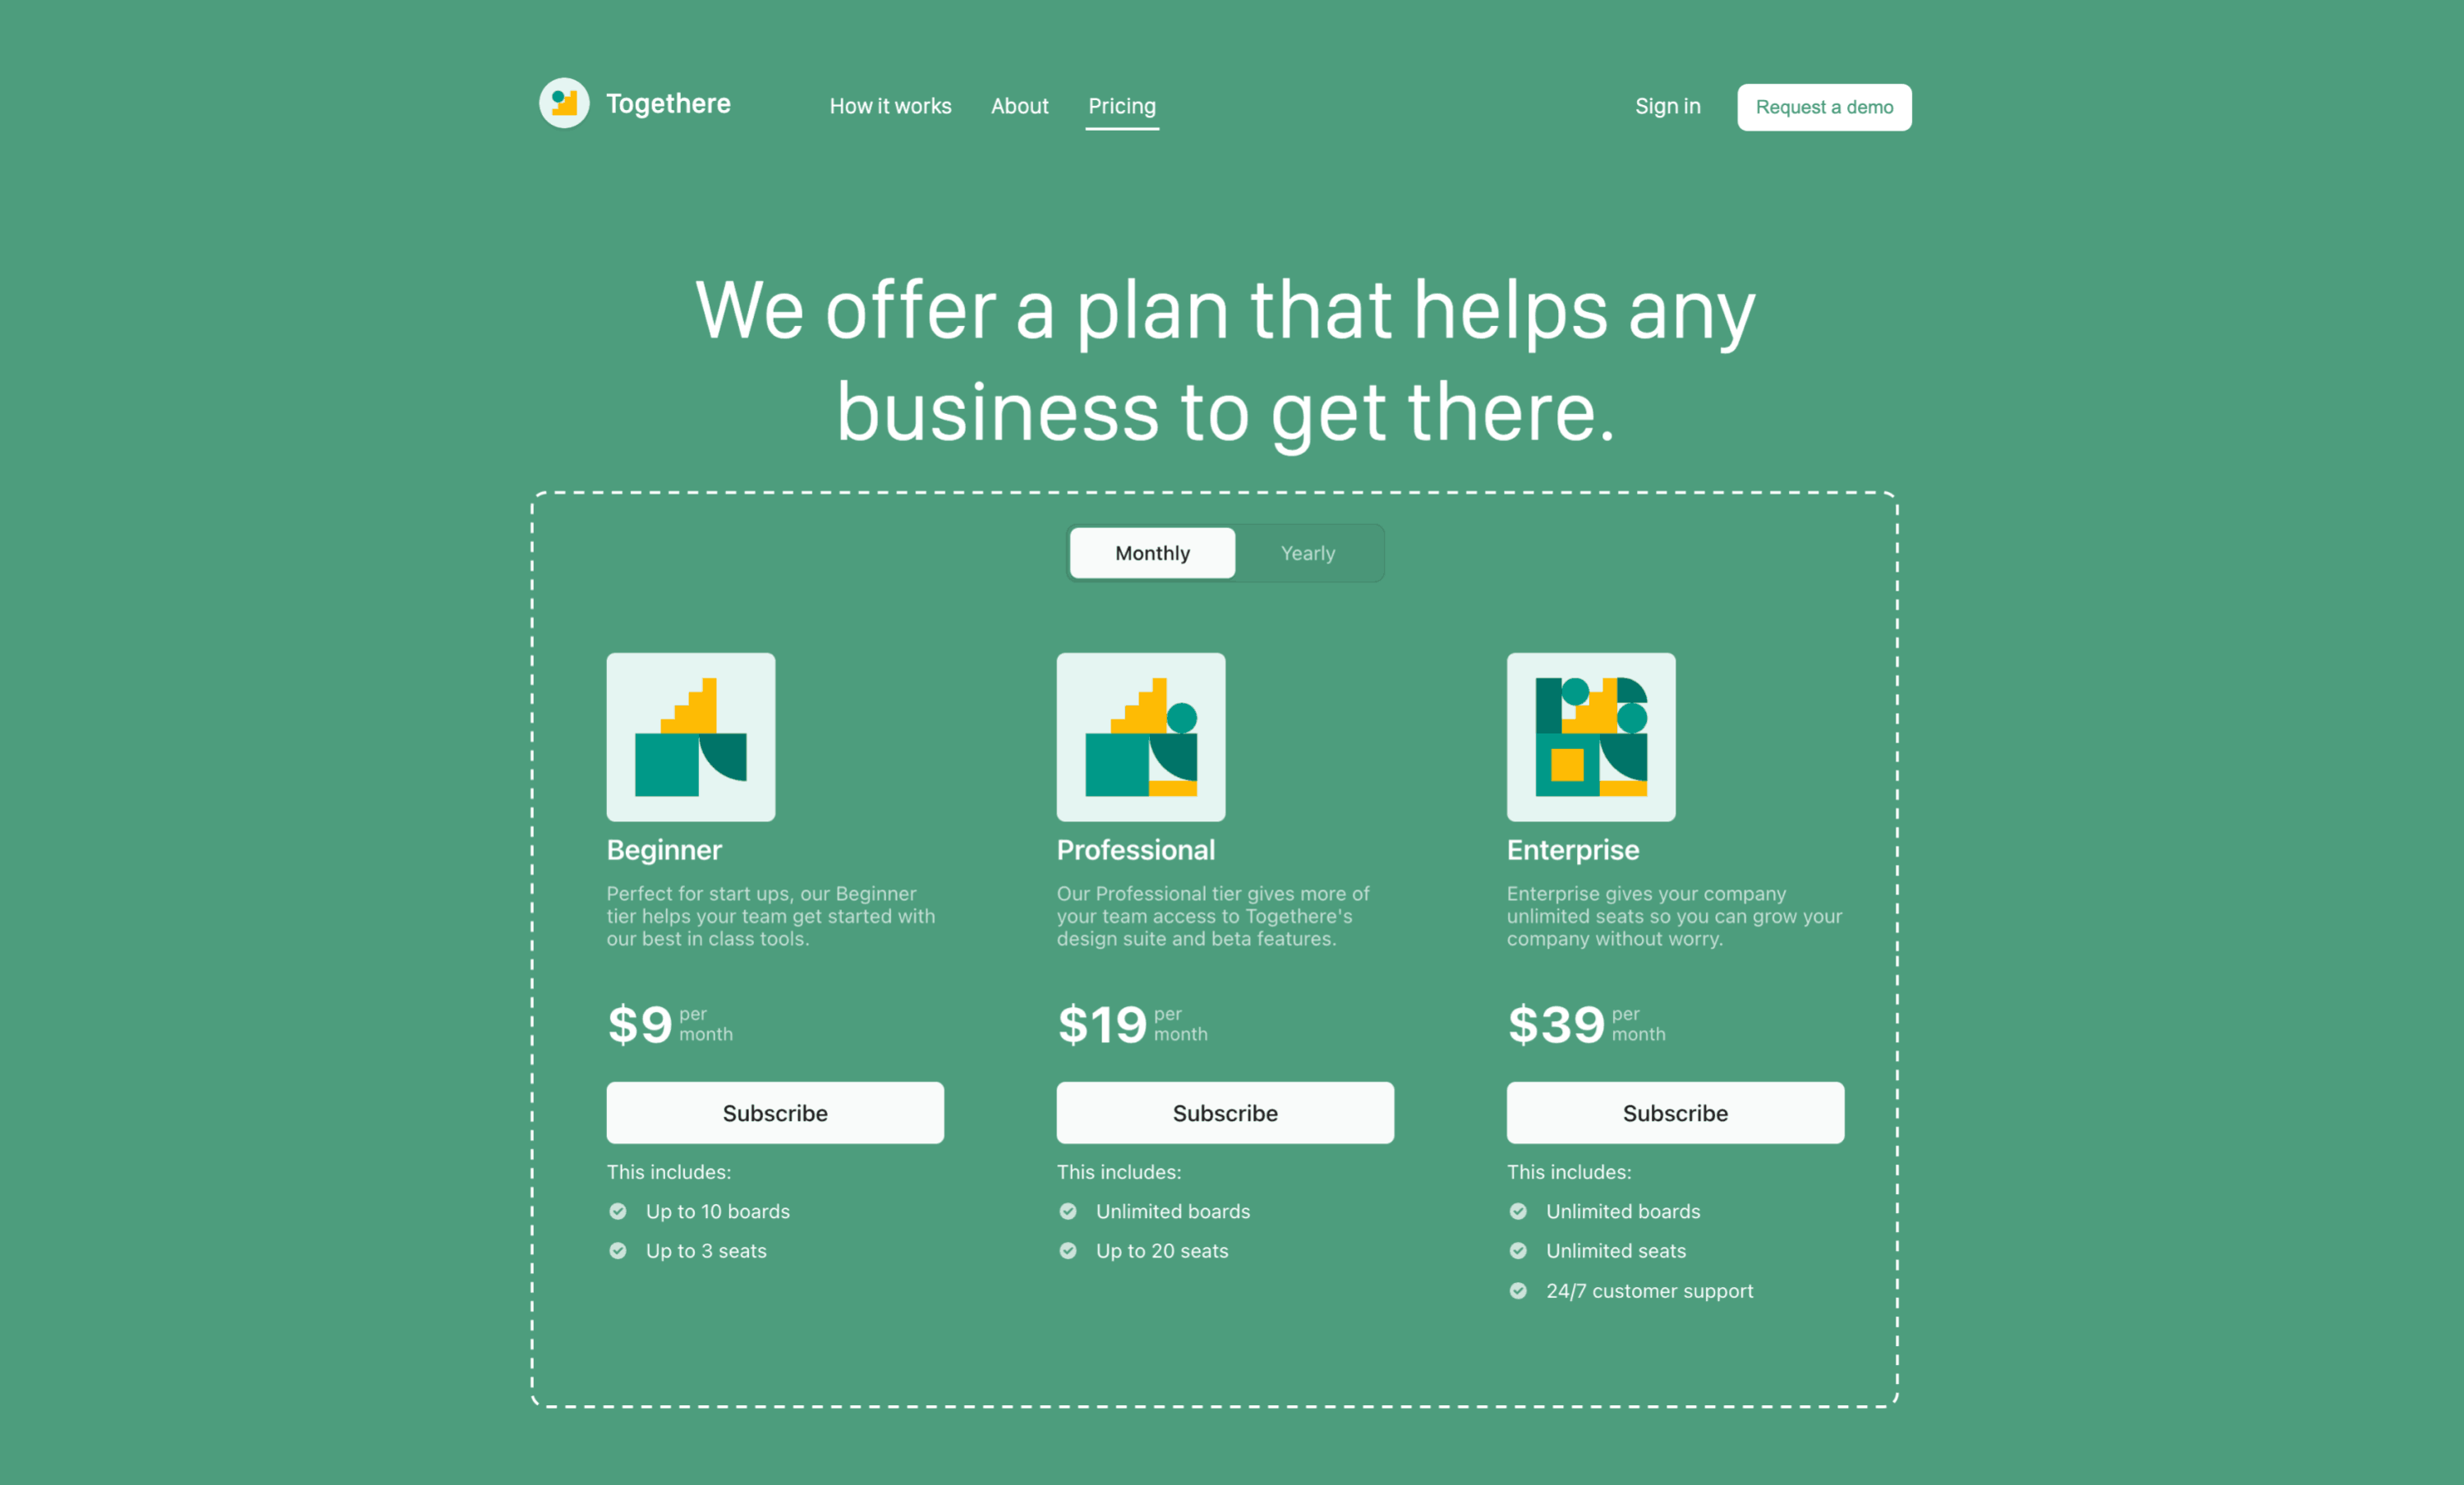
Embed a pricing table on your website to display pricing details and convert customers to checkout.
A pricing table is an embeddable UI that:
- Displays pricing information and takes customers to a prebuilt checkout flow. The checkout flow uses Stripe Checkout to complete the purchase.
- Supports common subscription business models like flat-rate, per-seat, tiered pricing, and free trials.
- Lets you configure, customize, and update product and pricing information directly in the Dashboard, without needing to write any code.
- Embeds into your website with a
<script>tag and web component. Stripe automatically generates the tag. You copy and paste it into your website’s code.
The diagram below summarizes how the customer goes from viewing a pricing table to completing checkout.
Create pricing table
- In the Dashboard, go to Product catalog > pricing tables.
- Click +Create pricing table.
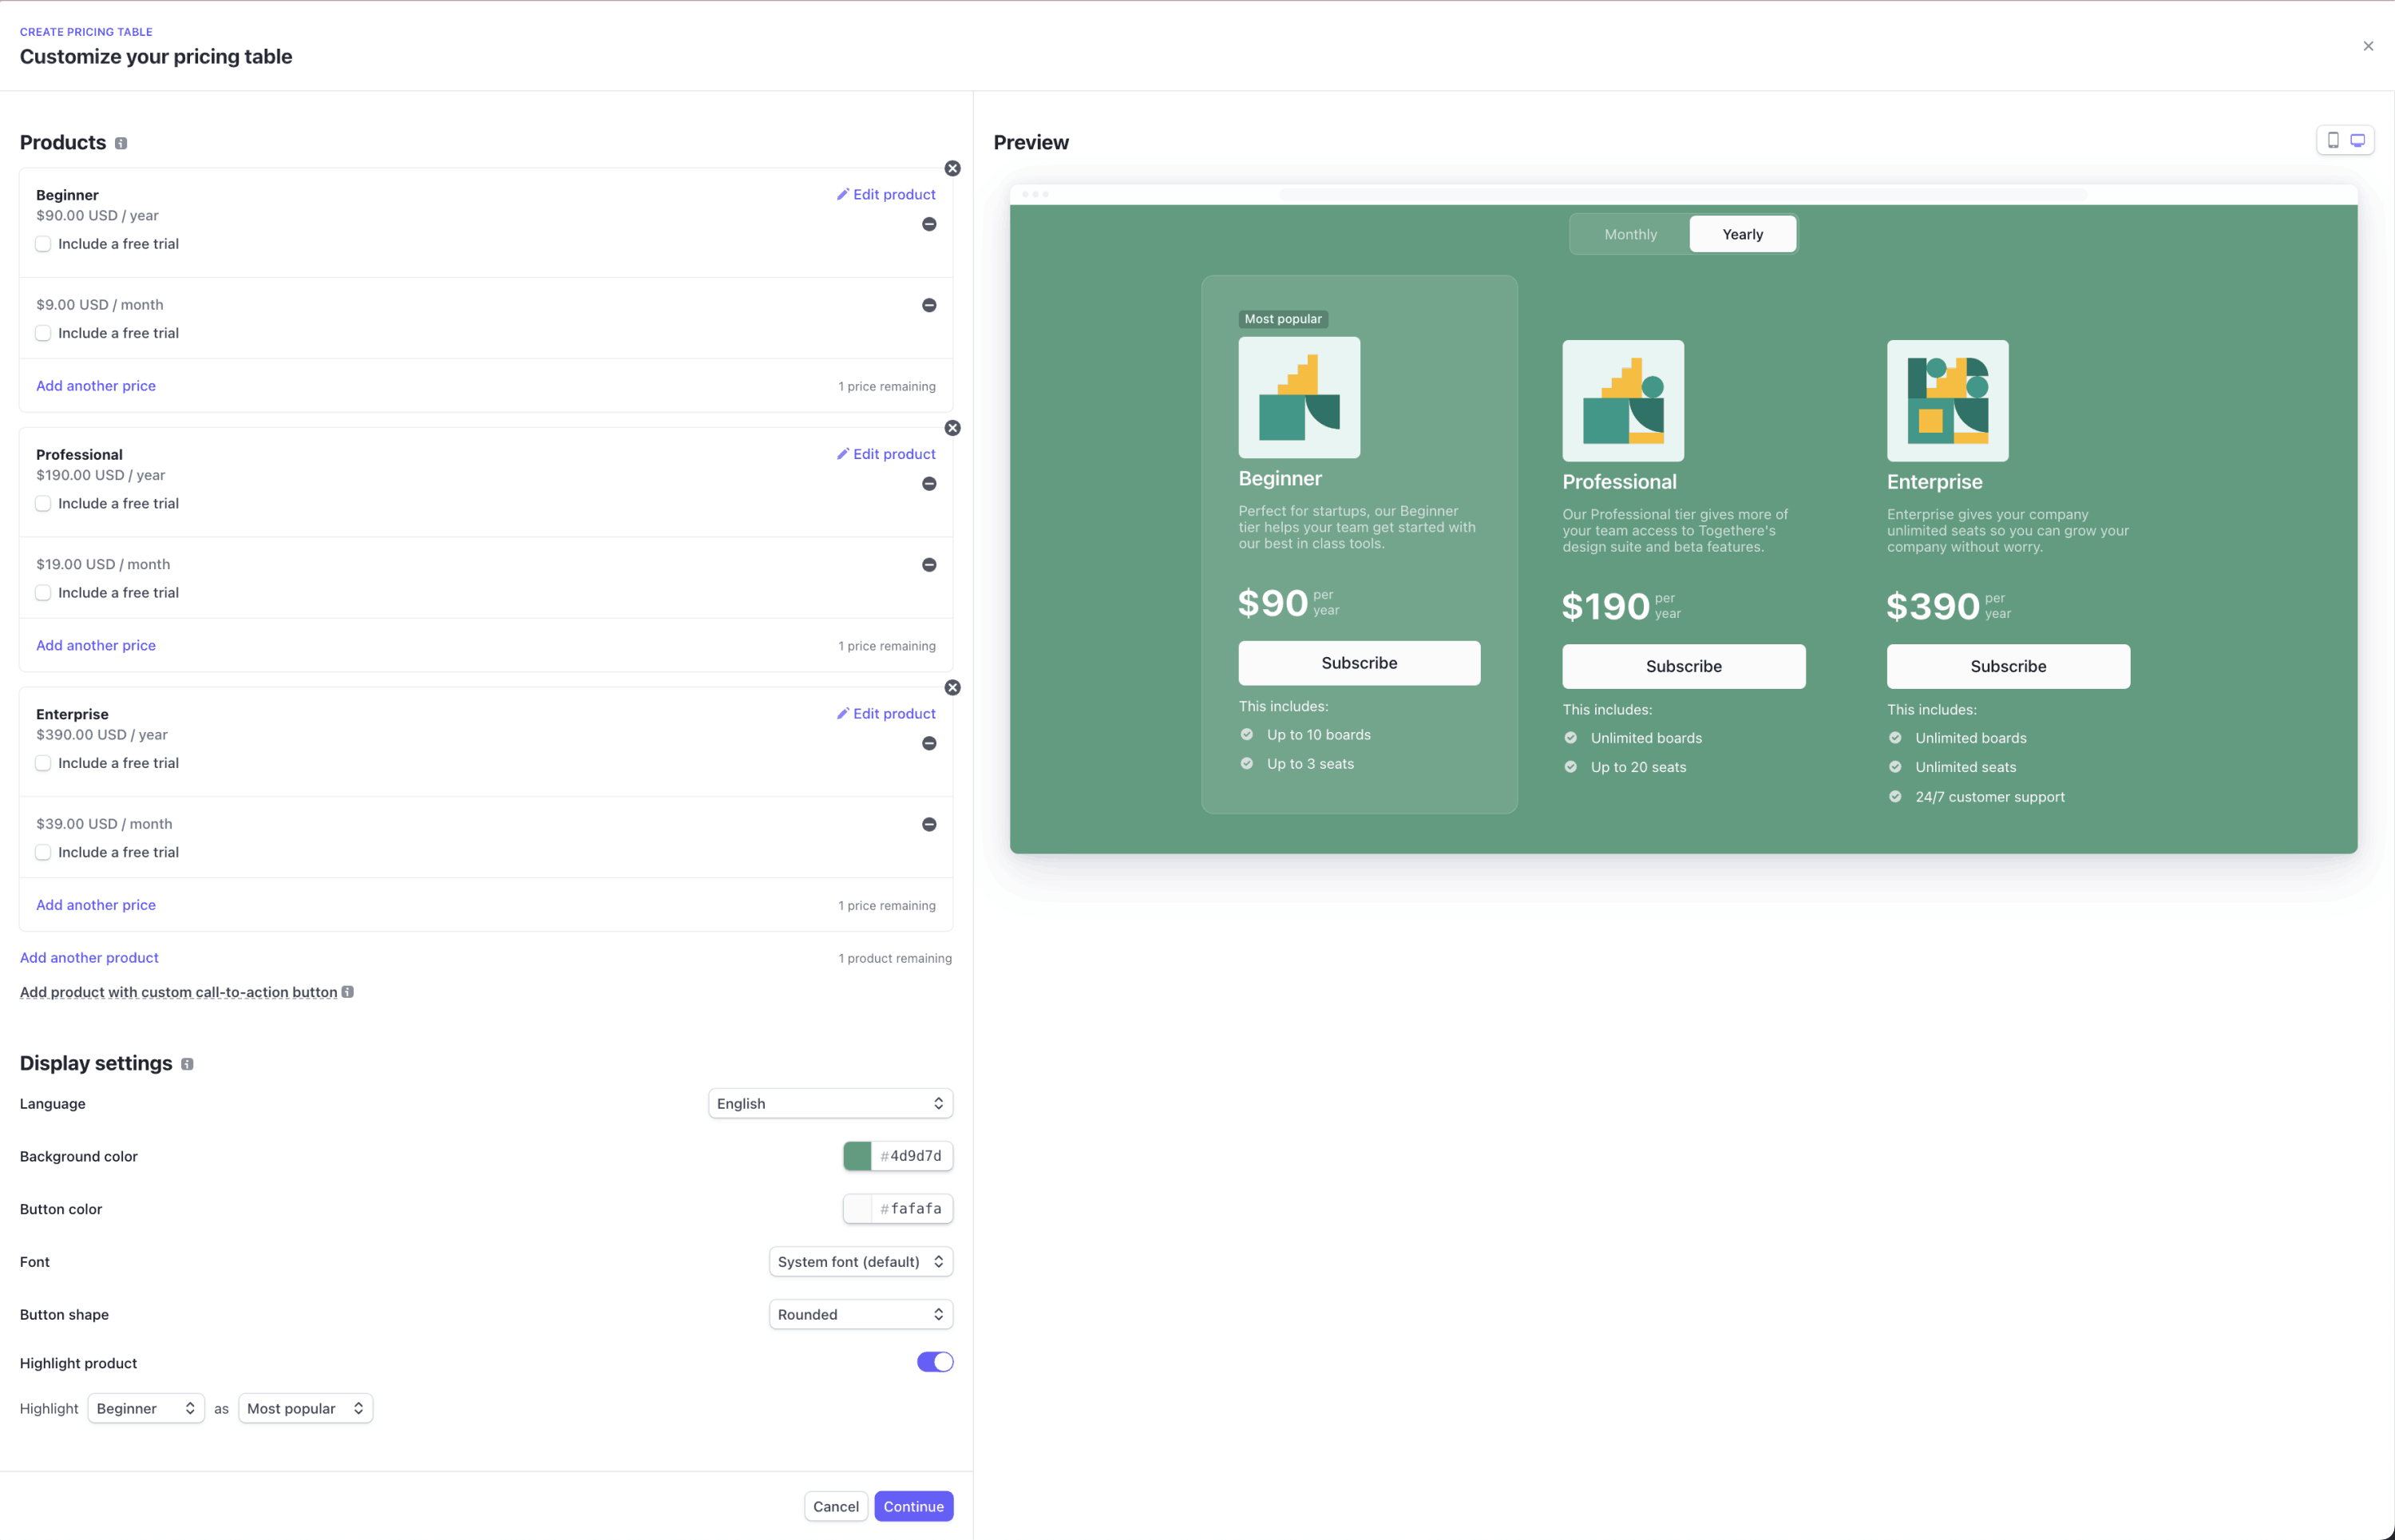
- Add products relevant to your customers (up to four per pricing interval). Optionally, include a free trial.
- Adjust the look and feel in Display settings. Highlight a specific product and customize the language, colors, font, and button design, then click Continue.
- Configure Payment settings to select the customer information to collect, options to present to the customer, and whether to display a confirmation page or redirect customers back to your site after a successful purchase.
Confirm maximum quantity
If you have tiered pricing that supports quantities greater than the default maximum of 99, check the Let customers adjust quantity property and increase the Max value accordingly. Tiered pricing options for quantities above the maximum don’t appear in the selector.
- Configure the customer portal by clicking Continue.
- Click Copy code to copy the generated code and embed it into your website.
Customize your pricing table

Configure payment settings
Embed pricing table
After creating a pricing table, Stripe automatically returns an embed code composed of a <script> tag and a <stripe-pricing-table> web component. Click the Copy code button to copy the code and paste it into your website.
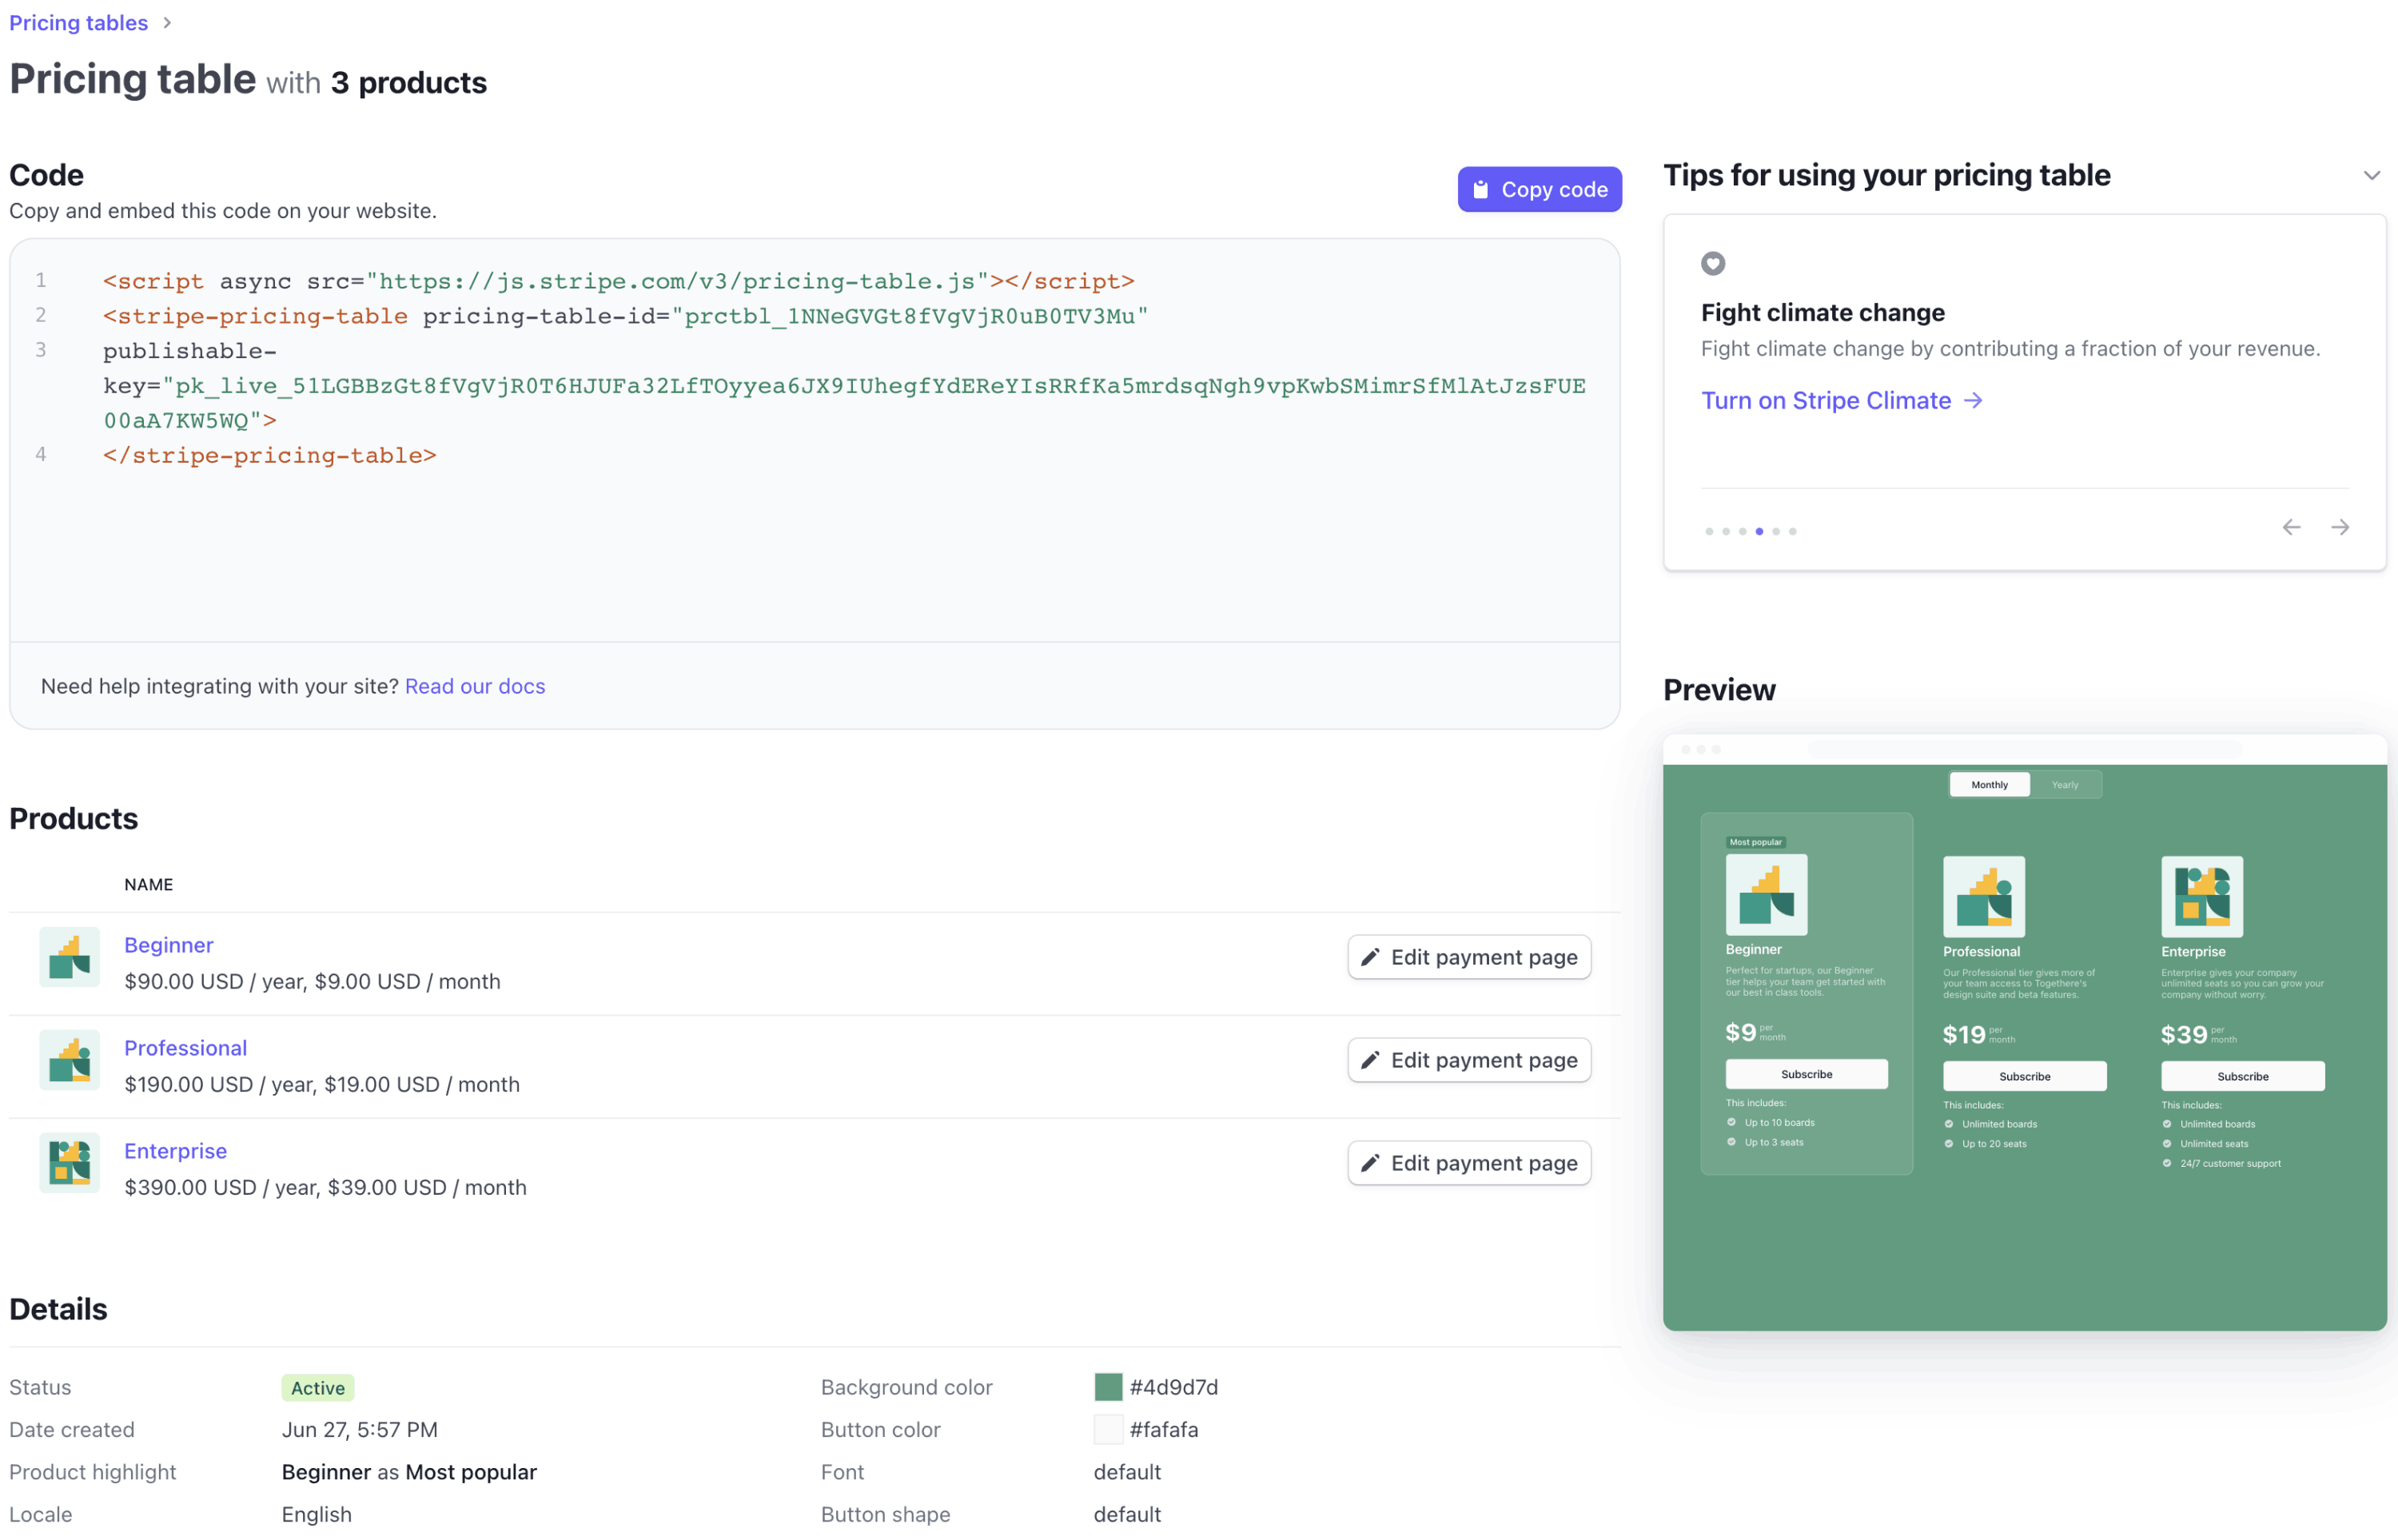
Copy the pricing table’s code and embed it on your website.
If you’re using HTML, paste the embed code into the HTML. If you’re using React, include the script tag in your index. page to mount the <stripe-pricing-table> component.
注意
The pricing table uses your account’s publishable API key. If you revoke the API key, you need to update the embed code with your new publishable API key.
Track subscriptions
When a customer purchases a subscription, you’ll see it on the subscriptions page in the Dashboard.
Handle fulfillment with the Stripe API
The pricing table component uses Stripe Checkout to render a prebuilt, hosted payment page. When a payment is completed using Checkout, Stripe sends the checkout.session.completed event. Register an event destination to receive the event at your endpoint to process fulfillment and reconciliation. See the Checkout fulfillment guide for more details.
The <stripe-pricing-table> web component supports setting the client-reference-id property. When the property is set, the pricing table passes it to the Checkout Session’s client_reference_id attribute to help you reconcile the Checkout Session with your internal system. This can be an authenticated user ID or a similar string. client-reference-id can be composed of alphanumeric characters, dashes, or underscores, and be any value up to 200 characters. Invalid values are silently dropped and your pricing table will continue to work as expected.
注意
Since the pricing table is embedded on your website and is accessible to anyone, check that client-reference-id doesn’t include sensitive information or secrets, such as passwords or API keys.
Limitations
- Business models—The pricing table supports subscription business models such as flat-rate, per-seat, tiered pricing, and trials. It doesn’t support usage-based pricing models.
- Product and price limits—You can configure the pricing table to display a maximum of four products, with up to three prices per product. You can only configure three unique pricing intervals across all products.
- Account creation—The pricing table call-to-action takes customers directly to checkout. It doesn’t currently support adding an intermediate step (for example, asking the customer to create an account on your website before checking out).
- Rate limit—The pricing table has a rate limit of up to 50 read operations per second. If you have multiple pricing tables, the rate limit is shared.
- Checkout redirect—The pricing table can’t redirect customers to checkout if your website provider sandboxes the embed code in an iframe without the
allow-top-navigationattribute enabled. Contact your website provider to enable this setting. - Testing the pricing table locally—The pricing table requires a website domain to render. To test the pricing table locally, run a local HTTP server to host your website’s
index.file over thehtml localhostdomain. To run a local HTTP server, use Python’s SimpleHTTPServer or the http-server npm module. - Connect—The pricing table isn’t designed to work with Connect and doesn’t support features like a platform collecting fees.
Limit customers to one subscription
You can redirect customers that already have a subscription to the customer portal or your website to manage their subscription. Learn more about limiting customers to one subscription.