Verwendung des Dashboards
Erstellen und Versenden einer Rechnung über das Stripe-Dashboard.
Erfahren Sie, wie Sie im Dashboard eine Rechnung erstellen, senden und bearbeiten. Rechnungen enthalten nicht nur eine Auflistung erbrachter Dienstleistungen und Waren, einschließlich aller Kosten, Mengen und Steuern, sondern dienen auch dem Einzug von Zahlungen. Um Rechnungen automatisch zu senden, vernetzen Sie sich mit der Invoicing API.
Rechnung erstellen
Bitte führen Sie die folgenden Schritte durch, um eine Rechnung zu erstellen und zu senden:
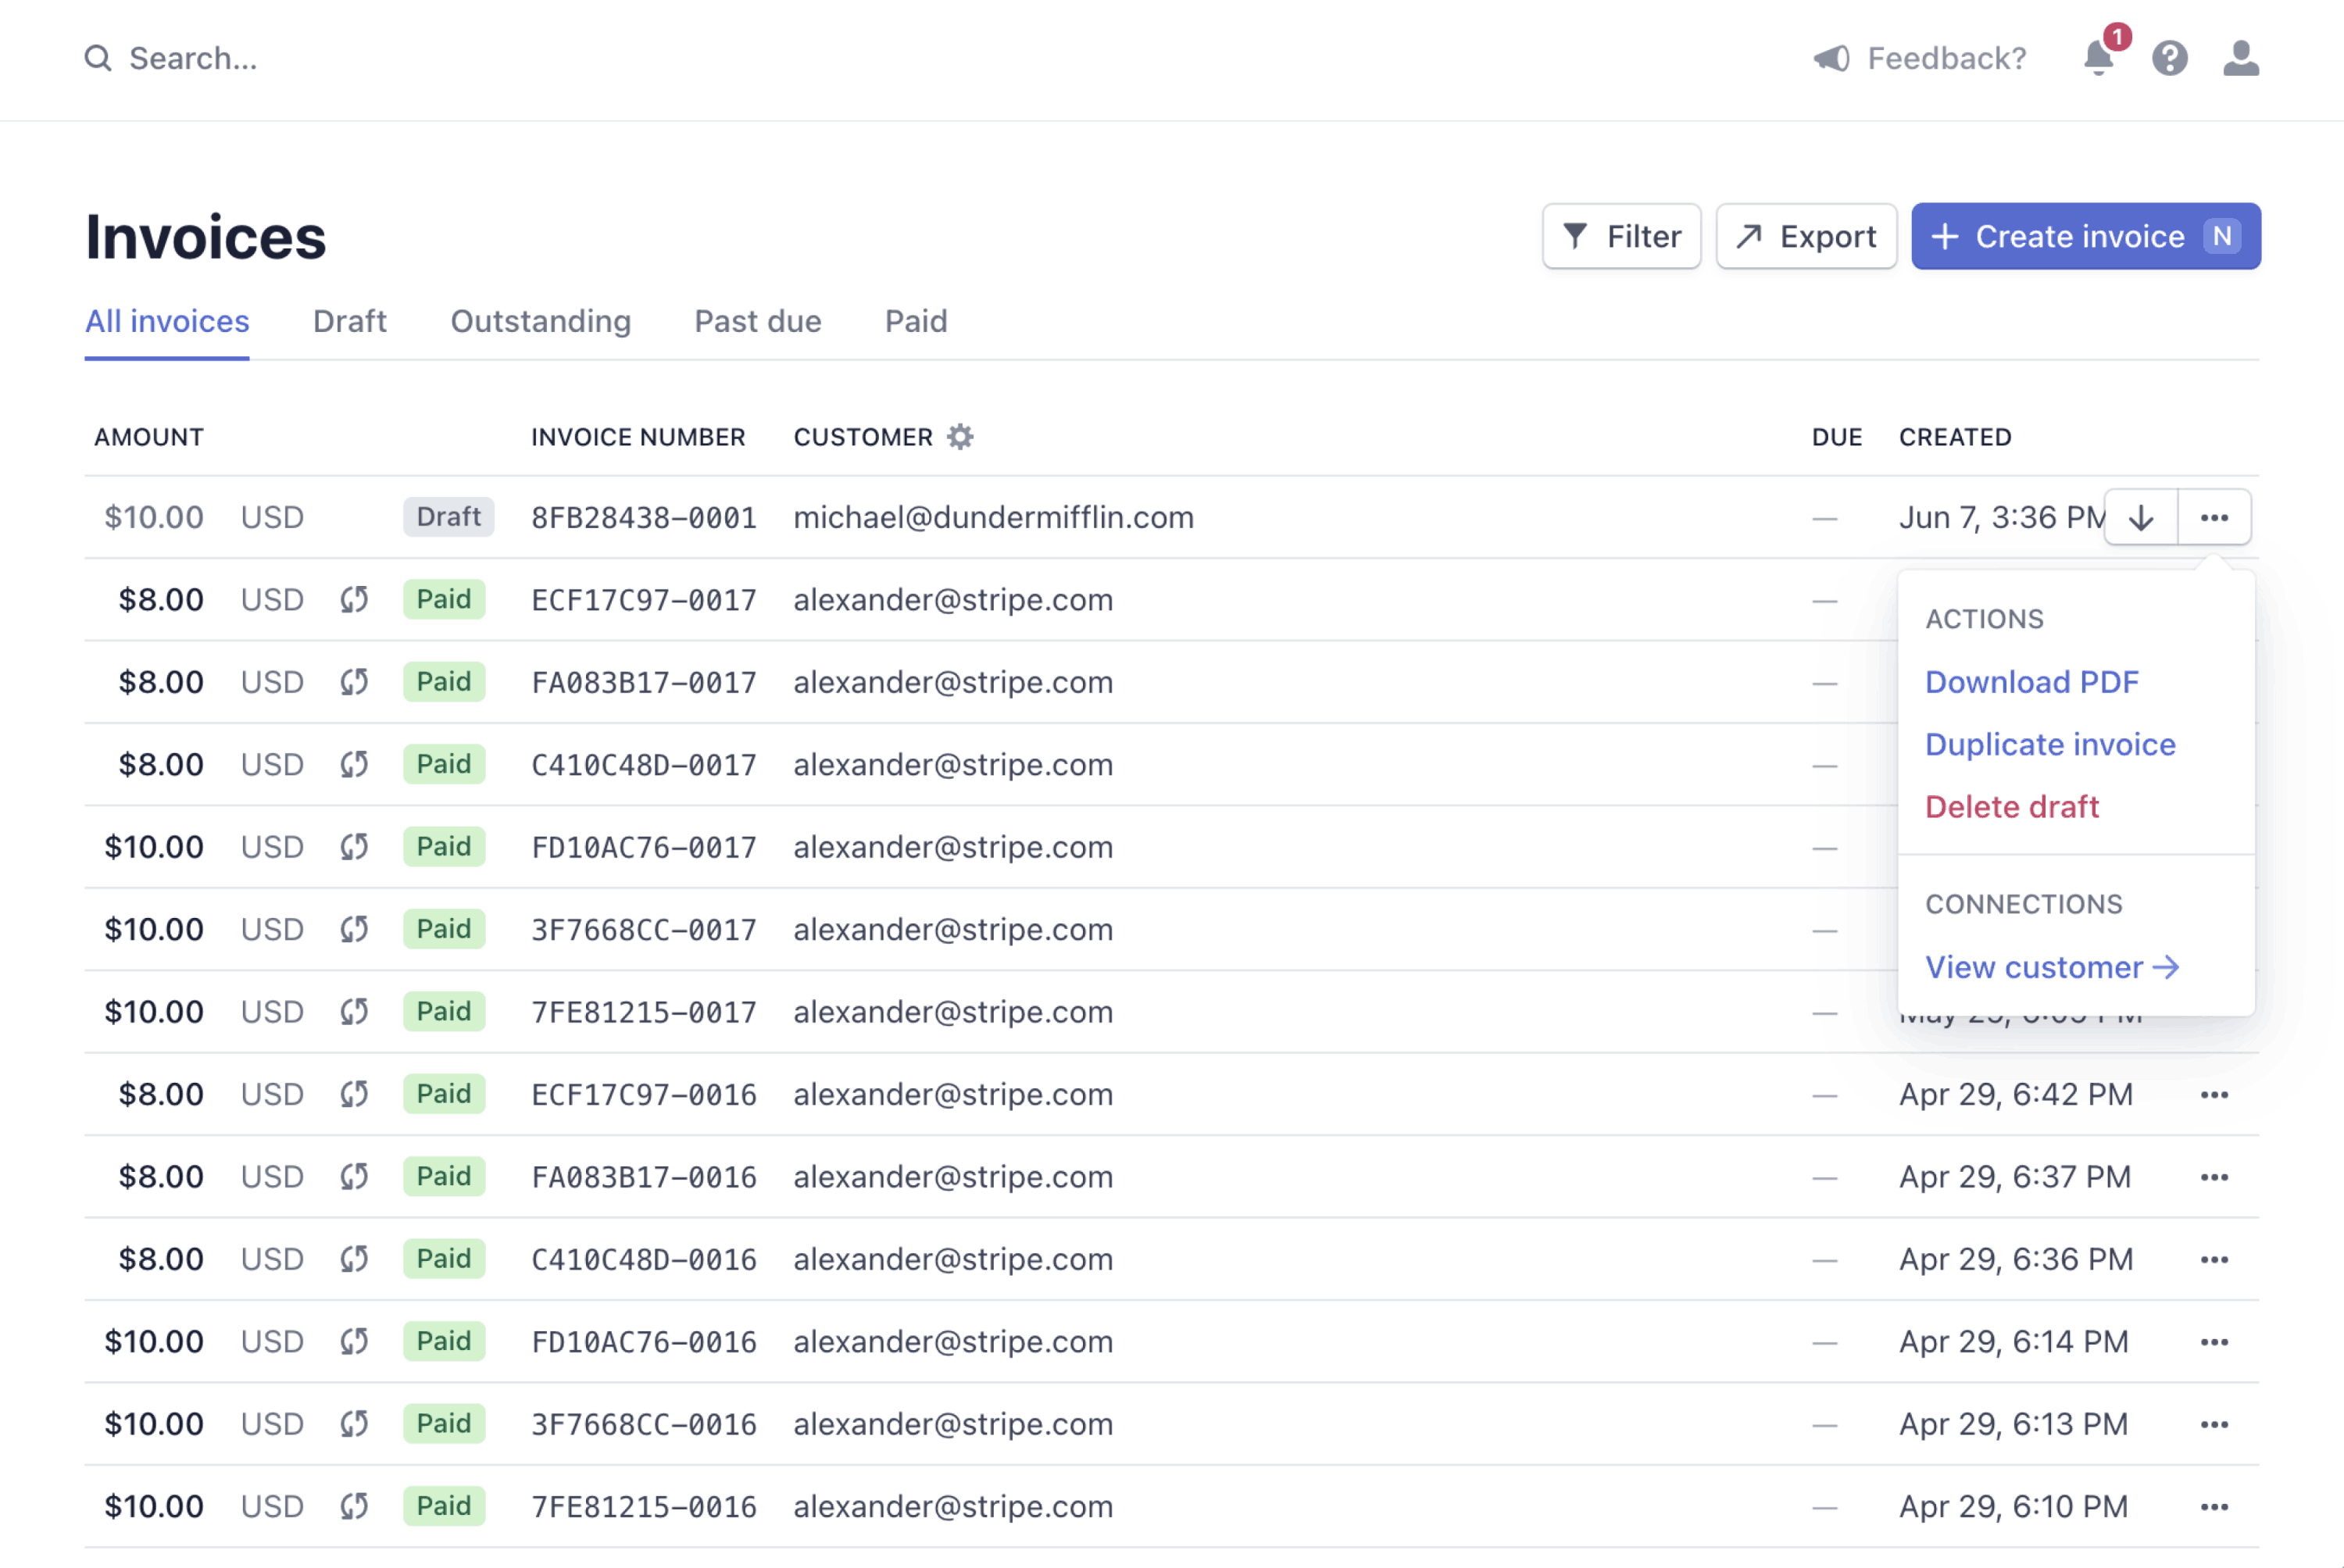
Rufen Sie im Dashboard die Seite Rechnungen auf und klicken Sie auf Rechnung erstellen, um den Rechnungseditor zu öffnen. Jedes Mal, wenn Sie den Rechnungseditor verlassen, speichert Stripe einen Entwurf. (Um einen Rechnungsentwurf zu löschen, klicken Sie auf das Überlaufmenü () neben einer Rechnung auf der Seite Rechnungen.)
Wählen Sie eine bestehende Kundin/einen bestehenden Kunden aus oder klicken Sie auf Neue Kundin/neuen Kunden hinzufügen. Bei Neukundinnen und Neukunden müssen Sie einen Namen eingeben. Optional können Sie eine E-Mail-Adresse oder weitere Details hinzufügen.
(Optional) Klicken Sie auf das Überlaufmenü () im Abschnitt Posten, um das Dialogfeld Optionen für Posten zu öffnen. Wählen Sie die gewünschte Währung und die Steuerdarstellungsoption für die Rechnung aus.
Wählen Sie Einmaligen Artikel hinzufügen aus, um einen einzelnen, einmaligen Artikel zu erstellen. Um ein Produkt für die zukünftige Verwendung zu speichern, wählen Sie Neues Produkt erstellen.
Geben Sie die Menge und den Preis für Ihr neues Produkt oder Ihren neuen Artikel an.
(Optional) Klicken Sie unter jedem Artikel auf die Option Artikeloptionen, um einen Steuersatz, einen Gutschein oder ein Lieferdatum hinzuzufügen. Sie können das Dashboard auch verwenden, um einen Steuersatz oder einen Gutschein zu erstellen.
(Optional) Im Feld Vermerk können Sie Ihren Kundinnen/Kunden weitere Informationen zur Verfügung stellen. Sie können den Rechnungsvermerk bearbeiten, indem Sie auf der Detailseite der Rechnung auf Vermerk bearbeiten klicken.
Wählen Sie eine der folgenden Optionen für den Rechnungsversand aus:
Automatisch eine hinterlegte Zahlungsmethode belasten: Dadurch wird Kundinnen/Kunden der Rechnungsbetrag mithilfe der Ihnen vorliegenden Zahlungsmethoden sofort in Rechnung gestellt.
Rechnung oder Link zur Zahlungsseite manuell senden: Stellt einen Zahlungslink bereit, den Sie an Kundinnen/Kunden senden können, nachdem Sie die Rechnung bestätigt haben.
Rechnung mit Link senden: So kann Stripe eine E-Mail mit einer Zahlungsseite und einer Rechnungs-PDF versenden.
Rechnung ohne Link senden: So kann Stripe nur eine Rechnungs-PDF versenden.
(Optional) Wenn Sie diese Rechnung zu einem späteren Zeitpunkt automatisch finalisieren lassen möchten, wählen Sie Versanddatum planen aus. Oder, je nachdem, was Sie im vorherigen Schritt ausgewählt haben, Abbuchungsdatum planen oder Abschlussdatum planen.
(Optional) Blenden Sie die Erweiterten Optionen ein und fügen Sie nutzerdefinierte Felder hinzu. Weitere Informationen finden Sie unter Nettopreise und Steuern. Blenden Sie die Erweiterten Optionen ein und fügen Sie nutzerdefinierte Felder hinzu.
Klicken Sie auf Rechnung prüfen und entscheiden Sie, ob Sie zusätzliche E-Mails hinzufügen oder mit der Bearbeitung fortfahren möchten. Senden Sie die Rechnung.
Rechnung im Dashboard erstellen
Rechnung bearbeiten
Im Dashboard können Sie auch eine Rechnung duplizieren und die neue Kopie ändern. Wenn Sie eine Rechnung duplizieren, werden alle Informationen der Originalrechnung mit Ausnahme von Stornorechnungen und allen gelöschten (oder archivierten) Produkten, Preisen, Gutscheinen, Rabatten und Steuersätzen kopiert. Wenn Ihnen bei einer bereits erstellten Rechnung ein Fehler unterlaufen ist, duplizieren Sie diese, nehmen Sie Ihre Korrekturen vor und senden Sie dann die neue Rechnung. Denken Sie auch daran, die fehlerhafte Rechnung zu stornieren.
Hinweis
Sie können den Status einer offenen Rechnung im Dashboard ändern, indem Sie auf der Detailseite Weitere Optionen > Rechnungsstatus ändern auswählen.
Zum Duplizieren einer Rechnung rufen Sie Ihre Rechnungen auf und klicken Sie bei der zu duplizierenden Rechnung auf das Erweiterungsmenü (). Klicken Sie dann auf Rechnung duplizieren, um die neue Rechnung zu erstellen, zu bearbeiten und dann zu versenden.

Rechnung vom Dashboard aus duplizieren
Eine Rechnung anpassen
Es gibt mehrere Möglichkeiten zur Anpassung von Rechnungen. Diese Optionen ermöglichen es Ihnen, Ihr eigenes Branding zu verwenden und Ihre Rechnungen an die Bestimmungen in den Ländern, in denen Sie tätig sind, anzupassen.
Rechnungsbelege
Stripe erstellt Belege, wenn der/die Kund/in eine Rechnung bezahlt oder eine Zahlung für ein Abonnement tätigt. Wir führen die Belege für Abonnement- und Rechnungszahlungen einzeln auf, um Einzelposten, Rabatte und Steuern für die Zahlung einzubeziehen. Um automatisch Belege zu senden, achten Sie darauf, dass die Option Erfolgreiche Zahlungen in Ihren E-Mail-Einstellungen aktiviert ist und fügen Sie die E-Mail-Adresse des/der Kund/in hinzu.
Nach der Zahlung enthält die gehostete Rechnungsseite einen Link zu einem Beleg, den Kundinnen/Kunden für ihre eigenen Unterlagen herunterladen können. Sie können einen Beleg auch manuell senden, indem Sie auf der Seite Rechnungsdetails auf Beleg senden klicken. Wenn Sie per E-Mail einen Testbeleg an sich selbst senden möchten, rufen Sie Ihre Branding-Einstellungen auf und bewegen Sie den Mauszeiger über den E-Mail-Beleg, damit Testbeleg senden angezeigt wird. Weitere Informationen zu E-Mail-Belegen finden Sie unter E-Mail-Belege.