Use the Dashboard
Create, send, and modify invoices from the Stripe Dashboard.
Learn how to create, send, and modify an invoice from the Dashboard. Invoices provide an itemized list of goods and services rendered, which includes the cost, quantity, and taxes. You can also use them as a tool to collect payment. To send invoices automatically, integrate with the Invoicing API.
Create an invoice
To create and send an invoice, complete the following steps:
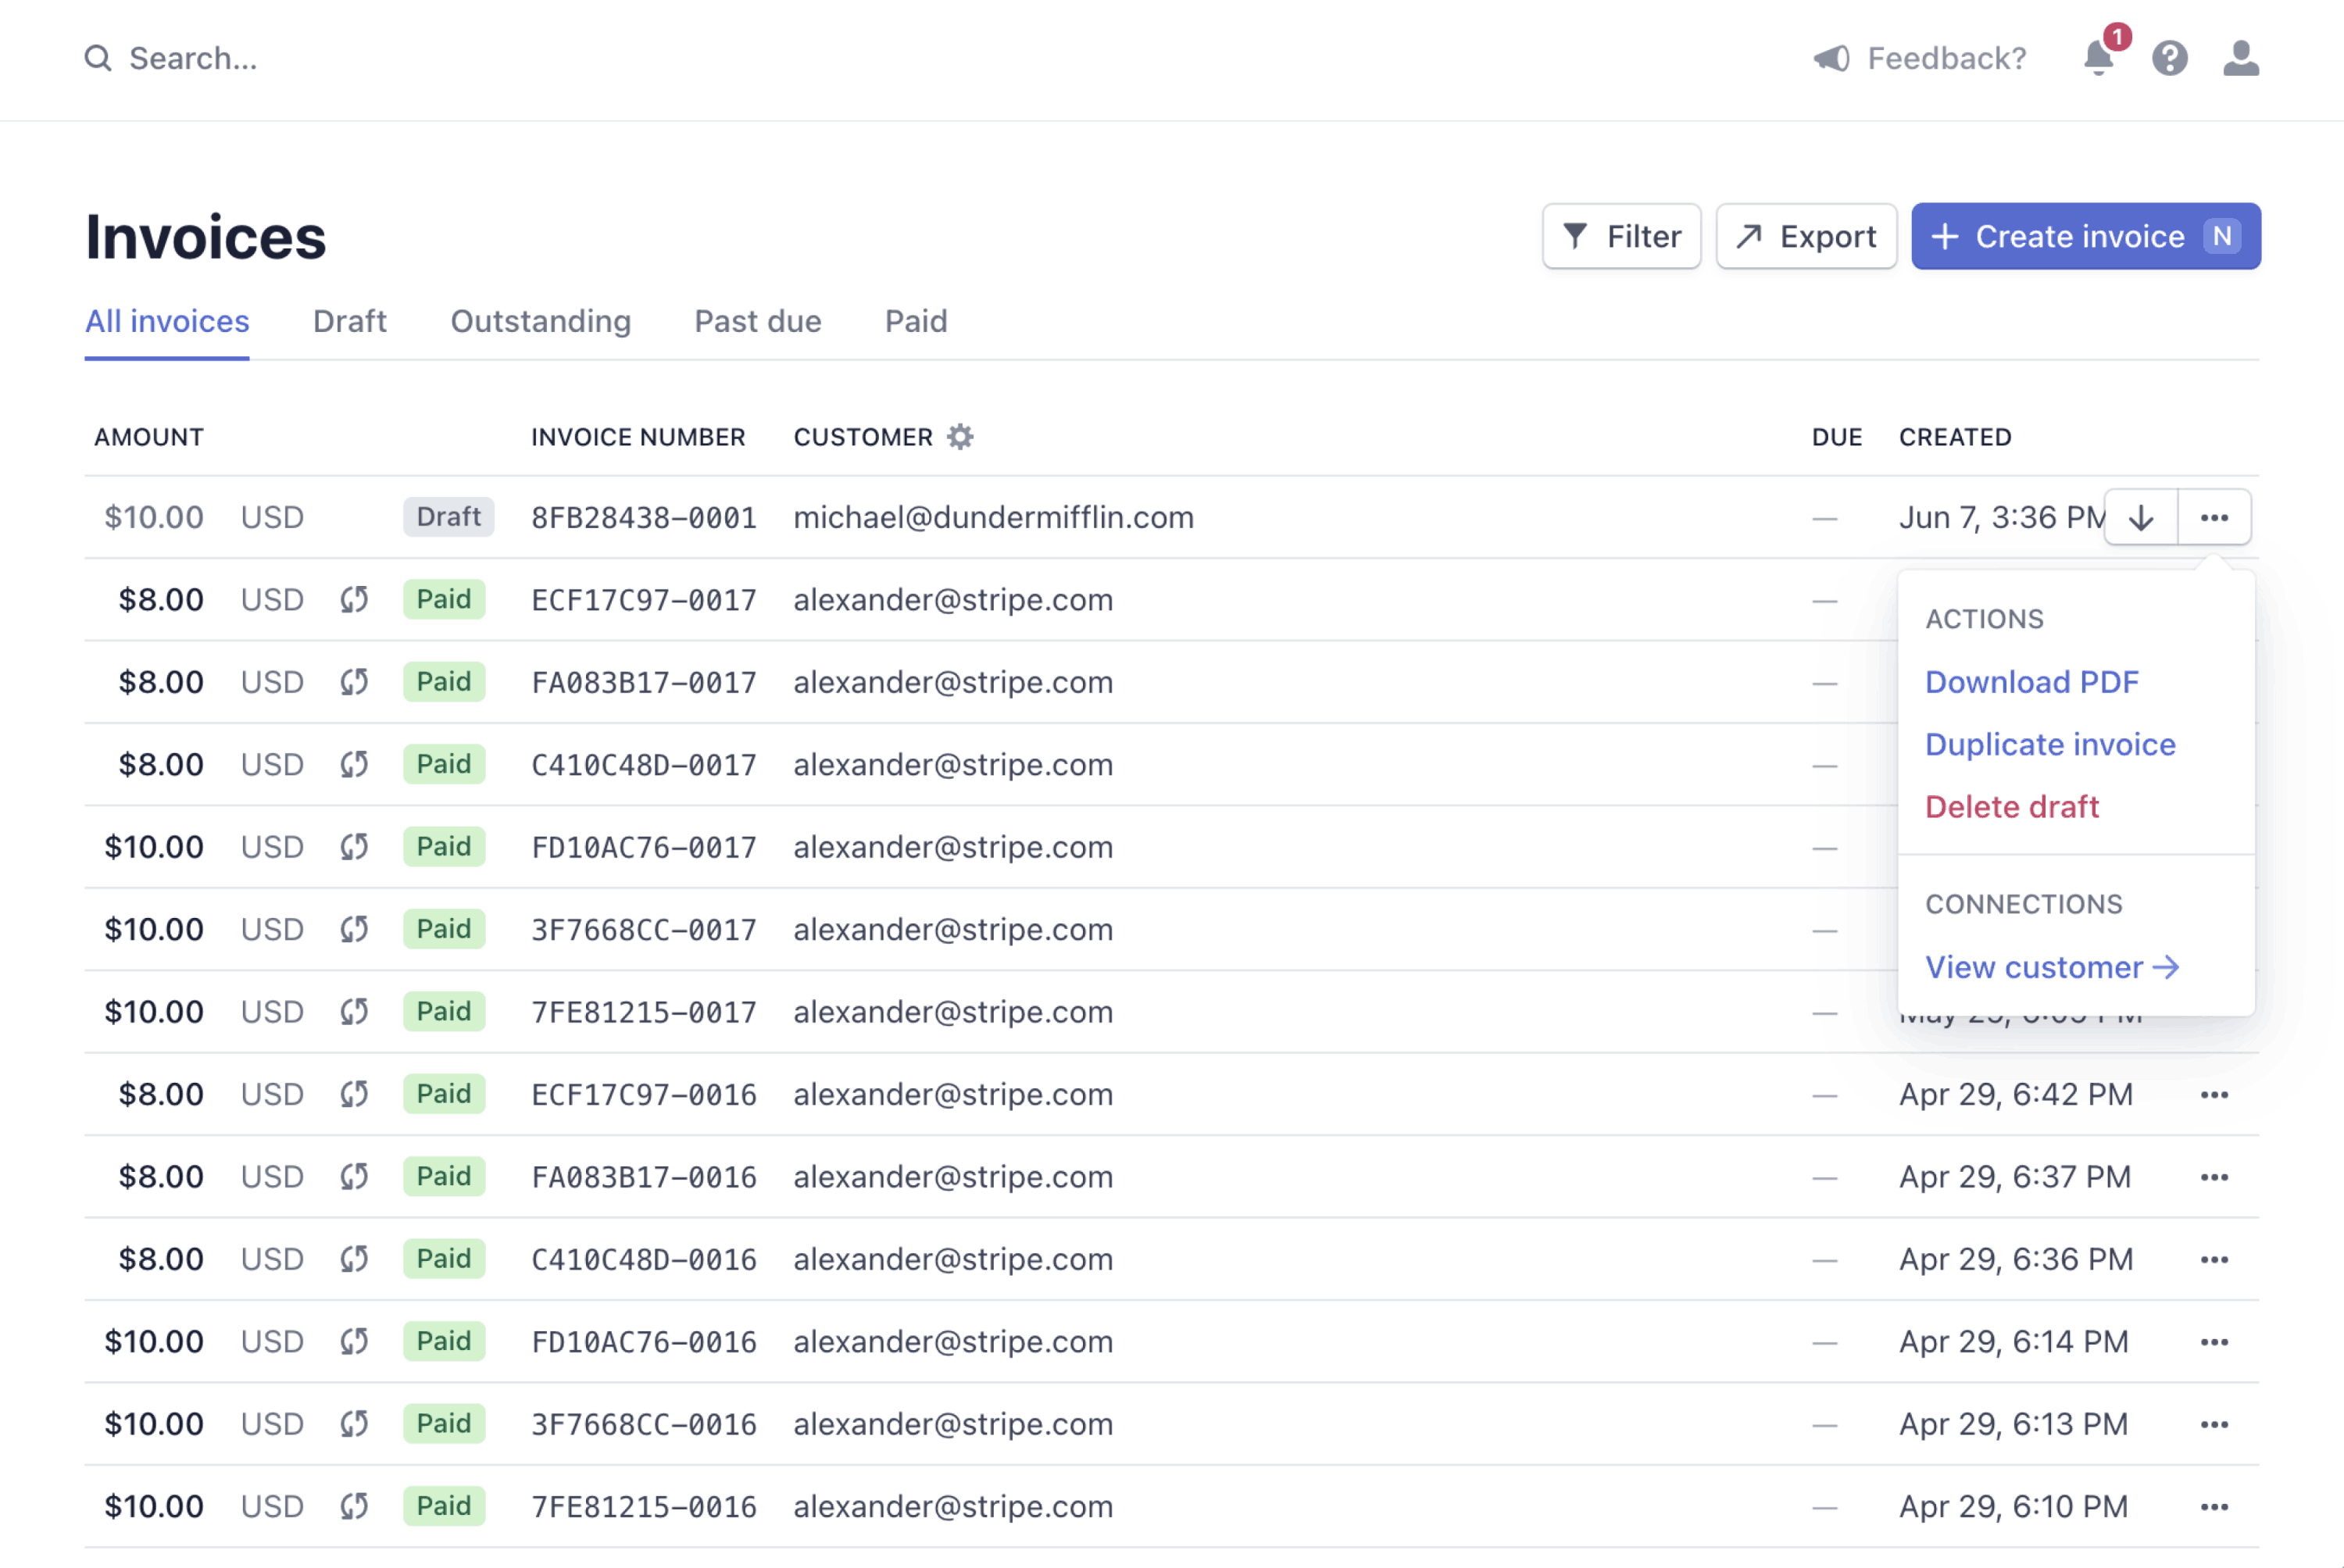
In the Dashboard, go to the Invoices page, and click Create Invoice to open the invoice editor. Whenever you exit the invoice editor, Stripe saves a draft. (To delete a draft invoice, click the overflow menu () next to an invoice on the Invoices page.)
Select an existing customer or click Add new customer. For new customers, you have to enter a name. You can optionally add an email address or other details.
(Optional) Click the overflow menu () in the Items section to open the Items Options dialog. Choose the desired currency and tax rendering option for the invoice.
Select Add one-time item to create a single, one-time item. To save a product for future use, select Create new product.
Enter the Quantity and Price for your new item or product.
(Optional) Click the Item options under each item to add a tax rate, coupon, or supply date. You can also use the Dashboard to create a tax rate or coupon.
(Optional) Use the Memo box to provide more information to your customer. You can edit the memo on an invoice by clicking Edit memo on its details page.
Select one of the following invoice delivery options:
Automatically charge a payment method on file: Immediately charges the invoice amount to your customer’s payment method that you have on file.
Send invoice or payment page link manually: Provides a payment link for you to send to customers after you confirm the invoice.
Email invoice with link: Enables Stripe to send an email with a payment page and an invoice PDF.
Email invoice without link: Enables Stripe to send an invoice PDF only.
(Optional) To schedule this invoice to finalize automatically at some date in the future, select Schedule send date. Or, depending on what you selected in the previous step, Schedule charge date or Schedule finalization date.
(Optional) Expand Advanced options, and add custom fields. To learn more, see Net prices and taxes. Expand Advanced options, and add custom fields.
Click Review invoice and decide whether you want to include additional emails or continue editing. Send the invoice.
Create an invoice with the Dashboard
Modify an invoice
With the Dashboard, you can duplicate an invoice and modify the new copy. When you duplicate an invoice, Stripe copies all of the information on the original invoice except for credit notes, deleted (or archived) products, prices, coupons, discounts, and tax rates. If you made a mistake on an invoice you already created, duplicate it, make your corrections, and then send the new invoice. Remember to void the incorrect invoice as well.
Note
You can change the status of an open invoice in the Dashboard by going to its details page and choosing More > Change Invoice Status.
To duplicate an invoice, view your invoices and click the overflow menu () for the invoice you want to duplicate. Click Duplicate invoice to create, edit, and then send the new invoice.

Duplicate an invoice from the Dashboard
Customize an invoice
You can customize invoices in several ways. These options allow you to add your own branding and modify your invoices so that they comply in the jurisdictions where you operate.
Invoice receipts
Stripe creates receipts when a customer pays an invoice, or makes any subscription payment. We itemize the receipts for subscription and invoice payments to include line items, discounts, and taxes for the payment. To automatically send receipts, make sure that you enable the Successful payments option in your Email settings and that you also add the customer’s email.
After payment, the Hosted Invoice Page includes a link to a receipt that a customer can download for their own records. You can also manually send a receipt by clicking the Send receipt button on the Invoice details page. To email yourself a test receipt, go to your Branding settings and hover over the email receipt to see the Send test receipt button. To learn more about email receipts, see Email receipts.