Personnaliser l'apparence
Personnalisez votre intégration mobile avec l'API Appearance.
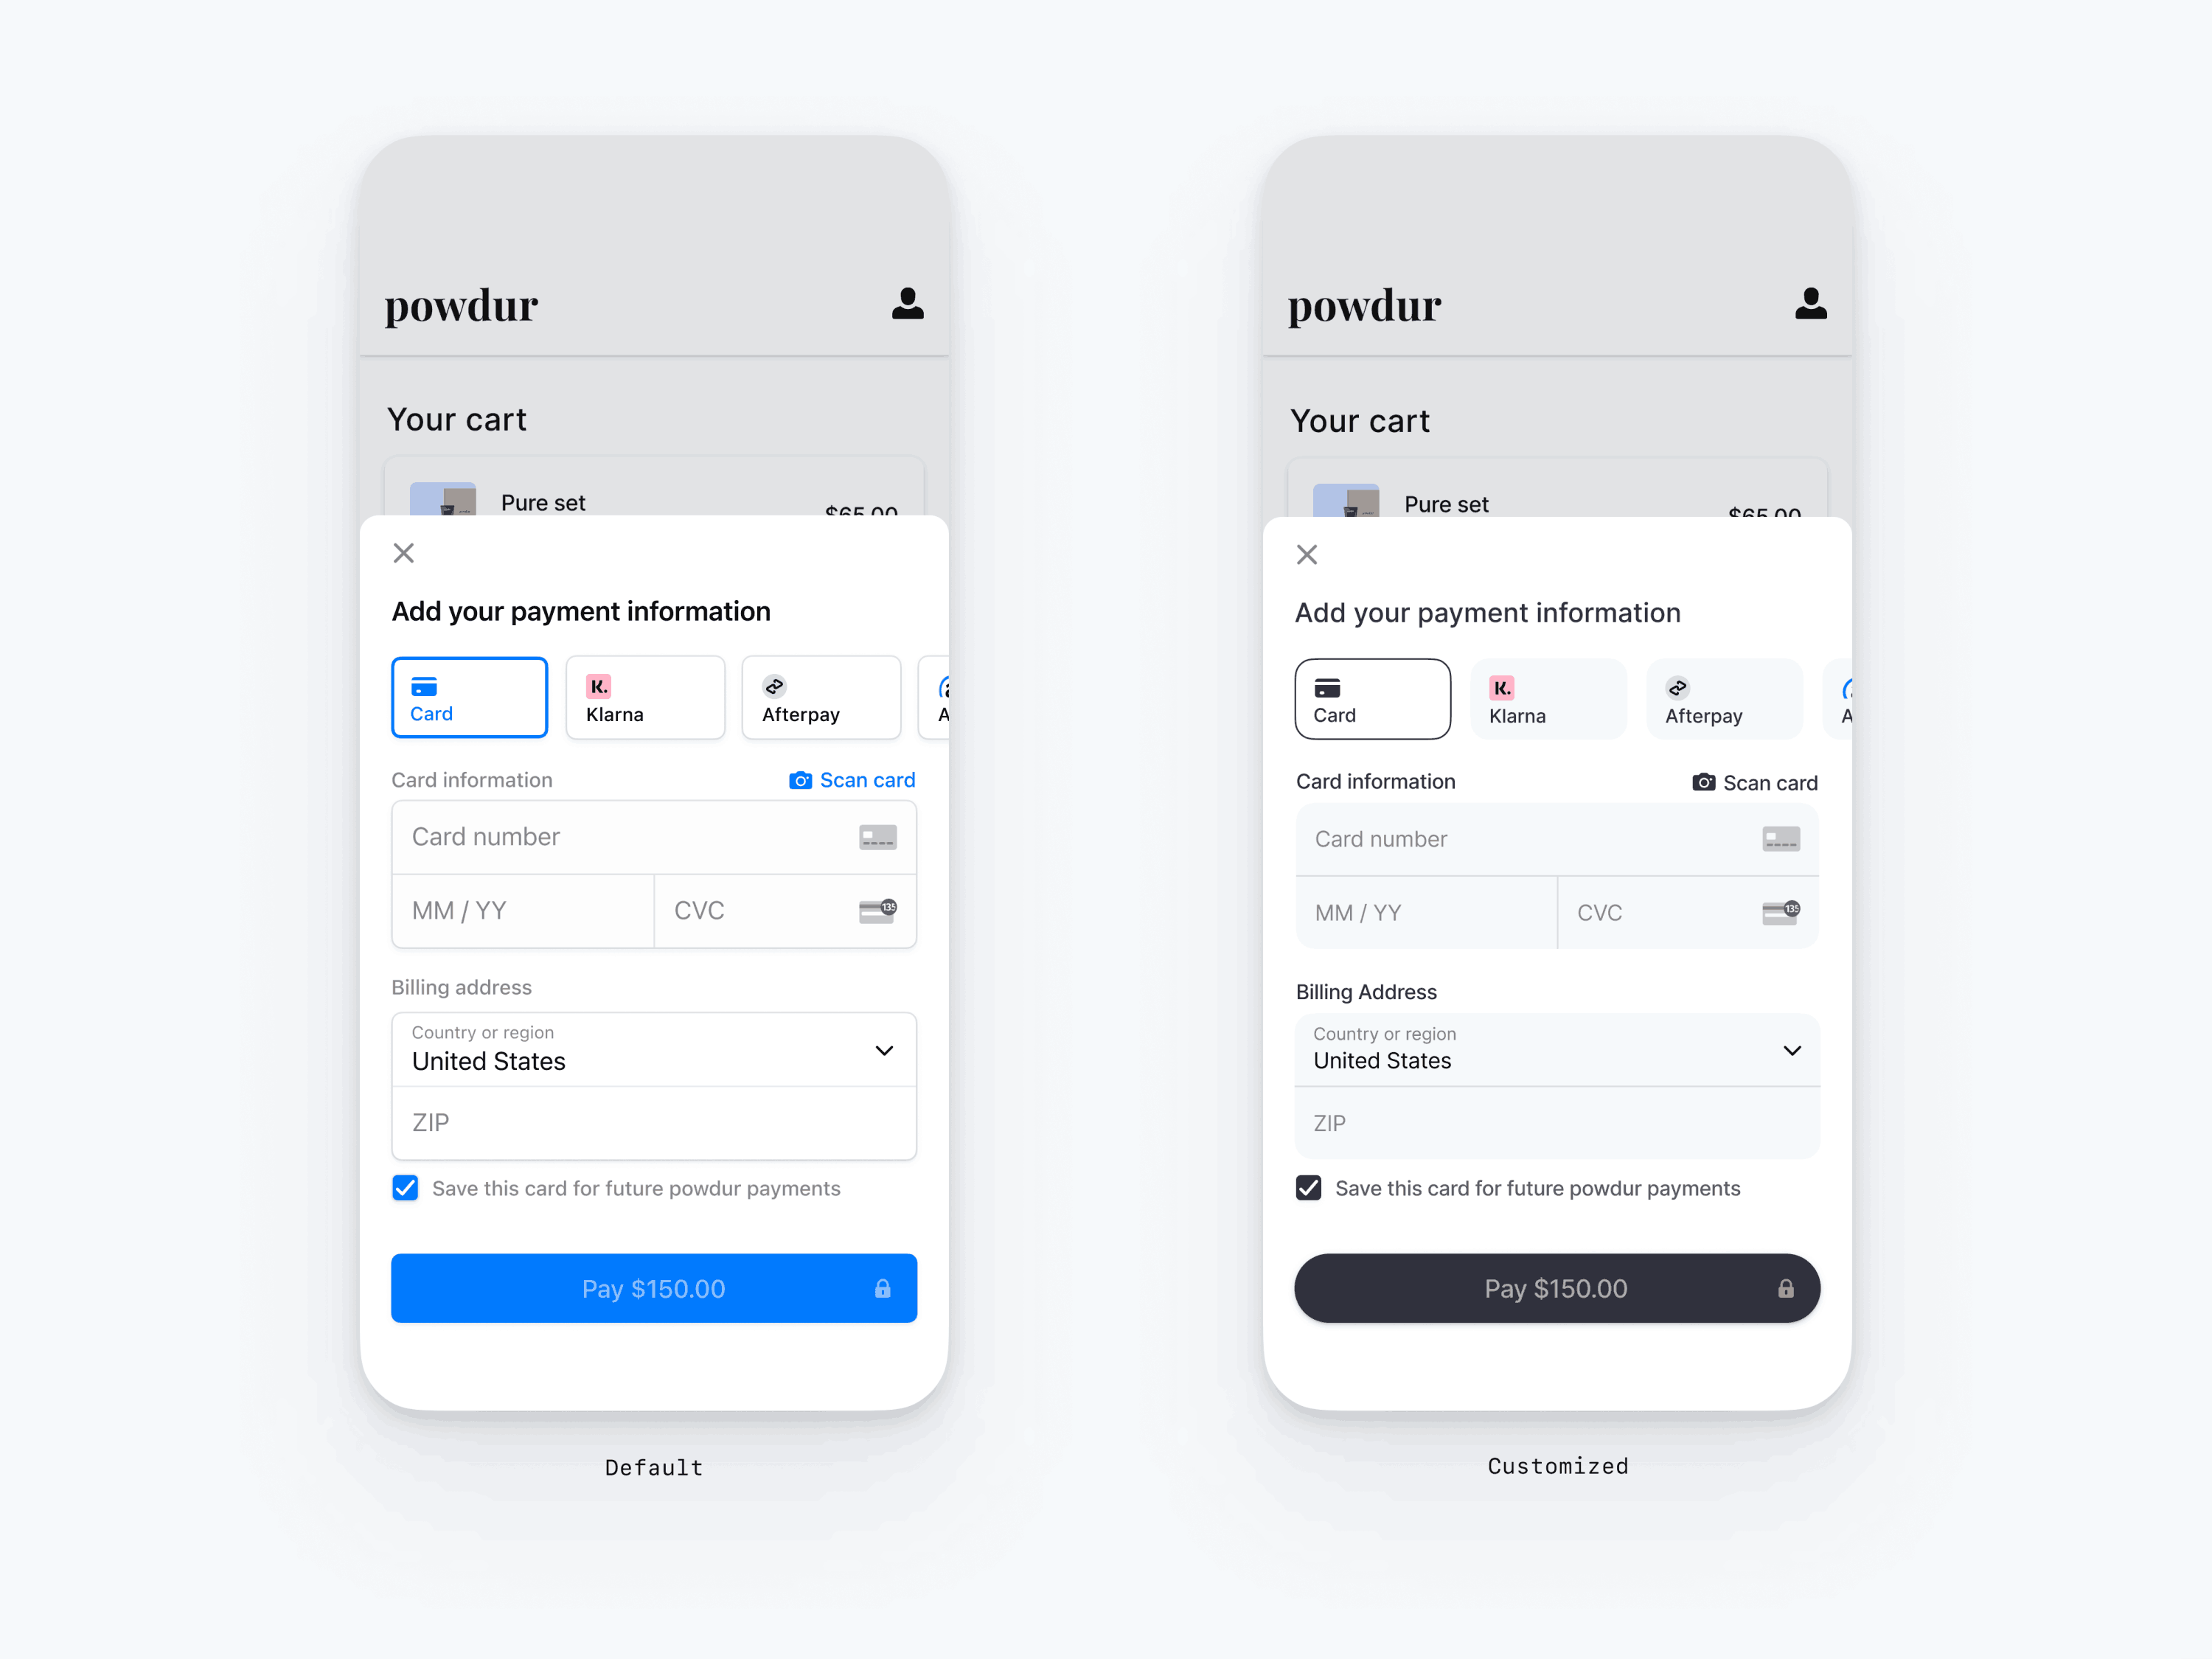
Le composant Payment Element mobile prend en charge la personnalisation visuelle, ce qui vous permet de vous adapter au design de votre application. La mise en page reste cohérente, mais vous pouvez modifier les couleurs, les polices et bien plus encore en utilisant la propriété d’apparence de votre objet PaymentSheet.Configuration.
- Commencez par personnaliser la police
- Personnaliser les couleurs à l’image de votre application
- Personnaliser les formes, comme l’angle des bordures
- Ajuster les composants spécifiques

var configuration = PaymentSheet.Configuration()
// The following code creates the appearance shown in the screenshot above
var appearance = PaymentSheet.Appearance()
appearance.font.base = UIFont(name: "AvenirNext-Regular", size: UIFont.systemFontSize)!
appearance.cornerRadius = 12
appearance.shadow = .disabled
appearance.borderWidth = 0.5
appearance.colors.background = .white
appearance.colors.primary = UIColor(red: 36/255, green: 36/255, blue: 47/255, alpha: 1)
appearance.colors.textSecondary = .black
appearance.colors.componentPlaceholderText = UIColor(red: 115/255, green: 117/255, blue: 123/255, alpha: 1)
appearance.colors.componentText = .black
appearance.colors.componentBorder = .clear
appearance.colors.componentDivider = UIColor(red: 195/255, green: 213/255, blue: 200/255, alpha: 1)
appearance.colors.componentBackground = UIColor(red: 243/255, green: 248/255, blue: 250/247, alpha: 1)
appearance.primaryButton.cornerRadius = 20
configuration.appearance = appearance
let paymentSheet = PaymentSheet(/* ... */, configuration: configuration)
Polices de caractères
Personnalisez la police en définissant font.base sur n’importe quelle variante de votre police personnalisée, à la taille et l’épaisseur de votre choix. Le composant Payment Element pour mobile utilise la famille de police de votre police personnalisée, mais détermine les tailles et l’épaisseur lui-même.
Pour augmenter ou diminuer la taille du texte, définissez font.sizeScaleFactor. Nous multiplions les tailles de polices par cette valeur avant de les afficher. Ce paramètre est utile lorsque votre police personnalisée est légèrement plus grande ou plus petite que la police du système.
var configuration = PaymentSheet.Configuration()
configuration.appearance.font.base = UIFont(name: "CustomFont-Regular", size: UIFont.systemFontSize)
configuration.appearance.font.sizeScaleFactor = 1.15 // Increase the size of all text by 1.15x
Couleurs
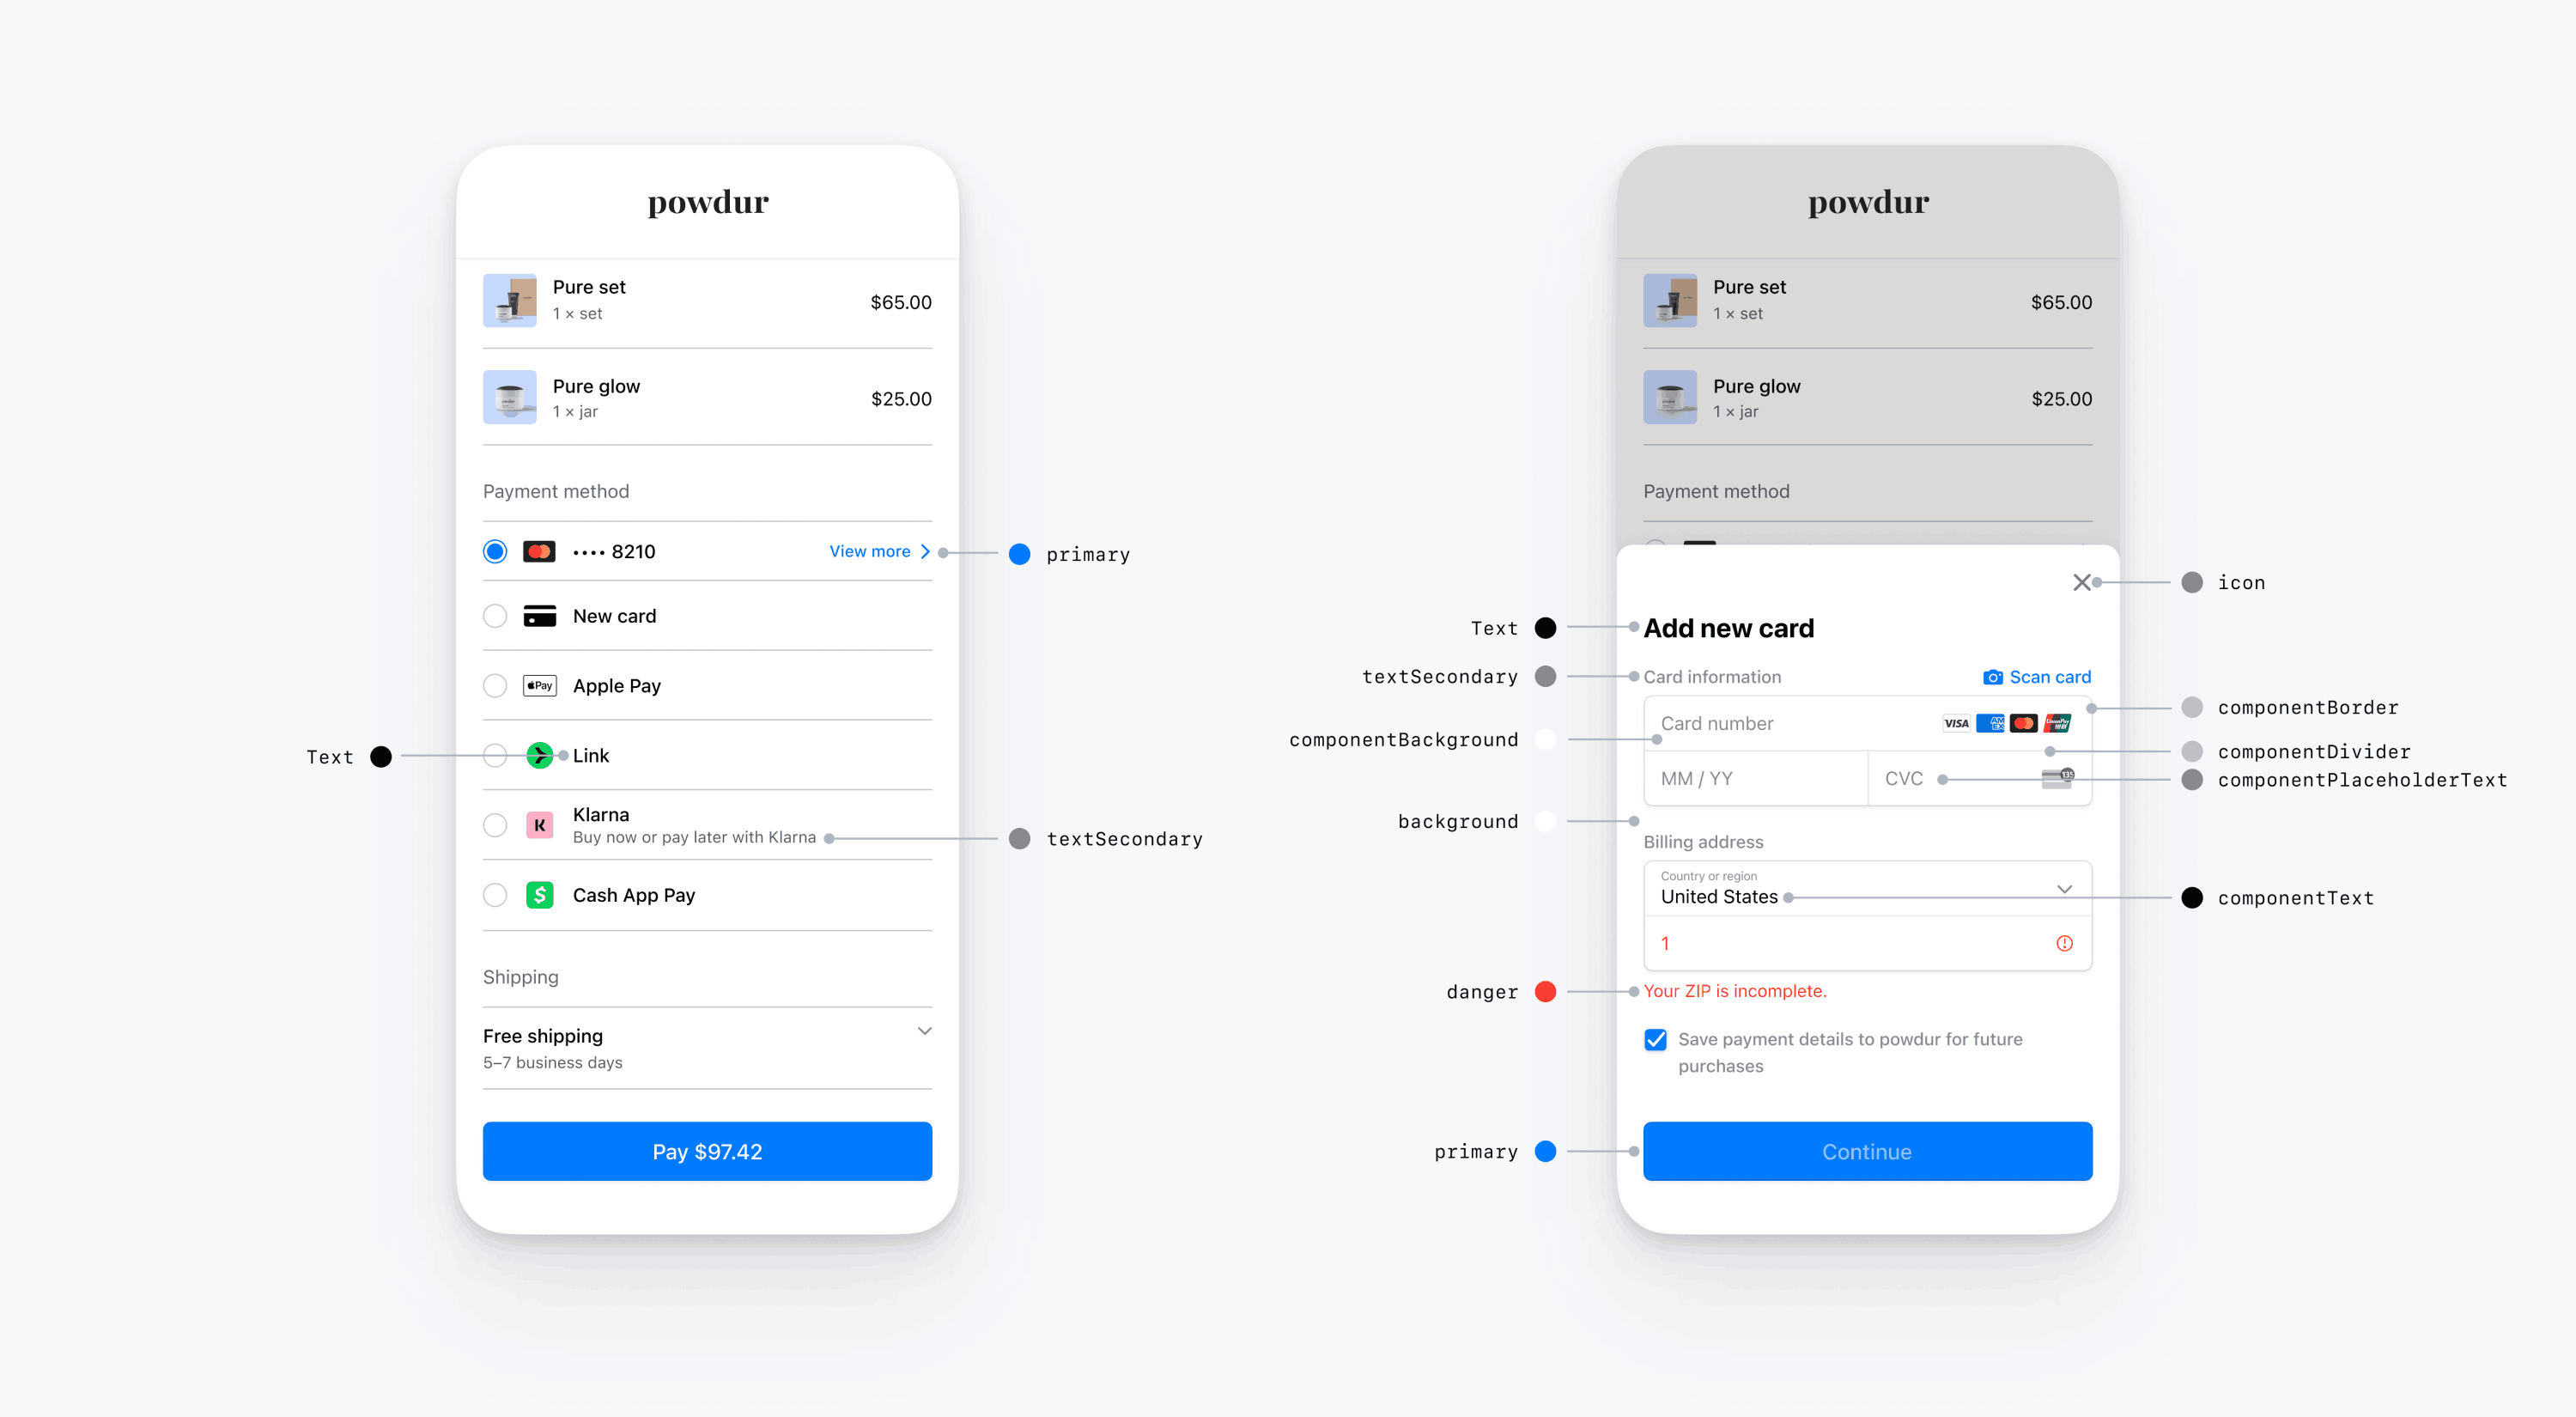
Personnalisez les couleurs dans le composant Payment Element pour mobile en modifiant les catégories de couleur définies dans Appearance.Colors. Chaque catégorie de couleur détermine la couleur d’un ou plusieurs composants de l’interface utilisateur. Par exemple, primary définit la couleur du bouton Payer et de certains autres éléments comme la case à cocher Enregistrer cette carte. Référez-vous au diagramme ci-dessous pour découvrir les éléments d’interface utilisateur associés à chaque catégorie de couleur.

Remarque
Initialisez vos objets UIColor personnalisés avec init(dynamicProvider:) pour prendre en charge le mode sombre.
Formes
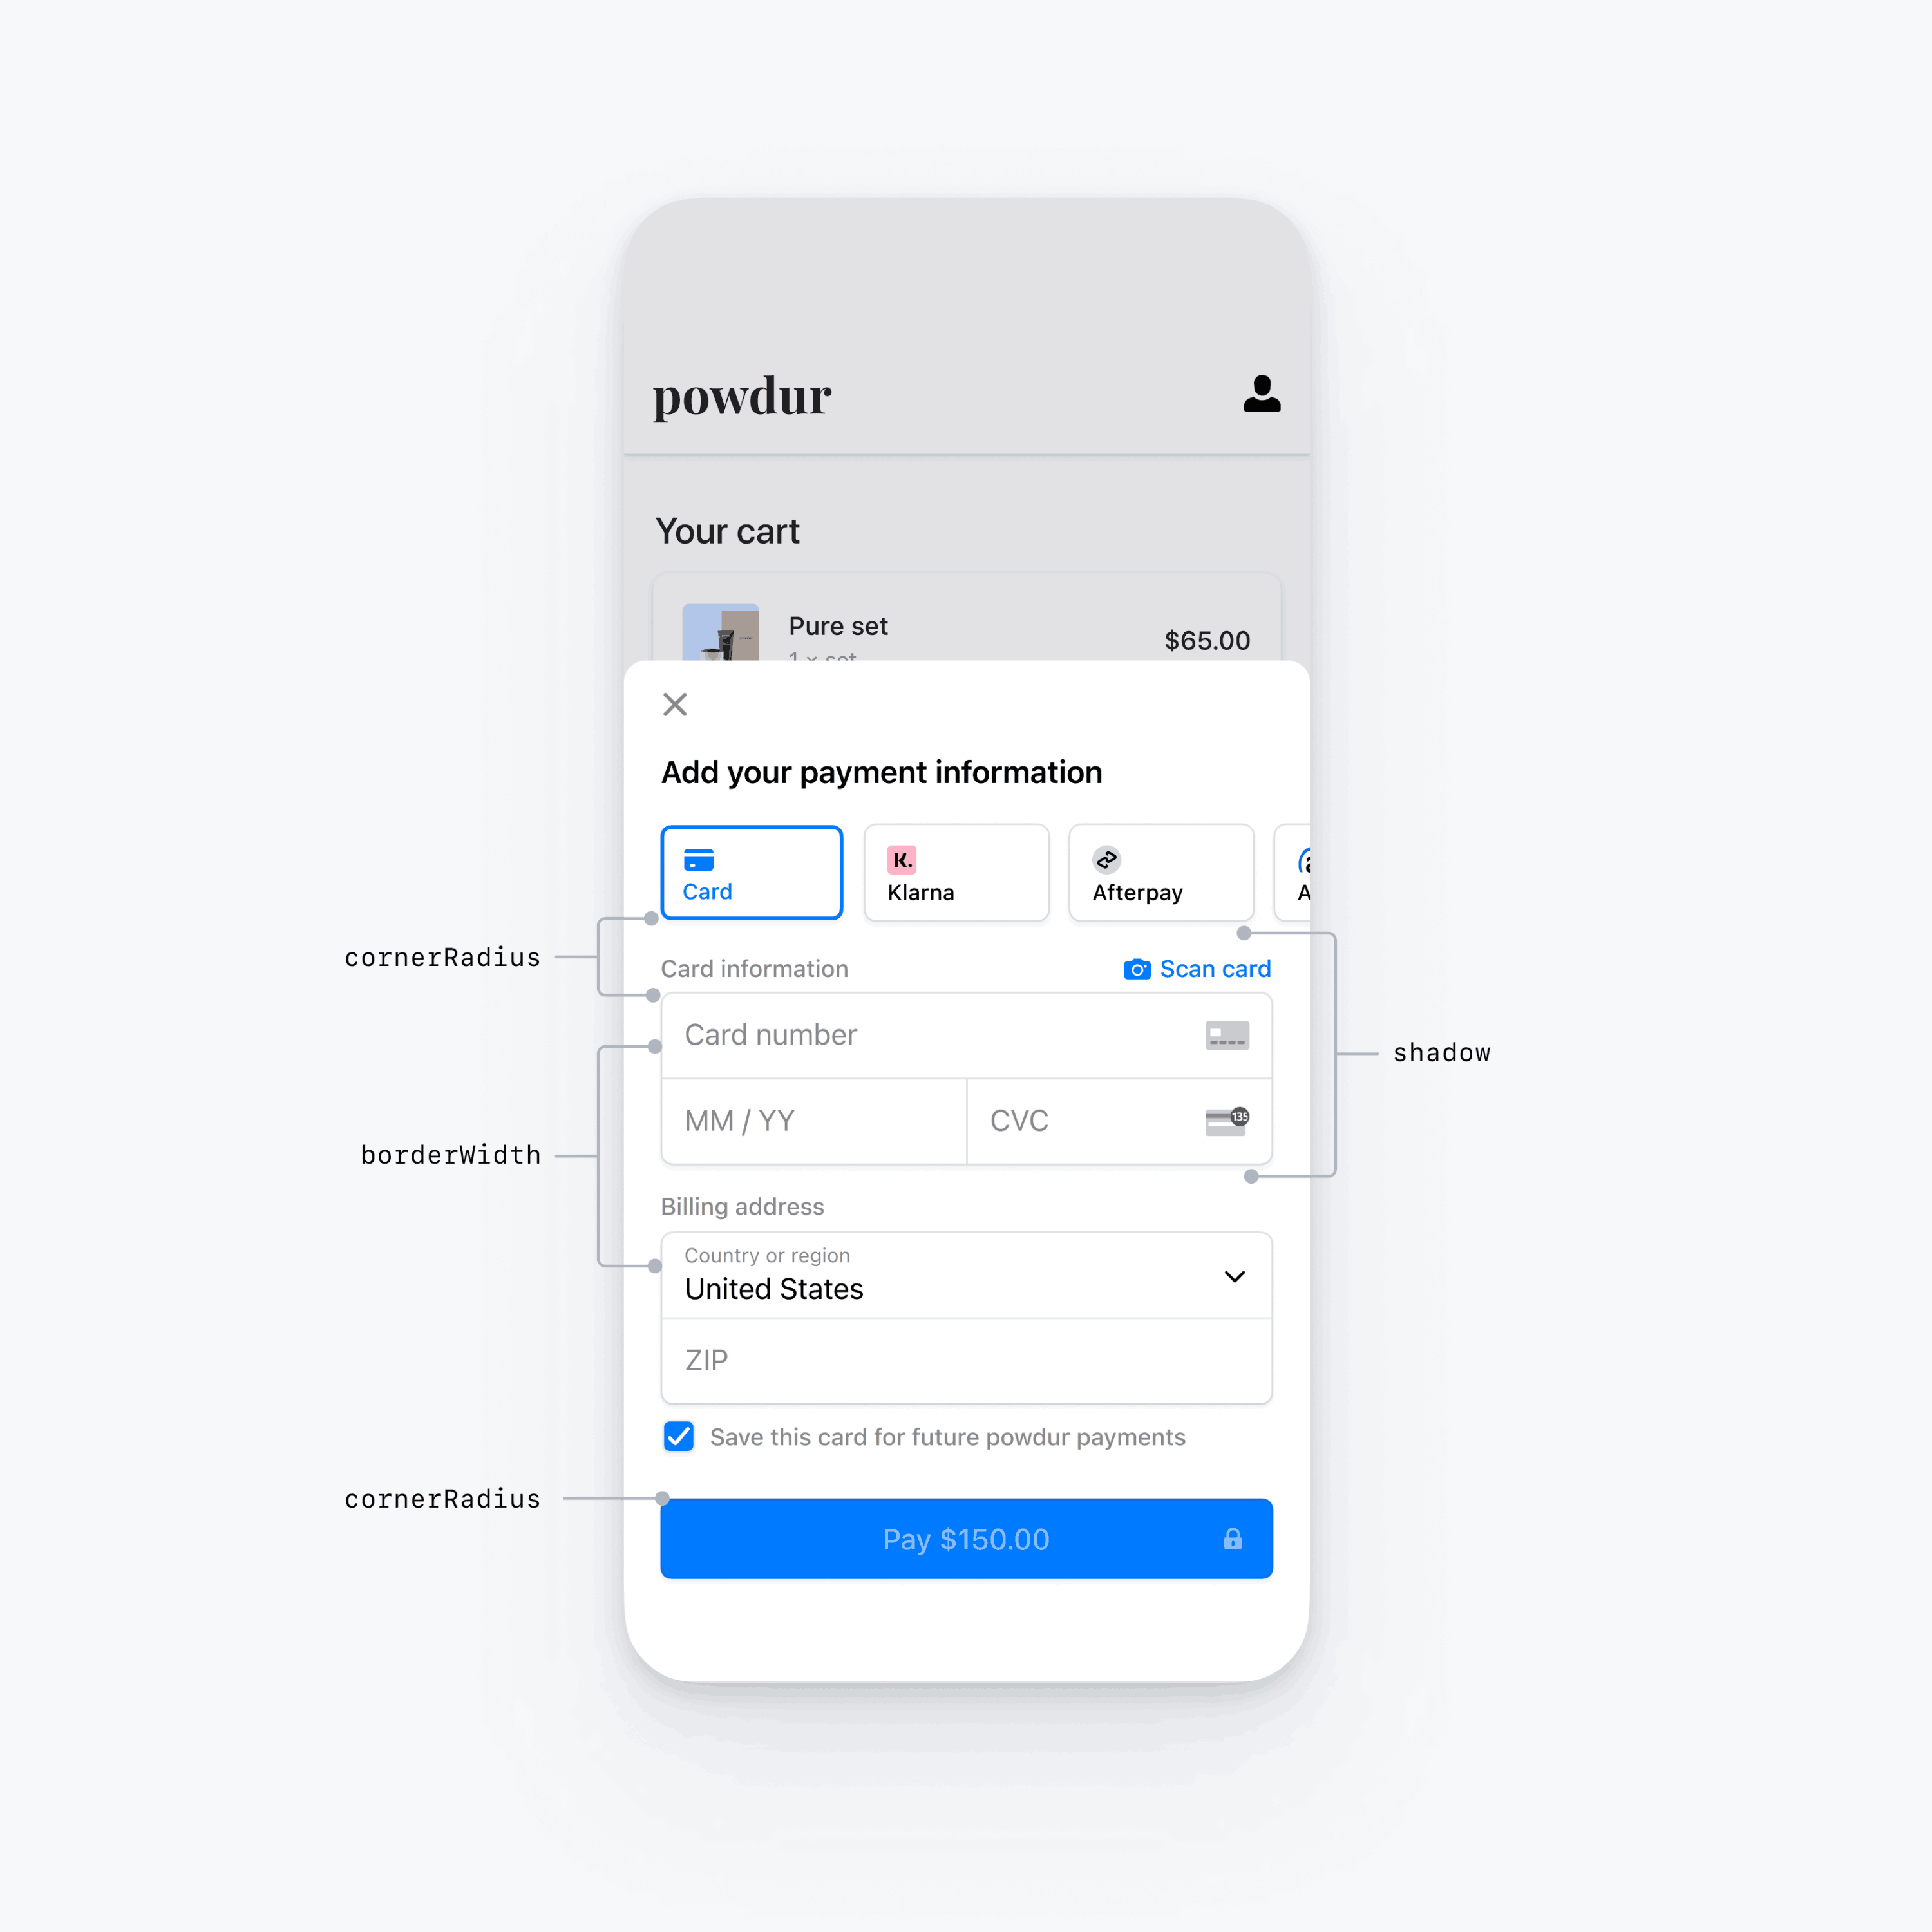
En plus des polices et des couleurs, vous pouvez aussi personnaliser l’angle des coins, la largeur de la bordure et l’ombre utilisés dans le composant Payment Element pour mobile.

Composants spécifiques de l’interface utilisateur
Les sections ci-dessus décrivent les options de personnalisation générales disponibles pour le composant Payment Element, qui affectent de nombreux composants d’interface utilisateur différents. Nous proposons également des options de personnalisation spécifiques au bouton principal (par exemple, le bouton Payer). Référez-vous à la documentation sur Appearance.PrimaryButton pour découvrir la liste complète des options de personnalisation.
Les options de personnalisation de composants d’interface utilisateur spécifiques priment sur les autres valeurs. Par exemple, appearance. remplace la valeur de appearance..
Remarque
Contactez-nous si vous pensez que des options de personnalisation supplémentaires doivent être ajoutées.