# Build a subscriptions integration
Create and manage subscriptions to accept recurring payments.
#### Checkout
#### Stripe-hosted page
#### Full embedded page
#### Elements
#### Checkout Sessions API
#### Integration effort
Complexity: 3/5
#### Integration type
Combine UI components into a custom payment flow
#### UI customization
CSS-level customization with the [Appearance API](https://docs.stripe.com/elements/appearance-api.md)
[Try it out](https://checkout.stripe.dev/)
Build a custom payment form using [Stripe Elements](https://docs.stripe.com/payments/elements.md) and the [Checkout Sessions API](https://docs.stripe.com/api/checkout/sessions.md) to sell fixed-price *subscriptions* (A Subscription represents the product details associated with the plan that your customer subscribes to. Allows you to charge the customer on a recurring basis). See how this integration [compares to Stripe’s other integration types](https://docs.stripe.com/payments/online-payments.md#compare-features-and-availability).
The Checkout Sessions API provides built-in support for tax calculation, discounts, shipping, and currency conversion, reducing the amount of custom code you need to write. This is the recommended approach for most integrations. Learn more about [when to use Checkout Sessions instead of PaymentIntents](https://docs.stripe.com/payments/checkout-sessions-and-payment-intents-comparison.md).
If you don’t want to build a custom payment form, you can integrate with the hosted version of Checkout. For an immersive version of that end-to-end integration guide, see the Billing [quickstart](https://docs.stripe.com/billing/quickstart.md).
If you aren’t ready to code an integration, you can set up basic subscriptions [manually in the Dashboard](https://docs.stripe.com/no-code/subscriptions.md). You can also use [Payment Links](https://docs.stripe.com/payment-links.md) to set up subscriptions without writing any code. Learn more about [designing an integration](https://docs.stripe.com/billing/subscriptions/design-an-integration.md) to understand the decisions you need to make and the resources you need.
## What you’ll build
This guide shows you how to:
- Model your business by building a product catalog.
- Build a registration process that creates a customer.
- Create subscriptions and collect payment information.
- Test and monitor payment and subscription status.
- Let customers change their plan or cancel the subscription.
### API object definitions
| Resource | Definition |
| --- | --- |
| [Account configured as a customer](https://docs.stripe.com/api/v2/core/accounts/create.md#v2_create_accounts-configuration-customer) | Represents a customer in the Accounts v2 API who purchases a subscription. Configure an `Account` object as a customer and associate it with a subscription to make and track recurring charges and to manage the products that they subscribe to. For more information, see the [Use Accounts as customers guide](https://docs.stripe.com/accounts-v2/use-accounts-as-customers.md). |
| [Customer](https://docs.stripe.com/api/customers.md) | Represents a customer in the Customers API who purchases a subscription. Use the `Customer` object associated with a subscription to make and track recurring charges and to manage the products that they subscribe to. |
| [Entitlement](https://docs.stripe.com/api/entitlements/active-entitlement.md) | Represents a customer’s access to a feature included in a service product that they subscribe to. When you create a subscription for a customer’s recurring purchase of a product, an active entitlement is automatically created for each feature associated with that product. When a customer accesses your services, use their active entitlements to enable the features included in their subscription. |
| [Feature](https://docs.stripe.com/api/entitlements/feature.md) | Represents a function or ability that your customers can access when they subscribe to a service product. You can include features in a product by creating ProductFeatures. |
| [Invoice](https://docs.stripe.com/api/invoices.md) | A statement of amounts a customer owes that tracks payment statuses from draft through paid or otherwise finalized. Subscriptions automatically generate invoices. |
| [PaymentIntent](https://docs.stripe.com/api/payment_intents.md) | A way to build dynamic payment flows. A PaymentIntent tracks the lifecycle of a customer checkout flow and triggers additional authentication steps when required by regulatory mandates, custom Radar fraud rules, or redirect-based payment methods. Invoices automatically create PaymentIntents. |
| [PaymentMethod](https://docs.stripe.com/api/payment_methods.md) | A customer’s payment methods that they use to pay for your products. For example, you can store a credit card on a customer-configured `Account` or `Customer` object and use it to make recurring payments for that customer. Typically used with the Payment Intents or Setup Intents APIs. |
| [Price](https://docs.stripe.com/api/prices.md) | Defines the unit price, currency, and billing cycle for a product. |
| [Product](https://docs.stripe.com/api/products.md) | A good or service that your business sells. A service product can include one or more features. |
| [ProductFeature](https://docs.stripe.com/api/product-feature.md) | Represents a single feature’s inclusion in a single product. Each product is associated with a ProductFeature for each feature that it includes, and each feature is associated with a ProductFeature for each product that includes it. |
| [Subscription](https://docs.stripe.com/api/subscriptions.md) | Represents a customer’s scheduled recurring purchase of a product. Use a subscription to collect payments and provide repeated delivery of or continuous access to a product. |
Here’s an example of how products, features, and entitlements work together. Imagine that you want to set up a recurring service that offers two tiers: a standard product with basic functionality, and an advanced product that adds extended functionality.
1. You create two features: `basic_features` and `extended_features`.
2. You create two products: `standard_product` and `advanced_product`.
3. For the standard product, you create one ProductFeature that associates `basic_features` with `standard_product`.
4. For the advanced product, you create two ProductFeatures: one that associates `basic_features` with `advanced_product` and one that associates `extended_features` with `advanced_product`.
A customer, `first_customer`, subscribes to the standard product. When you create the subscription, Stripe automatically creates an Entitlement that associates `first_customer` with `basic_features`.
Another customer, `second_customer`, subscribes to the advanced product. When you create the Subscription, Stripe automatically creates two Entitlements: one that associates `second_customer` with `basic_features`, and one that associates `second_customer` with `extended_features`.
You can determine which features to provision for a customer by [retrieving their active entitlements or listening to the Active Entitlement Summary event](https://docs.stripe.com/billing/entitlements.md#entitlements). You don’t have to retrieve their subscriptions, products, and features.
## Set up Stripe
Install the Stripe client of your choice:
#### Java
```java
/*
For Gradle, add the following dependency to your build.gradle and replace with
the version number you want to use from:
- https://mvnrepository.com/artifact/com.stripe/stripe-java or
- https://github.com/stripe/stripe-java/releases/latest
*/
implementation "com.stripe:stripe-java:33.1.0"
```
```xml
com.stripestripe-java33.1.0
```
```bash
# For other environments, manually install the following JARs:
# - The Stripe JAR from https://github.com/stripe/stripe-java/releases/latest
# - Google Gson from https://github.com/google/gson
```
And then install the Stripe CLI. The CLI provides webhook testing and you can run it to make API calls to Stripe. This guide shows how to use the CLI to set up a pricing model in a later section.
For additional install options, see [Get started with the Stripe CLI](https://docs.stripe.com/stripe-cli.md).
## Create the pricing model [Stripe CLI or Dashboard]
[Recurring pricing models](https://docs.stripe.com/products-prices/pricing-models.md) represent the products or services you sell, how much they cost, what currency you accept for payments, and the service period for subscriptions. To build the pricing model, create [products](https://docs.stripe.com/api/products.md) (what you sell) and [prices](https://docs.stripe.com/api/prices.md) (how much and how often to charge for your products).
This example uses flat-rate pricing with two different service-level options: Basic and Premium. For each service-level option, you need to create a product and a recurring price. To add a one-time charge for something like a setup fee, create a third product with a one-time price.
Each product bills at monthly intervals. The price for the Basic product is 5 USD. The price for the Premium product is 15 USD. See the [flat rate pricing](https://docs.stripe.com/subscriptions/pricing-models/flat-rate-pricing.md) guide for an example with three tiers.
#### Dashboard
Go to the [Add a product](https://dashboard.stripe.com/test/products/create) page and create two products. Add one price for each product, each with a monthly recurring billing period:
- Premium product: Premium service with extra features
- Price: Flat rate | 15 USD
- Basic product: Basic service with minimum features
- Price: Flat rate | 5 USD
After you create the prices, record the price IDs so you can use them in other steps. Price IDs look like this: `price_G0FvDp6vZvdwRZ`.
When you’re ready, use the **Copy to live mode** button at the top right of the page to clone your product from [a sandbox to live mode](https://docs.stripe.com/keys.md#test-live-modes).
#### API
You can use the API to create the [Products](https://docs.stripe.com/api/products.md) and [Prices](https://docs.stripe.com/api/prices.md).
Create the Premium product:
```java
// Don't put any keys in code. See https://docs.stripe.com/keys-best-practices.
// Find your keys at https://dashboard.stripe.com/apikeys.
StripeClient client = new StripeClient("<>");
ProductCreateParams params =
ProductCreateParams.builder()
.setName("Billing Guide: Premium Service")
.setDescription("Premium service with extra features")
.build();
// For SDK versions 29.4.0 or lower, remove '.v1()' from the following line.
Product product = client.v1().products().create(params);
```
Create the Basic product:
```java
// Don't put any keys in code. See https://docs.stripe.com/keys-best-practices.
// Find your keys at https://dashboard.stripe.com/apikeys.
StripeClient client = new StripeClient("<>");
ProductCreateParams params =
ProductCreateParams.builder()
.setName("Billing Guide: Basic Service")
.setDescription("Basic service with minimum features")
.build();
// For SDK versions 29.4.0 or lower, remove '.v1()' from the following line.
Product product = client.v1().products().create(params);
```
Record the product ID for each product. They look like this:
```json
{
"id": "prod_H94k5odtwJXMtQ",
"object": "product",
"active": true,
"attributes": [
],
"created": 1587577341,
"description": "Premium service with extra features",
"images": [
],
"livemode": false,
"metadata": {
},
"name": "Billing Guide: Premium Service",
"statement_descriptor": null,
"type": "service",
"unit_label": null,
"updated": 1587577341
}
```
Use the product IDs to create a price for each product. The [unit_amount](https://docs.stripe.com/api/prices/object.md#price_object-unit_amount) number is in cents, so `1500` = 15 USD, for example.
Create the Premium price:
```java
// Don't put any keys in code. See https://docs.stripe.com/keys-best-practices.
// Find your keys at https://dashboard.stripe.com/apikeys.
StripeClient client = new StripeClient("<>");
PriceCreateParams params =
PriceCreateParams.builder()
.setProduct("{{PREMIUM_PRODUCT_ID}}")
.setUnitAmount(1500L)
.setCurrency("usd")
.setRecurring(
PriceCreateParams.Recurring.builder()
.setInterval(PriceCreateParams.Recurring.Interval.MONTH)
.build()
)
.build();
// For SDK versions 29.4.0 or lower, remove '.v1()' from the following line.
Price price = client.v1().prices().create(params);
```
Create the Basic price:
```java
// Don't put any keys in code. See https://docs.stripe.com/keys-best-practices.
// Find your keys at https://dashboard.stripe.com/apikeys.
StripeClient client = new StripeClient("<>");
PriceCreateParams params =
PriceCreateParams.builder()
.setProduct("{{BASIC_PRODUCT_ID}}")
.setUnitAmount(500L)
.setCurrency("usd")
.setRecurring(
PriceCreateParams.Recurring.builder()
.setInterval(PriceCreateParams.Recurring.Interval.MONTH)
.build()
)
.build();
// For SDK versions 29.4.0 or lower, remove '.v1()' from the following line.
Price price = client.v1().prices().create(params);
```
Record the price ID for each price so you can use them in subsequent steps. They look like this:
```json
{
"id": "price_HGd7M3DV3IMXkC",
"object": "price",
"product": "prod_HGd6W1VUqqXGvr",
"type": "recurring",
"currency": "usd",
"recurring": {
"interval": "month",
"interval_count": 1,
"trial_period_days": null,
"usage_type": "licensed"
},
"active": true,
"billing_scheme": "per_unit",
"created": 1589319695,
"livemode": false,
"lookup_key": null,
"metadata": {},
"nickname": null,
"unit_amount": 1500,
"unit_amount_decimal": "1500",
"tiers": null,
"tiers_mode": null,
"transform_quantity": null
}
```
## Create the customer [Client and Server]
Stripe needs a customer for each subscription. In your application front end, collect any necessary information from your users and pass it to the back end.
If you need to collect address details, the Address Element enables you to collect a shipping or billing address for your customers. For more information on the Address Element, see the [Address Element](https://docs.stripe.com/elements/address-element.md) page.
```html
```
```javascript
const emailInput = document.querySelector('#email');
fetch('/create-customer', {
method: 'post',
headers: {
'Content-Type': 'application/json',
},
body: JSON.stringify({
email: emailInput.value,
}),
}).then(r => r.json());
```
On the server, create an object to represent the customer. This can be either a customer-configured `Account` object or a `Customer` object. Save the object’s ID to use in the Checkout Session.
> #### Use the Accounts v2 API to represent customers
>
> The Accounts v2 API is generally available for Connect users, and in public preview for other Stripe users. If you’re part of the Accounts v2 preview, you need to specify a [preview version](https://docs.stripe.com/api-v2-overview.md#sdk-and-api-versioning) in your code.
>
> To join the Accounts v2 preview, go to [Account previews and features](https://dashboard.stripe.com/settings/previews) in your Dashboard and enable **Reusable payment methods for Global Payouts**.
>
> For most use cases, we recommend [modeling your customers as customer-configured Account objects](https://docs.stripe.com/accounts-v2/use-accounts-as-customers.md) instead of using [Customer](https://docs.stripe.com/api/customers.md) objects.
#### Accounts v2
```java
// Don't put any keys in code. See https://docs.stripe.com/keys-best-practices.
// Find your keys at https://dashboard.stripe.com/apikeys.
StripeClient client = new StripeClient("<>");
AccountCreateParams params =
AccountCreateParams.builder()
.setContactEmail("jenny.rosen@example.com")
.setDisplayName("Jenny Rosen")
.setIdentity(
AccountCreateParams.Identity.builder()
.setIndividual(
AccountCreateParams.Identity.Individual.builder()
.setGivenName("Jenny Rosen")
.setAddress(
AccountCreateParams.Identity.Individual.Address.builder()
.setCity("San Francisco")
.setCountry("US")
.setLine1("123 Main Street")
.setPostalCode("94605")
.setState("CA")
.build()
)
.build()
)
.build()
)
.setConfiguration(
AccountCreateParams.Configuration.builder()
.setCustomer(
AccountCreateParams.Configuration.Customer.builder()
.setCapabilities(
AccountCreateParams.Configuration.Customer.Capabilities.builder()
.setAutomaticIndirectTax(
AccountCreateParams.Configuration.Customer.Capabilities.AutomaticIndirectTax.builder()
.setRequested(true)
.build()
)
.build()
)
.setShipping(
AccountCreateParams.Configuration.Customer.Shipping.builder()
.setAddress(
AccountCreateParams.Configuration.Customer.Shipping.Address.builder()
.setCity("San Francisco")
.setCountry("US")
.setLine1("123 Main Street")
.setPostalCode("94605")
.setState("CA")
.build()
)
.build()
)
.build()
)
.build()
)
.addInclude(AccountCreateParams.Include.CONFIGURATION__CUSTOMER)
.addInclude(AccountCreateParams.Include.IDENTITY)
.build();
Account account = client.v2().core().accounts().create(params);
```
#### Customers v1
```java
// Don't put any keys in code. See https://docs.stripe.com/keys-best-practices.
// Find your keys at https://dashboard.stripe.com/apikeys.
StripeClient client = new StripeClient("<>");
CustomerCreateParams params =
CustomerCreateParams.builder()
.setEmail("jenny.rosen@example.com")
.setName("Jenny Rosen")
.setShipping(
CustomerCreateParams.Shipping.builder()
.setAddress(
CustomerCreateParams.Shipping.Address.builder()
.setCity("San Francisco")
.setCountry("US")
.setLine1("123 Main Street")
.setPostalCode("9460")
.setState("CA")
.build()
)
.setName("Jenny Rosen")
.build()
)
.setAddress(
CustomerCreateParams.Address.builder()
.setCity("San Francisco")
.setCountry("US")
.setLine1("123 Main Street")
.setPostalCode("9460")
.setState("CA")
.build()
)
.build();
// For SDK versions 29.4.0 or lower, remove '.v1()' from the following line.
Customer customer = client.v1().customers().create(params);
```
## Create a Checkout Session [Server]
On the back end of your application, define an endpoint that [creates the session](https://docs.stripe.com/api/checkout/sessions/create.md) for your front end to call. You’ll need the price ID of the subscription the customer is signing up for—your front end passes this value.
If you created a one-time price in [step 2](https://docs.stripe.com/billing/subscriptions/build-subscriptions.md#create-pricing-model), pass that price ID also. After creating a Checkout Session, make sure you pass the [client secret](https://docs.stripe.com/api/checkout/sessions/object.md#checkout_session_object-client_secret) back to the client in the response.
> You can use [lookup_keys](https://docs.stripe.com/products-prices/manage-prices.md#lookup-keys) to fetch prices rather than Price IDs. See the [sample application](https://github.com/stripe-samples/subscription-use-cases/tree/main/fixed-price-subscriptions) for an example.
#### Accounts v2
#### Java
```java
package com.stripe.sample;
import java.nio.file.Paths;
import java.util.Map;
import java.util.HashMap;
import static spark.Spark.post;
import static spark.Spark.get;
import static spark.Spark.port;
import static spark.Spark.staticFiles;
import com.google.gson.Gson;
import com.stripe.StripeClient;
import com.stripe.model.checkout.Session;
import com.stripe.param.checkout.SessionCreateParams;
public class Server {
public static void main(String[] args) {
port(4242);
// This test secret API key is a placeholder. Don't include personal details in requests with this key.
// To see your test secret API key embedded in code samples, sign in to your Stripe account.
// You can also find your test secret API key at https://dashboard.stripe.com/test/apikeys.
// Don't put any keys in code. See https://docs.stripe.com/keys-best-practices.
StripeClient stripeClient = new StripeClient("<>");
staticFiles.externalLocation(
Paths.get("public").toAbsolutePath().toString());
Gson gson = new Gson();
post("/create-checkout-session", (request, response) -> {
String YOUR_DOMAIN = "http://localhost:3000";
SessionCreateParams params =
SessionCreateParams.builder().setUiMode(SessionCreateParams.UiMode.ELEMENTS)
// Provide the Account ID of the account you previously created
.setCustomerAccount("{{CUSTOMER_ACCOUNT_ID}}")
.setMode(SessionCreateParams.Mode.SUBSCRIPTION)
.setReturnUrl(YOUR_DOMAIN + "/return?session_id={CHECKOUT_SESSION_ID}")
.addLineItem(
SessionCreateParams.LineItem.builder()
.setQuantity(1L)
// Provide the exact Price ID (for example, price_1234) of the product you want to sell
.setPrice("{{PRICE_ID}}")
.build())
.build();
Session session = stripeClient.v1().checkout().sessions().create(params);
Map map = new HashMap<>();
map.put("clientSecret", session.getRawJsonObject().getAsJsonPrimitive("client_secret").getAsString());
return map;
}, gson::toJson);
}
}
```
#### Customers v1
#### Java
```java
package com.stripe.sample;
import java.nio.file.Paths;
import java.util.Map;
import java.util.HashMap;
import static spark.Spark.post;
import static spark.Spark.get;
import static spark.Spark.port;
import static spark.Spark.staticFiles;
import com.google.gson.Gson;
import com.stripe.StripeClient;
import com.stripe.model.checkout.Session;
import com.stripe.param.checkout.SessionCreateParams;
public class Server {
public static void main(String[] args) {
port(4242);
// This test secret API key is a placeholder. Don't include personal details in requests with this key.
// To see your test secret API key embedded in code samples, sign in to your Stripe account.
// You can also find your test secret API key at https://dashboard.stripe.com/test/apikeys.
// Don't put any keys in code. See https://docs.stripe.com/keys-best-practices.
StripeClient stripeClient = new StripeClient("<>");
staticFiles.externalLocation(
Paths.get("public").toAbsolutePath().toString());
Gson gson = new Gson();
post("/create-checkout-session", (request, response) -> {
String YOUR_DOMAIN = "http://localhost:3000";
SessionCreateParams params =
SessionCreateParams.builder().setUiMode(SessionCreateParams.UiMode.ELEMENTS)
// Provide the customer ID of the customer you previously created
.setCustomer("{{CUSTOMER_ID}}")
.setMode(SessionCreateParams.Mode.SUBSCRIPTION)
.setReturnUrl(YOUR_DOMAIN + "/return?session_id={CHECKOUT_SESSION_ID}")
.addLineItem(
SessionCreateParams.LineItem.builder()
.setQuantity(1L)
// Provide the exact Price ID (for example, price_1234) of the product you want to sell
.setPrice("{{PRICE_ID}}")
.build())
.build();
Session session = stripeClient.v1().checkout().sessions().create(params);
Map map = new HashMap<>();
map.put("clientSecret", session.getRawJsonObject().getAsJsonPrimitive("client_secret").getAsString());
return map;
}, gson::toJson);
}
}
```
From your [Dashboard](https://dashboard.stripe.com/settings/payment_methods), enable the payment methods you want to accept from your customers. Checkout supports [several payment methods](https://docs.stripe.com/payments/payment-methods/payment-method-support.md#product-support).
## Initialize Checkout [Client]
#### HTML + JS
Call [initCheckoutElementsSdk](https://docs.stripe.com/js/custom_checkout/init), passing in `clientSecret`.
`initCheckoutElementsSdk` returns a [Checkout](https://docs.stripe.com/js/custom_checkout) object that contains data from the Checkout Session and methods to update it.
Read the `total` and `lineItems` from [actions.getSession()](https://docs.stripe.com/js/custom_checkout/session), and display them in your UI. This lets you turn on new features with minimal code changes. For example, adding [manual currency prices](https://docs.stripe.com/payments/custom/localize-prices/manual-currency-prices.md) requires no UI changes if you display the `total`.
```html
```
```javascript
const clientSecret = fetch('/create-checkout-session', {method: 'POST'})
.then((response) => response.json())
.then((json) => json.client_secret);
const checkout = stripe.initCheckoutElementsSdk({clientSecret});
const loadActionsResult = await checkout.loadActions();
if (loadActionsResult.type === 'success') {
const session = loadActionsResult.actions.getSession();
const checkoutContainer = document.getElementById('checkout-container');
checkoutContainer.append(JSON.stringify(session.lineItems, null, 2));
checkoutContainer.append(document.createElement('br'));
checkoutContainer.append(`Total: ${session.total.total.amount}`);
}
```
#### React
Wrap your application with the [CheckoutElementsProvider](https://docs.stripe.com/js/react_stripe_js/checkout/checkout_provider) component, passing in `clientSecret` and the `stripe` instance.
```jsx
import React from 'react';
import {CheckoutElementsProvider} from '@stripe/react-stripe-js/checkout';
import CheckoutForm from './CheckoutForm';
const clientSecret = fetch('/create-checkout-session', {method: 'POST'})
.then((response) => response.json())
.then((json) => json.client_secret);
const App = () => {
return (
);
};
export default App;
```
Access the [Checkout](https://docs.stripe.com/js/custom_checkout) object in your checkout form component by using the `useCheckoutElements()` hook. The `Checkout` object contains data from the Checkout Session and methods to update it.
Read the `total` and `lineItems` from the `Checkout` object, and display them in your UI. This lets you enable features with minimal code changes. For example, adding [manual currency prices](https://docs.stripe.com/payments/custom/localize-prices/manual-currency-prices.md) requires no UI changes if you display the `total`.
```jsx
import React from 'react';
import {useCheckoutElements} from '@stripe/react-stripe-js/checkout';
const CheckoutForm = () => {const checkoutState = useCheckoutElements();
if (checkoutState.type === 'loading') {
return (
Loading...
);
}
if (checkoutState.type === 'error') {
return (
Error: {checkoutState.error.message}
);
}
return (
);
};
```
## Collect payment information [Client]
Collect payment details on the client with the [Payment Element](https://docs.stripe.com/payments/payment-element.md). The Payment Element is a prebuilt UI component that simplifies collecting payment details for a variety of payment methods.
The Payment Element contains an iframe that securely sends payment information to Stripe over an HTTPS connection. Avoid placing the Payment Element within another iframe because some payment methods require redirecting to another page for payment confirmation.
If you choose to use an iframe and want to accept Apple Pay or Google Pay, the iframe must have the [allow](https://developer.mozilla.org/en-US/docs/Web/HTML/Element/iframe#attr-allowpaymentrequest) attribute set to equal `"payment *"`.
The checkout page address must start with `https://` rather than `http://` for your integration to work. You can test your integration without using HTTPS, but remember to [enable it](https://docs.stripe.com/security/guide.md#tls) when you’re ready to accept live payments.
#### HTML + JS
First, create a container DOM element to mount the [Payment Element](https://docs.stripe.com/payments/payment-element.md). Then create an instance of the `Payment Element` using [checkout.createPaymentElement](https://docs.stripe.com/js/custom_checkout/create_payment_element) and mount it by calling [element.mount](https://docs.stripe.com/js/element/mount), providing either a CSS selector or the container DOM element.
```html
```
```javascript
const paymentElement = checkout.createPaymentElement();
paymentElement.mount('#payment-element');
```
See the [Stripe.js docs](https://docs.stripe.com/js/custom_checkout/create_payment_element#custom_checkout_create_payment_element-options) to view the supported options.
You can [customize the appearance](https://docs.stripe.com/payments/checkout/customization/appearance.md) of all Elements by passing [elementsOptions.appearance](https://docs.stripe.com/js/custom_checkout/init#custom_checkout_init-options-elementsOptions-appearance) when initializing Checkout on the front end.
#### React
Mount the [Payment Element](https://docs.stripe.com/payments/payment-element.md) component within the [CheckoutElementsProvider](https://docs.stripe.com/js/react_stripe_js/checkout/checkout_provider).
```jsx
import React from 'react';import {PaymentElement, useCheckoutElements} from '@stripe/react-stripe-js/checkout';
const CheckoutForm = () => {
const checkoutState = useCheckoutElements();
if (checkoutState.type === 'loading') {
return (
Loading...
);
}
if (checkoutState.type === 'error') {
return (
Error: {checkoutState.error.message}
);
}
return (
);
};
export default CheckoutForm;
```
See the [Stripe.js docs](https://docs.stripe.com/js/custom_checkout/create_payment_element#custom_checkout_create_payment_element-options) to view the supported options.
You can [customize the appearance](https://docs.stripe.com/payments/checkout/customization/appearance.md) of all Elements by passing [elementsOptions.appearance](https://docs.stripe.com/js/react_stripe_js/checkout/checkout_provider#react_checkout_provider-options-elementsOptions-appearance) to the [CheckoutElementsProvider](https://docs.stripe.com/js/react_stripe_js/checkout/checkout_provider).
## Submit the payment [Client-side]
#### HTML + JS
Render a **Pay** button that calls [confirm](https://docs.stripe.com/js/custom_checkout/confirm) from the `Checkout` instance to submit the payment.
```html
```
```js
const checkout = stripe.initCheckoutElementsSdk({clientSecret});
checkout.on('change', (session) => {
document.getElementById('pay-button').disabled = !session.canConfirm;
});
const loadActionsResult = await checkout.loadActions();
if (loadActionsResult.type === 'success') {
const {actions} = loadActionsResult;
const button = document.getElementById('pay-button');
const errors = document.getElementById('confirm-errors');
button.addEventListener('click', () => {
// Clear any validation errors
errors.textContent = '';
actions.confirm().then((result) => {
if (result.type === 'error') {
errors.textContent = result.error.message;
}
});
});
}
```
#### React
Render a **Pay** button that calls [confirm](https://docs.stripe.com/js/custom_checkout/confirm) from [useCheckoutElements](https://docs.stripe.com/js/react_stripe_js/checkout/use_checkout_elements) to submit the payment.
```jsx
import React from 'react';
import {useCheckoutElements} from '@stripe/react-stripe-js/checkout';
const PayButton = () => {
const checkoutState = useCheckoutElements();
const [loading, setLoading] = React.useState(false);
const [error, setError] = React.useState(null);
if (checkoutState.type !== "success") {
return null;
}
const handleClick = () => {
setLoading(true);checkoutState.checkout.confirm().then((result) => {
if (result.type === 'error') {
setError(result.error)
}
setLoading(false);
})
};
return (
{error &&
{error.message}
}
)
};
export default PayButton;
```
## Listen for webhooks [Server]
To complete the integration, you need to process *webhooks* (A webhook is a real-time push notification sent to your application as a JSON payload through HTTPS requests) sent by Stripe. These events are triggered whenever the status in Stripe changes, such as subscriptions creating new invoices. In your application, set up an HTTP handler to accept a POST request containing the webhook event, and verify the signature of the event:
#### Java
```java
// Don't put any keys in code. See https://docs.stripe.com/keys-best-practices.
// Find your keys at https://dashboard.stripe.com/apikeys.
StripeClient stripeClient = new StripeClient("<>");
post(
"/webhook",
(request, response) -> {
String payload = request.body();
String sigHeader = request.headers("Stripe-Signature");
String endpointSecret = dotenv.get("STRIPE_WEBHOOK_SECRET");
Event event = null;
try {
event = stripeClient.constructEvent(payload, sigHeader, endpointSecret);
} catch (SignatureVerificationException e) {
// Invalid signature
response.status(400);
return "";
}
// Deserialize the nested object inside the event
EventDataObjectDeserializer dataObjectDeserializer = event.getDataObjectDeserializer();
StripeObject stripeObject = null;
if (dataObjectDeserializer.getObject().isPresent()) {
stripeObject = dataObjectDeserializer.getObject().get();
} else {
// Deserialization failed, probably due to an API version mismatch.
// Refer to the Javadoc documentation on `EventDataObjectDeserializer` for
// instructions on how to handle this case, or return an error here.
}
switch (event.getType()) {
case "invoice.paid":
// Used to provision services after the trial has ended.
// The status of the invoice will show up as paid. Store the status in your
// database to reference when a user accesses your service to avoid hitting rate
// limits.
break;
case "invoice.payment_failed":
// If the payment fails or the customer doesn't have a valid payment method,
// an invoice.payment_failed event is sent, the subscription becomes past_due.
// Use this webhook to notify your user that their payment has
// failed and to retrieve new card details.
break;
case "customer.subscription.deleted":
// handle subscription canceled automatically based
// upon your subscription settings. Or if the user
// cancels it.
break;
default:
// Unhandled event type
}
response.status(200);
return "";
}
);
```
During development, use the Stripe CLI to [observe webhooks and forward them to your application](https://docs.stripe.com/webhooks.md#test-webhook). Run the following in a new terminal while your development app is running:
#### curl
```bash
stripe listen --forward-to localhost:4242/webhook
```
For production, set up a webhook endpoint URL in the Dashboard, or use the [Webhook Endpoints API](https://docs.stripe.com/api/webhook_endpoints.md).
You need to listen to a few events to complete the remaining steps in this guide. See [Subscription events](https://docs.stripe.com/billing/subscriptions/webhooks.md#events) for more details about subscription-specific webhooks.
## Provision access to your service [Client and Server]
Now that the subscription is active, give your user access to your service. To do this, listen to the `customer.subscription.created`, `customer.subscription.updated`, and `customer.subscription.deleted` events. These events pass a subscription object that contains a `status` field indicating whether the subscription is active, past due, or canceled. See [the subscription lifecycle](https://docs.stripe.com/billing/subscriptions/overview.md#subscription-lifecycle) for a complete list of statuses.
In your webhook handler:
1. Verify the subscription status. If it’s `active` then your user has paid for your product.
2. Check the product the customer subscribed to and grant access to your service. Checking the product instead of the price gives you more flexibility if you need to change the pricing or billing period.
3. Store the `product.id`, `subscription.id` and `subscription.status` in your database along with either the `customer_account.id` or the `customer.id` you already saved. Check this record when determining which features to enable for the user in your application.
The status of a subscription might change at any point during its lifetime, even if your application doesn’t directly make any calls to Stripe. For example, a renewal might fail because of an expired credit card, which puts the subscription into a past due status. Or, if you implement the [customer portal](https://docs.stripe.com/customer-management.md), a user might cancel their subscription without directly visiting your application. Implementing your handler correctly keeps your application status in sync with Stripe.
## Cancel the subscription [Client and Server]
It’s common to allow customers to cancel their subscriptions. This example adds a cancellation option to the account settings page.
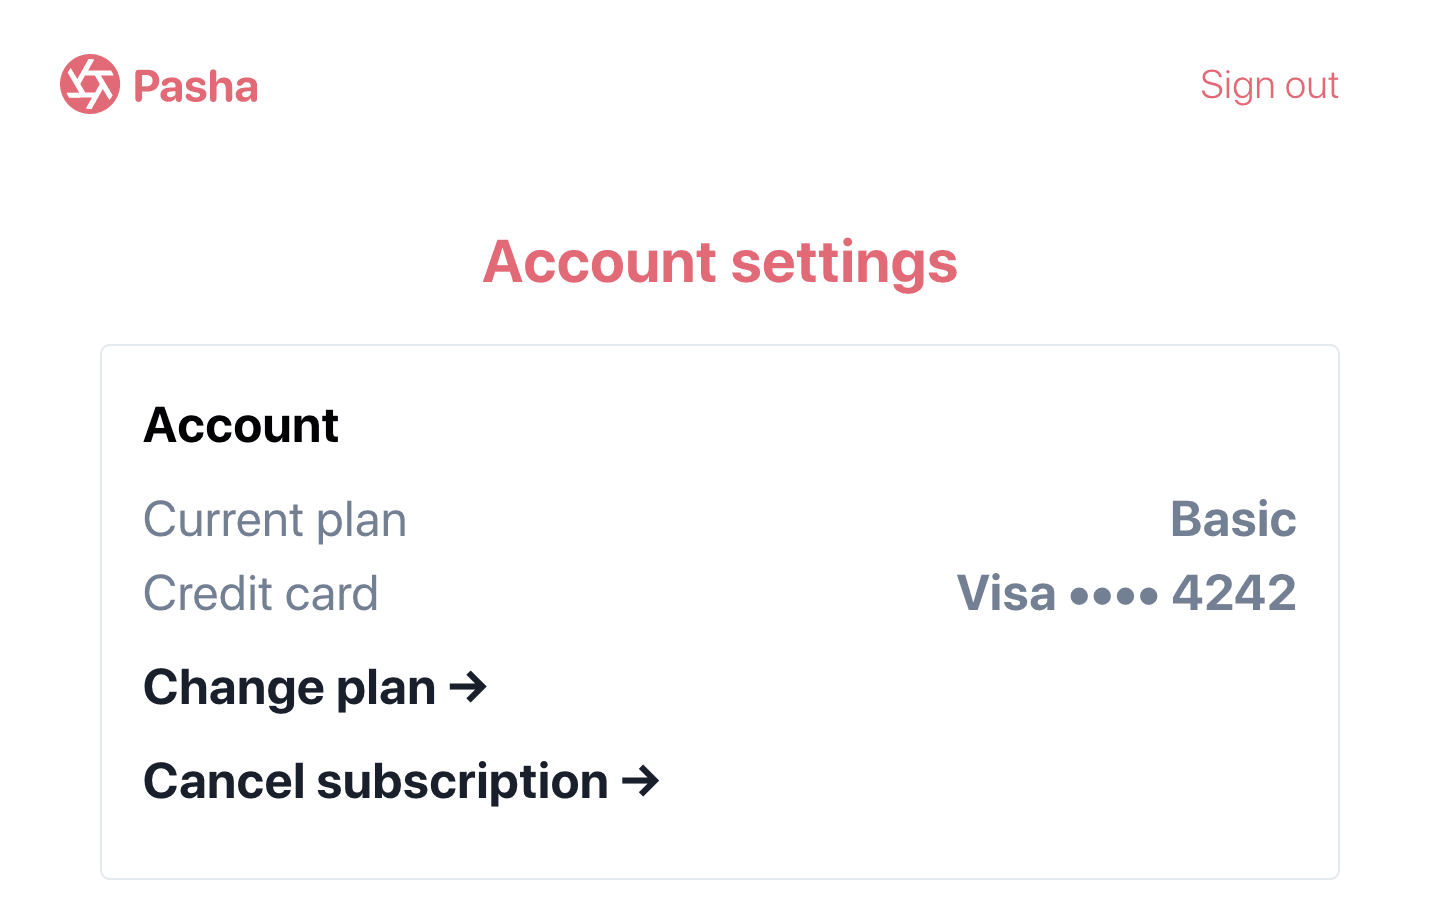
Account settings with the ability to cancel the subscription
```javascript
function cancelSubscription(subscriptionId) {
return fetch('/cancel-subscription', {
method: 'post',
headers: {
'Content-Type': 'application/json',
},
body: JSON.stringify({
subscriptionId: subscriptionId,
}),
})
.then(response => {
return response.json();
})
.then(cancelSubscriptionResponse => {
// Display to the user that the subscription has been canceled.
});
}
```
On the back end, define the endpoint for your front end to call.
#### Java
```java
// Don't put any keys in code. See https://docs.stripe.com/keys-best-practices.
// Find your keys at https://dashboard.stripe.com/apikeys.
StripeClient stripeClient = new StripeClient("<>");
post(
"/cancel-subscription",
(request, response) -> {
response.type("application/json");
CancelPostBody postBody = gson.fromJson(
request.body(),
CancelPostBody.class
);
Subscription deletedSubscription =
stripeClient.v1().subscriptions().cancel(postBody.getSubscriptionId());
return deletedSubscription.toJson();
}
);
```
Your application receives a `customer.subscription.deleted` event.
After the subscription cancels, update your database to remove the Stripe subscription ID you previously stored, and limit access to your service.
When a subscription cancels, you can’t reactivate it. Instead, collect updated billing information from your customer, update their default payment method, and create a new subscription with their existing customer record.
## Test your integration
### Test payment methods
Use the following table to test different payment methods and scenarios.
| Payment method | Scenario | How to test |
| --- | --- | --- |
| BECS Direct Debit | Your customer successfully pays with BECS Direct Debit. | Fill out the form using the account number `900123456` and BSB `000000`. The confirmed PaymentIntent initially transitions to `processing`, then transitions to the `succeeded` status three minutes later. |
| BECS Direct Debit | Your customer’s payment fails with an `account_closed` error code. | Fill out the form using the account number `111111113` and BSB `000000`. |
| Credit card | The card payment succeeds and doesn’t require authentication. | Fill out the credit card form using the credit card number `4242 4242 4242 4242` with any expiration, CVC, and postal code. |
| Credit card | The card payment requires *authentication* (Strong Customer Authentication (SCA) is a regulatory requirement in effect as of September 14, 2019, that impacts many European online payments. It requires customers to use two-factor authentication like 3D Secure to verify their purchase). | Fill out the credit card form using the credit card number `4000 0025 0000 3155` with any expiration, CVC, and postal code. |
| Credit card | The card is declined with a decline code like `insufficient_funds`. | Fill out the credit card form using the credit card number `4000 0000 0000 9995` with any expiration, CVC, and postal code. |
| SEPA Direct Debit | Your customer successfully pays with SEPA Direct Debit. | Fill out the form using the account number `AT321904300235473204`. The confirmed PaymentIntent initially transitions to processing, then transitions to the succeeded status three minutes later. |
| SEPA Direct Debit | Your customer’s PaymentIntent status transitions from `processing` to `requires_payment_method`. | Fill out the form using the account number `AT861904300235473202`. |
### Monitor events
Set up webhooks to listen to subscription change events, such as upgrades and cancellations. Learn more about [subscription webhooks](https://docs.stripe.com/billing/subscriptions/webhooks.md). You can view events in the [Dashboard](https://dashboard.stripe.com/test/events) or with the [Stripe CLI](https://docs.stripe.com/webhooks.md#test-webhook).
For more details, see [testing your Billing integration](https://docs.stripe.com/billing/testing.md).
## Optional: Let customers change their plans [Client and Server]
To let your customers change their subscription, collect the price ID of the option they want to change to. Then send the new price ID from the front end to a back-end endpoint. This example also passes the subscription ID, but you can retrieve it from your database for your logged in user.
```javascript
function updateSubscription(priceId, subscriptionId) {
return fetch('/update-subscription', {
method: 'post',
headers: {
'Content-type': 'application/json',
},
body: JSON.stringify({
subscriptionId: subscriptionId,
newPriceId: priceId,
}),
})
.then(response => {
return response.json();
})
.then(response => {
return response;
});
}
```
On the backend, define the endpoint for your frontend to call, passing the subscription ID and the new price ID. The subscription is now Premium, at 15 USD per month, instead of Basic at 5 USD per month.
#### Java
```java
// Don't put any keys in code. See https://docs.stripe.com/keys-best-practices.
// Find your keys at https://dashboard.stripe.com/apikeys.
StripeClient stripeClient = new StripeClient("<>");
post(
"/update-subscription",
(request, response) -> {
response.type("application/json");
UpdatePostBody postBody = gson.fromJson(
request.body(),
UpdatePostBody.class
);
Subscription subscription = stripeClient.v1().subscriptions().retrieve(
postBody.getSubscriptionId()
);
SubscriptionUpdateParams params = SubscriptionUpdateParams
.builder()
.addItem(
SubscriptionUpdateParams
.Item.builder()
.setId(subscription.getItems().getData().get(0).getId())
.setPrice(postBody.getNewPriceId())
.build()
)
.setCancelAtPeriodEnd(false)
.build();
Subscription updatedSubscription =
stripeClient.v1().subscriptions().update(subscription.getId(), params);
return updatedSubscription.toJson();
}
);
```
Your application receives a `customer.subscription.updated` event.
## Optional: Preview a price change [Client and Server]
When your customer changes their subscription, there’s often an adjustment to the amount they owe, known as a [proration](https://docs.stripe.com/billing/subscriptions/prorations.md). You can use the [create preview invoice endpoint](https://docs.stripe.com/api/invoices/create_preview.md) to display the adjusted amount to your customers.
On the front end, pass the create preview invoice details to a back-end endpoint.
#### Accounts v2
```javascript
function createPreviewInvoice(
customerAccountId,
subscriptionId,
newPriceId,
trialEndDate
) {
return fetch('/create-preview-invoice', {
method: 'post',
headers: {
'Content-type': 'application/json',
},
body: JSON.stringify({
customerAccountId: customerAccountId,
subscriptionId: subscriptionId,
newPriceId: newPriceId,
}),
})
.then(response => {
return response.json();
})
.then((invoice) => {
return invoice;
});
}
```
#### Customers v1
```javascript
function createPreviewInvoice(
customerId,
subscriptionId,
newPriceId,
trialEndDate
) {
return fetch('/create-preview-invoice', {
method: 'post',
headers: {
'Content-type': 'application/json',
},
body: JSON.stringify({
customerId: customerId,
subscriptionId: subscriptionId,
newPriceId: newPriceId,
}),
})
.then(response => {
return response.json();
})
.then((invoice) => {
return invoice;
});
}
```
On the back end, define the endpoint for your front end to call.
#### Accounts v2
#### Java
```java
// Don't put any keys in code. See https://docs.stripe.com/keys-best-practices.
// Find your keys at https://dashboard.stripe.com/apikeys.
StripeClient stripeClient = new StripeClient("<>");
post(
"/create-preview-invoice",
(request, response) -> {
response.type("application/json");
PreviewInvoicePostBody postBody = gson.fromJson(
request.body(),
PreviewInvoicePostBody.class
);
Subscription subscription = stripeClient.v1().subscriptions().retrieve(
postBody.getSubscriptionId()
);
InvoiceCreatePreviewParams invoiceParams = InvoiceCreatePreviewParams
.builder()
.setCustomerAccount(postBody.getCustomerAccountId())
.setSubscription(postBody.getSubscriptionId())
.setSubscriptionDetails(
InvoiceCreatePreviewParams.SubscriptionDetails.builder()
.addItem(
InvoiceCreatePreviewParams.SubscriptionDetails.Item.builder()
.setId(subscription.getItems().getData().get(0).getId())
.setDeleted(true)
.build()
)
.addItem(
InvoiceCreatePreviewParams.SubscriptionDetails.Item.builder()
.setPrice(dotenv.get(postBody.getNewPriceId()))
.build()
)
.build()
)
.build();
Invoice invoice = stripeClient.v1().invoices().createPreview(invoiceParams);
return invoice.toJson();
}
);
```
#### Customers v1
#### Java
```java
// Don't put any keys in code. See https://docs.stripe.com/keys-best-practices.
// Find your keys at https://dashboard.stripe.com/apikeys.
StripeClient stripeClient = new StripeClient("<>");
post(
"/create-preview-invoice",
(request, response) -> {
response.type("application/json");
PreviewInvoicePostBody postBody = gson.fromJson(
request.body(),
PreviewInvoicePostBody.class
);
Subscription subscription = stripeClient.v1().subscriptions().retrieve(
postBody.getSubscriptionId()
);
InvoiceCreatePreviewParams invoiceParams = InvoiceCreatePreviewParams
.builder()
.setCustomer(postBody.getCustomerId())
.setSubscription(postBody.getSubscriptionId())
.setSubscriptionDetails(
InvoiceCreatePreviewParams.SubscriptionDetails.builder()
.addItem(
InvoiceCreatePreviewParams.SubscriptionDetails.Item.builder()
.setId(subscription.getItems().getData().get(0).getId())
.setDeleted(true)
.build()
)
.addItem(
InvoiceCreatePreviewParams.SubscriptionDetails.Item.builder()
.setPrice(dotenv.get(postBody.getNewPriceId()))
.build()
)
.build()
)
.build();
Invoice invoice = stripeClient.v1().invoices().createPreview(invoiceParams);
return invoice.toJson();
}
);
```
## Optional: Display the customer payment method [Client and Server]
Displaying the brand and last four digits of your customer’s card can help them know which card is being charged, or if they need to update their payment method.
On the front end, send the payment method ID to a back-end endpoint that retrieves the payment method details.
```javascript
function retrieveCustomerPaymentMethod(paymentMethodId) {
return fetch('/retrieve-customer-payment-method', {
method: 'post',
headers: {
'Content-type': 'application/json',
},
body: JSON.stringify({
paymentMethodId: paymentMethodId,
}),
})
.then((response) => {
return response.json();
})
.then((response) => {
return response;
});
}
```
On the back end, define the endpoint for your front end to call.
#### Java
```java
// Don't put any keys in code. See https://docs.stripe.com/keys-best-practices.
// Find your keys at https://dashboard.stripe.com/apikeys.
StripeClient stripeClient = new StripeClient("<>");
post(
"/retrieve-customer-payment-method",
(request, response) -> {
response.type("application/json");
PaymentMethodBody paymentMethodBody = gson.fromJson(
request.body(),
PaymentMethodBody.class
);
PaymentMethod paymentMethod = stripeClient.v1().paymentMethods().retrieve(
paymentMethodBody.getPaymentMethodId()
);
return paymentMethod.toJson();
}
);
```
Example response:
```json
{
"id": "pm_1GcbHY2eZvKYlo2CoqlVxo42",
"object": "payment_method",
"billing_details": {
"address": {
"city": null,
"country": null,
"line1": null,
"line2": null,
"postal_code": null,
"state": null
},
"email": null,
"name": null,
"phone": null
},
"card": {
"brand": "visa",
"checks": {
"address_line1_check": null,
"address_postal_code_check": null,
"cvc_check": "pass"
},
"country": "US",
"exp_month": 8,
"exp_year": 2021,
"fingerprint": "Xt5EWLLDS7FJjR1c",
"funding": "credit",
"generated_from": null,
"last4": "4242",
"three_d_secure_usage": {
"supported": true
},
"wallet": null
},
"created": 1588010536,
"customer": "cus_HAxB7dVQxhoKLh",
"livemode": false,
"metadata": {},
"type": "card"
}
```
> We recommend that you save the `paymentMethod.id` and `last4` in your database, for example, `paymentMethod.id` as `stripeCustomerPaymentMethodId` in your `users` collection or table. You can optionally store `exp_month`, `exp_year`, `fingerprint`, `billing_details` as needed. This is to limit the number of calls you make to Stripe, for performance efficiency and to avoid possible rate limiting.
## Optional: Set the billing cycle date [Server]
When you create a Checkout Session, you can explicitly set a subscription’s billing cycle anchor to a fixed date, such as the 1st of the next month. The billing cycle anchor determines the first date when customers are billed the full subscription amount. The billing cycle anchor *and* the recurring interval of its [price](https://docs.stripe.com/products-prices/overview.md) determine a subscription’s future billing dates. For example, a monthly subscription created on May 15 with an anchor at June 1 is billed on May 15, then on the 1st of the month for the life of the subscription.
There are two ways to set the billing cycle anchor:
- Use [subscription_data.billing_cycle_anchor_config](https://docs.stripe.com/api/checkout/sessions/create.md#create_checkout_session-subscription_data-billing_cycle_anchor_config) to describe a recurring billing date with explicit fields for `day_of_month`, `month`, `hour`, `minute`, and `second` (monthly and yearly subscriptions only). Stripe automatically accounts for short months and leap years.
- Use [subscription_data.billing_cycle_anchor](https://docs.stripe.com/api/checkout/sessions/create.md#create_checkout_session-subscription_data-billing_cycle_anchor) to set the anchor directly as a future UNIX timestamp.
Use the [proration_behavior](https://docs.stripe.com/api/checkout/sessions/create.md#create_checkout_session-subscription_data-proration_behavior) parameter to customize how to handle [prorations](https://docs.stripe.com/billing/subscriptions/prorations.md) for the initial billing period up until the first full invoice date. By default, `proration_behavior` is set to `create_prorations`, and customers receive a prorated *invoice* (Invoices are statements of amounts owed by a customer. They track the status of payments from draft through paid or otherwise finalized. Subscriptions automatically generate invoices, or you can manually create a one-off invoice). If `proration_behavior` is `none`, the first invoice is waived, meaning that they are subscribed for free during the first period and they only get an invoice after the billing cycle anchor, which would then include the full amount.
## Set the billing cycle date with a config object
For monthly and yearly subscriptions, use `subscription_data.billing_cycle_anchor_config` to specify the billing renewal date with a config object instead of a raw timestamp. Stripe automatically handles edge cases like short months and leap years.
For example, to anchor billing to the 1st of every month, set `day_of_month` to `1`. To anchor a yearly subscription to July 1, set `month` to `7` and `day_of_month` to `1`.
> #### Mutually exclusive parameters
>
> The following parameters are mutually exclusive: `billing_cycle_anchor_config`, `billing_cycle_anchor`, and any trial period settings.
```java
// Don't put any keys in code. See https://docs.stripe.com/keys-best-practices.
// Find your keys at https://dashboard.stripe.com/apikeys.
StripeClient client = new StripeClient("<>");
SessionCreateParams params =
SessionCreateParams.builder()
.addLineItem(
SessionCreateParams.LineItem.builder()
.setPrice("{{PRICE_ID}}")
.setQuantity(1L)
.build()
)
.setMode(SessionCreateParams.Mode.SUBSCRIPTION)
.setUiMode(SessionCreateParams.UiMode.ELEMENTS)
.setReturnUrl("https://example.com/return?session_id={CHECKOUT_SESSION_ID}")
.setSubscriptionData(SessionCreateParams.SubscriptionData.builder().build())
.putExtraParam(
"subscription_data[billing_cycle_anchor_config][day_of_month]",
new BigDecimal(1)
)
.build();
// For SDK versions 29.4.0 or lower, remove '.v1()' from the following line.
Session session = client.v1().checkout().sessions().create(params);
```
You can also specify `hour`, `minute`, and `second` for precise control over the anchor time. If omitted, they default to the time of the subscription creation request (in UTC).
`billing_cycle_anchor_config` is only compatible with monthly and yearly subscriptions. For daily or weekly subscriptions, use `billing_cycle_anchor` with a UNIX timestamp instead.
### Create a Checkout Session with a billing cycle anchor
To configure a billing cycle anchor with a UNIX timestamp, set the `subscription_data.billing_cycle_anchor` parameter when you create a Checkout Session in `subscription` mode. The anchor must be a future UNIX timestamp within the first billing period (the current timestamp plus the recurring interval duration).
```java
// Don't put any keys in code. See https://docs.stripe.com/keys-best-practices.
// Find your keys at https://dashboard.stripe.com/apikeys.
StripeClient client = new StripeClient("<>");
SessionCreateParams params =
SessionCreateParams.builder()
.addLineItem(
SessionCreateParams.LineItem.builder()
.setPrice("{{PRICE_ID}}")
.setQuantity(1L)
.build()
)
.setMode(SessionCreateParams.Mode.SUBSCRIPTION)
.setUiMode(SessionCreateParams.UiMode.ELEMENTS)
.setReturnUrl("https://example.com/return?session_id={CHECKOUT_SESSION_ID}")
.setSubscriptionData(
SessionCreateParams.SubscriptionData.builder()
.setBillingCycleAnchor(1611008505L)
.build()
)
.build();
// For SDK versions 29.4.0 or lower, remove '.v1()' from the following line.
Session session = client.v1().checkout().sessions().create(params);
```
If a customer attempts payment after a session’s active period has passed the date set for the billing cycle anchor, Checkout charges for the full period starting with the billing cycle anchor instead of the prorated period before the billing cycle anchor.
### Disable prorations
To disable prorations, set the `subscription_data.proration_behavior` parameter to `none` when creating a Checkout Session.
```java
// Don't put any keys in code. See https://docs.stripe.com/keys-best-practices.
// Find your keys at https://dashboard.stripe.com/apikeys.
StripeClient client = new StripeClient("<>");
SessionCreateParams params =
SessionCreateParams.builder()
.addLineItem(
SessionCreateParams.LineItem.builder()
.setPrice("{{PRICE_ID}}")
.setQuantity(1L)
.build()
)
.setMode(SessionCreateParams.Mode.SUBSCRIPTION)
.setUiMode(SessionCreateParams.UiMode.ELEMENTS)
.setReturnUrl("https://example.com/return?session_id={CHECKOUT_SESSION_ID}")
.setSubscriptionData(
SessionCreateParams.SubscriptionData.builder()
.setBillingCycleAnchor(1611008505L)
.setProrationBehavior(SessionCreateParams.SubscriptionData.ProrationBehavior.NONE)
.build()
)
.build();
// For SDK versions 29.4.0 or lower, remove '.v1()' from the following line.
Session session = client.v1().checkout().sessions().create(params);
```
Similar to a free trial, the customer isn’t charged for the initial period up to the billing cycle anchor. Unlike a trial, no 0 USD invoice is generated. Customers receive an invoice with the full subscription amount on the billing cycle anchor date.
In the Checkout Session response object, amounts attached to the [line items](https://docs.stripe.com/api/checkout/sessions/object.md#checkout_session_object-line_items) and [total details](https://docs.stripe.com/api/checkout/sessions/object.md#checkout_session_object-total_details) are always 0 when prorations are disabled. Additionally, the [payment status](https://docs.stripe.com/api/checkout/sessions/object.md#checkout_session_object-payment_status) of the Session is set to `no_payment_required` to reflect that payment is delayed to a future date.
### Limitations
- You can’t use trials in Checkout Sessions with a billing cycle anchor.
- You can’t use one-time prices in Checkout Sessions when `proration_behavior` is `none`.
- You can’t apply [amount_off coupons](https://docs.stripe.com/api/coupons/create.md#create_coupon-amount_off) to Checkout Sessions with a default `proration_behavior` of `create_prorations`.
## Disclose Stripe to your customers
Stripe collects information on customer interactions with Elements to provide services to you, prevent fraud, and improve its services. This includes using cookies and IP addresses to identify which Elements a customer saw during a single checkout session. You’re responsible for disclosing and obtaining all rights and consents necessary for Stripe to use data in these ways. For more information, visit our [privacy center](https://stripe.com/legal/privacy-center#as-a-business-user-what-notice-do-i-provide-to-my-end-customers-about-stripe).
#### Payment Intents API
#### Integration effort
Complexity: 4/5
#### Integration type
Combine UI components into a custom payment flow
#### UI customization
CSS-level customization with the [Appearance API](https://docs.stripe.com/elements/appearance-api.md)
Build a custom payment form using [Stripe Elements](https://docs.stripe.com/payments/elements.md) and the [Payment Intents API](https://docs.stripe.com/api/payment_intents.md) to sell fixed-price *subscriptions* (A Subscription represents the product details associated with the plan that your customer subscribes to. Allows you to charge the customer on a recurring basis). See how this integration [compares to Stripe’s other integration types](https://docs.stripe.com/payments/online-payments.md#compare-features-and-availability).
The Payment Intents API is a lower-level API that you can use to build your own checkout or payments flow, but requires significantly more code and ongoing maintenance. We recommend the [Payment Element with Checkout Sessions](https://docs.stripe.com/payments/quickstart-checkout-sessions.md) for most integrations because it covers similar payment flows as Payment Intents. Learn more about [when to use Checkout Sessions instead of PaymentIntents](https://docs.stripe.com/payments/checkout-sessions-and-payment-intents-comparison.md).
If you don’t want to build a custom payment form, you can integrate with the hosted version of Checkout. For an immersive version of that end-to-end integration guide, see the [Billing quickstart](https://docs.stripe.com/billing/quickstart.md).
If you aren’t ready to code an integration, you can set up basic subscriptions [manually in the Dashboard](https://docs.stripe.com/no-code/subscriptions.md). You can also use [Payment Links](https://docs.stripe.com/payment-links.md) to set up subscriptions without writing any code. Learn more about [designing an integration](https://docs.stripe.com/billing/subscriptions/design-an-integration.md) to understand the decisions you need to make and the resources you need.
## What you’ll build
This guide shows you how to:
- Build a product catalog.
- Build a registration process that creates a customer.
- Create subscriptions and collect payment information.
- Test and monitor payment and subscription status.
- Let customers change their plan or cancel the subscription.
- Learn how to use [flexible billing mode](https://docs.stripe.com/billing/subscriptions/billing-mode.md) to access enhanced billing behavior and additional features.
## How to build on Stripe
[Subscriptions](https://docs.stripe.com/api/subscriptions.md) simplify your billing by automatically creating *Invoices* (Invoices are statements of amounts owed by a customer. They track the status of payments from draft through paid or otherwise finalized. Subscriptions automatically generate invoices, or you can manually create a one-off invoice) and [PaymentIntents](https://docs.stripe.com/api/payment_intents.md) for you. To create and activate a subscription, you need to first create a *Product* (Products represent what your business sells—whether that's a good or a service) to define what you’re selling, and a *Price* (Prices define how much and how often to charge for products. This includes how much the product costs, what currency to use, and the interval if the price is for subscriptions), which determines the amount to charge and how often. You also need either a customer-configured `Account` object or a `Customer` object to store the *PaymentMethods* (PaymentMethods represent your customer's payment instruments, used with the Payment Intents or Setup Intents APIs) used to make each recurring payment.
#### Accounts v2
A diagram illustrating common billing objects and their relationships (See full diagram at https://docs.stripe.com/billing/subscriptions/build-subscriptions)
#### Customer v1
A diagram illustrating common billing objects and their relationships (See full diagram at https://docs.stripe.com/billing/subscriptions/build-subscriptions)
### API object definitions
| Resource | Definition |
| --- | --- |
| [Account configured as a customer](https://docs.stripe.com/api/v2/core/accounts/create.md#v2_create_accounts-configuration-customer) | Represents a customer in the Accounts v2 API who purchases a subscription. Configure an `Account` object as a customer and associate it with a subscription to make and track recurring charges and to manage the products that they subscribe to. For more information, see the [Use Accounts as customers guide](https://docs.stripe.com/accounts-v2/use-accounts-as-customers.md). |
| [Customer](https://docs.stripe.com/api/customers.md) | Represents a customer in the Customers API who purchases a subscription. Use the `Customer` object associated with a subscription to make and track recurring charges and to manage the products that they subscribe to. |
| [Entitlement](https://docs.stripe.com/api/entitlements/active-entitlement.md) | Represents a customer’s access to a feature included in a service product that they subscribe to. When you create a subscription for a customer’s recurring purchase of a product, an active entitlement is automatically created for each feature associated with that product. When a customer accesses your services, use their active entitlements to enable the features included in their subscription. |
| [Feature](https://docs.stripe.com/api/entitlements/feature.md) | Represents a function or ability that your customers can access when they subscribe to a service product. You can include features in a product by creating ProductFeatures. |
| [Invoice](https://docs.stripe.com/api/invoices.md) | A statement of amounts a customer owes that tracks payment statuses from draft through paid or otherwise finalized. Subscriptions automatically generate invoices. |
| [PaymentIntent](https://docs.stripe.com/api/payment_intents.md) | A way to build dynamic payment flows. A PaymentIntent tracks the lifecycle of a customer checkout flow and triggers additional authentication steps when required by regulatory mandates, custom Radar fraud rules, or redirect-based payment methods. Invoices automatically create PaymentIntents. |
| [PaymentMethod](https://docs.stripe.com/api/payment_methods.md) | A customer’s payment methods that they use to pay for your products. For example, you can store a credit card on a customer-configured `Account` or `Customer` object and use it to make recurring payments for that customer. Typically used with the Payment Intents or Setup Intents APIs. |
| [Price](https://docs.stripe.com/api/prices.md) | Defines the unit price, currency, and billing cycle for a product. |
| [Product](https://docs.stripe.com/api/products.md) | A good or service that your business sells. A service product can include one or more features. |
| [ProductFeature](https://docs.stripe.com/api/product-feature.md) | Represents a single feature’s inclusion in a single product. Each product is associated with a ProductFeature for each feature that it includes, and each feature is associated with a ProductFeature for each product that includes it. |
| [Subscription](https://docs.stripe.com/api/subscriptions.md) | Represents a customer’s scheduled recurring purchase of a product. Use a subscription to collect payments and provide repeated delivery of or continuous access to a product. |
Here’s an example of how products, features, and entitlements work together. Imagine that you want to set up a recurring service that offers two tiers: a standard product with basic functionality, and an advanced product that adds extended functionality.
1. You create two features: `basic_features` and `extended_features`.
2. You create two products: `standard_product` and `advanced_product`.
3. For the standard product, you create one ProductFeature that associates `basic_features` with `standard_product`.
4. For the advanced product, you create two ProductFeatures: one that associates `basic_features` with `advanced_product` and one that associates `extended_features` with `advanced_product`.
A customer, `first_customer`, subscribes to the standard product. When you create the subscription, Stripe automatically creates an Entitlement that associates `first_customer` with `basic_features`.
Another customer, `second_customer`, subscribes to the advanced product. When you create the Subscription, Stripe automatically creates two Entitlements: one that associates `second_customer` with `basic_features`, and one that associates `second_customer` with `extended_features`.
You can determine which features to provision for a customer by [retrieving their active entitlements or listening to the Active Entitlement Summary event](https://docs.stripe.com/billing/entitlements.md#entitlements). You don’t have to retrieve their subscriptions, products, and features.
## Set up Stripe
Install the Stripe client of your choice:
#### Java
```java
/*
For Gradle, add the following dependency to your build.gradle and replace with
the version number you want to use from:
- https://mvnrepository.com/artifact/com.stripe/stripe-java or
- https://github.com/stripe/stripe-java/releases/latest
*/
implementation "com.stripe:stripe-java:33.1.0"
```
```xml
com.stripestripe-java33.1.0
```
```bash
# For other environments, manually install the following JARs:
# - The Stripe JAR from https://github.com/stripe/stripe-java/releases/latest
# - Google Gson from https://github.com/google/gson
```
Next, install the Stripe CLI. The CLI provides webhook testing, and you can run it to make API calls to Stripe. This guide shows how to use the CLI to set up a pricing model in a later section.
For additional install options, see [Get started with the Stripe CLI](https://docs.stripe.com/stripe-cli.md).
## Create the pricing model [Stripe CLI or Dashboard]
[Recurring pricing models](https://docs.stripe.com/products-prices/pricing-models.md) represent the products or services you sell, how much they cost, what currency you accept for payments, and the service period for subscriptions. To build the pricing model, create [products](https://docs.stripe.com/api/products.md) (what you sell) and [prices](https://docs.stripe.com/api/prices.md) (how much and how often to charge for your products).
This example uses flat-rate pricing with two different service-level options: Basic and Premium. For each service-level option, you need to create a product and a recurring price. To add a one-time charge for something like a setup fee, create a third product with a one-time price.
Each product bills at monthly intervals. The price for the Basic product is 5 USD. The price for the Premium product is 15 USD. See the [flat rate pricing](https://docs.stripe.com/subscriptions/pricing-models/flat-rate-pricing.md) guide for an example with three tiers.
#### Dashboard
Go to the [Add a product](https://dashboard.stripe.com/test/products/create) page and create two products. Add one price for each product, each with a monthly recurring billing period:
- Premium product: Premium service with extra features
- Price: Flat rate | 15 USD
- Basic product: Basic service with minimum features
- Price: Flat rate | 5 USD
After you create the prices, record the price IDs so you can use them in other steps. Price IDs look like this: `price_G0FvDp6vZvdwRZ`.
When you’re ready, use the **Copy to live mode** button at the top right of the page to clone your product from [a sandbox to live mode](https://docs.stripe.com/keys.md#test-live-modes).
#### API
You can use the API to create the [Products](https://docs.stripe.com/api/products.md) and [Prices](https://docs.stripe.com/api/prices.md).
Create the Premium product:
```java
// Don't put any keys in code. See https://docs.stripe.com/keys-best-practices.
// Find your keys at https://dashboard.stripe.com/apikeys.
StripeClient client = new StripeClient("<>");
ProductCreateParams params =
ProductCreateParams.builder()
.setName("Billing Guide: Premium Service")
.setDescription("Premium service with extra features")
.build();
// For SDK versions 29.4.0 or lower, remove '.v1()' from the following line.
Product product = client.v1().products().create(params);
```
Create the Basic product:
```java
// Don't put any keys in code. See https://docs.stripe.com/keys-best-practices.
// Find your keys at https://dashboard.stripe.com/apikeys.
StripeClient client = new StripeClient("<>");
ProductCreateParams params =
ProductCreateParams.builder()
.setName("Billing Guide: Basic Service")
.setDescription("Basic service with minimum features")
.build();
// For SDK versions 29.4.0 or lower, remove '.v1()' from the following line.
Product product = client.v1().products().create(params);
```
Record the product ID for each product. They look like this:
```json
{
"id": "prod_H94k5odtwJXMtQ",
"object": "product",
"active": true,
"attributes": [
],
"created": 1587577341,
"description": "Premium service with extra features",
"images": [
],
"livemode": false,
"metadata": {
},
"name": "Billing Guide: Premium Service",
"statement_descriptor": null,
"type": "service",
"unit_label": null,
"updated": 1587577341
}
```
Use the product IDs to create a price for each product. The [unit_amount](https://docs.stripe.com/api/prices/object.md#price_object-unit_amount) number is in cents, so `1500` = 15 USD, for example.
Create the Premium price:
```java
// Don't put any keys in code. See https://docs.stripe.com/keys-best-practices.
// Find your keys at https://dashboard.stripe.com/apikeys.
StripeClient client = new StripeClient("<>");
PriceCreateParams params =
PriceCreateParams.builder()
.setProduct("{{PREMIUM_PRODUCT_ID}}")
.setUnitAmount(1500L)
.setCurrency("usd")
.setRecurring(
PriceCreateParams.Recurring.builder()
.setInterval(PriceCreateParams.Recurring.Interval.MONTH)
.build()
)
.build();
// For SDK versions 29.4.0 or lower, remove '.v1()' from the following line.
Price price = client.v1().prices().create(params);
```
Create the Basic price:
```java
// Don't put any keys in code. See https://docs.stripe.com/keys-best-practices.
// Find your keys at https://dashboard.stripe.com/apikeys.
StripeClient client = new StripeClient("<>");
PriceCreateParams params =
PriceCreateParams.builder()
.setProduct("{{BASIC_PRODUCT_ID}}")
.setUnitAmount(500L)
.setCurrency("usd")
.setRecurring(
PriceCreateParams.Recurring.builder()
.setInterval(PriceCreateParams.Recurring.Interval.MONTH)
.build()
)
.build();
// For SDK versions 29.4.0 or lower, remove '.v1()' from the following line.
Price price = client.v1().prices().create(params);
```
Record the price ID for each price so you can use them in subsequent steps. They look like this:
```json
{
"id": "price_HGd7M3DV3IMXkC",
"object": "price",
"product": "prod_HGd6W1VUqqXGvr",
"type": "recurring",
"currency": "usd",
"recurring": {
"interval": "month",
"interval_count": 1,
"trial_period_days": null,
"usage_type": "licensed"
},
"active": true,
"billing_scheme": "per_unit",
"created": 1589319695,
"livemode": false,
"lookup_key": null,
"metadata": {},
"nickname": null,
"unit_amount": 1500,
"unit_amount_decimal": "1500",
"tiers": null,
"tiers_mode": null,
"transform_quantity": null
}
```
## Create the customer [Client and Server]
Stripe needs a customer for each subscription. In your application front end, collect any necessary information from your users and pass it to the back end.
If you need to collect address details, the Address Element enables you to collect a shipping or billing address for your customers. For more information on the Address Element, see the [Address Element](https://docs.stripe.com/elements/address-element.md) page.
```html
```
```javascript
const emailInput = document.querySelector('#email');
fetch('/create-customer', {
method: 'post',
headers: {
'Content-Type': 'application/json',
},
body: JSON.stringify({
email: emailInput.value,
}),
}).then(r => r.json());
```
On the server, create an object to represent the customer. This can be either a customer-configured `Account` object or a `Customer` object. Save the object’s ID to use in the Checkout Session.
> #### Use the Accounts v2 API to represent customers
>
> The Accounts v2 API is generally available for Connect users, and in public preview for other Stripe users. If you’re part of the Accounts v2 preview, you need to specify a [preview version](https://docs.stripe.com/api-v2-overview.md#sdk-and-api-versioning) in your code.
>
> To join the Accounts v2 preview, go to [Account previews and features](https://dashboard.stripe.com/settings/previews) in your Dashboard and enable **Reusable payment methods for Global Payouts**.
>
> For most use cases, we recommend [modeling your customers as customer-configured Account objects](https://docs.stripe.com/accounts-v2/use-accounts-as-customers.md) instead of using [Customer](https://docs.stripe.com/api/customers.md) objects.
#### Accounts v2
```java
// Don't put any keys in code. See https://docs.stripe.com/keys-best-practices.
// Find your keys at https://dashboard.stripe.com/apikeys.
StripeClient client = new StripeClient("<>");
AccountCreateParams params =
AccountCreateParams.builder()
.setContactEmail("jenny.rosen@example.com")
.setDisplayName("Jenny Rosen")
.setIdentity(
AccountCreateParams.Identity.builder()
.setIndividual(
AccountCreateParams.Identity.Individual.builder()
.setGivenName("Jenny Rosen")
.setAddress(
AccountCreateParams.Identity.Individual.Address.builder()
.setCity("San Francisco")
.setCountry("US")
.setLine1("123 Main Street")
.setPostalCode("94605")
.setState("CA")
.build()
)
.build()
)
.build()
)
.setConfiguration(
AccountCreateParams.Configuration.builder()
.setCustomer(
AccountCreateParams.Configuration.Customer.builder()
.setCapabilities(
AccountCreateParams.Configuration.Customer.Capabilities.builder()
.setAutomaticIndirectTax(
AccountCreateParams.Configuration.Customer.Capabilities.AutomaticIndirectTax.builder()
.setRequested(true)
.build()
)
.build()
)
.setShipping(
AccountCreateParams.Configuration.Customer.Shipping.builder()
.setAddress(
AccountCreateParams.Configuration.Customer.Shipping.Address.builder()
.setCity("San Francisco")
.setCountry("US")
.setLine1("123 Main Street")
.setPostalCode("94605")
.setState("CA")
.build()
)
.build()
)
.build()
)
.build()
)
.addInclude(AccountCreateParams.Include.CONFIGURATION__CUSTOMER)
.addInclude(AccountCreateParams.Include.IDENTITY)
.build();
Account account = client.v2().core().accounts().create(params);
```
#### Customers v1
```java
// Don't put any keys in code. See https://docs.stripe.com/keys-best-practices.
// Find your keys at https://dashboard.stripe.com/apikeys.
StripeClient client = new StripeClient("<>");
CustomerCreateParams params =
CustomerCreateParams.builder()
.setEmail("jenny.rosen@example.com")
.setName("Jenny Rosen")
.setShipping(
CustomerCreateParams.Shipping.builder()
.setAddress(
CustomerCreateParams.Shipping.Address.builder()
.setCity("San Francisco")
.setCountry("US")
.setLine1("123 Main Street")
.setPostalCode("9460")
.setState("CA")
.build()
)
.setName("Jenny Rosen")
.build()
)
.setAddress(
CustomerCreateParams.Address.builder()
.setCity("San Francisco")
.setCountry("US")
.setLine1("123 Main Street")
.setPostalCode("9460")
.setState("CA")
.build()
)
.build();
// For SDK versions 29.4.0 or lower, remove '.v1()' from the following line.
Customer customer = client.v1().customers().create(params);
```
## Create the Subscription [Client and Server]
> If you want to render the Payment Element without first creating a subscription, see [Collect payment details before creating an Intent](https://docs.stripe.com/payments/accept-a-payment-deferred.md?type=subscription).
Allow your customer to choose a plan, and then create the subscription. In the example in this guide, the customer chooses between a Basic plan or Premium plan.
On the front end, pass the selected price ID and the customer record ID to the back end.
#### Accounts v2
```javascript
fetch('/create-subscription', {
method: 'POST',
headers: {
'Content-Type': 'application/json',
},
body: JSON.stringify({
priceId: priceId,
customerAccountId: customerAccountId,
}),
})
```
#### Customers v1
```javascript
fetch('/create-subscription', {
method: 'POST',
headers: {
'Content-Type': 'application/json',
},
body: JSON.stringify({
priceId: priceId,
customerId: customerId,
}),
})
```
On the back end, create the subscription with an `incomplete` status using `payment_behavior=default_incomplete`. Then, return the `client_secret` from the subscription’s first [PaymentIntent](https://docs.stripe.com/payments/payment-intents.md) to the front end to complete payment. To do so, expand the [confirmation_secret](https://docs.stripe.com/api/invoices/object.md#invoice_object-confirmation_secret) on the latest invoice of the subscription.
To enable [improved subscription behavior](https://docs.stripe.com/billing/subscriptions/billing-mode.md), set `billing_mode[type]` to `flexible`. You must use the Stripe API version [2025-06-30.basil](https://docs.stripe.com/changelog/basil.md#2025-06-30.basil) or later.
Set [save_default_payment_method](https://docs.stripe.com/api/subscriptions/object.md#subscription_object-payment_settings-save_default_payment_method) to `on_subscription` to save the payment method as the default for a subscription when a payment succeeds. Saving a default payment method increases the success rate of future subscription payments.
The following example creates a `Subscription` and expands the `confirmation_secret` from its latest invoice in the response. That lets you pass the secret to the front end to confirm the payment.
#### Accounts v2
```java
// Don't put any keys in code. See https://docs.stripe.com/keys-best-practices.
// Find your keys at https://dashboard.stripe.com/apikeys.
StripeClient client = new StripeClient("<>");
SubscriptionCreateParams params =
SubscriptionCreateParams.builder()
.setCustomerAccount("{{CUSTOMERACCOUNT_ID}}")
.addItem(
SubscriptionCreateParams.Item.builder().setPrice("{{PRICE_ID}}").build()
)
.setPaymentBehavior(SubscriptionCreateParams.PaymentBehavior.DEFAULT_INCOMPLETE)
.setPaymentSettings(
SubscriptionCreateParams.PaymentSettings.builder()
.setSaveDefaultPaymentMethod(
SubscriptionCreateParams.PaymentSettings.SaveDefaultPaymentMethod.ON_SUBSCRIPTION
)
.build()
)
.setBillingMode(
SubscriptionCreateParams.BillingMode.builder()
.setType(SubscriptionCreateParams.BillingMode.Type.FLEXIBLE)
.build()
)
.addExpand("latest_invoice.confirmation_secret")
.build();
// For SDK versions 29.4.0 or lower, remove '.v1()' from the following line.
Subscription subscription = client.v1().subscriptions().create(params);
```
#### Customers v1
```java
// Don't put any keys in code. See https://docs.stripe.com/keys-best-practices.
// Find your keys at https://dashboard.stripe.com/apikeys.
StripeClient client = new StripeClient("<>");
SubscriptionCreateParams params =
SubscriptionCreateParams.builder()
.setCustomer("{{CUSTOMER_ID}}")
.addItem(
SubscriptionCreateParams.Item.builder().setPrice("{{PRICE_ID}}").build()
)
.setPaymentBehavior(SubscriptionCreateParams.PaymentBehavior.DEFAULT_INCOMPLETE)
.setPaymentSettings(
SubscriptionCreateParams.PaymentSettings.builder()
.setSaveDefaultPaymentMethod(
SubscriptionCreateParams.PaymentSettings.SaveDefaultPaymentMethod.ON_SUBSCRIPTION
)
.build()
)
.setBillingMode(
SubscriptionCreateParams.BillingMode.builder()
.setType(SubscriptionCreateParams.BillingMode.Type.FLEXIBLE)
.build()
)
.addExpand("latest_invoice.confirmation_secret")
.build();
// For SDK versions 29.4.0 or lower, remove '.v1()' from the following line.
Subscription subscription = client.v1().subscriptions().create(params);
```
> If you’re using a *multi-currency price* (A single Price object can support multiple currencies. Each purchase uses one of the supported currencies for the Price, depending on how you use the Price in your integration), use the [currency](https://docs.stripe.com/api/subscriptions/create.md#create_subscription-currency) parameter to tell the subscription which of the supported currencies to use. If you omit the `currency` parameter, the subscription uses the default currency.
The Subscription is now `inactive` and awaiting payment. The example response below highlights the minimum fields to store, but you can store the fields that your application frequently accesses.
#### Accounts v2
```json
{"id": "sub_JgRjFjhKbtD2qz",
"object": "subscription",
"application_fee_percent": null,
"automatic_tax": {
"disabled_reason": null,
"enabled": false,
"liability": "null"
},
"billing_cycle_anchor": 1623873347,
"billing_cycle_anchor_config": null,
"cancel_at": null,
"cancel_at_period_end": false,
"canceled_at": null,
"cancellation_details": {
"comment": null,
"feedback": null,
"reason": null
},
"collection_method": "charge_automatically",
"created": 1623873347,
"currency": "usd","customer_account": identifier("customerAccount"),
"days_until_due": null,
"default_payment_method": null,
"default_source": null,
"default_tax_rates": [
],
"discounts": [],
"ended_at": null,
"invoice_customer_balance_settings": {
"account_tax_ids": null,
"issuer": {
"type": "self"
}
},
"items": {
"object": "list",
"data": [
{
"id": "si_JgRjmS4Ur1khEx",
"object": "subscription_item",
"created": 1623873347,"current_period_end": 1626465347,
"current_period_start": 1623873347,
"discounts": [],
"metadata": {
},
"plan": {
"id": "price_1J32RfGPZ1iASj5zHHp57z7C",
"object": "plan",
"active": true,
"amount": 2000,
"amount_decimal": "2000",
"billing_scheme": "per_unit",
"created": 1623864151,
"currency": "usd",
"interval": "month",
"interval_count": 1,
"livemode": false,
"metadata": {
},
"nickname": null,
"product": "prod_JgPF5xnq7qBun3",
"tiers": null,
"tiers_mode": null,
"transform_usage": null,
"trial_period_days": null,
"usage_type": "licensed"
},
"price": {
"id": "price_1J32RfGPZ1iASj5zHHp57z7C",
"object": "price",
"active": true,
"billing_scheme": "per_unit",
"created": 1623864151,
"currency": "usd",
"livemode": false,
"lookup_key": null,
"metadata": {
},
"nickname": null,
"product": "prod_JgPF5xnq7qBun3",
"recurring": {
"interval": "month",
"interval_count": 1,
"trial_period_days": null,
"usage_type": "licensed"
},
"tiers_mode": null,
"transform_quantity": null,
"type": "recurring",
"unit_amount": 2000,
"unit_amount_decimal": "2000"
},
"quantity": 1,
"subscription": "sub_JgRjFjhKbtD2qz",
"tax_rates": [
]
}
],
"has_more": false,
"total_count": 1,
"url": "/v1/subscription_items?subscription=sub_JgRjFjhKbtD2qz"
},
"latest_invoice": {
"id": "in_1J34pzGPZ1iASj5zB87qdBNZ",
"object": "invoice",
"account_country": "US",
"account_name": "Angelina's Store",
"account_tax_ids": null,
"amount_due": 2000,
"amount_overpaid": 0,
"amount_paid": 0,
"amount_remaining": 2000,
"amount_shipping": 0,
"attempt_count": 0,
"attempted": false,
"auto_advance": false,
"automatic_tax": {
"disabled_reason": null,
"enabled": false,
"liability": null,
"status": null
},
"automatically_finalizes_at": null,
"billing_reason": "subscription_update",
"collection_method": "charge_automatically",
"created": 1623873347,
"currency": "usd",
"custom_fields": null,
"customer_account": identifier("customerAccount"),
"customer_address": null,
"customer_email": "angelina@stripe.com",
"customer_name": null,
"customer_phone": null,
"customer_shipping": {
"address": {
"city": "",
"country": "US",
"line1": "Berry",
"line2": "",
"postal_code": "",
"state": ""
},
"name": "",
"phone": null
},
"customer_tax_exempt": "none",
"customer_tax_ids": [
],
"default_payment_method": null,
"default_source": null,
"default_tax_rates": [
],
"description": null,
"discounts": [],
"due_date": null,
"effective_at": "1623873347",
"ending_balance": 0,
"footer": null,
"from_invoice": null,
"hosted_invoice_url": "https://invoice.stripe.com/i/acct_1By64KGPZ1iASj5z/invst_JgRjzIOILGeq2MKC9T0KtyXnD5udsLp",
"invoice_pdf": "https://pay.stripe.com/invoice/acct_1By64KGPZ1iASj5z/invst_JgRjzIOILGeq2MKC9T0KtyXnD5udsLp/pdf",
"last_finalization_error": null,
"latest_revision": null,
"lines": {
"object": "list",
"data": [
{
"id": "il_1N2CjMBwKQ696a5NeOawRQP2",
"object": "line_item",
"amount": 2000,
"currency": "usd",
"description": "1 × Gold Special (at $20.00 / month)",
"discount_amounts": [
],
"discountable": true,
"discounts": [
],
"invoice": "in_1J34pzGPZ1iASj5zB87qdBNZ",
"livemode": false,
"metadata": {
},
"parent": {
"invoice_item_details": null,
"subscription_item_details":
{
"invoice_item": null,
"proration": false,
"proration_details":
{
"credited_items": null
},
"subscription":
"sub_JgRjFjhKbtD2qz",
"subscription_item":
"si_JgRjmS4Ur1khEx"
},
"type": "subscription_item_details"
},
"period": {
"end": 1626465347,
"start": 1623873347
},
"plan": {
"id": "price_1J32RfGPZ1iASj5zHHp57z7C",
"object": "plan",
"active": true,
"amount": 2000,
"amount_decimal": "2000",
"billing_scheme": "per_unit",
"created": 1623864151,
"currency": "usd",
"interval": "month",
"interval_count": 1,
"livemode": false,
"metadata": {
},
"nickname": null,
"product": "prod_JgPF5xnq7qBun3",
"tiers": null,
"tiers_mode": null,
"transform_usage": null,
"trial_period_days": null,
"usage_type": "licensed"
},
"price": {
"id": "price_1J32RfGPZ1iASj5zHHp57z7C",
"object": "price",
"active": true,
"billing_scheme": "per_unit",
"created": 1623864151,
"currency": "usd",
"livemode": false,
"lookup_key": null,
"metadata": {
},
"nickname": null,
"product": "prod_JgPF5xnq7qBun3",
"recurring": {
"interval": "month",
"interval_count": 1,
"trial_period_days": null,
"usage_type": "licensed"
},
"tiers_mode": null,
"transform_quantity": null,
"type": "recurring",
"unit_amount": 2000,
"unit_amount_decimal": "2000"
},
"quantity": 1,
"taxes": []
}
],
"has_more": false,
"total_count": 1,
"url": "/v1/invoices/in_1J34pzGPZ1iASj5zB87qdBNZ/lines"
},
"livemode": false,
"metadata": {
},
"next_payment_attempt": null,
"number": "C008FC2-0354",
"on_behalf_of": null,
"parent": {
"quote_details": null,
"subscription_details": {
"metadata": {},
"pause_collection": null,
"subscription": "sub_JgRjFjhKbtD2qz"
}
},
"payment_intent": {
"id": "pi_1J34pzGPZ1iASj5zI2nOAaE6",
"object": "payment_intent",
"allowed_source_types": [
"card"
],
"amount": 2000,
"amount_capturable": 0,
"amount_received": 0,
"application": null,
"application_fee_amount": null,
"canceled_at": null,
"cancellation_reason": null,
"capture_method": "automatic",
"charges": {
"object": "list",
"data": [
],
"has_more": false,
"total_count": 0,
"url": "/v1/charges?payment_intent=pi_1J34pzGPZ1iASj5zI2nOAaE6"
},
"client_secret": "pi_1J34pzGPZ1iASj5zI2nOAaE6_secret_l7FN6ldFfXiFmJEumenJ2y2wu",
"confirmation_method": "automatic",
"created": 1623873347,
"currency": "usd",
"customer": "cus_CMqDWO2xODTZqt",
"description": "Subscription creation",
"invoice": "in_1J34pzGPZ1iASj5zB87qdBNZ",
"last_payment_error": null,
"livemode": false,
"metadata": {
},
"next_action": null,
"next_source_action": null,
"on_behalf_of": null,
"payment_method": null,
"payment_method_options": {
"card": {
"installments": null,
"network": null,
"request_three_d_secure": "automatic"
}
},
"payment_method_types": [
"card"
],
"receipt_email": null,
"review": null,
"setup_future_usage": "off_session",
"shipping": null,
"source": "card_1By6iQGPZ1iASj5z7ijKBnXJ",
"statement_descriptor": null,
"statement_descriptor_suffix": null,
"status": "requires_confirmation",
"transfer_data": null,
"transfer_group": null
},
"payment_settings": {
"payment_method_options": null,
"payment_method_types": null,
"save_default_payment_method": "on_subscription"
},
"period_end": 1623873347,
"period_start": 1623873347,
"post_payment_credit_notes_amount": 0,
"pre_payment_credit_notes_amount": 0,
"receipt_number": null,
"starting_balance": 0,
"statement_descriptor": null,
"status": "open",
"status_transitions": {
"finalized_at": 1623873347,
"marked_uncollectible_at": null,
"paid_at": null,
"voided_at": null
},
"subscription": "sub_JgRjFjhKbtD2qz",
"subtotal": 2000,
"tax": null,
"tax_percent": null,
"total": 2000,
"total_discount_amounts": [],
"total_tax_amounts": [],
"transfer_data": null,
"webhooks_delivered_at": 1623873347
},
"livemode": false,
"metadata": {
},
"next_pending_invoice_item_invoice": null,
"pause_collection": null,
"pending_invoice_item_interval": null,
"pending_setup_intent": null,
"pending_update": null,
"plan": {
"id": "price_1J32RfGPZ1iASj5zHHp57z7C",
"object": "plan",
"active": true,
"amount": 2000,
"amount_decimal": "2000",
"billing_scheme": "per_unit",
"created": 1623864151,
"currency": "usd",
"interval": "month",
"interval_count": 1,
"livemode": false,
"metadata": {
},
"nickname": null,
"product": "prod_JgPF5xnq7qBun3",
"tiers": null,
"tiers_mode": null,
"transform_usage": null,
"trial_period_days": null,
"usage_type": "licensed"
},
"quantity": 1,
"schedule": null,
"start": 1623873347,
"start_date": 1623873347,
"status": "incomplete",
"tax_percent": null,
"transfer_data": null,
"trial_end": null,
"trial_start": null
}
```
#### Customers v1
```json
{"id": "sub_JgRjFjhKbtD2qz",
"object": "subscription",
"application_fee_percent": null,
"automatic_tax": {
"disabled_reason": null,
"enabled": false,
"liability": "null"
},
"billing_cycle_anchor": 1623873347,
"billing_cycle_anchor_config": null,
"cancel_at": null,
"cancel_at_period_end": false,
"canceled_at": null,
"cancellation_details": {
"comment": null,
"feedback": null,
"reason": null
},
"collection_method": "charge_automatically",
"created": 1623873347,
"currency": "usd","customer": identifier("customer"),
"days_until_due": null,
"default_payment_method": null,
"default_source": null,
"default_tax_rates": [
],
"discounts": [],
"ended_at": null,
"invoice_customer_balance_settings": {
"account_tax_ids": null,
"issuer": {
"type": "self"
}
},
"items": {
"object": "list",
"data": [
{
"id": "si_JgRjmS4Ur1khEx",
"object": "subscription_item",
"created": 1623873347,"current_period_end": 1626465347,
"current_period_start": 1623873347,
"discounts": [],
"metadata": {
},
"plan": {
"id": "price_1J32RfGPZ1iASj5zHHp57z7C",
"object": "plan",
"active": true,
"amount": 2000,
"amount_decimal": "2000",
"billing_scheme": "per_unit",
"created": 1623864151,
"currency": "usd",
"interval": "month",
"interval_count": 1,
"livemode": false,
"metadata": {
},
"nickname": null,
"product": "prod_JgPF5xnq7qBun3",
"tiers": null,
"tiers_mode": null,
"transform_usage": null,
"trial_period_days": null,
"usage_type": "licensed"
},
"price": {
"id": "price_1J32RfGPZ1iASj5zHHp57z7C",
"object": "price",
"active": true,
"billing_scheme": "per_unit",
"created": 1623864151,
"currency": "usd",
"livemode": false,
"lookup_key": null,
"metadata": {
},
"nickname": null,
"product": "prod_JgPF5xnq7qBun3",
"recurring": {
"interval": "month",
"interval_count": 1,
"trial_period_days": null,
"usage_type": "licensed"
},
"tiers_mode": null,
"transform_quantity": null,
"type": "recurring",
"unit_amount": 2000,
"unit_amount_decimal": "2000"
},
"quantity": 1,
"subscription": "sub_JgRjFjhKbtD2qz",
"tax_rates": [
]
}
],
"has_more": false,
"total_count": 1,
"url": "/v1/subscription_items?subscription=sub_JgRjFjhKbtD2qz"
},
"latest_invoice": {
"id": "in_1J34pzGPZ1iASj5zB87qdBNZ",
"object": "invoice",
"account_country": "US",
"account_name": "Angelina's Store",
"account_tax_ids": null,
"amount_due": 2000,
"amount_overpaid": 0,
"amount_paid": 0,
"amount_remaining": 2000,
"amount_shipping": 0,
"attempt_count": 0,
"attempted": false,
"auto_advance": false,
"automatic_tax": {
"disabled_reason": null,
"enabled": false,
"liability": null,
"status": null
},
"automatically_finalizes_at": null,
"billing_reason": "subscription_update",
"collection_method": "charge_automatically",
"created": 1623873347,
"currency": "usd",
"custom_fields": null,
"customer": identifier("customer"),
"customer_address": null,
"customer_email": "angelina@stripe.com",
"customer_name": null,
"customer_phone": null,
"customer_shipping": {
"address": {
"city": "",
"country": "US",
"line1": "Berry",
"line2": "",
"postal_code": "",
"state": ""
},
"name": "",
"phone": null
},
"customer_tax_exempt": "none",
"customer_tax_ids": [
],
"default_payment_method": null,
"default_source": null,
"default_tax_rates": [
],
"description": null,
"discounts": [],
"due_date": null,
"effective_at": "1623873347",
"ending_balance": 0,
"footer": null,
"from_invoice": null,
"hosted_invoice_url": "https://invoice.stripe.com/i/acct_1By64KGPZ1iASj5z/invst_JgRjzIOILGeq2MKC9T0KtyXnD5udsLp",
"invoice_pdf": "https://pay.stripe.com/invoice/acct_1By64KGPZ1iASj5z/invst_JgRjzIOILGeq2MKC9T0KtyXnD5udsLp/pdf",
"last_finalization_error": null,
"latest_revision": null,
"lines": {
"object": "list",
"data": [
{
"id": "il_1N2CjMBwKQ696a5NeOawRQP2",
"object": "line_item",
"amount": 2000,
"currency": "usd",
"description": "1 × Gold Special (at $20.00 / month)",
"discount_amounts": [
],
"discountable": true,
"discounts": [
],
"invoice": "in_1J34pzGPZ1iASj5zB87qdBNZ",
"livemode": false,
"metadata": {
},
"parent": {
"invoice_item_details": null,
"subscription_item_details":
{
"invoice_item": null,
"proration": false,
"proration_details":
{
"credited_items": null
},
"subscription":
"sub_JgRjFjhKbtD2qz",
"subscription_item":
"si_JgRjmS4Ur1khEx"
},
"type": "subscription_item_details"
},
"period": {
"end": 1626465347,
"start": 1623873347
},
"plan": {
"id": "price_1J32RfGPZ1iASj5zHHp57z7C",
"object": "plan",
"active": true,
"amount": 2000,
"amount_decimal": "2000",
"billing_scheme": "per_unit",
"created": 1623864151,
"currency": "usd",
"interval": "month",
"interval_count": 1,
"livemode": false,
"metadata": {
},
"nickname": null,
"product": "prod_JgPF5xnq7qBun3",
"tiers": null,
"tiers_mode": null,
"transform_usage": null,
"trial_period_days": null,
"usage_type": "licensed"
},
"price": {
"id": "price_1J32RfGPZ1iASj5zHHp57z7C",
"object": "price",
"active": true,
"billing_scheme": "per_unit",
"created": 1623864151,
"currency": "usd",
"livemode": false,
"lookup_key": null,
"metadata": {
},
"nickname": null,
"product": "prod_JgPF5xnq7qBun3",
"recurring": {
"interval": "month",
"interval_count": 1,
"trial_period_days": null,
"usage_type": "licensed"
},
"tiers_mode": null,
"transform_quantity": null,
"type": "recurring",
"unit_amount": 2000,
"unit_amount_decimal": "2000"
},
"quantity": 1,
"taxes": []
}
],
"has_more": false,
"total_count": 1,
"url": "/v1/invoices/in_1J34pzGPZ1iASj5zB87qdBNZ/lines"
},
"livemode": false,
"metadata": {
},
"next_payment_attempt": null,
"number": "C008FC2-0354",
"on_behalf_of": null,
"parent": {
"quote_details": null,
"subscription_details": {
"metadata": {},
"pause_collection": null,
"subscription": "sub_JgRjFjhKbtD2qz"
}
},
"payment_intent": {
"id": "pi_1J34pzGPZ1iASj5zI2nOAaE6",
"object": "payment_intent",
"allowed_source_types": [
"card"
],
"amount": 2000,
"amount_capturable": 0,
"amount_received": 0,
"application": null,
"application_fee_amount": null,
"canceled_at": null,
"cancellation_reason": null,
"capture_method": "automatic",
"charges": {
"object": "list",
"data": [
],
"has_more": false,
"total_count": 0,
"url": "/v1/charges?payment_intent=pi_1J34pzGPZ1iASj5zI2nOAaE6"
},
"client_secret": "pi_1J34pzGPZ1iASj5zI2nOAaE6_secret_l7FN6ldFfXiFmJEumenJ2y2wu",
"confirmation_method": "automatic",
"created": 1623873347,
"currency": "usd",
"customer": "cus_CMqDWO2xODTZqt",
"description": "Subscription creation",
"invoice": "in_1J34pzGPZ1iASj5zB87qdBNZ",
"last_payment_error": null,
"livemode": false,
"metadata": {
},
"next_action": null,
"next_source_action": null,
"on_behalf_of": null,
"payment_method": null,
"payment_method_options": {
"card": {
"installments": null,
"network": null,
"request_three_d_secure": "automatic"
}
},
"payment_method_types": [
"card"
],
"receipt_email": null,
"review": null,
"setup_future_usage": "off_session",
"shipping": null,
"source": "card_1By6iQGPZ1iASj5z7ijKBnXJ",
"statement_descriptor": null,
"statement_descriptor_suffix": null,
"status": "requires_confirmation",
"transfer_data": null,
"transfer_group": null
},
"payment_settings": {
"payment_method_options": null,
"payment_method_types": null,
"save_default_payment_method": "on_subscription"
},
"period_end": 1623873347,
"period_start": 1623873347,
"post_payment_credit_notes_amount": 0,
"pre_payment_credit_notes_amount": 0,
"receipt_number": null,
"starting_balance": 0,
"statement_descriptor": null,
"status": "open",
"status_transitions": {
"finalized_at": 1623873347,
"marked_uncollectible_at": null,
"paid_at": null,
"voided_at": null
},
"subscription": "sub_JgRjFjhKbtD2qz",
"subtotal": 2000,
"tax": null,
"tax_percent": null,
"total": 2000,
"total_discount_amounts": [],
"total_tax_amounts": [],
"transfer_data": null,
"webhooks_delivered_at": 1623873347
},
"livemode": false,
"metadata": {
},
"next_pending_invoice_item_invoice": null,
"pause_collection": null,
"pending_invoice_item_interval": null,
"pending_setup_intent": null,
"pending_update": null,
"plan": {
"id": "price_1J32RfGPZ1iASj5zHHp57z7C",
"object": "plan",
"active": true,
"amount": 2000,
"amount_decimal": "2000",
"billing_scheme": "per_unit",
"created": 1623864151,
"currency": "usd",
"interval": "month",
"interval_count": 1,
"livemode": false,
"metadata": {
},
"nickname": null,
"product": "prod_JgPF5xnq7qBun3",
"tiers": null,
"tiers_mode": null,
"transform_usage": null,
"trial_period_days": null,
"usage_type": "licensed"
},
"quantity": 1,
"schedule": null,
"start": 1623873347,
"start_date": 1623873347,
"status": "incomplete",
"tax_percent": null,
"transfer_data": null,
"trial_end": null,
"trial_start": null
}
```
## Collect payment information [Client]
Use [Stripe Elements](https://docs.stripe.com/payments/elements.md) to collect payment details and activate the subscription. You can customize Elements to match the look and feel of your application.
The [Payment Element](https://docs.stripe.com/payments/payment-element.md) supports [Link](https://docs.stripe.com/payments/link.md), credit cards, SEPA Direct Debit, and BECS Direct Debit for subscriptions. You can display the enabled payment methods and securely collect payment details based on your customer’s selection.
### Set up Stripe Elements
The Payment Element is automatically available as a feature of Stripe.js. Include the Stripe.js script on your payment page by adding it to the `head` of your HTML file. Always load Stripe.js directly from js.stripe.com to remain PCI compliant. Don’t include the script in a bundle or host a copy of it yourself.
```html
Checkout
```
Create an instance of Stripe with the following JavaScript on your payment page:
```javascript
// Set your publishable key: remember to change this to your live publishable key in production
// See your keys here: https://dashboard.stripe.com/apikeys
const stripe = Stripe('<>');
```
### Add the Payment Element to your page
The Payment Element needs a place to live on your payment page. Create an empty DOM node (container) with a unique ID in your payment form.
```html
```
After the form loads, create an instance of the Payment Element and mount it to the container DOM node. When you [created the subscription](https://docs.stripe.com/billing/subscriptions/build-subscriptions.md#create-subscription), you passed the `client_secret` value to the front end. Pass this value as an option when you create an instance of Elements.
```javascript
const options = {
clientSecret: '{{CLIENT_SECRET}}',
// Fully customizable with appearance API.
appearance: {/*...*/},
};
// Set up Stripe.js and Elements to use in the payment form, passing the client secret obtained in step 5
const elements = stripe.elements(options);
const paymentElementOptions = {
layout: "tabs",
};
// Create and mount the Payment Element
const paymentElement = elements.create('payment', paymentElementOptions);
paymentElement.mount('#payment-element');
```
The Payment Element renders a dynamic form that allows your customer to select a payment method. The form automatically collects all necessary payments details for the payment method that they select.
#### Optional Payment Element configurations
You can optionally do the following:
- Customize the Payment Element to match the design of your site by passing the [appearance object](https://docs.stripe.com/js/elements_object/create#stripe_elements-options-appearance) into `options` when creating an instance of Elements.
- Configure the Apple Pay interface to return a [merchant token](https://docs.stripe.com/apple-pay/merchant-tokens.md?pay-element=web-pe) to support recurring, automatic reload, and deferred payments.
### Complete payment
Use `stripe.confirmPayment` to complete the payment using details from the Payment Element and activate the subscription. This creates a PaymentMethod, confirms the incomplete subscription’s first PaymentIntent, and makes a charge. If *Strong Customer Authentication* (Strong Customer Authentication (SCA) is a regulatory requirement in effect as of September 14, 2019, that impacts many European online payments. It requires customers to use two-factor authentication like 3D Secure to verify their purchase) (SCA) is required for the payment, the Payment Element handles the authentication process before confirming the PaymentIntent.
Provide a [return_url](https://docs.stripe.com/api/payment_intents/create.md#create_payment_intent-return_url) to indicate where Stripe redirects the user after they complete the payment. Your user might redirect to an intermediate site first, such as a bank authorization page, before redirecting to the `return_url`. Card payments immediately redirect to the `return_url` when a payment is successful.
```javascript
const form = document.getElementById('payment-form');
form.addEventListener('submit', async (event) => {
event.preventDefault();
const {error} = await stripe.confirmPayment({
//`Elements` instance that was used to create the Payment Element
elements,
confirmParams: {
return_url: "https://example.com/order/123/complete",
}
});
if (error) {
// This point is reached only if there's an immediate error when
// confirming the payment. Show an error to your customer (for example, payment
// details incomplete)
const messageContainer = document.querySelector('#error-message');
messageContainer.textContent = error.message;
} else {
// Your customer redirects to your `return_url`. For some payment
// methods, such as iDEAL, your customer redirects to an intermediate
// site first to authorize the payment, and then redirects to the `return_url`.
}
});
```
When your customer submits a payment, Stripe redirects them to the `return_url` and includes the following URL query parameters. The return page can use them to get the status of the PaymentIntent so it can display the payment status to the customer.
When you specify the `return_url`, you can also append your own query parameters for use on the return page.
| Parameter | Description |
| --- | --- |
| `payment_intent` | The unique identifier for the `PaymentIntent`. |
| `payment_intent_client_secret` | The [client secret](https://docs.stripe.com/api/payment_intents/object.md#payment_intent_object-client_secret) of the `PaymentIntent` object. For subscription integrations, this client_secret is also exposed on the `Invoice` object through [`confirmation_secret`](https://docs.stripe.com/api/invoices/object.md#invoice_object-confirmation_secret) |
When the customer is redirected back to your site, you can use the `payment_intent_client_secret` to query for the PaymentIntent and display the transaction status to your customer.
> If you have tooling that tracks the customer’s browser session, you might need to add the `stripe.com` domain to the referrer exclude list. Redirects cause some tools to create new sessions, which prevents you from tracking the complete session.
Use one of the query parameters to retrieve the PaymentIntent. Inspect the [status of the PaymentIntent](https://docs.stripe.com/payments/paymentintents/lifecycle.md) to decide what to show your customers. You can also append your own query parameters when providing the `return_url`, which persist through the redirect process.
```javascript
// Initialize Stripe.js using your publishable key
const stripe = Stripe('<>');
// Retrieve the "payment_intent_client_secret" query parameter appended to
// your return_url by Stripe.js
const clientSecret = new URLSearchParams(window.location.search).get(
'payment_intent_client_secret'
);
// Retrieve the PaymentIntent
stripe.retrievePaymentIntent(clientSecret).then(({paymentIntent}) => {
const message = document.querySelector('#message')
// Inspect the PaymentIntent `status` to indicate the status of the payment
// to your customer.
//
// Some payment methods [immediately succeed or fail][0] upon
// confirmation, while others first enter a `processing` status.
//
// [0]: https://stripe.com/docs/payments/payment-methods#payment-notification
switch (paymentIntent.status) {
case 'succeeded':
message.innerText = 'Success! Payment received.';
break;
case 'processing':
message.innerText = "Payment processing. We'll update you when payment is received.";
break;
case 'requires_payment_method':
message.innerText = 'Payment failed. Please try another payment method.';
// Redirect your user back to your payment page to attempt collecting
// payment again
break;
default:
message.innerText = 'Something went wrong.';
break;
}
});
```
## Listen for webhooks [Server]
To complete the integration, you need to process *webhooks* (A webhook is a real-time push notification sent to your application as a JSON payload through HTTPS requests) sent by Stripe. These events trigger whenever the status in Stripe changes, such as subscriptions creating new invoices. In your application, set up an HTTP handler to accept a POST request containing the webhook event, and verify the signature of the event:
#### Java
```java
// Don't put any keys in code. See https://docs.stripe.com/keys-best-practices.
// Find your keys at https://dashboard.stripe.com/apikeys.
StripeClient stripeClient = new StripeClient("<>");
post(
"/webhook",
(request, response) -> {
String payload = request.body();
String sigHeader = request.headers("Stripe-Signature");
String endpointSecret = dotenv.get("STRIPE_WEBHOOK_SECRET");
Event event = null;
try {
event = stripeClient.constructEvent(payload, sigHeader, endpointSecret);
} catch (SignatureVerificationException e) {
// Invalid signature
response.status(400);
return "";
}
// Deserialize the nested object inside the event
EventDataObjectDeserializer dataObjectDeserializer = event.getDataObjectDeserializer();
StripeObject stripeObject = null;
if (dataObjectDeserializer.getObject().isPresent()) {
stripeObject = dataObjectDeserializer.getObject().get();
} else {
// Deserialization failed, probably due to an API version mismatch.
// Refer to the Javadoc documentation on `EventDataObjectDeserializer` for
// instructions on how to handle this case, or return an error here.
}
switch (event.getType()) {
case "invoice.paid":
// Used to provision services after the trial has ended.
// The status of the invoice shows up as paid. Store the status in your
// database to reference when a user accesses your service to avoid hitting rate
// limits.
break;
case "invoice.payment_failed":
// If the payment fails or the customer doesn't have a valid payment method,
// an invoice.payment_failed event is sent and the subscription becomes past_due.
// Use this webhook to notify your user that their payment has
// failed and to retrieve new card details.
break;
case "customer.subscription.deleted":
// handle subscription canceled automatically based
// upon your subscription settings. Or if the user
// cancels it.
break;
default:
// Unhandled event type
}
response.status(200);
return "";
}
);
```
During development, use the Stripe CLI to [observe webhooks and forward them to your application](https://docs.stripe.com/webhooks.md#test-webhook). Run the following in a new terminal while your development app is running:
#### curl
```bash
stripe listen --forward-to localhost:4242/webhook
```
For production, set up a webhook endpoint in [Workbench](https://docs.stripe.com/workbench.md), or use the [Webhook Endpoints API](https://docs.stripe.com/api/webhook_endpoints.md).
Listen to a few events to complete the remaining steps in this guide. See [Subscription events](https://docs.stripe.com/billing/subscriptions/webhooks.md#events) for more details about subscription-specific webhooks.
## Provision access to your service [Client and Server]
Now that the subscription is active, give your user access to your service. To do this, listen to the `customer.subscription.created`, `customer.subscription.updated`, and `customer.subscription.deleted` events. These events pass a `Subscription` object that contains a `status` field indicating whether the subscription is active, past due, or canceled. See [the subscription lifecycle](https://docs.stripe.com/billing/subscriptions/overview.md#subscription-lifecycle) for a complete list of statuses.
In your webhook handler:
1. Verify the subscription status. If it’s `active`, your user has paid for your product.
2. Check the product your customer subscribed to and grant access to your service. Checking the product instead of the price gives you more flexibility if you need to change the pricing or billing period.
3. Store the `product.id`, `subscription.id` and `subscription.status` in your database along with either the `customer_account.id` or the `customer.id` you already saved. Check this record when determining which features to enable for the user in your application.
The subscription status might change at any point during its lifetime, even if your application doesn’t directly make any calls to Stripe. For example, a renewal might fail because of an expired credit card, which puts the subscription into a `past due` status. Or, if you implement the [customer portal](https://docs.stripe.com/customer-management.md), a user might cancel their subscription without directly visiting your application. Implementing your handler correctly keeps your application status in sync with Stripe.
## Cancel the subscription [Client and Server]
You can allow customers to cancel their subscriptions. The example below adds a cancellation option to the account settings page.

Account settings with the ability to cancel the subscription
```javascript
function cancelSubscription(subscriptionId) {
return fetch('/cancel-subscription', {
method: 'post',
headers: {
'Content-Type': 'application/json',
},
body: JSON.stringify({
subscriptionId: subscriptionId,
}),
})
.then(response => {
return response.json();
})
.then(cancelSubscriptionResponse => {
// Display to the user that the subscription has been canceled.
});
}
```
On the back end, define the endpoint for your front end to call.
#### Java
```java
// Don't put any keys in code. See https://docs.stripe.com/keys-best-practices.
// Find your keys at https://dashboard.stripe.com/apikeys.
StripeClient stripeClient = new StripeClient("<>");
post(
"/cancel-subscription",
(request, response) -> {
response.type("application/json");
CancelPostBody postBody = gson.fromJson(
request.body(),
CancelPostBody.class
);
Subscription deletedSubscription =
stripeClient.v1().subscriptions().cancel(postBody.getSubscriptionId());
return deletedSubscription.toJson();
}
);
```
Your application receives a `customer.subscription.deleted` event.
After the subscription is canceled, update your database to remove the Stripe subscription ID you previously stored, and limit access to your service.
When a subscription is canceled, it can’t be reactivated. Instead, collect updated billing information from your customer, update their default payment method, and create a new subscription with their existing customer record.
## Test your integration
### Test payment methods
Use the following table to test different payment methods and scenarios.
| Payment method | Scenario | How to test |
| --- | --- | --- |
| BECS Direct Debit | Your customer successfully pays with BECS Direct Debit. | Fill out the form using the account number `900123456` and BSB `000000`. The confirmed PaymentIntent initially transitions to `processing`, then transitions to the `succeeded` status three minutes later. |
| BECS Direct Debit | Your customer’s payment fails with an `account_closed` error code. | Fill out the form using the account number `111111113` and BSB `000000`. |
| Credit card | The card payment succeeds and doesn’t require authentication. | Fill out the credit card form using the credit card number `4242 4242 4242 4242` with any expiration, CVC, and postal code. |
| Credit card | The card payment requires *authentication* (Strong Customer Authentication (SCA) is a regulatory requirement in effect as of September 14, 2019, that impacts many European online payments. It requires customers to use two-factor authentication like 3D Secure to verify their purchase). | Fill out the credit card form using the credit card number `4000 0025 0000 3155` with any expiration, CVC, and postal code. |
| Credit card | The card is declined with a decline code like `insufficient_funds`. | Fill out the credit card form using the credit card number `4000 0000 0000 9995` with any expiration, CVC, and postal code. |
| SEPA Direct Debit | Your customer successfully pays with SEPA Direct Debit. | Fill out the form using the account number `AT321904300235473204`. The confirmed PaymentIntent initially transitions to processing, then transitions to the succeeded status three minutes later. |
| SEPA Direct Debit | Your customer’s PaymentIntent status transitions from `processing` to `requires_payment_method`. | Fill out the form using the account number `AT861904300235473202`. |
### Monitor events
Set up webhooks to listen to subscription change events, such as upgrades and cancellations. Learn more about [subscription webhooks](https://docs.stripe.com/billing/subscriptions/webhooks.md). You can view events in the [Dashboard](https://dashboard.stripe.com/test/events) or with the [Stripe CLI](https://docs.stripe.com/webhooks.md#test-webhook).
For more details, see [testing your Billing integration](https://docs.stripe.com/billing/testing.md).
## Optional: Let customers change their plans [Client and Server]
To let your customers change their subscription, collect the price ID of the option they want to change to. Then, send the new price ID from the front end to a back end endpoint. The example below also passes the subscription ID, but you can retrieve it from your database for your logged in user.
```javascript
function updateSubscription(priceId, subscriptionId) {
return fetch('/update-subscription', {
method: 'post',
headers: {
'Content-type': 'application/json',
},
body: JSON.stringify({
subscriptionId: subscriptionId,
newPriceId: priceId,
}),
})
.then(response => {
return response.json();
})
.then(response => {
return response;
});
}
```
On the back end, define the endpoint for your front end to call, passing the subscription ID and the new price ID. The subscription is now Premium at 15 USD per month, instead of Basic at 5 USD per month.
#### Java
```java
// Don't put any keys in code. See https://docs.stripe.com/keys-best-practices.
// Find your keys at https://dashboard.stripe.com/apikeys.
StripeClient stripeClient = new StripeClient("<>");
post(
"/update-subscription",
(request, response) -> {
response.type("application/json");
UpdatePostBody postBody = gson.fromJson(
request.body(),
UpdatePostBody.class
);
Subscription subscription = stripeClient.v1().subscriptions().retrieve(
postBody.getSubscriptionId()
);
SubscriptionUpdateParams params = SubscriptionUpdateParams
.builder()
.addItem(
SubscriptionUpdateParams
.Item.builder()
.setId(subscription.getItems().getData().get(0).getId())
.setPrice(postBody.getNewPriceId())
.build()
)
.setCancelAtPeriodEnd(false)
.build();
Subscription updatedSubscription =
stripeClient.v1().subscriptions().update(subscription.getId(), params);
return updatedSubscription.toJson();
}
);
```
Your application receives a `customer.subscription.updated` event.
## Optional: Preview a price change [Client and Server]
When your customer changes their subscription, there’s often an adjustment to the amount they owe, known as a [proration](https://docs.stripe.com/billing/subscriptions/prorations.md). You can use the [create preview invoice endpoint](https://docs.stripe.com/api/invoices/create_preview.md) to display the adjusted amount to your customers.
On the front end, pass the `create preview invoice` details to a back-end endpoint.
#### Accounts v2
```javascript
function createPreviewInvoice(
customerAccountId,
subscriptionId,
newPriceId,
trialEndDate
) {
return fetch('/create-preview-invoice', {
method: 'post',
headers: {
'Content-type': 'application/json',
},
body: JSON.stringify({
customerAccountId: customerAccountId,
subscriptionId: subscriptionId,
newPriceId: newPriceId,
}),
})
.then(response => {
return response.json();
})
.then((invoice) => {
return invoice;
});
}
```
#### Customers v1
```javascript
function createPreviewInvoice(
customerId,
subscriptionId,
newPriceId,
trialEndDate
) {
return fetch('/create-preview-invoice', {
method: 'post',
headers: {
'Content-type': 'application/json',
},
body: JSON.stringify({
customerId: customerId,
subscriptionId: subscriptionId,
newPriceId: newPriceId,
}),
})
.then(response => {
return response.json();
})
.then((invoice) => {
return invoice;
});
}
```
On the back end, define the endpoint for your front end to call.
#### Accounts v2
#### Java
```java
// Don't put any keys in code. See https://docs.stripe.com/keys-best-practices.
// Find your keys at https://dashboard.stripe.com/apikeys.
StripeClient stripeClient = new StripeClient("<>");
post(
"/create-preview-invoice",
(request, response) -> {
response.type("application/json");
PreviewInvoicePostBody postBody = gson.fromJson(
request.body(),
PreviewInvoicePostBody.class
);
Subscription subscription = stripeClient.v1().subscriptions().retrieve(
postBody.getSubscriptionId()
);
InvoiceCreatePreviewParams invoiceParams = InvoiceCreatePreviewParams
.builder()
.setCustomerAccount(postBody.getCustomerAccountId())
.setSubscription(postBody.getSubscriptionId())
.setSubscriptionDetails(
InvoiceCreatePreviewParams.SubscriptionDetails.builder()
.addItem(
InvoiceCreatePreviewParams.SubscriptionDetails.Item.builder()
.setId(subscription.getItems().getData().get(0).getId())
.setDeleted(true)
.build()
)
.addItem(
InvoiceCreatePreviewParams.SubscriptionDetails.Item.builder()
.setPrice(dotenv.get(postBody.getNewPriceId()))
.build()
)
.build()
)
.build();
Invoice invoice = stripeClient.v1().invoices().createPreview(invoiceParams);
return invoice.toJson();
}
);
```
#### Customers v1
#### Java
```java
// Don't put any keys in code. See https://docs.stripe.com/keys-best-practices.
// Find your keys at https://dashboard.stripe.com/apikeys.
StripeClient stripeClient = new StripeClient("<>");
post(
"/create-preview-invoice",
(request, response) -> {
response.type("application/json");
PreviewInvoicePostBody postBody = gson.fromJson(
request.body(),
PreviewInvoicePostBody.class
);
Subscription subscription = stripeClient.v1().subscriptions().retrieve(
postBody.getSubscriptionId()
);
InvoiceCreatePreviewParams invoiceParams = InvoiceCreatePreviewParams
.builder()
.setCustomer(postBody.getCustomerId())
.setSubscription(postBody.getSubscriptionId())
.setSubscriptionDetails(
InvoiceCreatePreviewParams.SubscriptionDetails.builder()
.addItem(
InvoiceCreatePreviewParams.SubscriptionDetails.Item.builder()
.setId(subscription.getItems().getData().get(0).getId())
.setDeleted(true)
.build()
)
.addItem(
InvoiceCreatePreviewParams.SubscriptionDetails.Item.builder()
.setPrice(dotenv.get(postBody.getNewPriceId()))
.build()
)
.build()
)
.build();
Invoice invoice = stripeClient.v1().invoices().createPreview(invoiceParams);
return invoice.toJson();
}
);
```
## Optional: Display the customer payment method [Client and Server]
Displaying the brand and last four digits of your customer’s card can help them know which card is being charged, or if they need to update their payment method.
On the front end, send the payment method ID to a back-end endpoint that retrieves the payment method details.
```javascript
function retrieveCustomerPaymentMethod(paymentMethodId) {
return fetch('/retrieve-customer-payment-method', {
method: 'post',
headers: {
'Content-type': 'application/json',
},
body: JSON.stringify({
paymentMethodId: paymentMethodId,
}),
})
.then((response) => {
return response.json();
})
.then((response) => {
return response;
});
}
```
On the back end, define the endpoint for your front end to call.
#### Java
```java
// Don't put any keys in code. See https://docs.stripe.com/keys-best-practices.
// Find your keys at https://dashboard.stripe.com/apikeys.
StripeClient stripeClient = new StripeClient("<>");
post(
"/retrieve-customer-payment-method",
(request, response) -> {
response.type("application/json");
PaymentMethodBody paymentMethodBody = gson.fromJson(
request.body(),
PaymentMethodBody.class
);
PaymentMethod paymentMethod = stripeClient.v1().paymentMethods().retrieve(
paymentMethodBody.getPaymentMethodId()
);
return paymentMethod.toJson();
}
);
```
Example response:
```json
{
"id": "pm_1GcbHY2eZvKYlo2CoqlVxo42",
"object": "payment_method",
"billing_details": {
"address": {
"city": null,
"country": null,
"line1": null,
"line2": null,
"postal_code": null,
"state": null
},
"email": null,
"name": null,
"phone": null
},
"card": {
"brand": "visa",
"checks": {
"address_line1_check": null,
"address_postal_code_check": null,
"cvc_check": "pass"
},
"country": "US",
"exp_month": 8,
"exp_year": 2021,
"fingerprint": "Xt5EWLLDS7FJjR1c",
"funding": "credit",
"generated_from": null,
"last4": "4242",
"three_d_secure_usage": {
"supported": true
},
"wallet": null
},
"created": 1588010536,
"customer": "cus_HAxB7dVQxhoKLh",
"livemode": false,
"metadata": {},
"type": "card"
}
```
> We recommend that you save the `paymentMethod.id` and `last4` in your database, for example, `paymentMethod.id` as `stripeCustomerPaymentMethodId` in your `users` collection or table. You can optionally store `exp_month`, `exp_year`, `fingerprint`, `billing_details` as needed. This limits the number of calls you make to Stripe, for performance efficiency and to avoid possible rate limiting.
## Disclose Stripe to your customers
Stripe collects information on customer interactions with Elements to provide services to you, prevent fraud, and improve its services. This includes using cookies and IP addresses to identify which Elements a customer saw during a single checkout session. You’re responsible for disclosing and obtaining all rights and consents necessary for Stripe to use data in these ways. For more information, visit our [privacy center](https://stripe.com/legal/privacy-center#as-a-business-user-what-notice-do-i-provide-to-my-end-customers-about-stripe).
#### Mobile
#### iOS
Learn how to sell fixed-price *subscriptions* (A Subscription represents the product details associated with the plan that your customer subscribes to. Allows you to charge the customer on a recurring basis). You’ll use the [Mobile Payment Element](https://docs.stripe.com/payments/accept-a-payment.md) to create a custom payment form that you embed in your app.
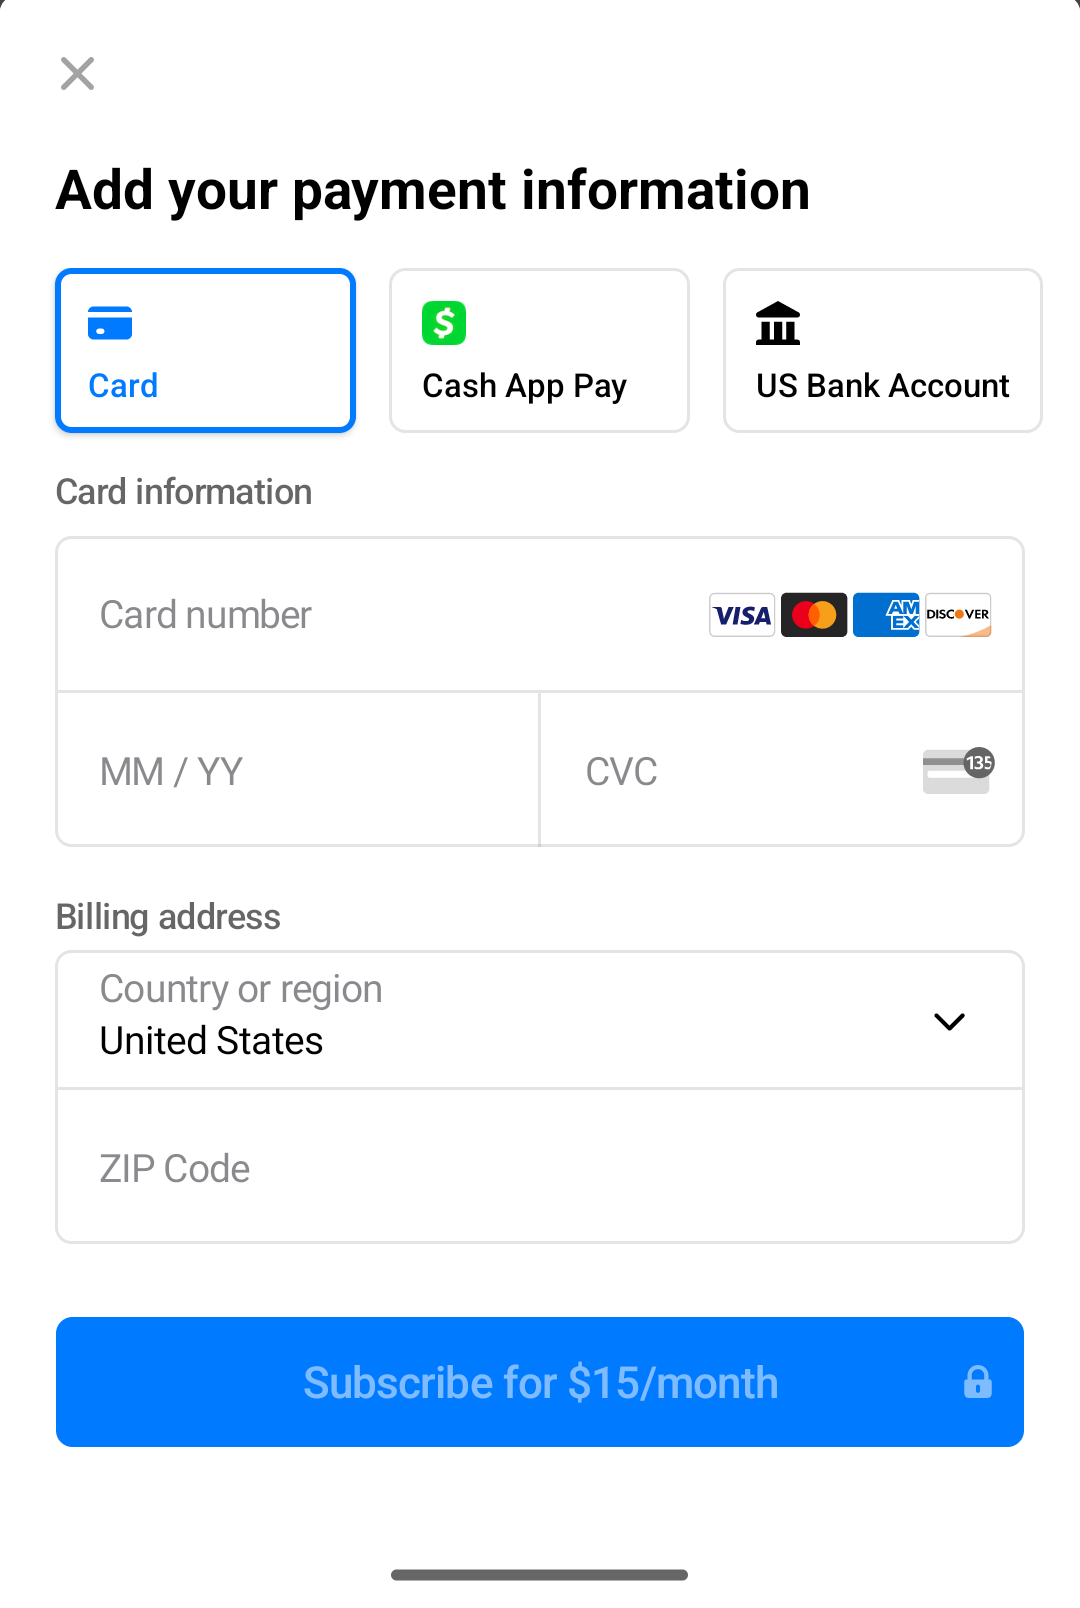
> If you’re selling digital products or services that are consumed within your app (for example, subscriptions, in-game currencies, game levels, access to premium content, or unlocking a full version), you must use Apple’s in-app purchase APIs. This rule has some exceptions, including one-to-one personal services and [apps based in specific regions](https://support.stripe.com/questions/changes-to-mobile-app-store-rules). See the [App Store review guidelines](https://developer.apple.com/app-store/review/guidelines/#payments) for more information.
## Build your subscription
This guide shows you how to:
- Model your business by building a product catalog.
- Create a registration process to add customers.
- Create subscriptions and collect payment information.
- Test and monitor the status of payments and subscriptions.
- Let customers change their plan or cancel the subscription.
- Learn how to use [flexible billing mode](https://docs.stripe.com/billing/subscriptions/billing-mode.md) to access enhanced billing behavior and additional features.
## How to model it on Stripe
[Subscriptions](https://docs.stripe.com/api/subscriptions.md) simplify your billing by automatically creating *Invoices* (Invoices are statements of amounts owed by a customer. They track the status of payments from draft through paid or otherwise finalized. Subscriptions automatically generate invoices, or you can manually create a one-off invoice) and [PaymentIntents](https://docs.stripe.com/api/payment_intents.md) for you. To create and activate a subscription, you need to first create a *Product* (Products represent what your business sells—whether that's a good or a service) to model what’s being sold, and a *Price* (Prices define how much and how often to charge for products. This includes how much the product costs, what currency to use, and the interval if the price is for subscriptions) which determines the interval and amount to charge. You also need either a customer-configured `Account` object or a `Customer` object to store *PaymentMethods* (PaymentMethods represent your customer's payment instruments, used with the Payment Intents or Setup Intents APIs) used to make each recurring payment.
#### Accounts v2
A diagram illustrating common billing objects and their relationships (See full diagram at https://docs.stripe.com/billing/subscriptions/build-subscriptions)
#### Customer v1
A diagram illustrating common billing objects and their relationships (See full diagram at https://docs.stripe.com/billing/subscriptions/build-subscriptions)
### API object definitions
| Resource | Definition |
| --- | --- |
| [Account configured as a customer](https://docs.stripe.com/api/v2/core/accounts/create.md#v2_create_accounts-configuration-customer) | Represents a customer in the Accounts v2 API who purchases a subscription. Configure an `Account` object as a customer and associate it with a subscription to make and track recurring charges and to manage the products that they subscribe to. For more information, see the [Use Accounts as customers guide](https://docs.stripe.com/accounts-v2/use-accounts-as-customers.md). |
| [Customer](https://docs.stripe.com/api/customers.md) | Represents a customer in the Customers API who purchases a subscription. Use the `Customer` object associated with a subscription to make and track recurring charges and to manage the products that they subscribe to. |
| [Entitlement](https://docs.stripe.com/api/entitlements/active-entitlement.md) | Represents a customer’s access to a feature included in a service product that they subscribe to. When you create a subscription for a customer’s recurring purchase of a product, an active entitlement is automatically created for each feature associated with that product. When a customer accesses your services, use their active entitlements to enable the features included in their subscription. |
| [Feature](https://docs.stripe.com/api/entitlements/feature.md) | Represents a function or ability that your customers can access when they subscribe to a service product. You can include features in a product by creating ProductFeatures. |
| [Invoice](https://docs.stripe.com/api/invoices.md) | A statement of amounts a customer owes that tracks payment statuses from draft through paid or otherwise finalized. Subscriptions automatically generate invoices. |
| [PaymentIntent](https://docs.stripe.com/api/payment_intents.md) | A way to build dynamic payment flows. A PaymentIntent tracks the lifecycle of a customer checkout flow and triggers additional authentication steps when required by regulatory mandates, custom Radar fraud rules, or redirect-based payment methods. Invoices automatically create PaymentIntents. |
| [PaymentMethod](https://docs.stripe.com/api/payment_methods.md) | A customer’s payment methods that they use to pay for your products. For example, you can store a credit card on a customer-configured `Account` or `Customer` object and use it to make recurring payments for that customer. Typically used with the Payment Intents or Setup Intents APIs. |
| [Price](https://docs.stripe.com/api/prices.md) | Defines the unit price, currency, and billing cycle for a product. |
| [Product](https://docs.stripe.com/api/products.md) | A good or service that your business sells. A service product can include one or more features. |
| [ProductFeature](https://docs.stripe.com/api/product-feature.md) | Represents a single feature’s inclusion in a single product. Each product is associated with a ProductFeature for each feature that it includes, and each feature is associated with a ProductFeature for each product that includes it. |
| [Subscription](https://docs.stripe.com/api/subscriptions.md) | Represents a customer’s scheduled recurring purchase of a product. Use a subscription to collect payments and provide repeated delivery of or continuous access to a product. |
Here’s an example of how products, features, and entitlements work together. Imagine that you want to set up a recurring service that offers two tiers: a standard product with basic functionality, and an advanced product that adds extended functionality.
1. You create two features: `basic_features` and `extended_features`.
2. You create two products: `standard_product` and `advanced_product`.
3. For the standard product, you create one ProductFeature that associates `basic_features` with `standard_product`.
4. For the advanced product, you create two ProductFeatures: one that associates `basic_features` with `advanced_product` and one that associates `extended_features` with `advanced_product`.
A customer, `first_customer`, subscribes to the standard product. When you create the subscription, Stripe automatically creates an Entitlement that associates `first_customer` with `basic_features`.
Another customer, `second_customer`, subscribes to the advanced product. When you create the Subscription, Stripe automatically creates two Entitlements: one that associates `second_customer` with `basic_features`, and one that associates `second_customer` with `extended_features`.
You can determine which features to provision for a customer by [retrieving their active entitlements or listening to the Active Entitlement Summary event](https://docs.stripe.com/billing/entitlements.md#entitlements). You don’t have to retrieve their subscriptions, products, and features.
## Set up Stripe
The [Stripe iOS SDK](https://github.com/stripe/stripe-ios) is open source, [fully documented](https://stripe.dev/stripe-ios/index.html), and compatible with apps supporting iOS 13 or above.
#### Swift Package Manager
To install the SDK, follow these steps:
1. In Xcode, select **File** > **Add Package Dependencies…** and enter `https://github.com/stripe/stripe-ios-spm` as the repository URL.
2. Select the latest version number from our [releases page](https://github.com/stripe/stripe-ios/releases).
3. Add the **StripePaymentSheet** product to the [target of your app](https://developer.apple.com/documentation/swift_packages/adding_package_dependencies_to_your_app).
#### CocoaPods
1. If you haven’t already, install the latest version of [CocoaPods](https://guides.cocoapods.org/using/getting-started.html).
2. If you don’t have an existing [Podfile](https://guides.cocoapods.org/syntax/podfile.html), run the following command to create one:
```bash
pod init
```
3. Add this line to your `Podfile`:
```podfile
pod 'StripePaymentSheet'
```
4. Run the following command:
```bash
pod install
```
5. Don’t forget to use the `.xcworkspace` file to open your project in Xcode, instead of the `.xcodeproj` file, from here on out.
6. In the future, to update to the latest version of the SDK, run:
```bash
pod update StripePaymentSheet
```
#### Carthage
1. If you haven’t already, install the latest version of [Carthage](https://github.com/Carthage/Carthage#installing-carthage).
2. Add this line to your `Cartfile`:
```cartfile
github "stripe/stripe-ios"
```
3. Follow the [Carthage installation instructions](https://github.com/Carthage/Carthage#if-youre-building-for-ios-tvos-or-watchos). Make sure to embed all of the required frameworks listed [here](https://github.com/stripe/stripe-ios/tree/master/StripePaymentSheet/README.md#manual-linking).
4. In the future, to update to the latest version of the SDK, run the following command:
```bash
carthage update stripe-ios --platform ios
```
#### Manual Framework
1. Head to our [GitHub releases page](https://github.com/stripe/stripe-ios/releases/latest) and download and unzip **Stripe.xcframework.zip**.
2. Drag **StripePaymentSheet.xcframework** to the **Embedded Binaries** section of the **General** settings in your Xcode project. Make sure to select **Copy items if needed**.
3. Repeat step 2 for all required frameworks listed [here](https://github.com/stripe/stripe-ios/tree/master/StripePaymentSheet/README.md#manual-linking).
4. In the future, to update to the latest version of our SDK, repeat steps 1–3.
> For details on the latest SDK release and past versions, see the [Releases](https://github.com/stripe/stripe-ios/releases) page on GitHub. To receive notifications when a new release is published, [watch releases](https://help.github.com/en/articles/watching-and-unwatching-releases-for-a-repository#watching-releases-for-a-repository) for the repository.
Configure the SDK with your Stripe [publishable key](https://dashboard.stripe.com/test/apikeys) on app start. This enables your app to make requests to the Stripe API.
#### Swift
```swift
import UIKitimportStripePaymentSheet
@main
class AppDelegate: UIResponder, UIApplicationDelegate {
func application(_ application: UIApplication, didFinishLaunchingWithOptions launchOptions: [UIApplication.LaunchOptionsKey: Any]?) -> Bool {StripeAPI.defaultPublishableKey = "<>"
// do any other necessary launch configuration
return true
}
}
```
> Use your [test keys](https://docs.stripe.com/keys.md#obtain-api-keys) while you test and develop, and your [live mode](https://docs.stripe.com/keys.md#test-live-modes) keys when you publish your app.
And then install the Stripe CLI. The CLI provides webhook testing and you can run it to make API calls to Stripe. This guide shows how to use the CLI to set up a pricing model in a later section.
For additional install options, see [Get started with the Stripe CLI](https://docs.stripe.com/stripe-cli.md).
## Create the pricing model [Stripe CLI or Dashboard]
[Recurring pricing models](https://docs.stripe.com/products-prices/pricing-models.md) represent the products or services you sell, how much they cost, what currency you accept for payments, and the service period for subscriptions. To build the pricing model, create [products](https://docs.stripe.com/api/products.md) (what you sell) and [prices](https://docs.stripe.com/api/prices.md) (how much and how often to charge for your products).
This example uses flat-rate pricing with two different service-level options: Basic and Premium. For each service-level option, you need to create a product and a recurring price. To add a one-time charge for something like a setup fee, create a third product with a one-time price.
Each product bills at monthly intervals. The price for the Basic product is 5 USD. The price for the Premium product is 15 USD. See the [flat rate pricing](https://docs.stripe.com/subscriptions/pricing-models/flat-rate-pricing.md) guide for an example with three tiers.
#### Dashboard
Go to the [Add a product](https://dashboard.stripe.com/test/products/create) page and create two products. Add one price for each product, each with a monthly recurring billing period:
- Premium product: Premium service with extra features
- Price: Flat rate | 15 USD
- Basic product: Basic service with minimum features
- Price: Flat rate | 5 USD
After you create the prices, record the price IDs so you can use them in other steps. Price IDs look like this: `price_G0FvDp6vZvdwRZ`.
When you’re ready, use the **Copy to live mode** button at the top right of the page to clone your product from [a sandbox to live mode](https://docs.stripe.com/keys.md#test-live-modes).
#### API
You can use the API to create the [Products](https://docs.stripe.com/api/products.md) and [Prices](https://docs.stripe.com/api/prices.md).
Create the Premium product:
```java
// Don't put any keys in code. See https://docs.stripe.com/keys-best-practices.
// Find your keys at https://dashboard.stripe.com/apikeys.
StripeClient client = new StripeClient("<>");
ProductCreateParams params =
ProductCreateParams.builder()
.setName("Billing Guide: Premium Service")
.setDescription("Premium service with extra features")
.build();
// For SDK versions 29.4.0 or lower, remove '.v1()' from the following line.
Product product = client.v1().products().create(params);
```
Create the Basic product:
```java
// Don't put any keys in code. See https://docs.stripe.com/keys-best-practices.
// Find your keys at https://dashboard.stripe.com/apikeys.
StripeClient client = new StripeClient("<>");
ProductCreateParams params =
ProductCreateParams.builder()
.setName("Billing Guide: Basic Service")
.setDescription("Basic service with minimum features")
.build();
// For SDK versions 29.4.0 or lower, remove '.v1()' from the following line.
Product product = client.v1().products().create(params);
```
Record the product ID for each product. They look like this:
```json
{
"id": "prod_H94k5odtwJXMtQ",
"object": "product",
"active": true,
"attributes": [
],
"created": 1587577341,
"description": "Premium service with extra features",
"images": [
],
"livemode": false,
"metadata": {
},
"name": "Billing Guide: Premium Service",
"statement_descriptor": null,
"type": "service",
"unit_label": null,
"updated": 1587577341
}
```
Use the product IDs to create a price for each product. The [unit_amount](https://docs.stripe.com/api/prices/object.md#price_object-unit_amount) number is in cents, so `1500` = 15 USD, for example.
Create the Premium price:
```java
// Don't put any keys in code. See https://docs.stripe.com/keys-best-practices.
// Find your keys at https://dashboard.stripe.com/apikeys.
StripeClient client = new StripeClient("<>");
PriceCreateParams params =
PriceCreateParams.builder()
.setProduct("{{PREMIUM_PRODUCT_ID}}")
.setUnitAmount(1500L)
.setCurrency("usd")
.setRecurring(
PriceCreateParams.Recurring.builder()
.setInterval(PriceCreateParams.Recurring.Interval.MONTH)
.build()
)
.build();
// For SDK versions 29.4.0 or lower, remove '.v1()' from the following line.
Price price = client.v1().prices().create(params);
```
Create the Basic price:
```java
// Don't put any keys in code. See https://docs.stripe.com/keys-best-practices.
// Find your keys at https://dashboard.stripe.com/apikeys.
StripeClient client = new StripeClient("<>");
PriceCreateParams params =
PriceCreateParams.builder()
.setProduct("{{BASIC_PRODUCT_ID}}")
.setUnitAmount(500L)
.setCurrency("usd")
.setRecurring(
PriceCreateParams.Recurring.builder()
.setInterval(PriceCreateParams.Recurring.Interval.MONTH)
.build()
)
.build();
// For SDK versions 29.4.0 or lower, remove '.v1()' from the following line.
Price price = client.v1().prices().create(params);
```
Record the price ID for each price so you can use them in subsequent steps. They look like this:
```json
{
"id": "price_HGd7M3DV3IMXkC",
"object": "price",
"product": "prod_HGd6W1VUqqXGvr",
"type": "recurring",
"currency": "usd",
"recurring": {
"interval": "month",
"interval_count": 1,
"trial_period_days": null,
"usage_type": "licensed"
},
"active": true,
"billing_scheme": "per_unit",
"created": 1589319695,
"livemode": false,
"lookup_key": null,
"metadata": {},
"nickname": null,
"unit_amount": 1500,
"unit_amount_decimal": "1500",
"tiers": null,
"tiers_mode": null,
"transform_quantity": null
}
```
## Create the customer [Client and Server]
Stripe needs a customer for each subscription. In your application front end, collect any necessary information from your users and pass it to the backend.
If you need to collect address details, the Address Element enables you to collect a shipping or billing address for your customers. For more information on the Address Element, visit the [Address Element](https://docs.stripe.com/elements/address-element.md) page.
```swift
struct RegisterView: View {
@State var email = ""
var body: some View {
VStack {
TextField(text: $email) {
Text("Email")
}
Button {
Task {
var request = URLRequest(url: URL(string: "http://localhost:4242/create-customer")!)
request.httpMethod = "POST"
request.setValue("application/json", forHTTPHeaderField: "Content-Type")
request.httpBody = try! JSONEncoder().encode(["email": email])
let (data, _) = try! await URLSession.shared.data(for: request)
let responseJSON = try! JSONSerialization.jsonObject(with: data) as! [String: Any]
// Return the customer ID here
print(responseJSON["customer"])
}
} label: {
Text("Submit")
}
}
}
}
```
On the server, create the Stripe customer object.
> #### Use the Accounts v2 API to represent customers
>
> The Accounts v2 API is generally available for Connect users, and in public preview for other Stripe users. If you’re part of the Accounts v2 preview, you need to specify a [preview version](https://docs.stripe.com/api-v2-overview.md#sdk-and-api-versioning) in your code.
>
> To join the Accounts v2 preview, go to [Account previews and features](https://dashboard.stripe.com/settings/previews) in your Dashboard and enable **Reusable payment methods for Global Payouts**.
>
> For most use cases, we recommend [modeling your customers as customer-configured Account objects](https://docs.stripe.com/accounts-v2/use-accounts-as-customers.md) instead of using [Customer](https://docs.stripe.com/api/customers.md) objects.
#### Accounts v2
```java
// Don't put any keys in code. See https://docs.stripe.com/keys-best-practices.
// Find your keys at https://dashboard.stripe.com/apikeys.
StripeClient client = new StripeClient("<>");
AccountCreateParams params =
AccountCreateParams.builder()
.setContactEmail("jenny.rosen@example.com")
.setDisplayName("Jenny Rosen")
.setIdentity(
AccountCreateParams.Identity.builder()
.setIndividual(
AccountCreateParams.Identity.Individual.builder()
.setGivenName("Jenny Rosen")
.setAddress(
AccountCreateParams.Identity.Individual.Address.builder()
.setCity("San Francisco")
.setCountry("US")
.setLine1("123 Main Street")
.setPostalCode("94605")
.setState("CA")
.build()
)
.build()
)
.build()
)
.setConfiguration(
AccountCreateParams.Configuration.builder()
.setCustomer(
AccountCreateParams.Configuration.Customer.builder()
.setCapabilities(
AccountCreateParams.Configuration.Customer.Capabilities.builder()
.setAutomaticIndirectTax(
AccountCreateParams.Configuration.Customer.Capabilities.AutomaticIndirectTax.builder()
.setRequested(true)
.build()
)
.build()
)
.setShipping(
AccountCreateParams.Configuration.Customer.Shipping.builder()
.setAddress(
AccountCreateParams.Configuration.Customer.Shipping.Address.builder()
.setCity("San Francisco")
.setCountry("US")
.setLine1("123 Main Street")
.setPostalCode("94605")
.setState("CA")
.build()
)
.build()
)
.build()
)
.build()
)
.addInclude(AccountCreateParams.Include.CONFIGURATION__CUSTOMER)
.addInclude(AccountCreateParams.Include.IDENTITY)
.build();
Account account = client.v2().core().accounts().create(params);
```
#### Customers v1
```java
// Don't put any keys in code. See https://docs.stripe.com/keys-best-practices.
// Find your keys at https://dashboard.stripe.com/apikeys.
StripeClient client = new StripeClient("<>");
CustomerCreateParams params =
CustomerCreateParams.builder()
.setEmail("jenny.rosen@example.com")
.setName("Jenny Rosen")
.setShipping(
CustomerCreateParams.Shipping.builder()
.setAddress(
CustomerCreateParams.Shipping.Address.builder()
.setCity("San Francisco")
.setCountry("US")
.setLine1("123 Main Street")
.setPostalCode("9460")
.setState("CA")
.build()
)
.setName("Jenny Rosen")
.build()
)
.setAddress(
CustomerCreateParams.Address.builder()
.setCity("San Francisco")
.setCountry("US")
.setLine1("123 Main Street")
.setPostalCode("9460")
.setState("CA")
.build()
)
.build();
// For SDK versions 29.4.0 or lower, remove '.v1()' from the following line.
Customer customer = client.v1().customers().create(params);
```
## Create the subscription [Client and Server]
> If you want to render the Payment Element without first creating a subscription, see [Collect payment details before creating an Intent](https://docs.stripe.com/payments/accept-a-payment-deferred.md?type=subscription).
Let your new customer choose a plan and then create the subscription—in this guide, they choose between Basic and Premium.
In your app, pass the selected price ID and the ID of the customer record to the backend.
#### Accounts v2
```swift
func createSubscription(priceId: String, customerAccountId: String) async -> SubscriptionsResponse {
var request = URLRequest(url: URL(string: "http://localhost:4242/create-subscription")!)
request.httpMethod = "POST"
request.setValue("application/json", forHTTPHeaderField: "Content-Type")
request.httpBody = try! JSONEncoder().encode(["customerAccountId": customerAccountId, "priceId": priceId])
let (responseData, _) = try! await URLSession.shared.data(for: request)
// SubscriptionsResponse is a Decodable struct conforming to the expected response from your backend.
// It should include the client_secret, as discussed below.
let subscriptionsResponse = try! JSONDecoder().decode(SubscriptionsResponse.self, from: responseData)
return subscriptionsResponse
}
```
#### Customers v1
```swift
func createSubscription(priceId: String, customerId: String) async -> SubscriptionsResponse {
var request = URLRequest(url: URL(string: "http://localhost:4242/create-subscription")!)
request.httpMethod = "POST"
request.setValue("application/json", forHTTPHeaderField: "Content-Type")
request.httpBody = try! JSONEncoder().encode(["customerId": customerId, "priceId": priceId])
let (responseData, _) = try! await URLSession.shared.data(for: request)
// SubscriptionsResponse is a Decodable struct conforming to the expected response from your backend.
// It should include the client_secret, as discussed below.
let subscriptionsResponse = try! JSONDecoder().decode(SubscriptionsResponse.self, from: responseData)
return subscriptionsResponse
}
```
On the backend, create the subscription with status `incomplete` using `payment_behavior=default_incomplete`. Then return the `client_secret` from the subscription’s first [payment intent](https://docs.stripe.com/payments/payment-intents.md) to the frontend to complete payment by expanding the[`confirmation_secret`](https://docs.stripe.com/api/invoices/object.md#invoice_object-confirmation_secret) on the latest invoice of the subscription.
To enable [improved subscription behavior](https://docs.stripe.com/billing/subscriptions/billing-mode.md), set `billing_mode[type]` to `flexible`. You must use Stripe API version [2025-06-30.basil](https://docs.stripe.com/changelog/basil.md#2025-06-30.basil) or later.
Set [save_default_payment_method](https://docs.stripe.com/api/subscriptions/object.md#subscription_object-payment_settings-save_default_payment_method) to `on_subscription` to save the payment method as the default for a subscription when a payment succeeds. Saving a default payment method increases the success rate of future subscription payments.
The following example creates a `Subscription` and expands the `confirmation_secret` from its latest invoice in the response. That lets you pass the secret to the front end to confirm the payment.
#### Accounts v2
```java
// Don't put any keys in code. See https://docs.stripe.com/keys-best-practices.
// Find your keys at https://dashboard.stripe.com/apikeys.
StripeClient client = new StripeClient("<>");
SubscriptionCreateParams params =
SubscriptionCreateParams.builder()
.setCustomerAccount("{{CUSTOMERACCOUNT_ID}}")
.addItem(
SubscriptionCreateParams.Item.builder().setPrice("{{PRICE_ID}}").build()
)
.setPaymentBehavior(SubscriptionCreateParams.PaymentBehavior.DEFAULT_INCOMPLETE)
.setPaymentSettings(
SubscriptionCreateParams.PaymentSettings.builder()
.setSaveDefaultPaymentMethod(
SubscriptionCreateParams.PaymentSettings.SaveDefaultPaymentMethod.ON_SUBSCRIPTION
)
.build()
)
.setBillingMode(
SubscriptionCreateParams.BillingMode.builder()
.setType(SubscriptionCreateParams.BillingMode.Type.FLEXIBLE)
.build()
)
.addExpand("latest_invoice.confirmation_secret")
.build();
// For SDK versions 29.4.0 or lower, remove '.v1()' from the following line.
Subscription subscription = client.v1().subscriptions().create(params);
```
#### Customers v1
```java
// Don't put any keys in code. See https://docs.stripe.com/keys-best-practices.
// Find your keys at https://dashboard.stripe.com/apikeys.
StripeClient client = new StripeClient("<>");
SubscriptionCreateParams params =
SubscriptionCreateParams.builder()
.setCustomer("{{CUSTOMER_ID}}")
.addItem(
SubscriptionCreateParams.Item.builder().setPrice("{{PRICE_ID}}").build()
)
.setPaymentBehavior(SubscriptionCreateParams.PaymentBehavior.DEFAULT_INCOMPLETE)
.setPaymentSettings(
SubscriptionCreateParams.PaymentSettings.builder()
.setSaveDefaultPaymentMethod(
SubscriptionCreateParams.PaymentSettings.SaveDefaultPaymentMethod.ON_SUBSCRIPTION
)
.build()
)
.setBillingMode(
SubscriptionCreateParams.BillingMode.builder()
.setType(SubscriptionCreateParams.BillingMode.Type.FLEXIBLE)
.build()
)
.addExpand("latest_invoice.confirmation_secret")
.build();
// For SDK versions 29.4.0 or lower, remove '.v1()' from the following line.
Subscription subscription = client.v1().subscriptions().create(params);
```
> If you’re using a *multi-currency Price* (A single Price object can support multiple currencies. Each purchase uses one of the supported currencies for the Price, depending on how you use the Price in your integration), use the [currency](https://docs.stripe.com/api/subscriptions/create.md#create_subscription-currency) parameter to tell the Subscription which of the Price’s currencies to use. (If you omit the `currency` parameter, then the Subscription uses the Price’s default currency.)
The Subscription is now `inactive` and awaiting payment. The following example response highlights the minimum fields to store, but you can store whatever your application frequently accesses.
#### Accounts v2
```json
{"id": "sub_JgRjFjhKbtD2qz",
"object": "subscription",
"application_fee_percent": null,
"automatic_tax": {
"disabled_reason": null,
"enabled": false,
"liability": "null"
},
"billing_cycle_anchor": 1623873347,
"billing_cycle_anchor_config": null,
"cancel_at": null,
"cancel_at_period_end": false,
"canceled_at": null,
"cancellation_details": {
"comment": null,
"feedback": null,
"reason": null
},
"collection_method": "charge_automatically",
"created": 1623873347,
"currency": "usd","customer_account": identifier("customerAccount"),
"days_until_due": null,
"default_payment_method": null,
"default_source": null,
"default_tax_rates": [
],
"discounts": [],
"ended_at": null,
"invoice_customer_balance_settings": {
"account_tax_ids": null,
"issuer": {
"type": "self"
}
},
"items": {
"object": "list",
"data": [
{
"id": "si_JgRjmS4Ur1khEx",
"object": "subscription_item",
"created": 1623873347,"current_period_end": 1626465347,
"current_period_start": 1623873347,
"discounts": [],
"metadata": {
},
"plan": {
"id": "price_1J32RfGPZ1iASj5zHHp57z7C",
"object": "plan",
"active": true,
"amount": 2000,
"amount_decimal": "2000",
"billing_scheme": "per_unit",
"created": 1623864151,
"currency": "usd",
"interval": "month",
"interval_count": 1,
"livemode": false,
"metadata": {
},
"nickname": null,
"product": "prod_JgPF5xnq7qBun3",
"tiers": null,
"tiers_mode": null,
"transform_usage": null,
"trial_period_days": null,
"usage_type": "licensed"
},
"price": {
"id": "price_1J32RfGPZ1iASj5zHHp57z7C",
"object": "price",
"active": true,
"billing_scheme": "per_unit",
"created": 1623864151,
"currency": "usd",
"livemode": false,
"lookup_key": null,
"metadata": {
},
"nickname": null,
"product": "prod_JgPF5xnq7qBun3",
"recurring": {
"interval": "month",
"interval_count": 1,
"trial_period_days": null,
"usage_type": "licensed"
},
"tiers_mode": null,
"transform_quantity": null,
"type": "recurring",
"unit_amount": 2000,
"unit_amount_decimal": "2000"
},
"quantity": 1,
"subscription": "sub_JgRjFjhKbtD2qz",
"tax_rates": [
]
}
],
"has_more": false,
"total_count": 1,
"url": "/v1/subscription_items?subscription=sub_JgRjFjhKbtD2qz"
},
"latest_invoice": {
"id": "in_1J34pzGPZ1iASj5zB87qdBNZ",
"object": "invoice",
"account_country": "US",
"account_name": "Angelina's Store",
"account_tax_ids": null,
"amount_due": 2000,
"amount_overpaid": 0,
"amount_paid": 0,
"amount_remaining": 2000,
"amount_shipping": 0,
"attempt_count": 0,
"attempted": false,
"auto_advance": false,
"automatic_tax": {
"disabled_reason": null,
"enabled": false,
"liability": null,
"status": null
},
"automatically_finalizes_at": null,
"billing_reason": "subscription_update",
"collection_method": "charge_automatically",
"created": 1623873347,
"currency": "usd",
"custom_fields": null,
"customer_account": identifier("customerAccount"),
"customer_address": null,
"customer_email": "angelina@stripe.com",
"customer_name": null,
"customer_phone": null,
"customer_shipping": {
"address": {
"city": "",
"country": "US",
"line1": "Berry",
"line2": "",
"postal_code": "",
"state": ""
},
"name": "",
"phone": null
},
"customer_tax_exempt": "none",
"customer_tax_ids": [
],
"default_payment_method": null,
"default_source": null,
"default_tax_rates": [
],
"description": null,
"discounts": [],
"due_date": null,
"effective_at": "1623873347",
"ending_balance": 0,
"footer": null,
"from_invoice": null,
"hosted_invoice_url": "https://invoice.stripe.com/i/acct_1By64KGPZ1iASj5z/invst_JgRjzIOILGeq2MKC9T0KtyXnD5udsLp",
"invoice_pdf": "https://pay.stripe.com/invoice/acct_1By64KGPZ1iASj5z/invst_JgRjzIOILGeq2MKC9T0KtyXnD5udsLp/pdf",
"last_finalization_error": null,
"latest_revision": null,
"lines": {
"object": "list",
"data": [
{
"id": "il_1N2CjMBwKQ696a5NeOawRQP2",
"object": "line_item",
"amount": 2000,
"currency": "usd",
"description": "1 × Gold Special (at $20.00 / month)",
"discount_amounts": [
],
"discountable": true,
"discounts": [
],
"invoice": "in_1J34pzGPZ1iASj5zB87qdBNZ",
"livemode": false,
"metadata": {
},
"parent": {
"invoice_item_details": null,
"subscription_item_details":
{
"invoice_item": null,
"proration": false,
"proration_details":
{
"credited_items": null
},
"subscription":
"sub_JgRjFjhKbtD2qz",
"subscription_item":
"si_JgRjmS4Ur1khEx"
},
"type": "subscription_item_details"
},
"period": {
"end": 1626465347,
"start": 1623873347
},
"plan": {
"id": "price_1J32RfGPZ1iASj5zHHp57z7C",
"object": "plan",
"active": true,
"amount": 2000,
"amount_decimal": "2000",
"billing_scheme": "per_unit",
"created": 1623864151,
"currency": "usd",
"interval": "month",
"interval_count": 1,
"livemode": false,
"metadata": {
},
"nickname": null,
"product": "prod_JgPF5xnq7qBun3",
"tiers": null,
"tiers_mode": null,
"transform_usage": null,
"trial_period_days": null,
"usage_type": "licensed"
},
"price": {
"id": "price_1J32RfGPZ1iASj5zHHp57z7C",
"object": "price",
"active": true,
"billing_scheme": "per_unit",
"created": 1623864151,
"currency": "usd",
"livemode": false,
"lookup_key": null,
"metadata": {
},
"nickname": null,
"product": "prod_JgPF5xnq7qBun3",
"recurring": {
"interval": "month",
"interval_count": 1,
"trial_period_days": null,
"usage_type": "licensed"
},
"tiers_mode": null,
"transform_quantity": null,
"type": "recurring",
"unit_amount": 2000,
"unit_amount_decimal": "2000"
},
"quantity": 1,
"taxes": []
}
],
"has_more": false,
"total_count": 1,
"url": "/v1/invoices/in_1J34pzGPZ1iASj5zB87qdBNZ/lines"
},
"livemode": false,
"metadata": {
},
"next_payment_attempt": null,
"number": "C008FC2-0354",
"on_behalf_of": null,
"parent": {
"quote_details": null,
"subscription_details": {
"metadata": {},
"pause_collection": null,
"subscription": "sub_JgRjFjhKbtD2qz"
}
},
"payment_intent": {
"id": "pi_1J34pzGPZ1iASj5zI2nOAaE6",
"object": "payment_intent",
"allowed_source_types": [
"card"
],
"amount": 2000,
"amount_capturable": 0,
"amount_received": 0,
"application": null,
"application_fee_amount": null,
"canceled_at": null,
"cancellation_reason": null,
"capture_method": "automatic",
"charges": {
"object": "list",
"data": [
],
"has_more": false,
"total_count": 0,
"url": "/v1/charges?payment_intent=pi_1J34pzGPZ1iASj5zI2nOAaE6"
},
"client_secret": "pi_1J34pzGPZ1iASj5zI2nOAaE6_secret_l7FN6ldFfXiFmJEumenJ2y2wu",
"confirmation_method": "automatic",
"created": 1623873347,
"currency": "usd",
"customer": "cus_CMqDWO2xODTZqt",
"description": "Subscription creation",
"invoice": "in_1J34pzGPZ1iASj5zB87qdBNZ",
"last_payment_error": null,
"livemode": false,
"metadata": {
},
"next_action": null,
"next_source_action": null,
"on_behalf_of": null,
"payment_method": null,
"payment_method_options": {
"card": {
"installments": null,
"network": null,
"request_three_d_secure": "automatic"
}
},
"payment_method_types": [
"card"
],
"receipt_email": null,
"review": null,
"setup_future_usage": "off_session",
"shipping": null,
"source": "card_1By6iQGPZ1iASj5z7ijKBnXJ",
"statement_descriptor": null,
"statement_descriptor_suffix": null,
"status": "requires_confirmation",
"transfer_data": null,
"transfer_group": null
},
"payment_settings": {
"payment_method_options": null,
"payment_method_types": null,
"save_default_payment_method": "on_subscription"
},
"period_end": 1623873347,
"period_start": 1623873347,
"post_payment_credit_notes_amount": 0,
"pre_payment_credit_notes_amount": 0,
"receipt_number": null,
"starting_balance": 0,
"statement_descriptor": null,
"status": "open",
"status_transitions": {
"finalized_at": 1623873347,
"marked_uncollectible_at": null,
"paid_at": null,
"voided_at": null
},
"subscription": "sub_JgRjFjhKbtD2qz",
"subtotal": 2000,
"tax": null,
"tax_percent": null,
"total": 2000,
"total_discount_amounts": [],
"total_tax_amounts": [],
"transfer_data": null,
"webhooks_delivered_at": 1623873347
},
"livemode": false,
"metadata": {
},
"next_pending_invoice_item_invoice": null,
"pause_collection": null,
"pending_invoice_item_interval": null,
"pending_setup_intent": null,
"pending_update": null,
"plan": {
"id": "price_1J32RfGPZ1iASj5zHHp57z7C",
"object": "plan",
"active": true,
"amount": 2000,
"amount_decimal": "2000",
"billing_scheme": "per_unit",
"created": 1623864151,
"currency": "usd",
"interval": "month",
"interval_count": 1,
"livemode": false,
"metadata": {
},
"nickname": null,
"product": "prod_JgPF5xnq7qBun3",
"tiers": null,
"tiers_mode": null,
"transform_usage": null,
"trial_period_days": null,
"usage_type": "licensed"
},
"quantity": 1,
"schedule": null,
"start": 1623873347,
"start_date": 1623873347,
"status": "incomplete",
"tax_percent": null,
"transfer_data": null,
"trial_end": null,
"trial_start": null
}
```
#### Customers v1
```json
{"id": "sub_JgRjFjhKbtD2qz",
"object": "subscription",
"application_fee_percent": null,
"automatic_tax": {
"disabled_reason": null,
"enabled": false,
"liability": "null"
},
"billing_cycle_anchor": 1623873347,
"billing_cycle_anchor_config": null,
"cancel_at": null,
"cancel_at_period_end": false,
"canceled_at": null,
"cancellation_details": {
"comment": null,
"feedback": null,
"reason": null
},
"collection_method": "charge_automatically",
"created": 1623873347,
"currency": "usd","customer": identifier("customer"),
"days_until_due": null,
"default_payment_method": null,
"default_source": null,
"default_tax_rates": [
],
"discounts": [],
"ended_at": null,
"invoice_customer_balance_settings": {
"account_tax_ids": null,
"issuer": {
"type": "self"
}
},
"items": {
"object": "list",
"data": [
{
"id": "si_JgRjmS4Ur1khEx",
"object": "subscription_item",
"created": 1623873347,"current_period_end": 1626465347,
"current_period_start": 1623873347,
"discounts": [],
"metadata": {
},
"plan": {
"id": "price_1J32RfGPZ1iASj5zHHp57z7C",
"object": "plan",
"active": true,
"amount": 2000,
"amount_decimal": "2000",
"billing_scheme": "per_unit",
"created": 1623864151,
"currency": "usd",
"interval": "month",
"interval_count": 1,
"livemode": false,
"metadata": {
},
"nickname": null,
"product": "prod_JgPF5xnq7qBun3",
"tiers": null,
"tiers_mode": null,
"transform_usage": null,
"trial_period_days": null,
"usage_type": "licensed"
},
"price": {
"id": "price_1J32RfGPZ1iASj5zHHp57z7C",
"object": "price",
"active": true,
"billing_scheme": "per_unit",
"created": 1623864151,
"currency": "usd",
"livemode": false,
"lookup_key": null,
"metadata": {
},
"nickname": null,
"product": "prod_JgPF5xnq7qBun3",
"recurring": {
"interval": "month",
"interval_count": 1,
"trial_period_days": null,
"usage_type": "licensed"
},
"tiers_mode": null,
"transform_quantity": null,
"type": "recurring",
"unit_amount": 2000,
"unit_amount_decimal": "2000"
},
"quantity": 1,
"subscription": "sub_JgRjFjhKbtD2qz",
"tax_rates": [
]
}
],
"has_more": false,
"total_count": 1,
"url": "/v1/subscription_items?subscription=sub_JgRjFjhKbtD2qz"
},
"latest_invoice": {
"id": "in_1J34pzGPZ1iASj5zB87qdBNZ",
"object": "invoice",
"account_country": "US",
"account_name": "Angelina's Store",
"account_tax_ids": null,
"amount_due": 2000,
"amount_overpaid": 0,
"amount_paid": 0,
"amount_remaining": 2000,
"amount_shipping": 0,
"attempt_count": 0,
"attempted": false,
"auto_advance": false,
"automatic_tax": {
"disabled_reason": null,
"enabled": false,
"liability": null,
"status": null
},
"automatically_finalizes_at": null,
"billing_reason": "subscription_update",
"collection_method": "charge_automatically",
"created": 1623873347,
"currency": "usd",
"custom_fields": null,
"customer": identifier("customer"),
"customer_address": null,
"customer_email": "angelina@stripe.com",
"customer_name": null,
"customer_phone": null,
"customer_shipping": {
"address": {
"city": "",
"country": "US",
"line1": "Berry",
"line2": "",
"postal_code": "",
"state": ""
},
"name": "",
"phone": null
},
"customer_tax_exempt": "none",
"customer_tax_ids": [
],
"default_payment_method": null,
"default_source": null,
"default_tax_rates": [
],
"description": null,
"discounts": [],
"due_date": null,
"effective_at": "1623873347",
"ending_balance": 0,
"footer": null,
"from_invoice": null,
"hosted_invoice_url": "https://invoice.stripe.com/i/acct_1By64KGPZ1iASj5z/invst_JgRjzIOILGeq2MKC9T0KtyXnD5udsLp",
"invoice_pdf": "https://pay.stripe.com/invoice/acct_1By64KGPZ1iASj5z/invst_JgRjzIOILGeq2MKC9T0KtyXnD5udsLp/pdf",
"last_finalization_error": null,
"latest_revision": null,
"lines": {
"object": "list",
"data": [
{
"id": "il_1N2CjMBwKQ696a5NeOawRQP2",
"object": "line_item",
"amount": 2000,
"currency": "usd",
"description": "1 × Gold Special (at $20.00 / month)",
"discount_amounts": [
],
"discountable": true,
"discounts": [
],
"invoice": "in_1J34pzGPZ1iASj5zB87qdBNZ",
"livemode": false,
"metadata": {
},
"parent": {
"invoice_item_details": null,
"subscription_item_details":
{
"invoice_item": null,
"proration": false,
"proration_details":
{
"credited_items": null
},
"subscription":
"sub_JgRjFjhKbtD2qz",
"subscription_item":
"si_JgRjmS4Ur1khEx"
},
"type": "subscription_item_details"
},
"period": {
"end": 1626465347,
"start": 1623873347
},
"plan": {
"id": "price_1J32RfGPZ1iASj5zHHp57z7C",
"object": "plan",
"active": true,
"amount": 2000,
"amount_decimal": "2000",
"billing_scheme": "per_unit",
"created": 1623864151,
"currency": "usd",
"interval": "month",
"interval_count": 1,
"livemode": false,
"metadata": {
},
"nickname": null,
"product": "prod_JgPF5xnq7qBun3",
"tiers": null,
"tiers_mode": null,
"transform_usage": null,
"trial_period_days": null,
"usage_type": "licensed"
},
"price": {
"id": "price_1J32RfGPZ1iASj5zHHp57z7C",
"object": "price",
"active": true,
"billing_scheme": "per_unit",
"created": 1623864151,
"currency": "usd",
"livemode": false,
"lookup_key": null,
"metadata": {
},
"nickname": null,
"product": "prod_JgPF5xnq7qBun3",
"recurring": {
"interval": "month",
"interval_count": 1,
"trial_period_days": null,
"usage_type": "licensed"
},
"tiers_mode": null,
"transform_quantity": null,
"type": "recurring",
"unit_amount": 2000,
"unit_amount_decimal": "2000"
},
"quantity": 1,
"taxes": []
}
],
"has_more": false,
"total_count": 1,
"url": "/v1/invoices/in_1J34pzGPZ1iASj5zB87qdBNZ/lines"
},
"livemode": false,
"metadata": {
},
"next_payment_attempt": null,
"number": "C008FC2-0354",
"on_behalf_of": null,
"parent": {
"quote_details": null,
"subscription_details": {
"metadata": {},
"pause_collection": null,
"subscription": "sub_JgRjFjhKbtD2qz"
}
},
"payment_intent": {
"id": "pi_1J34pzGPZ1iASj5zI2nOAaE6",
"object": "payment_intent",
"allowed_source_types": [
"card"
],
"amount": 2000,
"amount_capturable": 0,
"amount_received": 0,
"application": null,
"application_fee_amount": null,
"canceled_at": null,
"cancellation_reason": null,
"capture_method": "automatic",
"charges": {
"object": "list",
"data": [
],
"has_more": false,
"total_count": 0,
"url": "/v1/charges?payment_intent=pi_1J34pzGPZ1iASj5zI2nOAaE6"
},
"client_secret": "pi_1J34pzGPZ1iASj5zI2nOAaE6_secret_l7FN6ldFfXiFmJEumenJ2y2wu",
"confirmation_method": "automatic",
"created": 1623873347,
"currency": "usd",
"customer": "cus_CMqDWO2xODTZqt",
"description": "Subscription creation",
"invoice": "in_1J34pzGPZ1iASj5zB87qdBNZ",
"last_payment_error": null,
"livemode": false,
"metadata": {
},
"next_action": null,
"next_source_action": null,
"on_behalf_of": null,
"payment_method": null,
"payment_method_options": {
"card": {
"installments": null,
"network": null,
"request_three_d_secure": "automatic"
}
},
"payment_method_types": [
"card"
],
"receipt_email": null,
"review": null,
"setup_future_usage": "off_session",
"shipping": null,
"source": "card_1By6iQGPZ1iASj5z7ijKBnXJ",
"statement_descriptor": null,
"statement_descriptor_suffix": null,
"status": "requires_confirmation",
"transfer_data": null,
"transfer_group": null
},
"payment_settings": {
"payment_method_options": null,
"payment_method_types": null,
"save_default_payment_method": "on_subscription"
},
"period_end": 1623873347,
"period_start": 1623873347,
"post_payment_credit_notes_amount": 0,
"pre_payment_credit_notes_amount": 0,
"receipt_number": null,
"starting_balance": 0,
"statement_descriptor": null,
"status": "open",
"status_transitions": {
"finalized_at": 1623873347,
"marked_uncollectible_at": null,
"paid_at": null,
"voided_at": null
},
"subscription": "sub_JgRjFjhKbtD2qz",
"subtotal": 2000,
"tax": null,
"tax_percent": null,
"total": 2000,
"total_discount_amounts": [],
"total_tax_amounts": [],
"transfer_data": null,
"webhooks_delivered_at": 1623873347
},
"livemode": false,
"metadata": {
},
"next_pending_invoice_item_invoice": null,
"pause_collection": null,
"pending_invoice_item_interval": null,
"pending_setup_intent": null,
"pending_update": null,
"plan": {
"id": "price_1J32RfGPZ1iASj5zHHp57z7C",
"object": "plan",
"active": true,
"amount": 2000,
"amount_decimal": "2000",
"billing_scheme": "per_unit",
"created": 1623864151,
"currency": "usd",
"interval": "month",
"interval_count": 1,
"livemode": false,
"metadata": {
},
"nickname": null,
"product": "prod_JgPF5xnq7qBun3",
"tiers": null,
"tiers_mode": null,
"transform_usage": null,
"trial_period_days": null,
"usage_type": "licensed"
},
"quantity": 1,
"schedule": null,
"start": 1623873347,
"start_date": 1623873347,
"status": "incomplete",
"tax_percent": null,
"transfer_data": null,
"trial_end": null,
"trial_start": null
}
```
### Update your server endpoint
Add ephemeral key creation to the subscription endpoint and return it in the response:
#### Accounts v2
#### Java
```java
Map ephemeralKeyParams = new HashMap<>();
ephemeralKeyParams.put("customer_account", customerAccountId);
RequestOptions requestOptions = RequestOptions.builder()
.setStripeVersion("2026-03-25.dahlia")
.build();
EphemeralKey ephemeralKey = EphemeralKey.create(ephemeralKeyParams, requestOptions);
Map response = new HashMap<>();
response.put("subscriptionId", subscription.getId());
response.put("clientSecret", subscription.getLatestInvoiceObject()
.getConfirmationSecret().getClientSecret());
response.put("ephemeralKey", ephemeralKey.getSecret());
response.put("customerAccountId", customerAccountId);
return new Gson().toJson(response);
```
#### Customers v1
#### Java
```java
Map ephemeralKeyParams = new HashMap<>();
ephemeralKeyParams.put("customer", customerId);
RequestOptions requestOptions = RequestOptions.builder()
.setStripeVersion("2025-06-30.basil")
.build();
EphemeralKey ephemeralKey = EphemeralKey.create(ephemeralKeyParams, requestOptions);
Map response = new HashMap<>();
response.put("subscriptionId", subscription.getId());
response.put("clientSecret", subscription.getLatestInvoiceObject()
.getConfirmationSecret().getClientSecret());
response.put("ephemeralKey", ephemeralKey.getSecret());
response.put("customerId", customerId);
return new Gson().toJson(response);
```
### Update your response model
#### Accounts v2
```swift
struct SubscriptionsResponse: Decodable {
let subscriptionId: String
let clientSecret: String
let ephemeralKey: String
let customerAccountId: String
}
```
#### Customers v1
```swift
struct SubscriptionsResponse: Decodable {
let subscriptionId: String
let clientSecret: String
let ephemeralKey: String
let customerId: String
}
```
### Pass the customer configuration to PaymentSheet
#### Accounts v2
Add the following when configuring PaymentSheet:
```swift
config.customerAccount = .init(id: customerAccountId, ephemeralKeySecret: ephemeralKey)
```
#### Customers v1
Add the following when configuring PaymentSheet:
```swift
config.customer = .init(id: customerId, ephemeralKeySecret: ephemeralKey)
```
## Collect payment information [Client]
Use the [Payment Sheet](https://docs.stripe.com/payments/mobile/payment-sheet.md) to collect payment details and activate the subscription. You can customize Elements to match the look and feel of your application.
The Payment Sheet securely collects all necessary payment details for a wide variety of payments methods. Learn about the [supported payment methods](https://docs.stripe.com/payments/payment-methods/payment-method-support.md#product-support) for Payment Sheet and Subscriptions.
### Add the Payment Element to your app
> This step shows one way to get started, but you can use any [in-app payments integration](https://docs.stripe.com/payments/mobile.md).
Initialize and present the Mobile Payment Element using the PaymentSheet class.
```swift
struct SubscribeView: View {
let paymentSheet: PaymentSheet
@State var isPaymentSheetPresented = false
init(clientSecret: String) {
var config = PaymentSheet.Configuration()
// Set `allowsDelayedPaymentMethods` to true if your business handles
// delayed notification payment methods like US bank accounts.
config.allowsDelayedPaymentMethods = true
config.primaryButtonLabel = "Subscribe for $15/month"
self.paymentSheet = PaymentSheet(paymentIntentClientSecret: clientSecret, configuration: config)
}
var body: some View {
Button {
isPaymentSheetPresented = true
} label: {
Text("Subscribe")
}.paymentSheet(isPresented: $isPaymentSheetPresented, paymentSheet: paymentSheet) { result in
switch result {
case .completed:
// Handle completion
case .canceled:
break
case .failed(let error):
// Handle error
}
}
}
}
```
The Mobile Payment Element renders a sheet that allows your customer to select a payment method. The form automatically collects all necessary payments details for the payment method that they select.
Setting `allowsDelayedPaymentMethods` to true allows [delayed notification](https://docs.stripe.com/payments/payment-methods.md#payment-notification) payment methods like US bank accounts. For these payment methods, the final payment status isn’t known when the `PaymentSheet` completes, and instead succeeds or fails later. If you support these types of payment methods, inform the customer their order is confirmed and only fulfill their order (for example, ship their product) when the payment is successful.
You can customize the Payment Element to match the design of your app by using the [`appearance` property](https://docs.stripe.com/elements/appearance-api/mobile.md?platform=ios) your `PaymentSheet.Configuration` object.
### Confirm payment
The Mobile Payment Element creates a PaymentMethod and confirms the incomplete Subscription’s first PaymentIntent, causing a charge to be made. If *Strong Customer Authentication* (Strong Customer Authentication (SCA) is a regulatory requirement in effect as of September 14, 2019, that impacts many European online payments. It requires customers to use two-factor authentication like 3D Secure to verify their purchase) (SCA) is required for the payment, the Payment Element handles the authentication process before confirming the PaymentIntent.
## Set up a return URL [Client-side]
The customer might navigate away from your app to authenticate (for example, in Safari or their banking app). To allow them to automatically return to your app after authenticating, [configure a custom URL scheme](https://developer.apple.com/documentation/xcode/defining-a-custom-url-scheme-for-your-app) and set up your app delegate to forward the URL to the SDK. Stripe doesn’t support [universal links](https://developer.apple.com/documentation/xcode/allowing-apps-and-websites-to-link-to-your-content).
#### SceneDelegate
#### Swift
```swift
// This method handles opening custom URL schemes (for example, "your-app://stripe-redirect")
func scene(_ scene: UIScene, openURLContexts URLContexts: Set) {
guard let url = URLContexts.first?.url else {
return
}
let stripeHandled = StripeAPI.handleURLCallback(with: url)
if (!stripeHandled) {
// This was not a Stripe url – handle the URL normally as you would
}
}
```
#### AppDelegate
#### Swift
```swift
// This method handles opening custom URL schemes (for example, "your-app://stripe-redirect")
func application(_ app: UIApplication, open url: URL, options: [UIApplication.OpenURLOptionsKey: Any] = [:]) -> Bool {
let stripeHandled = StripeAPI.handleURLCallback(with: url)
if (stripeHandled) {
return true
} else {
// This was not a Stripe url – handle the URL normally as you would
}
return false
}
```
#### SwiftUI
#### Swift
```swift
@main
struct MyApp: App {
var body: some Scene {
WindowGroup {
Text("Hello, world!").onOpenURL { incomingURL in
let stripeHandled = StripeAPI.handleURLCallback(with: incomingURL)
if (!stripeHandled) {
// This was not a Stripe url – handle the URL normally as you would
}
}
}
}
}
```
Additionally, set the [returnURL](https://stripe.dev/stripe-ios/stripe-paymentsheet/Classes/PaymentSheet/Configuration.html#/s:6Stripe12PaymentSheetC13ConfigurationV9returnURLSSSgvp) on your [PaymentSheet.Configuration](https://stripe.dev/stripe-ios/stripe-paymentsheet/Classes/PaymentSheet/Configuration.html) object to the URL for your app.
```swift
var configuration = PaymentSheet.Configuration()
configuration.returnURL = "your-app://stripe-redirect"
```
## Optional: Enable Apple Pay
### Register for an Apple Merchant ID
Obtain an Apple Merchant ID by [registering for a new identifier](https://developer.apple.com/account/resources/identifiers/add/merchant) on the Apple Developer website.
Fill out the form with a description and identifier. Your description is for your own records and you can modify it in the future. Stripe recommends using the name of your app as the identifier (for example, `merchant.com.{{YOUR_APP_NAME}}`).
### Create a new Apple Pay certificate
Create a certificate for your app to encrypt payment data.
Go to the [iOS Certificate Settings](https://dashboard.stripe.com/settings/ios_certificates) in the Dashboard, click **Add new application**, and follow the guide.
Download a Certificate Signing Request (CSR) file to get a secure certificate from Apple that allows you to use Apple Pay.
One CSR file must be used to issue exactly one certificate. If you switch your Apple Merchant ID, you must go to the [iOS Certificate Settings](https://dashboard.stripe.com/settings/ios_certificates) in the Dashboard to obtain a new CSR and certificate.
### Integrate with Xcode
Add the Apple Pay capability to your app. In Xcode, open your project settings, click the **Signing & Capabilities** tab, and add the **Apple Pay** capability. You might be prompted to log in to your developer account at this point. Select the merchant ID you created earlier, and your app is ready to accept Apple Pay.
Enable the Apple Pay capability in Xcode
### Add Apple Pay
#### Recurring payments
To add Apple Pay to PaymentSheet, set [applePay](https://stripe.dev/stripe-ios/stripe-paymentsheet/Classes/PaymentSheet/Configuration.html#/s:6Stripe12PaymentSheetC13ConfigurationV8applePayAC05ApplefD0VSgvp) after initializing `PaymentSheet.Configuration` with your Apple merchant ID and the [country code of your business](https://dashboard.stripe.com/settings/account).
Per [Apple’s guidelines](https://developer.apple.com/design/human-interface-guidelines/apple-pay#Supporting-subscriptions) for recurring payments, you must also set additional attributes on the `PKPaymentRequest`. Add a handler in [ApplePayConfiguration.paymentRequestHandlers](https://stripe.dev/stripe-ios/stripepaymentsheet/documentation/stripepaymentsheet/paymentsheet/applepayconfiguration/handlers/paymentrequesthandler) to configure the [PKPaymentRequest.paymentSummaryItems](https://developer.apple.com/documentation/passkit/pkpaymentrequest/1619231-paymentsummaryitems) with the amount you intend to charge (for example, 9.95 USD a month).
You can also adopt [merchant tokens](https://developer.apple.com/apple-pay/merchant-tokens/) by setting the `recurringPaymentRequest` or `automaticReloadPaymentRequest` properties on the `PKPaymentRequest`.
To learn more about how to use recurring payments with Apple Pay, see [Apple’s PassKit documentation](https://developer.apple.com/documentation/passkit/pkpaymentrequest).
#### iOS (Swift)
```swift
let customHandlers = PaymentSheet.ApplePayConfiguration.Handlers(
paymentRequestHandler: { request in
// PKRecurringPaymentSummaryItem is available on iOS 15 or later
if #available(iOS 15.0, *) {
let billing = PKRecurringPaymentSummaryItem(label: "My Subscription", amount: NSDecimalNumber(string: "59.99"))
// Payment starts today
billing.startDate = Date()
// Payment ends in one year
billing.endDate = Date().addingTimeInterval(60 * 60 * 24 * 365)
// Pay once a month.
billing.intervalUnit = .month
billing.intervalCount = 1
// recurringPaymentRequest is only available on iOS 16 or later
if #available(iOS 16.0, *) {
request.recurringPaymentRequest = PKRecurringPaymentRequest(paymentDescription: "Recurring",
regularBilling: billing,
managementURL: URL(string: "https://my-backend.example.com/customer-portal")!)
request.recurringPaymentRequest?.billingAgreement = "You'll be billed $59.99 every month for the next 12 months. To cancel at any time, go to Account and click 'Cancel Membership.'"
}
request.paymentSummaryItems = [billing]
request.currencyCode = "USD"
} else {
// On older iOS versions, set alternative summary items.
request.paymentSummaryItems = [PKPaymentSummaryItem(label: "Monthly plan starting July 1, 2022", amount: NSDecimalNumber(string: "59.99"), type: .final)]
}
return request
}
)
var configuration = PaymentSheet.Configuration()
configuration.applePay = .init(merchantId: "merchant.com.your_app_name",
merchantCountryCode: "US",
customHandlers: customHandlers)
```
### Order tracking
To add [order tracking](https://developer.apple.com/design/human-interface-guidelines/technologies/wallet/designing-order-tracking) information in iOS 16 or later, configure an [authorizationResultHandler](https://stripe.dev/stripe-ios/stripepaymentsheet/documentation/stripepaymentsheet/paymentsheet/applepayconfiguration/handlers/authorizationresulthandler) in your `PaymentSheet.ApplePayConfiguration.Handlers`. Stripe calls your implementation after the payment is complete, but before iOS dismisses the Apple Pay sheet.
In your `authorizationResultHandler` implementation, fetch the order details from your server for the completed order. Add the details to the provided [PKPaymentAuthorizationResult](https://developer.apple.com/documentation/passkit/pkpaymentauthorizationresult) and return the modified result.
To learn more about order tracking, see [Apple’s Wallet Orders documentation](https://developer.apple.com/documentation/walletorders).
#### iOS (Swift)
```swift
let customHandlers = PaymentSheet.ApplePayConfiguration.Handlers(
authorizationResultHandler: { result in
do {
// Fetch the order details from your service
let myOrderDetails = try await MyAPIClient.shared.fetchOrderDetails(orderID: orderID)
result.orderDetails = PKPaymentOrderDetails(
orderTypeIdentifier: myOrderDetails.orderTypeIdentifier, // "com.myapp.order"
orderIdentifier: myOrderDetails.orderIdentifier, // "ABC123-AAAA-1111"
webServiceURL: myOrderDetails.webServiceURL, // "https://my-backend.example.com/apple-order-tracking-backend"
authenticationToken: myOrderDetails.authenticationToken) // "abc123"
// Return your modified PKPaymentAuthorizationResult
return result
} catch {
return PKPaymentAuthorizationResult(status: .failure, errors: [error])
}
}
)
var configuration = PaymentSheet.Configuration()
configuration.applePay = .init(merchantId: "merchant.com.your_app_name",
merchantCountryCode: "US",
customHandlers: customHandlers)
```
## Listen for webhooks [Server]
To complete the integration, you need to process *webhooks* (A webhook is a real-time push notification sent to your application as a JSON payload through HTTPS requests) sent by Stripe. These are events triggered whenever state inside of Stripe changes, such as subscriptions creating new invoices. In your application, set up an HTTP handler to accept a POST request containing the webhook event, and verify the signature of the event:
#### Java
```java
// Don't put any keys in code. See https://docs.stripe.com/keys-best-practices.
// Find your keys at https://dashboard.stripe.com/apikeys.
StripeClient stripeClient = new StripeClient("<>");
post(
"/webhook",
(request, response) -> {
String payload = request.body();
String sigHeader = request.headers("Stripe-Signature");
String endpointSecret = dotenv.get("STRIPE_WEBHOOK_SECRET");
Event event = null;
try {
event = stripeClient.constructEvent(payload, sigHeader, endpointSecret);
} catch (SignatureVerificationException e) {
// Invalid signature
response.status(400);
return "";
}
// Deserialize the nested object inside the event
EventDataObjectDeserializer dataObjectDeserializer = event.getDataObjectDeserializer();
StripeObject stripeObject = null;
if (dataObjectDeserializer.getObject().isPresent()) {
stripeObject = dataObjectDeserializer.getObject().get();
} else {
// Deserialization failed, probably due to an API version mismatch.
// Refer to the Javadoc documentation on `EventDataObjectDeserializer` for
// instructions on how to handle this case, or return an error here.
}
switch (event.getType()) {
case "invoice.paid":
// Used to provision services after the trial has ended.
// The status of the invoice will show up as paid. Store the status in your
// database to reference when a user accesses your service to avoid hitting rate
// limits.
break;
case "invoice.payment_failed":
// If the payment fails or the customer does not have a valid payment method,
// an invoice.payment_failed event is sent, the subscription becomes past_due.
// Use this webhook to notify your user that their payment has
// failed and to retrieve new card details.
break;
case "customer.subscription.deleted":
// handle subscription canceled automatically based
// upon your subscription settings. Or if the user
// cancels it.
break;
default:
// Unhandled event type
}
response.status(200);
return "";
}
);
```
During development, use the Stripe CLI to [observe webhooks and forward them to your application](https://docs.stripe.com/webhooks.md#test-webhook). Run the following in a new terminal while your development app is running:
#### curl
```bash
stripe listen --forward-to localhost:4242/webhook
```
For production, set up a webhook endpoint URL in the Dashboard, or use the [Webhook Endpoints API](https://docs.stripe.com/api/webhook_endpoints.md).
You need to listen to a few events to complete the remaining steps in this guide. See [Subscription events](https://docs.stripe.com/billing/subscriptions/webhooks.md#events) for more details about subscription-specific webhooks.
## Provision access to your service [Client and Server]
Now that the subscription is active, give your user access to your service. To do this, listen to the `customer.subscription.created`, `customer.subscription.updated`, and `customer.subscription.deleted` events. These events pass a subscription object which contains a `status` field indicating whether the subscription is active, past due, or canceled. See [the subscription lifecycle](https://docs.stripe.com/billing/subscriptions/overview.md#subscription-lifecycle) for a complete list of statuses.
In your webhook handler:
1. Verify the subscription status. If it’s `active` then your user has paid for your product.
2. Check the product the customer subscribed to and grant access to your service. Checking the product instead of the price gives you more flexibility if you need to change the pricing or billing interval.
3. Store the `product.id`, `subscription.id` and `subscription.status` in your database along with the `customer.id` you already saved. Check this record when determining which features to enable for the user in your application.
The state of a subscription might change at any point during its lifetime, even if your application doesn’t directly make any calls to Stripe. For example, a renewal might fail due to an expired credit card, which puts the subscription into a past due state. Or, if you implement the [customer portal](https://docs.stripe.com/customer-management.md), a user might cancel their subscription without directly visiting your application. Implementing your handler correctly keeps your application state in sync with Stripe.
## Cancel the subscription [Client and Server]
It’s common to allow customers to cancel their subscriptions. This example adds a cancellation option to the account settings page.
The example collects the subscription ID on the frontend, but your application can get this information from your database for your logged in user.

Account settings with the ability to cancel the subscription
```swift
func cancelSubscription() async {
var request = URLRequest(url: URL(string: "http://localhost:4242/cancel-subscription")!)
request.httpMethod = "POST"
request.setValue("application/json", forHTTPHeaderField: "Content-Type")
request.httpBody = try! JSONEncoder().encode(["subscriptionId": subscription.id])
let (subscriptionResponse, _) = try! await URLSession.shared.data(for: request)
// Update the state to show the subscription has been cancelled
}
```
On the backend, define the endpoint for your app to call.
#### Java
```java
// Don't put any keys in code. See https://docs.stripe.com/keys-best-practices.
// Find your keys at https://dashboard.stripe.com/apikeys.
StripeClient stripeClient = new StripeClient("<>");
post(
"/cancel-subscription",
(request, response) -> {
response.type("application/json");
CancelPostBody postBody = gson.fromJson(
request.body(),
CancelPostBody.class
);
Subscription deletedSubscription =
stripeClient.v1().subscriptions().cancel(postBody.getSubscriptionId());
return deletedSubscription.toJson();
}
);
```
Your backend receives a `customer.subscription.deleted` event.
After the subscription is canceled, update your database to remove the Stripe subscription ID you previously stored, and limit access to your service.
When a subscription is canceled, it can’t be reactivated. Instead, collect updated billing information from your customer, update their default payment method, and create a new subscription with their existing customer record.
## Test your integration
### Test payment methods
Use the following table to test different payment methods and scenarios.
| Payment method | Scenario | How to test |
| --- | --- | --- |
| BECS Direct Debit | Your customer successfully pays with BECS Direct Debit. | Fill out the form using the account number `900123456` and BSB `000000`. The confirmed PaymentIntent initially transitions to `processing`, then transitions to the `succeeded` status three minutes later. |
| BECS Direct Debit | Your customer’s payment fails with an `account_closed` error code. | Fill out the form using the account number `111111113` and BSB `000000`. |
| Credit card | The card payment succeeds and doesn’t require authentication. | Fill out the credit card form using the credit card number `4242 4242 4242 4242` with any expiration, CVC, and postal code. |
| Credit card | The card payment requires *authentication* (Strong Customer Authentication (SCA) is a regulatory requirement in effect as of September 14, 2019, that impacts many European online payments. It requires customers to use two-factor authentication like 3D Secure to verify their purchase). | Fill out the credit card form using the credit card number `4000 0025 0000 3155` with any expiration, CVC, and postal code. |
| Credit card | The card is declined with a decline code like `insufficient_funds`. | Fill out the credit card form using the credit card number `4000 0000 0000 9995` with any expiration, CVC, and postal code. |
| SEPA Direct Debit | Your customer successfully pays with SEPA Direct Debit. | Fill out the form using the account number `AT321904300235473204`. The confirmed PaymentIntent initially transitions to processing, then transitions to the succeeded status three minutes later. |
| SEPA Direct Debit | Your customer’s PaymentIntent status transitions from `processing` to `requires_payment_method`. | Fill out the form using the account number `AT861904300235473202`. |
### Monitor events
Set up webhooks to listen to subscription change events, such as upgrades and cancellations. Learn more about [subscription webhooks](https://docs.stripe.com/billing/subscriptions/webhooks.md). You can view events in the [Dashboard](https://dashboard.stripe.com/test/events) or with the [Stripe CLI](https://docs.stripe.com/webhooks.md#test-webhook).
For more details, see [testing your Billing integration](https://docs.stripe.com/billing/testing.md).
## Optional: Let customers change their plans [Client and Server]
To let your customers change their subscription, collect the price ID of the option they want to change to. Then send the new price ID from the app to a backend endpoint. This example also passes the subscription ID, but you can retrieve it from your database for your logged in user.
```swift
func updateSubscription(priceId: String, subscriptionId: String) async -> SubscriptionsResponse {
var request = URLRequest(url: URL(string: "http://localhost:4242/update-subscription")!)
request.httpMethod = "POST"
request.setValue("application/json", forHTTPHeaderField: "Content-Type")
request.httpBody = try! JSONEncoder().encode(["subscriptionId": subscriptionId, "priceId": priceId])
let (responseData, _) = try! await URLSession.shared.data(for: request)
// SubscriptionsResponse is a Decodable struct conforming to the expected response from your backend
let subscriptionsResponse = try! JSONDecoder().decode(SubscriptionsResponse.self, from: responseData)
return subscriptionsResponse
}
```
On the backend, define the endpoint for your frontend to call, passing the subscription ID and the new price ID. The subscription is now Premium, at 15 USD per month, instead of Basic at 5 USD per month.
#### Java
```java
// Don't put any keys in code. See https://docs.stripe.com/keys-best-practices.
// Find your keys at https://dashboard.stripe.com/apikeys.
StripeClient stripeClient = new StripeClient("<>");
post(
"/update-subscription",
(request, response) -> {
response.type("application/json");
UpdatePostBody postBody = gson.fromJson(
request.body(),
UpdatePostBody.class
);
Subscription subscription = stripeClient.v1().subscriptions().retrieve(
postBody.getSubscriptionId()
);
SubscriptionUpdateParams params = SubscriptionUpdateParams
.builder()
.addItem(
SubscriptionUpdateParams
.Item.builder()
.setId(subscription.getItems().getData().get(0).getId())
.setPrice(postBody.getNewPriceId())
.build()
)
.setCancelAtPeriodEnd(false)
.build();
Subscription updatedSubscription =
stripeClient.v1().subscriptions().update(subscription.getId(), params);
return updatedSubscription.toJson();
}
);
```
Your application receives a `customer.subscription.updated` event.
## Optional: Preview a price change [Client and Server]
When your customer changes their subscription, there’s often an adjustment to the amount they owe, known as a [proration](https://docs.stripe.com/billing/subscriptions/prorations.md). You can use the [create preview invoice endpoint](https://docs.stripe.com/api/invoices/create_preview.md) to display the adjusted amount to your customers.
From the app, pass the preview invoice details to a backend endpoint.
```swift
func createPreviewInvoice(customerId: String, subscriptionId: String, newPriceId: String) async -> InvoiceResponse {
var request = URLRequest(url: URL(string: "http://localhost:4242/create-preview-invoice")!)
request.httpMethod = "POST"
request.setValue("application/json", forHTTPHeaderField: "Content-Type")
request.httpBody = try! JSONEncoder().encode(["subscriptionId": subscriptionId, "customerId": customerId, "newPriceId": newPriceId])
let (responseData, _) = try! await URLSession.shared.data(for: request)
// Invoice is a Decodable struct conforming to the expected response from your backend
let invoiceResponse = try! JSONDecoder().decode(InvoiceResponse.self, from: responseData)
return invoiceResponse
}
```
On the backend, define the endpoint for your frontend to call.
#### Accounts v2
#### Java
```java
// Don't put any keys in code. See https://docs.stripe.com/keys-best-practices.
// Find your keys at https://dashboard.stripe.com/apikeys.
StripeClient stripeClient = new StripeClient("<>");
post(
"/create-preview-invoice",
(request, response) -> {
response.type("application/json");
PreviewInvoicePostBody postBody = gson.fromJson(
request.body(),
PreviewInvoicePostBody.class
);
Subscription subscription = stripeClient.v1().subscriptions().retrieve(
postBody.getSubscriptionId()
);
InvoiceCreatePreviewParams invoiceParams = InvoiceCreatePreviewParams
.builder()
.setCustomerAccount(postBody.getCustomerAccountId())
.setSubscription(postBody.getSubscriptionId())
.setSubscriptionDetails(
InvoiceCreatePreviewParams.SubscriptionDetails.builder()
.addItem(
InvoiceCreatePreviewParams.SubscriptionDetails.Item.builder()
.setId(subscription.getItems().getData().get(0).getId())
.setDeleted(true)
.build()
)
.addItem(
InvoiceCreatePreviewParams.SubscriptionDetails.Item.builder()
.setPrice(dotenv.get(postBody.getNewPriceId()))
.build()
)
.build()
)
.build();
Invoice invoice = stripeClient.v1().invoices().createPreview(invoiceParams);
return invoice.toJson();
}
);
```
#### Customers v1
#### Java
```java
// Don't put any keys in code. See https://docs.stripe.com/keys-best-practices.
// Find your keys at https://dashboard.stripe.com/apikeys.
StripeClient stripeClient = new StripeClient("<>");
post(
"/create-preview-invoice",
(request, response) -> {
response.type("application/json");
PreviewInvoicePostBody postBody = gson.fromJson(
request.body(),
PreviewInvoicePostBody.class
);
Subscription subscription = stripeClient.v1().subscriptions().retrieve(
postBody.getSubscriptionId()
);
InvoiceCreatePreviewParams invoiceParams = InvoiceCreatePreviewParams
.builder()
.setCustomer(postBody.getCustomerId())
.setSubscription(postBody.getSubscriptionId())
.setSubscriptionDetails(
InvoiceCreatePreviewParams.SubscriptionDetails.builder()
.addItem(
InvoiceCreatePreviewParams.SubscriptionDetails.Item.builder()
.setId(subscription.getItems().getData().get(0).getId())
.setDeleted(true)
.build()
)
.addItem(
InvoiceCreatePreviewParams.SubscriptionDetails.Item.builder()
.setPrice(dotenv.get(postBody.getNewPriceId()))
.build()
)
.build()
)
.build();
Invoice invoice = stripeClient.v1().invoices().createPreview(invoiceParams);
return invoice.toJson();
}
);
```
## Optional: Display the customer payment method [Client and Server]
Displaying the brand and last four digits of your customer’s card can help them know which card is being charged, or if they need to update their payment method.
On the front end, send the payment method ID to a back-end endpoint that retrieves the payment method details.
```swift
func retrieveCustomerPaymentMethod(paymentMethodId: String) async -> PaymentMethodResponse {
var request = URLRequest(url: URL(string: "http://localhost:4242/retrieve-customer-payment-method")!)
request.httpMethod = "POST"
request.setValue("application/json", forHTTPHeaderField: "Content-Type")
request.httpBody = try! JSONEncoder().encode(["paymentMethodId": paymentMethodId])
let (responseData, _) = try! await URLSession.shared.data(for: request)
// PaymentMethodResponse is a Decodable struct conforming to the expected response from your backend
let paymentMethodResponse = try! JSONDecoder().decode(PaymentMethodResponse.self, from: responseData)
return paymentMethodResponse
}
```
On the back end, define the endpoint for your app to call.
#### Java
```java
// Don't put any keys in code. See https://docs.stripe.com/keys-best-practices.
// Find your keys at https://dashboard.stripe.com/apikeys.
StripeClient stripeClient = new StripeClient("<>");
post(
"/retrieve-customer-payment-method",
(request, response) -> {
response.type("application/json");
PaymentMethodBody paymentMethodBody = gson.fromJson(
request.body(),
PaymentMethodBody.class
);
PaymentMethod paymentMethod = stripeClient.v1().paymentMethods().retrieve(
paymentMethodBody.getPaymentMethodId()
);
return paymentMethod.toJson();
}
);
```
Example response:
```json
{
"id": "pm_1GcbHY2eZvKYlo2CoqlVxo42",
"object": "payment_method",
"billing_details": {
"address": {
"city": null,
"country": null,
"line1": null,
"line2": null,
"postal_code": null,
"state": null
},
"email": null,
"name": null,
"phone": null
},
"card": {
"brand": "visa",
"checks": {
"address_line1_check": null,
"address_postal_code_check": null,
"cvc_check": "pass"
},
"country": "US",
"exp_month": 8,
"exp_year": 2021,
"fingerprint": "Xt5EWLLDS7FJjR1c",
"funding": "credit",
"generated_from": null,
"last4": "4242",
"three_d_secure_usage": {
"supported": true
},
"wallet": null
},
"created": 1588010536,
"customer": "cus_HAxB7dVQxhoKLh",
"livemode": false,
"metadata": {},
"type": "card"
}
```
> We recommend that you save the `paymentMethod.id` and `last4` in your database, for example, `paymentMethod.id` as `stripeCustomerPaymentMethodId` in your `users` collection or table. You can optionally store `exp_month`, `exp_year`, `fingerprint`, `billing_details` as needed. This is to limit the number of calls you make to Stripe—for both performance efficiency and to avoid possible rate limiting.
## Disclose Stripe to your customers
Stripe collects information on customer interactions with Elements to provide services to you, prevent fraud, and improve its services. This includes using cookies and IP addresses to identify which Elements a customer saw during a single checkout session. You’re responsible for disclosing and obtaining all rights and consents necessary for Stripe to use data in these ways. For more information, visit our [privacy center](https://stripe.com/legal/privacy-center#as-a-business-user-what-notice-do-i-provide-to-my-end-customers-about-stripe).
#### Android
Learn how to sell fixed-price *subscriptions* (A Subscription represents the product details associated with the plan that your customer subscribes to. Allows you to charge the customer on a recurring basis). You’ll use the [Mobile Payment Element](https://docs.stripe.com/payments/accept-a-payment.md) to create a custom payment form that you embed in your app.

> If you’re selling digital products or services that are consumed within your app (for example, subscriptions, in-game currencies, game levels, access to premium content, or unlocking a full version), you must use Apple’s in-app purchase APIs. This rule has some exceptions, including one-to-one personal services and [apps based in specific regions](https://support.stripe.com/questions/changes-to-mobile-app-store-rules). See the [App Store review guidelines](https://developer.apple.com/app-store/review/guidelines/#payments) for more information.
## Build your subscription
This guide shows you how to:
- Model your business by building a product catalog.
- Create a registration process to add customers.
- Create subscriptions and collect payment information.
- Test and monitor the status of payments and subscriptions.
- Let customers change their plan or cancel the subscription.
- Learn how to use [flexible billing mode](https://docs.stripe.com/billing/subscriptions/billing-mode.md) to access enhanced billing behavior and additional features.
## How to model it on Stripe
[Subscriptions](https://docs.stripe.com/api/subscriptions.md) simplify your billing by automatically creating *Invoices* (Invoices are statements of amounts owed by a customer. They track the status of payments from draft through paid or otherwise finalized. Subscriptions automatically generate invoices, or you can manually create a one-off invoice) and [PaymentIntents](https://docs.stripe.com/api/payment_intents.md) for you. To create and activate a subscription, you need to first create a *Product* (Products represent what your business sells—whether that's a good or a service) to model what’s being sold, and a *Price* (Prices define how much and how often to charge for products. This includes how much the product costs, what currency to use, and the interval if the price is for subscriptions) which determines the interval and amount to charge. You also need either a customer-configured `Account` object or a `Customer` object to store *PaymentMethods* (PaymentMethods represent your customer's payment instruments, used with the Payment Intents or Setup Intents APIs) used to make each recurring payment.
#### Accounts v2
A diagram illustrating common billing objects and their relationships (See full diagram at https://docs.stripe.com/billing/subscriptions/build-subscriptions)
#### Customer v1
A diagram illustrating common billing objects and their relationships (See full diagram at https://docs.stripe.com/billing/subscriptions/build-subscriptions)
### API object definitions
| Resource | Definition |
| --- | --- |
| [Account configured as a customer](https://docs.stripe.com/api/v2/core/accounts/create.md#v2_create_accounts-configuration-customer) | Represents a customer in the Accounts v2 API who purchases a subscription. Configure an `Account` object as a customer and associate it with a subscription to make and track recurring charges and to manage the products that they subscribe to. For more information, see the [Use Accounts as customers guide](https://docs.stripe.com/accounts-v2/use-accounts-as-customers.md). |
| [Customer](https://docs.stripe.com/api/customers.md) | Represents a customer in the Customers API who purchases a subscription. Use the `Customer` object associated with a subscription to make and track recurring charges and to manage the products that they subscribe to. |
| [Entitlement](https://docs.stripe.com/api/entitlements/active-entitlement.md) | Represents a customer’s access to a feature included in a service product that they subscribe to. When you create a subscription for a customer’s recurring purchase of a product, an active entitlement is automatically created for each feature associated with that product. When a customer accesses your services, use their active entitlements to enable the features included in their subscription. |
| [Feature](https://docs.stripe.com/api/entitlements/feature.md) | Represents a function or ability that your customers can access when they subscribe to a service product. You can include features in a product by creating ProductFeatures. |
| [Invoice](https://docs.stripe.com/api/invoices.md) | A statement of amounts a customer owes that tracks payment statuses from draft through paid or otherwise finalized. Subscriptions automatically generate invoices. |
| [PaymentIntent](https://docs.stripe.com/api/payment_intents.md) | A way to build dynamic payment flows. A PaymentIntent tracks the lifecycle of a customer checkout flow and triggers additional authentication steps when required by regulatory mandates, custom Radar fraud rules, or redirect-based payment methods. Invoices automatically create PaymentIntents. |
| [PaymentMethod](https://docs.stripe.com/api/payment_methods.md) | A customer’s payment methods that they use to pay for your products. For example, you can store a credit card on a customer-configured `Account` or `Customer` object and use it to make recurring payments for that customer. Typically used with the Payment Intents or Setup Intents APIs. |
| [Price](https://docs.stripe.com/api/prices.md) | Defines the unit price, currency, and billing cycle for a product. |
| [Product](https://docs.stripe.com/api/products.md) | A good or service that your business sells. A service product can include one or more features. |
| [ProductFeature](https://docs.stripe.com/api/product-feature.md) | Represents a single feature’s inclusion in a single product. Each product is associated with a ProductFeature for each feature that it includes, and each feature is associated with a ProductFeature for each product that includes it. |
| [Subscription](https://docs.stripe.com/api/subscriptions.md) | Represents a customer’s scheduled recurring purchase of a product. Use a subscription to collect payments and provide repeated delivery of or continuous access to a product. |
Here’s an example of how products, features, and entitlements work together. Imagine that you want to set up a recurring service that offers two tiers: a standard product with basic functionality, and an advanced product that adds extended functionality.
1. You create two features: `basic_features` and `extended_features`.
2. You create two products: `standard_product` and `advanced_product`.
3. For the standard product, you create one ProductFeature that associates `basic_features` with `standard_product`.
4. For the advanced product, you create two ProductFeatures: one that associates `basic_features` with `advanced_product` and one that associates `extended_features` with `advanced_product`.
A customer, `first_customer`, subscribes to the standard product. When you create the subscription, Stripe automatically creates an Entitlement that associates `first_customer` with `basic_features`.
Another customer, `second_customer`, subscribes to the advanced product. When you create the Subscription, Stripe automatically creates two Entitlements: one that associates `second_customer` with `basic_features`, and one that associates `second_customer` with `extended_features`.
You can determine which features to provision for a customer by [retrieving their active entitlements or listening to the Active Entitlement Summary event](https://docs.stripe.com/billing/entitlements.md#entitlements). You don’t have to retrieve their subscriptions, products, and features.
## Set up Stripe
The [Stripe Android SDK](https://github.com/stripe/stripe-android) is open source and [fully documented](https://stripe.dev/stripe-android/).
To install the SDK, add `stripe-android` to the `dependencies` block of your [app/build.gradle](https://developer.android.com/studio/build/dependencies) file:
#### Kotlin
```kotlin
plugins {
id("com.android.application")
}
android { ... }
dependencies {
// ...
// Stripe Android SDK
implementation("com.stripe:stripe-android:23.11.1")
// Include the financial connections SDK to support US bank account as a payment method
implementation("com.stripe:financial-connections:23.11.1")
}
```
> For details on the latest SDK release and past versions, see the [Releases](https://github.com/stripe/stripe-android/releases) page on GitHub. To receive notifications when a new release is published, [watch releases for the repository](https://docs.github.com/en/github/managing-subscriptions-and-notifications-on-github/configuring-notifications#configuring-your-watch-settings-for-an-individual-repository).
Configure the SDK with your Stripe [publishable key](https://dashboard.stripe.com/apikeys) so that it can make requests to the Stripe API, such as in your `Application` subclass:
#### Kotlin
```kotlin
import com.stripe.android.PaymentConfiguration
class MyApp : Application() {
override fun onCreate() {
super.onCreate()
PaymentConfiguration.init(
applicationContext,
"<>"
)
}
}
```
> Use your [test keys](https://docs.stripe.com/keys.md#obtain-api-keys) while you test and develop, and your [live mode](https://docs.stripe.com/keys.md#test-live-modes) keys when you publish your app.
And then install the Stripe CLI. The CLI provides webhook testing and you can run it to make API calls to Stripe. This guide shows how to use the CLI to set up a pricing model in a later section.
For additional install options, see [Get started with the Stripe CLI](https://docs.stripe.com/stripe-cli.md).
## Create the pricing model [Stripe CLI or Dashboard]
[Recurring pricing models](https://docs.stripe.com/products-prices/pricing-models.md) represent the products or services you sell, how much they cost, what currency you accept for payments, and the service period for subscriptions. To build the pricing model, create [products](https://docs.stripe.com/api/products.md) (what you sell) and [prices](https://docs.stripe.com/api/prices.md) (how much and how often to charge for your products).
This example uses flat-rate pricing with two different service-level options: Basic and Premium. For each service-level option, you need to create a product and a recurring price. To add a one-time charge for something like a setup fee, create a third product with a one-time price.
Each product bills at monthly intervals. The price for the Basic product is 5 USD. The price for the Premium product is 15 USD. See the [flat rate pricing](https://docs.stripe.com/subscriptions/pricing-models/flat-rate-pricing.md) guide for an example with three tiers.
#### Dashboard
Go to the [Add a product](https://dashboard.stripe.com/test/products/create) page and create two products. Add one price for each product, each with a monthly recurring billing period:
- Premium product: Premium service with extra features
- Price: Flat rate | 15 USD
- Basic product: Basic service with minimum features
- Price: Flat rate | 5 USD
After you create the prices, record the price IDs so you can use them in other steps. Price IDs look like this: `price_G0FvDp6vZvdwRZ`.
When you’re ready, use the **Copy to live mode** button at the top right of the page to clone your product from [a sandbox to live mode](https://docs.stripe.com/keys.md#test-live-modes).
#### API
You can use the API to create the [Products](https://docs.stripe.com/api/products.md) and [Prices](https://docs.stripe.com/api/prices.md).
Create the Premium product:
```java
// Don't put any keys in code. See https://docs.stripe.com/keys-best-practices.
// Find your keys at https://dashboard.stripe.com/apikeys.
StripeClient client = new StripeClient("<>");
ProductCreateParams params =
ProductCreateParams.builder()
.setName("Billing Guide: Premium Service")
.setDescription("Premium service with extra features")
.build();
// For SDK versions 29.4.0 or lower, remove '.v1()' from the following line.
Product product = client.v1().products().create(params);
```
Create the Basic product:
```java
// Don't put any keys in code. See https://docs.stripe.com/keys-best-practices.
// Find your keys at https://dashboard.stripe.com/apikeys.
StripeClient client = new StripeClient("<>");
ProductCreateParams params =
ProductCreateParams.builder()
.setName("Billing Guide: Basic Service")
.setDescription("Basic service with minimum features")
.build();
// For SDK versions 29.4.0 or lower, remove '.v1()' from the following line.
Product product = client.v1().products().create(params);
```
Record the product ID for each product. They look like this:
```json
{
"id": "prod_H94k5odtwJXMtQ",
"object": "product",
"active": true,
"attributes": [
],
"created": 1587577341,
"description": "Premium service with extra features",
"images": [
],
"livemode": false,
"metadata": {
},
"name": "Billing Guide: Premium Service",
"statement_descriptor": null,
"type": "service",
"unit_label": null,
"updated": 1587577341
}
```
Use the product IDs to create a price for each product. The [unit_amount](https://docs.stripe.com/api/prices/object.md#price_object-unit_amount) number is in cents, so `1500` = 15 USD, for example.
Create the Premium price:
```java
// Don't put any keys in code. See https://docs.stripe.com/keys-best-practices.
// Find your keys at https://dashboard.stripe.com/apikeys.
StripeClient client = new StripeClient("<>");
PriceCreateParams params =
PriceCreateParams.builder()
.setProduct("{{PREMIUM_PRODUCT_ID}}")
.setUnitAmount(1500L)
.setCurrency("usd")
.setRecurring(
PriceCreateParams.Recurring.builder()
.setInterval(PriceCreateParams.Recurring.Interval.MONTH)
.build()
)
.build();
// For SDK versions 29.4.0 or lower, remove '.v1()' from the following line.
Price price = client.v1().prices().create(params);
```
Create the Basic price:
```java
// Don't put any keys in code. See https://docs.stripe.com/keys-best-practices.
// Find your keys at https://dashboard.stripe.com/apikeys.
StripeClient client = new StripeClient("<>");
PriceCreateParams params =
PriceCreateParams.builder()
.setProduct("{{BASIC_PRODUCT_ID}}")
.setUnitAmount(500L)
.setCurrency("usd")
.setRecurring(
PriceCreateParams.Recurring.builder()
.setInterval(PriceCreateParams.Recurring.Interval.MONTH)
.build()
)
.build();
// For SDK versions 29.4.0 or lower, remove '.v1()' from the following line.
Price price = client.v1().prices().create(params);
```
Record the price ID for each price so you can use them in subsequent steps. They look like this:
```json
{
"id": "price_HGd7M3DV3IMXkC",
"object": "price",
"product": "prod_HGd6W1VUqqXGvr",
"type": "recurring",
"currency": "usd",
"recurring": {
"interval": "month",
"interval_count": 1,
"trial_period_days": null,
"usage_type": "licensed"
},
"active": true,
"billing_scheme": "per_unit",
"created": 1589319695,
"livemode": false,
"lookup_key": null,
"metadata": {},
"nickname": null,
"unit_amount": 1500,
"unit_amount_decimal": "1500",
"tiers": null,
"tiers_mode": null,
"transform_quantity": null
}
```
## Create the customer [Client and Server]
Stripe needs a customer for each subscription. In your application front end, collect any necessary information from your users and pass it to the backend.
You might want to use a Network library to send network requests to your backend. This document uses [okhttp](https://square.github.io/okhttp/), but you can use any library that work best in your project.
```groovy
dependencies {
...
implementation "com.squareup.okhttp3:okhttp:4.12.0"
}
```
If you need to collect address details, the Address Element enables you to collect a shipping or billing address for your customers. For more information on the Address Element, visit the [Address Element](https://docs.stripe.com/elements/address-element.md) page.
```kotlin
import androidx.compose.foundation.layout.Column
import androidx.compose.material3.Button
import androidx.compose.material3.OutlinedTextField
import androidx.compose.material3.Text
import androidx.compose.runtime.Composable
import androidx.compose.runtime.getValue
import androidx.compose.runtime.mutableStateOf
import androidx.compose.runtime.remember
import androidx.compose.runtime.setValue
import kotlinx.coroutines.CoroutineScope
import kotlinx.coroutines.Dispatchers
import kotlinx.coroutines.launch
import okhttp3.MediaType.Companion.toMediaType
import okhttp3.OkHttpClient
import okhttp3.Request
import okhttp3.RequestBody.Companion.toRequestBody
import org.json.JSONObject
@Composable
fun RegisterView() {
var email by remember { mutableStateOf("") }
Column {
OutlinedTextField(value = email,
label = { Text(text = "Email") },
onValueChange = { email = it })
Button(onClick = {
val body = JSONObject().put("email", email).toString()
.toRequestBody("application/json".toMediaType())
val request =
Request.Builder().url("http://10.0.2.2:4567/create-customer").post(body).build()
CoroutineScope(Dispatchers.IO).launch {
OkHttpClient().newCall(request).execute().use { response ->
if (response.isSuccessful) {
println(JSONObject(response.body!!.string()).get("customer"))
}
}
}
}) {
Text(text = "Submit")
}
}
}
```
On the server, create the Stripe customer object.
> #### Use the Accounts v2 API to represent customers
>
> The Accounts v2 API is generally available for Connect users, and in public preview for other Stripe users. If you’re part of the Accounts v2 preview, you need to specify a [preview version](https://docs.stripe.com/api-v2-overview.md#sdk-and-api-versioning) in your code.
>
> To join the Accounts v2 preview, go to [Account previews and features](https://dashboard.stripe.com/settings/previews) in your Dashboard and enable **Reusable payment methods for Global Payouts**.
>
> For most use cases, we recommend [modeling your customers as customer-configured Account objects](https://docs.stripe.com/accounts-v2/use-accounts-as-customers.md) instead of using [Customer](https://docs.stripe.com/api/customers.md) objects.
#### Accounts v2
```java
// Don't put any keys in code. See https://docs.stripe.com/keys-best-practices.
// Find your keys at https://dashboard.stripe.com/apikeys.
StripeClient client = new StripeClient("<>");
AccountCreateParams params =
AccountCreateParams.builder()
.setContactEmail("jenny.rosen@example.com")
.setDisplayName("Jenny Rosen")
.setIdentity(
AccountCreateParams.Identity.builder()
.setIndividual(
AccountCreateParams.Identity.Individual.builder()
.setGivenName("Jenny Rosen")
.setAddress(
AccountCreateParams.Identity.Individual.Address.builder()
.setCity("San Francisco")
.setCountry("US")
.setLine1("123 Main Street")
.setPostalCode("94605")
.setState("CA")
.build()
)
.build()
)
.build()
)
.setConfiguration(
AccountCreateParams.Configuration.builder()
.setCustomer(
AccountCreateParams.Configuration.Customer.builder()
.setCapabilities(
AccountCreateParams.Configuration.Customer.Capabilities.builder()
.setAutomaticIndirectTax(
AccountCreateParams.Configuration.Customer.Capabilities.AutomaticIndirectTax.builder()
.setRequested(true)
.build()
)
.build()
)
.setShipping(
AccountCreateParams.Configuration.Customer.Shipping.builder()
.setAddress(
AccountCreateParams.Configuration.Customer.Shipping.Address.builder()
.setCity("San Francisco")
.setCountry("US")
.setLine1("123 Main Street")
.setPostalCode("94605")
.setState("CA")
.build()
)
.build()
)
.build()
)
.build()
)
.addInclude(AccountCreateParams.Include.CONFIGURATION__CUSTOMER)
.addInclude(AccountCreateParams.Include.IDENTITY)
.build();
Account account = client.v2().core().accounts().create(params);
```
#### Customers v1
```java
// Don't put any keys in code. See https://docs.stripe.com/keys-best-practices.
// Find your keys at https://dashboard.stripe.com/apikeys.
StripeClient client = new StripeClient("<>");
CustomerCreateParams params =
CustomerCreateParams.builder()
.setEmail("jenny.rosen@example.com")
.setName("Jenny Rosen")
.setShipping(
CustomerCreateParams.Shipping.builder()
.setAddress(
CustomerCreateParams.Shipping.Address.builder()
.setCity("San Francisco")
.setCountry("US")
.setLine1("123 Main Street")
.setPostalCode("9460")
.setState("CA")
.build()
)
.setName("Jenny Rosen")
.build()
)
.setAddress(
CustomerCreateParams.Address.builder()
.setCity("San Francisco")
.setCountry("US")
.setLine1("123 Main Street")
.setPostalCode("9460")
.setState("CA")
.build()
)
.build();
// For SDK versions 29.4.0 or lower, remove '.v1()' from the following line.
Customer customer = client.v1().customers().create(params);
```
## Create the subscription [Client and Server]
> If you want to render the Payment Element without first creating a subscription, see [Collect payment details before creating an Intent](https://docs.stripe.com/payments/accept-a-payment-deferred.md?type=subscription).
Let your new customer choose a plan and then create the subscription—in this guide, they choose between Basic and Premium.
In your app, pass the selected price ID and the ID of the customer record to the backend.
#### Accounts v2
```kotlin
import okhttp3.MediaType.Companion.toMediaType
import okhttp3.OkHttpClient
import okhttp3.Request
import okhttp3.RequestBody.Companion.toRequestBody
import org.json.JSONObject
fun createSubscription(priceId: String, customerAccountId: String): SubscriptionResponse? {
val body = JSONObject()
.put("priceId", priceId)
.put("customerAccountId", customerAccountId).toString()
.toRequestBody("application/json".toMediaType())
val request =
Request.Builder().url("http://10.0.2.2:4567/create-subscription").post(body).build()
OkHttpClient().newCall(request).execute().use { response ->
if (response.isSuccessful) {
// SubscriptionsResponse is data class conforming to the expected response from your backend.
// It should include the client_secret, as discussed below.
return Gson().fromJson(response.body!!.string(), SubscriptionResponse::class.java)
}
}
return null
}
```
#### Customers v1
```kotlin
import okhttp3.MediaType.Companion.toMediaType
import okhttp3.OkHttpClient
import okhttp3.Request
import okhttp3.RequestBody.Companion.toRequestBody
import org.json.JSONObject
fun createSubscription(priceId: String, customerId: String): SubscriptionResponse? {
val body = JSONObject()
.put("priceId", priceId)
.put("customerId", customerId).toString()
.toRequestBody("application/json".toMediaType())
val request =
Request.Builder().url("http://10.0.2.2:4567/create-subscription").post(body).build()
OkHttpClient().newCall(request).execute().use { response ->
if (response.isSuccessful) {
// SubscriptionsResponse is data class conforming to the expected response from your backend.
// It should include the client_secret, as discussed below.
return Gson().fromJson(response.body!!.string(), SubscriptionResponse::class.java)
}
}
return null
}
```
On the backend, create the subscription with status `incomplete` using `payment_behavior=default_incomplete`. Then return the `client_secret` from the subscription’s first [payment intent](https://docs.stripe.com/payments/payment-intents.md) to the frontend to complete payment by expanding the[`confirmation_secret`](https://docs.stripe.com/api/invoices/object.md#invoice_object-confirmation_secret) on the latest invoice of the subscription.
To enable [improved subscription behavior](https://docs.stripe.com/billing/subscriptions/billing-mode.md), set `billing_mode[type]` to `flexible`. You must use Stripe API version [2025-06-30.basil](https://docs.stripe.com/changelog/basil.md#2025-06-30.basil) or later.
Set [save_default_payment_method](https://docs.stripe.com/api/subscriptions/object.md#subscription_object-payment_settings-save_default_payment_method) to `on_subscription` to save the payment method as the default for a subscription when a payment succeeds. Saving a default payment method increases the success rate of future subscription payments.
The following example creates a `Subscription` and expands the `confirmation_secret` from its latest invoice in the response. That lets you pass the secret to the front end to confirm the payment.
#### Accounts v2
```java
// Don't put any keys in code. See https://docs.stripe.com/keys-best-practices.
// Find your keys at https://dashboard.stripe.com/apikeys.
StripeClient client = new StripeClient("<>");
SubscriptionCreateParams params =
SubscriptionCreateParams.builder()
.setCustomerAccount("{{CUSTOMERACCOUNT_ID}}")
.addItem(
SubscriptionCreateParams.Item.builder().setPrice("{{PRICE_ID}}").build()
)
.setPaymentBehavior(SubscriptionCreateParams.PaymentBehavior.DEFAULT_INCOMPLETE)
.setPaymentSettings(
SubscriptionCreateParams.PaymentSettings.builder()
.setSaveDefaultPaymentMethod(
SubscriptionCreateParams.PaymentSettings.SaveDefaultPaymentMethod.ON_SUBSCRIPTION
)
.build()
)
.setBillingMode(
SubscriptionCreateParams.BillingMode.builder()
.setType(SubscriptionCreateParams.BillingMode.Type.FLEXIBLE)
.build()
)
.addExpand("latest_invoice.confirmation_secret")
.build();
// For SDK versions 29.4.0 or lower, remove '.v1()' from the following line.
Subscription subscription = client.v1().subscriptions().create(params);
```
#### Customers v1
```java
// Don't put any keys in code. See https://docs.stripe.com/keys-best-practices.
// Find your keys at https://dashboard.stripe.com/apikeys.
StripeClient client = new StripeClient("<>");
SubscriptionCreateParams params =
SubscriptionCreateParams.builder()
.setCustomer("{{CUSTOMER_ID}}")
.addItem(
SubscriptionCreateParams.Item.builder().setPrice("{{PRICE_ID}}").build()
)
.setPaymentBehavior(SubscriptionCreateParams.PaymentBehavior.DEFAULT_INCOMPLETE)
.setPaymentSettings(
SubscriptionCreateParams.PaymentSettings.builder()
.setSaveDefaultPaymentMethod(
SubscriptionCreateParams.PaymentSettings.SaveDefaultPaymentMethod.ON_SUBSCRIPTION
)
.build()
)
.setBillingMode(
SubscriptionCreateParams.BillingMode.builder()
.setType(SubscriptionCreateParams.BillingMode.Type.FLEXIBLE)
.build()
)
.addExpand("latest_invoice.confirmation_secret")
.build();
// For SDK versions 29.4.0 or lower, remove '.v1()' from the following line.
Subscription subscription = client.v1().subscriptions().create(params);
```
> If you’re using a *multi-currency Price* (A single Price object can support multiple currencies. Each purchase uses one of the supported currencies for the Price, depending on how you use the Price in your integration), use the [currency](https://docs.stripe.com/api/subscriptions/create.md#create_subscription-currency) parameter to tell the Subscription which of the Price’s currencies to use. (If you omit the `currency` parameter, then the Subscription uses the Price’s default currency.)
The Subscription is now `inactive` and awaiting payment. The following example response highlights the minimum fields to store, but you can store whatever your application frequently accesses.
#### Accounts v2
```json
{"id": "sub_JgRjFjhKbtD2qz",
"object": "subscription",
"application_fee_percent": null,
"automatic_tax": {
"disabled_reason": null,
"enabled": false,
"liability": "null"
},
"billing_cycle_anchor": 1623873347,
"billing_cycle_anchor_config": null,
"cancel_at": null,
"cancel_at_period_end": false,
"canceled_at": null,
"cancellation_details": {
"comment": null,
"feedback": null,
"reason": null
},
"collection_method": "charge_automatically",
"created": 1623873347,
"currency": "usd","customer_account": identifier("customerAccount"),
"days_until_due": null,
"default_payment_method": null,
"default_source": null,
"default_tax_rates": [
],
"discounts": [],
"ended_at": null,
"invoice_customer_balance_settings": {
"account_tax_ids": null,
"issuer": {
"type": "self"
}
},
"items": {
"object": "list",
"data": [
{
"id": "si_JgRjmS4Ur1khEx",
"object": "subscription_item",
"created": 1623873347,"current_period_end": 1626465347,
"current_period_start": 1623873347,
"discounts": [],
"metadata": {
},
"plan": {
"id": "price_1J32RfGPZ1iASj5zHHp57z7C",
"object": "plan",
"active": true,
"amount": 2000,
"amount_decimal": "2000",
"billing_scheme": "per_unit",
"created": 1623864151,
"currency": "usd",
"interval": "month",
"interval_count": 1,
"livemode": false,
"metadata": {
},
"nickname": null,
"product": "prod_JgPF5xnq7qBun3",
"tiers": null,
"tiers_mode": null,
"transform_usage": null,
"trial_period_days": null,
"usage_type": "licensed"
},
"price": {
"id": "price_1J32RfGPZ1iASj5zHHp57z7C",
"object": "price",
"active": true,
"billing_scheme": "per_unit",
"created": 1623864151,
"currency": "usd",
"livemode": false,
"lookup_key": null,
"metadata": {
},
"nickname": null,
"product": "prod_JgPF5xnq7qBun3",
"recurring": {
"interval": "month",
"interval_count": 1,
"trial_period_days": null,
"usage_type": "licensed"
},
"tiers_mode": null,
"transform_quantity": null,
"type": "recurring",
"unit_amount": 2000,
"unit_amount_decimal": "2000"
},
"quantity": 1,
"subscription": "sub_JgRjFjhKbtD2qz",
"tax_rates": [
]
}
],
"has_more": false,
"total_count": 1,
"url": "/v1/subscription_items?subscription=sub_JgRjFjhKbtD2qz"
},
"latest_invoice": {
"id": "in_1J34pzGPZ1iASj5zB87qdBNZ",
"object": "invoice",
"account_country": "US",
"account_name": "Angelina's Store",
"account_tax_ids": null,
"amount_due": 2000,
"amount_overpaid": 0,
"amount_paid": 0,
"amount_remaining": 2000,
"amount_shipping": 0,
"attempt_count": 0,
"attempted": false,
"auto_advance": false,
"automatic_tax": {
"disabled_reason": null,
"enabled": false,
"liability": null,
"status": null
},
"automatically_finalizes_at": null,
"billing_reason": "subscription_update",
"collection_method": "charge_automatically",
"created": 1623873347,
"currency": "usd",
"custom_fields": null,
"customer_account": identifier("customerAccount"),
"customer_address": null,
"customer_email": "angelina@stripe.com",
"customer_name": null,
"customer_phone": null,
"customer_shipping": {
"address": {
"city": "",
"country": "US",
"line1": "Berry",
"line2": "",
"postal_code": "",
"state": ""
},
"name": "",
"phone": null
},
"customer_tax_exempt": "none",
"customer_tax_ids": [
],
"default_payment_method": null,
"default_source": null,
"default_tax_rates": [
],
"description": null,
"discounts": [],
"due_date": null,
"effective_at": "1623873347",
"ending_balance": 0,
"footer": null,
"from_invoice": null,
"hosted_invoice_url": "https://invoice.stripe.com/i/acct_1By64KGPZ1iASj5z/invst_JgRjzIOILGeq2MKC9T0KtyXnD5udsLp",
"invoice_pdf": "https://pay.stripe.com/invoice/acct_1By64KGPZ1iASj5z/invst_JgRjzIOILGeq2MKC9T0KtyXnD5udsLp/pdf",
"last_finalization_error": null,
"latest_revision": null,
"lines": {
"object": "list",
"data": [
{
"id": "il_1N2CjMBwKQ696a5NeOawRQP2",
"object": "line_item",
"amount": 2000,
"currency": "usd",
"description": "1 × Gold Special (at $20.00 / month)",
"discount_amounts": [
],
"discountable": true,
"discounts": [
],
"invoice": "in_1J34pzGPZ1iASj5zB87qdBNZ",
"livemode": false,
"metadata": {
},
"parent": {
"invoice_item_details": null,
"subscription_item_details":
{
"invoice_item": null,
"proration": false,
"proration_details":
{
"credited_items": null
},
"subscription":
"sub_JgRjFjhKbtD2qz",
"subscription_item":
"si_JgRjmS4Ur1khEx"
},
"type": "subscription_item_details"
},
"period": {
"end": 1626465347,
"start": 1623873347
},
"plan": {
"id": "price_1J32RfGPZ1iASj5zHHp57z7C",
"object": "plan",
"active": true,
"amount": 2000,
"amount_decimal": "2000",
"billing_scheme": "per_unit",
"created": 1623864151,
"currency": "usd",
"interval": "month",
"interval_count": 1,
"livemode": false,
"metadata": {
},
"nickname": null,
"product": "prod_JgPF5xnq7qBun3",
"tiers": null,
"tiers_mode": null,
"transform_usage": null,
"trial_period_days": null,
"usage_type": "licensed"
},
"price": {
"id": "price_1J32RfGPZ1iASj5zHHp57z7C",
"object": "price",
"active": true,
"billing_scheme": "per_unit",
"created": 1623864151,
"currency": "usd",
"livemode": false,
"lookup_key": null,
"metadata": {
},
"nickname": null,
"product": "prod_JgPF5xnq7qBun3",
"recurring": {
"interval": "month",
"interval_count": 1,
"trial_period_days": null,
"usage_type": "licensed"
},
"tiers_mode": null,
"transform_quantity": null,
"type": "recurring",
"unit_amount": 2000,
"unit_amount_decimal": "2000"
},
"quantity": 1,
"taxes": []
}
],
"has_more": false,
"total_count": 1,
"url": "/v1/invoices/in_1J34pzGPZ1iASj5zB87qdBNZ/lines"
},
"livemode": false,
"metadata": {
},
"next_payment_attempt": null,
"number": "C008FC2-0354",
"on_behalf_of": null,
"parent": {
"quote_details": null,
"subscription_details": {
"metadata": {},
"pause_collection": null,
"subscription": "sub_JgRjFjhKbtD2qz"
}
},
"payment_intent": {
"id": "pi_1J34pzGPZ1iASj5zI2nOAaE6",
"object": "payment_intent",
"allowed_source_types": [
"card"
],
"amount": 2000,
"amount_capturable": 0,
"amount_received": 0,
"application": null,
"application_fee_amount": null,
"canceled_at": null,
"cancellation_reason": null,
"capture_method": "automatic",
"charges": {
"object": "list",
"data": [
],
"has_more": false,
"total_count": 0,
"url": "/v1/charges?payment_intent=pi_1J34pzGPZ1iASj5zI2nOAaE6"
},
"client_secret": "pi_1J34pzGPZ1iASj5zI2nOAaE6_secret_l7FN6ldFfXiFmJEumenJ2y2wu",
"confirmation_method": "automatic",
"created": 1623873347,
"currency": "usd",
"customer": "cus_CMqDWO2xODTZqt",
"description": "Subscription creation",
"invoice": "in_1J34pzGPZ1iASj5zB87qdBNZ",
"last_payment_error": null,
"livemode": false,
"metadata": {
},
"next_action": null,
"next_source_action": null,
"on_behalf_of": null,
"payment_method": null,
"payment_method_options": {
"card": {
"installments": null,
"network": null,
"request_three_d_secure": "automatic"
}
},
"payment_method_types": [
"card"
],
"receipt_email": null,
"review": null,
"setup_future_usage": "off_session",
"shipping": null,
"source": "card_1By6iQGPZ1iASj5z7ijKBnXJ",
"statement_descriptor": null,
"statement_descriptor_suffix": null,
"status": "requires_confirmation",
"transfer_data": null,
"transfer_group": null
},
"payment_settings": {
"payment_method_options": null,
"payment_method_types": null,
"save_default_payment_method": "on_subscription"
},
"period_end": 1623873347,
"period_start": 1623873347,
"post_payment_credit_notes_amount": 0,
"pre_payment_credit_notes_amount": 0,
"receipt_number": null,
"starting_balance": 0,
"statement_descriptor": null,
"status": "open",
"status_transitions": {
"finalized_at": 1623873347,
"marked_uncollectible_at": null,
"paid_at": null,
"voided_at": null
},
"subscription": "sub_JgRjFjhKbtD2qz",
"subtotal": 2000,
"tax": null,
"tax_percent": null,
"total": 2000,
"total_discount_amounts": [],
"total_tax_amounts": [],
"transfer_data": null,
"webhooks_delivered_at": 1623873347
},
"livemode": false,
"metadata": {
},
"next_pending_invoice_item_invoice": null,
"pause_collection": null,
"pending_invoice_item_interval": null,
"pending_setup_intent": null,
"pending_update": null,
"plan": {
"id": "price_1J32RfGPZ1iASj5zHHp57z7C",
"object": "plan",
"active": true,
"amount": 2000,
"amount_decimal": "2000",
"billing_scheme": "per_unit",
"created": 1623864151,
"currency": "usd",
"interval": "month",
"interval_count": 1,
"livemode": false,
"metadata": {
},
"nickname": null,
"product": "prod_JgPF5xnq7qBun3",
"tiers": null,
"tiers_mode": null,
"transform_usage": null,
"trial_period_days": null,
"usage_type": "licensed"
},
"quantity": 1,
"schedule": null,
"start": 1623873347,
"start_date": 1623873347,
"status": "incomplete",
"tax_percent": null,
"transfer_data": null,
"trial_end": null,
"trial_start": null
}
```
#### Customers v1
```json
{"id": "sub_JgRjFjhKbtD2qz",
"object": "subscription",
"application_fee_percent": null,
"automatic_tax": {
"disabled_reason": null,
"enabled": false,
"liability": "null"
},
"billing_cycle_anchor": 1623873347,
"billing_cycle_anchor_config": null,
"cancel_at": null,
"cancel_at_period_end": false,
"canceled_at": null,
"cancellation_details": {
"comment": null,
"feedback": null,
"reason": null
},
"collection_method": "charge_automatically",
"created": 1623873347,
"currency": "usd","customer": identifier("customer"),
"days_until_due": null,
"default_payment_method": null,
"default_source": null,
"default_tax_rates": [
],
"discounts": [],
"ended_at": null,
"invoice_customer_balance_settings": {
"account_tax_ids": null,
"issuer": {
"type": "self"
}
},
"items": {
"object": "list",
"data": [
{
"id": "si_JgRjmS4Ur1khEx",
"object": "subscription_item",
"created": 1623873347,"current_period_end": 1626465347,
"current_period_start": 1623873347,
"discounts": [],
"metadata": {
},
"plan": {
"id": "price_1J32RfGPZ1iASj5zHHp57z7C",
"object": "plan",
"active": true,
"amount": 2000,
"amount_decimal": "2000",
"billing_scheme": "per_unit",
"created": 1623864151,
"currency": "usd",
"interval": "month",
"interval_count": 1,
"livemode": false,
"metadata": {
},
"nickname": null,
"product": "prod_JgPF5xnq7qBun3",
"tiers": null,
"tiers_mode": null,
"transform_usage": null,
"trial_period_days": null,
"usage_type": "licensed"
},
"price": {
"id": "price_1J32RfGPZ1iASj5zHHp57z7C",
"object": "price",
"active": true,
"billing_scheme": "per_unit",
"created": 1623864151,
"currency": "usd",
"livemode": false,
"lookup_key": null,
"metadata": {
},
"nickname": null,
"product": "prod_JgPF5xnq7qBun3",
"recurring": {
"interval": "month",
"interval_count": 1,
"trial_period_days": null,
"usage_type": "licensed"
},
"tiers_mode": null,
"transform_quantity": null,
"type": "recurring",
"unit_amount": 2000,
"unit_amount_decimal": "2000"
},
"quantity": 1,
"subscription": "sub_JgRjFjhKbtD2qz",
"tax_rates": [
]
}
],
"has_more": false,
"total_count": 1,
"url": "/v1/subscription_items?subscription=sub_JgRjFjhKbtD2qz"
},
"latest_invoice": {
"id": "in_1J34pzGPZ1iASj5zB87qdBNZ",
"object": "invoice",
"account_country": "US",
"account_name": "Angelina's Store",
"account_tax_ids": null,
"amount_due": 2000,
"amount_overpaid": 0,
"amount_paid": 0,
"amount_remaining": 2000,
"amount_shipping": 0,
"attempt_count": 0,
"attempted": false,
"auto_advance": false,
"automatic_tax": {
"disabled_reason": null,
"enabled": false,
"liability": null,
"status": null
},
"automatically_finalizes_at": null,
"billing_reason": "subscription_update",
"collection_method": "charge_automatically",
"created": 1623873347,
"currency": "usd",
"custom_fields": null,
"customer": identifier("customer"),
"customer_address": null,
"customer_email": "angelina@stripe.com",
"customer_name": null,
"customer_phone": null,
"customer_shipping": {
"address": {
"city": "",
"country": "US",
"line1": "Berry",
"line2": "",
"postal_code": "",
"state": ""
},
"name": "",
"phone": null
},
"customer_tax_exempt": "none",
"customer_tax_ids": [
],
"default_payment_method": null,
"default_source": null,
"default_tax_rates": [
],
"description": null,
"discounts": [],
"due_date": null,
"effective_at": "1623873347",
"ending_balance": 0,
"footer": null,
"from_invoice": null,
"hosted_invoice_url": "https://invoice.stripe.com/i/acct_1By64KGPZ1iASj5z/invst_JgRjzIOILGeq2MKC9T0KtyXnD5udsLp",
"invoice_pdf": "https://pay.stripe.com/invoice/acct_1By64KGPZ1iASj5z/invst_JgRjzIOILGeq2MKC9T0KtyXnD5udsLp/pdf",
"last_finalization_error": null,
"latest_revision": null,
"lines": {
"object": "list",
"data": [
{
"id": "il_1N2CjMBwKQ696a5NeOawRQP2",
"object": "line_item",
"amount": 2000,
"currency": "usd",
"description": "1 × Gold Special (at $20.00 / month)",
"discount_amounts": [
],
"discountable": true,
"discounts": [
],
"invoice": "in_1J34pzGPZ1iASj5zB87qdBNZ",
"livemode": false,
"metadata": {
},
"parent": {
"invoice_item_details": null,
"subscription_item_details":
{
"invoice_item": null,
"proration": false,
"proration_details":
{
"credited_items": null
},
"subscription":
"sub_JgRjFjhKbtD2qz",
"subscription_item":
"si_JgRjmS4Ur1khEx"
},
"type": "subscription_item_details"
},
"period": {
"end": 1626465347,
"start": 1623873347
},
"plan": {
"id": "price_1J32RfGPZ1iASj5zHHp57z7C",
"object": "plan",
"active": true,
"amount": 2000,
"amount_decimal": "2000",
"billing_scheme": "per_unit",
"created": 1623864151,
"currency": "usd",
"interval": "month",
"interval_count": 1,
"livemode": false,
"metadata": {
},
"nickname": null,
"product": "prod_JgPF5xnq7qBun3",
"tiers": null,
"tiers_mode": null,
"transform_usage": null,
"trial_period_days": null,
"usage_type": "licensed"
},
"price": {
"id": "price_1J32RfGPZ1iASj5zHHp57z7C",
"object": "price",
"active": true,
"billing_scheme": "per_unit",
"created": 1623864151,
"currency": "usd",
"livemode": false,
"lookup_key": null,
"metadata": {
},
"nickname": null,
"product": "prod_JgPF5xnq7qBun3",
"recurring": {
"interval": "month",
"interval_count": 1,
"trial_period_days": null,
"usage_type": "licensed"
},
"tiers_mode": null,
"transform_quantity": null,
"type": "recurring",
"unit_amount": 2000,
"unit_amount_decimal": "2000"
},
"quantity": 1,
"taxes": []
}
],
"has_more": false,
"total_count": 1,
"url": "/v1/invoices/in_1J34pzGPZ1iASj5zB87qdBNZ/lines"
},
"livemode": false,
"metadata": {
},
"next_payment_attempt": null,
"number": "C008FC2-0354",
"on_behalf_of": null,
"parent": {
"quote_details": null,
"subscription_details": {
"metadata": {},
"pause_collection": null,
"subscription": "sub_JgRjFjhKbtD2qz"
}
},
"payment_intent": {
"id": "pi_1J34pzGPZ1iASj5zI2nOAaE6",
"object": "payment_intent",
"allowed_source_types": [
"card"
],
"amount": 2000,
"amount_capturable": 0,
"amount_received": 0,
"application": null,
"application_fee_amount": null,
"canceled_at": null,
"cancellation_reason": null,
"capture_method": "automatic",
"charges": {
"object": "list",
"data": [
],
"has_more": false,
"total_count": 0,
"url": "/v1/charges?payment_intent=pi_1J34pzGPZ1iASj5zI2nOAaE6"
},
"client_secret": "pi_1J34pzGPZ1iASj5zI2nOAaE6_secret_l7FN6ldFfXiFmJEumenJ2y2wu",
"confirmation_method": "automatic",
"created": 1623873347,
"currency": "usd",
"customer": "cus_CMqDWO2xODTZqt",
"description": "Subscription creation",
"invoice": "in_1J34pzGPZ1iASj5zB87qdBNZ",
"last_payment_error": null,
"livemode": false,
"metadata": {
},
"next_action": null,
"next_source_action": null,
"on_behalf_of": null,
"payment_method": null,
"payment_method_options": {
"card": {
"installments": null,
"network": null,
"request_three_d_secure": "automatic"
}
},
"payment_method_types": [
"card"
],
"receipt_email": null,
"review": null,
"setup_future_usage": "off_session",
"shipping": null,
"source": "card_1By6iQGPZ1iASj5z7ijKBnXJ",
"statement_descriptor": null,
"statement_descriptor_suffix": null,
"status": "requires_confirmation",
"transfer_data": null,
"transfer_group": null
},
"payment_settings": {
"payment_method_options": null,
"payment_method_types": null,
"save_default_payment_method": "on_subscription"
},
"period_end": 1623873347,
"period_start": 1623873347,
"post_payment_credit_notes_amount": 0,
"pre_payment_credit_notes_amount": 0,
"receipt_number": null,
"starting_balance": 0,
"statement_descriptor": null,
"status": "open",
"status_transitions": {
"finalized_at": 1623873347,
"marked_uncollectible_at": null,
"paid_at": null,
"voided_at": null
},
"subscription": "sub_JgRjFjhKbtD2qz",
"subtotal": 2000,
"tax": null,
"tax_percent": null,
"total": 2000,
"total_discount_amounts": [],
"total_tax_amounts": [],
"transfer_data": null,
"webhooks_delivered_at": 1623873347
},
"livemode": false,
"metadata": {
},
"next_pending_invoice_item_invoice": null,
"pause_collection": null,
"pending_invoice_item_interval": null,
"pending_setup_intent": null,
"pending_update": null,
"plan": {
"id": "price_1J32RfGPZ1iASj5zHHp57z7C",
"object": "plan",
"active": true,
"amount": 2000,
"amount_decimal": "2000",
"billing_scheme": "per_unit",
"created": 1623864151,
"currency": "usd",
"interval": "month",
"interval_count": 1,
"livemode": false,
"metadata": {
},
"nickname": null,
"product": "prod_JgPF5xnq7qBun3",
"tiers": null,
"tiers_mode": null,
"transform_usage": null,
"trial_period_days": null,
"usage_type": "licensed"
},
"quantity": 1,
"schedule": null,
"start": 1623873347,
"start_date": 1623873347,
"status": "incomplete",
"tax_percent": null,
"transfer_data": null,
"trial_end": null,
"trial_start": null
}
```
### Update your server endpoint
Add ephemeral key creation to the subscription endpoint and return it in the response:
#### Accounts v2
#### Java
```java
Map ephemeralKeyParams = new HashMap<>();
ephemeralKeyParams.put("customer_account", customerAccountId);
RequestOptions requestOptions = RequestOptions.builder()
.setStripeVersion("2026-03-25.dahlia")
.build();
EphemeralKey ephemeralKey = EphemeralKey.create(ephemeralKeyParams, requestOptions);
Map response = new HashMap<>();
response.put("subscriptionId", subscription.getId());
response.put("clientSecret", subscription.getLatestInvoiceObject()
.getConfirmationSecret().getClientSecret());
response.put("ephemeralKey", ephemeralKey.getSecret());
response.put("customerAccountId", customerAccountId);
return new Gson().toJson(response);
```
#### Customers v1
#### Java
```java
Map ephemeralKeyParams = new HashMap<>();
ephemeralKeyParams.put("customer", customerId);
RequestOptions requestOptions = RequestOptions.builder()
.setStripeVersion("2025-06-30.basil")
.build();
EphemeralKey ephemeralKey = EphemeralKey.create(ephemeralKeyParams, requestOptions);
Map response = new HashMap<>();
response.put("subscriptionId", subscription.getId());
response.put("clientSecret", subscription.getLatestInvoiceObject()
.getConfirmationSecret().getClientSecret());
response.put("ephemeralKey", ephemeralKey.getSecret());
response.put("customerId", customerId);
return new Gson().toJson(response);
```
### Update your response model
#### Accounts v2
```kotlin
data class SubscriptionsResponse(
val subscriptionId: String,
val clientSecret: String,
val ephemeralKey: String,
val customerAccountId: String
)
```
#### Customers v1
```kotlin
data class SubscriptionsResponse(
val subscriptionId: String,
val clientSecret: String,
val ephemeralKey: String,
val customerId: String
)
```
### Pass the customer configuration to PaymentSheet
#### Accounts v2
Add the following when configuring PaymentSheet:
```kotlin
PaymentSheet.Configuration(
primaryButtonLabel = "Subscribe for $15/month",
merchantDisplayName = "My merchant name",
customerAccount = PaymentSheet.CustomerConfiguration(
id = customerAccountId,
ephemeralKeySecret = ephemeralKey
)
)
```
#### Customers v1
Add the following when configuring PaymentSheet:
```kotlin
PaymentSheet.Configuration(
primaryButtonLabel = "Subscribe for $15/month",
merchantDisplayName = "My merchant name",
customer = PaymentSheet.CustomerConfiguration(
id = customerId,
ephemeralKeySecret = ephemeralKey
)
)
```
## Collect payment information [Client]
Use the [Payment Sheet](https://docs.stripe.com/payments/mobile/payment-sheet.md) to collect payment details and activate the subscription. You can customize Elements to match the look and feel of your application.
The Payment Sheet securely collects all necessary payment details for a wide variety of payments methods. Learn about the [supported payment methods](https://docs.stripe.com/payments/payment-methods/payment-method-support.md#product-support) for Payment Sheet and Subscriptions.
### Add the Payment Element to your app
> This step shows one way to get started, but you can use any [in-app payments integration](https://docs.stripe.com/payments/mobile.md).
Initialize and present the Mobile Payment Element using the PaymentSheet class.
```kotlin
import androidx.compose.material3.Button
import androidx.compose.material3.Text
import androidx.compose.runtime.Composable
import com.stripe.android.paymentsheet.PaymentSheet
import com.stripe.android.paymentsheet.PaymentSheetResult
import com.stripe.android.paymentsheet.rememberPaymentSheet
@Composable
fun SubscribeView(clientSecret: String) {
val paymentSheet = rememberPaymentSheet(::onPaymentSheetResult)
Button(onClick = {
paymentSheet.presentWithPaymentIntent(
clientSecret, PaymentSheet.Configuration(
primaryButtonLabel = "Subscribe for $15/month",
merchantDisplayName = "My merchant name",
// Set `allowsDelayedPaymentMethods` to true if your business handles
// delayed notification payment methods like US bank accounts.
allowsDelayedPaymentMethods = true
)
)
}) {
Text(text = "Subscribe")
}
}
fun onPaymentSheetResult(paymentSheetResult: PaymentSheetResult) {
when (paymentSheetResult) {
is PaymentSheetResult.Canceled -> {
print("Canceled")
}
is PaymentSheetResult.Failed -> {
print("Error: ${paymentSheetResult.error}")
}
is PaymentSheetResult.Completed -> {
// Display for example, an order confirmation screen
print("Completed")
}
}
}
```
The Mobile Payment Element renders a sheet that allows your customer to select a payment method. The form automatically collects all necessary payments details for the payment method that they select.
Setting `allowsDelayedPaymentMethods` to true allows [delayed notification](https://docs.stripe.com/payments/payment-methods.md#payment-notification) payment methods like US bank accounts. For these payment methods, the final payment status isn’t known when the `PaymentSheet` completes, and instead succeeds or fails later. If you support these types of payment methods, inform the customer their order is confirmed and only fulfill their order (for example, ship their product) when the payment is successful.
You can customize the Payment Element to match the design of your app by using the [`appearance` property](https://docs.stripe.com/elements/appearance-api/mobile.md?platform=ios) your `PaymentSheet.Configuration` object.
### Confirm payment
The Mobile Payment Element creates a PaymentMethod and confirms the incomplete Subscription’s first PaymentIntent, causing a charge to be made. If *Strong Customer Authentication* (Strong Customer Authentication (SCA) is a regulatory requirement in effect as of September 14, 2019, that impacts many European online payments. It requires customers to use two-factor authentication like 3D Secure to verify their purchase) (SCA) is required for the payment, the Payment Element handles the authentication process before confirming the PaymentIntent.
## Listen for webhooks [Server]
To complete the integration, you need to process *webhooks* (A webhook is a real-time push notification sent to your application as a JSON payload through HTTPS requests) sent by Stripe. These are events triggered whenever state inside of Stripe changes, such as subscriptions creating new invoices. In your application, set up an HTTP handler to accept a POST request containing the webhook event, and verify the signature of the event:
#### Java
```java
// Don't put any keys in code. See https://docs.stripe.com/keys-best-practices.
// Find your keys at https://dashboard.stripe.com/apikeys.
StripeClient stripeClient = new StripeClient("<>");
post(
"/webhook",
(request, response) -> {
String payload = request.body();
String sigHeader = request.headers("Stripe-Signature");
String endpointSecret = dotenv.get("STRIPE_WEBHOOK_SECRET");
Event event = null;
try {
event = stripeClient.constructEvent(payload, sigHeader, endpointSecret);
} catch (SignatureVerificationException e) {
// Invalid signature
response.status(400);
return "";
}
// Deserialize the nested object inside the event
EventDataObjectDeserializer dataObjectDeserializer = event.getDataObjectDeserializer();
StripeObject stripeObject = null;
if (dataObjectDeserializer.getObject().isPresent()) {
stripeObject = dataObjectDeserializer.getObject().get();
} else {
// Deserialization failed, probably due to an API version mismatch.
// Refer to the Javadoc documentation on `EventDataObjectDeserializer` for
// instructions on how to handle this case, or return an error here.
}
switch (event.getType()) {
case "invoice.paid":
// Used to provision services after the trial has ended.
// The status of the invoice will show up as paid. Store the status in your
// database to reference when a user accesses your service to avoid hitting rate
// limits.
break;
case "invoice.payment_failed":
// If the payment fails or the customer does not have a valid payment method,
// an invoice.payment_failed event is sent, the subscription becomes past_due.
// Use this webhook to notify your user that their payment has
// failed and to retrieve new card details.
break;
case "customer.subscription.deleted":
// handle subscription canceled automatically based
// upon your subscription settings. Or if the user
// cancels it.
break;
default:
// Unhandled event type
}
response.status(200);
return "";
}
);
```
During development, use the Stripe CLI to [observe webhooks and forward them to your application](https://docs.stripe.com/webhooks.md#test-webhook). Run the following in a new terminal while your development app is running:
#### curl
```bash
stripe listen --forward-to localhost:4242/webhook
```
For production, set up a webhook endpoint URL in the Dashboard, or use the [Webhook Endpoints API](https://docs.stripe.com/api/webhook_endpoints.md).
You need to listen to a few events to complete the remaining steps in this guide. See [Subscription events](https://docs.stripe.com/billing/subscriptions/webhooks.md#events) for more details about subscription-specific webhooks.
## Provision access to your service [Client and Server]
Now that the subscription is active, give your user access to your service. To do this, listen to the `customer.subscription.created`, `customer.subscription.updated`, and `customer.subscription.deleted` events. These events pass a subscription object which contains a `status` field indicating whether the subscription is active, past due, or canceled. See [the subscription lifecycle](https://docs.stripe.com/billing/subscriptions/overview.md#subscription-lifecycle) for a complete list of statuses.
In your webhook handler:
1. Verify the subscription status. If it’s `active` then your user has paid for your product.
2. Check the product the customer subscribed to and grant access to your service. Checking the product instead of the price gives you more flexibility if you need to change the pricing or billing interval.
3. Store the `product.id`, `subscription.id` and `subscription.status` in your database along with the `customer.id` you already saved. Check this record when determining which features to enable for the user in your application.
The state of a subscription might change at any point during its lifetime, even if your application doesn’t directly make any calls to Stripe. For example, a renewal might fail due to an expired credit card, which puts the subscription into a past due state. Or, if you implement the [customer portal](https://docs.stripe.com/customer-management.md), a user might cancel their subscription without directly visiting your application. Implementing your handler correctly keeps your application state in sync with Stripe.
## Cancel the subscription [Client and Server]
It’s common to allow customers to cancel their subscriptions. This example adds a cancellation option to the account settings page.
The example collects the subscription ID on the frontend, but your application can get this information from your database for your logged in user.

Account settings with the ability to cancel the subscription
```kotlin
fun cancelSubscription(subscriptionId: String): SubscriptionResponse? {
val body = JSONObject().put("subscriptionId", subscriptionId).toString()
.toRequestBody("application/json".toMediaType())
val request =
Request.Builder().url("http://10.0.2.2:4567/cancel-subscription").post(body).build()
OkHttpClient().newCall(request).execute().use { response ->
if (response.isSuccessful) {
return Gson().fromJson(response.body!!.string(), SubscriptionResponse::class.java)
}
}
return null
}
```
On the backend, define the endpoint for your app to call.
#### Java
```java
// Don't put any keys in code. See https://docs.stripe.com/keys-best-practices.
// Find your keys at https://dashboard.stripe.com/apikeys.
StripeClient stripeClient = new StripeClient("<>");
post(
"/cancel-subscription",
(request, response) -> {
response.type("application/json");
CancelPostBody postBody = gson.fromJson(
request.body(),
CancelPostBody.class
);
Subscription deletedSubscription =
stripeClient.v1().subscriptions().cancel(postBody.getSubscriptionId());
return deletedSubscription.toJson();
}
);
```
Your backend receives a `customer.subscription.deleted` event.
After the subscription is canceled, update your database to remove the Stripe subscription ID you previously stored, and limit access to your service.
When a subscription is canceled, it can’t be reactivated. Instead, collect updated billing information from your customer, update their default payment method, and create a new subscription with their existing customer record.
## Test your integration
### Test payment methods
Use the following table to test different payment methods and scenarios.
| Payment method | Scenario | How to test |
| --- | --- | --- |
| BECS Direct Debit | Your customer successfully pays with BECS Direct Debit. | Fill out the form using the account number `900123456` and BSB `000000`. The confirmed PaymentIntent initially transitions to `processing`, then transitions to the `succeeded` status three minutes later. |
| BECS Direct Debit | Your customer’s payment fails with an `account_closed` error code. | Fill out the form using the account number `111111113` and BSB `000000`. |
| Credit card | The card payment succeeds and doesn’t require authentication. | Fill out the credit card form using the credit card number `4242 4242 4242 4242` with any expiration, CVC, and postal code. |
| Credit card | The card payment requires *authentication* (Strong Customer Authentication (SCA) is a regulatory requirement in effect as of September 14, 2019, that impacts many European online payments. It requires customers to use two-factor authentication like 3D Secure to verify their purchase). | Fill out the credit card form using the credit card number `4000 0025 0000 3155` with any expiration, CVC, and postal code. |
| Credit card | The card is declined with a decline code like `insufficient_funds`. | Fill out the credit card form using the credit card number `4000 0000 0000 9995` with any expiration, CVC, and postal code. |
| SEPA Direct Debit | Your customer successfully pays with SEPA Direct Debit. | Fill out the form using the account number `AT321904300235473204`. The confirmed PaymentIntent initially transitions to processing, then transitions to the succeeded status three minutes later. |
| SEPA Direct Debit | Your customer’s PaymentIntent status transitions from `processing` to `requires_payment_method`. | Fill out the form using the account number `AT861904300235473202`. |
### Monitor events
Set up webhooks to listen to subscription change events, such as upgrades and cancellations. Learn more about [subscription webhooks](https://docs.stripe.com/billing/subscriptions/webhooks.md). You can view events in the [Dashboard](https://dashboard.stripe.com/test/events) or with the [Stripe CLI](https://docs.stripe.com/webhooks.md#test-webhook).
For more details, see [testing your Billing integration](https://docs.stripe.com/billing/testing.md).
## Optional: Let customers change their plans [Client and Server]
To let your customers change their subscription, collect the price ID of the option they want to change to. Then send the new price ID from the app to a backend endpoint. This example also passes the subscription ID, but you can retrieve it from your database for your logged in user.
```kotlin
fun updateSubscription(subscriptionId: String, priceId: String): SubscriptionResponse? {
val body = JSONObject()
.put("priceId", priceId)
.put("subscriptionId", subscriptionId).toString()
.toRequestBody("application/json".toMediaType())
val request =
Request.Builder().url("http://10.0.2.2:4567/update-subscription").post(body).build()
OkHttpClient().newCall(request).execute().use { response ->
if (response.isSuccessful) {
// It should include the client_secret, as discussed below.
return Gson().fromJson(response.body!!.string(), SubscriptionResponse::class.java)
}
}
return null
}
```
On the backend, define the endpoint for your frontend to call, passing the subscription ID and the new price ID. The subscription is now Premium, at 15 USD per month, instead of Basic at 5 USD per month.
#### Java
```java
// Don't put any keys in code. See https://docs.stripe.com/keys-best-practices.
// Find your keys at https://dashboard.stripe.com/apikeys.
StripeClient stripeClient = new StripeClient("<>");
post(
"/update-subscription",
(request, response) -> {
response.type("application/json");
UpdatePostBody postBody = gson.fromJson(
request.body(),
UpdatePostBody.class
);
Subscription subscription = stripeClient.v1().subscriptions().retrieve(
postBody.getSubscriptionId()
);
SubscriptionUpdateParams params = SubscriptionUpdateParams
.builder()
.addItem(
SubscriptionUpdateParams
.Item.builder()
.setId(subscription.getItems().getData().get(0).getId())
.setPrice(postBody.getNewPriceId())
.build()
)
.setCancelAtPeriodEnd(false)
.build();
Subscription updatedSubscription =
stripeClient.v1().subscriptions().update(subscription.getId(), params);
return updatedSubscription.toJson();
}
);
```
Your application receives a `customer.subscription.updated` event.
## Optional: Preview a price change [Client and Server]
When your customer changes their subscription, there’s often an adjustment to the amount they owe, known as a [proration](https://docs.stripe.com/billing/subscriptions/prorations.md). You can use the [create preview invoice endpoint](https://docs.stripe.com/api/invoices/create_preview.md) to display the adjusted amount to your customers.
From the app, pass the preview invoice details to a backend endpoint.
```kotlin
fun createPreviewInvoice(
subscriptionId: String,
priceId: String,
newPriceId: String
): InvoiceResponse? {
val body = JSONObject()
.put("priceId", priceId)
.put("subscriptionId", subscriptionId)
.put("newPriceId", newPriceId).toString()
.toRequestBody("application/json".toMediaType())
val request =
Request.Builder().url("http://10.0.2.2:4567/create-preview-invoice").post(body).build()
OkHttpClient().newCall(request).execute().use { response ->
if (response.isSuccessful) {
// InvoiceResponse is a data class conforming to the expected response from your backend
return Gson().fromJson(response.body!!.string(), InvoiceResponse::class.java)
}
}
return null
}
```
On the backend, define the endpoint for your frontend to call.
#### Accounts v2
#### Java
```java
// Don't put any keys in code. See https://docs.stripe.com/keys-best-practices.
// Find your keys at https://dashboard.stripe.com/apikeys.
StripeClient stripeClient = new StripeClient("<>");
post(
"/create-preview-invoice",
(request, response) -> {
response.type("application/json");
PreviewInvoicePostBody postBody = gson.fromJson(
request.body(),
PreviewInvoicePostBody.class
);
Subscription subscription = stripeClient.v1().subscriptions().retrieve(
postBody.getSubscriptionId()
);
InvoiceCreatePreviewParams invoiceParams = InvoiceCreatePreviewParams
.builder()
.setCustomerAccount(postBody.getCustomerAccountId())
.setSubscription(postBody.getSubscriptionId())
.setSubscriptionDetails(
InvoiceCreatePreviewParams.SubscriptionDetails.builder()
.addItem(
InvoiceCreatePreviewParams.SubscriptionDetails.Item.builder()
.setId(subscription.getItems().getData().get(0).getId())
.setDeleted(true)
.build()
)
.addItem(
InvoiceCreatePreviewParams.SubscriptionDetails.Item.builder()
.setPrice(dotenv.get(postBody.getNewPriceId()))
.build()
)
.build()
)
.build();
Invoice invoice = stripeClient.v1().invoices().createPreview(invoiceParams);
return invoice.toJson();
}
);
```
#### Customers v1
#### Java
```java
// Don't put any keys in code. See https://docs.stripe.com/keys-best-practices.
// Find your keys at https://dashboard.stripe.com/apikeys.
StripeClient stripeClient = new StripeClient("<>");
post(
"/create-preview-invoice",
(request, response) -> {
response.type("application/json");
PreviewInvoicePostBody postBody = gson.fromJson(
request.body(),
PreviewInvoicePostBody.class
);
Subscription subscription = stripeClient.v1().subscriptions().retrieve(
postBody.getSubscriptionId()
);
InvoiceCreatePreviewParams invoiceParams = InvoiceCreatePreviewParams
.builder()
.setCustomer(postBody.getCustomerId())
.setSubscription(postBody.getSubscriptionId())
.setSubscriptionDetails(
InvoiceCreatePreviewParams.SubscriptionDetails.builder()
.addItem(
InvoiceCreatePreviewParams.SubscriptionDetails.Item.builder()
.setId(subscription.getItems().getData().get(0).getId())
.setDeleted(true)
.build()
)
.addItem(
InvoiceCreatePreviewParams.SubscriptionDetails.Item.builder()
.setPrice(dotenv.get(postBody.getNewPriceId()))
.build()
)
.build()
)
.build();
Invoice invoice = stripeClient.v1().invoices().createPreview(invoiceParams);
return invoice.toJson();
}
);
```
## Optional: Display the customer payment method [Client and Server]
Displaying the brand and last four digits of your customer’s card can help them know which card is being charged, or if they need to update their payment method.
On the front end, send the payment method ID to a back-end endpoint that retrieves the payment method details.
```kotlin
fun retrieveCustomerPaymentMethod(paymentMethodId: String): PaymentMethodResponse? {
val body = JSONObject()
.put("paymentMethodId", paymentMethodId).toString()
.toRequestBody("application/json".toMediaType())
val request =
Request.Builder().url("http://10.0.2.2:4567/retrieve-customer-payment-method").post(body)
.build()
OkHttpClient().newCall(request).execute().use { response ->
if (response.isSuccessful) {
// PaymentMethodResponse is a data class conforming to the expected response from your backend
return Gson().fromJson(response.body!!.string(), PaymentMethodResponse::class.java)
}
}
return null
}
```
On the back end, define the endpoint for your app to call.
#### Java
```java
// Don't put any keys in code. See https://docs.stripe.com/keys-best-practices.
// Find your keys at https://dashboard.stripe.com/apikeys.
StripeClient stripeClient = new StripeClient("<>");
post(
"/retrieve-customer-payment-method",
(request, response) -> {
response.type("application/json");
PaymentMethodBody paymentMethodBody = gson.fromJson(
request.body(),
PaymentMethodBody.class
);
PaymentMethod paymentMethod = stripeClient.v1().paymentMethods().retrieve(
paymentMethodBody.getPaymentMethodId()
);
return paymentMethod.toJson();
}
);
```
Example response:
```json
{
"id": "pm_1GcbHY2eZvKYlo2CoqlVxo42",
"object": "payment_method",
"billing_details": {
"address": {
"city": null,
"country": null,
"line1": null,
"line2": null,
"postal_code": null,
"state": null
},
"email": null,
"name": null,
"phone": null
},
"card": {
"brand": "visa",
"checks": {
"address_line1_check": null,
"address_postal_code_check": null,
"cvc_check": "pass"
},
"country": "US",
"exp_month": 8,
"exp_year": 2021,
"fingerprint": "Xt5EWLLDS7FJjR1c",
"funding": "credit",
"generated_from": null,
"last4": "4242",
"three_d_secure_usage": {
"supported": true
},
"wallet": null
},
"created": 1588010536,
"customer": "cus_HAxB7dVQxhoKLh",
"livemode": false,
"metadata": {},
"type": "card"
}
```
> We recommend that you save the `paymentMethod.id` and `last4` in your database, for example, `paymentMethod.id` as `stripeCustomerPaymentMethodId` in your `users` collection or table. You can optionally store `exp_month`, `exp_year`, `fingerprint`, `billing_details` as needed. This is to limit the number of calls you make to Stripe—for both performance efficiency and to avoid possible rate limiting.
## Disclose Stripe to your customers
Stripe collects information on customer interactions with Elements to provide services to you, prevent fraud, and improve its services. This includes using cookies and IP addresses to identify which Elements a customer saw during a single checkout session. You’re responsible for disclosing and obtaining all rights and consents necessary for Stripe to use data in these ways. For more information, visit our [privacy center](https://stripe.com/legal/privacy-center#as-a-business-user-what-notice-do-i-provide-to-my-end-customers-about-stripe).
#### React Native
Learn how to sell fixed-price *subscriptions* (A Subscription represents the product details associated with the plan that your customer subscribes to. Allows you to charge the customer on a recurring basis). You’ll use the [Mobile Payment Element](https://docs.stripe.com/payments/accept-a-payment.md) to create a custom payment form that you embed in your app.

> If you’re selling digital products or services that are consumed within your app (for example, subscriptions, in-game currencies, game levels, access to premium content, or unlocking a full version), you must use Apple’s in-app purchase APIs. This rule has some exceptions, including one-to-one personal services and [apps based in specific regions](https://support.stripe.com/questions/changes-to-mobile-app-store-rules). See the [App Store review guidelines](https://developer.apple.com/app-store/review/guidelines/#payments) for more information.
## Build your subscription
This guide shows you how to:
- Model your business by building a product catalog.
- Create a registration process to add customers.
- Create subscriptions and collect payment information.
- Test and monitor the status of payments and subscriptions.
- Let customers change their plan or cancel the subscription.
- Learn how to use [flexible billing mode](https://docs.stripe.com/billing/subscriptions/billing-mode.md) to access enhanced billing behavior and additional features.
## How to model it on Stripe
[Subscriptions](https://docs.stripe.com/api/subscriptions.md) simplify your billing by automatically creating *Invoices* (Invoices are statements of amounts owed by a customer. They track the status of payments from draft through paid or otherwise finalized. Subscriptions automatically generate invoices, or you can manually create a one-off invoice) and [PaymentIntents](https://docs.stripe.com/api/payment_intents.md) for you. To create and activate a subscription, you need to first create a *Product* (Products represent what your business sells—whether that's a good or a service) to model what’s being sold, and a *Price* (Prices define how much and how often to charge for products. This includes how much the product costs, what currency to use, and the interval if the price is for subscriptions) which determines the interval and amount to charge. You also need either a customer-configured `Account` object or a `Customer` object to store *PaymentMethods* (PaymentMethods represent your customer's payment instruments, used with the Payment Intents or Setup Intents APIs) used to make each recurring payment.
#### Accounts v2
A diagram illustrating common billing objects and their relationships (See full diagram at https://docs.stripe.com/billing/subscriptions/build-subscriptions)
#### Customer v1
A diagram illustrating common billing objects and their relationships (See full diagram at https://docs.stripe.com/billing/subscriptions/build-subscriptions)
### API object definitions
| Resource | Definition |
| --- | --- |
| [Account configured as a customer](https://docs.stripe.com/api/v2/core/accounts/create.md#v2_create_accounts-configuration-customer) | Represents a customer in the Accounts v2 API who purchases a subscription. Configure an `Account` object as a customer and associate it with a subscription to make and track recurring charges and to manage the products that they subscribe to. For more information, see the [Use Accounts as customers guide](https://docs.stripe.com/accounts-v2/use-accounts-as-customers.md). |
| [Customer](https://docs.stripe.com/api/customers.md) | Represents a customer in the Customers API who purchases a subscription. Use the `Customer` object associated with a subscription to make and track recurring charges and to manage the products that they subscribe to. |
| [Entitlement](https://docs.stripe.com/api/entitlements/active-entitlement.md) | Represents a customer’s access to a feature included in a service product that they subscribe to. When you create a subscription for a customer’s recurring purchase of a product, an active entitlement is automatically created for each feature associated with that product. When a customer accesses your services, use their active entitlements to enable the features included in their subscription. |
| [Feature](https://docs.stripe.com/api/entitlements/feature.md) | Represents a function or ability that your customers can access when they subscribe to a service product. You can include features in a product by creating ProductFeatures. |
| [Invoice](https://docs.stripe.com/api/invoices.md) | A statement of amounts a customer owes that tracks payment statuses from draft through paid or otherwise finalized. Subscriptions automatically generate invoices. |
| [PaymentIntent](https://docs.stripe.com/api/payment_intents.md) | A way to build dynamic payment flows. A PaymentIntent tracks the lifecycle of a customer checkout flow and triggers additional authentication steps when required by regulatory mandates, custom Radar fraud rules, or redirect-based payment methods. Invoices automatically create PaymentIntents. |
| [PaymentMethod](https://docs.stripe.com/api/payment_methods.md) | A customer’s payment methods that they use to pay for your products. For example, you can store a credit card on a customer-configured `Account` or `Customer` object and use it to make recurring payments for that customer. Typically used with the Payment Intents or Setup Intents APIs. |
| [Price](https://docs.stripe.com/api/prices.md) | Defines the unit price, currency, and billing cycle for a product. |
| [Product](https://docs.stripe.com/api/products.md) | A good or service that your business sells. A service product can include one or more features. |
| [ProductFeature](https://docs.stripe.com/api/product-feature.md) | Represents a single feature’s inclusion in a single product. Each product is associated with a ProductFeature for each feature that it includes, and each feature is associated with a ProductFeature for each product that includes it. |
| [Subscription](https://docs.stripe.com/api/subscriptions.md) | Represents a customer’s scheduled recurring purchase of a product. Use a subscription to collect payments and provide repeated delivery of or continuous access to a product. |
Here’s an example of how products, features, and entitlements work together. Imagine that you want to set up a recurring service that offers two tiers: a standard product with basic functionality, and an advanced product that adds extended functionality.
1. You create two features: `basic_features` and `extended_features`.
2. You create two products: `standard_product` and `advanced_product`.
3. For the standard product, you create one ProductFeature that associates `basic_features` with `standard_product`.
4. For the advanced product, you create two ProductFeatures: one that associates `basic_features` with `advanced_product` and one that associates `extended_features` with `advanced_product`.
A customer, `first_customer`, subscribes to the standard product. When you create the subscription, Stripe automatically creates an Entitlement that associates `first_customer` with `basic_features`.
Another customer, `second_customer`, subscribes to the advanced product. When you create the Subscription, Stripe automatically creates two Entitlements: one that associates `second_customer` with `basic_features`, and one that associates `second_customer` with `extended_features`.
You can determine which features to provision for a customer by [retrieving their active entitlements or listening to the Active Entitlement Summary event](https://docs.stripe.com/billing/entitlements.md#entitlements). You don’t have to retrieve their subscriptions, products, and features.
## Set up Stripe
The [React Native SDK](https://github.com/stripe/stripe-react-native) is open source and fully documented. Internally, it uses the [native iOS](https://github.com/stripe/stripe-ios) and [Android](https://github.com/stripe/stripe-android) SDKs. To install Stripe’s React Native SDK, run one of the following commands in your project’s directory (depending on which package manager you use):
#### yarn
```bash
yarn add @stripe/stripe-react-native
```
#### npm
```bash
npm install @stripe/stripe-react-native
```
Next, install some other necessary dependencies:
- For iOS, go to the **ios** directory and run `pod install` to ensure that you also install the required native dependencies.
- For Android, there are no more dependencies to install.
> We recommend following the [official TypeScript guide](https://reactnative.dev/docs/typescript#adding-typescript-to-an-existing-project) to add TypeScript support.
### Stripe initialization
To initialize Stripe in your React Native app, either wrap your payment screen with the `StripeProvider` component, or use the `initStripe` initialization method. Only the API [publishable key](https://docs.stripe.com/keys.md#obtain-api-keys) in `publishableKey` is required. The following example shows how to initialize Stripe using the `StripeProvider` component.
```jsx
import { useState, useEffect } from 'react';
import { StripeProvider } from '@stripe/stripe-react-native';
function App() {
const [publishableKey, setPublishableKey] = useState('');
const fetchPublishableKey = async () => {
const key = await fetchKey(); // fetch key from your server here
setPublishableKey(key);
};
useEffect(() => {
fetchPublishableKey();
}, []);
return (
{/* Your app code here */}
);
}
```
> Use your API [test keys](https://docs.stripe.com/keys.md#obtain-api-keys) while you test and develop, and your [live mode](https://docs.stripe.com/keys.md#test-live-modes) keys when you publish your app.
And then install the Stripe CLI. The CLI provides webhook testing and you can run it to make API calls to Stripe. This guide shows how to use the CLI to set up a pricing model in a later section.
For additional install options, see [Get started with the Stripe CLI](https://docs.stripe.com/stripe-cli.md).
## Create the pricing model [Stripe CLI or Dashboard]
[Recurring pricing models](https://docs.stripe.com/products-prices/pricing-models.md) represent the products or services you sell, how much they cost, what currency you accept for payments, and the service period for subscriptions. To build the pricing model, create [products](https://docs.stripe.com/api/products.md) (what you sell) and [prices](https://docs.stripe.com/api/prices.md) (how much and how often to charge for your products).
This example uses flat-rate pricing with two different service-level options: Basic and Premium. For each service-level option, you need to create a product and a recurring price. To add a one-time charge for something like a setup fee, create a third product with a one-time price.
Each product bills at monthly intervals. The price for the Basic product is 5 USD. The price for the Premium product is 15 USD. See the [flat rate pricing](https://docs.stripe.com/subscriptions/pricing-models/flat-rate-pricing.md) guide for an example with three tiers.
#### Dashboard
Go to the [Add a product](https://dashboard.stripe.com/test/products/create) page and create two products. Add one price for each product, each with a monthly recurring billing period:
- Premium product: Premium service with extra features
- Price: Flat rate | 15 USD
- Basic product: Basic service with minimum features
- Price: Flat rate | 5 USD
After you create the prices, record the price IDs so you can use them in other steps. Price IDs look like this: `price_G0FvDp6vZvdwRZ`.
When you’re ready, use the **Copy to live mode** button at the top right of the page to clone your product from [a sandbox to live mode](https://docs.stripe.com/keys.md#test-live-modes).
#### API
You can use the API to create the [Products](https://docs.stripe.com/api/products.md) and [Prices](https://docs.stripe.com/api/prices.md).
Create the Premium product:
```java
// Don't put any keys in code. See https://docs.stripe.com/keys-best-practices.
// Find your keys at https://dashboard.stripe.com/apikeys.
StripeClient client = new StripeClient("<>");
ProductCreateParams params =
ProductCreateParams.builder()
.setName("Billing Guide: Premium Service")
.setDescription("Premium service with extra features")
.build();
// For SDK versions 29.4.0 or lower, remove '.v1()' from the following line.
Product product = client.v1().products().create(params);
```
Create the Basic product:
```java
// Don't put any keys in code. See https://docs.stripe.com/keys-best-practices.
// Find your keys at https://dashboard.stripe.com/apikeys.
StripeClient client = new StripeClient("<>");
ProductCreateParams params =
ProductCreateParams.builder()
.setName("Billing Guide: Basic Service")
.setDescription("Basic service with minimum features")
.build();
// For SDK versions 29.4.0 or lower, remove '.v1()' from the following line.
Product product = client.v1().products().create(params);
```
Record the product ID for each product. They look like this:
```json
{
"id": "prod_H94k5odtwJXMtQ",
"object": "product",
"active": true,
"attributes": [
],
"created": 1587577341,
"description": "Premium service with extra features",
"images": [
],
"livemode": false,
"metadata": {
},
"name": "Billing Guide: Premium Service",
"statement_descriptor": null,
"type": "service",
"unit_label": null,
"updated": 1587577341
}
```
Use the product IDs to create a price for each product. The [unit_amount](https://docs.stripe.com/api/prices/object.md#price_object-unit_amount) number is in cents, so `1500` = 15 USD, for example.
Create the Premium price:
```java
// Don't put any keys in code. See https://docs.stripe.com/keys-best-practices.
// Find your keys at https://dashboard.stripe.com/apikeys.
StripeClient client = new StripeClient("<>");
PriceCreateParams params =
PriceCreateParams.builder()
.setProduct("{{PREMIUM_PRODUCT_ID}}")
.setUnitAmount(1500L)
.setCurrency("usd")
.setRecurring(
PriceCreateParams.Recurring.builder()
.setInterval(PriceCreateParams.Recurring.Interval.MONTH)
.build()
)
.build();
// For SDK versions 29.4.0 or lower, remove '.v1()' from the following line.
Price price = client.v1().prices().create(params);
```
Create the Basic price:
```java
// Don't put any keys in code. See https://docs.stripe.com/keys-best-practices.
// Find your keys at https://dashboard.stripe.com/apikeys.
StripeClient client = new StripeClient("<>");
PriceCreateParams params =
PriceCreateParams.builder()
.setProduct("{{BASIC_PRODUCT_ID}}")
.setUnitAmount(500L)
.setCurrency("usd")
.setRecurring(
PriceCreateParams.Recurring.builder()
.setInterval(PriceCreateParams.Recurring.Interval.MONTH)
.build()
)
.build();
// For SDK versions 29.4.0 or lower, remove '.v1()' from the following line.
Price price = client.v1().prices().create(params);
```
Record the price ID for each price so you can use them in subsequent steps. They look like this:
```json
{
"id": "price_HGd7M3DV3IMXkC",
"object": "price",
"product": "prod_HGd6W1VUqqXGvr",
"type": "recurring",
"currency": "usd",
"recurring": {
"interval": "month",
"interval_count": 1,
"trial_period_days": null,
"usage_type": "licensed"
},
"active": true,
"billing_scheme": "per_unit",
"created": 1589319695,
"livemode": false,
"lookup_key": null,
"metadata": {},
"nickname": null,
"unit_amount": 1500,
"unit_amount_decimal": "1500",
"tiers": null,
"tiers_mode": null,
"transform_quantity": null
}
```
## Create the customer [Client and Server]
Stripe needs a customer for each subscription. In your application front end, collect any necessary information from your users and pass it to the backend.
If you need to collect address details, the Address Element enables you to collect a shipping or billing address for your customers. For more information on the Address Element, visit the [Address Element](https://docs.stripe.com/elements/address-element.md) page.
```javascript
import React from 'react';
import {View, TextInput, StyleSheet, Button, Platform} from 'react-native';
function RegisterView() {
const [email, setEmail] = React.useState('');
const createCustomer = async () => {
const apiEndpoint =
Platform.OS === 'ios' ? 'http://localhost:4242' : 'http://10.0.2.2:4567';
const response = await fetch(`${apiEndpoint}/create-customer`, {
method: 'POST',
headers: {
'Content-Type': 'application/json',
},
body: JSON.stringify({
email: email,
}),
});
if (response.status === 200) {
const customer = await response.json();
console.log(customer);
}
};
return (
);
}
const styles = StyleSheet.create({
input: {
height: 40,
margin: 12,
borderWidth: 1,
padding: 10,
},
});
export default RegisterView;
```
On the server, create the Stripe customer object.
> #### Use the Accounts v2 API to represent customers
>
> The Accounts v2 API is generally available for Connect users, and in public preview for other Stripe users. If you’re part of the Accounts v2 preview, you need to specify a [preview version](https://docs.stripe.com/api-v2-overview.md#sdk-and-api-versioning) in your code.
>
> To join the Accounts v2 preview, go to [Account previews and features](https://dashboard.stripe.com/settings/previews) in your Dashboard and enable **Reusable payment methods for Global Payouts**.
>
> For most use cases, we recommend [modeling your customers as customer-configured Account objects](https://docs.stripe.com/accounts-v2/use-accounts-as-customers.md) instead of using [Customer](https://docs.stripe.com/api/customers.md) objects.
#### Accounts v2
```java
// Don't put any keys in code. See https://docs.stripe.com/keys-best-practices.
// Find your keys at https://dashboard.stripe.com/apikeys.
StripeClient client = new StripeClient("<>");
AccountCreateParams params =
AccountCreateParams.builder()
.setContactEmail("jenny.rosen@example.com")
.setDisplayName("Jenny Rosen")
.setIdentity(
AccountCreateParams.Identity.builder()
.setIndividual(
AccountCreateParams.Identity.Individual.builder()
.setGivenName("Jenny Rosen")
.setAddress(
AccountCreateParams.Identity.Individual.Address.builder()
.setCity("San Francisco")
.setCountry("US")
.setLine1("123 Main Street")
.setPostalCode("94605")
.setState("CA")
.build()
)
.build()
)
.build()
)
.setConfiguration(
AccountCreateParams.Configuration.builder()
.setCustomer(
AccountCreateParams.Configuration.Customer.builder()
.setCapabilities(
AccountCreateParams.Configuration.Customer.Capabilities.builder()
.setAutomaticIndirectTax(
AccountCreateParams.Configuration.Customer.Capabilities.AutomaticIndirectTax.builder()
.setRequested(true)
.build()
)
.build()
)
.setShipping(
AccountCreateParams.Configuration.Customer.Shipping.builder()
.setAddress(
AccountCreateParams.Configuration.Customer.Shipping.Address.builder()
.setCity("San Francisco")
.setCountry("US")
.setLine1("123 Main Street")
.setPostalCode("94605")
.setState("CA")
.build()
)
.build()
)
.build()
)
.build()
)
.addInclude(AccountCreateParams.Include.CONFIGURATION__CUSTOMER)
.addInclude(AccountCreateParams.Include.IDENTITY)
.build();
Account account = client.v2().core().accounts().create(params);
```
#### Customers v1
```java
// Don't put any keys in code. See https://docs.stripe.com/keys-best-practices.
// Find your keys at https://dashboard.stripe.com/apikeys.
StripeClient client = new StripeClient("<>");
CustomerCreateParams params =
CustomerCreateParams.builder()
.setEmail("jenny.rosen@example.com")
.setName("Jenny Rosen")
.setShipping(
CustomerCreateParams.Shipping.builder()
.setAddress(
CustomerCreateParams.Shipping.Address.builder()
.setCity("San Francisco")
.setCountry("US")
.setLine1("123 Main Street")
.setPostalCode("9460")
.setState("CA")
.build()
)
.setName("Jenny Rosen")
.build()
)
.setAddress(
CustomerCreateParams.Address.builder()
.setCity("San Francisco")
.setCountry("US")
.setLine1("123 Main Street")
.setPostalCode("9460")
.setState("CA")
.build()
)
.build();
// For SDK versions 29.4.0 or lower, remove '.v1()' from the following line.
Customer customer = client.v1().customers().create(params);
```
## Create the subscription [Client and Server]
> If you want to render the Payment Element without first creating a subscription, see [Collect payment details before creating an Intent](https://docs.stripe.com/payments/accept-a-payment-deferred.md?type=subscription).
Let your new customer choose a plan and then create the subscription—in this guide, they choose between Basic and Premium.
In your app, pass the selected price ID and the ID of the customer record to the backend.
#### Accounts v2
```javascript
const createSubscription = async (priceId, customerAccountId) => {
const apiEndpoint =
Platform.OS === 'ios' ? 'http://localhost:4242' : 'http://10.0.2.2:4567';
const response = await fetch(`${apiEndpoint}/create-subscription`, {
method: 'POST',
headers: {
'Content-Type': 'application/json',
},
body: JSON.stringify({
priceId: priceId,
customerAccountId: customerAccountId,
}),
});
if (response.status === 200) {
const subscription = await response.json();
return subscription;
}
};
```
#### Customers v1
```javascript
const createSubscription = async (priceId, customerId) => {
const apiEndpoint =
Platform.OS === 'ios' ? 'http://localhost:4242' : 'http://10.0.2.2:4567';
const response = await fetch(`${apiEndpoint}/create-subscription`, {
method: 'POST',
headers: {
'Content-Type': 'application/json',
},
body: JSON.stringify({
priceId: priceId,
customerId: customerId,
}),
});
if (response.status === 200) {
const subscription = await response.json();
return subscription;
}
};
```
On the backend, create the subscription with status `incomplete` using `payment_behavior=default_incomplete`. Then return the `client_secret` from the subscription’s first [payment intent](https://docs.stripe.com/payments/payment-intents.md) to the frontend to complete payment by expanding the[`confirmation_secret`](https://docs.stripe.com/api/invoices/object.md#invoice_object-confirmation_secret) on the latest invoice of the subscription.
To enable [improved subscription behavior](https://docs.stripe.com/billing/subscriptions/billing-mode.md), set `billing_mode[type]` to `flexible`. You must use Stripe API version [2025-06-30.basil](https://docs.stripe.com/changelog/basil.md#2025-06-30.basil) or later.
Set [save_default_payment_method](https://docs.stripe.com/api/subscriptions/object.md#subscription_object-payment_settings-save_default_payment_method) to `on_subscription` to save the payment method as the default for a subscription when a payment succeeds. Saving a default payment method increases the success rate of future subscription payments.
The following example creates a `Subscription` and expands the `confirmation_secret` from its latest invoice in the response. That lets you pass the secret to the front end to confirm the payment.
#### Accounts v2
```java
// Don't put any keys in code. See https://docs.stripe.com/keys-best-practices.
// Find your keys at https://dashboard.stripe.com/apikeys.
StripeClient client = new StripeClient("<>");
SubscriptionCreateParams params =
SubscriptionCreateParams.builder()
.setCustomerAccount("{{CUSTOMERACCOUNT_ID}}")
.addItem(
SubscriptionCreateParams.Item.builder().setPrice("{{PRICE_ID}}").build()
)
.setPaymentBehavior(SubscriptionCreateParams.PaymentBehavior.DEFAULT_INCOMPLETE)
.setPaymentSettings(
SubscriptionCreateParams.PaymentSettings.builder()
.setSaveDefaultPaymentMethod(
SubscriptionCreateParams.PaymentSettings.SaveDefaultPaymentMethod.ON_SUBSCRIPTION
)
.build()
)
.setBillingMode(
SubscriptionCreateParams.BillingMode.builder()
.setType(SubscriptionCreateParams.BillingMode.Type.FLEXIBLE)
.build()
)
.addExpand("latest_invoice.confirmation_secret")
.build();
// For SDK versions 29.4.0 or lower, remove '.v1()' from the following line.
Subscription subscription = client.v1().subscriptions().create(params);
```
#### Customers v1
```java
// Don't put any keys in code. See https://docs.stripe.com/keys-best-practices.
// Find your keys at https://dashboard.stripe.com/apikeys.
StripeClient client = new StripeClient("<>");
SubscriptionCreateParams params =
SubscriptionCreateParams.builder()
.setCustomer("{{CUSTOMER_ID}}")
.addItem(
SubscriptionCreateParams.Item.builder().setPrice("{{PRICE_ID}}").build()
)
.setPaymentBehavior(SubscriptionCreateParams.PaymentBehavior.DEFAULT_INCOMPLETE)
.setPaymentSettings(
SubscriptionCreateParams.PaymentSettings.builder()
.setSaveDefaultPaymentMethod(
SubscriptionCreateParams.PaymentSettings.SaveDefaultPaymentMethod.ON_SUBSCRIPTION
)
.build()
)
.setBillingMode(
SubscriptionCreateParams.BillingMode.builder()
.setType(SubscriptionCreateParams.BillingMode.Type.FLEXIBLE)
.build()
)
.addExpand("latest_invoice.confirmation_secret")
.build();
// For SDK versions 29.4.0 or lower, remove '.v1()' from the following line.
Subscription subscription = client.v1().subscriptions().create(params);
```
> If you’re using a *multi-currency Price* (A single Price object can support multiple currencies. Each purchase uses one of the supported currencies for the Price, depending on how you use the Price in your integration), use the [currency](https://docs.stripe.com/api/subscriptions/create.md#create_subscription-currency) parameter to tell the Subscription which of the Price’s currencies to use. (If you omit the `currency` parameter, then the Subscription uses the Price’s default currency.)
The Subscription is now `inactive` and awaiting payment. The following example response highlights the minimum fields to store, but you can store whatever your application frequently accesses.
#### Accounts v2
```json
{"id": "sub_JgRjFjhKbtD2qz",
"object": "subscription",
"application_fee_percent": null,
"automatic_tax": {
"disabled_reason": null,
"enabled": false,
"liability": "null"
},
"billing_cycle_anchor": 1623873347,
"billing_cycle_anchor_config": null,
"cancel_at": null,
"cancel_at_period_end": false,
"canceled_at": null,
"cancellation_details": {
"comment": null,
"feedback": null,
"reason": null
},
"collection_method": "charge_automatically",
"created": 1623873347,
"currency": "usd","customer_account": identifier("customerAccount"),
"days_until_due": null,
"default_payment_method": null,
"default_source": null,
"default_tax_rates": [
],
"discounts": [],
"ended_at": null,
"invoice_customer_balance_settings": {
"account_tax_ids": null,
"issuer": {
"type": "self"
}
},
"items": {
"object": "list",
"data": [
{
"id": "si_JgRjmS4Ur1khEx",
"object": "subscription_item",
"created": 1623873347,"current_period_end": 1626465347,
"current_period_start": 1623873347,
"discounts": [],
"metadata": {
},
"plan": {
"id": "price_1J32RfGPZ1iASj5zHHp57z7C",
"object": "plan",
"active": true,
"amount": 2000,
"amount_decimal": "2000",
"billing_scheme": "per_unit",
"created": 1623864151,
"currency": "usd",
"interval": "month",
"interval_count": 1,
"livemode": false,
"metadata": {
},
"nickname": null,
"product": "prod_JgPF5xnq7qBun3",
"tiers": null,
"tiers_mode": null,
"transform_usage": null,
"trial_period_days": null,
"usage_type": "licensed"
},
"price": {
"id": "price_1J32RfGPZ1iASj5zHHp57z7C",
"object": "price",
"active": true,
"billing_scheme": "per_unit",
"created": 1623864151,
"currency": "usd",
"livemode": false,
"lookup_key": null,
"metadata": {
},
"nickname": null,
"product": "prod_JgPF5xnq7qBun3",
"recurring": {
"interval": "month",
"interval_count": 1,
"trial_period_days": null,
"usage_type": "licensed"
},
"tiers_mode": null,
"transform_quantity": null,
"type": "recurring",
"unit_amount": 2000,
"unit_amount_decimal": "2000"
},
"quantity": 1,
"subscription": "sub_JgRjFjhKbtD2qz",
"tax_rates": [
]
}
],
"has_more": false,
"total_count": 1,
"url": "/v1/subscription_items?subscription=sub_JgRjFjhKbtD2qz"
},
"latest_invoice": {
"id": "in_1J34pzGPZ1iASj5zB87qdBNZ",
"object": "invoice",
"account_country": "US",
"account_name": "Angelina's Store",
"account_tax_ids": null,
"amount_due": 2000,
"amount_overpaid": 0,
"amount_paid": 0,
"amount_remaining": 2000,
"amount_shipping": 0,
"attempt_count": 0,
"attempted": false,
"auto_advance": false,
"automatic_tax": {
"disabled_reason": null,
"enabled": false,
"liability": null,
"status": null
},
"automatically_finalizes_at": null,
"billing_reason": "subscription_update",
"collection_method": "charge_automatically",
"created": 1623873347,
"currency": "usd",
"custom_fields": null,
"customer_account": identifier("customerAccount"),
"customer_address": null,
"customer_email": "angelina@stripe.com",
"customer_name": null,
"customer_phone": null,
"customer_shipping": {
"address": {
"city": "",
"country": "US",
"line1": "Berry",
"line2": "",
"postal_code": "",
"state": ""
},
"name": "",
"phone": null
},
"customer_tax_exempt": "none",
"customer_tax_ids": [
],
"default_payment_method": null,
"default_source": null,
"default_tax_rates": [
],
"description": null,
"discounts": [],
"due_date": null,
"effective_at": "1623873347",
"ending_balance": 0,
"footer": null,
"from_invoice": null,
"hosted_invoice_url": "https://invoice.stripe.com/i/acct_1By64KGPZ1iASj5z/invst_JgRjzIOILGeq2MKC9T0KtyXnD5udsLp",
"invoice_pdf": "https://pay.stripe.com/invoice/acct_1By64KGPZ1iASj5z/invst_JgRjzIOILGeq2MKC9T0KtyXnD5udsLp/pdf",
"last_finalization_error": null,
"latest_revision": null,
"lines": {
"object": "list",
"data": [
{
"id": "il_1N2CjMBwKQ696a5NeOawRQP2",
"object": "line_item",
"amount": 2000,
"currency": "usd",
"description": "1 × Gold Special (at $20.00 / month)",
"discount_amounts": [
],
"discountable": true,
"discounts": [
],
"invoice": "in_1J34pzGPZ1iASj5zB87qdBNZ",
"livemode": false,
"metadata": {
},
"parent": {
"invoice_item_details": null,
"subscription_item_details":
{
"invoice_item": null,
"proration": false,
"proration_details":
{
"credited_items": null
},
"subscription":
"sub_JgRjFjhKbtD2qz",
"subscription_item":
"si_JgRjmS4Ur1khEx"
},
"type": "subscription_item_details"
},
"period": {
"end": 1626465347,
"start": 1623873347
},
"plan": {
"id": "price_1J32RfGPZ1iASj5zHHp57z7C",
"object": "plan",
"active": true,
"amount": 2000,
"amount_decimal": "2000",
"billing_scheme": "per_unit",
"created": 1623864151,
"currency": "usd",
"interval": "month",
"interval_count": 1,
"livemode": false,
"metadata": {
},
"nickname": null,
"product": "prod_JgPF5xnq7qBun3",
"tiers": null,
"tiers_mode": null,
"transform_usage": null,
"trial_period_days": null,
"usage_type": "licensed"
},
"price": {
"id": "price_1J32RfGPZ1iASj5zHHp57z7C",
"object": "price",
"active": true,
"billing_scheme": "per_unit",
"created": 1623864151,
"currency": "usd",
"livemode": false,
"lookup_key": null,
"metadata": {
},
"nickname": null,
"product": "prod_JgPF5xnq7qBun3",
"recurring": {
"interval": "month",
"interval_count": 1,
"trial_period_days": null,
"usage_type": "licensed"
},
"tiers_mode": null,
"transform_quantity": null,
"type": "recurring",
"unit_amount": 2000,
"unit_amount_decimal": "2000"
},
"quantity": 1,
"taxes": []
}
],
"has_more": false,
"total_count": 1,
"url": "/v1/invoices/in_1J34pzGPZ1iASj5zB87qdBNZ/lines"
},
"livemode": false,
"metadata": {
},
"next_payment_attempt": null,
"number": "C008FC2-0354",
"on_behalf_of": null,
"parent": {
"quote_details": null,
"subscription_details": {
"metadata": {},
"pause_collection": null,
"subscription": "sub_JgRjFjhKbtD2qz"
}
},
"payment_intent": {
"id": "pi_1J34pzGPZ1iASj5zI2nOAaE6",
"object": "payment_intent",
"allowed_source_types": [
"card"
],
"amount": 2000,
"amount_capturable": 0,
"amount_received": 0,
"application": null,
"application_fee_amount": null,
"canceled_at": null,
"cancellation_reason": null,
"capture_method": "automatic",
"charges": {
"object": "list",
"data": [
],
"has_more": false,
"total_count": 0,
"url": "/v1/charges?payment_intent=pi_1J34pzGPZ1iASj5zI2nOAaE6"
},
"client_secret": "pi_1J34pzGPZ1iASj5zI2nOAaE6_secret_l7FN6ldFfXiFmJEumenJ2y2wu",
"confirmation_method": "automatic",
"created": 1623873347,
"currency": "usd",
"customer": "cus_CMqDWO2xODTZqt",
"description": "Subscription creation",
"invoice": "in_1J34pzGPZ1iASj5zB87qdBNZ",
"last_payment_error": null,
"livemode": false,
"metadata": {
},
"next_action": null,
"next_source_action": null,
"on_behalf_of": null,
"payment_method": null,
"payment_method_options": {
"card": {
"installments": null,
"network": null,
"request_three_d_secure": "automatic"
}
},
"payment_method_types": [
"card"
],
"receipt_email": null,
"review": null,
"setup_future_usage": "off_session",
"shipping": null,
"source": "card_1By6iQGPZ1iASj5z7ijKBnXJ",
"statement_descriptor": null,
"statement_descriptor_suffix": null,
"status": "requires_confirmation",
"transfer_data": null,
"transfer_group": null
},
"payment_settings": {
"payment_method_options": null,
"payment_method_types": null,
"save_default_payment_method": "on_subscription"
},
"period_end": 1623873347,
"period_start": 1623873347,
"post_payment_credit_notes_amount": 0,
"pre_payment_credit_notes_amount": 0,
"receipt_number": null,
"starting_balance": 0,
"statement_descriptor": null,
"status": "open",
"status_transitions": {
"finalized_at": 1623873347,
"marked_uncollectible_at": null,
"paid_at": null,
"voided_at": null
},
"subscription": "sub_JgRjFjhKbtD2qz",
"subtotal": 2000,
"tax": null,
"tax_percent": null,
"total": 2000,
"total_discount_amounts": [],
"total_tax_amounts": [],
"transfer_data": null,
"webhooks_delivered_at": 1623873347
},
"livemode": false,
"metadata": {
},
"next_pending_invoice_item_invoice": null,
"pause_collection": null,
"pending_invoice_item_interval": null,
"pending_setup_intent": null,
"pending_update": null,
"plan": {
"id": "price_1J32RfGPZ1iASj5zHHp57z7C",
"object": "plan",
"active": true,
"amount": 2000,
"amount_decimal": "2000",
"billing_scheme": "per_unit",
"created": 1623864151,
"currency": "usd",
"interval": "month",
"interval_count": 1,
"livemode": false,
"metadata": {
},
"nickname": null,
"product": "prod_JgPF5xnq7qBun3",
"tiers": null,
"tiers_mode": null,
"transform_usage": null,
"trial_period_days": null,
"usage_type": "licensed"
},
"quantity": 1,
"schedule": null,
"start": 1623873347,
"start_date": 1623873347,
"status": "incomplete",
"tax_percent": null,
"transfer_data": null,
"trial_end": null,
"trial_start": null
}
```
#### Customers v1
```json
{"id": "sub_JgRjFjhKbtD2qz",
"object": "subscription",
"application_fee_percent": null,
"automatic_tax": {
"disabled_reason": null,
"enabled": false,
"liability": "null"
},
"billing_cycle_anchor": 1623873347,
"billing_cycle_anchor_config": null,
"cancel_at": null,
"cancel_at_period_end": false,
"canceled_at": null,
"cancellation_details": {
"comment": null,
"feedback": null,
"reason": null
},
"collection_method": "charge_automatically",
"created": 1623873347,
"currency": "usd","customer": identifier("customer"),
"days_until_due": null,
"default_payment_method": null,
"default_source": null,
"default_tax_rates": [
],
"discounts": [],
"ended_at": null,
"invoice_customer_balance_settings": {
"account_tax_ids": null,
"issuer": {
"type": "self"
}
},
"items": {
"object": "list",
"data": [
{
"id": "si_JgRjmS4Ur1khEx",
"object": "subscription_item",
"created": 1623873347,"current_period_end": 1626465347,
"current_period_start": 1623873347,
"discounts": [],
"metadata": {
},
"plan": {
"id": "price_1J32RfGPZ1iASj5zHHp57z7C",
"object": "plan",
"active": true,
"amount": 2000,
"amount_decimal": "2000",
"billing_scheme": "per_unit",
"created": 1623864151,
"currency": "usd",
"interval": "month",
"interval_count": 1,
"livemode": false,
"metadata": {
},
"nickname": null,
"product": "prod_JgPF5xnq7qBun3",
"tiers": null,
"tiers_mode": null,
"transform_usage": null,
"trial_period_days": null,
"usage_type": "licensed"
},
"price": {
"id": "price_1J32RfGPZ1iASj5zHHp57z7C",
"object": "price",
"active": true,
"billing_scheme": "per_unit",
"created": 1623864151,
"currency": "usd",
"livemode": false,
"lookup_key": null,
"metadata": {
},
"nickname": null,
"product": "prod_JgPF5xnq7qBun3",
"recurring": {
"interval": "month",
"interval_count": 1,
"trial_period_days": null,
"usage_type": "licensed"
},
"tiers_mode": null,
"transform_quantity": null,
"type": "recurring",
"unit_amount": 2000,
"unit_amount_decimal": "2000"
},
"quantity": 1,
"subscription": "sub_JgRjFjhKbtD2qz",
"tax_rates": [
]
}
],
"has_more": false,
"total_count": 1,
"url": "/v1/subscription_items?subscription=sub_JgRjFjhKbtD2qz"
},
"latest_invoice": {
"id": "in_1J34pzGPZ1iASj5zB87qdBNZ",
"object": "invoice",
"account_country": "US",
"account_name": "Angelina's Store",
"account_tax_ids": null,
"amount_due": 2000,
"amount_overpaid": 0,
"amount_paid": 0,
"amount_remaining": 2000,
"amount_shipping": 0,
"attempt_count": 0,
"attempted": false,
"auto_advance": false,
"automatic_tax": {
"disabled_reason": null,
"enabled": false,
"liability": null,
"status": null
},
"automatically_finalizes_at": null,
"billing_reason": "subscription_update",
"collection_method": "charge_automatically",
"created": 1623873347,
"currency": "usd",
"custom_fields": null,
"customer": identifier("customer"),
"customer_address": null,
"customer_email": "angelina@stripe.com",
"customer_name": null,
"customer_phone": null,
"customer_shipping": {
"address": {
"city": "",
"country": "US",
"line1": "Berry",
"line2": "",
"postal_code": "",
"state": ""
},
"name": "",
"phone": null
},
"customer_tax_exempt": "none",
"customer_tax_ids": [
],
"default_payment_method": null,
"default_source": null,
"default_tax_rates": [
],
"description": null,
"discounts": [],
"due_date": null,
"effective_at": "1623873347",
"ending_balance": 0,
"footer": null,
"from_invoice": null,
"hosted_invoice_url": "https://invoice.stripe.com/i/acct_1By64KGPZ1iASj5z/invst_JgRjzIOILGeq2MKC9T0KtyXnD5udsLp",
"invoice_pdf": "https://pay.stripe.com/invoice/acct_1By64KGPZ1iASj5z/invst_JgRjzIOILGeq2MKC9T0KtyXnD5udsLp/pdf",
"last_finalization_error": null,
"latest_revision": null,
"lines": {
"object": "list",
"data": [
{
"id": "il_1N2CjMBwKQ696a5NeOawRQP2",
"object": "line_item",
"amount": 2000,
"currency": "usd",
"description": "1 × Gold Special (at $20.00 / month)",
"discount_amounts": [
],
"discountable": true,
"discounts": [
],
"invoice": "in_1J34pzGPZ1iASj5zB87qdBNZ",
"livemode": false,
"metadata": {
},
"parent": {
"invoice_item_details": null,
"subscription_item_details":
{
"invoice_item": null,
"proration": false,
"proration_details":
{
"credited_items": null
},
"subscription":
"sub_JgRjFjhKbtD2qz",
"subscription_item":
"si_JgRjmS4Ur1khEx"
},
"type": "subscription_item_details"
},
"period": {
"end": 1626465347,
"start": 1623873347
},
"plan": {
"id": "price_1J32RfGPZ1iASj5zHHp57z7C",
"object": "plan",
"active": true,
"amount": 2000,
"amount_decimal": "2000",
"billing_scheme": "per_unit",
"created": 1623864151,
"currency": "usd",
"interval": "month",
"interval_count": 1,
"livemode": false,
"metadata": {
},
"nickname": null,
"product": "prod_JgPF5xnq7qBun3",
"tiers": null,
"tiers_mode": null,
"transform_usage": null,
"trial_period_days": null,
"usage_type": "licensed"
},
"price": {
"id": "price_1J32RfGPZ1iASj5zHHp57z7C",
"object": "price",
"active": true,
"billing_scheme": "per_unit",
"created": 1623864151,
"currency": "usd",
"livemode": false,
"lookup_key": null,
"metadata": {
},
"nickname": null,
"product": "prod_JgPF5xnq7qBun3",
"recurring": {
"interval": "month",
"interval_count": 1,
"trial_period_days": null,
"usage_type": "licensed"
},
"tiers_mode": null,
"transform_quantity": null,
"type": "recurring",
"unit_amount": 2000,
"unit_amount_decimal": "2000"
},
"quantity": 1,
"taxes": []
}
],
"has_more": false,
"total_count": 1,
"url": "/v1/invoices/in_1J34pzGPZ1iASj5zB87qdBNZ/lines"
},
"livemode": false,
"metadata": {
},
"next_payment_attempt": null,
"number": "C008FC2-0354",
"on_behalf_of": null,
"parent": {
"quote_details": null,
"subscription_details": {
"metadata": {},
"pause_collection": null,
"subscription": "sub_JgRjFjhKbtD2qz"
}
},
"payment_intent": {
"id": "pi_1J34pzGPZ1iASj5zI2nOAaE6",
"object": "payment_intent",
"allowed_source_types": [
"card"
],
"amount": 2000,
"amount_capturable": 0,
"amount_received": 0,
"application": null,
"application_fee_amount": null,
"canceled_at": null,
"cancellation_reason": null,
"capture_method": "automatic",
"charges": {
"object": "list",
"data": [
],
"has_more": false,
"total_count": 0,
"url": "/v1/charges?payment_intent=pi_1J34pzGPZ1iASj5zI2nOAaE6"
},
"client_secret": "pi_1J34pzGPZ1iASj5zI2nOAaE6_secret_l7FN6ldFfXiFmJEumenJ2y2wu",
"confirmation_method": "automatic",
"created": 1623873347,
"currency": "usd",
"customer": "cus_CMqDWO2xODTZqt",
"description": "Subscription creation",
"invoice": "in_1J34pzGPZ1iASj5zB87qdBNZ",
"last_payment_error": null,
"livemode": false,
"metadata": {
},
"next_action": null,
"next_source_action": null,
"on_behalf_of": null,
"payment_method": null,
"payment_method_options": {
"card": {
"installments": null,
"network": null,
"request_three_d_secure": "automatic"
}
},
"payment_method_types": [
"card"
],
"receipt_email": null,
"review": null,
"setup_future_usage": "off_session",
"shipping": null,
"source": "card_1By6iQGPZ1iASj5z7ijKBnXJ",
"statement_descriptor": null,
"statement_descriptor_suffix": null,
"status": "requires_confirmation",
"transfer_data": null,
"transfer_group": null
},
"payment_settings": {
"payment_method_options": null,
"payment_method_types": null,
"save_default_payment_method": "on_subscription"
},
"period_end": 1623873347,
"period_start": 1623873347,
"post_payment_credit_notes_amount": 0,
"pre_payment_credit_notes_amount": 0,
"receipt_number": null,
"starting_balance": 0,
"statement_descriptor": null,
"status": "open",
"status_transitions": {
"finalized_at": 1623873347,
"marked_uncollectible_at": null,
"paid_at": null,
"voided_at": null
},
"subscription": "sub_JgRjFjhKbtD2qz",
"subtotal": 2000,
"tax": null,
"tax_percent": null,
"total": 2000,
"total_discount_amounts": [],
"total_tax_amounts": [],
"transfer_data": null,
"webhooks_delivered_at": 1623873347
},
"livemode": false,
"metadata": {
},
"next_pending_invoice_item_invoice": null,
"pause_collection": null,
"pending_invoice_item_interval": null,
"pending_setup_intent": null,
"pending_update": null,
"plan": {
"id": "price_1J32RfGPZ1iASj5zHHp57z7C",
"object": "plan",
"active": true,
"amount": 2000,
"amount_decimal": "2000",
"billing_scheme": "per_unit",
"created": 1623864151,
"currency": "usd",
"interval": "month",
"interval_count": 1,
"livemode": false,
"metadata": {
},
"nickname": null,
"product": "prod_JgPF5xnq7qBun3",
"tiers": null,
"tiers_mode": null,
"transform_usage": null,
"trial_period_days": null,
"usage_type": "licensed"
},
"quantity": 1,
"schedule": null,
"start": 1623873347,
"start_date": 1623873347,
"status": "incomplete",
"tax_percent": null,
"transfer_data": null,
"trial_end": null,
"trial_start": null
}
```
### Update your server endpoint
Add ephemeral key creation to the subscription endpoint and return it in the response:
#### Accounts v2
#### Java
```java
Map ephemeralKeyParams = new HashMap<>();
ephemeralKeyParams.put("customer_account", customerAccountId);
RequestOptions requestOptions = RequestOptions.builder()
.setStripeVersion("2026-03-25.dahlia")
.build();
EphemeralKey ephemeralKey = EphemeralKey.create(ephemeralKeyParams, requestOptions);
Map response = new HashMap<>();
response.put("subscriptionId", subscription.getId());
response.put("clientSecret", subscription.getLatestInvoiceObject()
.getConfirmationSecret().getClientSecret());
response.put("ephemeralKey", ephemeralKey.getSecret());
response.put("customerAccountId", customerAccountId);
return new Gson().toJson(response);
```
#### Customers v1
#### Java
```java
Map ephemeralKeyParams = new HashMap<>();
ephemeralKeyParams.put("customer", customerId);
RequestOptions requestOptions = RequestOptions.builder()
.setStripeVersion("2025-06-30.basil")
.build();
EphemeralKey ephemeralKey = EphemeralKey.create(ephemeralKeyParams, requestOptions);
Map response = new HashMap<>();
response.put("subscriptionId", subscription.getId());
response.put("clientSecret", subscription.getLatestInvoiceObject()
.getConfirmationSecret().getClientSecret());
response.put("ephemeralKey", ephemeralKey.getSecret());
response.put("customerId", customerId);
return new Gson().toJson(response);
```
### Update your response model
#### Accounts v2
```typescript
interface SubscriptionsResponse {
subscriptionId: string;
clientSecret: string;
ephemeralKey: string;
customerAccountId: string;
}
```
#### Customers v1
```typescript
interface SubscriptionsResponse {
subscriptionId: string;
clientSecret: string;
ephemeralKey: string;
customerId: string;
}
```
### Pass the customer configuration to PaymentSheet
#### Accounts v2
Add the following parameters when initializing PaymentSheet:
```javascript
await initPaymentSheet({
paymentIntentClientSecret: clientSecret,
customerAccountId: customerAccountId,
customerEphemeralKeySecret: ephemeralKey,
// ... other parameters
});
```
#### Customers v1
Add the following parameters when initializing PaymentSheet:
```javascript
await initPaymentSheet({
paymentIntentClientSecret: clientSecret,
customerId: customerId,
customerEphemeralKeySecret: ephemeralKey,
// ... other parameters
});
```
## Collect payment information [Client]
Use the [Payment Sheet](https://docs.stripe.com/payments/mobile/payment-sheet.md) to collect payment details and activate the subscription. You can customize Elements to match the look and feel of your application.
The Payment Sheet securely collects all necessary payment details for a wide variety of payments methods. Learn about the [supported payment methods](https://docs.stripe.com/payments/payment-methods/payment-method-support.md#product-support) for Payment Sheet and Subscriptions.
### Add the Payment Element to your app
> This step shows one way to get started, but you can use any [in-app payments integration](https://docs.stripe.com/payments/mobile.md).
Initialize and present the Mobile Payment Element using the PaymentSheet class.
```javascript
import React from 'react';
import {useStripe, PaymentSheetError} from '@stripe/stripe-react-native';
import {View, Button} from 'react-native';
function SubscribeView({clientSecret}) {
const {initPaymentSheet, presentPaymentSheet} = useStripe();
React.useEffect(() => {
const initializePaymentSheet = async () => {
const {error} = await initPaymentSheet({
paymentIntentClientSecret: clientSecret,
returnURL: 'stripe-example://payment-sheet',
// Set `allowsDelayedPaymentMethods` to true if your business handles
// delayed notification payment methods like US bank accounts.
allowsDelayedPaymentMethods: true,
});
if (error) {
// Handle error
}
};
initializePaymentSheet();
}, [clientSecret, initPaymentSheet]);
return (
);
}
export default SubscribeView;
```
The Mobile Payment Element renders a sheet that allows your customer to select a payment method. The form automatically collects all necessary payments details for the payment method that they select.
Setting `allowsDelayedPaymentMethods` to true allows [delayed notification](https://docs.stripe.com/payments/payment-methods.md#payment-notification) payment methods like US bank accounts. For these payment methods, the final payment status isn’t known when the `PaymentSheet` completes, and instead succeeds or fails later. If you support these types of payment methods, inform the customer their order is confirmed and only fulfill their order (for example, ship their product) when the payment is successful.
You can customize the Payment Element to match the design of your app by using the [`appearance` property](https://docs.stripe.com/elements/appearance-api/mobile.md?platform=ios) your `PaymentSheet.Configuration` object.
### Confirm payment
The Mobile Payment Element creates a PaymentMethod and confirms the incomplete Subscription’s first PaymentIntent, causing a charge to be made. If *Strong Customer Authentication* (Strong Customer Authentication (SCA) is a regulatory requirement in effect as of September 14, 2019, that impacts many European online payments. It requires customers to use two-factor authentication like 3D Secure to verify their purchase) (SCA) is required for the payment, the Payment Element handles the authentication process before confirming the PaymentIntent.
## Set up a return URL (iOS only) [Client-side]
When a customer exits your app (for example to authenticate in Safari or their banking app), provide a way for them to automatically return to your app. Many payment method types *require* a return URL. If you don’t provide one, we can’t present payment methods that require a return URL to your users, even if you’ve enabled them.
To provide a return URL:
1. [Register](https://developer.apple.com/documentation/xcode/defining-a-custom-url-scheme-for-your-app#Register-your-URL-scheme) a custom URL. Universal links aren’t supported.
2. [Configure](https://reactnative.dev/docs/linking) your custom URL.
3. Set up your root component to forward the URL to the Stripe SDK as shown below.
> If you’re using Expo, [set your scheme](https://docs.expo.io/guides/linking/#in-a-standalone-app) in the `app.json` file.
```jsx
import { useEffect, useCallback } from 'react';
import { Linking, View } from 'react-native';
import { useStripe } from '@stripe/stripe-react-native';
export default function MyApp() {
const { handleURLCallback } = useStripe();
const handleDeepLink = useCallback(
async (url: string | null) => {
if (url) {
const stripeHandled = await handleURLCallback(url);
if (stripeHandled) {
// This was a Stripe URL - you can return or add extra handling here as you see fit
} else {
// This was NOT a Stripe URL – handle as you normally would
}
}
},
[handleURLCallback]
);
useEffect(() => {
const getUrlAsync = async () => {
const initialUrl = await Linking.getInitialURL();
handleDeepLink(initialUrl);
};
getUrlAsync();
const deepLinkListener = Linking.addEventListener(
'url',
(event: { url: string }) => {
handleDeepLink(event.url);
}
);
return () => deepLinkListener.remove();
}, [handleDeepLink]);
return (
);
}
```
Additionally, set the `returnURL` when you call the `initPaymentSheet` method:
```js
await initPaymentSheet({
...
returnURL: 'your-app://stripe-redirect',
...
});
```
For more information on native URL schemes, refer to the [Android](https://developer.android.com/training/app-links/deep-linking) and [iOS](https://developer.apple.com/documentation/xcode/allowing_apps_and_websites_to_link_to_your_content/defining_a_custom_url_scheme_for_your_app) docs.
## Optional: Enable Apple Pay
### Register for an Apple Merchant ID
Obtain an Apple Merchant ID by [registering for a new identifier](https://developer.apple.com/account/resources/identifiers/add/merchant) on the Apple Developer website.
Fill out the form with a description and identifier. Your description is for your own records and you can modify it in the future. Stripe recommends using the name of your app as the identifier (for example, `merchant.com.{{YOUR_APP_NAME}}`).
### Create a new Apple Pay certificate
Create a certificate for your app to encrypt payment data.
Go to the [iOS Certificate Settings](https://dashboard.stripe.com/settings/ios_certificates) in the Dashboard, click **Add new application**, and follow the guide.
Download a Certificate Signing Request (CSR) file to get a secure certificate from Apple that allows you to use Apple Pay.
One CSR file must be used to issue exactly one certificate. If you switch your Apple Merchant ID, you must go to the [iOS Certificate Settings](https://dashboard.stripe.com/settings/ios_certificates) in the Dashboard to obtain a new CSR and certificate.
### Integrate with Xcode
Add the Apple Pay capability to your app. In Xcode, open your project settings, click the **Signing & Capabilities** tab, and add the **Apple Pay** capability. You might be prompted to log in to your developer account at this point. Select the merchant ID you created earlier, and your app is ready to accept Apple Pay.

Enable the Apple Pay capability in Xcode
### Add Apple Pay
#### Recurring payments
When you call `initPaymentSheet`, pass in an [ApplePayParams](https://stripe.dev/stripe-react-native/api-reference/modules/PaymentSheet.html#ApplePayParams) with `merchantCountryCode` set to the country code of your business.
In accordance with [Apple’s guidelines](https://developer.apple.com/design/human-interface-guidelines/apple-pay#Supporting-subscriptions) for recurring payments, you must also set a `cardItems` that includes a [RecurringCartSummaryItem](https://stripe.dev/stripe-react-native/api-reference/modules/ApplePay.html#RecurringCartSummaryItem) with the amount you intend to charge (for example, “59.95 USD a month”).
You can also adopt [merchant tokens](https://developer.apple.com/apple-pay/merchant-tokens/) by setting the `request` with its `type` set to `PaymentRequestType.Recurring`
To learn more about how to use recurring payments with Apple Pay, see [Apple’s PassKit documentation](https://developer.apple.com/documentation/passkit/pkpaymentrequest).
#### iOS (React Native)
```javascript
const initializePaymentSheet = async () => {
const recurringSummaryItem = {
label: 'My Subscription',
amount: '59.99',
paymentType: 'Recurring',
intervalCount: 1,
intervalUnit: 'month',
// Payment starts today
startDate: new Date().getTime() / 1000,
// Payment ends in one year
endDate: new Date().getTime() / 1000 + 60 * 60 * 24 * 365,
};
const {error} = await initPaymentSheet({
// ...
applePay: {
merchantCountryCode: 'US',
cartItems: [recurringSummaryItem],
request: {
type: PaymentRequestType.Recurring,
description: 'Recurring',
managementUrl: 'https://my-backend.example.com/customer-portal',
billing: recurringSummaryItem,
billingAgreement:
"You'll be billed $59.99 every month for the next 12 months. To cancel at any time, go to Account and click 'Cancel Membership.'",
},
},
});
};
```
### Order tracking
To add [order tracking](https://developer.apple.com/design/human-interface-guidelines/technologies/wallet/designing-order-tracking) information in iOS 16 or later, configure a `setOrderTracking` callback function. Stripe calls your implementation after the payment is complete, but before iOS dismisses the Apple Pay sheet.
In your implementation of `setOrderTracking` callback function, fetch the order details from your server for the completed order, and pass the details to the provided `completion` function.
To learn more about order tracking, see [Apple’s Wallet Orders documentation](https://developer.apple.com/documentation/walletorders).
#### iOS (React Native)
```javascript
await initPaymentSheet({
// ...
applePay: {
// ...
setOrderTracking: async complete => {
const apiEndpoint =
Platform.OS === 'ios'
? 'http://localhost:4242'
: 'http://10.0.2.2:4567';
const response = await fetch(
`${apiEndpoint}/retrieve-order?orderId=${orderId}`,
{
method: 'GET',
headers: {
'Content-Type': 'application/json',
},
},
);
if (response.status === 200) {
const orderDetails = await response.json();
// orderDetails should include orderIdentifier, orderTypeIdentifier,
// authenticationToken and webServiceUrl
complete(orderDetails);
}
},
},
});
```
## Listen for webhooks [Server]
To complete the integration, you need to process *webhooks* (A webhook is a real-time push notification sent to your application as a JSON payload through HTTPS requests) sent by Stripe. These are events triggered whenever state inside of Stripe changes, such as subscriptions creating new invoices. In your application, set up an HTTP handler to accept a POST request containing the webhook event, and verify the signature of the event:
#### Java
```java
// Don't put any keys in code. See https://docs.stripe.com/keys-best-practices.
// Find your keys at https://dashboard.stripe.com/apikeys.
StripeClient stripeClient = new StripeClient("<>");
post(
"/webhook",
(request, response) -> {
String payload = request.body();
String sigHeader = request.headers("Stripe-Signature");
String endpointSecret = dotenv.get("STRIPE_WEBHOOK_SECRET");
Event event = null;
try {
event = stripeClient.constructEvent(payload, sigHeader, endpointSecret);
} catch (SignatureVerificationException e) {
// Invalid signature
response.status(400);
return "";
}
// Deserialize the nested object inside the event
EventDataObjectDeserializer dataObjectDeserializer = event.getDataObjectDeserializer();
StripeObject stripeObject = null;
if (dataObjectDeserializer.getObject().isPresent()) {
stripeObject = dataObjectDeserializer.getObject().get();
} else {
// Deserialization failed, probably due to an API version mismatch.
// Refer to the Javadoc documentation on `EventDataObjectDeserializer` for
// instructions on how to handle this case, or return an error here.
}
switch (event.getType()) {
case "invoice.paid":
// Used to provision services after the trial has ended.
// The status of the invoice will show up as paid. Store the status in your
// database to reference when a user accesses your service to avoid hitting rate
// limits.
break;
case "invoice.payment_failed":
// If the payment fails or the customer does not have a valid payment method,
// an invoice.payment_failed event is sent, the subscription becomes past_due.
// Use this webhook to notify your user that their payment has
// failed and to retrieve new card details.
break;
case "customer.subscription.deleted":
// handle subscription canceled automatically based
// upon your subscription settings. Or if the user
// cancels it.
break;
default:
// Unhandled event type
}
response.status(200);
return "";
}
);
```
During development, use the Stripe CLI to [observe webhooks and forward them to your application](https://docs.stripe.com/webhooks.md#test-webhook). Run the following in a new terminal while your development app is running:
#### curl
```bash
stripe listen --forward-to localhost:4242/webhook
```
For production, set up a webhook endpoint URL in the Dashboard, or use the [Webhook Endpoints API](https://docs.stripe.com/api/webhook_endpoints.md).
You need to listen to a few events to complete the remaining steps in this guide. See [Subscription events](https://docs.stripe.com/billing/subscriptions/webhooks.md#events) for more details about subscription-specific webhooks.
## Provision access to your service [Client and Server]
Now that the subscription is active, give your user access to your service. To do this, listen to the `customer.subscription.created`, `customer.subscription.updated`, and `customer.subscription.deleted` events. These events pass a subscription object which contains a `status` field indicating whether the subscription is active, past due, or canceled. See [the subscription lifecycle](https://docs.stripe.com/billing/subscriptions/overview.md#subscription-lifecycle) for a complete list of statuses.
In your webhook handler:
1. Verify the subscription status. If it’s `active` then your user has paid for your product.
2. Check the product the customer subscribed to and grant access to your service. Checking the product instead of the price gives you more flexibility if you need to change the pricing or billing interval.
3. Store the `product.id`, `subscription.id` and `subscription.status` in your database along with the `customer.id` you already saved. Check this record when determining which features to enable for the user in your application.
The state of a subscription might change at any point during its lifetime, even if your application doesn’t directly make any calls to Stripe. For example, a renewal might fail due to an expired credit card, which puts the subscription into a past due state. Or, if you implement the [customer portal](https://docs.stripe.com/customer-management.md), a user might cancel their subscription without directly visiting your application. Implementing your handler correctly keeps your application state in sync with Stripe.
## Cancel the subscription [Client and Server]
It’s common to allow customers to cancel their subscriptions. This example adds a cancellation option to the account settings page.
The example collects the subscription ID on the frontend, but your application can get this information from your database for your logged in user.

Account settings with the ability to cancel the subscription
```javascript
const cancelSubscription = async subscriptionId => {
const apiEndpoint =
Platform.OS === 'ios' ? 'http://localhost:4242' : 'http://10.0.2.2:4567';
const response = await fetch(`${apiEndpoint}/cancel-subscription`, {
method: 'POST',
headers: {
'Content-Type': 'application/json',
},
body: JSON.stringify({
subscriptionId: subscriptionId,
}),
});
if (response.status === 200) {
const subscription = await response.json();
return subscription;
}
};
```
On the backend, define the endpoint for your app to call.
#### Java
```java
// Don't put any keys in code. See https://docs.stripe.com/keys-best-practices.
// Find your keys at https://dashboard.stripe.com/apikeys.
StripeClient stripeClient = new StripeClient("<>");
post(
"/cancel-subscription",
(request, response) -> {
response.type("application/json");
CancelPostBody postBody = gson.fromJson(
request.body(),
CancelPostBody.class
);
Subscription deletedSubscription =
stripeClient.v1().subscriptions().cancel(postBody.getSubscriptionId());
return deletedSubscription.toJson();
}
);
```
Your backend receives a `customer.subscription.deleted` event.
After the subscription is canceled, update your database to remove the Stripe subscription ID you previously stored, and limit access to your service.
When a subscription is canceled, it can’t be reactivated. Instead, collect updated billing information from your customer, update their default payment method, and create a new subscription with their existing customer record.
## Test your integration
### Test payment methods
Use the following table to test different payment methods and scenarios.
| Payment method | Scenario | How to test |
| --- | --- | --- |
| BECS Direct Debit | Your customer successfully pays with BECS Direct Debit. | Fill out the form using the account number `900123456` and BSB `000000`. The confirmed PaymentIntent initially transitions to `processing`, then transitions to the `succeeded` status three minutes later. |
| BECS Direct Debit | Your customer’s payment fails with an `account_closed` error code. | Fill out the form using the account number `111111113` and BSB `000000`. |
| Credit card | The card payment succeeds and doesn’t require authentication. | Fill out the credit card form using the credit card number `4242 4242 4242 4242` with any expiration, CVC, and postal code. |
| Credit card | The card payment requires *authentication* (Strong Customer Authentication (SCA) is a regulatory requirement in effect as of September 14, 2019, that impacts many European online payments. It requires customers to use two-factor authentication like 3D Secure to verify their purchase). | Fill out the credit card form using the credit card number `4000 0025 0000 3155` with any expiration, CVC, and postal code. |
| Credit card | The card is declined with a decline code like `insufficient_funds`. | Fill out the credit card form using the credit card number `4000 0000 0000 9995` with any expiration, CVC, and postal code. |
| SEPA Direct Debit | Your customer successfully pays with SEPA Direct Debit. | Fill out the form using the account number `AT321904300235473204`. The confirmed PaymentIntent initially transitions to processing, then transitions to the succeeded status three minutes later. |
| SEPA Direct Debit | Your customer’s PaymentIntent status transitions from `processing` to `requires_payment_method`. | Fill out the form using the account number `AT861904300235473202`. |
### Monitor events
Set up webhooks to listen to subscription change events, such as upgrades and cancellations. Learn more about [subscription webhooks](https://docs.stripe.com/billing/subscriptions/webhooks.md). You can view events in the [Dashboard](https://dashboard.stripe.com/test/events) or with the [Stripe CLI](https://docs.stripe.com/webhooks.md#test-webhook).
For more details, see [testing your Billing integration](https://docs.stripe.com/billing/testing.md).
## Optional: Let customers change their plans [Client and Server]
To let your customers change their subscription, collect the price ID of the option they want to change to. Then send the new price ID from the app to a backend endpoint. This example also passes the subscription ID, but you can retrieve it from your database for your logged in user.
```javascript
const updateSubscription = async (subscriptionId, priceId) => {
const apiEndpoint =
Platform.OS === 'ios' ? 'http://localhost:4242' : 'http://10.0.2.2:4567';
const response = await fetch(`${apiEndpoint}/update-subscription`, {
method: 'POST',
headers: {
'Content-Type': 'application/json',
},
body: JSON.stringify({
subscriptionId: subscriptionId,
newPriceId: priceId,
}),
});
if (response.status === 200) {
const subscription = await response.json();
return subscription;
}
};
```
On the backend, define the endpoint for your frontend to call, passing the subscription ID and the new price ID. The subscription is now Premium, at 15 USD per month, instead of Basic at 5 USD per month.
#### Java
```java
// Don't put any keys in code. See https://docs.stripe.com/keys-best-practices.
// Find your keys at https://dashboard.stripe.com/apikeys.
StripeClient stripeClient = new StripeClient("<>");
post(
"/update-subscription",
(request, response) -> {
response.type("application/json");
UpdatePostBody postBody = gson.fromJson(
request.body(),
UpdatePostBody.class
);
Subscription subscription = stripeClient.v1().subscriptions().retrieve(
postBody.getSubscriptionId()
);
SubscriptionUpdateParams params = SubscriptionUpdateParams
.builder()
.addItem(
SubscriptionUpdateParams
.Item.builder()
.setId(subscription.getItems().getData().get(0).getId())
.setPrice(postBody.getNewPriceId())
.build()
)
.setCancelAtPeriodEnd(false)
.build();
Subscription updatedSubscription =
stripeClient.v1().subscriptions().update(subscription.getId(), params);
return updatedSubscription.toJson();
}
);
```
Your application receives a `customer.subscription.updated` event.
## Optional: Preview a price change [Client and Server]
When your customer changes their subscription, there’s often an adjustment to the amount they owe, known as a [proration](https://docs.stripe.com/billing/subscriptions/prorations.md). You can use the [create preview invoice endpoint](https://docs.stripe.com/api/invoices/create_preview.md) to display the adjusted amount to your customers.
From the app, pass the preview invoice details to a backend endpoint.
```javascript
const createPreviewInvoice = async (subscriptionId, priceId, newPriceId) => {
const apiEndpoint =
Platform.OS === 'ios' ? 'http://localhost:4242' : 'http://10.0.2.2:4567';
const response = await fetch(`${apiEndpoint}/create-preview-invoice`, {
method: 'POST',
headers: {
'Content-Type': 'application/json',
},
body: JSON.stringify({
subscriptionId: subscriptionId,
priceId: priceId,
newPriceId: newPriceId,
}),
});
if (response.status === 200) {
const invoice = await response.json();
return invoice;
}
};
```
On the backend, define the endpoint for your frontend to call.
#### Accounts v2
#### Java
```java
// Don't put any keys in code. See https://docs.stripe.com/keys-best-practices.
// Find your keys at https://dashboard.stripe.com/apikeys.
StripeClient stripeClient = new StripeClient("<>");
post(
"/create-preview-invoice",
(request, response) -> {
response.type("application/json");
PreviewInvoicePostBody postBody = gson.fromJson(
request.body(),
PreviewInvoicePostBody.class
);
Subscription subscription = stripeClient.v1().subscriptions().retrieve(
postBody.getSubscriptionId()
);
InvoiceCreatePreviewParams invoiceParams = InvoiceCreatePreviewParams
.builder()
.setCustomerAccount(postBody.getCustomerAccountId())
.setSubscription(postBody.getSubscriptionId())
.setSubscriptionDetails(
InvoiceCreatePreviewParams.SubscriptionDetails.builder()
.addItem(
InvoiceCreatePreviewParams.SubscriptionDetails.Item.builder()
.setId(subscription.getItems().getData().get(0).getId())
.setDeleted(true)
.build()
)
.addItem(
InvoiceCreatePreviewParams.SubscriptionDetails.Item.builder()
.setPrice(dotenv.get(postBody.getNewPriceId()))
.build()
)
.build()
)
.build();
Invoice invoice = stripeClient.v1().invoices().createPreview(invoiceParams);
return invoice.toJson();
}
);
```
#### Customers v1
#### Java
```java
// Don't put any keys in code. See https://docs.stripe.com/keys-best-practices.
// Find your keys at https://dashboard.stripe.com/apikeys.
StripeClient stripeClient = new StripeClient("<>");
post(
"/create-preview-invoice",
(request, response) -> {
response.type("application/json");
PreviewInvoicePostBody postBody = gson.fromJson(
request.body(),
PreviewInvoicePostBody.class
);
Subscription subscription = stripeClient.v1().subscriptions().retrieve(
postBody.getSubscriptionId()
);
InvoiceCreatePreviewParams invoiceParams = InvoiceCreatePreviewParams
.builder()
.setCustomer(postBody.getCustomerId())
.setSubscription(postBody.getSubscriptionId())
.setSubscriptionDetails(
InvoiceCreatePreviewParams.SubscriptionDetails.builder()
.addItem(
InvoiceCreatePreviewParams.SubscriptionDetails.Item.builder()
.setId(subscription.getItems().getData().get(0).getId())
.setDeleted(true)
.build()
)
.addItem(
InvoiceCreatePreviewParams.SubscriptionDetails.Item.builder()
.setPrice(dotenv.get(postBody.getNewPriceId()))
.build()
)
.build()
)
.build();
Invoice invoice = stripeClient.v1().invoices().createPreview(invoiceParams);
return invoice.toJson();
}
);
```
## Optional: Display the customer payment method [Client and Server]
Displaying the brand and last four digits of your customer’s card can help them know which card is being charged, or if they need to update their payment method.
On the front end, send the payment method ID to a back-end endpoint that retrieves the payment method details.
```javascript
const retrieveCustomerPaymentMethod = async paymentMethodId => {
const apiEndpoint =
Platform.OS === 'ios' ? 'http://localhost:4242' : 'http://10.0.2.2:4567';
const response = await fetch(
`${apiEndpoint}/retrieve-customer-payment-method`,
{
method: 'POST',
headers: {
'Content-Type': 'application/json',
},
body: JSON.stringify({
paymentMethodId: paymentMethodId,
}),
},
);
if (response.status === 200) {
const paymentMethod = await response.json();
return paymentMethod;
}
};
```
On the back end, define the endpoint for your app to call.
#### Java
```java
// Don't put any keys in code. See https://docs.stripe.com/keys-best-practices.
// Find your keys at https://dashboard.stripe.com/apikeys.
StripeClient stripeClient = new StripeClient("<>");
post(
"/retrieve-customer-payment-method",
(request, response) -> {
response.type("application/json");
PaymentMethodBody paymentMethodBody = gson.fromJson(
request.body(),
PaymentMethodBody.class
);
PaymentMethod paymentMethod = stripeClient.v1().paymentMethods().retrieve(
paymentMethodBody.getPaymentMethodId()
);
return paymentMethod.toJson();
}
);
```
Example response:
```json
{
"id": "pm_1GcbHY2eZvKYlo2CoqlVxo42",
"object": "payment_method",
"billing_details": {
"address": {
"city": null,
"country": null,
"line1": null,
"line2": null,
"postal_code": null,
"state": null
},
"email": null,
"name": null,
"phone": null
},
"card": {
"brand": "visa",
"checks": {
"address_line1_check": null,
"address_postal_code_check": null,
"cvc_check": "pass"
},
"country": "US",
"exp_month": 8,
"exp_year": 2021,
"fingerprint": "Xt5EWLLDS7FJjR1c",
"funding": "credit",
"generated_from": null,
"last4": "4242",
"three_d_secure_usage": {
"supported": true
},
"wallet": null
},
"created": 1588010536,
"customer": "cus_HAxB7dVQxhoKLh",
"livemode": false,
"metadata": {},
"type": "card"
}
```
> We recommend that you save the `paymentMethod.id` and `last4` in your database, for example, `paymentMethod.id` as `stripeCustomerPaymentMethodId` in your `users` collection or table. You can optionally store `exp_month`, `exp_year`, `fingerprint`, `billing_details` as needed. This is to limit the number of calls you make to Stripe—for both performance efficiency and to avoid possible rate limiting.
## Disclose Stripe to your customers
Stripe collects information on customer interactions with Elements to provide services to you, prevent fraud, and improve its services. This includes using cookies and IP addresses to identify which Elements a customer saw during a single checkout session. You’re responsible for disclosing and obtaining all rights and consents necessary for Stripe to use data in these ways. For more information, visit our [privacy center](https://stripe.com/legal/privacy-center#as-a-business-user-what-notice-do-i-provide-to-my-end-customers-about-stripe).