# Set up your integration
Set up a Stripe Terminal SDK or server-driven integration to accept in-person payments.
# Server-driven
> This is a Server-driven for when terminal-sdk-platform is server-driven. View the full page at https://docs.stripe.com/terminal/payments/setup-integration?terminal-sdk-platform=server-driven.
Server-driven integrations use the Stripe API instead of a Terminal SDK to connect to [WisePOS E, Stripe Reader S700/S710, and Verifone smart readers](https://docs.stripe.com/terminal/smart-readers.md) and collect in-person payments. This allows you to:
- Use Terminal even if your infrastructure doesn’t support iOS, Android, or JavaScript SDKs
- Build a Terminal integration that’s powered by your custom middleware or cloud-based infrastructure
- Integrate any device including a .NET-based point of sale to Terminal
- Improve reader network connections using an internet connection instead of the local area network
- Make curl requests to prototype an integration
Server-driven integration doesn’t support:
- [Stripe Terminal mobile readers](https://docs.stripe.com/terminal/mobile-readers.md)
- [Collect card payments while offline](https://docs.stripe.com/terminal/features/operate-offline/collect-card-payments.md)
## Get started
You can start your server-driven integration using the [Terminal Quickstart](https://docs.stripe.com/terminal/quickstart.md) with the following components:
- **Your point of sale application**: The operator-facing UI that employees see when creating a transaction.
- **Your back-end infrastructure**: Mediates requests from your point of sale application and makes requests to the Stripe API during the transaction.
- **The Stripe API**: Receives requests and forwards them to a smart reader, such as the [BBPOS WisePOS E reader](https://docs.stripe.com/terminal/payments/setup-reader/bbpos-wisepos-e.md), [Stripe Reader S700/S710](https://docs.stripe.com/terminal/readers/stripe-reader-s700-s710.md), or a [Verifone reader](https://docs.stripe.com/terminal/payments/setup-reader/verifone.md). Stripe also sends *webhooks* (A webhook is a real-time push notification sent to your application as a JSON payload through HTTPS requests) to your back-end infrastructure with the payment status.
- **A BBPOS WisePOS E reader, Stripe Reader S700/S710, Verifone reader, or simulated reader**: Prompts the cardholder for payment and communicates with Stripe and our financial infrastructure to process the payment. You can create a simulated reader if you don’t yet have a physical reader.

## See also
- [Terminal Quickstart](https://docs.stripe.com/terminal/quickstart.md)
- [Connect to a reader](https://docs.stripe.com/terminal/payments/connect-reader.md?terminal-sdk-platform=server-driven&reader-type=internet)
# JavaScript
> This is a JavaScript for when terminal-sdk-platform is js. View the full page at https://docs.stripe.com/terminal/payments/setup-integration?terminal-sdk-platform=js.
> #### Recommendation for smart readers
>
> For smart readers, such as the [BBPOS WisePOS E reader](https://docs.stripe.com/terminal/payments/setup-reader/bbpos-wisepos-e.md), [Stripe Reader S700/S710](https://docs.stripe.com/terminal/readers/stripe-reader-s700-s710.md), and [Verifone readers](https://docs.stripe.com/terminal/payments/setup-reader/verifone.md), we recommend using the [server-driven integration](https://docs.stripe.com/terminal/payments/setup-integration.md?terminal-sdk-platform=server-driven) instead of the JavaScript SDK.
>
> The JavaScript SDK requires your POS and reader on the same local network with working local DNS. The server-driven integration uses the Stripe API instead, which can be simpler in complex network environments. See our [platform comparison](https://docs.stripe.com/terminal/payments/setup-reader.md#sdk) to help you choose the best platform for your needs.
If you’re looking for a more detailed reference with all available methods, objects, and errors, consult our [full SDK reference](https://docs.stripe.com/terminal/references/api/js-sdk.md).
### Terminal JavaScript SDK requirements
When you integrate with [smart readers](https://docs.stripe.com/terminal/smart-readers.md) using the JavaScript SDK, make sure your network meets [our network requirements](https://docs.stripe.com/terminal/network-requirements.md).
Getting started with the JavaScript SDK requires three steps:
1. [Install the SDK and client library](https://docs.stripe.com/terminal/payments/setup-integration.md#install) on your checkout page.
1. [Set up the connection token endpoint](https://docs.stripe.com/terminal/payments/setup-integration.md#connection-token) on your web application app and backend.
1. [Initialize the SDK](https://docs.stripe.com/terminal/payments/setup-integration.md#initialize) in your web application.
> If you integrate your web application with the JavaScript SDK, you can run it in a mobile browser as long as the mobile device is connected to the same local network as the reader, and devices on that network can communicate directly with one another.
## Install the SDK and client library [Client-side] [Server-side]
#### Client-side
To get started, include this script on your checkout page. This script must always load directly from **https://js.stripe.com** for compatibility with the latest reader software. Don’t include the script in a bundle or host a copy yourself; this might break your integration without warning.
```html
```
#### Use the Terminal JS SDK as a module
We also provide an npm package to load and use the Terminal JS SDK as a module. For more information, check out the [project on GitHub](https://github.com/stripe/terminal-js).
> For information on migrating from beta versions of the JavaScript SDK, see the [Stripe Terminal Beta Migration Guide](https://docs.stripe.com/terminal/references/sdk-migration-guide.md).
#### Server-side
Use our official libraries for access to the Stripe API from your application:
#### Ruby
```bash
# Available as a gem
sudo gem install stripe
```
```ruby
# If you use bundler, you can add this line to your Gemfile
gem 'stripe'
```
## Set up the ConnectionToken endpoint [Server-side] [Client-side]
#### Server-side
To connect to a reader, your backend needs to give the SDK permission to use the reader with your Stripe account, by providing it with the [secret](https://docs.stripe.com/api/terminal/connection_tokens/object.md#terminal_connection_token_object-secret) from a [ConnectionToken](https://docs.stripe.com/api/terminal/connection_tokens.md). Your backend needs to only create connection tokens for clients that it trusts.
#### curl
```bash
curl https://api.stripe.com/v1/terminal/connection_tokens \
-u <>: \
-X "POST"
```
Obtain the secret from the `ConnectionToken` on your server and pass it to the client side.
#### Ruby
```ruby
post '/connection_token' do
token = # ... Create or retrieve the ConnectionToken
{secret: token.secret}.to_json
end
```
> The `secret` from the `ConnectionToken` lets you connect to any Stripe Terminal reader and take payments with your Stripe account. Be sure to authenticate the endpoint for creating connection tokens and protect it from cross-site request forgery (CSRF).
#### Client-side
To give the SDK access to this endpoint, create a function in your web application that requests a `ConnectionToken` from your backend and returns the `secret` from the `ConnectionToken` object.
```javascript
async function fetchConnectionToken() {
// Your backend should call /v1/terminal/connection_tokens and return the JSON response from Stripe
const response = await fetch('https://{{YOUR_BACKEND_URL}}/connection_token', { method: "POST" });
const data = await response.json();
return data.secret;
}
```
This function is called whenever the SDK needs to authenticate with Stripe or the Reader. It’s also called when a new connection token is needed to connect to a reader (for example, when your app disconnects from a reader). If the SDK can’t retrieve a new connection token from your backend, connecting to a reader fails with the error from your server.
> Don’t cache or hardcode the connection token. The SDK manages the connection token’s lifecycle.
## Initialize the SDK [Client-side]
> Chrome 142 (released October 28, 2025) and later versions require explicit permission before websites can access local network devices (like Terminal readers) when using the Stripe Terminal JavaScript SDK. For setup steps and troubleshooting, see [Chrome 142+ instructions](https://support.stripe.com/questions/ensuring-stripe-terminal-javascript-sdk-functionality-on-chrome-142).
The [StripeTerminal](https://docs.stripe.com/terminal/references/api/js-sdk.md#stripeterminal-create) object made available by the SDK exposes a generic interface for discovering readers, connecting to a reader, and creating payments. To initialize a `StripeTerminal` instance in your JavaScript application, provide the `ConnectionToken` function implemented in [Step 2](https://docs.stripe.com/terminal/payments/setup-integration.md#connection-token).
You must also provide a function to handle unexpected disconnects from the reader, [onUnexpectedReaderDisconnect](https://docs.stripe.com/terminal/references/api/js-sdk.md#stripeterminal-create). In this function, your app needs to notify the user that the reader disconnected. You can also include a way to attempt to reconnect to a reader. For more information, see [Handling disconnects](https://docs.stripe.com/terminal/payments/connect-reader.md?terminal-sdk-platform=js&reader-type=internet#handling-disconnects).
```javascript
const terminal = StripeTerminal.create({
onFetchConnectionToken: fetchConnectionToken,
onUnexpectedReaderDisconnect: unexpectedDisconnect,
});
function unexpectedDisconnect() {
// You might want to display UI to notify the user and start re-discovering readers
}
```
## SDK updates
Stripe periodically releases updates which can include new functionality, bug fixes, and security updates. Update your SDK as soon as a new version is available. The currently available SDKs are:
- [Stripe Terminal Android SDK](https://github.com/stripe/stripe-terminal-android/releases)
- [Stripe Terminal iOS SDK](https://github.com/stripe/stripe-terminal-ios/releases)
- [Stripe Terminal JavaScript SDK](https://docs.stripe.com/terminal/references/api/js-sdk.md#changelog)
- [Stripe Terminal React Native SDK](https://github.com/stripe/stripe-terminal-react-native)
## Supported browsers
The Stripe Terminal JavaScript SDK strives to support all recent versions of major browsers. We support:
- Edge on Windows.
- Firefox on desktop platforms.
- Chrome and Safari on all platforms.
- The Android native browser on Android 4.4 and later.
If you have issues with the Stripe Terminal JavaScript SDK on a specific browser, email [support-terminal@stripe.com](mailto:support-terminal@stripe.com).
> Note: Using the Stripe Terminal JavaScript SDK with React Native isn’t supported. To build Stripe Terminal into your mobile app with React Native, use the [Stripe Terminal React Native SDK](https://github.com/stripe/stripe-terminal-react-native).
## Next steps
- [Connect to a reader](https://docs.stripe.com/terminal/payments/connect-reader.md?terminal-sdk-platform=js&reader-type=internet)
# iOS
> This is a iOS for when terminal-sdk-platform is ios. View the full page at https://docs.stripe.com/terminal/payments/setup-integration?terminal-sdk-platform=ios.
If you’re looking for a more detailed reference with all available methods, objects, and errors, consult our [full SDK reference](https://stripe.dev/stripe-terminal-ios).
Getting started with the iOS SDK requires four steps:
1. [Install the SDK](https://docs.stripe.com/terminal/payments/setup-integration.md#install) in your app.
1. [Configure](https://docs.stripe.com/terminal/payments/setup-integration.md#configure) your app.
1. [Set up the connection token endpoint](https://docs.stripe.com/terminal/payments/setup-integration.md#connection-token) in your app and backend.
1. [Initialize the SDK](https://docs.stripe.com/terminal/payments/setup-integration.md#initialize) in your app.
## Install the SDK [Client-side]
The Stripe Terminal iOS SDK is compatible with apps that:
- Support iOS 13 and above
- Are installed with CocoaPods, Swift Package Manager, or by manually integrating the framework
#### Cocoapods
1. If you haven’t already done so, install a recent version of [CocoaPods](https://guides.cocoapods.org/using/getting-started.html).
1. If you don’t have an existing [Podfile](https://guides.cocoapods.org/syntax/podfile.html), run the following command to create one:
```bash
pod init
```
1. Add this line to your Podfile:
```podfile
pod 'StripeTerminal', '~> 5.0'
```
1. Run the following command:
```bash
pod install
```
1. From now on, use the `.xcworkspace` file to open your project in Xcode, instead of the `.xcodeproj` file.
#### Swift Package Manager
1. In Xcode, select **File** > **Add Packages…** from the menu bar
1. Enter the Stripe Terminal iOS SDK’s GitHub URL: `https://github.com/stripe/stripe-terminal-ios`
1. Enter the SDK version you’d like to install in your project. The default value, “Up to Next Major,” helps you keep up-to-date with security and feature updates without taking on breaking changes unexpectedly.
#### Manual
1. Visit the Stripe Terminal iOS repository on GitHub and go to the [latest release](https://github.com/stripe/stripe-terminal-ios/releases).
1. Download the `StripeTerminal.xcframework.zip` file attached to the GitHub release.
1. Unzip the file, then drag and drop the XCFramework into your Xcode project.
1. If the framework’s symbols can’t be loaded, go to the “General” pane of your target and find the “Frameworks, Libraries, and Embedded Content” dropdown. Switch `StripeTerminal.xcframework` from “Don’t Embed” to “Embed and Sign”.
> For details on the latest SDK release and past versions, see the [Releases](https://github.com/stripe/stripe-terminal-ios/releases) page on GitHub. To receive notifications when a new release is published, [watch releases for the repository](https://docs.github.com/en/github/managing-subscriptions-and-notifications-on-github/configuring-notifications#configuring-your-watch-settings-for-an-individual-repository) or [subscribe to the GitHub Releases RSS feed](https://github.com/stripe/stripe-terminal-ios/releases.atom).
>
> For information on migrating from previous versions of the iOS SDK, see the [Stripe Terminal SDK Migration Guide](https://docs.stripe.com/terminal/references/sdk-migration-guide.md).
## Configure your app [Client-side]
To prepare your app to work with the Stripe Terminal SDK, make a few changes to your **Info.plist** file in Xcode.
1. Enable location services with the following key-value pair.
| Privacy – Location When In Use Usage Description |
| ------------------------------------------------ |
| **Key** | [NSLocationWhenInUseUsageDescription](https://developer.apple.com/documentation/bundleresources/information_property_list/nslocationwheninuseusagedescription) |
| **Value** | **Location access is required to accept payments.** |
To reduce fraud risks associated with payments, and to minimize disputes, Stripe must know where payments occur. If the SDK can’t determine the location of the iOS device, payments are disabled until location access is restored.
1. Make sure that your app runs in the background and remains connected to Bluetooth readers.
| Required background modes for Bluetooth readers |
| ----------------------------------------------- |
| **Key** | [UIBackgroundModes](https://developer.apple.com/documentation/bundleresources/information_property_list/uibackgroundmodes) |
| **Value** | **bluetooth-central** (Uses Bluetooth LE accessories) |
Setting the [bluetooth-central](https://developer.apple.com/library/archive/documentation/NetworkingInternetWeb/Conceptual/CoreBluetooth_concepts/CoreBluetoothBackgroundProcessingForIOSApps/PerformingTasksWhileYourAppIsInTheBackground.html#//apple_ref/doc/uid/TP40013257-CH7-SW6) background mode lets the reader remain in standby mode when your app is running in the background, or when the iOS device is locked. Without this value, standby fails. When your app is running in the background, the reader can turn off automatically to conserve power.
1. Allow your app to display a Bluetooth permission dialog. The app store requires including this, even if your app doesn’t support connecting to Bluetooth readers.
| Privacy - Bluetooth Always Usage Description |
| -------------------------------------------- |
| **Key** | [NSBluetoothAlwaysUsageDescription](https://developer.apple.com/documentation/bundleresources/information_property_list/NSBluetoothAlwaysUsageDescription) |
| **Value** | **This app uses Bluetooth to connect to supported card readers.** |
iOS 13 introduced more specific permissions concerning an app’s use of Bluetooth peripherals. Apps that link with Core Bluetooth must include this key in their Info.plist file to prevent the app from crashing on its first launch.
1. Pass app validation checks when you submit it to the App Store. As of SDK version 3.4.0, this permission requirement is removed.
| Privacy – Bluetooth Peripheral Usage Description |
| ------------------------------------------------ |
| **Key** | [NSBluetoothPeripheralUsageDescription](https://developer.apple.com/documentation/bundleresources/information_property_list/nsbluetoothperipheralusagedescription) |
| **Value** | **Connecting to supported card readers requires Bluetooth access.** |
This is an example—you can rephrase the prompt for user permission in your app.
1. Save your app’s **Info.plist**. Now it’s configured correctly and ready for use with the Stripe Terminal SDK.
> If you’re using Tap to Pay on iPhone, you must [request and configure](https://developer.apple.com/documentation/proximityreader/setting-up-the-entitlement-for-tap-to-pay-on-iphone) the Tap to Pay on iPhone development entitlement from your Apple Developer account.
## Set up the ConnectionToken endpoint [Server-side] [Client-side]
### Server-side
To connect to a reader, your backend needs to give the SDK permission to use the reader with your Stripe account, by providing it with the [secret](https://docs.stripe.com/api/terminal/connection_tokens/object.md#terminal_connection_token_object-secret) from a [ConnectionToken](https://docs.stripe.com/api/terminal/connection_tokens.md). Your backend needs to only create connection tokens for clients that it trusts.
#### curl
```bash
curl https://api.stripe.com/v1/terminal/connection_tokens \
-u <>: \
-X "POST"
```
Obtain the secret from the `ConnectionToken` on your server and pass it to the client side.
#### Ruby
```ruby
post '/connection_token' do
token = # ... Create or retrieve the ConnectionToken
{secret: token.secret}.to_json
end
```
> The `secret` from the `ConnectionToken` lets you connect to any Stripe Terminal reader and take payments with your Stripe account. Be sure to authenticate the endpoint for creating connection tokens and protect it from cross-site request forgery (CSRF).
### Client-side
To give the SDK access to this endpoint, implement the [ConnectionTokenProvider](https://stripe.dev/stripe-terminal-ios/docs/Protocols/SCPConnectionTokenProvider.html) protocol in your app, which defines a single function that requests a `ConnectionToken` from your backend.
```swift
import StripeTerminal
// Example API client class for communicating with your backend
class APIClient: ConnectionTokenProvider {
// For simplicity, this example class is a singleton
static let shared = APIClient()
// Fetches a ConnectionToken from your backend
func fetchConnectionToken(_ completion: @escaping ConnectionTokenCompletionBlock) {
let config = URLSessionConfiguration.default
let session = URLSession(configuration: config)
guard let url = URL(string: "https://{{YOUR_BACKEND_URL}}/connection_token") else {
fatalError("Invalid backend URL")
}
var request = URLRequest(url: url)
request.httpMethod = "POST"
let task = session.dataTask(with: request) { (data, response, error) in
if let data = data {
do {
// Warning: casting using `as? [String: String]` looks simpler, but isn't safe:
let json = try JSONSerialization.jsonObject(with: data, options: []) as? [String: Any]
if let secret = json?["secret"] as? String {
completion(secret, nil)
}
else {
let error = NSError(domain: "com.stripe-terminal-ios.example",
code: 2000,
userInfo: [NSLocalizedDescriptionKey: "Missing `secret` in ConnectionToken JSON response"])
completion(nil, error)
}
}
catch {
completion(nil, error)
}
}
else {
let error = NSError(domain: "com.stripe-terminal-ios.example",
code: 1000,
userInfo: [NSLocalizedDescriptionKey: "No data in response from ConnectionToken endpoint"])
completion(nil, error)
}
}
task.resume()
}
}
```
This function is called whenever the SDK needs to authenticate with Stripe or the Reader. It’s also called when a new connection token is needed to connect to a reader (for example, when your app disconnects from a reader). If the SDK can’t retrieve a new connection token from your backend, connecting to a reader fails with the error from your server.
> Don’t cache or hardcode the connection token. The SDK manages the connection token’s lifecycle.
> #### Certificate pinning
>
> In most cases, you shouldn’t configure your application with certificate pinning. If your application does require it, see the [certificate pinning](https://docs.stripe.com/tls-certificates.md#certificate-pinning) docs.
## Initialize the SDK [Client-side]
The [Terminal](https://stripe.dev/stripe-terminal-ios/docs/Classes/SCPTerminal.html) class made available by the Stripe Terminal SDK exposes a generic interface for discovering readers, connecting to a reader, and performing operations on the reader, such as displaying cart details, collecting payments, and saving cards for future use.
Provide the `ConnectionTokenProvider` you implemented while [setting up the connection token](https://docs.stripe.com/terminal/payments/setup-integration.md#connection-token). Call `initWithTokenProvider` only once in your app before accessing `Terminal.shared`, typically in the `AppDelegate` method `application:didFinishLaunchingWithOptions` or in the `init()` of your SwiftUI `App` type. Alternatively, use `dispatch_once` in Objective-C or a `static` initializer in Swift.
```swift
import UIKit
import StripeTerminal
@UIApplicationMain
class AppDelegate: UIResponder, UIApplicationDelegate {
func application(_ application: UIApplication, didFinishLaunchingWithOptions launchOptions: [UIApplication.LaunchOptionsKey : Any]? = nil) -> Bool {
Terminal.initWithTokenProvider(APIClient.shared)
// ...
return true
}
// ...
}
```
## SDK updates
Stripe periodically releases updates which can include new functionality, bug fixes, and security updates. Update your SDK as soon as a new version is available. The currently available SDKs are:
- [Stripe Terminal Android SDK](https://github.com/stripe/stripe-terminal-android/releases)
- [Stripe Terminal iOS SDK](https://github.com/stripe/stripe-terminal-ios/releases)
- [Stripe Terminal JavaScript SDK](https://docs.stripe.com/terminal/references/api/js-sdk.md#changelog)
- [Stripe Terminal React Native SDK](https://github.com/stripe/stripe-terminal-react-native)
## Next steps
- [Connect to a reader](https://docs.stripe.com/terminal/payments/connect-reader.md?terminal-sdk-platform=ios&reader-type=internet)
# Android
> This is a Android for when terminal-sdk-platform is android. View the full page at https://docs.stripe.com/terminal/payments/setup-integration?terminal-sdk-platform=android.
If you’re looking for a more detailed reference with all available methods, objects, and errors, consult our [full SDK reference](https://stripe.dev/stripe-terminal-android/).
Getting started with the Android SDK requires four steps:
1. [Install the SDK](https://docs.stripe.com/terminal/payments/setup-integration.md#install) in your app.
1. [Configure](https://docs.stripe.com/terminal/payments/setup-integration.md#configure) your app.
1. [Set up the connection token endpoint](https://docs.stripe.com/terminal/payments/setup-integration.md#connection-token) in your app and backend.
1. [Initialize the SDK](https://docs.stripe.com/terminal/payments/setup-integration.md#initialize) in your app.
## Install the SDK [Client-side]
> The SDK is no longer compatible with the support libraries, as we use Room to store and maintain state across the app lifecycle. Make sure your app has migrated to AndroidX.
To install the SDK, add `stripeterminal` to the `dependencies` block of your [app’s build file](https://developer.android.com/studio/build/dependencies):
#### Kotlin
```kotlin
plugins {
id("com.android.application")
}
android { ... }
dependencies {
implementation("com.stripe:stripeterminal:5.4.1")
// ...
}
```
### (Optional) Kotlin Coroutine support
SDK version 5.0.0 includes an optional module, `stripeterminal-ktx`. This module provides `suspend` function wrappers for asynchronous Terminal APIs, allowing you to write simple, sequential code instead of nesting callbacks.
To use it, add its dependency:
#### Kotlin
```kotlin
dependencies {
implementation("com.stripe:stripeterminal:5.4.1")
// Add the coroutines module
implementation("com.stripe:stripeterminal-ktx:5.4.1")
// ...
}
```
See an example of this integration pattern in our [Kotlin example app](https://github.com/stripe/stripe-terminal-android/tree/master/Example/kotlinapp) on GitHub.
### Set target Java version
Next, since the SDK relies on Java 8, your app’s build file needs to specify that as your target Java version:
#### Kotlin
```kotlin
android {
// ...
compileOptions {
sourceCompatibility = JavaVersion.VERSION_1_8
targetCompatibility = JavaVersion.VERSION_1_8
}
kotlinOptions {
jvmTarget = "1.8"
}
}
```
> For details on the latest SDK release and past versions, see the [Releases](https://github.com/stripe/stripe-terminal-android/releases) page on GitHub. To receive notifications when a new release is published, [watch releases for the repository](https://docs.github.com/en/github/managing-subscriptions-and-notifications-on-github/configuring-notifications#configuring-your-watch-settings-for-an-individual-repository).
>
> For information on migrating from earlier or beta versions of the Android SDK, see the [Stripe Terminal Migration Guide](https://docs.stripe.com/terminal/references/sdk-migration-guide.md).
## Configure your app [Client-side]
You must enable the `ACCESS_FINE_LOCATION` permission. To connect a Bluetooth reader, you must also enable Bluetooth permissions. Add the appropriate permissions to your manifest as shown here:
```xml
```
Before initializing the [Terminal](https://stripe.dev/stripe-terminal-android/core/com.stripe.stripeterminal/-terminal/index.html) object, add the following check to make sure that the `ACCESS_FINE_LOCATION` permission is enabled in your app:
```kotlin
if (ContextCompat.checkSelfPermission(this, android.Manifest.permission.ACCESS_FINE_LOCATION) != PackageManager.PERMISSION_GRANTED) {
val permissions = arrayOf(android.Manifest.permission.ACCESS_FINE_LOCATION)
ActivityCompat.requestPermissions(this, permissions, REQUEST_CODE_LOCATION)
}
```
Also verify that the app user grants location permission—the SDK doesn’t function without it. To do this, override the `onRequestPermissionsResult` method in your app and check the permission result.
```kotlin
override fun onRequestPermissionsResult(
requestCode: Int,
permissions: Array,
grantResults: IntArray
) {
super.onRequestPermissionsResult(requestCode, permissions, grantResults)
if (requestCode == REQUEST_CODE_LOCATION && grantResults.isNotEmpty()
&& grantResults[0] != PackageManager.PERMISSION_GRANTED
) {
throw RuntimeException("Location services are required to connect to a reader.")
}
}
```
You should also ensure that location and bluetooth services are enabled on the device, not just for the application. See an example of how this might look in device settings:
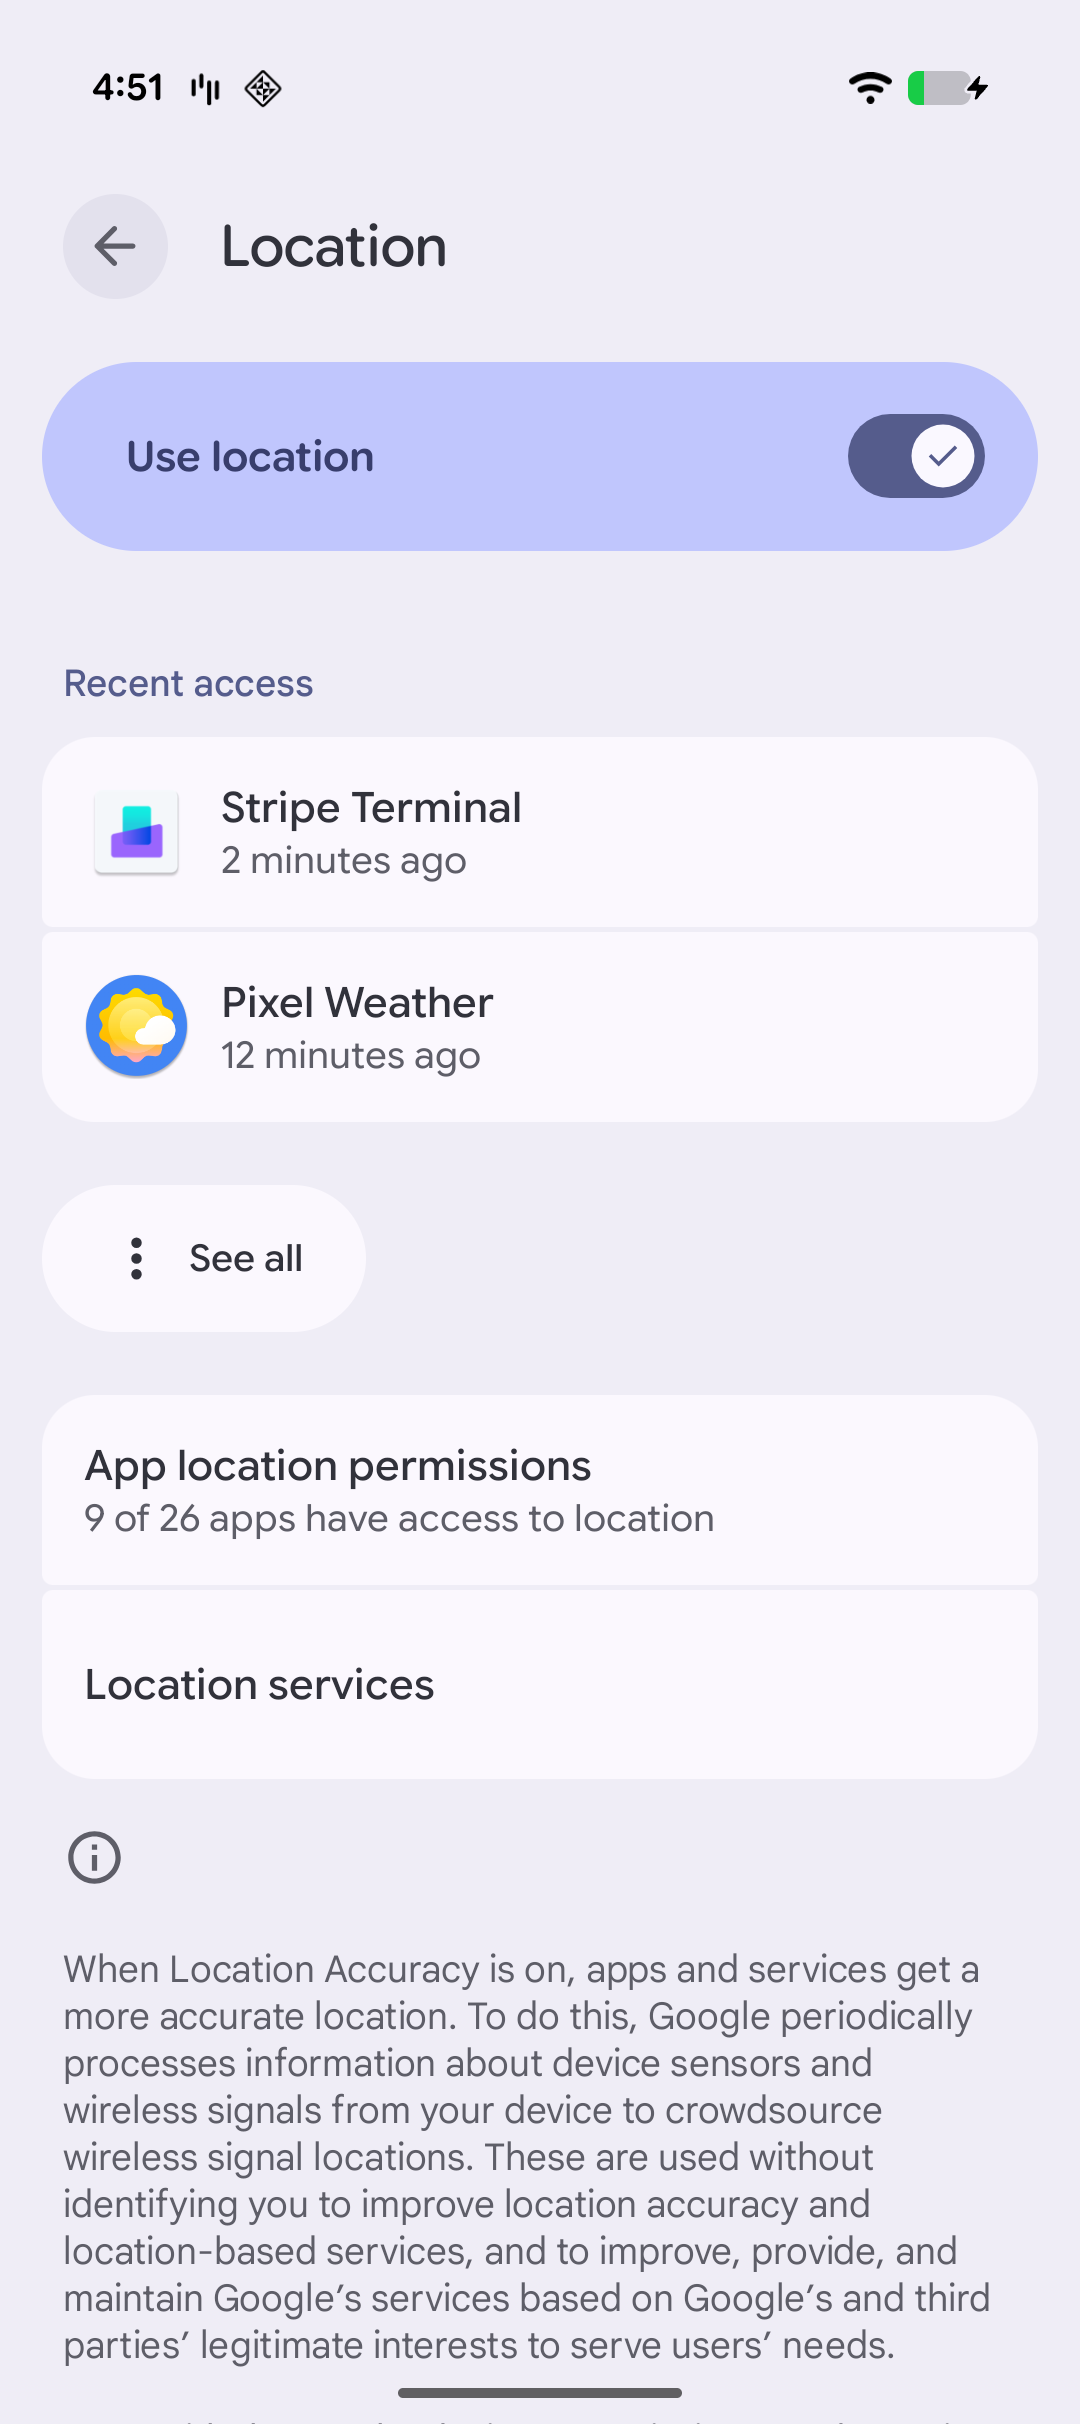
Location settings
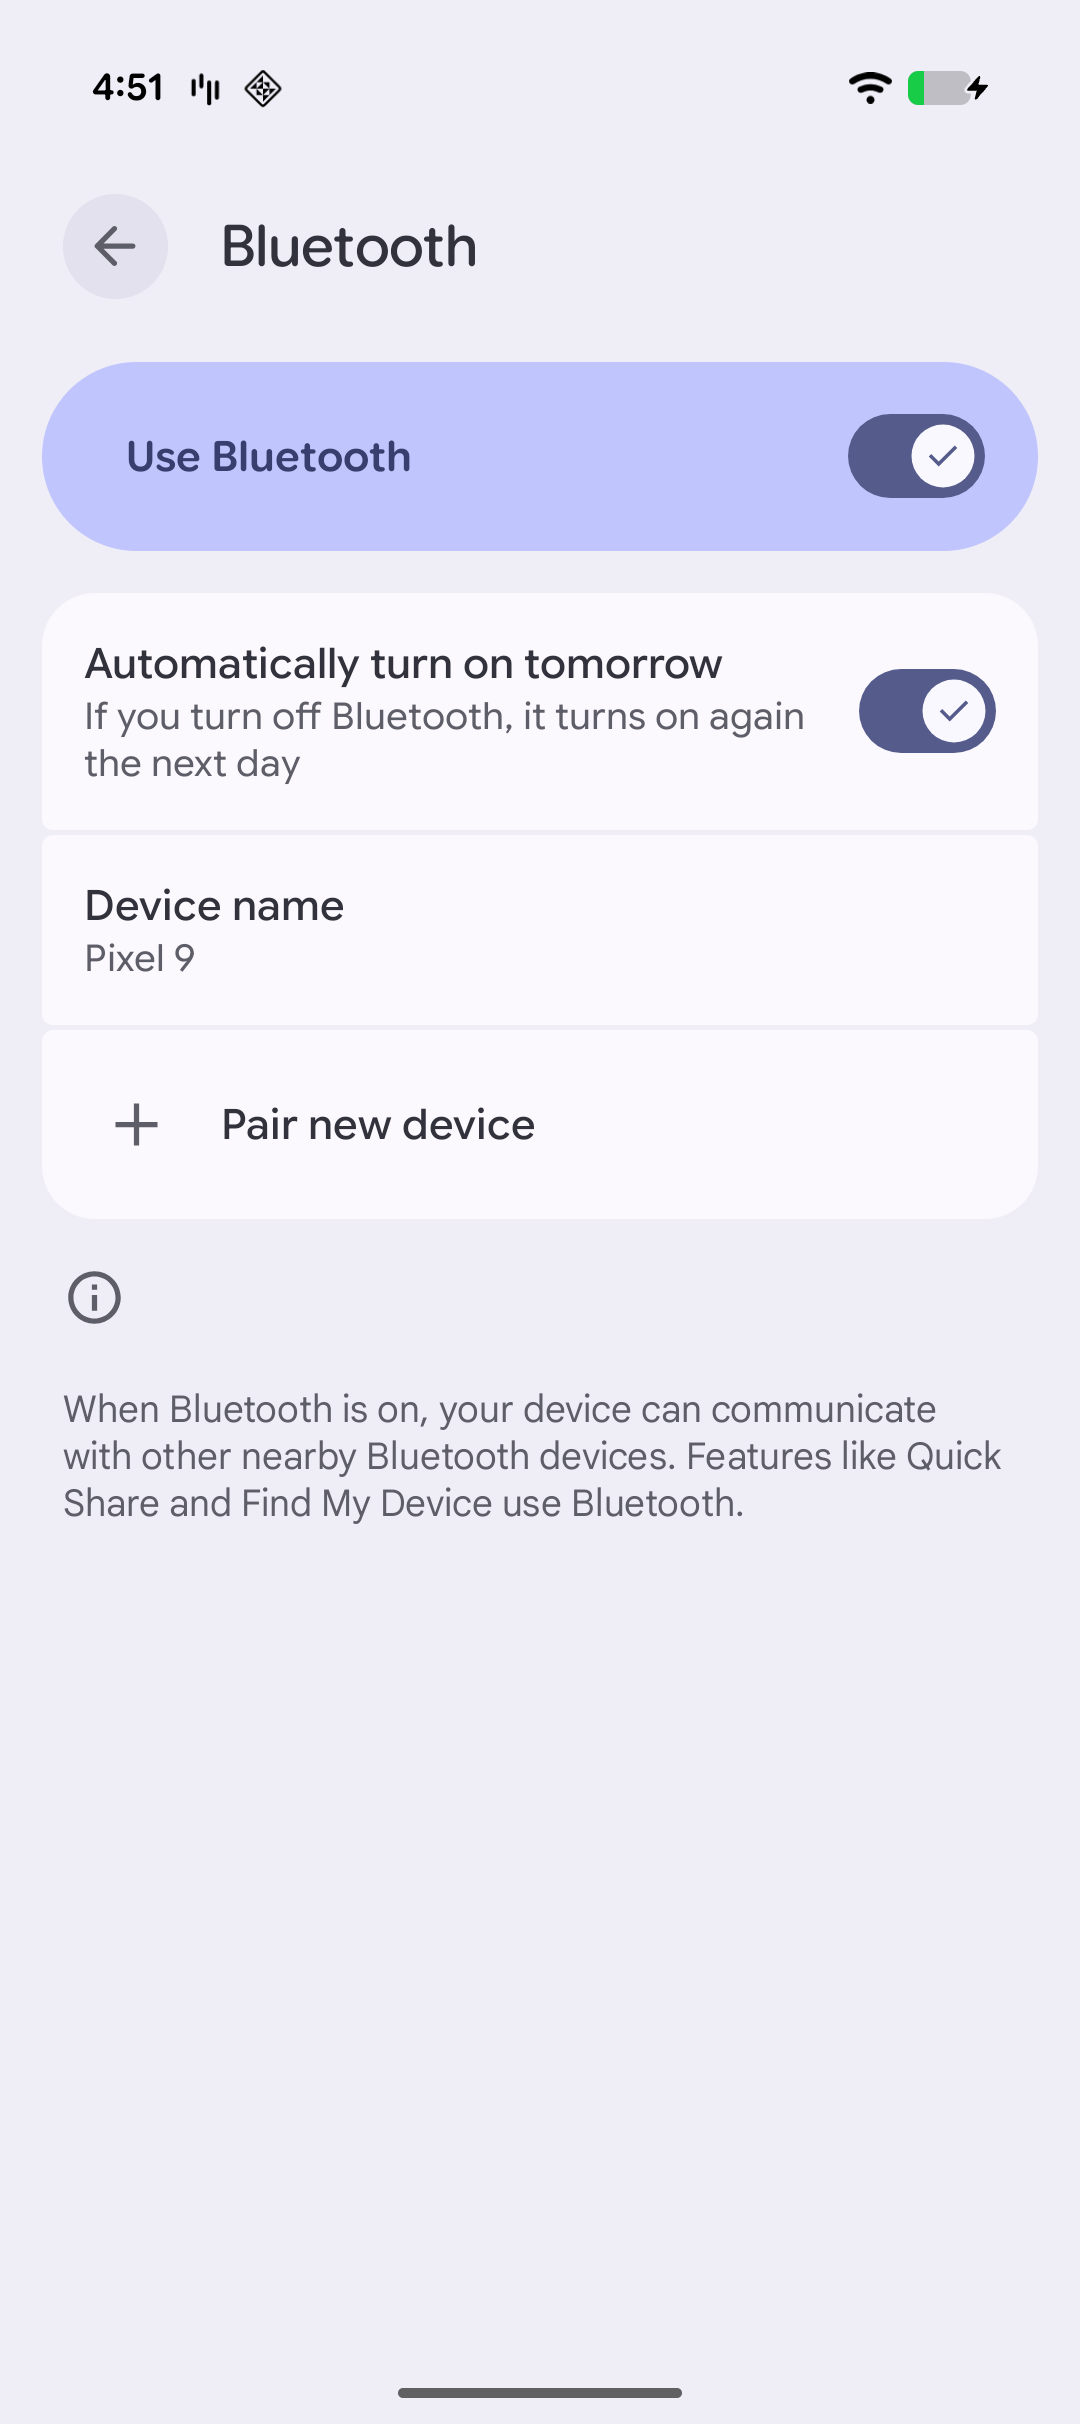
Bluetooth settings
> To reduce fraud risks associated with payments, and to minimize disputes, Stripe needs to know where payments occur. If the SDK can’t determine the location of the Android device, payments are disabled until location access is restored.
## Set up the ConnectionToken endpoint [Server-side] [Client-side]
### Server-side
To connect to a reader, your backend needs to give the SDK permission to use the reader with your Stripe account, by providing it with the [secret](https://docs.stripe.com/api/terminal/connection_tokens/object.md#terminal_connection_token_object-secret) from a [ConnectionToken](https://docs.stripe.com/api/terminal/connection_tokens.md). Your backend needs to only create connection tokens for clients that it trusts.
#### curl
```bash
curl https://api.stripe.com/v1/terminal/connection_tokens \
-u <>: \
-X "POST"
```
Obtain the secret from the `ConnectionToken` on your server and pass it to the client side.
#### Ruby
```ruby
post '/connection_token' do
token = # ... Create or retrieve the ConnectionToken
{secret: token.secret}.to_json
end
```
> The `secret` from the `ConnectionToken` lets you connect to any Stripe Terminal reader and take payments with your Stripe account. Be sure to authenticate the endpoint for creating connection tokens and protect it from cross-site request forgery (CSRF).
### Client-side
To give the SDK access to this endpoint, implement the [ConnectionTokenProvider](https://stripe.dev/stripe-terminal-android/external/com.stripe.stripeterminal.external.callable/-connection-token-provider/index.html) interface in your app, which defines a single function that requests a `ConnectionToken` from your backend.
```kotlin
class CustomConnectionTokenProvider : ConnectionTokenProvider {
override fun fetchConnectionToken(callback: ConnectionTokenCallback) {
try {
// Your backend should call /v1/terminal/connection_tokens and return the
// JSON response from Stripe. When the request to your backend succeeds,
// return the `secret` from the response to the SDK.
callback.onSuccess(secret)
} catch (e: Exception) {
callback.onFailure(
ConnectionTokenException("Failed to fetch connection token", e)
)
}
}
}
```
This function is called whenever the SDK needs to authenticate with Stripe or the Reader. It’s also called when a new connection token is needed to connect to a reader (for example, when your app disconnects from a reader). If the SDK can’t retrieve a new connection token from your backend, connecting to a reader fails with the error from your server.
> Don’t cache or hardcode the connection token. The SDK manages the connection token’s lifecycle.
> #### Certificate pinning
>
> In most cases, you shouldn’t configure your application with certificate pinning. If your application does require it, see the [certificate pinning](https://docs.stripe.com/tls-certificates.md#certificate-pinning) docs.
## Initialize the SDK [Client-side]
The Android SDK is lifecycle aware. To prevent memory leaks and ensure proper cleanup of long-running Terminal SDK processes, your application must implement an `Application` subclass that uses `TerminalApplicationDelegate.onCreate()` to inform the SDK about lifecycle events.
```kotlin
// Substitute with your application name, and remember to keep it the same as your AndroidManifest.xml
class StripeTerminalApplication : Application() {
override fun onCreate() {
super.onCreate()
TerminalApplicationDelegate.onCreate(this)
}
}
```
> If you want to use Tap to Pay on Android (TTPA), the initialization in `Application` is slightly different from this example. See [Connect to a reader with TTPA](https://docs.stripe.com/terminal/payments/connect-reader.md?terminal-sdk-platform=android&reader-type=tap-to-pay#initialize).
The [Terminal](https://stripe.dev/stripe-terminal-android/core/com.stripe.stripeterminal/-terminal/index.html) class made available by the Stripe Terminal SDK exposes a generic interface for discovering readers, connecting to a reader, and performing operations on the reader, such as displaying cart details, collecting payments, and saving cards for future use.
To get started, provide the current application context, the [ConnectionTokenProvider](https://stripe.dev/stripe-terminal-android/external/com.stripe.stripeterminal.external.callable/-connection-token-provider/index.html) implemented in [Step 3](https://docs.stripe.com/terminal/payments/setup-integration.md#connection-token), and a [TerminalListener](https://stripe.dev/stripe-terminal-android/external/com.stripe.stripeterminal.external.callable/-terminal-listener/index.html) object. You can use this listener to handle events such as payment and connection status updates from the SDK.
```kotlin
// Create your listener object. Override any methods that you want to be notified about
val listener = object : TerminalListener {
override fun onConnectionStatusChange(status: ConnectionStatus) {
println("onConnectionStatusChange: $status");
}
override fun onPaymentStatusChange(status: PaymentStatus) {
println("onPaymentStatusChange: $status");
}
}
// Choose the level of messages that should be logged to your console
val logLevel = LogLevel.VERBOSE
// Create your token provider.
val tokenProvider = CustomConnectionTokenProvider()
// Offline listener is optional and only needed if processing offline transactions.
// See https://docs.stripe.com/terminal/features/operate-offline/collect-card-payments
val offlineListener: OfflineListener? = null
// Pass in the current application context, your desired logging level, your token provider, and the listener you created
if (!Terminal.isInitialized()) {
Terminal.init(applicationContext, logLevel, tokenProvider, listener, offlineListener)
}
// Since the Terminal is a singleton, you can call getInstance whenever you need it
Terminal.getInstance()
```
## SDK updates
Stripe periodically releases updates which can include new functionality, bug fixes, and security updates. Update your SDK as soon as a new version is available. The currently available SDKs are:
- [Stripe Terminal Android SDK](https://github.com/stripe/stripe-terminal-android/releases)
- [Stripe Terminal iOS SDK](https://github.com/stripe/stripe-terminal-ios/releases)
- [Stripe Terminal JavaScript SDK](https://docs.stripe.com/terminal/references/api/js-sdk.md#changelog)
- [Stripe Terminal React Native SDK](https://github.com/stripe/stripe-terminal-react-native)
## Next steps
- [Connect to a reader](https://docs.stripe.com/terminal/payments/connect-reader.md?terminal-sdk-platform=android&reader-type=internet)
# React Native
> This is a React Native for when terminal-sdk-platform is react-native. View the full page at https://docs.stripe.com/terminal/payments/setup-integration?terminal-sdk-platform=react-native.
> Terminal’s React Native library is in [public preview](https://docs.stripe.com/release-phases.md) and in active development. Please report any issues you encounter to our [GitHub project](https://github.com/stripe/stripe-terminal-react-native/issues/new/choose).
Getting started with the React Native SDK requires four steps:
1. [Install the SDK](https://docs.stripe.com/terminal/payments/setup-integration.md#install) in your app.
1. [Configure](https://docs.stripe.com/terminal/payments/setup-integration.md#configure) your app.
1. [Set up the connection token endpoint](https://docs.stripe.com/terminal/payments/setup-integration.md#connection-token) in your app and backend.
1. [Initialize the SDK](https://docs.stripe.com/terminal/payments/setup-integration.md#initialize) in your app.
> If you’re building an **Apps on Devices** integration (running your app on Stripe smart readers such as the S700/S710), you must also complete additional [native Android setup steps](https://docs.stripe.com/terminal/features/apps-on-devices/build.md?terminal-sdk-platform=react-native#setup-app) after following this guide.
## Install the SDK [Client-side]
The [React Native SDK](https://github.com/stripe/stripe-terminal-react-native) is open source and fully documented. Internally, it makes use of native iOS and Android SDKs. Install the SDK by running:
#### NPM
```bash
npm install @stripe/stripe-terminal-react-native
```
#### Yarn
```bash
yarn add @stripe/stripe-terminal-react-native
```
#### Expo
```bash
npx expo install @stripe/stripe-terminal-react-native
```
## Configure your app [Client-side]
#### React Native CLI
#### iOS
### Pods
You must run `pod install` in your `ios` directory to install the native dependencies.
### Permissions
To prepare your app to work with the Stripe Terminal SDK, make a few changes to your **Info.plist** file in Xcode.
1. Enable location services with the following key-value pair.
| Privacy – Location When In Use Usage Description |
| ------------------------------------------------ |
| **Key** | [NSLocationWhenInUseUsageDescription](https://developer.apple.com/documentation/bundleresources/information_property_list/nslocationwheninuseusagedescription) |
| **Value** | **Location access is required to accept payments.** |
To reduce fraud risks associated with payments, and to minimize disputes, Stripe must know where payments occur. If the SDK can’t determine the location of the iOS device, payments are disabled until location access is restored.
1. Make sure that your app runs in the background and remains connected to Bluetooth readers.
| Required background modes for Bluetooth readers |
| ----------------------------------------------- |
| **Key** | [UIBackgroundModes](https://developer.apple.com/documentation/bundleresources/information_property_list/uibackgroundmodes) |
| **Value** | **bluetooth-central** (Uses Bluetooth LE accessories) |
Setting the [bluetooth-central](https://developer.apple.com/library/archive/documentation/NetworkingInternetWeb/Conceptual/CoreBluetooth_concepts/CoreBluetoothBackgroundProcessingForIOSApps/PerformingTasksWhileYourAppIsInTheBackground.html#//apple_ref/doc/uid/TP40013257-CH7-SW6) background mode lets the reader remain in standby mode when your app is running in the background, or when the iOS device is locked. Without this value, standby fails. When your app is running in the background, the reader can turn off automatically to conserve power.
1. Allow your app to display a Bluetooth permission dialog. The app store requires including this, even if your app doesn’t support connecting to Bluetooth readers.
| Privacy - Bluetooth Always Usage Description |
| -------------------------------------------- |
| **Key** | [NSBluetoothAlwaysUsageDescription](https://developer.apple.com/documentation/bundleresources/information_property_list/NSBluetoothAlwaysUsageDescription) |
| **Value** | **This app uses Bluetooth to connect to supported card readers.** |
iOS 13 introduced more specific permissions concerning an app’s use of Bluetooth peripherals. Apps that link with Core Bluetooth must include this key in their Info.plist file to prevent the app from crashing on its first launch.
1. Pass app validation checks when you submit it to the App Store. As of SDK version 3.4.0, this permission requirement is removed.
| Privacy – Bluetooth Peripheral Usage Description |
| ------------------------------------------------ |
| **Key** | [NSBluetoothPeripheralUsageDescription](https://developer.apple.com/documentation/bundleresources/information_property_list/nsbluetoothperipheralusagedescription) |
| **Value** | **Connecting to supported card readers requires Bluetooth access.** |
This is an example—you can rephrase the prompt for user permission in your app.
1. Save your app’s **Info.plist**. Now it’s configured correctly and ready for use with the Stripe Terminal SDK.
> If you’re using Tap to Pay on iPhone, you must [request and configure](https://developer.apple.com/documentation/proximityreader/setting-up-the-entitlement-for-tap-to-pay-on-iphone) the Tap to Pay on iPhone development entitlement from your Apple Developer account.
#### Android
### Permissions
The Stripe Terminal SDK requires the following Android permissions to function properly:
- `PermissionsAndroid.PERMISSIONS.BLUETOOTH_CONNECT`
- `PermissionsAndroid.PERMISSIONS.BLUETOOTH_SCAN`
- `PermissionsAndroid.PERMISSIONS.ACCESS_FINE_LOCATION`
Use the `requestNeededAndroidPermissions` helper function to automatically request all required permissions before you initialize the Terminal SDK:
```js
import { requestNeededAndroidPermissions } from '@stripe/stripe-terminal-react-native';
try {
const granted = await requestNeededAndroidPermissions({
accessFineLocation: {
title: 'Location Permission',
message: 'Stripe Terminal needs access to your location',
buttonPositive: 'Accept',
},
});
if (granted) {
// Initialize the SDK
} else {
console.error(
'Location and BT services are required to connect to a reader.'
);
}
} catch (e) {
console.error(e);
}
```
Alternatively, if you need granular control over permission requests, you can manually request each permission using `PermissionsAndroid.request`:
```js
import { PermissionsAndroid } from 'react-native';
// Mobile readers using Bluetooth connection require BLUETOOTH_CONNECT, BLUETOOTH_SCAN, and ACCESS_FINE_LOCATION.
// This example shows the pattern for requesting one permission.
const granted = await PermissionsAndroid.request(
PermissionsAndroid.PERMISSIONS.ACCESS_FINE_LOCATION,
{
title: 'Location Permission',
message: 'Stripe Terminal needs access to your location',
buttonPositive: 'Accept',
},
);
if (granted === PermissionsAndroid.RESULTS.GRANTED) {
console.log('Location permission granted');
} else {
console.error('Location permission denied');
}
```
### Manifest
To ensure compatibility with Android 12 and later, make sure to add `android:exported="true"` to `AndroidManifest.xml`:
```xml
```
For additional context on changes made in Android 12, see the [Android documentation about safer component exporting](https://developer.android.com/about/versions/12/behavior-changes-12#exported).
For devices running on Android 11 or below, you must grant permissions through the manifest as well:
```xml
```
#### Expo
> This package can’t be used in the “Expo Go” app because it requires [custom native code](https://docs.expo.io/workflow/customizing/). You must use `npx expo prebuild` to generate native projects and run your app using `npx expo run:ios` or `npx expo run:android`.
#### iOS
### Configuring the SDK
After [installing](https://docs.stripe.com/terminal/payments/setup-integration.md#installation) the SDK, add the [configuration plugin](https://docs.expo.io/guides/config-plugins/) to the [plugins](https://docs.expo.io/versions/latest/config/app/#plugins) array of your `app.json` or `app.config.js`:
Set the following configuration options, depending on your reader type:
- `localNetworkUsagePermission` - Required for smart readers using LAN connection
- `appDelegate` - Required for Tap to Pay on Android
- `tapToPayCheck` - Enables Tap to Pay compatibility checking
```json
{
"expo": {
"plugins": [
[
"@stripe/stripe-terminal-react-native",
{
"bluetoothBackgroundMode": true,
"locationWhenInUsePermission": "Location access is required to accept payments.",
"bluetoothPeripheralPermission": "Bluetooth access is required to connect to supported bluetooth card readers.",
"bluetoothAlwaysUsagePermission": "This app uses Bluetooth to connect to supported card readers.",
"localNetworkUsagePermission": "This app uses the local WiFi network to connect to supported card readers.",
"appDelegate": true,
"tapToPayCheck": true
}
]
]
}
}
```
### Build
Next, rebuild your app as described in the [Adding custom native code](https://docs.expo.io/workflow/customizing/) guide with:
```bash
npx expo prebuild
```
and then:
```bash
npx expo run:ios
```
> If you’re using Tap to Pay on iPhone, you must [request and configure](https://developer.apple.com/documentation/proximityreader/setting-up-the-entitlement-for-tap-to-pay-on-iphone) the Tap to Pay on iPhone development entitlement from your Apple Developer account.
#### Android
### Permissions
The Stripe Terminal SDK requires the following Android permissions to function properly:
- `PermissionsAndroid.PERMISSIONS.BLUETOOTH_CONNECT`
- `PermissionsAndroid.PERMISSIONS.BLUETOOTH_SCAN`
- `PermissionsAndroid.PERMISSIONS.ACCESS_FINE_LOCATION`
Use the `requestNeededAndroidPermissions` helper function to automatically request all required permissions before you initialize the Terminal SDK:
```js
import { requestNeededAndroidPermissions } from '@stripe/stripe-terminal-react-native';
try {
const granted = await requestNeededAndroidPermissions({
accessFineLocation: {
title: 'Location Permission',
message: 'Stripe Terminal needs access to your location',
buttonPositive: 'Accept',
},
});
if (granted) {
// Initialize the SDK
} else {
console.error(
'Location and BT services are required to connect to a reader.'
);
}
} catch (e) {
console.error(e);
}
```
Alternatively, if you need granular control over permission requests, you can manually request each permission using `PermissionsAndroid.request`:
```js
import { PermissionsAndroid } from 'react-native';
// Mobile readers using Bluetooth connection require BLUETOOTH_CONNECT, BLUETOOTH_SCAN, and ACCESS_FINE_LOCATION.
// This example shows the pattern for requesting one permission.
const granted = await PermissionsAndroid.request(
PermissionsAndroid.PERMISSIONS.ACCESS_FINE_LOCATION,
{
title: 'Location Permission',
message: 'Stripe Terminal needs access to your location',
buttonPositive: 'Accept',
},
);
if (granted === PermissionsAndroid.RESULTS.GRANTED) {
console.log('Location permission granted');
} else {
console.error('Location permission denied');
}
```
### Configuring the SDK
After [installing](https://docs.stripe.com/terminal/payments/setup-integration.md#installation) the SDK, add the [configuration plugin](https://docs.expo.io/guides/config-plugins/) to the [plugins](https://docs.expo.io/versions/latest/config/app/#plugins) array of your `app.json` or `app.config.js`:
Set the following configuration options, depending on your reader type:
- `localNetworkUsagePermission` - Required for smart readers using LAN connection
- `appDelegate` - Required for Tap to Pay on Android
- `tapToPayCheck` - Enables Tap to Pay compatibility checking
```json
{
"expo": {
"plugins": [
[
"@stripe/stripe-terminal-react-native",
{
"bluetoothBackgroundMode": true,
"locationWhenInUsePermission": "Location access is required to accept payments.",
"bluetoothPeripheralPermission": "Bluetooth access is required to connect to supported bluetooth card readers.",
"bluetoothAlwaysUsagePermission": "This app uses Bluetooth to connect to supported card readers.",
"localNetworkUsagePermission": "This app uses the local WiFi network to connect to supported card readers.",
"appDelegate": true,
"tapToPayCheck": true
}
]
]
}
}
```
#### Build
Next, rebuild your app as described in the [Adding custom native code](https://docs.expo.io/workflow/customizing/) guide with:
```bash
npx expo prebuild
```
and then:
```bash
npx expo run:android
```
## Set up the connection token endpoint [Server-side] [Client-side]
### Server-side
To connect to a reader, your backend needs to give the SDK permission to use the reader with your Stripe account, by providing it with the [secret](https://docs.stripe.com/api/terminal/connection_tokens/object.md#terminal_connection_token_object-secret) from a [ConnectionToken](https://docs.stripe.com/api/terminal/connection_tokens.md). Your backend needs to only create connection tokens for clients that it trusts.
#### curl
```bash
curl https://api.stripe.com/v1/terminal/connection_tokens \
-u <>: \
-X "POST"
```
Obtain the secret from the `ConnectionToken` on your server and pass it to the client side.
#### Ruby
```ruby
post '/connection_token' do
token = # ... Create or retrieve the ConnectionToken
{secret: token.secret}.to_json
end
```
> The `secret` from the `ConnectionToken` lets you connect to any Stripe Terminal reader and take payments with your Stripe account. Be sure to authenticate the endpoint for creating connection tokens and protect it from cross-site request forgery (CSRF).
### Client-side
To give the SDK access to this endpoint, create a token provider single function that requests a `ConnectionToken` from your backend.
```js
import { StripeTerminalProvider } from '@stripe/stripe-terminal-react-native';
const fetchTokenProvider = async () => {
const response = await fetch(`{YOUR BACKEND URL}/connection_token`, {
method: 'POST',
headers: {
'Content-Type': 'application/json',
},
});
const { secret } = await response.json();
return secret;
};
```
This function is called whenever the SDK needs to authenticate with Stripe or the Reader. It’s also called when a new connection token is needed to connect to a reader (for example, when your app disconnects from a reader). If the SDK can’t retrieve a new connection token from your backend, connecting to a reader fails with the error from your server.
> Don’t cache or hardcode the connection token. The SDK manages the connection token’s lifecycle.
## Initialize the SDK [Client-side]
To get started, pass in your token provider implemented in [Step 3](https://docs.stripe.com/terminal/payments/setup-integration.md#connection-token) to `StripeTerminalProvider` as a prop.
```js
import { StripeTerminalProvider } from '@stripe/stripe-terminal-react-native';
function Root() {
const fetchTokenProvider = async () => {
const response = await fetch(`${API_URL}/connection_token`, {
method: 'POST',
headers: {
'Content-Type': 'application/json',
},
});
const { secret } = await response.json();
return secret;
};
return (
);
}
```
As a last step, call the `initialize` method from `useStripeTerminal` hook.
> You must call the `initialize` method from a component nested within `StripeTerminalProvider`, not from the component that contains the `StripeTerminalProvider`.
>
> After initialization completes, you can use other SDK methods such as `discoverReaders`, `connectReader`, and `processPaymentIntent`. If you attempt to call these methods before initialization, you’ll receive the following error: “First initialize the Stripe Terminal SDK before performing any action.”
```js
function App() {
const { initialize } = useStripeTerminal();
useEffect(() => {
initialize();
}, []);
return ;
}
```
## SDK updates
Stripe periodically releases updates which can include new functionality, bug fixes, and security updates. Update your SDK as soon as a new version is available. The currently available SDKs are:
- [Stripe Terminal Android SDK](https://github.com/stripe/stripe-terminal-android/releases)
- [Stripe Terminal iOS SDK](https://github.com/stripe/stripe-terminal-ios/releases)
- [Stripe Terminal JavaScript SDK](https://docs.stripe.com/terminal/references/api/js-sdk.md#changelog)
- [Stripe Terminal React Native SDK](https://github.com/stripe/stripe-terminal-react-native)
## Next steps
- [Connect to a reader](https://docs.stripe.com/terminal/payments/connect-reader.md?terminal-sdk-platform=react-native&reader-type=internet)
# Apps on Devices
> This is a Apps on Devices for when terminal-sdk-platform is apps-on-devices. View the full page at https://docs.stripe.com/terminal/payments/setup-integration?terminal-sdk-platform=apps-on-devices.
Use Apps on Devices to run your point-of-sale (POS) application along with other apps on your device. You can deploy your POS app to Stripe smart readers to provide an all-in-one solution, or build a customer-facing app for payments, driven by your POS running on another device.
Stripe handles all payments and compliance with the Stripe Terminal Android SDK.
Learn more about [Apps on Devices](https://docs.stripe.com/terminal/features/apps-on-devices/overview.md). You can also view the [sample app](https://github.com/stripe-samples/terminal-apps-on-devices) to learn integration best practices, how to collect and confirm a payment, and more.