# Integration einrichten
Richten Sie ein Stripe Terminal SDK oder eine servergestützte Integration ein, um persönliche Zahlungen zu akzeptieren.
# Servergestützt
> This is a Servergestützt for when terminal-sdk-platform is server-driven. View the full page at https://docs.stripe.com/terminal/payments/setup-integration?terminal-sdk-platform=server-driven.
Servergestützte Integrationen verwenden die Stripe API anstelle eines Terminal SDK, um eine Verbindung zu [WisePOS E, Stripe Reader S700/S710 und Verifone Smart-Lesegeräten](https://docs.stripe.com/terminal/smart-readers.md) herzustellen und Zahlungen vor Ort zu erfassen. Dadurch wird Folgendes ermöglicht:
- Terminal verwenden, auch wenn Ihre Infrastruktur iOS, Android oder JavaScript SDKs nicht unterstützt
- Eine Terminal-Integration erstellen, die von Ihrer nutzerdefinierten Middleware oder cloudbasierten Infrastruktur unterstützt wird
- Ein beliebiges Gerät, einschließlich eines .NET-basierten Point of Sale in Terminal integrieren
- Die Netzwerkverbindung von Lesegeräten durch Nutzung einer Internetverbindung anstelle des lokalen Netzwerks verbessern
- Curl-Anfragen stellen, um den Prototyp einer Integration zu erstellen
Folgendes wird von der servergesteuerten Integration nicht unterstützt:
- [Mobile Lesegeräte von Stripe Terminal](https://docs.stripe.com/terminal/mobile-readers.md)
- [Kartenzahlungen offline einziehen](https://docs.stripe.com/terminal/features/operate-offline/collect-card-payments.md)
## Loslegen
Sie können Ihre servergestützte Integration mit dem [Terminal-Schnellstart](https://docs.stripe.com/terminal/quickstart.md) mit den folgenden Komponenten starten:
- **Ihre Point of Sale-Anwendung**: Die betreiberseitige Nutzeroberfläche, die Ihre Beschäftigten sehen, wenn eine Transaktion erstellt wird.
- **Ihre Backend-Infrastruktur**: Vermittelt Anfragen von Ihrer Point-of-Sale-Anwendung und sendet während der Transaktion Anfragen an die Stripe API.
- **Stripe API**: Empfängt Anfragen und leitet sie an ein Smart-Lesegerät weiter, z. B. das Lesegerät [ BBPOS WisePOS E](https://docs.stripe.com/terminal/payments/setup-reader/bbpos-wisepos-e.md), [Stripe Reader S700/S710](https://docs.stripe.com/terminal/readers/stripe-reader-s700-s710.md) oder ein [Verifone-Lesegerät](https://docs.stripe.com/terminal/payments/setup-reader/verifone.md). Stripe sendet außerdem *Webhooks* (A webhook is a real-time push notification sent to your application as a JSON payload through HTTPS requests) mit dem Zahlungsstatus an Ihre Back-End-Infrastruktur.
- **BBPOS WisePOS E, Stripe Reader S700/S710, Verifone-Lesegerät oder simuliertes Lesegerät**: Fordert die Karteninhaberin/den Karteninhaber zur Zahlung auf und kommuniziert mit Stripe sowie unserer Finanzinfrastruktur, um die Zahlung zu verarbeiten. Sie können ein simuliertes Lesegerät erstellen, wenn Sie noch kein physisches Lesegerät haben.

## See also
- [Terminal-Schnellstart](https://docs.stripe.com/terminal/quickstart.md)
- [Mit einem Lesegerät verbinden](https://docs.stripe.com/terminal/payments/connect-reader.md?terminal-sdk-platform=server-driven&reader-type=internet)
# JavaScript
> This is a JavaScript for when terminal-sdk-platform is js. View the full page at https://docs.stripe.com/terminal/payments/setup-integration?terminal-sdk-platform=js.
> #### Empfehlung für intelligente Lesegeräte
>
> Für intelligente Lesegeräte wie das Lesegerät [BBPOS WisePOS E](https://docs.stripe.com/terminal/payments/setup-reader/bbpos-wisepos-e.md), [Stripe Reader S700/S710](https://docs.stripe.com/terminal/readers/stripe-reader-s700-s710.md) und [Verifone-Lesegeräte](https://docs.stripe.com/terminal/payments/setup-reader/verifone.md) empfehlen wir die Verwendung der [servergestützten Integration](https://docs.stripe.com/terminal/payments/setup-integration.md?terminal-sdk-platform=server-driven) anstelle des JavaScript-SDK.
>
> Das JavaScript-SDK erfordert Ihr POS und Lesegerät im selben lokalen Netzwerk mit funktionierendem lokalen DNS. Die Server-gestützte Integration verwendet stattdessen die Stripe API, was in komplexen Netzwerkumgebungen einfacher sein kann. Lesen Sie unseren [Plattformvergleich](https://docs.stripe.com/terminal/payments/setup-reader.md#sdk), um die beste Plattform für Ihre Anforderungen auszuwählen.
Eine ausführlichere Dokumentation mit allen verfügbaren Methoden, Objekten und Fehlern finden Sie in unserer [vollständigen SDK-Dokumentation](https://docs.stripe.com/terminal/references/api/js-sdk.md).
### Anforderungen an das Terminal JavaScript SDK
Wenn Sie [intelligente Lesegeräte](https://docs.stripe.com/terminal/smart-readers.md) mit dem JavaScript SDK integrieren, stellen Sie sicher, dass Ihr Netzwerk [unsere Netzwerkanforderungen](https://docs.stripe.com/terminal/network-requirements.md) erfüllt.
Für den Einstieg in das JavaScript SDK sind drei Schritte erforderlich:
1. [Installieren Sie das SDK und die Client-Bibliothek](https://docs.stripe.com/terminal/payments/setup-integration.md#install) auf Ihrer Bezahlseite.
1. [Richten Sie den Verbindungs-Token-Endpoint](https://docs.stripe.com/terminal/payments/setup-integration.md#connection-token) für Ihr Backend und Ihre Webanwendung ein.
1. [Initialisieren Sie das SDK](https://docs.stripe.com/terminal/payments/setup-integration.md#initialize) in Ihrer Webanwendung.
> Wenn Sie Ihre Webanwendung mit dem JavaScript SDK vernetzen, lässt diese sich in einem mobilen Browser ausführen, sofern das mobile Gerät mit demselben lokalen Netzwerk verbunden ist wie das Lesegerät und die Geräte in diesem Netzwerk direkt miteinander kommunizieren können.
## SDK und Client-Bibliothek installieren [Clientseitig] [Serverseitig]
#### Clientseitig
Um zu beginnen, fügen Sie das folgende Skript in Ihre Bezahlseite ein. Dieses Skript muss immer direkt von **https://js.stripe.com** geladen werden, damit es mit der neuesten Software des Lesegeräts kompatibel ist. Fügen Sie das Skript nicht in ein Paket ein und hosten Sie selbst keine Kopie. Dies könnte Ihre Integration ohne Vorwarnung unterbrechen.
```html
```
#### Terminal JS SDK als Modul verwenden
Wir stellen außerdem ein npm-Paket bereit, damit Sie das Terminal JS SDK als Modul laden und verwenden können. Weitere Informationen finden Sie im [Projekt auf GitHub](https://github.com/stripe/terminal-js).
> Informationen zur Migration von Beta-Versionen des JavaScript SDK finden Sie im [Migrationsleitfaden der Stripe Terminal Beta](https://docs.stripe.com/terminal/references/sdk-migration-guide.md).
#### Serverseitig
Verwenden Sie unsere offiziellen Bibliotheken für den Zugriff auf die Stripe-API über Ihre Anwendung:
#### Ruby
```bash
# Available as a gem
sudo gem install stripe
```
```ruby
# If you use bundler, you can add this line to your Gemfile
gem 'stripe'
```
## ConnectionToken-Endpoint einrichten [Serverseitig] [Clientseitig]
#### Serverseitig
Um sich mit einem Lesegerät verbinden zu können, muss das Backend dem SDK erlauben, das Lesegerät in Ihrem Stripe-Konto zu nutzen. Dazu stellt es dem SDK das [Geheimnis](https://docs.stripe.com/api/terminal/connection_tokens/object.md#terminal_connection_token_object-secret) aus einem [ConnectionToken](https://docs.stripe.com/api/terminal/connection_tokens.md) zur Verfügung. Das Backend muss nur Verbindungstoken für vertrauenswürdige Clients erstellen.
#### curl
```bash
curl https://api.stripe.com/v1/terminal/connection_tokens \
-u <>: \
-X "POST"
```
Beziehen Sie das Geheimnis aus dem `ConnectionToken` auf Ihrem Server und übergeben Sie es an den Client.
#### Ruby
```ruby
post '/connection_token' do
token = # ... Create or retrieve the ConnectionToken
{secret: token.secret}.to_json
end
```
> Mit dem `secret` aus dem `ConnectionToken` können Sie sich mit einem beliebigen Stripe Terminal-Lesegerät verbinden und Zahlungen mit Ihrem Stripe-Konto annehmen. Stellen Sie sicher, dass Sie den Endpoint zum Erstellen von Verbindungstoken authentifizieren und diesen vor Cross Site Request Forgery (CSRF) schützen.
#### Clientseitig
Um dem SDK Zugriff auf diesen Endpoint zu ermöglichen, erstellen Sie eine Funktion in Ihrer Webanwendung, die ein `ConnectionToken` aus Ihrem Backend anfordert und das `secret` aus dem `ConnectionToken`-Objekt zurückgibt.
```javascript
async function fetchConnectionToken() {
// Your backend should call /v1/terminal/connection_tokens and return the JSON response from Stripe
const response = await fetch('https://{{YOUR_BACKEND_URL}}/connection_token', { method: "POST" });
const data = await response.json();
return data.secret;
}
```
Diese Funktion wird aufgerufen, wenn das SDK sich bei Stripe oder dem Lesegerät authentifizieren muss. Sie wird auch aufgerufen, wenn ein neues Verbindungstoken benötigt wird, um sich mit einem Lesegerät zu verbinden (z. B. wenn Ihre App sich von einem Lesegerät getrennt hat). Wenn das SDK kein neues Verbindungstoken von Ihrem Backend abrufen kann, schlägt die Verbindung zu einem Lesegerät mit einem Fehler von Ihrem Server fehl.
> Speichern Sie den Verbindungstoken nicht im Cache und codieren Sie ihn nicht fest. Der Lifecycle des Verbindungstokens wird vom SDK verwaltet.
## SDK initialisieren [Clientseitig]
> Chrome 142 (veröffentlicht am 28. Oktober 2025) und neuere Versionen erfordern eine ausdrückliche Genehmigung, bevor Websites auf lokale Netzwerkgeräte (wie Datenterminal Reader) zugreifen können, wenn sie das JavaScript-SDK des Stripe-Datenterminals verwenden. Informationen zu Einrichtungsschritten und Fehlerbehebung finden Sie in der [Anleitung zu Chrome 142+](https://support.stripe.com/questions/ensuring-stripe-terminal-javascript-sdk-functionality-on-chrome-142).
Das vom SDK bereitgestellte [StripeTerminal](https://docs.stripe.com/terminal/references/api/js-sdk.md#stripeterminal-create)-Objekt verfügt über eine allgemeine Nutzeroberfläche für die Suche nach Lesegeräten, die Verbindung mit einem Lesegerät und die Erstellung von Zahlungen. Um eine `StripeTerminal`-Instanz in Ihrer JavaScript-Anwendung zu initialisieren, geben Sie die in [Schritt 2](https://docs.stripe.com/terminal/payments/setup-integration.md#connection-token) implementierte `ConnectionToken`-Funktion an.
Sie müssen auch eine Funktion bereitstellen, die eine unerwartete Trennung vom Lesegerät handhabt, [onUnexpectedReaderDisconnect](https://docs.stripe.com/terminal/references/api/js-sdk.md#stripeterminal-create). Bei dieser Funktion muss Ihre App die Nutzer/innen darüber informieren, dass die Verbindung zum Lesegerät getrennt wurde. Zusätzlich können Sie auch eine Funktion einfügen, mit der versucht wird, die Verbindung zu einem Lesegerät wiederherzustellen. Weitere Informationen finden Sie unter [Umgang mit Verbindungstrennungen](https://docs.stripe.com/terminal/payments/connect-reader.md?terminal-sdk-platform=js&reader-type=internet#handling-disconnects).
```javascript
const terminal = StripeTerminal.create({
onFetchConnectionToken: fetchConnectionToken,
onUnexpectedReaderDisconnect: unexpectedDisconnect,
});
function unexpectedDisconnect() {
// You might want to display UI to notify the user and start re-discovering readers
}
```
## SDK-Aktualisierungen
Stripe veröffentlicht regelmäßig Updates, die neue Funktionen, Fehlerkorrekturen und Sicherheitsupdates enthalten können. Aktualisieren Sie Ihr SDK, sobald eine neue Version verfügbar ist. Die derzeit verfügbaren SDKs sind:
- [Stripe Terminal Android SDK](https://github.com/stripe/stripe-terminal-android/releases)
- [Stripe Terminal iOS SDK](https://github.com/stripe/stripe-terminal-ios/releases)
- [Stripe Terminal JavaScript SDK](https://docs.stripe.com/terminal/references/api/js-sdk.md#changelog)
- [Stripe Terminal React Native SDK](https://github.com/stripe/stripe-terminal-react-native)
## Unterstützte Browser
Das Stripe Terminal JavaScript SDK unterstützt nach Möglichkeit alle aktuellen Versionen der wichtigsten Browser. Folgendes wird von uns unterstützt:
- Edge unter Windows
- Firefox auf Desktop-Plattformen
- Chrome und Safari auf allen Plattformen
- Android-Browser auf Android 4.4 und neuer
Wenn Sie Probleme mit dem Stripe Terminal JavaScript SDK in Verbindung mit einem bestimmten Browser haben, kontaktieren Sie uns per E-Mail unter [support-terminal@stripe.com](mailto:support-terminal@stripe.com).
> Hinweis: Die Verwendung des Stripe Terminal JavaScript SDK mit React Native wird nicht unterstützt. Um Stripe Terminal mit React Native in Ihre mobile App zu integrieren, verwenden Sie das [Stripe Terminal React Native SDK](https://github.com/stripe/stripe-terminal-react-native).
## Nächste Schritte
- [Mit einem Lesegerät verbinden](https://docs.stripe.com/terminal/payments/connect-reader.md?terminal-sdk-platform=js&reader-type=internet)
# iOS
> This is a iOS for when terminal-sdk-platform is ios. View the full page at https://docs.stripe.com/terminal/payments/setup-integration?terminal-sdk-platform=ios.
Eine ausführlichere Dokumentation mit allen verfügbaren Methoden, Objekten und Fehlern finden Sie in unserer [vollständigen SDK-Dokumentation](https://stripe.dev/stripe-terminal-ios).
Für den Einstieg in das iOS SDK sind vier Schritte erforderlich:
1. [SDK](https://docs.stripe.com/terminal/payments/setup-integration.md#install) in Ihrer App installieren.
1. Ihre App [konfigurieren](https://docs.stripe.com/terminal/payments/setup-integration.md#configure).
1. [Verbindungs-Token](https://docs.stripe.com/terminal/payments/setup-integration.md#connection-token)-Endpoint in Ihrer App und Ihrem Backend einrichten.
1. [SDK](https://docs.stripe.com/terminal/payments/setup-integration.md#initialize) in Ihrer App initialisieren.
## SDK installieren [Clientseitig]
Das Stripe Terminal iOS SDK ist mit Apps kompatibel, die:
- iOS 13 und höher unterstützen
- MIt CocoaPods, Swift Package Manager oder durch die manuelle Integration des Frameworks installiert werden
#### CocoaPods
1. Falls noch nicht geschehen, installieren Sie bitte die aktuellste Version von [CocoaPods](https://guides.cocoapods.org/using/getting-started.html).
1. Wenn Sie keine bestehende [Podfile](https://guides.cocoapods.org/syntax/podfile.html) haben, führen Sie folgenden Befehl aus, um eine zu erstellen:
```bash
pod init
```
1. Fügen Sie folgende Zeile in Ihre Podfile ein:
```podfile
pod 'StripeTerminal', '~> 5.0'
```
1. Führen Sie folgenden Befehl aus:
```bash
pod install
```
1. Verwenden Sie ab jetzt anstelle der Datei `.xcodeproj` die Datei `.xcworkspace` zum Öffnen Ihres Projekts in Xcode.
#### Swift Package Manager
1. Wählen Sie in Xcode in der Menüleiste die Option **Datei** > **Pakete hinzufügen…** aus.
1. Geben Sie die GitHub-URL des Stripe Terminal iOS SDK ein: `https://github.com/stripe/stripe-terminal-ios`
1. Geben Sie die SDK-Version ein, die Sie in Ihrem Projekt installieren möchten. Der Standardwert „Up to Next Major“ hilft Ihnen, über Sicherheits- und Funktionsupdates auf dem Laufenden zu bleiben, ohne dass fehlerverursachende Änderungen unerwartet übernommen werden.
#### Manuell
1. Besuchen Sie das Stripe Terminal iOS Repository auf GitHub und gehen Sie zur [neuesten Veröffentlichung](https://github.com/stripe/stripe-terminal-ios/releases).
1. Laden Sie die Datei `StripeTerminal.xcframework.zip` herunter, die dem GitHub-Release zugeordnet ist.
1. Dekomprimieren Sie die Datei und fügen Sie anschließend das XCFramework per Drag-and-Drop in Ihr Xcode-Projekt ein.
1. Wenn die Symbole des Frameworks nicht geladen werden können, navigieren Sie zum Bereich „Allgemeines“ und wählen Sie das Dropdown-Menü „Frameworks, Bibliotheken und eingebettete Inhalte“. Wechseln Sie den Status von `StripeTerminal.xcframework` von „Nicht einbetten“ zu „Einbetten und Anmelden“.
> Details zur neuesten SDK-Version und zu früheren Versionen finden Sie auf der [Releases](https://github.com/stripe/stripe-terminal-ios/releases)-Seite auf GitHub. Um Benachrichtigungen zu erhalten, wenn eine neue Version veröffentlicht wird, [beobachten Sie die Releases des Repositories](https://docs.github.com/en/github/managing-subscriptions-and-notifications-on-github/configuring-notifications#configuring-your-watch-settings-for-an-individual-repository) oder [abonnieren Sie den GitHub Releases RSS-Feed](https://github.com/stripe/stripe-terminal-ios/releases.atom).
>
> Informationen zur Migration von älteren Versionen des iOS SDK finden Sie im [Migrationsleitfaden für Stripe Terminal SDK](https://docs.stripe.com/terminal/references/sdk-migration-guide.md).
## App konfigurieren [Clientseitig]
Damit Ihre App mit dem Stripe Terminal SDK verwendet werden kann, müssen Sie in Xcode einige Änderungen an Ihrer Datei **Info.plist** vornehmen.
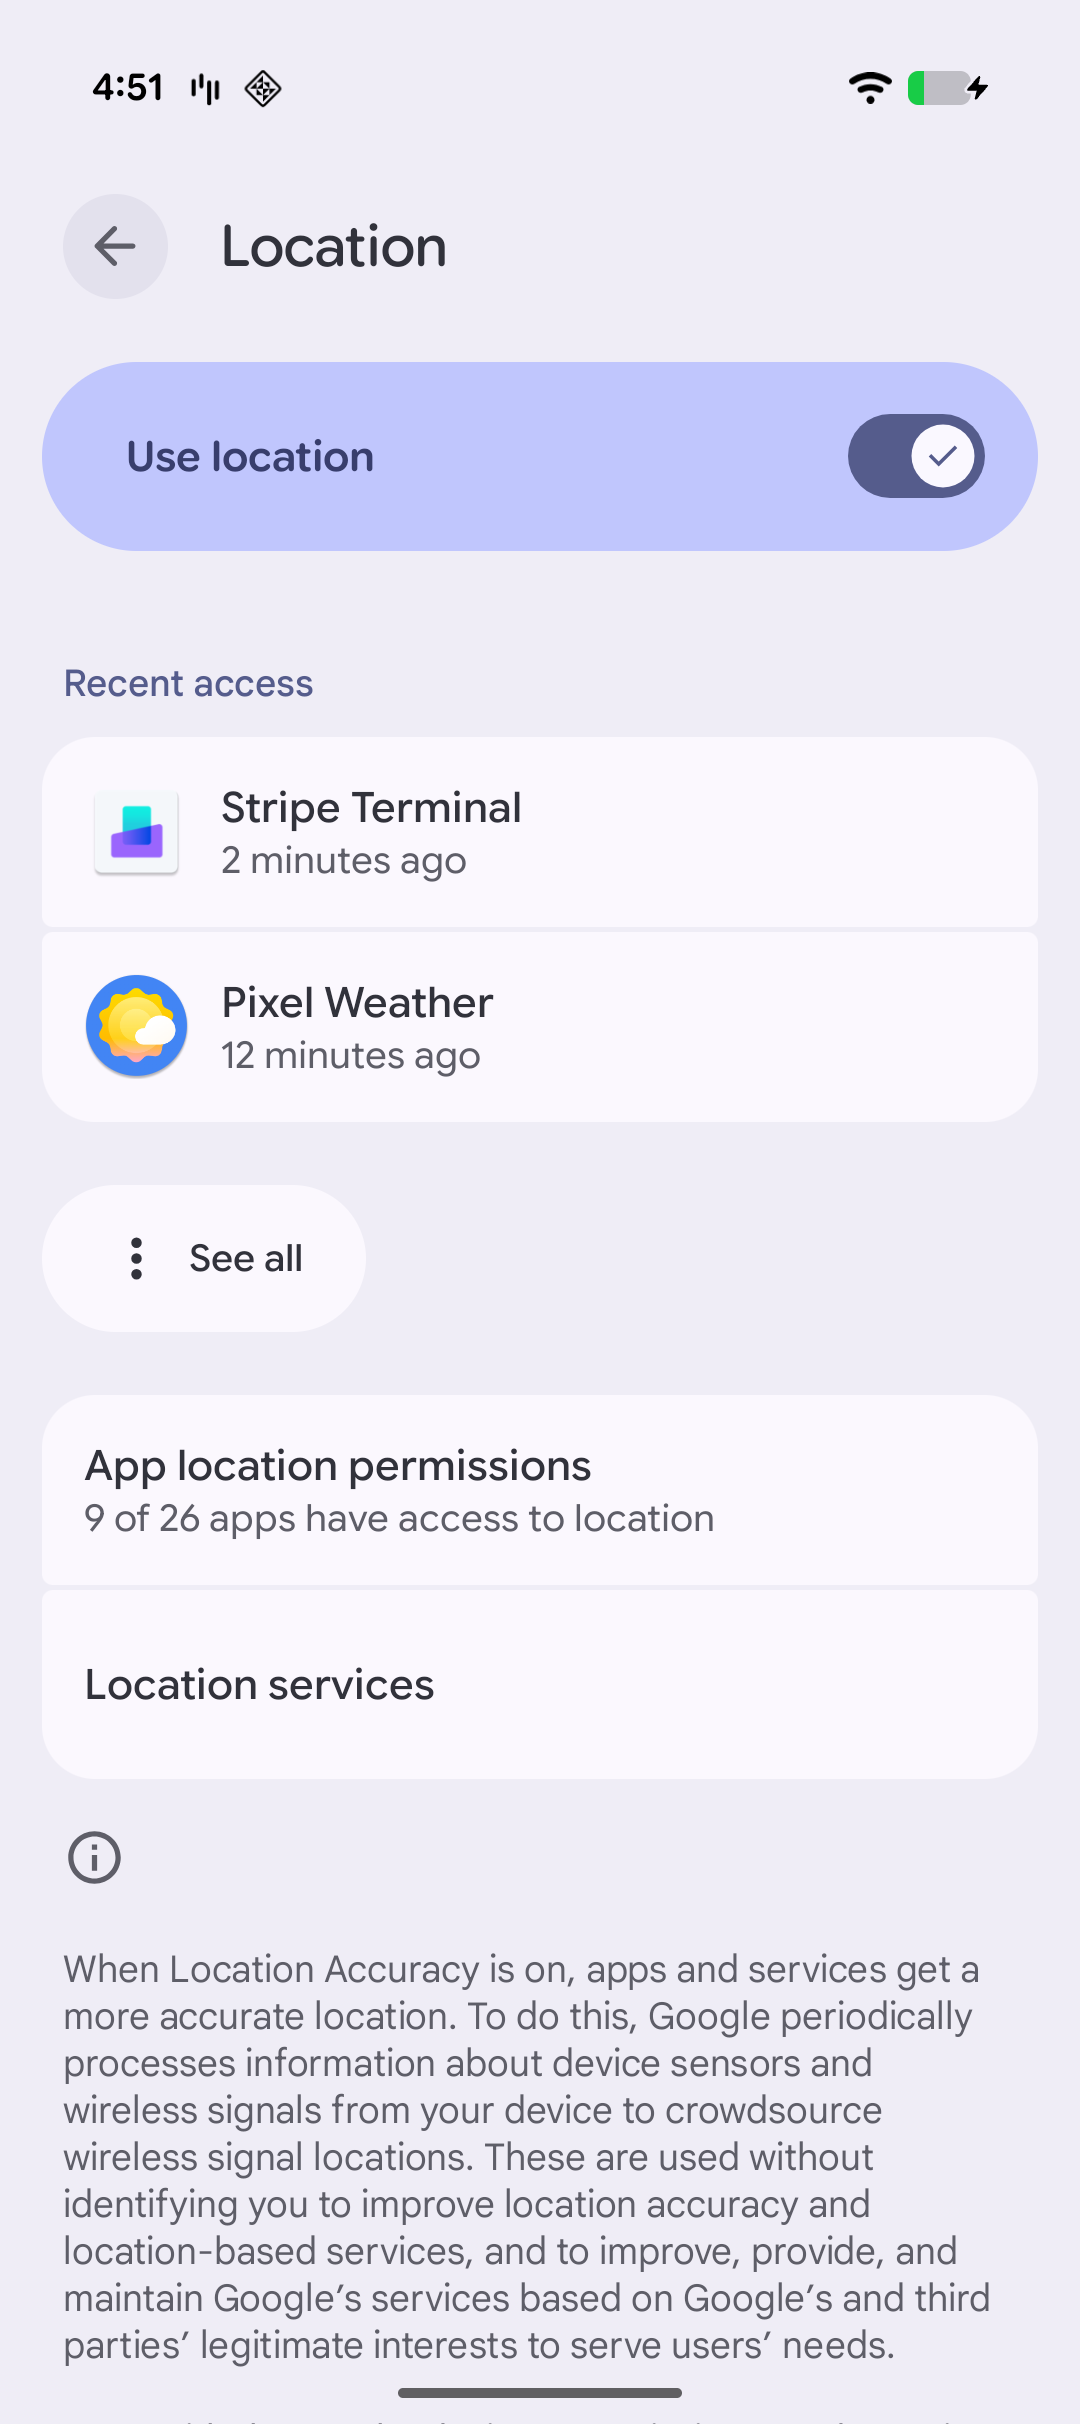
1. Aktivieren Sie Standortdienste mit dem folgenden Schlüssel-Wert-Paar.
| Datenschutz – „Location When In Use Usage Description“ |
| ------------------------------------------------------ |
| **Schlüssel** | [NSLocationWhenInUseUsageDescription](https://developer.apple.com/documentation/bundleresources/information_property_list/nslocationwheninuseusagedescription) |
| **Wert** | **Zur Annahme von Zahlungen ist ein Standortzugriff erforderlich.** |
Um das Risiko von Betrugsfällen bei Zahlungen zu reduzieren und Zahlungsanfechtungen zu minimieren, muss Stripe den Standort der getätigten Zahlungen kennen. Wenn das SDK den Standort des iOS-Geräts nicht ermitteln kann, werden alle Zahlungen bis zur Wiederherstellung des Standortzugriffs deaktiviert.
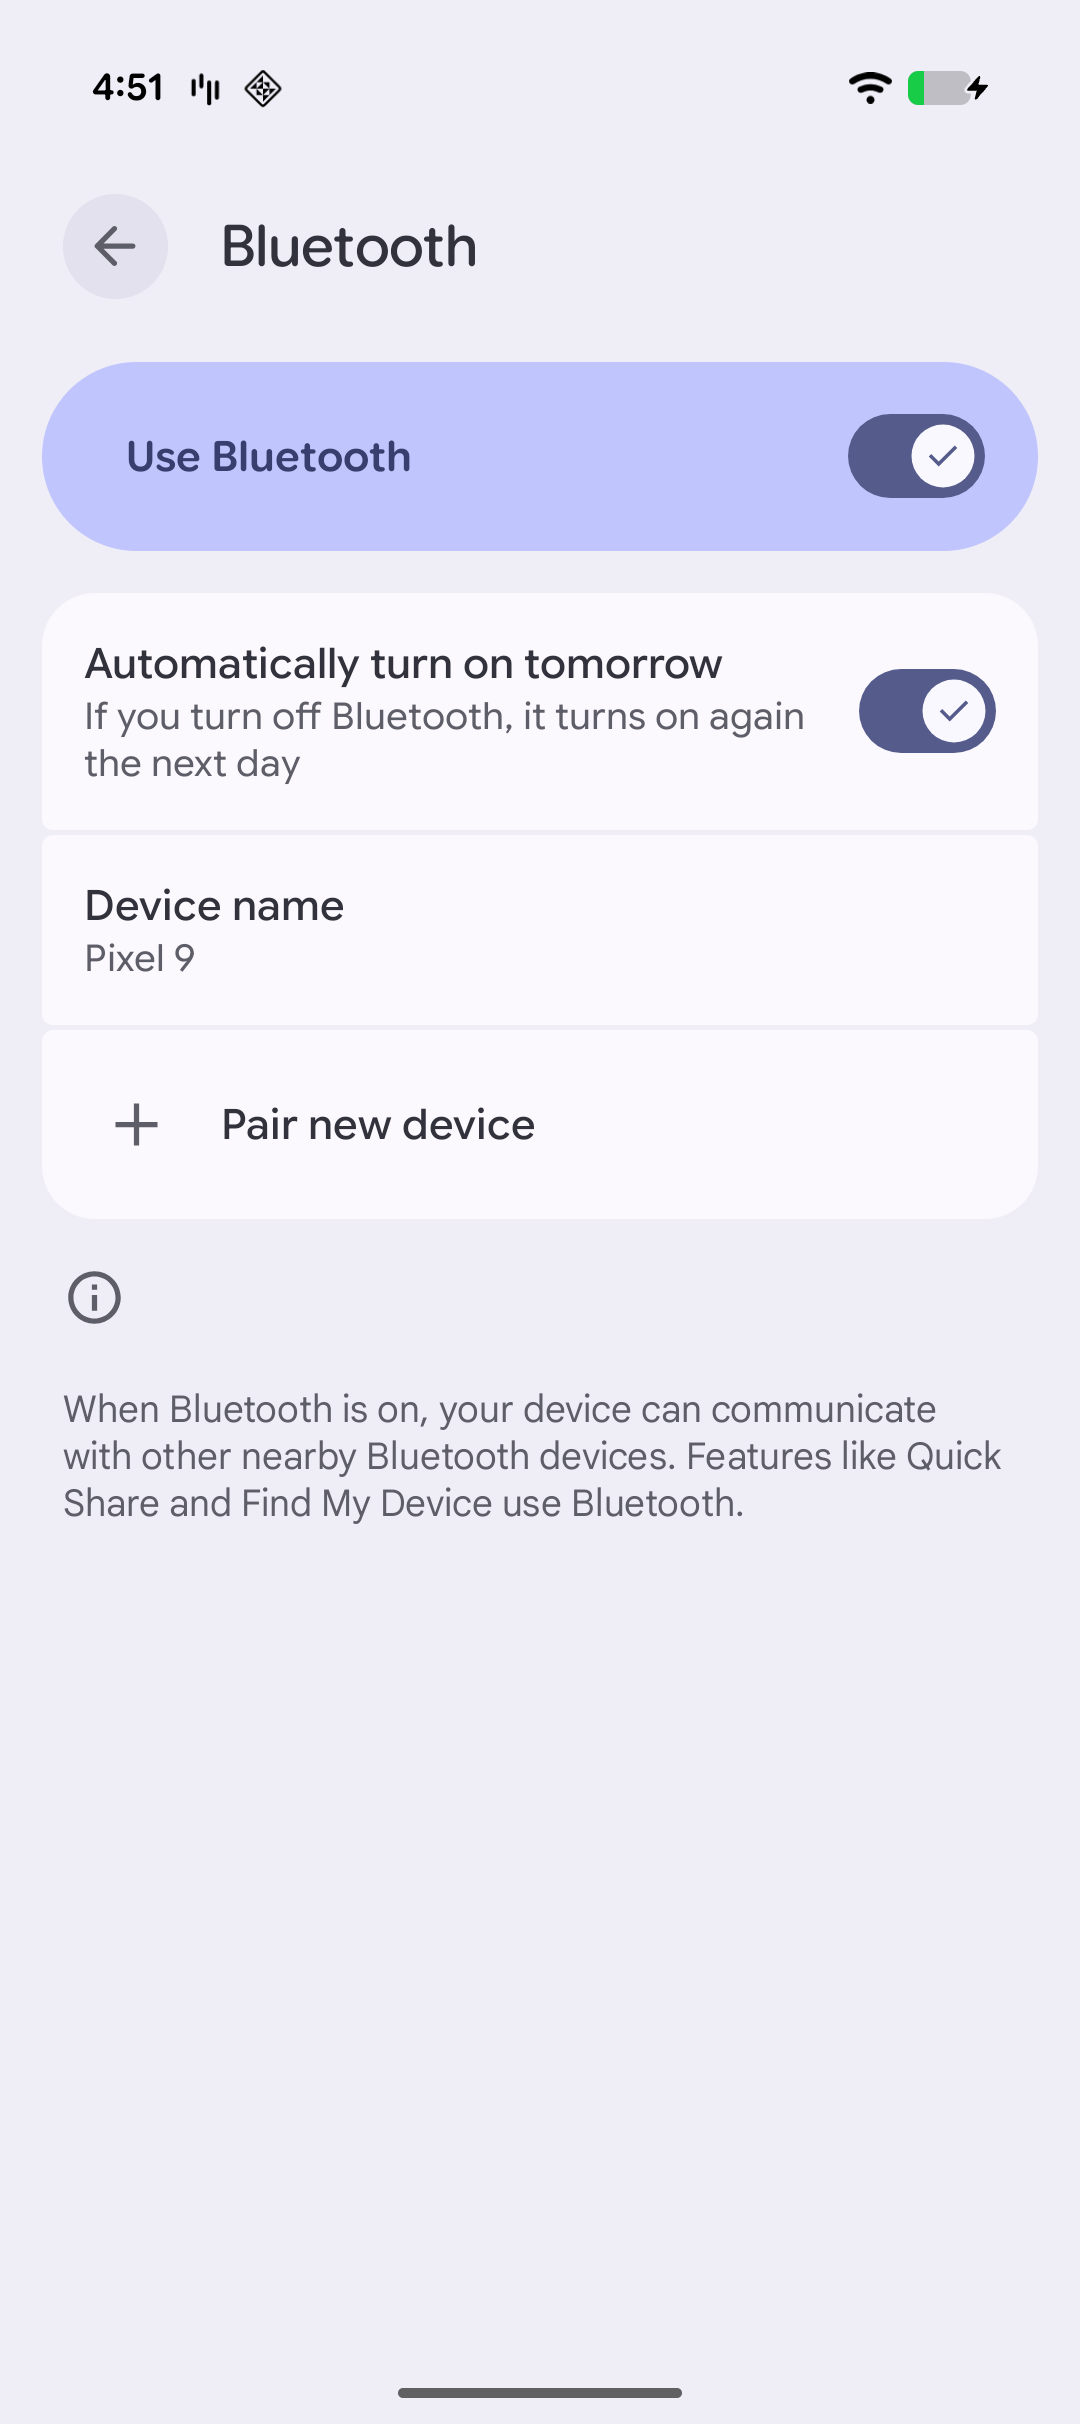
1. Stellen Sie sicher, dass Ihre App im Hintergrund ausgeführt wird und mit den Bluetooth-Lesegeräten verbunden bleibt.
| Erforderliche Hintergrundmodi für Bluetooth-Lesegeräte |
| ------------------------------------------------------ |
| **Schlüssel** | [UIBackgroundModes](https://developer.apple.com/documentation/bundleresources/information_property_list/uibackgroundmodes) |
| **Wert** | **bluetooth-central** (Verwendet Zubehör von Bluetooth LE) |
Mit dem Festlegen des Hintergrundmodus [bluetooth-central](https://developer.apple.com/library/archive/documentation/NetworkingInternetWeb/Conceptual/CoreBluetooth_concepts/CoreBluetoothBackgroundProcessingForIOSApps/PerformingTasksWhileYourAppIsInTheBackground.html#//apple_ref/doc/uid/TP40013257-CH7-SW6) kann das Lesegerät im Standby-Modus bleiben, wenn die App im Hintergrund läuft oder wenn das iOS-Gerät gesperrt ist. Wird dieser Wert nicht angegeben, wird der Standby-Modus nicht aktiviert. Wenn Ihre App im Hintergrund läuft, kann sich das Lesegerät zum Energiesparen automatisch ausschalten.
1. Gestatten Sie Ihrer App, ein Dialogfeld für Bluetooth-Berechtigungen anzuzeigen. Der App-Store verlangt dies, auch wenn Ihre App die Verbindung mit Bluetooth-Lesegeräten nicht unterstützt.
| Datenschutz – „Bluetooth Always Usage Description“ |
| -------------------------------------------------- |
| **Schlüssel** | [NSBluetoothAlwaysUsageDescription](https://developer.apple.com/documentation/bundleresources/information_property_list/NSBluetoothAlwaysUsageDescription) |
| **Wert** | **Diese App verwendet Bluetooth, um sich mit unterstützten Kartenlesegeräten zu verbinden.** |
iOS 13 führte spezifischere Berechtigungen für die Verwendung von Bluetooth-Peripheriegeräten durch eine App ein. Apps, die sich mit Core Bluetooth verbinden, müssen diesen Schlüssel in ihre Info.plist-Datei aufnehmen, um zu verhindern, dass die App beim ersten Start abstürzt.
1. App-Validierungsprüfungen bestehen, wenn Sie sie an den App Store übermittlen. Ab SDK-Version 3.4.0 ist diese Berechtigung nicht mehr erforderlich.
| Datenschutz – „Bluetooth Peripheral Usage Description“ |
| ------------------------------------------------------ |
| **Schlüssel** | [NSBluetoothPeripheralUsageDescription](https://developer.apple.com/documentation/bundleresources/information_property_list/nsbluetoothperipheralusagedescription) |
| **Wert** | **Für die Verbindung mit unterstützten Kartenlesegeräten ist Bluetooth-Zugriff erforderlich.** |
Es handelt sich hierbei um ein Beispiel – Sie können die Aufforderung zur Nutzerberechtigung in Ihrer App umformulieren.
1. Speichern Sie die **Info.plist** Ihrer App. Die App ist jetzt korrekt konfiguriert und kann mit dem Stripe Terminal SDK verwendet werden.
> Wenn Sie Tap to Pay auf dem iPhone verwenden, müssen Sie die Entwicklungsberechtigung für Tap to Pay auf dem iPhone von Ihrem Apple Entwicklerkonto aus [beantragen und konfigurieren](https://developer.apple.com/documentation/proximityreader/setting-up-the-entitlement-for-tap-to-pay-on-iphone).
## ConnectionToken-Endpoint einrichten [Serverseitig] [Clientseitig]
### Serverseitig
Um sich mit einem Lesegerät verbinden zu können, muss das Backend dem SDK erlauben, das Lesegerät in Ihrem Stripe-Konto zu nutzen. Dazu stellt es dem SDK das [Geheimnis](https://docs.stripe.com/api/terminal/connection_tokens/object.md#terminal_connection_token_object-secret) aus einem [ConnectionToken](https://docs.stripe.com/api/terminal/connection_tokens.md) zur Verfügung. Das Backend muss nur Verbindungstoken für vertrauenswürdige Clients erstellen.
#### curl
```bash
curl https://api.stripe.com/v1/terminal/connection_tokens \
-u <>: \
-X "POST"
```
Beziehen Sie das Geheimnis aus dem `ConnectionToken` auf Ihrem Server und übergeben Sie es an den Client.
#### Ruby
```ruby
post '/connection_token' do
token = # ... Create or retrieve the ConnectionToken
{secret: token.secret}.to_json
end
```
> Mit dem `secret` aus dem `ConnectionToken` können Sie sich mit einem beliebigen Stripe Terminal-Lesegerät verbinden und Zahlungen mit Ihrem Stripe-Konto annehmen. Stellen Sie sicher, dass Sie den Endpoint zum Erstellen von Verbindungstoken authentifizieren und diesen vor Cross Site Request Forgery (CSRF) schützen.
### Clientseitig
Um dem SDK Zugriff auf diesen Endpoint zu ermöglichen, implementieren Sie das [ConnectionTokenProvider](https://stripe.dev/stripe-terminal-ios/docs/Protocols/SCPConnectionTokenProvider.html)-Protokoll in Ihrer App, das eine einzelne Funktion definiert, die einen `ConnectionToken` von Ihrem Backend anfordert.
```swift
import StripeTerminal
// Example API client class for communicating with your backend
class APIClient: ConnectionTokenProvider {
// For simplicity, this example class is a singleton
static let shared = APIClient()
// Fetches a ConnectionToken from your backend
func fetchConnectionToken(_ completion: @escaping ConnectionTokenCompletionBlock) {
let config = URLSessionConfiguration.default
let session = URLSession(configuration: config)
guard let url = URL(string: "https://{{YOUR_BACKEND_URL}}/connection_token") else {
fatalError("Invalid backend URL")
}
var request = URLRequest(url: url)
request.httpMethod = "POST"
let task = session.dataTask(with: request) { (data, response, error) in
if let data = data {
do {
// Warning: casting using `as? [String: String]` looks simpler, but isn't safe:
let json = try JSONSerialization.jsonObject(with: data, options: []) as? [String: Any]
if let secret = json?["secret"] as? String {
completion(secret, nil)
}
else {
let error = NSError(domain: "com.stripe-terminal-ios.example",
code: 2000,
userInfo: [NSLocalizedDescriptionKey: "Missing `secret` in ConnectionToken JSON response"])
completion(nil, error)
}
}
catch {
completion(nil, error)
}
}
else {
let error = NSError(domain: "com.stripe-terminal-ios.example",
code: 1000,
userInfo: [NSLocalizedDescriptionKey: "No data in response from ConnectionToken endpoint"])
completion(nil, error)
}
}
task.resume()
}
}
```
Diese Funktion wird aufgerufen, wenn das SDK sich bei Stripe oder dem Lesegerät authentifizieren muss. Sie wird auch aufgerufen, wenn ein neues Verbindungstoken benötigt wird, um sich mit einem Lesegerät zu verbinden (z. B. wenn Ihre App sich von einem Lesegerät getrennt hat). Wenn das SDK kein neues Verbindungstoken von Ihrem Backend abrufen kann, schlägt die Verbindung zu einem Lesegerät mit einem Fehler von Ihrem Server fehl.
> Speichern Sie den Verbindungstoken nicht im Cache und codieren Sie ihn nicht fest. Der Lifecycle des Verbindungstokens wird vom SDK verwaltet.
> #### Certificate Pinning
>
> In den meisten Fällen sollten Sie Ihre Anwendung nicht mit Certificate Pinning konfigurieren. Erfordert Ihre Anwendung dies dennoch, so lesen Sie bitte die Dokumentation zum [Certificate Pinning](https://docs.stripe.com/tls-certificates.md#certificate-pinning).
## SDK initialisieren [Clientseitig]
Die vom Stripe Terminal SDK bereitgestellte [Terminal](https://stripe.dev/stripe-terminal-ios/docs/Classes/SCPTerminal.html)-Klasse stellt eine allgemeine Schnittstelle zum Erkennen von Lesegeräten, zum Verbinden mit einem Lesegerät und zum Durchführen von Vorgängen auf dem Lesegerät bereit, wie z. B. Anzeigen von Warenkorbdetails, Erfassen von Zahlungen und Speichern von Karten für die zukünftige Verwendung.
Geben Sie den `ConnectionTokenProvider` an, den Sie beim [Einrichten des Verbindungstokens](https://docs.stripe.com/terminal/payments/setup-integration.md#connection-token) implementiert haben. Rufen Sie `initWithTokenProvider` in Ihrer App nur einmal auf, bevor Sie auf `Terminal.shared` zugreifen, in der Regel in der `AppDelegate`-Methode `application:didFinishLaunchingWithOptions` oder im `init()` Ihres SwiftUI-`App`-Typs. Alternativ können Sie `dispatch_once` in Objective-C oder einen `statischen` Initialisierer in Swift verwenden.
```swift
import UIKit
import StripeTerminal
@UIApplicationMain
class AppDelegate: UIResponder, UIApplicationDelegate {
func application(_ application: UIApplication, didFinishLaunchingWithOptions launchOptions: [UIApplication.LaunchOptionsKey : Any]? = nil) -> Bool {
Terminal.initWithTokenProvider(APIClient.shared)
// ...
return true
}
// ...
}
```
## SDK-Aktualisierungen
Stripe veröffentlicht regelmäßig Updates, die neue Funktionen, Fehlerkorrekturen und Sicherheitsupdates enthalten können. Aktualisieren Sie Ihr SDK, sobald eine neue Version verfügbar ist. Die derzeit verfügbaren SDKs sind:
- [Stripe Terminal Android SDK](https://github.com/stripe/stripe-terminal-android/releases)
- [Stripe Terminal iOS SDK](https://github.com/stripe/stripe-terminal-ios/releases)
- [Stripe Terminal JavaScript SDK](https://docs.stripe.com/terminal/references/api/js-sdk.md#changelog)
- [Stripe Terminal React Native SDK](https://github.com/stripe/stripe-terminal-react-native)
## Nächste Schritte
- [Mit einem Lesegerät verbinden](https://docs.stripe.com/terminal/payments/connect-reader.md?terminal-sdk-platform=ios&reader-type=internet)
# Android
> This is a Android for when terminal-sdk-platform is android. View the full page at https://docs.stripe.com/terminal/payments/setup-integration?terminal-sdk-platform=android.
Eine ausführlichere Dokumentation mit allen verfügbaren Methoden, Objekten und Fehlern finden Sie in unserer [vollständigen SDK-Referenz](https://stripe.dev/stripe-terminal-android/).
Für den Einstieg in das Android SDK sind vier Schritte erforderlich:
1. [SDK](https://docs.stripe.com/terminal/payments/setup-integration.md#install) in Ihrer App installieren.
1. Ihre App [konfigurieren](https://docs.stripe.com/terminal/payments/setup-integration.md#configure).
1. [Verbindungs-Token](https://docs.stripe.com/terminal/payments/setup-integration.md#connection-token)-Endpoint in Ihrer App und Ihrem Backend einrichten.
1. [SDK](https://docs.stripe.com/terminal/payments/setup-integration.md#initialize) in Ihrer App initialisieren.
## SDK installieren [Clientseitig]
> Das SDK ist nicht länger mit den Support-Bibliotheken kompatibel, da wir zum Speichern und Pflegen der Status über den gesamten Lebenszyklus der App Room verwenden. Stellen Sie sicher, dass Ihre App auf AndroidX migriert ist.
Um das SDK zu installieren, fügen Sie `stripeterminal` dem Block `dependencies` der [Build-Datei Ihrer App](https://developer.android.com/studio/build/dependencies) hinzu:
#### Kotlin
```kotlin
plugins {
id("com.android.application")
}
android { ... }
dependencies {
implementation("com.stripe:stripeterminal:5.5.0")
// ...
}
```
### (Optional) Support für Kotlin Coroutine
Die SDK-Version 5.0.0 enthält ein optionales Modul, `stripeterminal-ktx`. Dieses Modul bietet Wrapper für `suspend`-Funktionen für asynchrone Terminal-APIs, mit denen Sie einfachen, sequentiellen Code schreiben können, anstatt Rückrufe zu verschachteln.
Um es zu verwenden, fügen Sie seine Abhängigkeit hinzu:
#### Kotlin
```kotlin
dependencies {
implementation("com.stripe:stripeterminal:5.5.0")
// Add the coroutines module
implementation("com.stripe:stripeterminal-ktx:5.5.0")
// ...
}
```
Ein Beispiel für dieses Integrationsmuster finden Sie in unserer [Kotlin-Beispiel-App](https://github.com/stripe/stripe-terminal-android/tree/master/Example/kotlinapp) auf GitHub.
### Java-Zielversion festlegen
Da das SDK auf Java 8 basiert, muss diese Version als Ihre Java-Zielversion angegeben werden:
#### Kotlin
```kotlin
android {
// ...
compileOptions {
sourceCompatibility = JavaVersion.VERSION_1_8
targetCompatibility = JavaVersion.VERSION_1_8
}
kotlinOptions {
jvmTarget = "1.8"
}
}
```
> Details zur aktuellen SDK-Version und zu vorherigen Versionen finden Sie auf der Seite [Releases](https://github.com/stripe/stripe-terminal-android/releases) auf GitHub. Um bei Veröffentlichung einer neuen Version eine Benachrichtigung zu erhalten, [achten Sie auf die Releases zum jeweiligen Repository](https://docs.github.com/en/github/managing-subscriptions-and-notifications-on-github/configuring-notifications#configuring-your-watch-settings-for-an-individual-repository).
>
> Informationen zur Migration von früheren Versionen oder Beta-Versionen des Android-SDK finden Sie im [Migrationsleitfaden für Stripe Terminal](https://docs.stripe.com/terminal/references/sdk-migration-guide.md).
## App konfigurieren [Clientseitig]
Sie müssen die Berechtigung `ACCESS_FINE_LOCATION` aktivieren. Um eine Verbindung zu einem Bluetooth-Lesegerät herzustellen, müssen Sie auch Blueteooth-Berechtigungen aktivieren. Fügen Sie Ihrem Manifest die entsprechenden Berechtigungen hinzu, wie hier dargestellt:
```xml
```
Bevor Sie das [Terminal](https://stripe.dev/stripe-terminal-android/core/com.stripe.stripeterminal/-terminal/index.html)-Objekt initialisieren, fügen Sie die folgende Prüfung hinzu, um sicherzustellen, dass die Berechtigung `ACCESS_FINE_LOCATION` in Ihrer App aktiviert ist:
```kotlin
if (ContextCompat.checkSelfPermission(this, android.Manifest.permission.ACCESS_FINE_LOCATION) != PackageManager.PERMISSION_GRANTED) {
val permissions = arrayOf(android.Manifest.permission.ACCESS_FINE_LOCATION)
ActivityCompat.requestPermissions(this, permissions, REQUEST_CODE_LOCATION)
}
```
Prüfen Sie außerdem, ob der/die Nutzer/in der App die Standortberechtigung erteilt – ohne diese funktioniert das SDK nicht. Überschreiben Sie dazu die Methode `onRequestPermissionsResult` in Ihrer App und überprüfen Sie das Berechtigungsergebnis.
```kotlin
override fun onRequestPermissionsResult(
requestCode: Int,
permissions: Array,
grantResults: IntArray
) {
super.onRequestPermissionsResult(requestCode, permissions, grantResults)
if (requestCode == REQUEST_CODE_LOCATION && grantResults.isNotEmpty()
&& grantResults[0] != PackageManager.PERMISSION_GRANTED
) {
throw RuntimeException("Location services are required to connect to a reader.")
}
}
```
Sie sollten auch sicherstellen, dass die Standort- und Bluetooth-Dienste auf dem Gerät aktiviert sind, nicht nur für die Anwendung. Hier sehen Sie ein Beispiel dafür, wie dies in den Geräteeinstellungen aussehen könnte:
Standorteinstellungen
Bluetooth-Einstellungen
> Um das Risiko von Betrugsfällen bei Zahlungen zu reduzieren und Zahlungsanfechtungen zu minimieren, muss Stripe den Standort der getätigten Zahlungen kennen. Wenn das SDK den Standort des Android-Geräts nicht ermitteln kann, werden alle Zahlungen bis zur Wiederherstellung des Standortzugriffs deaktiviert.
## ConnectionToken-Endpoint einrichten [Serverseitig] [Clientseitig]
### Serverseitig
Um sich mit einem Lesegerät verbinden zu können, muss das Backend dem SDK erlauben, das Lesegerät in Ihrem Stripe-Konto zu nutzen. Dazu stellt es dem SDK das [Geheimnis](https://docs.stripe.com/api/terminal/connection_tokens/object.md#terminal_connection_token_object-secret) aus einem [ConnectionToken](https://docs.stripe.com/api/terminal/connection_tokens.md) zur Verfügung. Das Backend muss nur Verbindungstoken für vertrauenswürdige Clients erstellen.
#### curl
```bash
curl https://api.stripe.com/v1/terminal/connection_tokens \
-u <>: \
-X "POST"
```
Beziehen Sie das Geheimnis aus dem `ConnectionToken` auf Ihrem Server und übergeben Sie es an den Client.
#### Ruby
```ruby
post '/connection_token' do
token = # ... Create or retrieve the ConnectionToken
{secret: token.secret}.to_json
end
```
> Mit dem `secret` aus dem `ConnectionToken` können Sie sich mit einem beliebigen Stripe Terminal-Lesegerät verbinden und Zahlungen mit Ihrem Stripe-Konto annehmen. Stellen Sie sicher, dass Sie den Endpoint zum Erstellen von Verbindungstoken authentifizieren und diesen vor Cross Site Request Forgery (CSRF) schützen.
### Clientseitig
Um dem SDK Zugriff auf diesen Endpoint zu ermöglichen, implementieren Sie die [ConnectionTokenProvider](https://stripe.dev/stripe-terminal-android/external/com.stripe.stripeterminal.external.callable/-connection-token-provider/index.html)-Schnittstelle in Ihrer App, die eine einzelne Funktion definiert, die einen `ConnectionToken` aus Ihrem Backend anfordert.
```kotlin
class CustomConnectionTokenProvider : ConnectionTokenProvider {
override fun fetchConnectionToken(callback: ConnectionTokenCallback) {
try {
// Your backend should call /v1/terminal/connection_tokens and return the
// JSON response from Stripe. When the request to your backend succeeds,
// return the `secret` from the response to the SDK.
callback.onSuccess(secret)
} catch (e: Exception) {
callback.onFailure(
ConnectionTokenException("Failed to fetch connection token", e)
)
}
}
}
```
Diese Funktion wird aufgerufen, wenn das SDK sich bei Stripe oder dem Lesegerät authentifizieren muss. Sie wird auch aufgerufen, wenn ein neues Verbindungstoken benötigt wird, um sich mit einem Lesegerät zu verbinden (z. B. wenn Ihre App sich von einem Lesegerät getrennt hat). Wenn das SDK kein neues Verbindungstoken von Ihrem Backend abrufen kann, schlägt die Verbindung zu einem Lesegerät mit einem Fehler von Ihrem Server fehl.
> Speichern Sie den Verbindungstoken nicht im Cache und codieren Sie ihn nicht fest. Der Lifecycle des Verbindungstokens wird vom SDK verwaltet.
> #### Certificate Pinning
>
> In den meisten Fällen sollten Sie Ihre Anwendung nicht mit Certificate Pinning konfigurieren. Erfordert Ihre Anwendung dies dennoch, so lesen Sie bitte die Dokumentation zum [Certificate Pinning](https://docs.stripe.com/tls-certificates.md#certificate-pinning).
## SDK initialisieren [Clientseitig]
Das Android SDK berücksichtigt den Lebenszyklus. Um Speicherlecks zu vermeiden und eine ordnungsgemäße Bereinigung von über einen langen Zeitraum ausgeführten Terminal-SDK-Prozessen zu gewährleisten, muss Ihre Anwendung eine `Application`-Unterklasse implementieren, die `TerminalApplicationDelegate.onCreate()` verwendet, um das SDK über Ereignisse im Lebenszyklus zu informieren.
```kotlin
// Substitute with your application name, and remember to keep it the same as your AndroidManifest.xml
class StripeTerminalApplication : Application() {
override fun onCreate() {
super.onCreate()
TerminalApplicationDelegate.onCreate(this)
}
}
```
> Wenn Sie Tap to Pay auf Android (TTPA) verwenden möchten, unterscheidet sich die Initialisierung in `Application` geringfügig von diesem Beispiel. Weitere Informationen finden Sie unter [Mit einem Lesegerät mit TTPA verbinden](https://docs.stripe.com/terminal/payments/connect-reader.md?terminal-sdk-platform=android&reader-type=tap-to-pay#initialize).
Die vom Stripe Terminal SDK bereitgestellte [Terminal](https://stripe.dev/stripe-terminal-android/core/com.stripe.stripeterminal/-terminal/index.html)-Klasse stellt eine allgemeine Schnittstelle zum Erkennen von Lesegeräten, zum Verbinden mit einem Lesegerät und zum Ausführen von Vorgängen auf dem Lesegerät bereit, wie z. B. Anzeigen von Warenkorbdetails, Erfassen von Zahlungen und Speichern von Karten für die zukünftige Verwendung.
Stellen Sie zunächst den aktuellen Anwendungskontext, den in [Schritt 3](https://docs.stripe.com/terminal/payments/setup-integration.md#connection-token) implementierten [ConnectionTokenProvider](https://stripe.dev/stripe-terminal-android/external/com.stripe.stripeterminal.external.callable/-connection-token-provider/index.html) und ein [TerminalListener](https://stripe.dev/stripe-terminal-android/external/com.stripe.stripeterminal.external.callable/-terminal-listener/index.html)-Objekt bereit. Sie können diesen Listener verwenden, um Ereignisse wie Zahlungen und Aktualisierungen des Verbindungsstatus über das SDK zu verarbeiten.
```kotlin
// Create your listener object. Override any methods that you want to be notified about
val listener = object : TerminalListener {
override fun onConnectionStatusChange(status: ConnectionStatus) {
println("onConnectionStatusChange: $status");
}
override fun onPaymentStatusChange(status: PaymentStatus) {
println("onPaymentStatusChange: $status");
}
}
// Choose the level of messages that should be logged to your console
val logLevel = LogLevel.VERBOSE
// Create your token provider.
val tokenProvider = CustomConnectionTokenProvider()
// Offline listener is optional and only needed if processing offline transactions.
// See https://docs.stripe.com/terminal/features/operate-offline/collect-card-payments
val offlineListener: OfflineListener? = null
// Pass in the current application context, your desired logging level, your token provider, and the listener you created
if (!Terminal.isInitialized()) {
Terminal.init(applicationContext, logLevel, tokenProvider, listener, offlineListener)
}
// Since the Terminal is a singleton, you can call getInstance whenever you need it
Terminal.getInstance()
```
## SDK-Aktualisierungen
Stripe veröffentlicht regelmäßig Updates, die neue Funktionen, Fehlerkorrekturen und Sicherheitsupdates enthalten können. Aktualisieren Sie Ihr SDK, sobald eine neue Version verfügbar ist. Die derzeit verfügbaren SDKs sind:
- [Stripe Terminal Android SDK](https://github.com/stripe/stripe-terminal-android/releases)
- [Stripe Terminal iOS SDK](https://github.com/stripe/stripe-terminal-ios/releases)
- [Stripe Terminal JavaScript SDK](https://docs.stripe.com/terminal/references/api/js-sdk.md#changelog)
- [Stripe Terminal React Native SDK](https://github.com/stripe/stripe-terminal-react-native)
## Nächste Schritte
- [Mit einem Lesegerät verbinden](https://docs.stripe.com/terminal/payments/connect-reader.md?terminal-sdk-platform=android&reader-type=internet)
# React Native
> This is a React Native for when terminal-sdk-platform is react-native. View the full page at https://docs.stripe.com/terminal/payments/setup-integration?terminal-sdk-platform=react-native.
> Die React Native-Bibliothek von Terminal befindet sich in der [öffentlichen Vorschau](https://docs.stripe.com/release-phases.md) und in aktiver Entwicklung. Bitte melden Sie alle Probleme, auf die Sie stoßen, unserem [GitHub-Projekt](https://github.com/stripe/stripe-terminal-react-native/issues/new/choose).
Für den Einstieg in das React Native SDK sind vier Schritte erforderlich:
1. [SDK](https://docs.stripe.com/terminal/payments/setup-integration.md#install) in Ihrer App installieren.
1. Ihre App [konfigurieren](https://docs.stripe.com/terminal/payments/setup-integration.md#configure).
1. [Verbindungs-Token](https://docs.stripe.com/terminal/payments/setup-integration.md#connection-token)-Endpoint in Ihrer App und Ihrem Backend einrichten.
1. [SDK](https://docs.stripe.com/terminal/payments/setup-integration.md#initialize) in Ihrer App initialisieren.
> Wenn Sie eine **Apps on Devices**-Integration (mit Ihrer App auf intelligenten Stripe-Lesegeräten wie dem S700/S710) erstellen, müssen Sie nach Befolgen dieses Leitfadens noch zusätzliche [native Android-Einrichtungsschritte](https://docs.stripe.com/terminal/features/apps-on-devices/build.md?terminal-sdk-platform=react-native#setup-app) durchführen.
## SDK installieren [Clientseitig]
Das [React Native SDK](https://github.com/stripe/stripe-terminal-react-native) ist Open Source und vollständig dokumentiert. Intern nutzt es die nativen iOS- und Android-SDKs. Installieren Sie das SDK, indem Sie Folgendes ausführen:
#### NPM
```bash
npm install @stripe/stripe-terminal-react-native
```
#### Yarn
```bash
yarn add @stripe/stripe-terminal-react-native
```
#### Expo
```bash
npx expo install @stripe/stripe-terminal-react-native
```
## App konfigurieren [Clientseitig]
#### React Native CLI
#### iOS
### Pods
Sie müssen in Ihrem `ios`-Verzeichnis `pod install` ausführen, um die nativen Abhängigkeiten zu installieren.
### Berechtigungen
Damit Ihre App mit dem Stripe Terminal SDK verwendet werden kann, müssen Sie in Xcode einige Änderungen an Ihrer Datei **Info.plist** vornehmen.
1. Aktivieren Sie Standortdienste mit dem folgenden Schlüssel-Wert-Paar.
| Datenschutz – „Location When In Use Usage Description“ |
| ------------------------------------------------------ |
| **Schlüssel** | [NSLocationWhenInUseUsageDescription](https://developer.apple.com/documentation/bundleresources/information_property_list/nslocationwheninuseusagedescription) |
| **Wert** | **Zur Annahme von Zahlungen ist ein Standortzugriff erforderlich.** |
Um das Risiko von Betrugsfällen bei Zahlungen zu reduzieren und Zahlungsanfechtungen zu minimieren, muss Stripe den Standort der getätigten Zahlungen kennen. Wenn das SDK den Standort des iOS-Geräts nicht ermitteln kann, werden alle Zahlungen bis zur Wiederherstellung des Standortzugriffs deaktiviert.
1. Stellen Sie sicher, dass Ihre App im Hintergrund ausgeführt wird und mit den Bluetooth-Lesegeräten verbunden bleibt.
| Erforderliche Hintergrundmodi für Bluetooth-Lesegeräte |
| ------------------------------------------------------ |
| **Schlüssel** | [UIBackgroundModes](https://developer.apple.com/documentation/bundleresources/information_property_list/uibackgroundmodes) |
| **Wert** | **bluetooth-central** (Verwendet Zubehör von Bluetooth LE) |
Mit dem Festlegen des Hintergrundmodus [bluetooth-central](https://developer.apple.com/library/archive/documentation/NetworkingInternetWeb/Conceptual/CoreBluetooth_concepts/CoreBluetoothBackgroundProcessingForIOSApps/PerformingTasksWhileYourAppIsInTheBackground.html#//apple_ref/doc/uid/TP40013257-CH7-SW6) kann das Lesegerät im Standby-Modus bleiben, wenn die App im Hintergrund läuft oder wenn das iOS-Gerät gesperrt ist. Wird dieser Wert nicht angegeben, wird der Standby-Modus nicht aktiviert. Wenn Ihre App im Hintergrund läuft, kann sich das Lesegerät zum Energiesparen automatisch ausschalten.
1. Gestatten Sie Ihrer App, ein Dialogfeld für Bluetooth-Berechtigungen anzuzeigen. Der App-Store verlangt dies, auch wenn Ihre App die Verbindung mit Bluetooth-Lesegeräten nicht unterstützt.
| Datenschutz – „Bluetooth Always Usage Description“ |
| -------------------------------------------------- |
| **Schlüssel** | [NSBluetoothAlwaysUsageDescription](https://developer.apple.com/documentation/bundleresources/information_property_list/NSBluetoothAlwaysUsageDescription) |
| **Wert** | **Diese App verwendet Bluetooth, um sich mit unterstützten Kartenlesegeräten zu verbinden.** |
iOS 13 führte spezifischere Berechtigungen für die Verwendung von Bluetooth-Peripheriegeräten durch eine App ein. Apps, die sich mit Core Bluetooth verbinden, müssen diesen Schlüssel in ihre Info.plist-Datei aufnehmen, um zu verhindern, dass die App beim ersten Start abstürzt.
1. App-Validierungsprüfungen bestehen, wenn Sie sie an den App Store übermittlen. Ab SDK-Version 3.4.0 ist diese Berechtigung nicht mehr erforderlich.
| Datenschutz – „Bluetooth Peripheral Usage Description“ |
| ------------------------------------------------------ |
| **Schlüssel** | [NSBluetoothPeripheralUsageDescription](https://developer.apple.com/documentation/bundleresources/information_property_list/nsbluetoothperipheralusagedescription) |
| **Wert** | **Für die Verbindung mit unterstützten Kartenlesegeräten ist Bluetooth-Zugriff erforderlich.** |
Es handelt sich hierbei um ein Beispiel – Sie können die Aufforderung zur Nutzerberechtigung in Ihrer App umformulieren.
1. Speichern Sie die **Info.plist** Ihrer App. Die App ist jetzt korrekt konfiguriert und kann mit dem Stripe Terminal SDK verwendet werden.
> Wenn Sie Tap to Pay auf dem iPhone verwenden, müssen Sie die Entwicklungsberechtigung für Tap to Pay auf dem iPhone von Ihrem Apple Entwicklerkonto aus [beantragen und konfigurieren](https://developer.apple.com/documentation/proximityreader/setting-up-the-entitlement-for-tap-to-pay-on-iphone).
#### Android
### Berechtigungen
Das Stripe Terminal-SDK benötigt die folgenden Android-Berechtigungen, um ordnungsgemäß zu funktionieren:
- `PermissionsAndroid.PERMISSIONS.BLUETOOTH_CONNECT`
- `PermissionsAndroid.PERMISSIONS.BLUETOOTH_SCAN`
- `PermissionsAndroid.PERMISSIONS.ACCESS_FINE_LOCATION`
Verwenden Sie die Hilfsfunktion `requestNeededAndroidPermissions`, um automatisch alle erforderlichen Berechtigungen anzufordern, bevor Sie das Terminal-SDK initialisieren:
```js
import { requestNeededAndroidPermissions } from '@stripe/stripe-terminal-react-native';
try {
const granted = await requestNeededAndroidPermissions({
accessFineLocation: {
title: 'Location Permission',
message: 'Stripe Terminal needs access to your location',
buttonPositive: 'Accept',
},
});
if (granted) {
// Initialize the SDK
} else {
console.error(
'Location and BT services are required to connect to a reader.'
);
}
} catch (e) {
console.error(e);
}
```
Wenn Sie eine detaillierte Kontrolle über Anfragen von Berechtigungen benötigen, können Sie alternativ jede Berechtigung manuell über `PermissionsAndroid.request` anfordern:
```js
import { PermissionsAndroid } from 'react-native';
// Mobile readers using Bluetooth connection require BLUETOOTH_CONNECT, BLUETOOTH_SCAN, and ACCESS_FINE_LOCATION.
// This example shows the pattern for requesting one permission.
const granted = await PermissionsAndroid.request(
PermissionsAndroid.PERMISSIONS.ACCESS_FINE_LOCATION,
{
title: 'Location Permission',
message: 'Stripe Terminal needs access to your location',
buttonPositive: 'Accept',
},
);
if (granted === PermissionsAndroid.RESULTS.GRANTED) {
console.log('Location permission granted');
} else {
console.error('Location permission denied');
}
```
### Manifest
Um die Kompatibilität mit Android 12 und neueren Versionen zu gewährleisten, fügen Sie `android:exported="true"` zu `AndroidManifest.xml` hinzu:
```xml
```
Weitere Informationen zu den in Android 12 vorgenommenen Änderungen finden Sie in der [Android-Dokumentation zum sicheren Export von Komponenten](https://developer.android.com/about/versions/12/behavior-changes-12#exported).
Für Geräte mit Android 11 oder darunter müssen Sie zudem Berechtigungen über das Manifest erteilen:
```xml
```
#### Expo
> Dieses Paket kann nicht in der „Expo Go“-App verwendet werden, da es [benutzerdefinierten nativen Code](https://docs.expo.io/workflow/customizing/) erfordert. Sie müssen `npx expo prebuild` verwenden, um native Projekte zu generieren und Ihre App mit `npx expo run:ios` oder `npx expo run:android` ausführen.
#### iOS
### Konfiguration des SDK
Fügen Sie nach der [Installation](https://docs.stripe.com/terminal/payments/setup-integration.md#installation) des SDK das [Konfigurations-Plugin](https://docs.expo.io/guides/config-plugins/) zum Array [Plugins](https://docs.expo.io/versions/latest/config/app/#plugins) Ihrer `app.json` oder `app.config.js` hinzu:
Legen Sie die folgenden Konfigurationsoptionen entsprechend Ihrem Lesegerätetyp fest:
- `localNetworkUsagePermission` – Erforderlich für Lesegeräte, die eine LAN-Verbindung verwenden
- `appDelegate` – Erforderlich für Tap to Pay auf Android
- `tapToPayCheck` – Aktiviert die Kompatibilitätsprüfung für Tap to Pay
```json
{
"expo": {
"plugins": [
[
"@stripe/stripe-terminal-react-native",
{
"bluetoothBackgroundMode": true,
"locationWhenInUsePermission": "Location access is required to accept payments.",
"bluetoothPeripheralPermission": "Bluetooth access is required to connect to supported bluetooth card readers.",
"bluetoothAlwaysUsagePermission": "This app uses Bluetooth to connect to supported card readers.",
"localNetworkUsagePermission": "This app uses the local WiFi network to connect to supported card readers.",
"appDelegate": true,
"tapToPayCheck": true
}
]
]
}
}
```
### Build
Stellen Sie als Nächstes Ihre App wieder her, wie in der Anleitung [Hinzufügen von nutzerspezifischem nativen Code](https://docs.expo.io/workflow/customizing/) beschrieben:
```bash
npx expo prebuild
```
dann:
```bash
npx expo run:ios
```
> Wenn Sie Tap to Pay auf dem iPhone verwenden, müssen Sie die Entwicklungsberechtigung für Tap to Pay auf dem iPhone von Ihrem Apple Entwicklerkonto aus [beantragen und konfigurieren](https://developer.apple.com/documentation/proximityreader/setting-up-the-entitlement-for-tap-to-pay-on-iphone).
#### Android
### Berechtigungen
Das Stripe Terminal-SDK benötigt die folgenden Android-Berechtigungen, um ordnungsgemäß zu funktionieren:
- `PermissionsAndroid.PERMISSIONS.BLUETOOTH_CONNECT`
- `PermissionsAndroid.PERMISSIONS.BLUETOOTH_SCAN`
- `PermissionsAndroid.PERMISSIONS.ACCESS_FINE_LOCATION`
Verwenden Sie die Hilfsfunktion `requestNeededAndroidPermissions`, um automatisch alle erforderlichen Berechtigungen anzufordern, bevor Sie das Terminal-SDK initialisieren:
```js
import { requestNeededAndroidPermissions } from '@stripe/stripe-terminal-react-native';
try {
const granted = await requestNeededAndroidPermissions({
accessFineLocation: {
title: 'Location Permission',
message: 'Stripe Terminal needs access to your location',
buttonPositive: 'Accept',
},
});
if (granted) {
// Initialize the SDK
} else {
console.error(
'Location and BT services are required to connect to a reader.'
);
}
} catch (e) {
console.error(e);
}
```
Wenn Sie eine detaillierte Kontrolle über Anfragen von Berechtigungen benötigen, können Sie alternativ jede Berechtigung manuell über `PermissionsAndroid.request` anfordern:
```js
import { PermissionsAndroid } from 'react-native';
// Mobile readers using Bluetooth connection require BLUETOOTH_CONNECT, BLUETOOTH_SCAN, and ACCESS_FINE_LOCATION.
// This example shows the pattern for requesting one permission.
const granted = await PermissionsAndroid.request(
PermissionsAndroid.PERMISSIONS.ACCESS_FINE_LOCATION,
{
title: 'Location Permission',
message: 'Stripe Terminal needs access to your location',
buttonPositive: 'Accept',
},
);
if (granted === PermissionsAndroid.RESULTS.GRANTED) {
console.log('Location permission granted');
} else {
console.error('Location permission denied');
}
```
### Konfiguration des SDK
Fügen Sie nach der [Installation](https://docs.stripe.com/terminal/payments/setup-integration.md#installation) des SDK das [Konfigurations-Plugin](https://docs.expo.io/guides/config-plugins/) zum Array [Plugins](https://docs.expo.io/versions/latest/config/app/#plugins) Ihrer `app.json` oder `app.config.js` hinzu:
Legen Sie die folgenden Konfigurationsoptionen entsprechend Ihrem Lesegerätetyp fest:
- `localNetworkUsagePermission` – Erforderlich für Lesegeräte, die eine LAN-Verbindung verwenden
- `appDelegate` – Erforderlich für Tap to Pay auf Android
- `tapToPayCheck` – Aktiviert die Kompatibilitätsprüfung für Tap to Pay
```json
{
"expo": {
"plugins": [
[
"@stripe/stripe-terminal-react-native",
{
"bluetoothBackgroundMode": true,
"locationWhenInUsePermission": "Location access is required to accept payments.",
"bluetoothPeripheralPermission": "Bluetooth access is required to connect to supported bluetooth card readers.",
"bluetoothAlwaysUsagePermission": "This app uses Bluetooth to connect to supported card readers.",
"localNetworkUsagePermission": "This app uses the local WiFi network to connect to supported card readers.",
"appDelegate": true,
"tapToPayCheck": true
}
]
]
}
}
```
#### Build
Stellen Sie als Nächstes Ihre App wieder her, wie in der Anleitung [Hinzufügen von nutzerspezifischem nativen Code](https://docs.expo.io/workflow/customizing/) beschrieben:
```bash
npx expo prebuild
```
dann:
```bash
npx expo run:android
```
## Verbindungs-Token-Endpoint einrichten [Serverseitig] [Clientseitig]
### Serverseitig
Um sich mit einem Lesegerät verbinden zu können, muss das Backend dem SDK erlauben, das Lesegerät in Ihrem Stripe-Konto zu nutzen. Dazu stellt es dem SDK das [Geheimnis](https://docs.stripe.com/api/terminal/connection_tokens/object.md#terminal_connection_token_object-secret) aus einem [ConnectionToken](https://docs.stripe.com/api/terminal/connection_tokens.md) zur Verfügung. Das Backend muss nur Verbindungstoken für vertrauenswürdige Clients erstellen.
#### curl
```bash
curl https://api.stripe.com/v1/terminal/connection_tokens \
-u <>: \
-X "POST"
```
Beziehen Sie das Geheimnis aus dem `ConnectionToken` auf Ihrem Server und übergeben Sie es an den Client.
#### Ruby
```ruby
post '/connection_token' do
token = # ... Create or retrieve the ConnectionToken
{secret: token.secret}.to_json
end
```
> Mit dem `secret` aus dem `ConnectionToken` können Sie sich mit einem beliebigen Stripe Terminal-Lesegerät verbinden und Zahlungen mit Ihrem Stripe-Konto annehmen. Stellen Sie sicher, dass Sie den Endpoint zum Erstellen von Verbindungstoken authentifizieren und diesen vor Cross Site Request Forgery (CSRF) schützen.
### Clientseitig
Um dem SDK Zugriff auf diesen Endpoint zu ermöglichen, erstellen Sie eine Token-Anbieter-Einzelfunktion, die ein `ConnectionToken` aus Ihrem Back-End anfordert.
```js
import { StripeTerminalProvider } from '@stripe/stripe-terminal-react-native';
const fetchTokenProvider = async () => {
const response = await fetch(`{YOUR BACKEND URL}/connection_token`, {
method: 'POST',
headers: {
'Content-Type': 'application/json',
},
});
const { secret } = await response.json();
return secret;
};
```
Diese Funktion wird aufgerufen, wenn das SDK sich bei Stripe oder dem Lesegerät authentifizieren muss. Sie wird auch aufgerufen, wenn ein neues Verbindungstoken benötigt wird, um sich mit einem Lesegerät zu verbinden (z. B. wenn Ihre App sich von einem Lesegerät getrennt hat). Wenn das SDK kein neues Verbindungstoken von Ihrem Backend abrufen kann, schlägt die Verbindung zu einem Lesegerät mit einem Fehler von Ihrem Server fehl.
> Speichern Sie den Verbindungstoken nicht im Cache und codieren Sie ihn nicht fest. Der Lifecycle des Verbindungstokens wird vom SDK verwaltet.
## SDK initialisieren [Clientseitig]
Übergeben Sie zunächst Ihren in [Schritt 3](https://docs.stripe.com/terminal/payments/setup-integration.md#connection-token) implementierten Token-Anbieter als Prop an `StripeTerminalProvider`.
```js
import { StripeTerminalProvider } from '@stripe/stripe-terminal-react-native';
function Root() {
const fetchTokenProvider = async () => {
const response = await fetch(`${API_URL}/connection_token`, {
method: 'POST',
headers: {
'Content-Type': 'application/json',
},
});
const { secret } = await response.json();
return secret;
};
return (
);
}
```
Rufen Sie als letzten Schritt die `Initialisierungsmethode` über den Hook `useStripeTerminal` auf.
> Sie müssen die `Initialisierungsmethode` über eine in `StripeTerminalProvider` verschachtelte Komponente aufrufen, nicht über die Komponente, die den `StripeTerminalProvider` enthält.
>
> Nach Abschluss der Initialisierung können Sie andere SDK-Methoden wie `discoverReaders`, `connectReader` und `processPaymentIntent` verwenden. Wenn Sie versuchen, diese Methoden vor der Initialisierung aufzurufen, erhalten Sie die folgende Fehlermeldung: „Initiieren Sie zuerst das Stripe Terminal-SDK, bevor Sie eine Aktion ausführen.“
```js
function App() {
const { initialize } = useStripeTerminal();
useEffect(() => {
initialize();
}, []);
return ;
}
```
## SDK-Aktualisierungen
Stripe veröffentlicht regelmäßig Updates, die neue Funktionen, Fehlerkorrekturen und Sicherheitsupdates enthalten können. Aktualisieren Sie Ihr SDK, sobald eine neue Version verfügbar ist. Die derzeit verfügbaren SDKs sind:
- [Stripe Terminal Android SDK](https://github.com/stripe/stripe-terminal-android/releases)
- [Stripe Terminal iOS SDK](https://github.com/stripe/stripe-terminal-ios/releases)
- [Stripe Terminal JavaScript SDK](https://docs.stripe.com/terminal/references/api/js-sdk.md#changelog)
- [Stripe Terminal React Native SDK](https://github.com/stripe/stripe-terminal-react-native)
## Nächste Schritte
- [Mit einem Lesegerät verbinden](https://docs.stripe.com/terminal/payments/connect-reader.md?terminal-sdk-platform=react-native&reader-type=internet)
# Apps auf Geräten
> This is a Apps auf Geräten for when terminal-sdk-platform is apps-on-devices. View the full page at https://docs.stripe.com/terminal/payments/setup-integration?terminal-sdk-platform=apps-on-devices.
Verwenden Sie „Apps auf Geräten“, um Ihre Point-of-Sale (POS)-Anwendung zusammen mit anderen Apps auf Ihrem Gerät auszuführen. Sie können Ihre POS-App auf intelligenten Stripe-Lesegeräten bereitstellen, um eine All-in-One-Lösung zu liefern, oder eine kundenorientierte App für Zahlungen erstellen, die von Ihrem POS auf einem anderen Gerät ausgeführt wird.
Stripe wickelt alle Zahlungen und die Einhaltung der Vorschriften mit dem Stripe Terminal Android SDK ab.
Erfahren Sie mehr über [Apps auf Geräten](https://docs.stripe.com/terminal/features/apps-on-devices/overview.md). Sie können sich auch die [Beispiel-App](https://github.com/stripe-samples/terminal-apps-on-devices) ansehen, um Best Practices für die Integration, den Einzug und die Bestätigung einer Zahlung und vieles mehr zu erfahren.