Accéder directement au contenu
Créez un compte
ou
connecter-vous
Logo de la documentation Stripe
/
Demander à l'assistant IA
Créez un compte
Connectez-vous
Démarrer
Paiements
Automatisation des opérations financières
Plateformes et places de marché
Gestion de fonds
Outils de développement
Démarrer
Paiements
Automatisation des opérations financières
Démarrer
Paiements
Automatisation des opérations financières
Plateformes et places de marché
Gestion de fonds
Aperçu
À propos des paiements Stripe
Mettre votre intégration à niveau
Analyses des paiements
Paiements en ligne
PrésentationTrouver votre cas d'usageManaged Payments
Utiliser Payment Links
Créer une page de paiement
Développer une intégration avancée
Développer une intégration dans l'application
Moyens de paiement
Ajouter des moyens de paiement
Gérer les moyens de paiement
Paiement accéléré avec Link
Interfaces de paiement
Payment Links
Checkout
Web Elements
Elements intégrés à l'application
Scénarios de paiement
Tunnels de paiement personnalisés
Acquisition flexible
Orchestration
Paiements par TPE
Terminal
    Présentation
    Accepter les paiements par TPE
    Conception d'intégration
    Choisir votre lecteur
    Concevoir une intégration
    Démarrage rapide
    Exemples d'applications
    Tests
    Configuration de Terminal
    Configurer votre intégration
    Se connecter à un lecteur
    Acceptation d'un paiement
    Encaisser des paiements par carte
      Marques de cartes prises en charge
    Autres moyens de paiement
    Accepter les paiements hors ligne
    Paiement des commande par courrier/par téléphone
    Spécificités régionales
    Lors du règlement
    Collecter des pourboires
    Collecter et enregistrer des informations de paiement pour une utilisation ultérieure
    Autorisations flexibles
    Après le paiement
    Rembourser des transactions
    Fournir des reçus
    Personnalisez Checkout
    Affichage du panier
    Collecter les données saisies à l'écran
    Collecter les données des lectures de la piste magnétique
    Collecter les données des paiements NFC sans contact
    Applications sur des appareils
    Gérer les lecteurs
    Commander, renvoyer ou remplacer des lecteurs
    Enregistrer des lecteurs
    Gérer les emplacements et les zones
    Configurer des lecteurs
    Chiffrement
    Références
    Documentation de l'API
    Lecteurs mobiles
    Lecteurs intelligents
    Guide de migration du SDK
    Liste de contrôle pour le déploiement
    Fiches produit du lecteur Stripe Terminal
Autres produits Stripe
Financial Connections
Cryptomonnaies
Climate
AccueilPaiementsTerminal

Remarque

Cette page n'est pas encore disponible dans cette langue. Nous faisons tout notre possible pour proposer notre documentation dans davantage de langues et nous vous fournirons la version traduite dès qu'elle sera disponible.

Collect card payments

Prepare your application and back end to collect card payments using Stripe Terminal.

Copier la page

Learn More

New to the Payment Intents API? Here are some helpful resources:

  • The Payment Intents API
  • The PaymentIntent object
  • More payment scenarios

Collecting payments with Stripe Terminal requires writing a payment flow in your application. Use the Stripe Terminal SDK to create and update a PaymentIntent, an object representing a single payment session.

Designed to be robust to failures, the Terminal integration splits the payment process into several steps, each of which can be retried safely:

  1. Create a PaymentIntent.
  2. Collect a payment method. You can define whether to automatically or manually capture your payments.
  3. Confirm the payment. Authorization on the customer’s card takes place when the SDK confirms the payment.
  4. (Optional) Capture the payment

Create a PaymentIntent
Client-side
Server-side

The first step when collecting payments is to start the payment flow. When a customer begins checking out, your application must create a PaymentIntent object. This represents a new payment session on Stripe.

SDK Reference

  • createPaymentIntent (Android)

You can create a PaymentIntent on the client or server.

Use test amounts to try producing different results. An amount ending in 00 results in an approved payment.

Client-side

Create a PaymentIntent from your client:

Avertissement

If your app is connected to the Verifone P400, you can’t create a PaymentIntent from the Android SDK. Instead, you must create the PaymentIntent server-side, and retrieve the PaymentIntent in your app using the Terminal.retrievePaymentIntent method in the SDK.

PaymentActivity.kt
Kotlin
val params = PaymentIntentParameters.Builder() .setAmount(1000) .setCurrency("usd") .build() Terminal.getInstance().createPaymentIntent( params, object : PaymentIntentCallback { override fun onSuccess(paymentIntent: PaymentIntent) { // Placeholder for handling successful operation } override fun onFailure(e: TerminalException) { // Placeholder for handling exception } } )

Server-side

You can create the PaymentIntent on your server if the information required to start a payment isn’t readily available in your app.

The following example shows how to create a PaymentIntent on your server:

Command Line
curl
curl https://api.stripe.com/v1/payment_intents \ -u
sk_test_BQokikJOvBiI2HlWgH4olfQ2
:
\ -d "amount"=1000 \ -d "currency"="usd" \ -d "payment_method_types[]"="card_present" \ -d "capture_method"="manual"

For Terminal payments, the payment_method_types parameter must include card_present.

You can control the payment flow as follows:

  • To fully control the payment flow for card_present payments, set the capture_method to manual. This allows you to add a reconciliation step before finalizing the payment.
  • To authorize and capture payments in one step, set the capture_method to automatic.

To accept payments in Australia, you need to set capture_method to automatic or manual_preferred. For more details, visit our Australia documentation. To accept Interac payments in Canada, you must also include interac_present in payment_method_types. For more details, visit our Canada documentation.

The PaymentIntent contains a client secret, a key that’s unique to the individual PaymentIntent. To use the client secret, you must obtain it from the PaymentIntent on your server and pass it to the client side.

Ruby
post '/create_payment_intent' do intent = # ... Create or retrieve the PaymentIntent {client_secret: intent.client_secret}.to_json end

SDK Reference

  • retrievePaymentIntent (Android)

To retrieve a PaymentIntent, use the client secret to call retrievePaymentIntent.

After you retrieve the PaymentIntent, use it to call collectPaymentMethod.

PaymentActivity.kt
Kotlin
Terminal.getInstance().retrievePaymentIntent( clientSecret, object : PaymentIntentCallback { override fun onSuccess(paymentIntent: PaymentIntent) { // Placeholder for handling successful operation } override fun onFailure(e: TerminalException) { // Placeholder for handling exception } } )

Collect a payment method
Client-side

SDK Reference

  • collectPaymentMethod (Android)

After you’ve created a PaymentIntent, the next step is to collect a payment method with the SDK.

To collect a payment method, your app needs to be connected to a reader. The connected reader waits for a card to be presented after your app calls collectPaymentMethod.

PaymentActivity.kt
Kotlin
val cancelable = Terminal.getInstance().collectPaymentMethod( paymentIntent, object : PaymentIntentCallback { override fun onSuccess(paymentIntent: PaymentIntent) { // Placeholder for handling successful operation } override fun onFailure(e: TerminalException) { // Placeholder for handling exception } } )

This method collects encrypted payment method data using the connected card reader, and associates the encrypted data with the local PaymentIntent.

Optionally inspect payment method details

SDK Reference

  • CollectConfiguration (Android)
  • CardPresentDetails (Android)

For advanced use cases, you can examine the payment method details of the presented card and perform your own business logic prior to authorization.

Use the updatePaymentIntent parameter in CollectConfiguration to attach a PaymentMethod to the server-side PaymentIntent. This data is returned in the collectPaymentMethod response.

PaymentActivity.kt
Kotlin
val collectConfig = CollectConfiguration.Builder() .updatePaymentIntent(true) .build() val cancelable = Terminal.getInstance().collectPaymentMethod(paymentIntent, object : PaymentIntentCallback { override fun onSuccess(paymentIntent: PaymentIntent) { val pm = paymentIntent.paymentMethod val card = pm?.cardPresentDetails ?: pm?.interacPresentDetails // Placeholder for business logic on card before confirming paymentIntent } override fun onFailure(e: TerminalException) { // Placeholder for handling exception } } )

Remarque

This method attaches the collected encrypted payment method data with an update to the PaymentIntent object. It requires no authorization until the next step, confirm the payment.

This advanced use case isn’t supported on the Verifone P400.

After payment method collection you must authorize the payment or cancel collection within 30 seconds.

If the SDK is operating offline, the paymentMethod field isn’t present in the PaymentIntent object.

You can access attributes like card brand, funding, and other useful data at this point.

Remarque

Stripe attempts to detect whether a mobile wallet is used in a transaction as shown in the wallet.type attribute. However, the attribute isn’t populated if the card’s issuing bank doesn’t support reader-driven identification of a mobile wallet, so accurate detection isn’t guaranteed. After authorization in the confirmation step, Stripe receives up-to-date information from the networks and updates wallet.type reliably

Cancel collection

Programmatic cancellation

SDK Reference

  • Cancelable (Android)

You can cancel collecting a payment method using the Cancelable object returned by the Android SDK.

Customer-initiated cancellation

SDK Reference

  • setEnableCustomerCancellation (Android)

When you set setEnableCustomerCancellation to true for a transaction, smart reader users see a cancel button.

Tapping the cancel button cancels the active transaction.

PaymentActivity.kt
Kotlin
Terminal.getInstance().collectPaymentMethod( paymentIntent, object : PaymentIntentCallback { override fun onSuccess(paymentIntent: PaymentIntent) { // Placeholder for handling successful operation } override fun onFailure(e: TerminalException) { // Placeholder for handling exception } }, CollectConfiguration.Builder() .setEnableCustomerCancellation(true) .build(), )

Handle events

SDK Reference

  • MobileReaderListener (Android)

When collecting a payment method using a reader like the Stripe M2, without a built-in display, your app must be able to display events from the payment method collection process to users. These events help users successfully collect payments (for example, retrying a card, trying a different card, or using a different read method).

When a transaction begins, the SDK passes a ReaderInputOptions value to your app’s reader display handler, denoting the acceptable types of input (for example, Swipe, Insert, Tap). In your app’s checkout UI, prompt the user to present a card using one of these options.

During the transaction, the SDK might request your app to display additional prompts (for example, Retry Card) to your user by passing a ReaderDisplayMessage value to your app’s reader display handler. Make sure your checkout UI displays these messages to the user.

Remarque

Your application doesn’t need to display events from the payment method collection process to users because the reader displays them. To clear the payment method on a transaction, you can cancel the request.

ReaderActivity.kt
Kotlin
class ReaderActivity : AppCompatActivity(), MobileReaderListener { // ... override fun onRequestReaderInput(options: ReaderInputOptions) { Toast.makeText(activity, options.toString(), Toast.LENGTH_SHORT).show() } override fun onRequestReaderDisplayMessage(message: ReaderDisplayMessage) { Toast.makeText(activity, message.toString(), Toast.LENGTH_SHORT).show() } // ... }

Collect payments with Tap to Pay on Android

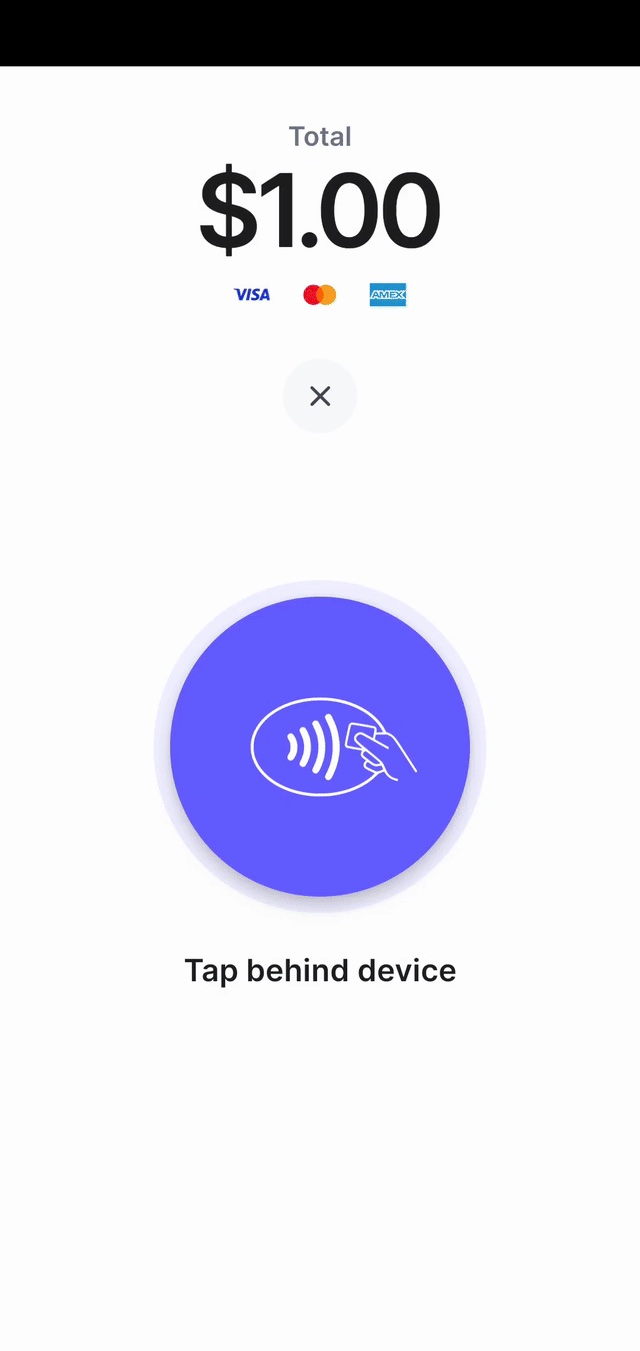
When your application is ready to collect a payment, the Stripe Android SDK takes over the display to handle the collection process. After calling the collect payment method, your application remains running. The Android device displays a full-screen prompt to the cardholder, instructing them to present their card or NFC-based mobile wallet. If there’s an error reading the card, a prompt for retry displays. A successful presentation returns a success indication, and then control returns to your application to confirm the payment.

Tap to pay on Android

Payment collection

Confirm the payment
Client-side

SDK Reference

  • confirmPaymentIntent (Android)

After successfully collecting a payment method from the customer, the next step is to confirm the payment with the SDK. When you’re ready to proceed with the payment, call confirmPaymentIntent with the updated PaymentIntent from Step 2.

  • For manual capture of payments, a successful confirmPaymentIntent call results in a PaymentIntent with a status of requires_capture.
  • For automatic capture of payments, the PaymentIntent transitions to a succeeded state.
PaymentActivity.kt
Kotlin
val cancelable = Terminal.getInstance().confirmPaymentIntent( paymentIntent, object : PaymentIntentCallback { override fun onSuccess(paymentIntent: PaymentIntent) { // Placeholder handling successful operation } override fun onFailure(e: TerminalException) { // Placeholder for handling exception } } )

Avertissement

You must manually capture a PaymentIntent within 2 days or the authorization expires and funds are released to the customer.

Handle failures

SDK Reference

  • TerminalException (Android)

When confirming a payment fails, the SDK returns an error that includes the updated PaymentIntent. Your application needs to inspect the PaymentIntent to decide how to deal with the error.

PaymentIntent StatusMeaningResolution
requires_payment_methodPayment method declinedTry collecting a different payment method by calling collectPaymentMethod again with the same PaymentIntent.
requires_confirmationTemporary connectivity problemCall confirmPaymentIntent again with the same PaymentIntent to retry the request.
PaymentIntent is nilRequest to Stripe timed out, unknown PaymentIntent statusRetry confirming the original PaymentIntent. Don’t create a new one, because that could result in multiple authorizations for the cardholder.

If you encounter multiple, consecutive timeouts, there might be a problem with your connectivity. Make sure that your app can communicate with the internet.

Avoiding double charges

The PaymentIntent object enables money movement at Stripe—use a single PaymentIntent to represent a transaction.

Re-use the same PaymentIntent after a card is declined (for example, if it has insufficient funds), so your customer can try again with a different card.

If you edit the PaymentIntent, you must call collectPaymentMethod to update the payment information on the reader.

A PaymentIntent must be in the requires_payment_method state before Stripe can confirm it. An authorized, captured, or canceled PaymentIntent can’t be confirmed by a reader.

Capture the payment
Server-side

If you defined capture_method as manual during PaymentIntent creation in Step 1, the SDK returns an authorized but not captured PaymentIntent to your application. Learn more about the difference between authorization and capture.

When your app receives a confirmed PaymentIntent from the SDK, make sure it notifies your backend to capture the payment. Create an endpoint on your backend that accepts a PaymentIntent ID and sends a request to the Stripe API to capture it:

Command Line
cURL
curl -X POST https://api.stripe.com/v1/payment_intents/{{PAYMENT_INTENT_ID}}/capture \ -u "
sk_test_BQokikJOvBiI2HlWgH4olfQ2
:"

A successful capture call results in a PaymentIntent with a status of succeeded.

Remarque

To make sure the application fee captured is correct for connected accounts, inspect each PaymentIntent and modify the application fee, if needed, before manually capturing the payment.

Reconcile payments

To monitor the payments activity of your business, you might want to reconcile PaymentIntents with your internal orders system on your server at the end of a day’s activity.

A PaymentIntent that retains a requires_capture status might represent two things:

Unnecessary authorization on your customer’s card statement

  • Cause: User abandons your app’s checkout flow in the middle of a transaction
  • Solution: If the uncaptured PaymentIntent isn’t associated with a completed order on your server, you can cancel it. You can’t use a canceled PaymentIntent to perform charges.

Incomplete collection of funds from a customer

  • Cause: Failure of the request from your app notifying your backend to capture the payment
  • Solution: If the uncaptured PaymentIntent is associated with a completed order on your server, and no other payment has been taken for the order (for example, a cash payment), you can capture it.

Collect tips US only

In the US, eligible users can collect tips when capturing payments.

Cette page vous a-t-elle été utile ?
OuiNon
Besoin d'aide ? Contactez le service Support.
Rejoignez notre programme d'accès anticipé.
Consultez notre log des modifications.
Des questions ? Contactez l'équipe commerciale.
LLM ? Lire llms.txt.
Propulsé par Markdoc