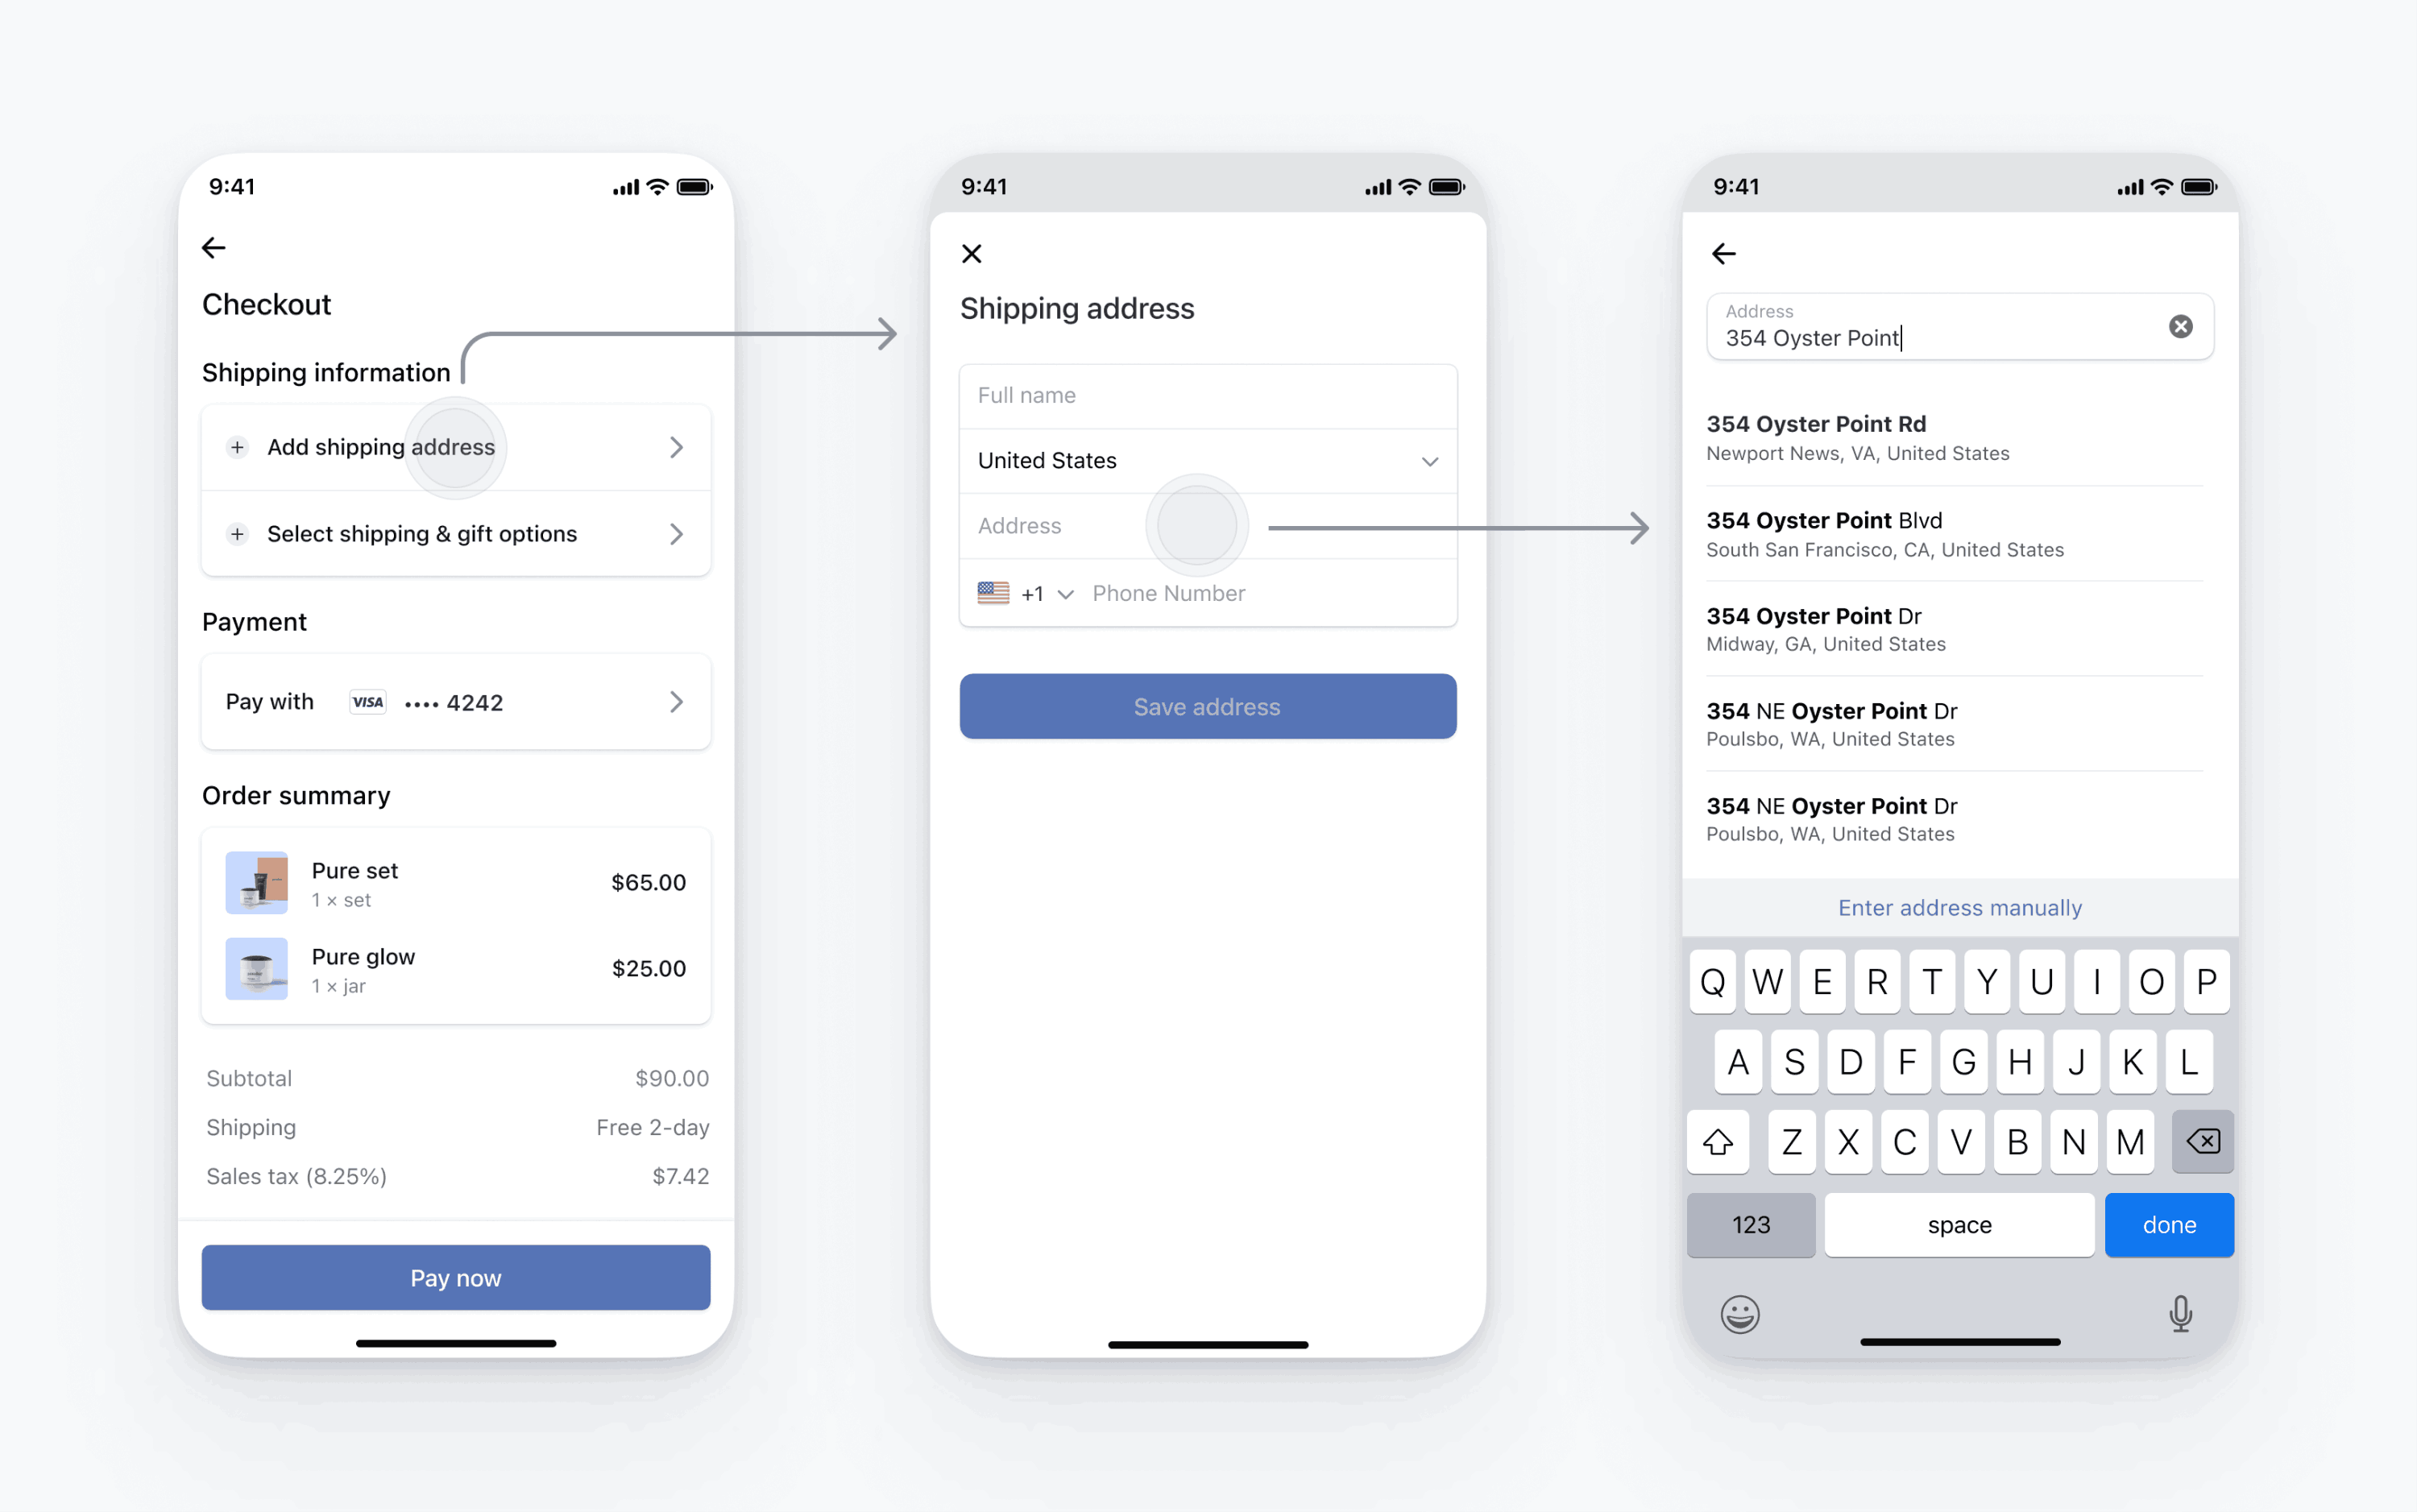
住所と電話番号を収集
Address Element を使用してモバイルアプリで顧客の住所と電話番号を収集する方法をご紹介します。
請求や配送先の詳細な住所を収集するには、Address Element を使用します。
Address Element は次の目的でも使用できます。
- 顧客の電話番号を収集する
- オートコンプリートを利用する (iOS ではデフォルトで有効になっています)
- 配送先住所を渡して Payment Element に請求先情報を事前入力する
Stripe は、収集した住所情報と決済手段を組み合わせて、PaymentIntent を作成します。

Stripe をセットアップするサーバー側クライアント側
まず、Stripe アカウントが必要です。今すぐ登録してください。
Stripe iOS SDK はオープンソースです。詳細なドキュメントが提供されており、iOS 13 以降をサポートするアプリと互換性があります。
メモ
SDK の最新リリースおよび過去バージョンの詳細については、GitHub の Releases (リリース) ページをご覧ください。リポジトリのリリースをウォッチして、新しいリリースの公開時に通知を受け取ることも可能です。
アプリの起動時に Stripe 公開可能キーを使用して SDK を設定します。これにより、アプリが Stripe API にリクエストを送信できるようになります。
住所のオートコンプリートの入力候補を設定する
iOS ではオートコンプリートがデフォルトで有効になっています。
Address Element を設定する
Address Element では、デフォルト値の表示、許可された国の設定、デザインのカスタマイズなどの詳細を設定できます。設定オプションの一覧については、AddressViewController.Configuration をご覧ください。
let addressConfiguration = AddressViewController.Configuration(
  additionalFields: .init(phone: .required),
  allowedCountries: ["US", "CA", "GB"],
  title: "Shipping Address"
)
住所の詳細を取得する
AddressViewControllerDelegate に従って住所の詳細を取得し、addressViewControllerDidFinish を使用してビューコントローラーを閉じます。住所の値は、有効な住所または nil のいずれかです。
extension MyViewController: AddressViewControllerDelegate {
    func addressViewControllerDidFinish(_ addressViewController: AddressViewController, with address: AddressViewController.AddressDetails?) {
        addressViewController.dismiss(animated: true)
        self.addressDetails = address
    }
}
Address Element を表示する
前のステップのアドレス設定とデリゲートを使用して、AddressViewController を作成します。ナビゲーションコントローラーに表示するか、ナビゲーションコントローラーにプッシュできます。
self.addressViewController = AddressViewController(configuration: addressConfiguration, delegate: self)
let navigationController = UINavigationController(rootViewController: addressViewController)

present(navigationController, animated: true)
オプションPayment Element で配送先住所を事前入力する
モバイル支払い要素を使用する場合は、PaymentSheet.Configuration.shippingDetails に、address要素で収集する住所を設定します。shippingDetails が入力されると、ユーザーには請求先住所が事前に入力され、Billing address is the same as shipping チェックボックスが表示されます。shippingDetails が入力された確認済みの PaymentIntent には、PaymentIntent が確認されたときにshipping インテントプロパティも入力されます。
var configuration = PaymentSheet.Configuration()
// ...
configuration.shippingDetails = { [weak self] in
    return self?.addressDetails
}
オプションデザインをカスタマイズする
上記でアプリに住所 Element が追加されたので、アプリの他の部分のデザインに合わせて外観をカスタマイズできます。AddressLauncher.Configuration.appearance を使用する Appearance API で、デザインを設定できます。
オプションデフォルトの請求詳細を設定する
支払い画面で収集される請求詳細のデフォルト値を設定するには、defaultBillingDetails プロパティーを設定します。PaymentSheet の各フィールドに、指定したそれらの値が事前に読み込まれます。
var configuration = PaymentSheet.Configuration()
configuration.defaultBillingDetails.address.country = "US"
configuration.defaultBillingDetails.email = "foo@bar.com"
オプション請求先の詳細の収集をカスタマイズする
billingDetailsCollectionConfiguration を使用して、決済画面で請求の詳細を収集する方法を指定します。
顧客の名前、メールアドレス、電話番号、住所を収集できます。
支払い方法で必須の請求詳細のみを収集する場合は、billingDetailsCollectionConfiguration. を true に設定します。その場合、PaymentSheet. が支払い方法の請求詳細として設定されます。
支払い方法で必ずしも必須ではない追加の請求詳細を収集する場合は、billingDetailsCollectionConfiguration. を false に設定します。 その場合、PaymentSheet で収集した請求詳細が支払い方法の請求詳細として設定されます。
var configuration = PaymentSheet.Configuration()
configuration.defaultBillingDetails.email = "foo@bar.com"
configuration.billingDetailsCollectionConfiguration.name = .always
configuration.billingDetailsCollectionConfiguration.email = .never
configuration.billingDetailsCollectionConfiguration.address = .full
configuration.billingDetailsCollectionConfiguration.attachDefaultsToPaymentMethod = true
メモ
情報の収集に適用される法律については、弁護士に相談してください。電話番号は、取引に必要な場合にのみ収集してください。