# 住所と電話番号を収集する
1 回限りの決済フロー内で住所と電話番号を収集する方法をご紹介します。
請求先または配送先の詳細な住所を収集するには、[Address Element](https://docs.stripe.com/elements/address-element.md) を使用します。[詳細な住所の収集は、税金の計算に使用される場合](https://docs.stripe.com/tax/custom.md#collect-address)などに必要になります。[Payment Element](https://docs.stripe.com/payments/payment-element.md) は、支払いを完了するために必要な請求先住所情報のみを収集しますが、他の請求詳細を収集するように設定することもできます。
Address Element を使用するその他の理由は次のとおりです。
- 顧客の[電話番号](https://docs.stripe.com/js/elements_object/create_address_element#address_element_create-options-fields-phone)を収集する
- [オートコンプリート](https://docs.stripe.com/js/elements_object/create_address_element#address_element_create-options-autocomplete)を有効にする
- 配送先住所を渡して Payment Element に請求先情報を事前入力する
Stripe は、収集した住所情報と決済手段を組み合わせて、*PaymentIntent* (API object that represents your intent to collect payment from a customer, tracking charge attempts and payment state changes throughout the process) を作成します。
# Checkout Sessions API
> This is a Checkout Sessions API for when payment-ui is embedded-components. View the full page at https://docs.stripe.com/payments/advanced/collect-addresses?payment-ui=embedded-components.
## Stripe を設定する [サーバ側]
まず、[Stripe アカウントを作成する](https://dashboard.stripe.com/register)か[サインイン](https://dashboard.stripe.com/login)します。
アプリケーションから Stripe API にアクセスするには、Stripe の公式ライブラリを使用します。
#### Ruby
```bash
# Available as a gem
sudo gem install stripe
```
```ruby
# If you use bundler, you can add this line to your Gemfile
gem 'stripe'
```
## 住所の詳細を収集する [クライアント側]
Address Element を使用して、クライアント側で住所の詳細を収集する準備が整いました。
#### HTML + JS
### Stripe.js を設定
Address Element は Stripe.js の機能として自動的に使用できます。決済ページに Stripe.js スクリプトを含めるには、HTML ファイルの `head` に追加します。PCI 準拠を維持するため、常に js.stripe.com から Stripe.js を直接読み込んでください。スクリプトをバンドルに含めたり、コピーを独自にホストしたりしないでください。
```html
Checkout
```
### Stripe インスタンスを作成して決済を初期化する
決済ページで Stripe のインスタンスを作成します。
```javascript
// Set your publishable key: remember to change this to your live publishable key in production
// See your keys here: https://dashboard.stripe.com/apikeys
const stripe = Stripe('<>');
let checkout;
initialize();
async function initialize() {
const promise = fetch("/create-checkout-session", {
method: "POST",
headers: { "Content-Type": "application/json" },
})
.then((r) => r.json())
.then((r) => r.clientSecret);
const appearance = {
theme: 'stripe',
};
checkout = stripe.initCheckoutElementsSdk({
clientSecret: promise,
elementsOptions: { appearance },
});
}
```
### Address Element をページに追加する
ページに住所 Element を配置する場所が必要です。フォームで一意の ID を持つ空の DOM ノード (コンテナー) を作成します。
```html
```
このフォームが読み込まれたら、Address Element のインスタンスを作成し、[請求先](https://docs.stripe.com/js/custom_checkout/create_billing_address_element) または[配送先](https://docs.stripe.com/js/custom_checkout/create_shipping_address_element)住所を収集し、コンテナーの DOM ノードにマウントします。
すでに [Checkout](https://docs.stripe.com/js/custom_checkout/init) インスタンスを作成している場合には、同じインスタンスを使用して Address Element を作成できます。それ以外の場合は、最初に新しい [Checkout](https://docs.stripe.com/js/custom_checkout/init) インスタンスを作成します。
```javascript
const options = {
// Fully customizable with the Appearance API.
appearance: { /* ... */ }
};
const billingAddressElement = checkout.createBillingAddressElement();
billingAddressElement.mount("#billing-address-element");
const shippingAddressElement = checkout.createShippingAddressElement();
shippingAddressElement.mount("#shipping-address-element");
```
#### React
### Stripe.js を設定
npm 公開レジストリから [React Stripe.js](https://www.npmjs.com/package/@stripe/react-stripe-js) と [Stripe.js loader](https://www.npmjs.com/package/@stripe/stripe-js) をインストールします。
```bash
npm install --save @stripe/react-stripe-js @stripe/stripe-js
```
### CheckoutElementsProvider をページに追加して設定する
Address Element コンポーネントを使用するには、[CheckoutElementsProvider](https://docs.stripe.com/sdks/stripejs-react.md?ui=embedded-components#checkout-provider) で貴社の決済画面をラップします。公開可能キーを使用して `loadStripe` を呼び出します。返された `Promise` を `CheckoutElementsProvider` に渡します。
```jsx
import React from 'react';
import ReactDOM from 'react-dom';
import {CheckoutElementsProvider} from '@stripe/react-stripe-js/checkout';
import {loadStripe} from '@stripe/stripe-js';
import AddressForm from './AddressForm';
// Make sure to call `loadStripe` outside of a component's render to avoid
// recreating the `Stripe` object on every render.
const stripePromise = loadStripe('<>');
function App() {
const promise = useMemo(() => {
return fetch('/create-checkout-session', {
method: 'POST',
})
.then((res) => res.json())
.then((data) => data.clientSecret);
}, []);
const appearance = {
// Fully customizable with appearance API.
};
return (
promise,
elementsOptions: {appearance},
}}
>
);
}
ReactDOM.render(, document.getElementById('root'));
```
### Address Element コンポーネントを追加する
`BillingAddressElement` コンポーネントまたは `ShippingAddressElement` コンポーネントを使用してフォームを構築します。
#### 請求
```jsx
import React from 'react';
import {BillingAddressElement} from '@stripe/react-stripe-js/checkout';
const AddressForm = () => {
return (
);
};
export default AddressForm;
```
#### 配送
```jsx
import React from 'react';
import {ShippingAddressElement} from '@stripe/react-stripe-js/checkout';
const AddressForm = () => {
return (
);
};
export default AddressForm;
```
## 住所の詳細を取得する [クライアント側]
[change](https://docs.stripe.com/js/custom_checkout/events) イベントをリッスンして住所の詳細を取得できます。ユーザーが Element のいずれかのフィールドを更新すると、`change` イベントが発生します。
#### HTML + JS
```javascript
checkout.on('change', (event) => {
if (event.complete){
// Extract potentially complete address
const address = event.value.address;
}
})
```
#### React
```jsx
{
if (event.complete) {
// Extract potentially complete address
const address = event.value.address;
}
}} />
```
[Payment Element](https://docs.stripe.com/payments/payment-element.md) を使用したシングルページの決済フローでは、Checkout Session の *確定* (Confirming an intent indicates that the customer intends to use the current or provided payment method. Upon confirmation, the intent attempts to initiate the portions of the flow that have real-world side effects) 時に、Address Element が自動的に配送先または請求先情報を渡します。
## Address Element を設定する [クライアント側]
ニーズに合わせて Address Element を設定できます。
### オートコンプリート
Address Element には、[Google Maps API Places Library](https://developers.google.com/maps/documentation/javascript/places) を使用する住所のオートコンプリート機能が組み込まれています。デフォルトでは、以下のいずれかの条件が満たされると、Stripe が提供する Google Maps API キーを使用したオートコンプリートが有効になります。
- [Payment Element](https://docs.stripe.com/payments/payment-element.md) が Address Element と同じ Elements グループにマウントされた単一ページの決済フロー。
- アクティブな[Link](https://docs.stripe.com/payments/link.md)セッションで Address Element を使用する決済フロー内。
### 住所フォームを事前入力する
[updateBillingAddress](https://docs.stripe.com/js/custom_checkout/update_billing_address) または [updateShippingAddress](https://docs.stripe.com/js/custom_checkout/update_shipping_address) を使用して、住所を自動入力できます。
#### HTML + JS
```javascript
actions.updateBillingAddress({
name: 'Jenny Rosen',
address: {
line1: '27 Fredrick Ave',
city: 'Brothers',
state: 'OR',
postal_code: '97712',
country: 'US',
}
});
```
#### React
```jsx
const {updateBillingAddress} = useCheckout();
updateBillingAddress({
address: {
line1: '27 Fredrick Ave',
city: 'Brothers',
state: 'OR',
postal_code: '97712',
country: 'US',
}
});
```
## 住所の詳細を検証する [クライアント側]
Stripe は、住所の完全性を検証して、個々の不完全な住所フィールドに「このフィールドは未入力です」などのエラーを表示するいくつかの方法を用意しています。
Checkout Session を確定することで住所を検証できます。Checkout Session では、Address Element が自動的に検証され、検証エラーがある場合には表示されます。
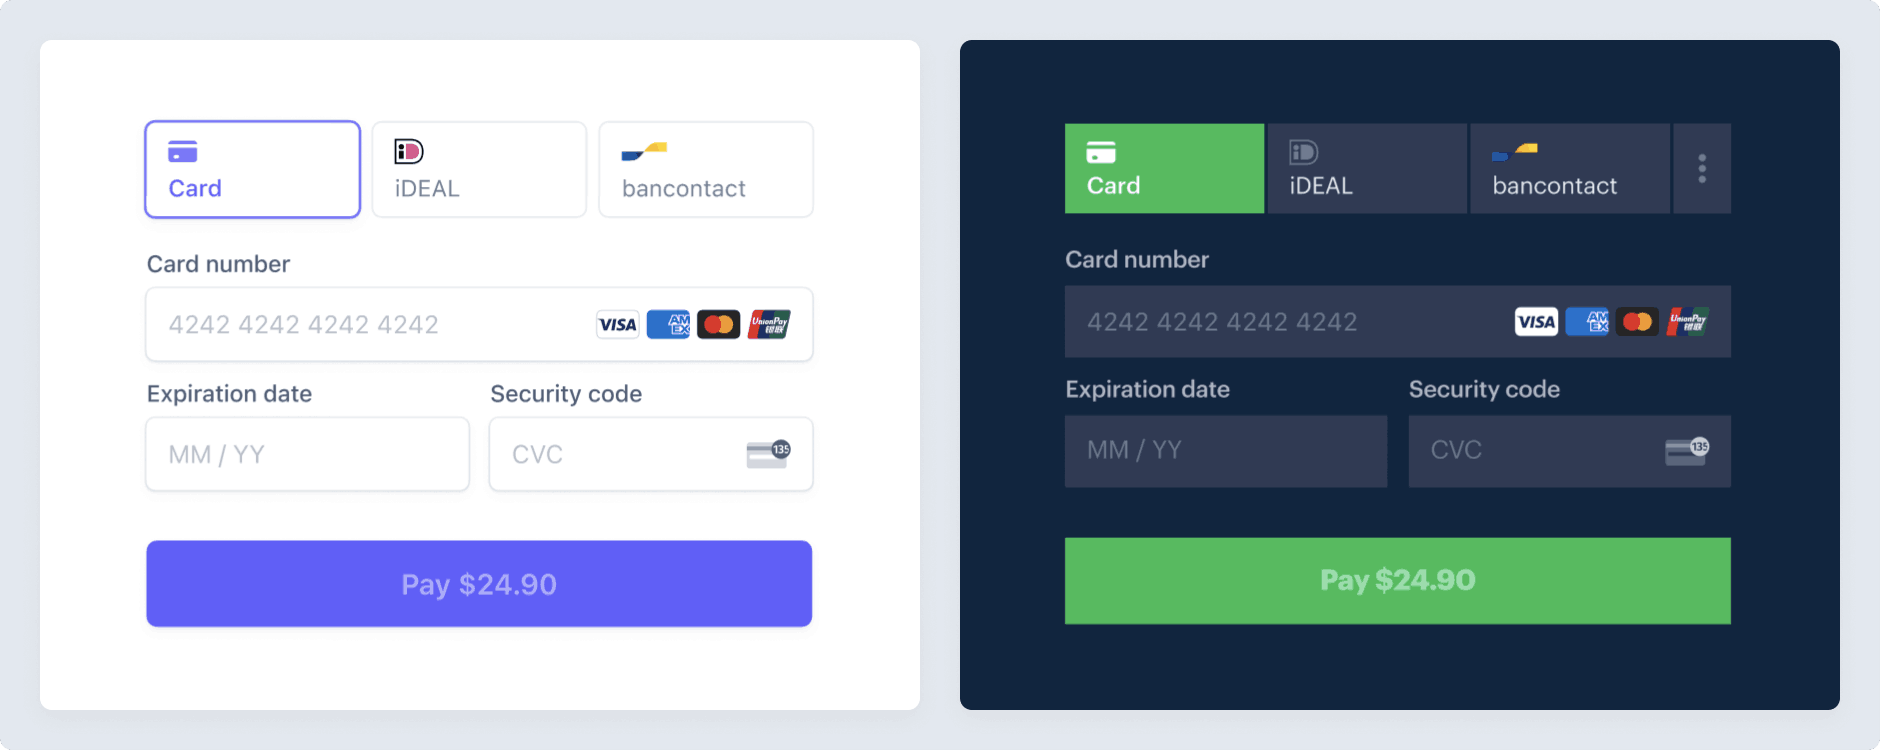
## Optional: 外観をカスタマイズする [クライアント側]
Address Element をページに追加した後、ページの他の部分のデザインに合わせて外観をカスタマイズできます。詳細については、[Appearance API](https://docs.stripe.com/elements/appearance-api.md) のページを参照してください。
### Address Element を他の Elements とともに使用する
ページで複数の Address Elements を使用すると配送先住所と請求先住所の両方を収集できます。
配送先住所と請求書住所の両方を収集する必要があり、使用する Address Element が 1 つの場合は、Shipping Address Element と[Payment Element](https://docs.stripe.com/payments/payment-element.md) を使用します。これは請求に必要な住所のみを収集します。
Address Element を他の Element とともに使用すると、Checkout Session の確定時に一部の動作が自動で実行されます。Checkout Session の確定時に Address Element の完全性が検証されます。検証エラーが発生するとフィールドごとにエラーが表示されます。
### 請求先住所と配送先住所を同期
Billing Address Element と Shipping Address Element の両方を使用する場合、顧客が請求先住所と配送先住所を同期できるようにするチェックボックスを表示できます。
#### HTML + JS
決済の初期化時に `elementsOptions` で [syncAddressCheckbox](https://docs.stripe.com/js/custom_checkout/init#custom_checkout_init-options-elementsOptions-syncAddressCheckbox) オプションを渡し、チェックボックスを表示する Address Element を設定します。
```javascript
const checkout = stripe.initCheckoutElementsSdk({
clientSecret,
elementsOptions: {
syncAddressCheckbox: 'shipping',
},
});
```
#### React
`elementsOptions` の [syncAddressCheckbox](https://docs.stripe.com/js/react_stripe_js/checkout/checkout_provider#react_checkout_provider-options-elementsOptions-syncAddressCheckbox) オプションを `CheckoutElementsProvider` に渡して、チェックボックスを表示する Address Element を設定します。
```jsx
promise,
elementsOptions: {
syncAddressCheckbox: 'shipping',
},
}}
>
```
値を `'billing'` または `'shipping'` に設定して、チェックボックスを表示する Address Element を選択します。チェックボックスを非表示にするには、`'none'` に設定します。デフォルト値 (`'billing'`) を使用する場合は、空白のままにします。
## See also
- [住所を使用する](https://docs.stripe.com/elements/address-element.md?platform=web#use-an-address)
- [Linkで自動入力を設定する](https://docs.stripe.com/elements/address-element.md?platform=web#autofill-with-link-brand-name)
- [フォームのデザインをカスタマイズする](https://docs.stripe.com/elements/address-element.md?platform=web#appearance)
# Payment Intents API
> This is a Payment Intents API for when payment-ui is elements. View the full page at https://docs.stripe.com/payments/advanced/collect-addresses?payment-ui=elements.
## Stripe を設定する [サーバ側]
まず、[Stripe アカウントを作成する](https://dashboard.stripe.com/register)か[サインイン](https://dashboard.stripe.com/login)します。
アプリケーションから Stripe API にアクセスするには、Stripe の公式ライブラリを使用します。
#### Ruby
```bash
# Available as a gem
sudo gem install stripe
```
```ruby
# If you use bundler, you can add this line to your Gemfile
gem 'stripe'
```
## 住所の詳細を収集する [クライアント側]
Address Element を使用して、クライアント側で住所の詳細を収集する準備が整いました。
#### HTML + JS
### Stripe.js を設定
Address Element は Stripe.js の機能として自動的に使用できます。決済ページに Stripe.js スクリプトを含めるには、HTML ファイルの `head` に追加します。PCI 準拠を維持するため、常に js.stripe.com から Stripe.js を直接読み込んでください。スクリプトをバンドルに含めたり、コピーを独自にホストしたりしないでください。
```html
Checkout
```
### Stripe インスタンスを作成する
決済ページで Stripe のインスタンスを作成します。
```javascript
// Set your publishable key: remember to change this to your live publishable key in production
// See your keys here: https://dashboard.stripe.com/apikeys
const stripe = Stripe('<>');
```
### Address Element をページに追加する
ページに住所 Element を配置する場所が必要です。フォームで一意の ID を持つ空の DOM ノード (コンテナー) を作成します。
```html
```
このフォームが読み込まれたら、Address Element のインスタンスを作成し、アドレス [モード](https://docs.stripe.com/js/elements_object/create_address_element#address_element_create-options-mode) を指定して、コンテナーの DOM ノードにマウントします。
すでに [Elements](https://docs.stripe.com/js/elements_object/create) インスタンスを作成している場合は、同じインスタンスを使用して Address Element を作成できます。それ以外の場合は、最初に新しい [Elements](https://docs.stripe.com/js/elements_object/create) インスタンスを作成します。
#### 配送
```javascript
const options = {
// Fully customizable with the Appearance API.
appearance: { /* ... */ }
};
// Only need to create this if no elements group exist yet.
// Create a new Elements instance if needed, passing the
// optional appearance object.
const elements = stripe.elements(options);
// Create and mount the Address Element in shipping mode
const addressElement = elements.create("address", {
mode: "shipping",
});
addressElement.mount("#address-element");
```
#### 請求
```javascript
const options = {
// Fully customizable with appearance API.
appearance: { /* ... */ }
};
// Only need to create this if no elements group exist yet.
// Create a new Elements instance if needed, passing the
// optional appearance object.
const elements = stripe.elements(options);
// Create and mount the Address Element in billing mode
const addressElement = elements.create("address", {
mode: "billing",
});
addressElement.mount("#address-element");
```
#### React
### Stripe.js を設定
npm 公開レジストリから [React Stripe.js](https://www.npmjs.com/package/@stripe/react-stripe-js) と [Stripe.js loader](https://www.npmjs.com/package/@stripe/stripe-js) をインストールします。
```bash
npm install --save @stripe/react-stripe-js @stripe/stripe-js
```
### Elements プロバイダーをページに追加して設定する
Address Element コンポーネントを使用するには、決済ページコンポーネントを [Elements プロバイダー](https://docs.stripe.com/sdks/stripejs-react.md#elements-provider) でラップします。公開可能キーを使用して `loadStripe` を呼び出し、返された `Promise` を `Elements` プロバイダーに渡します。
```jsx
import React from 'react';
import ReactDOM from 'react-dom';
import {Elements} from '@stripe/react-stripe-js';
import {loadStripe} from '@stripe/stripe-js';
import AddressForm from './AddressForm';
// Make sure to call `loadStripe` outside of a component's render to avoid
// recreating the `Stripe` object on every render.
const stripe = loadStripe('<>');
function App() {
const options = {
// Fully customizable with appearance API.
appearance: {/*...*/},
};
return (
);
};
ReactDOM.render(, document.getElementById('root'));
```
### Address Element コンポーネントを追加する
`AddressElement` コンポーネントを使用して、フォームを構築します。
#### 配送
```jsx
import React from 'react';
import {AddressElement} from '@stripe/react-stripe-js';
const AddressForm = () => {
return (
);
};
export default AddressForm;
```
#### 請求
```jsx
import React from 'react';
import {AddressElement} from '@stripe/react-stripe-js';
const AddressForm = () => {
return (
);
};
export default AddressForm;
```
## 住所の詳細を取得する [クライアント側]
[change](https://docs.stripe.com/js/element/events/on_change?type=addressElement) イベントをリッスンすることで、住所の詳細を取得できます。顧客が Element のフィールドを更新するたびに、`change` イベントがトリガーされます。
#### HTML + JS
```javascript
addressElement.on('change', (event) => {
if (event.complete){
// Extract potentially complete address
const address = event.value.address;
}
})
```
#### React
```jsx
{
if (event.complete) {
// Extract potentially complete address
const address = event.value.address;
}
}} />
```
または、[getValue](https://docs.stripe.com/js/elements_object/get_value_address_element) を使用することもできます。
```javascript
const handleNextStep = async () => {
const addressElement = elements.getElement('address');
const {complete, value} = await addressElement.getValue();
if (complete) {
// Allow user to proceed to the next step
// Optionally, use value to store the address details
}
};
```
[Payment Element](https://docs.stripe.com/payments/payment-element.md) を使用したシングルページの決済フローでは、PaymentIntent または SetupIntent の *確定* (Confirming an intent indicates that the customer intends to use the current or provided payment method. Upon confirmation, the intent attempts to initiate the portions of the flow that have real-world side effects) 時に、Address Element が自動的に配送先または請求先情報を渡します。
複数ページの決済フローでは、次のステップに移動する前に、手動で [PaymentIntent を更新](https://docs.stripe.com/api/payment_intents/update.md) するか、`change` イベントや `getValue` メソッドで受け取った住所の詳細で [Customer オブジェクトを](https://docs.stripe.com/api/customers/update.md) 更新できます。
## Address Element を設定する [クライアント側]
ニーズに合わせて Address Element を設定できます。
### オートコンプリート
Address Element には、[Google Maps API Places Library](https://developers.google.com/maps/documentation/javascript/places) を使用する住所のオートコンプリート機能が組み込まれています。デフォルトでは、以下のいずれかの条件が満たされると、Stripe が提供する Google Maps API キーを使用したオートコンプリートが有効になります。
- [Payment Element](https://docs.stripe.com/payments/payment-element.md) が Address Element と同じ Elements グループにマウントされた単一ページの決済フロー。
- アクティブな[Link](https://docs.stripe.com/payments/link.md)セッションで Address Element を使用する決済フロー内。
その他すべてのシナリオで Address Element でオートコンプリートを有効にするには、`mode` を `google_maps_api` に設定した [autocomplete](https://docs.stripe.com/js/elements_object/create_address_element#address_element_create-options-autocomplete) オプションを使用します。`apiKey` を、[Places API](https://developers.google.com/maps/documentation/javascript/places#add-places-api-to-the-api-keys-api-restrictions-list) の使用を許可するように設定された独自の [Google Maps API キー](https://developers.google.com/maps/documentation/javascript/get-api-key#create-api-keys) に設定します。Google Maps API キーは、Stripe が提供する Google Maps API キーが使用できない場合にのみ使用されます。
> [CSP](https://developer.mozilla.org/en-US/docs/Web/HTTP/CSP) を導入済みで、独自の Google Maps API キーを使用してオートコンプリートを有効にする場合は、`connect-src` および `script-src` ディレクティブとして `https://maps.googleapis.com` を含めます。最新の CSP 要件については、[Google Maps API 公式ガイド](https://developers.google.com/maps/documentation/javascript/content-security-policy) を参照してください。
#### HTML + JS
```javascript
const addressElement = elements.create("address", {
mode: "shipping",autocomplete: {
mode: "google_maps_api",
apiKey: "{YOUR_GOOGLE_MAPS_API_KEY}",
},
});
```
#### React
```jsx
```
### 住所フォームを事前入力する
Address Element は [defaultValues](https://docs.stripe.com/js/elements_object/create_address_element#address_element_create-options-defaultValues) を受け付けます。これにより、ページの読み込み時に住所フォームに事前入力できます。すべての値が事前入力された Address Element は、以下のようになります。
#### HTML + JS
```javascript
const addressElement = elements.create("address", {
mode: "shipping",defaultValues: {
name: 'Jane Doe',
address: {
line1: '354 Oyster Point Blvd',
line2: '',
city: 'South San Francisco',
state: 'CA',
postal_code: '94080',
country: 'US',
},
}
});
```
#### React
```jsx
```
### その他のオプション
詳細なオプションの一覧については、[Stripe.js](https://docs.stripe.com/js/elements_object/create_address_element#address_element_create-options) を参照してください。
#### HTML + JS
```javascript
// Sample of a options object
const addressElement = elements.create("address", {
mode: 'shipping',
allowedCountries: ['US'],
blockPoBox: true,
fields: {
phone: 'always',
},
validation: {
phone: {
required: 'never',
},
},
});
```
#### React
```jsx
// Sample of a options object
```
## 住所の詳細を検証する [クライアント側]
Stripe は、住所の完全性を検証して、個々の不完全な住所フィールドに「このフィールドは未入力です」などのエラーを表示するいくつかの方法を用意しています。
PaymentIntent または SetupIntent で Address Element を使用する場合は、それぞれ [stripe.confirmPayment](https://docs.stripe.com/js/payment_intents/confirm_payment) または [stripe.confirmSetup](https://docs.stripe.com/js/setup_intents/confirm_setup) を使用して Intent を完了します。検証エラーがある場合は、Address Element に表示されます。
複数ページの決済フローなど、その他のユースケースでは、[getValue](https://docs.stripe.com/js/elements_object/get_value_address_element) を使用して検証エラーをトリガーし、Address Element に表示します。
## Optional: 外観をカスタマイズする [クライアント側]
Address Element をページに追加した後、ページの他の部分のデザインに合わせて外観をカスタマイズできます。詳細については、[Appearance API](https://docs.stripe.com/elements/appearance-api.md) のページを参照してください。

## See also
- [住所を使用する](https://docs.stripe.com/elements/address-element.md?platform=web#use-an-address)
- [Linkで自動入力を設定する](https://docs.stripe.com/elements/address-element.md?platform=web#autofill-with-link-brand-name)
- [フォームのデザインをカスタマイズする](https://docs.stripe.com/elements/address-element.md?platform=web#appearance)