支払いを受け付ける
オンライン支払いを安全に受け付けます。
支払いフォームを作成するか、構築済みの決済ページを使用して、オンライン決済の受け付けを開始します。
開発者ではない場合
Stripe のノーコードオプションまたは当社パートナーのアプリを使用して、Stripe アカウントのご利用を開始すると、ノーコードでさらに多くのことを実現できます。サードパーティーのプラットフォームを使用してウェブサイトを構築し管理している場合は、プラグインを使用して Stripe Payments を追加できます。
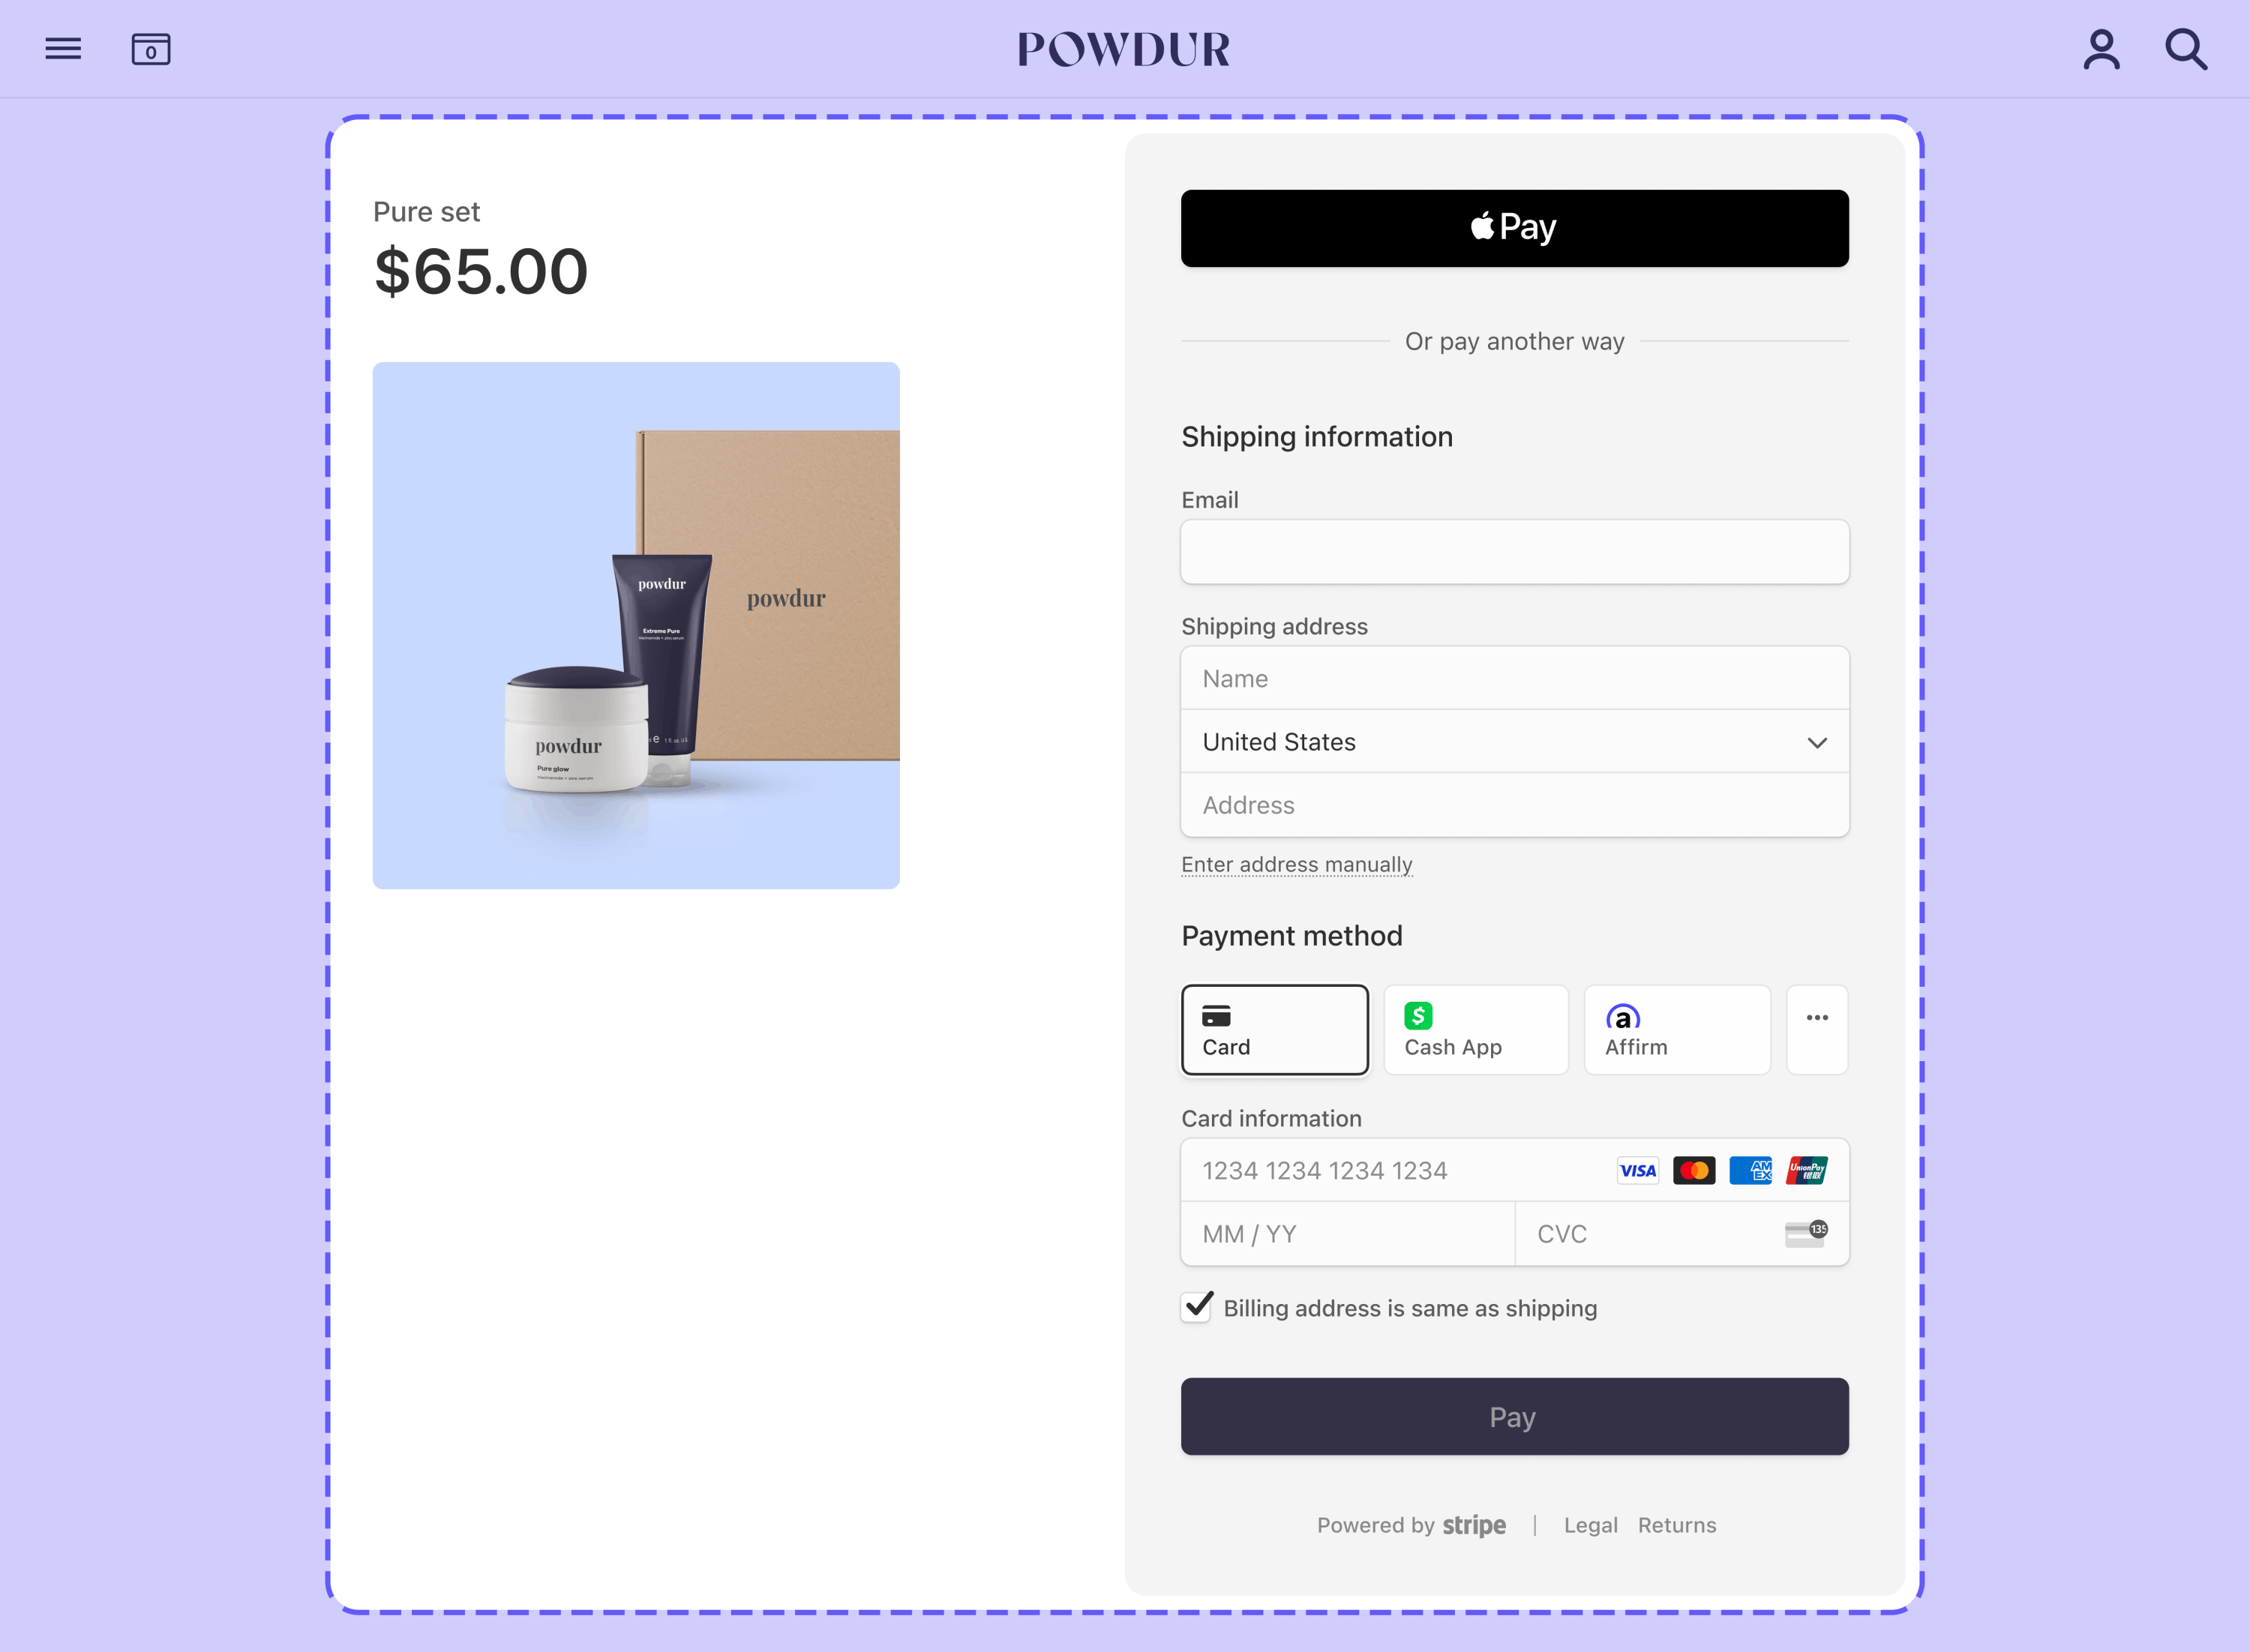
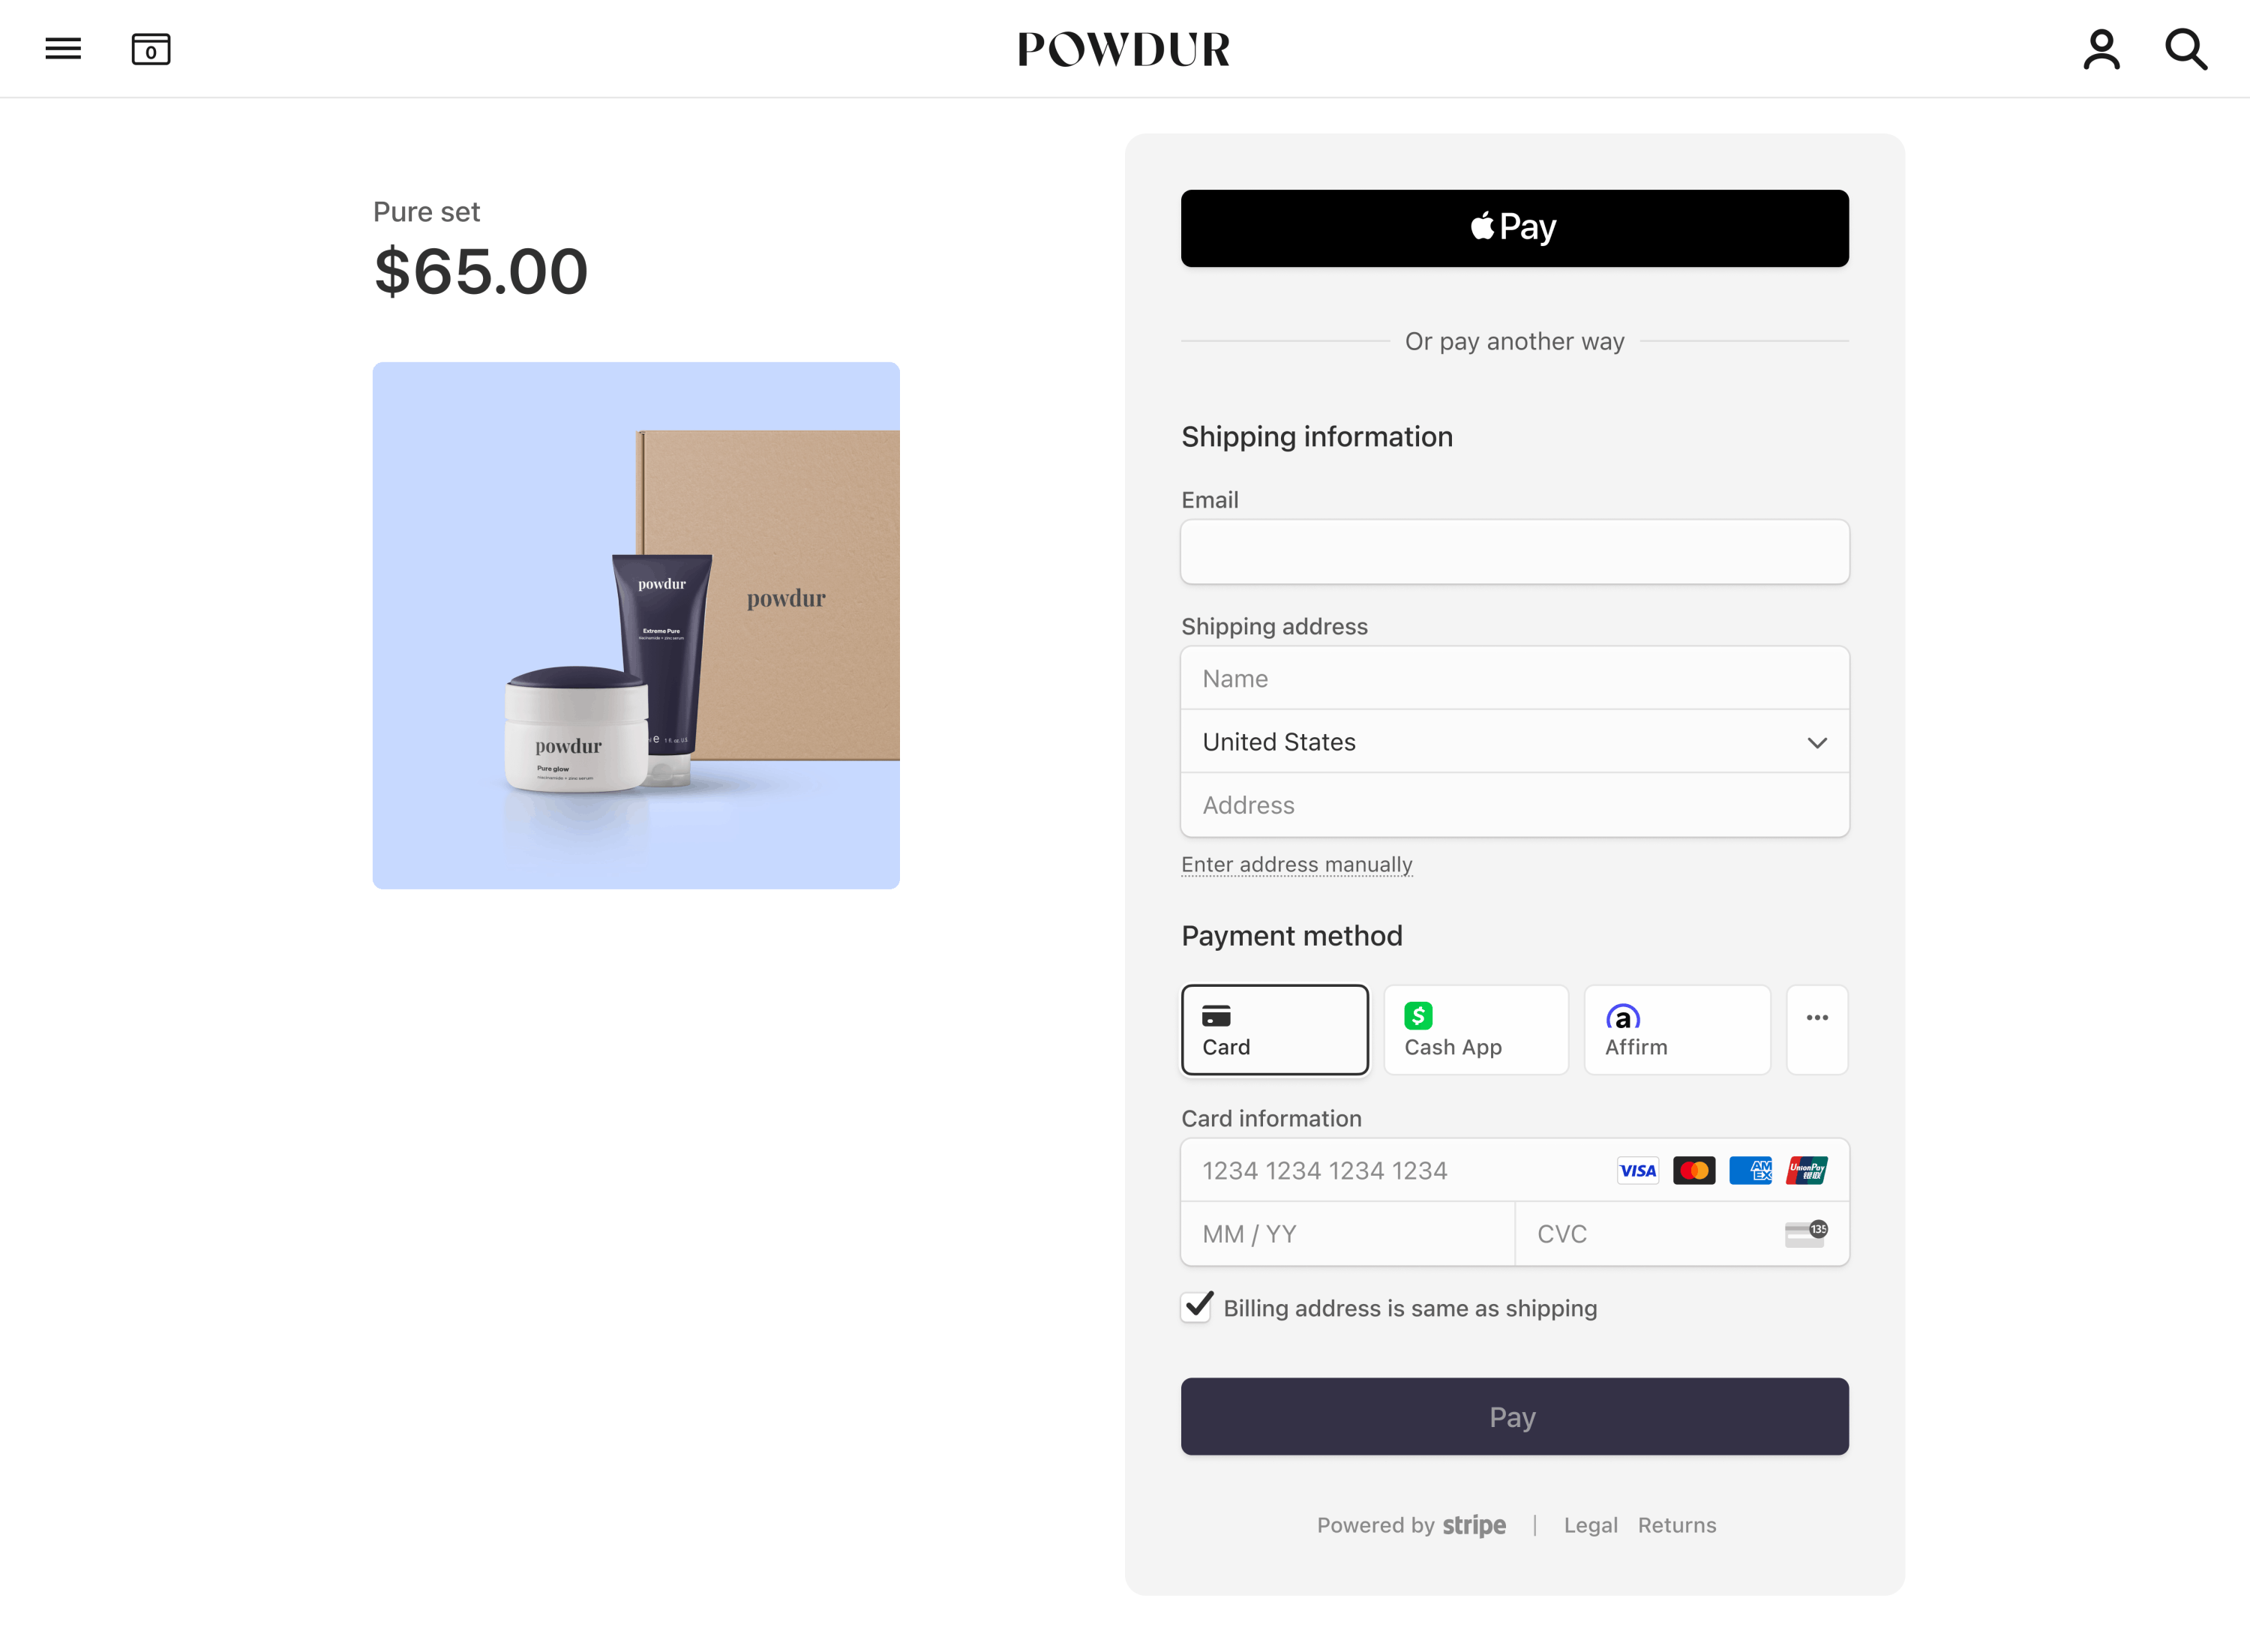
Stripe Checkout を使用して、事前構築した決済フォームをサイトに埋め込みます。この実装と、Stripe の他の実装タイプとの比較をご覧ください。


Stripe ダッシュボードのブランディング設定を使用して、Checkout を自社サイトのデザインに合わせることができます。
まず、Stripe アカウントを登録します。
アプリケーションから Stripe API にアクセスするには、Stripe の公式ライブラリを使用します。
Checkout セッションを作成するサーバー側
サーバーで Checkout セッションを作成し、ui_mode を embedded に設定します。Checkout セッションを設定する際、line items に加え、currency などのオプションを指定できます。
既存の顧客の Checkout セッションを作成することもできます。これにより、Checkout フィールドに既知の連絡先情報を事前入力して、その顧客の購入履歴を統合することができます。
自社サイトでホストされているカスタムページに顧客を戻すには、そのページの URL を return_url パラメーターに指定します。URL にテンプレート変数 {CHECKOUT_ を含めて、戻り先ページでセッションのステータスを取得します。Checkout では、リダイレクト前にこの変数が Checkout セッション ID に自動的に置き換えられます。
戻り先ページの設定と、リダイレクト動作をカスタマイズするためのその他のオプションについて、詳細をご覧ください。
Checkout セッションの作成後、レスポンスで返される client_ を使用して、Checkout をマウントします。
Checkout をマウントするクライアント側
Checkout は、HTTPS 接続を介して支払い情報をStripeに安全に送信する iframe でレンダリングされます。
よくある間違い
一部の支払い方法では、別のページにリダイレクトして支払いを確定する必要があるため、Checkout は別の iframe 内に配置しないでください。
デザインをカスタマイズする
アカウントのブランディング設定で、背景色、ボタンの色、枠線の角丸半径、フォントを設定して、サイトのデザインに合わせて Checkout をカスタマイズします。
デフォルトでは、Checkout は外側に余白やマージンが追加されずに表示されます。必要なマージンを適用するには (四方すべてに 16px など)、目的の余白を適用するコンテナー要素 (div など) を使用することをお勧めします。
戻り先ページを表示する
顧客が支払いを試行すると、Stripe はサイトがホストしている戻りページに顧客をリダイレクトします。Checkout セッションを作成したときに、return_url パラメーターで戻りページの URL は指定されています。リダイレクト動作をカスタマイズするためのオプションについては、こちらの記事をご覧ください。
戻り先ページを表示する際は、URL の Checkout セッション ID を使用して Checkout セッションのステータスを取得します。以下のように、セッションのステータスに応じて結果を処理します。
complete: 支払いが成功しました。Checkout セッションの情報を使用して成功ページを表示します。open: 支払いが失敗またはキャンセルされました。顧客がやり直せるように Checkout を再度マウントします。
const session = await fetch(`/session_status?session_id=${session_id}`)
if (session.status == 'open') {
  // Remount embedded Checkout
} else if (session.status == 'complete') {
  // Show success page
  // Optionally use session.payment_status or session.customer_email
  // to customize the success page
}
リダイレクトベースの支払い方法
決済の進行中、支払い方法によっては、発行会社/銀行のオーソリページなどの中間ページに顧客がリダイレクトされる場合があります。そのページでの操作を完了した顧客は、Stripe によって戻り先ページにリダイレクトされます。
リダイレクトベースの決済手段とリダイレクト動作についてご紹介します。
支払い後のイベントを処理する
顧客が Checkout セッションの支払いを完了すると、Stripe は checkout.session.completed イベントを送信します。ダッシュボードの Webhook ツールを使用するか、Webhook ガイドに従ってこれらのイベントを受信して処理します。これにより、次のアクションがトリガーされます。
- 顧客に注文確認メールを送信します。
- 取引をデータベースに記録します。
- 配送ワークフローを開始します。
顧客がリダイレクトされ、ウェブサイトに戻るのを待たずに、これらのイベントはリッスンできます。Checkout のランディングページからのみフルフィルメントをトリガーする場合、確実性に欠けます。非同期型のイベントをリッスンするようシステムを設定すると、1 回の実装で異なるタイプの決済手段を受け付けられるようになります。
詳しくは、Checkout のフルフィルメントガイドをご覧ください。
Checkout で支払いを回収する際には、以下のイベントを処理します。
| イベント | 説明 | アクション |
|---|---|---|
| checkout.session.completed | 顧客が Checkout セッションを正常に完了すると送信されます。 | 注文確認書を顧客に送信し、注文のフルフィルメントを実行します。 |
| checkout.session.async_payment_succeeded | ACH Direct Debt など、遅延型の決済手段による支払いが成功した場合に送信されます。 | 注文確認書を顧客に送信し、注文のフルフィルメントを実行します。 |
| checkout.session.async_payment_failed | ACH Direct Debt など、遅延型の決済手段による支払いが失敗した場合に送信されます。 | 顧客に失敗を通知して、顧客をオンセッションに戻し、支払いを再試行できるようにします。 |
導入をテストする
埋め込みの決済フォームの導入をテストする方法は以下のとおりです。
- 埋め込み型の Checkout セッションを作成し、決済フォームを自社のページに搭載します。
- 以下の表に記載の方法を使用して、決済の詳細を入力します。
- カードの有効期限として任意の将来の日付を入力します。
- 任意の 3 桁のセキュリティコード (CVC) を入力します。
- 請求先の任意の郵便番号を入力します。
- 支払う をクリックします。
return_にリダイレクトされます。url - ダッシュボードに移動して、取引ページで支払いを探します。支払いが成功すると、そのリストに表示されます。
- 支払いをクリックすると詳細が表示され、請求先情報と購入されたアイテムのリストが含まれた Checkout サマリーなどを確認できます。これを使用して注文の処理を実行できます。
詳しくは導入のテストをご覧ください。
実装内容をテストするためのその他の情報については、テストをご覧ください。
オプション支払い方法をさらに追加する
Checkout は、デフォルトで多数の支払い方法に対応しています。Apple Pay、Google Pay、後払いなどの支払い方法を有効にして表示するには、追加のステップを実行する必要があります。
Apple Pay および Google Pay
Apple Pay および Google Pay から決済を受け付けるには、次を行う必要があります。
- 支払い方法設定でこれらを有効にします。Apple Payはデフォルトで有効になっています。
- 開発環境と本番環境で HTTPS を介してアプリケーションを提供します。
- ドメインを登録します。
- 開発環境と本番環境でアプリケーションを HTTPS 経由で提供します。ngrok などのサービスを利用して、ローカルテスト用のアプリケーションを提供できます。
さらに、Checkout セッションでは、以下の条件が「すべて」満たされている場合にのみ Apple Pay ボタンが表示されます。
- 顧客のデバイスが macOS バージョン 17 以降または iOS バージョン 17 以降を実行している。
- 顧客が Safari ブラウザを使用している。
- 顧客が、Apple Pay に有効なカードを登録している。
Checkout セッションでは、以下の条件が「すべて」満たされている場合のみ Google Pay ボタンが表示されます。
- 顧客のデバイスが Chrome 61 以降を実行している。
- 顧客が、Google Pay に有効なカードを登録している。
各地域でのテストインド
Stripe Checkout は、インドの Stripe アカウントと顧客に対して Apple Pay と Google Pay をサポートしていません。ご自身の IP アドレスがインドにある場合は、Stripe アカウントがインド国外に所在していても、Apple Pay または Google Pay の実装内容をテストできません。
オプション商品および価格を作成する
Checkout Session を作成する前に、商品と価格を事前に設定できます。商品を使用して複数の物理的商品やサービスのレベルを表し、価格を使用して各商品の料金体系を表します。Checkout Session を設定して、チップや寄付を受け付けることや、Pay What You Want の商品やサービスを販売することができます。
たとえば、価格が 20 USD の T シャツ商品を作成できます。これにより、対象商品の詳細を変更せずに価格を更新したり追加したりできるようになります。商品と価格は、Stripe ダッシュボードまたは API で作成できます。商品および価格の仕組みについて、詳細をご確認ください。
作成された価格ごとに ID があります。Checkout Session を作成する際には、価格 ID と数量を参照します。複数の通貨で販売している場合、Price を 多通貨 にします。Checkout は自動的に 顧客の現地通貨を特定し、Price が対応している場合にはその通貨を提示します。
オプション顧客データを事前入力するサーバー側
すでに顧客のメールを収集していて、それを Checkout セッションで事前に入力するには、Checkout セッションの作成時に customer_email を渡します。
オプション支払い方法の詳細を保存するサーバー側
デフォルトでは、Checkout で 1 回限りの支払いに使用した支払い方法を将来の支払いに使用することはできません。
支払い方法を保存し、オフセッションでその支払い方法に請求する
payment_intent_data.setup_future_usage 引数を渡すことで、1 回限りの支払いに使用した支払い方法を保存するように Checkout を設定できます。これは、キャンセル手数料やノーショー手数料などの将来の手数料に使用するために、登録済みの決済手段を取得しなければならない場合に便利です。
subscription モードで Checkout を使用すると、Stripe は決済手段を自動的に保存し、次回以降の支払いにはその決済手段で請求されます。setup_ または subscription のいずれかのモードを使用している顧客用に保存されたカード決済手段は、Checkout の返品購入には表示されません (詳細については以下をご覧ください)。カスタムテキストを使用して、保存された決済情報の使用に関連する規約にリンクすることをお勧めします。
注意
世界の個人情報保護法は複雑かつ曖昧です。setup_future_usage の実装は既存の個人情報の規制に関わる可能性があるため、事前に法務チームや個人情報担当チームに問い合わせることをお勧めします。支払いの詳細を保存することについては、欧州データ保護委員会から発行されたガイダンスをご覧ください。
支払い方法を保存し、Checkout でその支払い方法を事前入力する
デフォルトでは、Checkoutは Link を使用して、顧客に支払い情報を安全に保存して再利用するオプションを提供します。決済手段を自分で管理したい場合は、saved_payment_method_options.payment_method_save を Checkout Sessions の作成時に使用し、顧客に決済手段を保存していただき、Checkout で次回購入時に使用できるようにします。
このパラメーターを payment モードまたは subscription モードで渡すと、今後の購入に備えて顧客が支払い方法を明示的に保存できるようにするためのオプションのチェックボックスが表示されます。顧客がこのチェックボックスをオンにすると、Checkout は allow_redisplay: always を指定して支払い方法を保存します。Checkout はこのパラメーターを使用して、今後の購入で支払い方法を事前入力できるかどうかを判断します。saved_ を使用する場合、支払い方法を保存するために setup_ を渡す必要はありません。
saved_payment_method_options.payment_method_save を使用するには Customer が必要です。新しい顧客を保存するには、Checkout セッションの customer_creation を always に設定します。それ以外の場合、セッションで顧客や決済手段は保存されません。
payment_ が渡されていない場合、または顧客が支払い方法の保存に同意しない場合でも、Checkout は、subscription モードで作成された支払い方法または setup_ を使用して作成された支払い方法を保存します。これらの決済手段の allow_ 値は limited であるため、購入の返品に備えてこれらの決済手段が事前入力されることがなくなり、カードネットワークの規則およびデータ保護規制に準拠できます。これらのモードによって有効になるデフォルトの動作を変更する方法と、allow_ の動作を変更または上書きする方法をご紹介します。
メモ
Checkout を使用してカードやその他の決済手段を保存してオフセッションに請求することはできますが、Checkout では保存したカードのみが事前入力されます。保存したカード情報を事前入力する方法をご紹介します。初回の支払いなしで決済手段を保存するには、Checkout の設定モードを使用します。
保存した決済手段を顧客が削除できるようにする
今後の支払いで再表示されないように、保存された決済手段を顧客が削除できるようにするには、Checkout セッションの作成時に saved_payment_method_options.payment_method_remove を使用します。
有効なサブスクリプションに関連付けられていて、請求書やサブスクリプションの支払い用にデフォルトの決済手段が保存されていない場合、顧客は決済手段を削除できません。
オプションオーソリとキャプチャーを分離するサーバー側
Stripe は、まずカード支払いをオーソリし、後で売上をキャプチャーするという、2 段階構成のカード支払いに対応しています。Stripe が支払いをオーソリすると、カード発行会社が売上を保証し、支払い金額を顧客のカードで保持します。その後、カードに応じて)一定期間にわたって売上をキャプチャーできます。オーソリが期限切れになる前に支払いをキャプチャーしない場合、支払いはキャンセルされ、カード発行からは保留されていた売上がリリースされます。
オーソリとキャプチャーを分離すると、顧客の支払い能力の確認と支払い回収の間に別のアクションをとる必要がある場合に便利です。たとえば、在庫が限られたアイテムを販売している場合、支払いをキャプチャーして購入をフルフィルメントする前に、Checkout を使用して顧客が購入したアイテムの在庫がまだあることを確認する必要があります。これは、以下のワークフローで実行します。
- Stripe が顧客の支払い方法を承認したことを確認します。
- 在庫管理システムを調べ、アイテムがまだあることを確認します。
- 在庫管理システムを更新し、アイテムが購入されたことを反映させます。
- 顧客の支払いをキャプチャーします。
- 購入が成功したかどうかを確認ページで顧客に通知します。
オーソリとキャプチャーを分離するには、Checkout セッションの作成時に、payment_intent_data.capture_method の値を manual に設定します。これにより、Stripe に対して顧客のカードで金額のオーソリのみを行うよう指示します。
キャプチャーされていない支払いをキャプチャーするには、ダッシュボードまたはキャプチャーエンドポイントを使用します。プログラムによる支払いのキャプチャーには、Checkout セッションの際に作成される PaymentIntent へのアクセスが必要です。これは Session (セッション) オブジェクトから取得できます。
オプション注文のフルフィルメント
顧客が支払いを行ったときにプログラムで通知を受け取る方法をご紹介します。