Set up Stripe Reader M2
Learn how to set up the Stripe Reader M2.

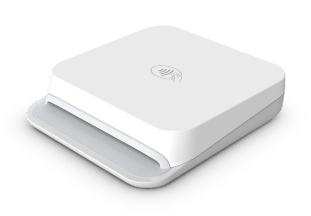
Stripe Reader M2 is a small reader that you can use with mobile applications. It uses Bluetooth Low Energy (LE) or USB (Android only) to connect to the Stripe Terminal SDK on a mobile device.
This reader is compatible with our iOS, Android, and React Native SDKs. To view the reader’s parts and features, see the Stripe Reader M2 product sheet.
Warning
Stripe readers aren’t liquid-proof and we recommend that users make appropriate efforts to make sure their devices remain dry. If your device has experienced liquid ingress, we recommend that you stop using the device and let it dry thoroughly before attempting to re-use or charge the device. If your device doesn’t properly operate or charge properly after drying, you need to replace it.
Availability
The Stripe Reader M2 is available in all 50 US states and Puerto Rico.
Turn the reader on and off
Turn on the Stripe Reader M2 by pressing and releasing the power button. The status LEDs turn on for 2 seconds and the reader beeps twice. The reader waits for a Bluetooth connection for five minutes before turning off.
When the reader connects to a device running your app, the status LEDs on top of the reader flash four times. After connecting, the first status light begins flashing at five second intervals. The reader stays connected to your iOS or Android device while in standby mode and automatically exits standby mode when you resume activity.
When connected, the reader automatically turns off after 10 hours of inactivity. You can turn off the reader manually by pressing and holding the power button for four seconds. You don’t need to turn off the reader to conserve power. When the reader turns off, the four LEDs light up and then turn off one by one to indicate it has turned off.
Note
With typical usage, you only need to charge the reader fully once per day.
Charge the reader
To charge the Stripe Reader M2, use the included cable or a USB 2.0 cable.
Check the battery status
When the Stripe Reader M2 is on, you can press and release the power button once to check the battery level. The LEDs on top of the reader show the current status.
| LEDs | Meaning |
|---|---|
| Full charge | |
| 75% charge | |
| 50% charge | |
| 25% charge | |
| (flashing) Charging |
Accessories for the reader
You can use the Stripe Reader M2 with an optional dock for countertop checkout, or an optional mount for roaming checkout.
You can also design your own accessories for the Stripe Reader M2. To download the Stripe Reader M2 mechanical design files (.STP), you must first review and accept our Terminal Design File License Agreement. By downloading the file below, you agree to the terms outlined in the license.