Set up an embeddable onramp integrationPublic preview
Use this guide to fully customize the embeddable onramp.
This guide is an extended version of the Embeddable onramp quickstart. Learn how to add more functionality such as:
- Installing the SDK using a script tag or package manager
- Fetching estimated quotes for onramp conversions into cryptocurrencies
- Configuring the onramp UI into mobile web views
Install the SDK and client libraryclient-sideserver-side
Client-side
Include the following scripts using script tags within the <head> element of your HTML. These scripts must always load directly from Stripe’s domains (https://js.stripe.com and https://crypto-js.stripe.com) for compatibility and PCI compliance. Don’t include the scripts in a bundle or host a copy yourself. If you do, your integration might break without warning.
<head>
  <title>Onramp</title>
  <script src="https://js.stripe.com/basil/stripe.js"></script>
  <script src="https://crypto-js.stripe.com/crypto-onramp-outer.js"></script>
</head>
Use the Onramp JS SDK as a module
Use the npm package to load the onramp JS SDK as an ES module. The package includes Typescript type definitions.
npm install --save @stripe/stripe-js @stripe/crypto
Alternate SDK installation
Server-side
Our official libraries don’t contain built-in support for the API endpoints because the onramp API is in limited beta. As a result, our examples use curl for backend interactions.
Generate a crypto onramp sessionserver-side
Generate a crypto onramp session by running the following curl command in your terminal:
curl -X POST https://api.stripe.com/v1/crypto/onramp_sessions \ -u: \ -d "wallet_addresses[ethereum]"="0xB00F0759DbeeF5E543Cc3E3B07A6442F5f3928a2" # add as many parameters as you'd likesk_test_BQokikJOvBiI2HlWgH4olfQ2
You receive a response similar to the following:
{
  "id": "cos_0MYfrA589O8KAxCGEDdIVYy3",
  "object": "crypto.onramp_session",
  "client_secret": "cos_0MYfrA589O8KAxCGEDdIVYy3_secret_rnpnWaxQbYQOvp6nVMvEeczx300NRU4hErZ",
  "created": 1675732824,
  "livemode": false,
  "status": "initialized",
  "transaction_details": {
    "destination_currency": null,
    "destination_amount": null,
    "destination_network": null,
    "fees": null,
    "lock_wallet_address": false,
    "source_currency": null,
    "source_amount": null,
    "destination_currencies": [
      "btc",
      "eth",
      "sol",
      "usdc"
    ],
    "destination_networks": [
      "bitcoin",
      "ethereum",
      "solana"
    ],
    "transaction_id": null,
    "wallet_address": null,
    "wallet_addresses": {
      "bitcoin": null,
      "ethereum": "0xB00F0759DbeeF5E543Cc3E3B07A6442F5f3928a2",
      "polygon": null,
      "solana": null
    }
  }
}
See the Onramp API reference for the full parameter list you can pass in when creating a session.
Render the Onramp UIclient-side
After running the script, the onramp renders the following dialog:
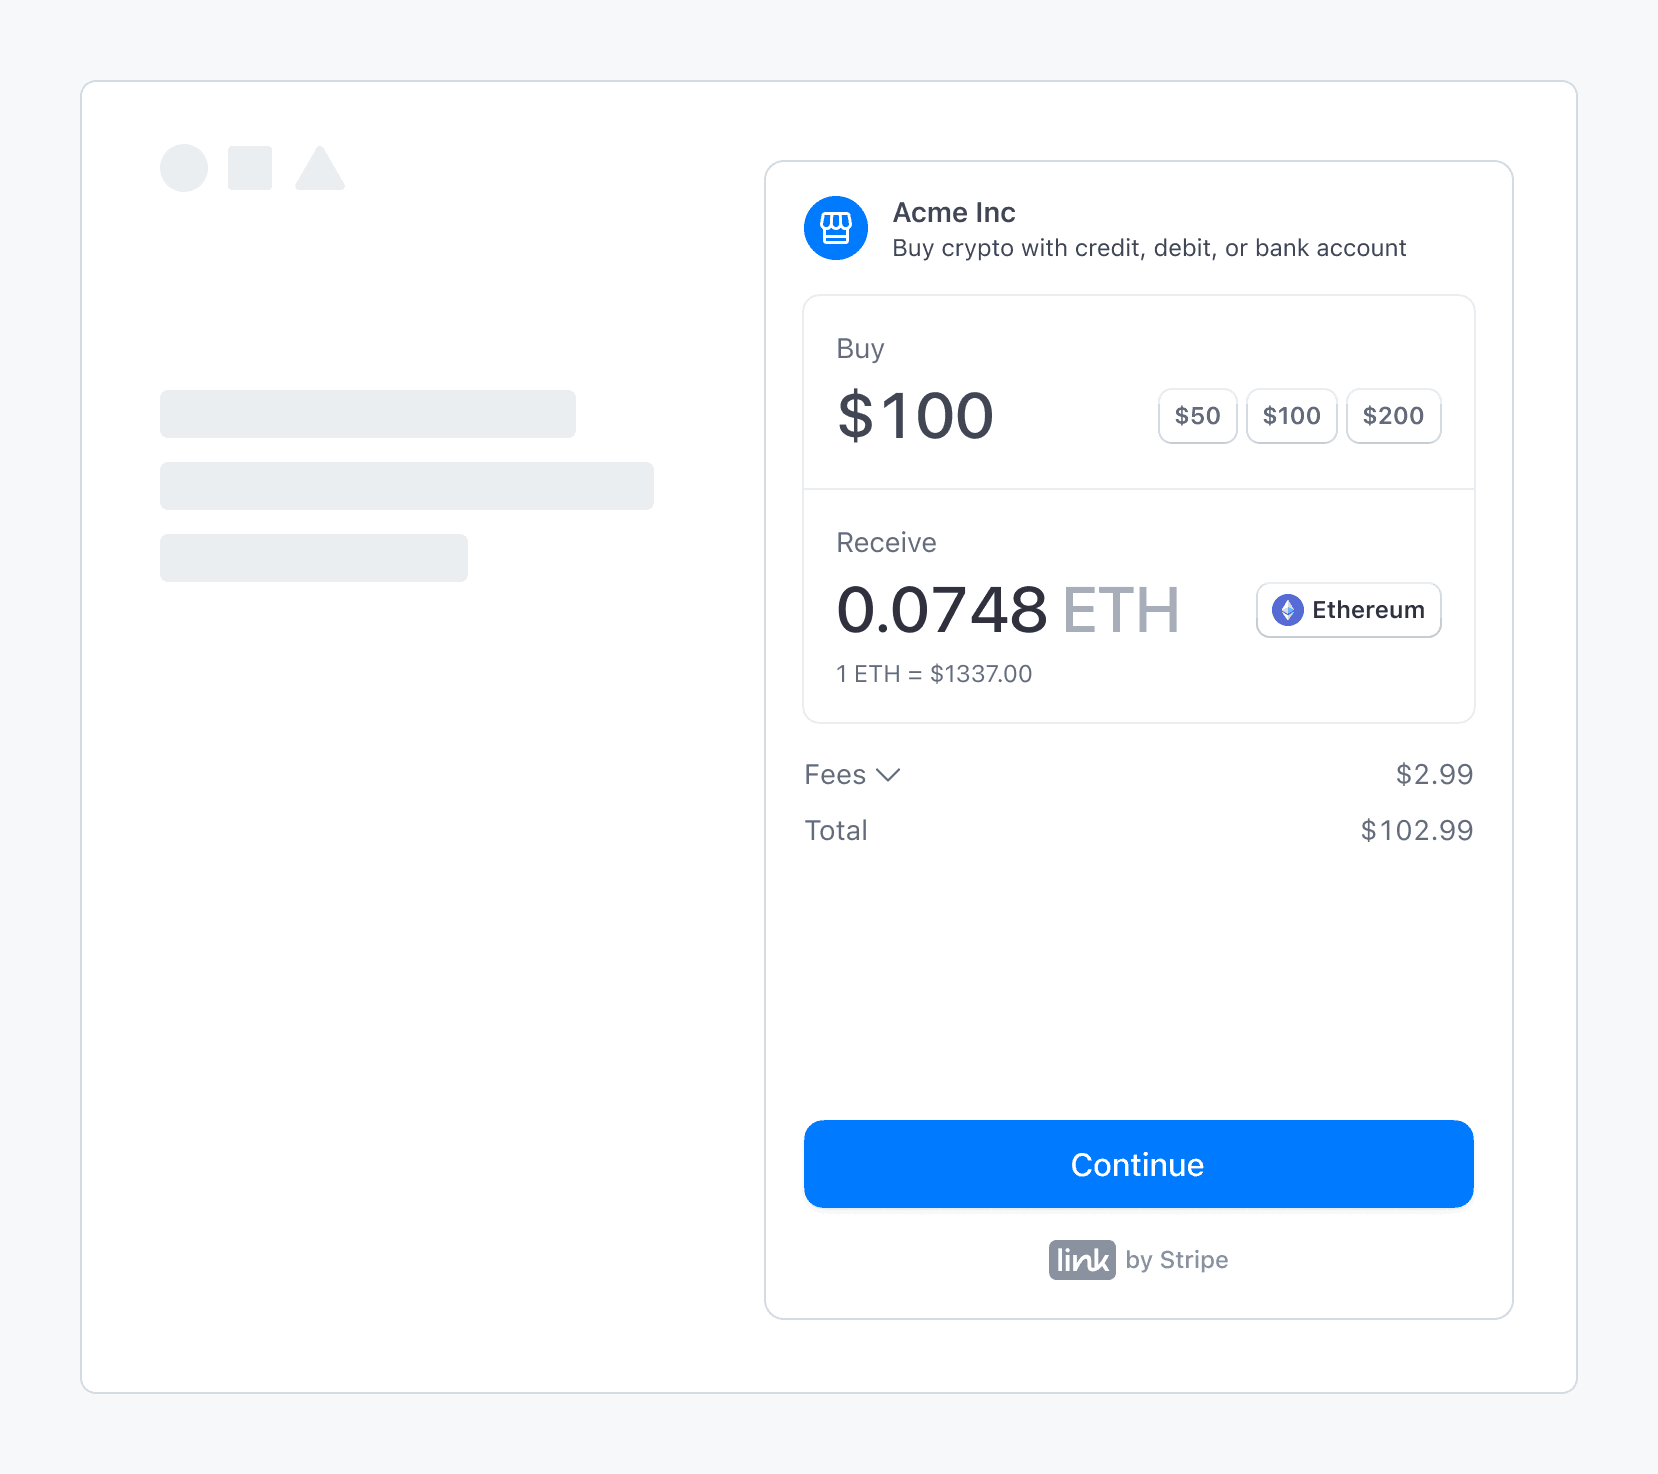
Stripe’s fiat-to-crypto onramp embedded within a third-party application
Sandbox values
Warning
Sandbox transaction amounts are overridden by our pre-decided limits.
Use the following values to complete an onramp transaction in sandbox:
- On the OTP screen, use
000000for the verification code. - On the personal information screen, use
000000000for the SSN andaddress_for address line 1.full_ match - On the payment details screen, use the test credit card number
4242424242424242.
View integration usage
After you’ve launched the onramp, you can view customized usage reports in the Stripe Dashboard. You can also return to the onboarding page to update the domains where you plan to host the onramp, and check the status of any onboarding tasks.
OptionalConfigure the onramp for mobile use
Integrate Stripe’s crypto onramp UI into mobile web views and browsers by minting a session, hosting the onramp UI, completing the purchase, and redirecting users back to the mobile app.
Mint a session
Similar to other integrations, you need to implement a server endpoint to create a new onramp session for every user visit. The endpoint returns a client_ that can load the onramp UI or display an error if the onramp is unavailable.
Host the onramp UI
Create a frontend route (for example, www.my-web3-wallet.com/onramp/<client_secret>) to host the onramp UI. Your /onramp/<client_secret> points to an onramp.html.
<!DOCTYPE html>
<html lang="en">
  <head>
    <meta charset="utf-8" />
    <title>Crypto Onramp</title>
    <meta name="description" content="A demo of the hosted onramp" />
    <meta name="viewport" content="width=device-width, initial-scale=1" />
    <script type="text/javascript" src="https://crypto-js.stripe.com/crypto-onramp-outer.js"></script>
    <script src="onramp.js" defer></script>
  </head>
  <body>
    <div id="onramp-element" />
  </body>
</html>
Where onramp.js consumes the client_ from the URL and mounts the onramp UI:
const stripeOnramp = StripeOnramp(); initialize(); // initialize onramp element with client secret function initialize() { const url = window.location.href.replace(/\/$/, ''); const clientSecret = url.substring(url.lastIndexOf('/') + 1); const onrampSession = stripeOnramp.createSession({ clientSecret, // other client side options that customize the look and feel }); onrampSession .addEventListener('onramp_session_updated', handleSessionUpdate) .mount("#onramp-element"); } function handleSessionUpdate(event) { const session = event.payload.session; if (session.status === 'fulfillment_complete' || session.status === 'rejected') { // redirect back to mobile app through universal link window.location.assign('/onramp_success/' + session.id); } }pk_test_TYooMQauvdEDq54NiTphI7jx
Configure universal links to deep link /onramp_ back to your mobile app. Consider providing a fallback or onramp_ page to prompt users to manually switch back to your app.
Complete the purchase
As with a standard integration, the front-end client controls the entire onramp UI. The UI adapts to fit the screen size. As the session state changes and we gather more transaction_, the CryptoOnrampSession object updates accordingly. We generate webhooks and front-end events for every status transition. By using front-end event listeners, you can redirect users back to your application flow when the OnrampSession completes.
Redirect to the mobile app
Using a deep link or manual switch, users can resume their flow in your mobile application. Your mobile application can use your back end to continue querying the CryptoOnrampSession state.
For example, if a user is topping up their balance during initial setup, you can redirect them back to your application as soon as the session transitions to fulfillment_. You can allow users to explore the rest of your application while polling the OnrampSession status in the background.