# Eine eingebettete Onramp-Integration einrichten
Verwenden Sie diesen Leitfaden, um die einbettbare Onramp vollständig anzupassen.
Bei diesem Leitfaden handelt es sich um eine erweiterte Version des [QuickStarts für eingebetteten Onramp](https://docs.stripe.com/crypto/onramp/embedded-quickstart.md). Erfahren Sie, wie Sie weitere Funktionalitäten hinzufügen, wie z. B.:
- Installieren des SDK mit einem Script-Tag oder Paket-Manager
- Passen Sie das Erscheinungsbild des Onramps an
- Onramp-Nutzeroberfläche für mobile Webansichten konfigurieren
- Kundensupport und Betrugsfälle bearbeiten
- Geschätzte Kryptowährungs-Umrechnungskurse abrufen
## Before you begin
1. Der eingebettete Onramp ist nur in der EU und den USA (außer Hawaii) verfügbar.
1. Die Onramp-API befindet sich in der öffentlichen Vorschau. Sie müssen [das Onramp-Anmeldeformular einreichen](https://docs.stripe.com/crypto/onramp.md#submit-your-application), bevor Sie mit der Entwicklung in einer Testumgebung beginnen.
1. [Nachdem Sie Zugriff auf die Onramp-API](https://dashboard.stripe.com/crypto-onramp/onboarding) erhalten haben, können Sie über das [Dashboard](https://dashboard.stripe.com/apikeys) Ihre geheimen und veröffentlichbaren [API-Schlüssel](https://docs.stripe.com/keys.md#obtain-api-keys) abrufen.
## SDK und Client-Bibliothek installieren [clientseitig] [serverseitig]
### Clientseitig
Fügen Sie die folgenden Scripts mithilfe von Script-Tags innerhalb des ``-Elements Ihres HTML ein. Diese Scripts müssen stets direkt von den Stripe-Domains (https://js.stripe.com und https://crypto-js.stripe.com) geladen werden, um die Kompatibilität und die *PCI-Compliance* (Any party involved in processing, transmitting, or storing credit card data must comply with the rules specified in the Payment Card Industry (PCI) Data Security Standards. PCI compliance is a shared responsibility and applies to both Stripe and your business) sicherzustellen.
Fügen Sie die Scripts nicht in ein Paket ein und hosten Sie keine eigene Kopie, da Ihre Integration sonst ohne Vorwarnung fehlerhaft werden könnte.
```html
Onramp
```
### JS SDK
Verwenden Sie das npm-Paket, um das Onramp-JS-SDK als ES-Modul zu laden. Das Paket enthält Definitionen des Typescript-Typs.
```
npm install --save @stripe/stripe-js @stripe/crypto
```
### Alternative SDK-Installation
Alternativ können Sie das clientseitige [Stripe-Krypto-ES-Modul](https://www.npmjs.com/@stripe/crypto)-SDK mit einem Skript-Tag oder Paket-Manager installieren. Das SDK umschließt die globale `StripeOnramp`-Funktion, die vom Stripe-Kryptoskript als ES Modul bereitgestellt wird.
1. Laden Sie das Skript manuell. Fügen Sie die folgenden Skripte mithilfe von Skript-Tags in das ``-Element Ihres HTML ein. Diese Skripte müssen stets direkt aus Stripes Domänen, *https://js.stripe.com* und *https://crypto-js.stripe.com*, aus Gründen der Kompatibilität und *zur PCI-Compliance* (Any party involved in processing, transmitting, or storing credit card data must comply with the rules specified in the Payment Card Industry (PCI) Data Security Standards. PCI compliance is a shared responsibility and applies to both Stripe and your business) geladen werden. Fügen Sie die Skripte nicht in ein Paket ein und hosten Sie selbst keine Kopie. Wenn Sie dies tun, kann Ihre Integration ohne Warnung unterbrochen werden.
```html
Onramp
```
1. Legen Sie den veröffentlichbaren [API-Schlüssel](https://dashboard.stripe.com/test/apikeys) fest, damit Stripe das von Ihrem Backend erstellte `OnrampSession`-Objekt abrufen kann. Beispiel:
```javascript
const stripeOnramp = StripeOnramp('<>');
```
1. Um das Modul über den Paketmanager zu installieren, installieren Sie zunächst das [Stripe.js-ES-Modul](https://github.com/stripe/stripe-js) und das [Stripe Krypto-ES-Modul](https://www.npmjs.com/package/@stripe/crypto) aus dem [öffentlichen npm-Verzeichnis](https://www.npmjs.com/). Das Paket enthält Typescript-Typdefinitionen.
```bash
npm install @stripe/stripe-js @stripe/crypto
```
1. Importieren Sie das Modul und legen Sie den [veröffentlichbaren API-Schlüssel](https://dashboard.stripe.com/test/apikeys) fest, damit Stripe das von Ihrem Backend erstellte `OnrampSession`-Objekt abrufen kann. Die Funktion gibt ein `Promise`-Objekt zurück, das nach dem Laden der Skripts mit einem neu erstellten `StripeOnramp`-Objekt aufgelöst wird.
```javascript
import {loadStripeOnramp} from '@stripe/crypto';
const stripeOnramp = await loadStripeOnramp('<>');
```
### Serverseitig
Unsere offiziellen Bibliotheken enthalten derzeit keine integrierte Unterstützung für die API-Endpoints, da sich die Onramp-API in der öffentlichen Vorschau befindet. Daher verwenden unsere Beispiele curl für Backend-Interaktionen.
## Eine Krypto-Onramp-Sitzung erstellen [serverseitig]
Stellen Sie auf dem Server einen neuen API-Endpoint bereit (zum Beispiel `myserver.com/mint-onramp-session`), der den Stripe `POST /v1/crypto/onramp_sessions`-Endpoint aufruft. Dadurch wird eine Onramp-Sitzung mit Stripe erstellt, die Sie für neue oder wiederkehrende Kundinnen und Kunden verwenden können. Sie müssen pro Kundin bzw. Kunde eine eigene Session erstellen.
[Erstellen Sie eine Crypto-Onramp-Sitzung](https://docs.stripe.com/api/crypto/onramp_sessions/create.md), indem Sie den folgenden curl-Befehl in Ihrem Terminal ausführen:
```bash
curl -X POST https://api.stripe.com/v1/crypto/onramp_sessions \
-u <>: \
-d "wallet_addresses[ethereum]"="0xB00F0759DbeeF5E543Cc3E3B07A6442F5f3928a2"
# add as many parameters as you'd like
```
Sie erhalten eine Antwort ähnlich der folgenden:
```json
{
"id": "cos_0MYfrA589O8KAxCGEDdIVYy3",
"object": "crypto.onramp_session",
"client_secret": "cos_0MYfrA589O8KAxCGEDdIVYy3_secret_rnpnWaxQbYQOvp6nVMvEeczx300NRU4hErZ",
"created": 1675732824,
"livemode": false,
"status": "initialized",
"transaction_details": {
"destination_currency": null,
"destination_amount": null,
"destination_network": null,
"fees": null,
"lock_wallet_address": false,
"source_currency": null,
"source_amount": null,
"destination_currencies": [
"btc",
"eth",
"sol",
"usdc"
],
"destination_networks": [
"bitcoin",
"ethereum",
"solana"
],
"transaction_id": null,
"wallet_address": null,
"wallet_addresses": {
"bitcoin": null,
"ethereum": "0xB00F0759DbeeF5E543Cc3E3B07A6442F5f3928a2",
"polygon": null,
"solana": null
}
}
}
```
### Fehler
Dieser Endpoint gibt Fehlercodes zurück, wenn Stripe keine Onramp-Sitzungen erstellen kann. Weitere Informationen zu möglichen Ursachen finden Sie unter [Kundensupportfähigkeit und Betrugsprävention](https://docs.stripe.com/crypto/onramp/embedded.md#support-and-fraud). Wir empfehlen, die Onramp-Komponente nur dann anzuzeigen, wenn bei der Session-Erstellung ein HTTP-Status `200` zurückgegeben wird und eine alternative Nutzeroberfläche bereitzustellen, die mit Fehlern bei der Session-Erstellung umgehen kann.
Die vollständige Parameterliste, die Sie beim Erstellen einer Sitzung übergeben können, finden Sie in der [Onramp API](https://docs.stripe.com/api/crypto/onramp_sessions/create.md).
### Zustände
Jede Onramp-Sitzung durchläuft die folgenden Zustände:
- `initialized`: Die App hat die Onramp-Sitzung serverseitig neu erstellt, aber die Kundin/der Kunde hat sie noch nicht verwendet. Sitzungen befinden sich in diesem Zustand, bis die Kundin/der Kunde den Onboarding-Prozess abgeschlossen hat und zur Zahlung bereit ist.
- `abgelehnt`: Stripe hat die Kundin/den Kunden aus irgendeinem Grund abgelehnt (KYC-Fehler, Probleme bei der Sanktionsprüfung, Betrugsprüfungen).
- `requires_payment`: Die Kundin/Der Kunde hat das Onboarding oder die Anmeldung abgeschlossen und wechselt zur Zahlungsseite. Wenn der Zahlungsversuch fehlschlägt, verbleibt dieser Status.
- `fulfillment_processing`: Der Kunde/die Kundin hat die Zahlung erfolgreich abgeschlossen. Wir haben die von ihnen gekaufte Kryptowährung noch nicht geliefert.
- `fulfillment_complete`: Der Kunde/die Kundin konnte erfolgreich für Kryptowährungen bezahlen und wir haben die Lieferung bestätigt.
## Optional: Das Erscheinungsbild des Onramp anpassen
Sie können das Erscheinungsbild des Onramp anpassen.
### Branding aktualisieren
Verwenden Sie die [Branding-Einstellungen](https://docs.stripe.com/payments/checkout/customization/appearance.md#branding), um Ihr Logo und Ihre Markenfarben hochzuladen, die automatisch für Onramp-Sitzungen gelten, die mit Ihrem Plattform-API-Schlüssel erstellt wurden.
### Dunkelmodus aktivieren
Um den Dark Mode zu aktivieren, fügen Sie beim Erstellen der Sitzung eine Darstellungsstruktur in den Aufruf ein:
```js
const onrampSession = stripeOnramp.createSession({
clientSecret: clientSecret,
appearance: {
theme: 'dark'
},
});
```
Wenn Sie das Erscheinungsbild nicht angeben, wird für Onramp standardmäßig ein helles Design verwendet. Sie können das Design auch ändern, nachdem Onramp gerendert wurde, indem Sie Folgendes aufrufen:
```js
onrampSession.setAppearance({
theme: newTheme
});
```
## Optional: Parameter vorab ausfüllen
Sie können einige Parameter der Onramp-Sitzung vorab ausfüllen.
### Transaktionsparameter vorab ausfüllen
Beispielsweise kann eine Dapp oder Wallet bereits die `wallet_addresses` einer Kundin/eines Kunden speichern. Dies lässt sich während der Sitzungserstellung erreichen:
```bash
curl -X POST https://api.stripe.com/v1/crypto/onramp_sessions \
-u <>: \
-d "wallet_addresses[ethereum]"="0xB00F0759DbeeF5E543Cc3E3B07A6442F5f3928a2" \
-d "source_currency"="usd" \
-d "destination_currency"="eth" \
-d "destination_network"="ethereum" \
-d "destination_amount"="0.1234"
```
Sie erhalten eine Antwort wie:
```json
{
"id": "cos_0MYvnp589O8KAxCGwmWATYfA",
"object": "crypto.onramp_session",
"client_secret": "cos_0MYvnp589O8KAxCGwmWATYfA_secret_LhqXJi2lvbMCYhVHfrHGfUfX6009qtZPtV7",
"created": 1675794121,
"livemode": false,
"status": "initialized",
"transaction_details": {
"destination_currency": "eth",
"destination_amount": "0.123400000000000000",
"destination_network": "ethereum",
"fees": null,
"lock_wallet_address": false,
"source_currency": "usd",
"source_amount": null,
"destination_currencies": [
"btc",
"eth",
"sol",
"usdc",
"xlm"
],
"destination_networks": [
"bitcoin",
"ethereum",
"solana",
"stellar"
],
"transaction_id": null,
"wallet_address": null,
"wallet_addresses": {
"bitcoin": null,
"ethereum": "0xB00F0759DbeeF5E543Cc3E3B07A6442F5f3928a2",
"polygon": null,
"solana": null,
"stellar": null,
"destination_tags": null
}
}
}
```
Die folgenden Parameter können vorab ausgefüllt werden:
- `wallet_addresses`: Die vorgeschlagene Wallet-Adresse, an die Kryptowährungen gesendet werden sollen (die Standardauswahl auf dem Bildschirm zum Anhängen der Wallet)
- `lock_wallet_address`: Ob die vorgeschlagene Wallet-Adresse gesperrt werden soll oder nicht
- `source_currency`: Die Fiat-Währung für die Transaktion (derzeit nur `usd` und `eur`)
- `source_amount`: Der Betrag der Fiat-Währung, der für den Kauf von Kryptowährungen verwendet werden soll (dieser und der Zielbetrag schließen sich gegenseitig aus)
- `destination_network`: Das Standard-Kryptonetzwerk für diese Onramp (z. B. `ethereum`)
- `destination_currency`: Die Standard-Kryptowährung für diese Onramp-Sitzung (z. B. `eth`).
- `destination_amount`: Der Betrag der Kryptowährung, die gekauft wird (dieser und der Quellbetrag schließen sich gegenseitig aus)
- `destination_currencies`: Ein Array von Kryptowährungen, auf die Sie die Auswahl beschränken möchten (z. B. `[eth, usdc]`)
- `destination_networks`: Ein Array von Krypto-Netzwerken, auf die Sie die Auswahl beschränken möchten (z. B. `[ethereum, polygon]`)
Weitere Informationen zu den spezifischen Anforderungen und deren Auswirkungen auf Kundinnen/Kunden in der Onramp-Nutzeroberfläche finden Sie unter [Onramp-API-Referenz](https://docs.stripe.com/api/crypto/onramp_sessions.md).
### Kundeninformationen vorab ausfüllen
Um einen möglichst reibungslosen Ablauf für die Kundinnen und Kunden zu ermöglichen und die Konversion zu steigern, sollten Sie einige der erforderlichen KYC-Informationen möglicherweise vorab ausfüllen, wenn Sie diese bereits in Ihrer Anwendung erfasst haben.
Während des gesamten Ablaufs müssen Kundinnen und Kunden folgende Angaben machen:
- E-Mail
- Vorname
- Nachname
- Geburtsdatum
- SSN
- Privatadresse (Land, Adresszeile 1, Adresszeile 2, Ort, Bundesland, Postleitzahl)
Die Onramp-API ermöglicht es, alle diese Felder mit Ausnahme der Sozialversicherungsnummer (SSN) vorab auszufüllen. Um diese Informationen vorab bereitzustellen, können Sie den Parameter `customer_information` in der API zur OnrampSession-Erstellung verwenden.
Beispielanfrage:
```bash
curl -X POST https://api.stripe.com/v1/crypto/onramp_sessions \
-u <>: \
-d "customer_information[email]"="john@doe.com" \
-d "customer_information[first_name]"="John" \
-d "customer_information[last_name]"="Doe" \
-d "customer_information[dob][year]"=1990 \
-d "customer_information[dob][month]"=7 \
-d "customer_information[dob][day]"=4 \
-d "customer_information[address][country]"="US" \
-d "customer_information[address][line1]"="354 Oyster Point Blvd" \
-d "customer_information[address][line2]"="Apt 1A" \
-d "customer_information[address][city]"="South San Francisco" \
-d "customer_information[address][state]"="CA" \
-d "customer_information[address][postal_code]"="94080"
```
Beispielantwort:
```json
{
"id": "cos_1MbuUeAEFtmWU4EVBFZS0gce",
"object": "crypto.onramp_session",
"client_secret": "cos_1MbuUeAEFtmWU4EVBFZS0gce_secret_zPsPPytwNU6mMKh1Bmz7ymXGi00ILwwyGeG",
"created": 1676504072,
"livemode": false,
"status": "initialized",
"transaction_details": {
"destination_currency": null,
"destination_amount": null,
"destination_network": null,
"fees": null,
"lock_wallet_address": false,
"source_currency": null,
"source_amount": null,
"destination_currencies": [
"btc",
"eth",
"sol",
"usdc",
"xlm"
],
"destination_networks": [
"bitcoin",
"ethereum",
"solana",
"polygon",
"stellar"
],
"transaction_id": null,
"wallet_address": null,
"wallet_addresses": null
}
}
```
Die folgenden Parameter können vorab ausgefüllt werden:
- `customer_information.email` – Freitextfeld für die E-Mail-Adresse der Kundin/des Kunden
- `customer_information.first_name` – Freitextfeld für den Vornamen der Kundin/des Kunden
- `customer_information.last_name` – Freitextfeld für den Nachnamen der Kundin/des Kunden
- `customer_information.dob.year` – Ganzzahl für das Geburtsjahr der Kundin/des Kunden
- `customer_information.dob.month` – Ganzzahl für den Geburtsmonat der Kundin/des Kunden
- `customer_information.dob.day` – Ganzzahl für den Geburtstag der Kundin/des Kunden
- `customer_information.address.country` – Zeichenkette mit dem zweistelligen Ländercode des Wohnsitzlandes der Kundin/des Kunden
- `customer_information.address.line1` – Freitextfeld für die erste Adresszeile der Kundin/des Kunden
- `customer_information.address.line2` – Freitextfeld für die zweite Adresszeile der Kundin/des Kunden
- `customer_information.address.city` – Freitextfeld für die Stadt der Kundin/des Kunden
- `customer_information.address.state` – Zeichenfolge des aus zwei Buchstaben bestehenden Codes für US-Bundesstaaten (der vollständige Name des Bundesstaates funktioniert auch), z. B. „CA“ oder „Kalifornien“
- `customer_information.address.postal_code` – Freitextfeld für die Postleitzahl der Kundin/des Kunden
Alle Felder sind optional und Sie können eine beliebige Teilmenge davon zur Vorausfüllung angeben. Wenn Sie jedoch das Geburtsdatum angeben, müssen Sie auch alle drei Werte für die folgenden Felder angeben: `Jahr`, `Monat` und `Tag`.
## Rendern der Onramp Nutzeroberfläche [clientseitig]
#### JavaScript
Importieren Sie sowohl das StripeJS- als auch das OnrampJS-Paket:
```html
Crypto Onramp
```
Verwenden Sie das *client\_secret* (A client secret is used with your publishable key to authenticate a request for a single object. Each client secret is unique to the object it's associated with) aus Ihrem serverseitigen Aufruf im vorherigen Schritt, um die Onramp-Sitzung zu initiieren und bereitzustellen:
```javascript
const stripeOnramp = StripeOnramp("<>");
initialize();
// Initialize the onramp element with a client secret
function initialize() {
// IMPORTANT: replace the following with your logic of how to mint/retrieve the client secret
const clientSecret = "cos_1Lb6vsAY1pjOSNXVWF3nUtkV_secret_8fuPvTzBaxj3XRh14C6tqvdl600rpW7hG4G";
const onrampSession = stripeOnramp.createSession({clientSecret});
onrampSession
.mount("#onramp-element");
}
```
#### React
Um die Onramp in React nutzen zu können, definieren wir zunächst die beiden Komponenten `CryptoElements` und `OnrampElement`. `CryptoElements` ist ein Anbieter von [React-Kontext](https://reactjs.org/docs/context.html) für eine initialisierte `StripeOnramp`-Instanz. Die Komponente `OnrampElement` rendert die Nutzeroberfläche mit dem *client\_secret* (A client secret is used with your publishable key to authenticate a request for a single object. Each client secret is unique to the object it's associated with) aus dem serverseitigen Aufruf, der im vorherigen Schritt gezeigt wurde.
```jsx
import {loadStripeOnramp} from '@stripe/crypto';
import {CryptoElements, OnrampElement} from './StripeCryptoElements';
const stripeOnrampPromise = loadStripeOnramp("<>");
export default () => {
// IMPORTANT: replace with your logic of how to mint/retrieve client secret
const clientSecret = "cos_1Lb6vsAY1pjOSNXVWF3nUtkV_secret_8fuPvTzBaxj3XRh14C6tqvdl600rpW7hG4G";
return (
);
}
```
```jsx
import React, { ReactNode } from 'react';
// ReactContext to simplify access of StripeOnramp object
const CryptoElementsContext = React.createContext(null);
export const CryptoElements = ({
stripeOnramp,
children,
}) => {
const [ctx, setContext] = React.useState(() => ({ onramp: null }));
React.useEffect(() => {
let isMounted = true;
Promise.resolve(stripeOnramp).then((onramp) => {
if (onramp && isMounted) {
setContext((ctx) => (ctx.onramp ? ctx : { onramp }));
}
});
return () => {
isMounted = false;
};
}, [stripeOnramp]);
return (
{children}
);
};
// React hook to get StripeOnramp from context
export const useStripeOnramp = () => {
const context = React.useContext(CryptoElementsContext);
return context?.onramp;
};
// React element to render Onramp UI
export const OnrampElement = ({
clientSecret,
appearance,
...props
}) => {
const stripeOnramp = useStripeOnramp();
const onrampElementRef = React.useRef(null);
React.useEffect(() => {
const containerRef = onrampElementRef.current;
if (containerRef) {
containerRef.innerHTML = '';
if (clientSecret && stripeOnramp) {
stripeOnramp
.createSession({
clientSecret,
appearance,
})
.mount(containerRef);
}
}
}, [clientSecret, stripeOnramp]);
return ;
};
```
Nach der Ausführung des Skripts rendert Onramp das folgende Dialogfeld:
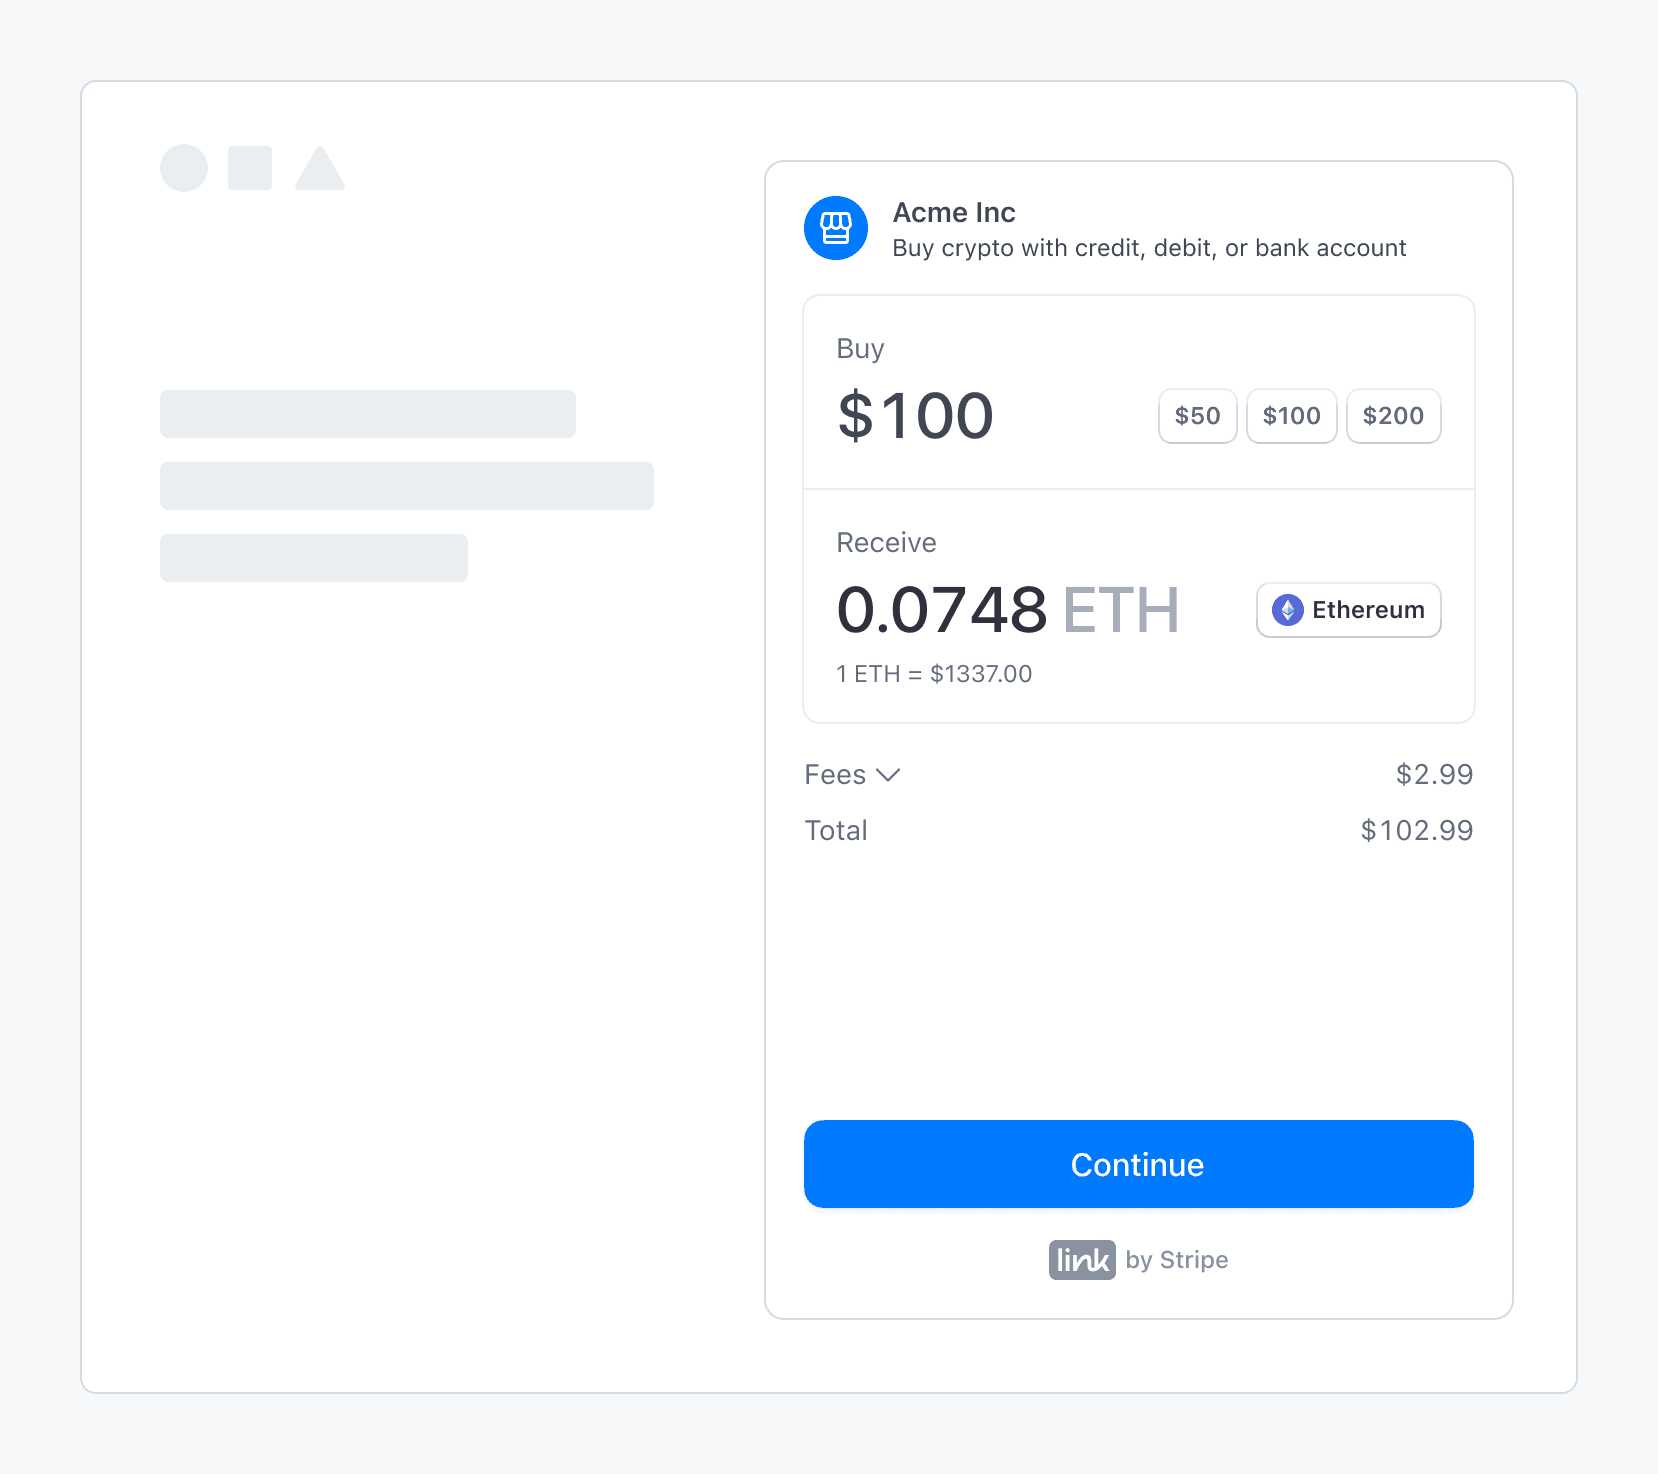
Fiat-zu-Krypto-Onramp von Stripe, eingebettet in eine Drittanbieteranwendung
### Sandbox-Werte
> Beträge für Sandbox-Transaktionen werden durch unsere vorab festgelegten Limits außer Kraft gesetzt.
Verwenden Sie die folgenden Werte, um eine Onramp-Transaktion in der *Sandbox* (A sandbox is an isolated test environment that allows you to test Stripe functionality in your account without affecting your live integration. Use sandboxes to safely experiment with new features and changes) abzuschließen:
- Verwenden Sie auf dem OTP-Bildschirm `000000` für den Verifizierungscode.
- Verwenden Sie auf dem Bildschirm mit den persönliche Daten `000000000` für die SSN und `address_full_match` für die Adresszeile 1.
- Verwenden Sie auf dem Bildschirm mit den Zahlungsdetails die Test-Kreditkartennummer `4242424242424242`.
## Integrationsnutzung anzeigen
Nachdem Sie Onramp gestartet haben, können Sie angepassten Nutzungsberichte im [Stripe-Dashboard](https://dashboard.stripe.com/crypto-onramp/reports) einsehen. Sie können auch zur [Onboarding-Seite](https://dashboard.stripe.com/crypto-onramp/onboarding) zurückkehren, um die Domains zu aktualisieren, auf denen Sie die Onramp hosten möchten. Dort können Sie auch den Status der Onboarding-Aufgaben prüfen.
## Optional: Den Onramp für die mobile Nutzung konfigurieren
Integrieren Sie Stripes Crypto-Onramp-Nutzeroberfläche in mobile Web-Views und Browser, indem Sie eine Session erstellen, die Onramp-UI hosten, den Kauf abschließen und Kundinnen und Kunden zur mobilen App zurückleiten.
### Minting einer Sitzung
Ähnlich wie bei anderen Integrationen müssen Sie einen Server-Endpoint implementieren, um für jeden Besuch einer Kundin/eines Kunden [eine neue Onramp-Sitzung zu](https://docs.stripe.com/crypto/onramp/embedded.md#create-onramp-session)erstellen](#create-onramp-session). Der Endpoint gibt ein `client_secret` zurück, das die Onramp-Nutzeroberfläche laden oder einen Fehler anzeigen kann, wenn der Onramp nicht verfügbar ist.
### Onramp-Nutzeroberfläche hosten
Erstellen Sie eine Frontend-Route (*zum Beispiel www.my-web3-wallet.com/onramp/*), um die Onramp-Nutzeroberfläche zu hosten. Ihr */onramp/* verweist auf onramp.html.
```html
Crypto Onramp
```
Dabei verwendet onramp.js das `client_secret` aus der URL und stellt die Onramp-Nutzeroberfläche bereit:
```js
const stripeOnramp = StripeOnramp(<>);
initialize();
// initialize onramp element with client secret
function initialize() {
const url = window.location.href.replace(/\/$/, '');
const clientSecret = url.substring(url.lastIndexOf('/') + 1);
const onrampSession = stripeOnramp.createSession({
clientSecret,
// other client side options that customize the look and feel
});
onrampSession
.addEventListener('onramp_session_updated', handleSessionUpdate)
.mount("#onramp-element");
}
function handleSessionUpdate(event) {
const session = event.payload.session;
if (session.status === 'fulfillment_complete' || session.status === 'rejected') {
// redirect back to mobile app through universal link
window.location.assign('/onramp_success/' + session.id);
}
}
```
Konfigurieren Sie universelle Links, um `/onramp_success` zurück zu Ihrer Mobile App per Deep-Link zu verlinken. Erwägen Sie, eine Ausweich- oder `onramp_success`-Seite bereitzustellen, um Nutzer/innen aufzufordern, manuell zurück zu Ihrer App zu wechseln.
### Kauf abschließen
Wie bei einer Standardintegration steuert der Frontend-Client die gesamte Onramp-Nutzeroberfläche. Die Nutzeroberfläche passt sich der Bildschirmgröße an. Wenn sich der Sitzungsstatus ändert und wir mehr `transaction_details` erfassen, wird das `CryptoOnrampSession`-Objekt entsprechend aktualisiert. Wir generieren Webhooks und Frontend-Ereignisse für jeden Statusübergang. Durch die Verwendung von Frontend-Ereignis-Listenern können Sie Kundinnen/Kunden nach Abschluss der `OnrampSession` wieder zu Ihrem Anwendungsablauf zurück leiten.
### Zur Mobil-App weiterleiten
Über einen Deep-Link oder eine manuelle Umstellung können Kundinnen/Kunden ihren Ablauf in Ihrer mobilen Anwendung wiederaufnehmen. Ihre Mobilanwendung kann Ihr Backend verwenden, um weiterhin den Status von `CryptoOnrampSession` abzufragen.
Wenn eine Kundin/ein Kunde beispielsweise während der Ersteinrichtung ihr/sein Guthaben auflädt, können Sie sie/ihn wieder zu Ihrer Anwendung weiterleiten, sobald die Sitzung in den Status `fulfillment_processing` übergeht. Sie können Kundinnen und Kunden erlauben, den Rest Ihrer Anwendung zu erkunden, während Sie den Status der `OnrampSession` im Hintergrund abfragen.
## Optional: Konversionsangebote konfigurieren
Die [Onramp Quotes](https://docs.stripe.com/api/crypto/onramp_quotes.md)-API ermöglicht es Ihnen, geschätzte Angebote für Onramp-Konversionen in verschiedene Kryptowährungen auf unterschiedlichen Netzwerken abzurufen. Sie können dabei einen festen Quell- oder Zielbetrag angeben und die Angebote auf eine Teilmenge von Zielwährungen oder Netzwerken beschränken. Diese API erlaubt es Ihnen, Angebote in der Nutzeroberfläche Ihres Produkts anzuzeigen, bevor Sie die Kundin/den Kunden zum Onramp-Widget weiterleiten. Wenn das Angebot abläuft, bevor die Kundin/der Kunde das Onramp-Widget besucht, kann im Onramp-Widget ein leicht abweichendes Angebot angezeigt werden.
### Konversionsangebot anfordern
Verwenden Sie den Endpoint [`GET /v1/crypto/onramp/quotes`](https://docs.stripe.com/api/crypto/onramp_quotes/retrieve.md), um ein Konversionsangebot zu erhalten. Die folgende Tabelle enthält alle verfügbaren Parameter für diesen Endpoint:
| Parameter | Typ | Standard | Details |
| ------------------------ | ------------------------ | --------------------------------------------------------- | ---------------------------------------------------------------------------------------------------------------------------------------------------------------------------------------------------------------------------------------------------------------------------------------------------------------------------------------------------------------------------------------------- |
| `source_currency` | Zeichenfolge (optional) | `usd` | Der [ISO-4217](https://www.iso.org/iso-4217-currency-codes.html)-Währungscode. Wir unterstützen derzeit nur `usd` und `eur`. |
| `source_amount` | Zeichenfolge (optional) | `100.00` | Eine Zeichenfolgendarstellung des Fiat-Betrags, den Sie für den Onramp benötigen. Wenn `source_amount` eingestellt ist, muss `destination_amount` null sein (diese schließen sich gegenseitig aus, da Sie lediglich einen festen Betrag für ein Ende des Handels festlegen können). |
| `destination_amount` | Zeichenfolge (optional) | `null` | Eine Zeichenfolgendarstellung des Betrags der zu erwerbenden `destination_currency`. Falls der `destination_amount` festgelegt ist, muss der `source_amount` null sein. Wenn Sie dieses Feld angeben, müssen Sie außerdem jeweils einen Wert für `destination_currencies` und `destination_networks` festlegen. Dadurch wissen wir, für welche Kryptowährung ein Angebot gemacht werden soll.) |
| `destination_currencies` | Array (optional) | `null`
- `['usdc', 'ethereum']` | Die Liste der Kryptowährungen, für die Sie Angebote generieren möchten. Wenn der Wert auf `null` gelassen wird, rufen wir Angebote für alle `destination_currencies` auf, die `destination_networks` unterstützt.
- Currencies: `btc`, `eth`, `sol`, `matic`, `usdc`, `xlm` |
| `destination_networks` | Array (optional) | `null`
- `['polygon', 'bitcoin', 'solana', 'ethereum']` | Die Liste der Kryptowährungsnetzwerke, für die Sie quotes erstellen möchten. Wenn sie auf `null` gelassen wird, rufen wir Angebote für `destination_currencies` in allen Netzwerken ab.
- Networks: `bitcoin`, `ethereum`, `solana`, `polygon`, `stellar` |
### Beispiel für Angebotsanfragen
Führen Sie den folgenden Befehl aus, um alle Währungsnetzwerk-Zielpaare mit einem Standard-Ausgangsbetrag von 100 USD abzurufen:
```bash
curl -G https://api.stripe.com/v1/crypto/onramp/quotes \
-u <>:
```
Sie erhalten eine Antwort ähnlich der folgenden:
```json
{
"id": "cd35838481497f403988360cc0ff5ce5c5ce7451ce8938f86d379dff7157d33d",
"rate_fetched_at": 1674265380.6883376,
"destination_network_quotes": {
"ethereum": [
{
"id": "7eb9ccb7c1bffadf3773ca1f56ba3a352fe4a226328e72142925a80e7242b70c",
"destination_currency": "eth",
"destination_amount": "0.060232255577506866",
"destination_network": "ethereum",
"fees": {
"network_fee_monetary": "1.41",
"transaction_fee_monetary": "3.03"
},
"source_total_amount": "104.44"
},
{
"id": "398de047128b6dff1abbc41519811db68dd8bcb69939b87c4a4621b1740a1c5b",
"destination_currency": "usdc",
"destination_amount": "100.00",
"destination_network": "ethereum",
"fees": {
"network_fee_monetary": "5.63",
"transaction_fee_monetary": "3.07"
},
"source_total_amount": "108.70"
}
],
...
},
"livemode": true,
"source_currency": "usd",
"source_amount": "100.00"
}
```
Führen Sie den folgenden Befehl aus, um alle Währungsnetzwerk-Zielpaare mit einem Ausgangsbetrag von 200 USD abzurufen:
```bash
curl -G https://api.stripe.com/v1/crypto/onramp/quotes \
-u <>: \
-d "source_amount"="200"
```
Sie erhalten eine Antwort ähnlich der folgenden:
```json
{
"id": "2e5818944df6a2325c7e9c1e72d27174b9bedfc8e64ace47c081370a5b982a7b",
"rate_fetched_at": 1674265506.3408287,
"destination_network_quotes": {
"ethereum": [
{
"id": "d160a80828eabb6b6d4aeafac585eee62d95425c7fb7577866ab04b9a786df00",
"destination_currency": "eth",
"destination_amount": "0.253568242640499553",
"destination_network": "ethereum",
"fees": {
"network_fee_monetary": "1.45",
"transaction_fee_monetary": "12.71"
},
"source_total_amount": "214.20"
},
{
"id": "53f864cb28a42f11e1d9d5aff7e43ac96b056406f74cbf618399c6fa40f3d275",
"destination_currency": "usdc",
"destination_amount": "200.00",
"destination_network": "ethereum",
"fees": {
"network_fee_monetary": "5.80",
"transaction_fee_monetary": "12.76"
},
"source_total_amount": "218.56"
}
],
...
},
"livemode": true,
"source_currency": "usd",
"source_amount": "200.00"
}
```
Führen Sie den folgenden Befehl aus, um Angebote für ETH und SOL in den Ethereum- und Solana-Netzwerken abzurufen (das Ergebnis ist ETH auf Ethereum und SOL auf Solana). Wenn Sie `destination_currencies` und `destination_networks` angeben, wird für jedes gültige Währungsnetzwerk-Paar ein Angebot ermittelt. Der Standardwert für `destination_currencies` ist alle Währungen und der Standardwert für `destination_networks` ist alle Netzwerke.
```bash
curl -G https://api.stripe.com/v1/crypto/onramp/quotes \
-u <>: \
-d "source_amount"="200" \
-d "destination_currencies[]"="eth" \
-d "destination_currencies[]"="sol" \
-d "destination_networks[]"="ethereum" \
-d "destination_networks[]"="solana"
```
Sie erhalten eine Antwort ähnlich der folgenden:
```json
{
"id": "c9ab6fd14f87290ef94b583f0dd346de8e197321e029776c12b7790cd83fb78c",
"rate_fetched_at": 1674265576.8238478,
"destination_network_quotes": {
"bitcoin": [],
"ethereum": [
{
"id": "97bbd7b9f8bc1a029264cdc28b47b636e989f8bcab96a80a3bded2094131e311",
"destination_currency": "eth",
"destination_amount": "0.253433817682353791",
"destination_network": "ethereum",
"fees": {
"network_fee_monetary": "1.46",
"transaction_fee_monetary": "12.71"
},
"source_total_amount": "214.17"
}
],
"polygon": [],
"solana": [
{
"id": "79f00923b96543aa69d140172c7cefd0e73a2ed089d8935e63dcf21028698e23",
"destination_currency": "sol",
"destination_amount": "16.767237943",
"destination_network": "solana",
"fees": {
"network_fee_monetary": "0.01",
"transaction_fee_monetary": "12.70"
},
"source_total_amount": "212.71"
}
]
},
"livemode": true,
"source_currency": "usd",
"source_amount": "200.00"
}
```
Führen Sie den folgenden Befehl aus, um Angebote für USDC auf Ethereum und Solana abzurufen:
```bash
curl -G https://api.stripe.com/v1/crypto/onramp/quotes \
-u <>: \
-d "source_amount"="200" \
-d "destination_currencies[]"="usdc" \
-d "destination_networks[]"="ethereum" \
-d "destination_networks[]"="solana"
```
Sie erhalten eine Antwort ähnlich der folgenden:
```json
{
"id": "8727e8de9a22915aea079973028054e31d362a328758a5953cee6ba1b6f22569",
"rate_fetched_at": 1674268717.432479,
"destination_network_quotes": {
"bitcoin": [],
"ethereum": [
{
"id": "603f29933c921d59b169572cf2d61da7d88f2a6973da0d6fcb686b3dec3de223",
"destination_currency": "usdc",
"destination_amount": "200.00",
"destination_network": "ethereum",
"fees": {
"network_fee_monetary": "5.88",
"transaction_fee_monetary": "12.76"
},
"source_total_amount": "218.64"
}
],
"polygon": [],
"solana": [
{
"id": "38b8388072e6272e7a0c0d5ee1161d3d747362a574f54fe76f1554ff60e3a007",
"destination_currency": "usdc",
"destination_amount": "200.00",
"destination_network": "solana",
"fees": {
"network_fee_monetary": "0.01",
"transaction_fee_monetary": "12.70"
},
"source_total_amount": "212.71"
}
]
},
"livemode": true,
"source_currency": "usd",
"source_amount": "200.00"
}
```
Führen Sie den folgenden Befehl aus, um ein Angebot für ein einzelnes Währungsnetzwerk-Zielpaar (ETH auf Ethereum) mit dem angegebenen `destination_amount` abzurufen:
```bash
curl -G https://api.stripe.com/v1/crypto/onramp/quotes \
-u <>: \
-d "destination_amount"="0.42" \
-d "destination_currencies[]"="eth" \
-d "destination_networks[]"="ethereum"
```
Sie erhalten eine Antwort ähnlich der folgenden:
```json
{
"id": "74f73859a8836293ce4f1e6757dc258c9f1016deea7b075faba8b5755d163168",
"rate_fetched_at": 1674268804.6989243,
"destination_network_quotes": {
"bitcoin": null,
"ethereum": [
{
"id": "f1adad5680b081031b03b89c174d25ce6b609416fc82f976423e95a089a10334",
"destination_currency": "eth",
"destination_amount": "0.420000000000000000",
"destination_network": "ethereum",
"fees": {
"network_fee_monetary": "1.45",
"transaction_fee_monetary": "21.06"
},
"source_total_amount": "719.53"
}
],
"polygon": null,
"solana": null
},
"livemode": true,
"source_currency": "usd",
"source_amount": "697.02"
}
```
## Optional: Webhook-Ereignisse überwachen
Wir senden einen `crypto.onramp_session.updated`-Webhook, jedes Mal, wenn sich der Status einer Onramp-Session nach ihrer Erstellung ändert. Beim Erstellen einer neuen Session wird kein Ereignis gesendet. Im Dashboard können Sie [Webhooks konfigurieren](https://docs.stripe.com/webhooks.md).
Der Webhook verwendet die Ressource `CryptoOnrampSession`:
```json
{
"id": "evt_123",
"object": "event",
"data": {
"object": {
"id": "cos_0MYvv9589O8KAxCGPm84FhVR",
"object": "crypto.onramp_session",
"client_secret": "cos_0MYvv9589O8KAxCGPm84FhVR_secret_IGBYKVlTlnJL8UGxji48pKxBO00deNcBuVc",
"created": 1675794575,
"livemode": false,
"status": "initialized",
"transaction_details": {
"destination_currency": "eth",
"destination_amount": null,
"destination_network": "ethereum",
"fees": null,
"lock_wallet_address": false,
"source_currency": "usd",
"source_amount": null,
"destination_currencies": [
"eth"
],
"destination_networks": [
"ethereum"
],
"transaction_id": null,
"wallet_address": null,
"wallet_addresses": {
"bitcoin": null,
"ethereum": "0xB00F0759DbeeF5E543Cc3E3B07A6442F5f3928a2",
"polygon": null,
"solana": null,
"stellar": null,
"destination_tags": null
}
}
}
}
}
```
### Frontend-Ereignisse
Sie können die folgenden Frontend-Ereignisse abonnieren:
```js
// when the onramp UI is rendered
{
type: 'onramp_ui_loaded',
payload: {session: OnrampSession},
}
// when the onramp session object is updated
{
type: 'onramp_session_updated',
payload: {session: OnrampSession},
}
// for modal overlay render mode only
{
type: 'onramp_ui_modal_opened',
payload: {session: OnrampSession},
}
{
type: 'onramp_ui_modal_closed',
payload: {session: OnrampSession},
}
```
Wie oben gezeigt, können Sie Ereignisse mit den Standardfunktionen `addEventListener und removeEventListener` für OnrampSession abonnieren oder abbestellen. Sie können `'*'` verwenden, um alle Ereignisse zu erfassen.
## Optional: Kundensupport und Betrugsfälle bearbeiten
Stripe setzt Einschränkungen für den eingebetteten Onramp durch, um den Kundensupport sicherzustellen und im Fall von Betrugsangriffen zu schützen.
### Kundensupportfähigkeit prüfen
Übergeben Sie `customer_ip_address` während der Sitzungserstellung, damit wir die oben genannten Einschränkungen vorbeugend prüfen können.
Der Endpoint gibt `HTTP 400` mit `code=crypto_onramp_unsupportable_customer` zurück, wenn sich die Kundin/der Kunde in einer Region befindet, die wir nicht unterstützen können (basierend auf `customer_ip_address`). In diesem Fall sollten Sie die Onramp-Option für Kundinnen und Kunden aus dieser Region ausblenden. Andernfalls wird die Onramp-Nutzeroberfläche in einem `deaktivierten` Status angezeigt.
Hier ist eine Beispielanfrage, die dieses Verhalten veranschaulicht:
```bash
curl -X POST https://api.stripe.com/v1/crypto/onramp_sessions \
-u <>: \
-d "customer_ip_address"="8.8.8.8" \
```
Beispielantwort (400):
```json
{
"error": {
"type": "invalid_request_error",
"code": "crypto_onramp_unsupportable_customer",
"message": "Based on the information provided about the customer, we're currently unable to support them."
}
}
```
### Betrugsangriffe abwehren
Stripe fungiert als eingetragener Händler und übernimmt die Haftung für Zahlungsanfechtungen und Betrugsfälle. Wenn wir eine Risikosituation feststellen (zum Beispiel bei aktiven Angriffen oder Exploits), können wir die Erstellung von Onramp-Sitzungen vorübergehend einschränken.
Wenn wir die API aufgrund eines unbeschränkten Betrugsangriffs schließen müssen, geben wir Folgendes zurück, wenn jemand versucht, eine neue Sitzung zu erstellen:
```bash
curl -X POST https://api.stripe.com/v1/crypto/onramp_sessions \
-u <>: \
```
Sie erhalten eine Antwort ähnlich der folgenden:
```json
{
"error": {
"type": "api_error",
"code": "crypto_onramp_disabled",
"message": "The v1/crypto/onramp_sessions endpoint has been disabled temporarily. Stripe will get in contact with you about details of the outage.",
"updated": 1652025690
}
}
```
### Zusätzliche Validierung und Fehler
| Bedingung | HTTP-Status | Fehlercode |
| ------------------------------------------------------------------------------------------------------------------------------------------------------------------------------------------------------------------------------ | ----------- | ------------------------------------------------------------------------------- |
| Aufgrund eines Vorfalls ist es uns nicht möglich, das Minting neuer Sitzungen durchzuführen | 400 | `crypto_onramp_disabled` |
| Basierend auf dem Parameter `customer_ip_address` können wir den/die angegebene/n Verbraucher/in nicht unterstützen. | 400 | `crypto_onramp_unsupported_country` oder `crypto_onramp_unsupportable_customer` |
| Es wird eine fehlerhafte `customer_ip_address` an den Endpoint `/v1/crypto/onramp_session` übergeben | 400 | `customer_ip_address` |
| `source_amount` und `destination_amount` schließen sich gegenseitig aus, die Plattform legt jedoch beide Werte fest. | 400 | `crypto_onramp_invalid_source_destination_pair` |
| Eine der Optionen `destination_currency` und `destination_network` ist festgelegt, die andere nicht | 400 | `crypto_onramp_incomplete_destination_currency_and_network_pair` |
| Die Kombination aus `destination_currency` und `destination_network` ist ungültig | 400 | `crypto_onramp_invalid_destination_currency_and_network_pair` |
| `source_amount` ist festgelegt, aber `source_currency` ist nicht festgelegt | 400 | `crypto_onramp_missing_source_currency` |
| `source_amount` ist keine positive Zahl | 400 | `crypto_onramp_invalid_source_amount` |
| `destination_amount` ist festgelegt, aber `destination_currency` ist nicht festgelegt | 400 | `crypto_onramp_missing_destination_currency` |
| `destination_amount` ist keine positive Zahl | 400 | `crypto_onramp_invalid_destination_amount` |
| Die Kombination aus `destination_currencies` und `destination_networks` hat keine unterstützten Währungen | 400 | `crypto_onramp_invalid_destination_currencies_and_networks` |
| `destination_currency` ist nicht in `destination_currencies` enthalten | 400 | `crypto_onramp_conflicting_destination_currency` |
| `destination_network` ist nicht in `destination_networks` enthalten | 400 | `crypto_onramp_conflicting_destination_network` |
| Mindestens eine Wallet-Adresse in `wallet_addresses` ist mit einem Netzwerk verknüpft, das nicht in `destination_networks` enthalten ist. | 400 | `crypto_onramp_wallet_addresses_not_all_networks_supported` |
| Unter `wallet_addresses` wurden keine Wallet-Adressen angegeben, aber `lock_wallet_address` wurde auf true gesetzt | 400 | `crypto_onramp_no_wallet_address_to_lock` |
| Das Unternehmen hat die Felder `business_name` oder `business_url` nicht festgelegt. Diese werden im [Dashboard](https://dashboard.stripe.com/settings/public/) unter `Public business name` and `Business website` ausgefüllt | 400 | `crypto_onramp_merchant_not_properly_setup` |
## Optional: Sitzungspersistenz verwenden
Sie können Sitzungspersistenz verwenden, um Benachrichtigungen bereitzustellen und Kundinnen und Kunden nach Abschluss ihres Kaufs weiterhin in den Onramp-Prozess einzubinden.
#### Vorteile der Sitzungspersistenz
In einigen Fällen kann es sinnvoll sein, eine Onramp-Session über mehrere Kundenbesuche hinweg beizubehalten. Beispielsweise können Sie Kundinnen und Kunden auffordern, ihre Onramp-Session fortzusetzen, wenn sie unterbrochen oder abgebrochen wurde. Oder wenn ein Kunde bzw. eine Kundin die Seite nach Abschluss der Zahlung aktualisiert, können Sie weiterhin Benachrichtigungen senden, sobald ein früherer Onramp-Kauf ausgeführt wurde.
Aus diesem Grund ist das OnrampSession-Objekt zustandsbehaftet und wird als serverseitige Ressource gespeichert. Wenn die Onramp-Nutzeroberfläche mit einem zuvor verwendeten OnrampSession-Client-Geheimnis initialisiert wird, kehren Kundinnen und Kunden an die Stelle zurück, an der sie aufgehört haben.
#### Konfiguration der Sitzungspersistenz
Ein Client-Geheimnis ist eine eindeutige Kennung für die Onramp-Sitzung, die den Lebenszyklus einer Sitzung speichert, ohne sensible Zahlungsinformationen preiszugeben. Es legt jedoch private Informationen wie Wallet-Adressen offen. Protokollieren Sie es nicht, betten Sie es nicht in URLs ein und geben Sie es nicht an andere Personen als die Kundin/den Kunden weiter. Stellen Sie sicher, dass Sie TLS auf jeder Seite haben, die das Client-Geheimnis enthält.
Wenn Sie eine Web2-ähnliche Kontostruktur verwenden, können Sie OnrampSession mit Ihrem Kundenobjekt verknüpfen und es nach der Authentifizierung abrufen. Bei einer kontolosen Web3-Anwendung würde die Anforderung einer Nachrichtensignatur zur Authentifizierung zu zusätzlicher Belastung für Kundinnen und Kunden führen. Datenschutzfreundlicher lokaler Speicher bietet hingegen ein akzeptables Kundenerlebnis.
## Optional: Konfigurieren Sie den Onramp nach Use Case
Sie können die Onramp-Session-Parameter je nach Use Case konfigurieren:
- Wallets
- Dapp- oder NFT-Bezahlvorgang
- Integration einer dezentralen Börse (DEX)
Damit der Onramp als integraler Bestandteil Ihrer Produkt-UI wirkt, binden Sie ihn als native Komponente in Ihre Anwendung ein.
## Wallet
Wallet-Nutzer/innen haben zwei Haupteinstiegspunkte für Onramp-Vorgänge: Wallet-Aufladungen und Transaktions-Aufstockungen.
### Wallet-Finanzierung
Sie können Kundinnen und Kunden proaktiv dazu auffordern, ihre Wallet aufzuladen, nachdem sie eine neue Wallet erstellt haben oder wenn ihr Guthaben kritisch niedrig ist.
In diesen Fällen sollten Sie die folgenden Parameter angeben:
- `wallet_addresses`: Die bereits genutzte Wallet-Adresse verwenden.
- `destination_networks`: Auf das Standardnetzwerk oder das ausgewählte Netzwerk setzen, um Verwirrung bei Kundinnen und Kunden zu reduzieren.
- `destination_currencies`: Sie können dieses Feld leer lassen, aber Sie können es auch auf das negative Gas-Token oder beliebige Kryptowährungen beschränken. Wenn Sie beispielsweise einen DeFi-Dienst in USDC anbieten, sollten Sie berücksichtigen, dass die/der Nutzer/in wahrscheinlich sowohl USDC als auch den Gas-Token benötigt.
- `destination_network`: Lassen Sie dieses Feld leer, um den ersten Wert des unterstützten Netzwerks zu übernehmen.
- `destination_currency`: Lassen Sie dieses Feld leer, um den ersten Wert der unterstützten Kryptowährungen zu übernehmen.
Das folgende Codebeispiel zeigt die Erstellung einer Onramp-Sitzung mit mehreren dieser Parameter:
```bash
curl -X POST https://api.stripe.com/v1/crypto/onramp_sessions \
-u <>: \
-d "customer_ip_address"="8.8.8.8" \
-d "wallet_addresses[ethereum]"="0xB00F0759DbeeF5E543Cc3E3B07A6442F5f3928a2" \
-d "wallet_addresses[solana]"="bufoH37MTiMTNAfBS4VEZ94dCEwMsmeSijD2vZRShuV" \
-d "destination_networks[]"="ethereum" \
-d "destination_networks[]"="solana"
```
### Transaktionsaufstockungen
Wenn eine Dapp oder eine Kundin/ein Kunde eine Transaktion vorschlägt, stellen Sie möglicherweise fest, dass die Transaktion aufgrund unzureichender Mittel fehlschlägt. In diesem Fall können Sie die Differenz berechnen, die erforderlich ist, damit die Transaktion abgeschlossen werden kann. Es ist jedoch oft schwierig, den angeforderten Betrag oder die Kryptowährung für ERC- oder SPL-Token zu erkennen.
In diesen Fällen sollten Sie Folgendes angeben:
- `wallet_addresses`: Die genutzte Wallet-Adresse verwenden.
- `destination_networks`: Auf das ausgewählte Netzwerk festlegen.
- `destination_currencies`: Beschränken Sie sich nach Möglichkeit auf die fehlenden Währungen.
- `destination_network`: Auf das ausgewählte Netzwerk festlegen (ein erforderlicher Wert, wenn Sie den Betrag festlegen möchten).
- `destination_currency`: Auf die Zielwährung festlegen (ein erforderlicher Wert, wenn Sie den Betrag festlegen möchten.
- `destination_amount`: Auf die Saldodifferenzen festlegen und ggf. einen Puffer für Gasgebühren lassen.
Das folgende Codebeispiel zeigt die Erstellung einer Onramp-Sitzung mit mehreren dieser Parameter:
```bash
curl -X POST https://api.stripe.com/v1/crypto/onramp_sessions \
-u <>: \
-d "customer_ip_address"="8.8.8.8" \
-d "wallet_addresses[ethereum]"="0xB00F0759DbeeF5E543Cc3E3B07A6442F5f3928a2" \
-d "destination_networks[]"="ethereum" \
-d "destination_currencies[]"="usdc" \
-d "destination_network"="ethereum" \
-d "destination_currency"="usdc" \
-d "destination_amount"="10"
```
## Dapp- oder NFT-Bezahlvorgang
Sie können die Onramp im Bezahlvorgang verwenden, wenn Sie den Zielbetrag kennen. Zum Beispiel kann eine Dapp verwendet werden, um Mitgliedschaften zu einem festen Preis zu verkaufen oder wenn die/der Nutzer/in einen bestimmten NFT von einem Marktplatz kaufen möchte.
In diesen Fällen sollten Sie Folgendes angeben:
- `wallet_addresses`: Adresse der verbundenen Wallet verwenden.
- `destination_networks`: Verbundenes Netzwerk verwenden.
- `destination_currencies`: Verwenden Sie die dargestellte Währung (den Preis in der Währung, in der die Waren angeboten werden).
- `destination_network`: Auf das oben ausgewählte Netzwerk festlegen (erforderlich, wenn Sie den Betrag festlegen möchten).
- `destination_currency`: Auf die obige Zielwährung festlegen (erforderlich, wenn Sie den Betrag festlegen möchten)
- `destination_amount`: Legen Sie diesen Wert entweder auf die Differenz des Guthabens oder auf den gesamten Kaufbetrag fest. Einige Kundinnen und Kunden kombinieren beides, indem sie On-Chain-Analysen mit nahezu gleichmäßiger Aufteilung nutzen. Eine Kundin/ein Kunde könnte den vollen Betrag wählen, um die steuerliche Bemessungsgrundlage zu vereinfachen oder um angesammelte Vermögenswerte nicht auszugeben. In beiden Fällen sollte ausreichend Spielraum für Gaskosten bleiben.
Das folgende Codebeispiel zeigt die Erstellung einer Onramp-Sitzung mit mehreren dieser Parameter:
```bash
curl -X POST https://api.stripe.com/v1/crypto/onramp_sessions \
-u <>: \
-d "customer_ip_address"="8.8.8.8" \
-d "wallet_addresses[ethereum]"="0xB00F0759DbeeF5E543Cc3E3B07A6442F5f3928a2" \
-d "destination_networks[]"="ethereum" \
-d "destination_currencies[]"="eth" \
-d "destination_network"="ethereum" \
-d "destination_currency"="eth" \
-d "destination_amount"="0.2343"
```
## DEX
Eine DEX bietet eine einzigartige Möglichkeit, Kundinnen und Kunden den Kauf von Kryptowährungen mit Fiat zu ermöglichen. Eine DEX kann Kundinnen/Kunden zwar dazu auffordern, beim Umtausch beliebiger Krypto-Paare über eine bestehende Schnittstelle Kryptowährungen aufzuladen, aber es ist besser, einen speziellen Ablauf für Kundinnen/Kunden zu haben, der sich ausschließlich auf den Umtausch von Fiat-Währungen in Kryptowährungen konzentriert.
Da das Onramp Ihnen die Kontrolle über Ihre Marke und Nutzeroberfläche ermöglicht, kann eine DEX ein Onramp-Widget erstellen, das Stripes Fähigkeit nutzt, Fiat-Währungen in ausgewählte Kryptowährungen umzuwandeln. Die DEX kann anschließend den abschließenden Umtausch in beliebige Währungen durchführen. Eine DEX kann außerdem ein Onramp-Widget für einen bestimmten Token erstellen. Beispielsweise könnte eine DAO einen bestimmten Liquiditätspool empfehlen und mithilfe einer DEX ihre Token vertreiben und neue Kundinnen und Kunden mit Fiat-Währungen zu gewinnen.
In diesen Fällen sollten Sie Folgendes angeben:
- `wallet_addresses`: Die bereits genutzte Wallet-Adresse verwenden.
- `destination_networks`: Auf das ausgewählte Netzwerk festlegen.
- `destination_currencies`: Auf die ausgewählte Kryptowährung beschränken.
- `destination_network`: Auf das ausgewählte Netzwerk festlegen (erforderlich, wenn Sie den Betrag festlegen möchten).
- `destination_currency`: Legen Sie die Zielwährung fest (erforderlich, wenn Sie den Betrag festlegen möchten).
- `destination_amount`: Wird nur festgelegt, wenn Sie die Absicht der Kundin/des Kunden im Voraus erfassen können – andernfalls leer lassen, damit Stripe intelligente Standardwerte vorschlägt.
Das folgende Codebeispiel zeigt die Erstellung einer Onramp-Sitzung mit mehreren dieser Parameter:
```bash
curl -X POST https://api.stripe.com/v1/crypto/onramp_sessions \
-u <>: \
-d "customer_ip_address"="8.8.8.8" \
-d "wallet_addresses[ethereum]"="0xB00F0759DbeeF5E543Cc3E3B07A6442F5f3928a2" \
-d "destination_networks[]"="ethereum" \
-d "destination_currencies[]"="eth" \
-d "destination_network"="ethereum" \
-d "destination_currency"="eth"
```