Ir a contenido
Crea una cuenta
o
inicia sesión
Logotipo de la documentación de Stripe
/
Pregúntale a la IA
Crear cuenta
Iniciar sesión
Empezar
Pagos
Ingresos
Plataformas y marketplaces
Gestión del dinero
Recursos para desarrolladores
Resumen
Acerca de Stripe Payments
Actualiza tu integración
Análisis de pagos
Pagos por Internet
ResumenEncuentra tu caso de usoManaged Payments
Utiliza Payment Links
Crear una página del proceso de compra
Desarrolla una integración avanzada
Desarrolla una integración en la aplicación
Métodos de pago
Añadir métodos de pago
Gestiona los métodos de pago
Proceso de compra más rápido con Link
Interfaces de pago
Payment Links
Checkout
Elements para la web
Elements en la aplicación
Escenarios de pago
Administrar múltiples divisas
Flujos de pagos personalizados
Capacidad adquirente flexible
Orquestación
Pagos en persona
Terminal
Más allá de los pagos
Constituye tu empresa
Criptomonedas
    Resumen
    Pagos con criptomonedas estables
    Ruta de acceso de monedas fiduciarias a criptomonedas
      Resumen
      Empezar
      Inicio rápido de la ruta de acceso integrable
      Guía ampliada sobre la ruta de acceso integrable
      Ruta de acceso independiente que no requiere programación
      Guía sobre la ruta de acceso independiente
      Novedades sobre la integración
      Utiliza la ruta de acceso API Quotes
      Integra criptomonedas para móviles
      Instala el Módulo ES SDK para criptomonedas de Stripe
      Referencias
      Referencia de la API de la ruta de acceso
      Mejores prácticas para la integración del back end
    Transferencias de criptomonedas estables
    Cuentas financieras en stablecoins o criptomonedas estables
Financial Connections
Climate
Comprender el fraude
Protección antifraude de Radar
Gestiona disputas
Verificar identidades
InicioPagosCryptoFiat-to-crypto onramp

Set up an embeddable onramp integrationVista previa pública

Use this guide to fully customize the embeddable onramp.

To integrate with the onramp SDK:

  1. Install the SDK and client library.
  2. Generate a crypto onramp session on your backend.
  3. Render the onramp UI on your website.
  4. View your integration’s usage in the Stripe Dashboard.

Install the SDK and client library
client-side
server-side

Client-side

Include the following scripts using script tags within the <head> element of your HTML. These scripts must always load directly from Stripe’s domains (https://js.stripe.com and https://crypto-js.stripe.com) for compatibility and PCI compliance. Don’t include the scripts in a bundle or host a copy yourself. If you do, your integration might break without warning.

onramp.html
<head> <title>Onramp</title> <script src="https://js.stripe.com/basil/stripe.js"></script> <script src="https://crypto-js.stripe.com/crypto-onramp-outer.js"></script> </head>

Use the Onramp JS SDK as a module

Use the npm package to load the onramp JS SDK as an ES module. The package includes Typescript type definitions.

npm install --save @stripe/stripe-js @stripe/crypto

Server-side

Our official libraries don’t contain built-in support for the API endpoints because the onramp API is in limited beta. As a result, our examples use curl for backend interactions.

Generate a crypto onramp session
server-side

Generate a crypto onramp session by running the following curl command in your terminal:

Command Line
curl -X POST https://api.stripe.com/v1/crypto/onramp_sessions \ -u
sk_test_BQokikJOvBiI2HlWgH4olfQ2
:
\ -d "wallet_addresses[ethereum]"="0xB00F0759DbeeF5E543Cc3E3B07A6442F5f3928a2" # add as many parameters as you'd like

You receive a response similar to the following:

{ "id": "cos_0MYfrA589O8KAxCGEDdIVYy3", "object": "crypto.onramp_session", "client_secret": "cos_0MYfrA589O8KAxCGEDdIVYy3_secret_rnpnWaxQbYQOvp6nVMvEeczx300NRU4hErZ", "created": 1675732824, "livemode": false, "status": "initialized", "transaction_details": { "destination_currency": null, "destination_amount": null, "destination_network": null, "fees": null, "lock_wallet_address": false, "source_currency": null, "source_amount": null, "destination_currencies": [ "btc", "eth", "sol", "usdc" ], "destination_networks": [ "bitcoin", "ethereum", "solana" ], "transaction_id": null, "wallet_address": null, "wallet_addresses": { "bitcoin": null, "ethereum": "0xB00F0759DbeeF5E543Cc3E3B07A6442F5f3928a2", "polygon": null, "solana": null } } }

See the Onramp API reference for the full parameter list you can pass in when creating a session.

Render the Onramp UI
client-side

Import both the StripeJS and the OnrampJS bundles:

index.html
<!DOCTYPE html> <html lang="en"> <head> <meta charset="utf-8" /> <title>Crypto Onramp</title> <meta name="description" content="A demo of the hosted onramp" /> <meta name="viewport" content="width=device-width, initial-scale=1" /> <script src="https://js.stripe.com/basil/stripe.js"></script> <script src="https://crypto-js.stripe.com/crypto-onramp-outer.js"></script> <script src="onramp.js" defer></script> </head> <body> <div id="onramp-element" /> </body> </html>

Use the client_secret from your server-side call in the previous step to initiate and mount the onramp session:

onramp.js
const stripeOnramp = StripeOnramp(
"pk_test_TYooMQauvdEDq54NiTphI7jx"
); initialize(); // Initialize the onramp element with a client secret function initialize() { // IMPORTANT: replace the following with your logic of how to mint/retrieve the client secret const clientSecret = "cos_1Lb6vsAY1pjOSNXVWF3nUtkV_secret_8fuPvTzBaxj3XRh14C6tqvdl600rpW7hG4G"; const onrampSession = stripeOnramp.createSession({clientSecret}); onrampSession .mount("#onramp-element"); }

After running the script, the onramp renders the following dialog:
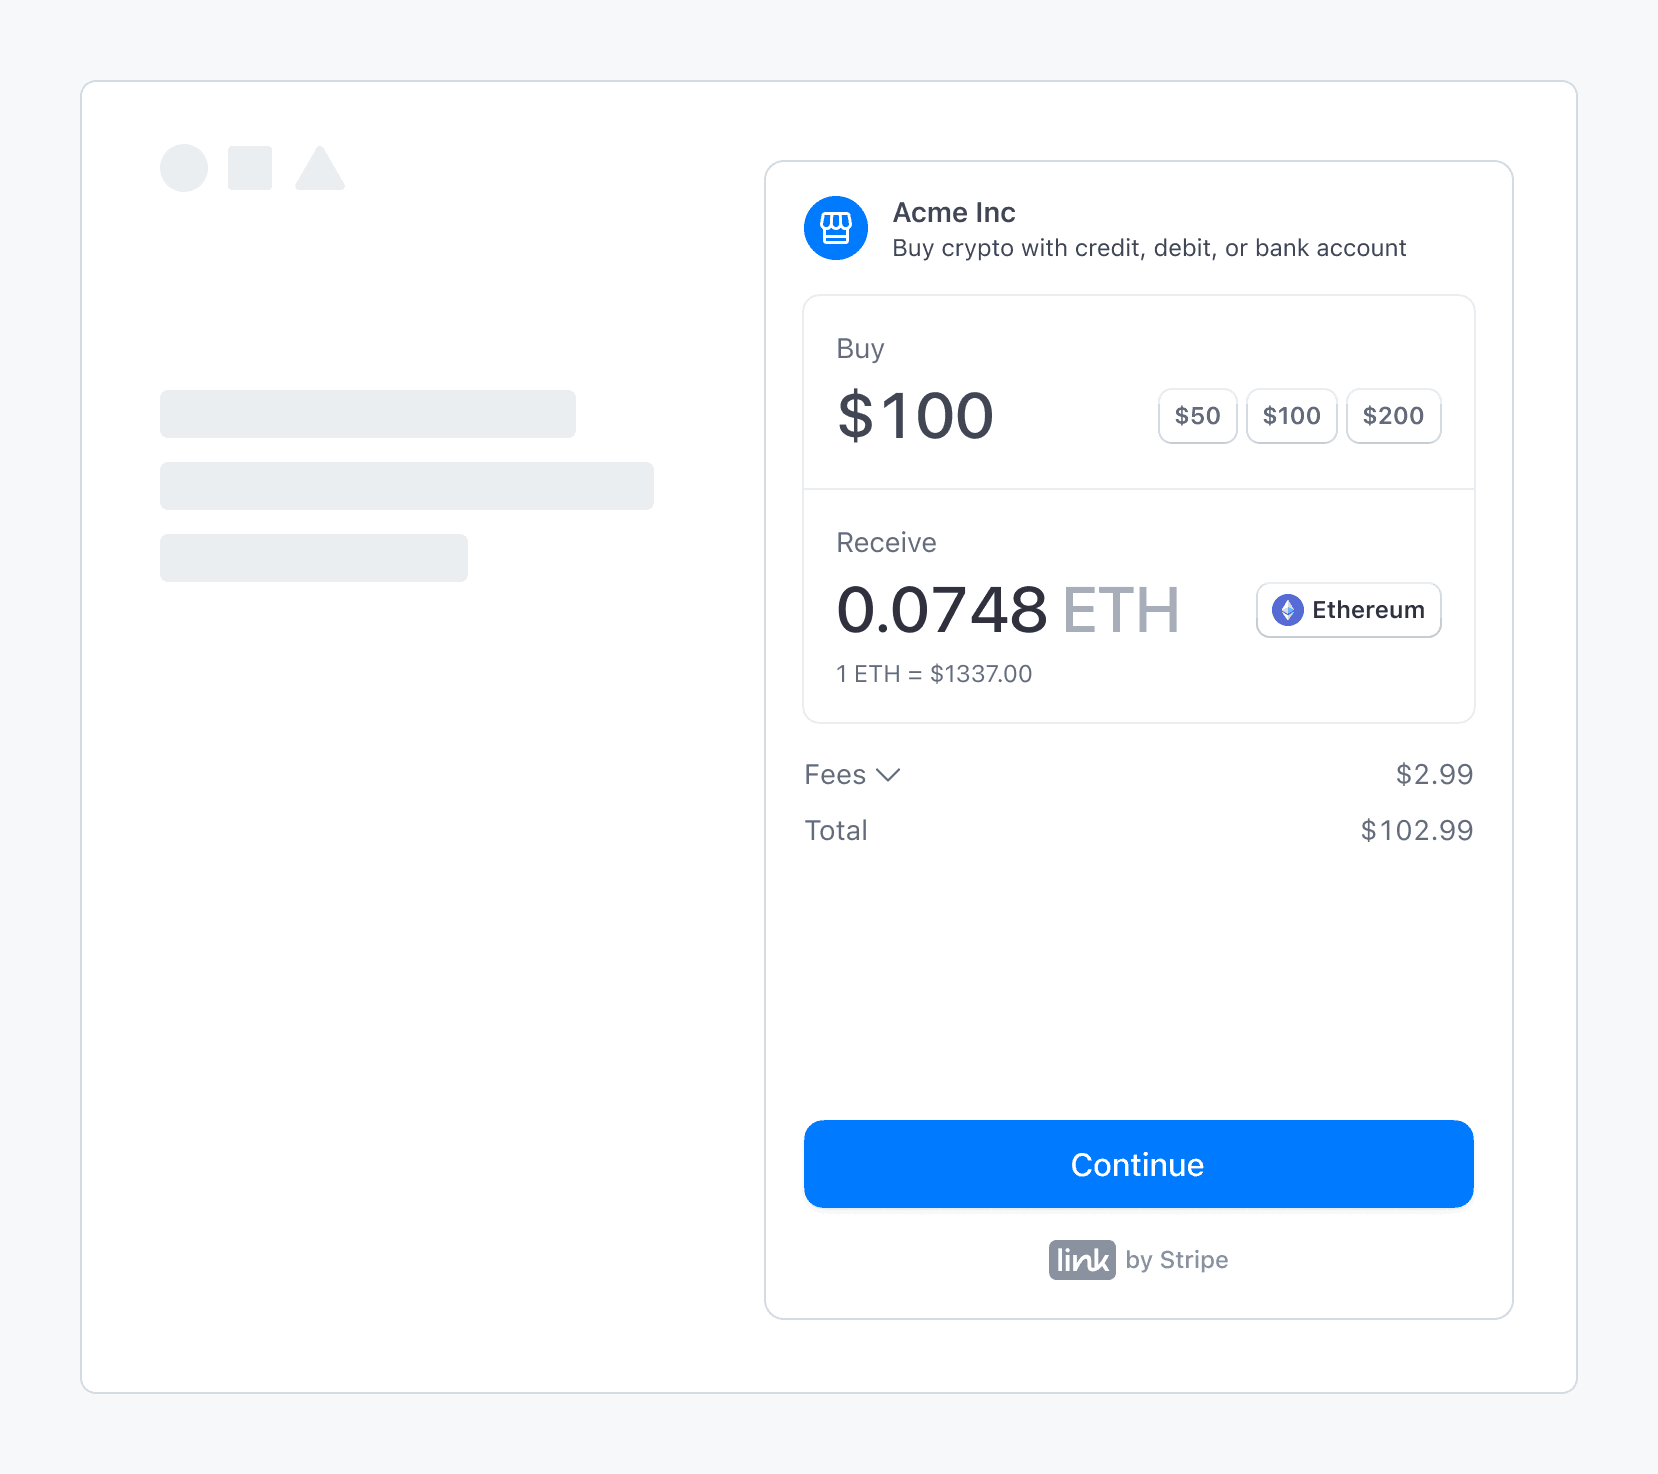
Stripe's fiat-to-crypto onramp being embedded into a third-party application

Stripe’s fiat-to-crypto onramp embedded within a third-party application

Sandbox values

Advertencia

Sandbox transaction amounts are overridden by our pre-decided limits.

Use the following values to complete an onramp transaction in sandbox:

  • On the OTP screen, use 000000 for the verification code.
  • On the personal information screen, use 000000000 for the SSN and address_full_match for address line 1.
  • On the payment details screen, use the test credit card number 4242424242424242.

View integration usage

After you’ve launched the onramp, you can view customized usage reports in the Stripe Dashboard. You can also return to the onboarding page to update the domains where you plan to host the onramp, and check the status of any onboarding tasks.

¿Te ha sido útil la página?
SíNo
  • ¿Necesitas ayuda? Ponte en contacto con el equipo de soporte.
  • Únete a nuestro programa de acceso anticipado.
  • Echa un vistazo a nuestro registro de cambios.
  • ¿Tienes alguna pregunta? Ponte en contacto con el equipo de ventas.
  • ¿LLM? Lee llms.txt.
  • Con tecnología de Markdoc
Code quickstart
Guías relacionadas
Onramp API reference