Build a subscriptions integration
Create and manage subscriptions to accept recurring payments.


Integration effort
UI customization
Customize the appearance.
Integration type
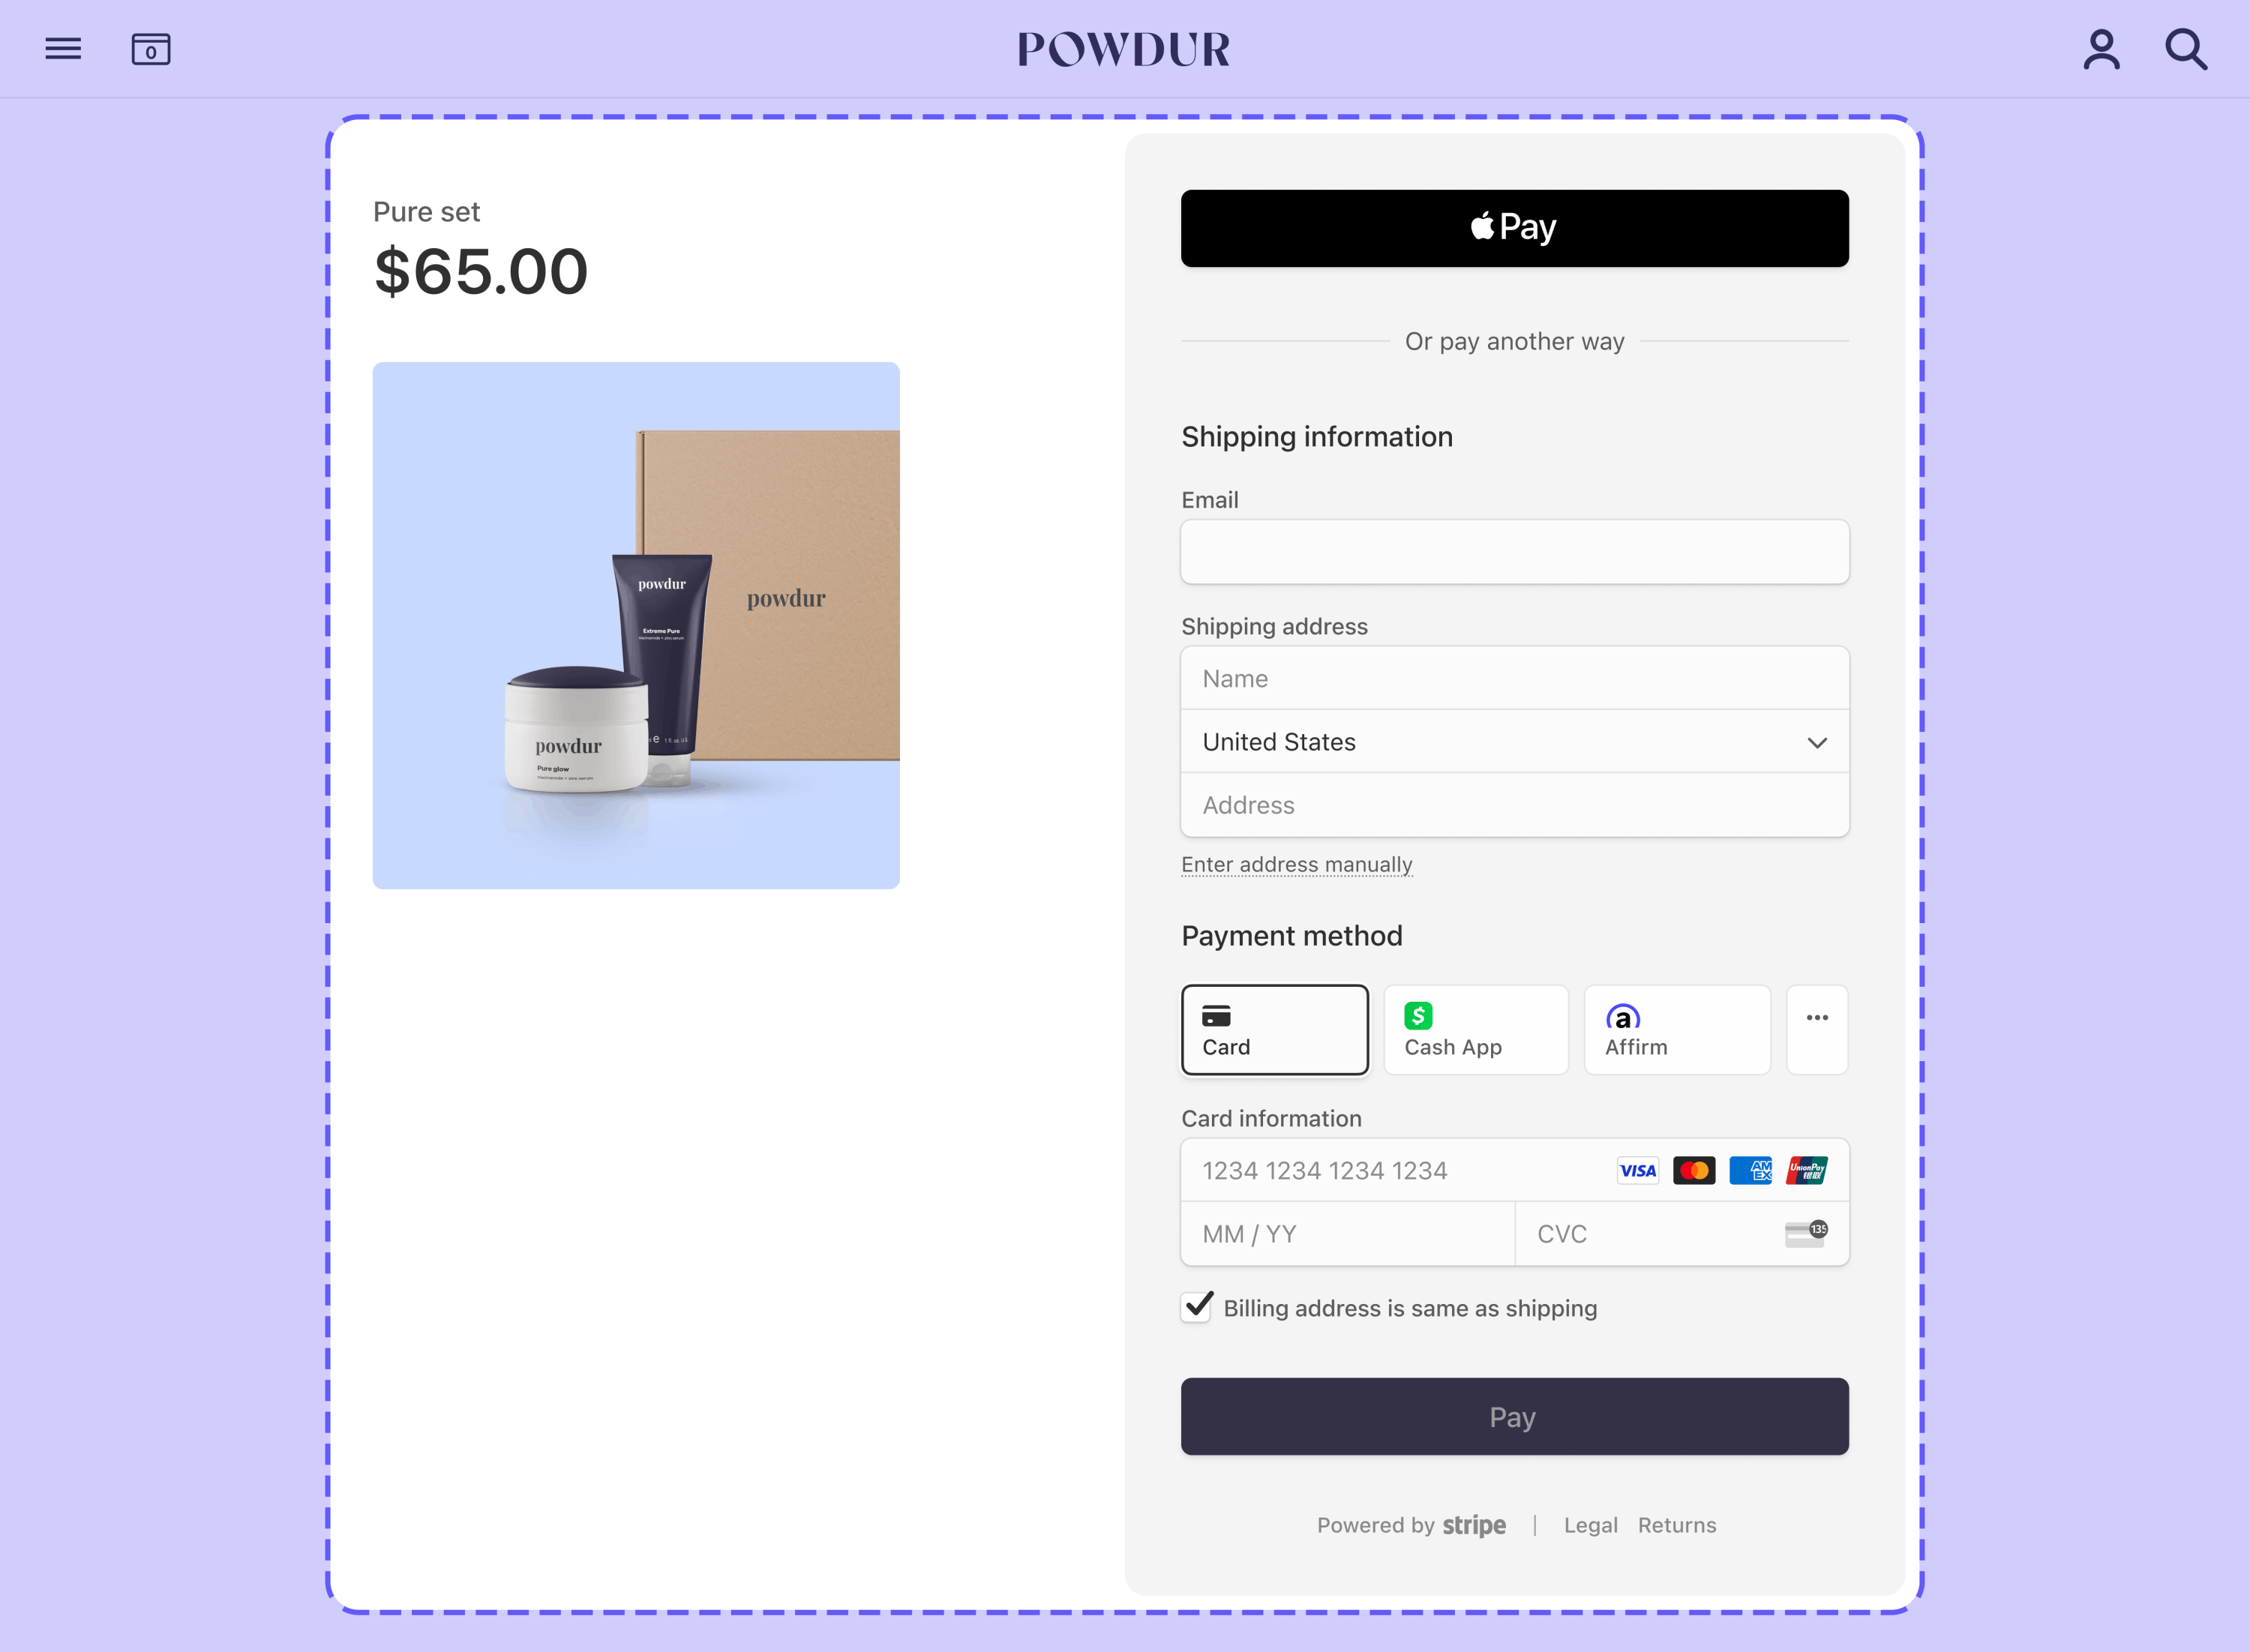
Use prebuilt embedded forms to collect payments and manage subscriptions.
Set up the server
Set up Stripe
Install the Stripe client of your choice:
Create a product and price
Create your products and their prices in the Dashboard or with the Stripe CLI.
This example uses a fixed-price service with two different service-level options: Basic and Premium. For each service-level option, you need to create a product and a recurring price. (If you want to add a one-time charge for something like a setup fee, create a third product with a one-time price. To keep things simple, this example doesn’t include a one-time charge.)
In this example, each product bills at monthly intervals. The price for the Basic product is 5 USD. The price for the Premium product is 15 USD.
If you offer multiple billing intervals, use Checkout to upsell customers on longer billing intervals and collect more revenue upfront.
For other pricing models, see Billing examples.
Create a Checkout Session
Add an endpoint on your server that creates a Checkout Session.
When you create the Checkout Session, pass the following parameters:
- To use the embedded Checkout form, set ui_mode to
embedded. - To create subscriptions when your customer checks out, set mode to
subscription. - To define the page your customer returns to after completing or attempting payment, specify a return_url. Include the
{CHECKOUT_template variable in the URL. Checkout replaces the variable with the Checkout Session ID before redirecting your customer. You create and host the return page on your website.SESSION_ ID}
To mount Checkout, use the Checkout Session’s client_ returned in the response.
Build your subscription pageClient
Mount Checkout
Show a return page
After your customer attempts payment, Stripe redirects them to a return page that you host on your site. When you created the Checkout Session, you specified the URL of the return page in the return_url parameter.
Note
During payment, some payment methods redirect the customer to an intermediate page, such as a bank authorization page. When they complete that page, Stripe redirects them to your return page.
Create an endpoint to retrieve a Checkout Session
Add an endpoint to retrieve a Checkout Session status with the Checkout Session ID in the URL.
Retrieve a Checkout Session
To use details for the Checkout session, immediately make a request to the endpoint on your server to retrieve the Checkout Session status using the Checkout Session ID in the URL as soon as your return page loads.
Handle the session
Handle the result according to the session status:
complete: The payment succeeded. Use the information from the Checkout Session to render a success page.open: The payment failed or was canceled. Remount Checkout so that your customer can try again.
// Retrieve a Checkout Session
// Use the session ID
initialize();

async function initialize() {
  const queryString = window.location.search;
  const urlParams = new URLSearchParams(queryString);
  const sessionId = urlParams.get('session_id');
  const response = await fetch(`/session-status?session_id=${sessionId}`);
  const session = await response.json();
// Handle the session according to its status
  if (session.status == 'open') {
    // Remount embedded Checkout
    window.location.replace('http://localhost:4242/checkout.html')
  } else if (session.status == 'complete') {
    document.getElementById('success').classList.remove('hidden');
    document.getElementById('customer-email').textContent = session.customer_email;
    // Show success page
    // Optionally use session.payment_status or session.customer_email
    // to customize the success page
  }
}
// Add an endpoint to fetch the Checkout Session status
app.get('/session_status', async (req, res) => {
  const session = await stripe.checkout.sessions.retrieve(req.query.session_id);
  const customer = await stripe.customers.retrieve(session.customer);

  res.send({
    status: session.status,
    payment_status: session.payment_status,
    customer_email: customer.email
  });
});
Provision access
Now that the subscription is active, give your user access to your service. To do this, listen to the customer., customer., and customer. events. These events pass a subscription object that contains a status field indicating whether the subscription is active, past due, or canceled. See the subscription lifecycle for a complete list of statuses. To learn about managing access to your product’s feature, see the doc on integrating entitlements.
In your webhook handler:
- Verify the subscription status. If it’s
activethen your user has paid for your product. - Check the product the customer subscribed to and grant access to your service. Checking the product instead of the price gives you more flexibility if you need to change the pricing or billing interval.
- Store the
product.,id subscription.andid subscription.in your database along with thestatus customer.you already saved. Check this record when determining which features to enable for the user in your application.id
The state of a subscription might change at any point during its lifetime, even if your application does not directly make any calls to Stripe. For example, a renewal might fail due to an expired credit card, which puts the subscription into a past due state. Or, if you implement the customer portal, a user might cancel their subscription without directly visiting your application. Implementing your handler correctly keeps your application state in sync with Stripe.
Test your integration
Test payment methods
Use the following table to test different payment methods and scenarios.
| Payment method | Scenario | How to test |
|---|---|---|
| BECS Direct Debit | Your customer successfully pays with BECS Direct Debit. | Fill out the form using the account number 900123456 and BSB 000-000. The confirmed PaymentIntent initially transitions to processing, then transitions to the succeeded status three minutes later. |
| BECS Direct Debit | Your customer’s payment fails with an account_ error code. | Fill out the form using the account number 111111113 and BSB 000-000. |
| Credit card | The card payment succeeds and doesn’t require authentication. | Fill out the credit card form using the credit card number 4242 4242 4242 4242 with any expiration, CVC, and postal code. |
| Credit card | The card payment requires authentication. | Fill out the credit card form using the credit card number 4000 0025 0000 3155 with any expiration, CVC, and postal code. |
| Credit card | The card is declined with a decline code like insufficient_. | Fill out the credit card form using the credit card number 4000 0000 0000 9995 with any expiration, CVC, and postal code. |
| SEPA Direct Debit | Your customer successfully pays with SEPA Direct Debit. | Fill out the form using the account number AT321904300235473204. The confirmed PaymentIntent initially transitions to processing, then transitions to the succeeded status three minutes later. |
| SEPA Direct Debit | Your customer’s PaymentIntent status transitions from processing to requires_. | Fill out the form using the account number AT861904300235473202. |
Monitoring events
Set up webhooks to listen to subscription change events such as upgrades and cancellations. Learn more about subscription webhooks. You can view events in the Dashboard or with the Stripe CLI.
Learn more about testing your Billing integration.