Migrate Klarna from Sources
Migrate an integration from the Sources API to the Payment Intents API.
Klarna is launching a new checkout process that requires the Payment Methods API and the Payment Intents API. This guide outlines several recommended paths to migrate from using the Sources API, including a low-code option that uses Stripe Checkout.
Feature deprecated
We have deprecated Sources API support for Klarna, and we plan to remove it entirely in early 2024. If you’re still using the Sources API to process Klarna payments, migrate now to use PaymentMethods and PaymentIntents.

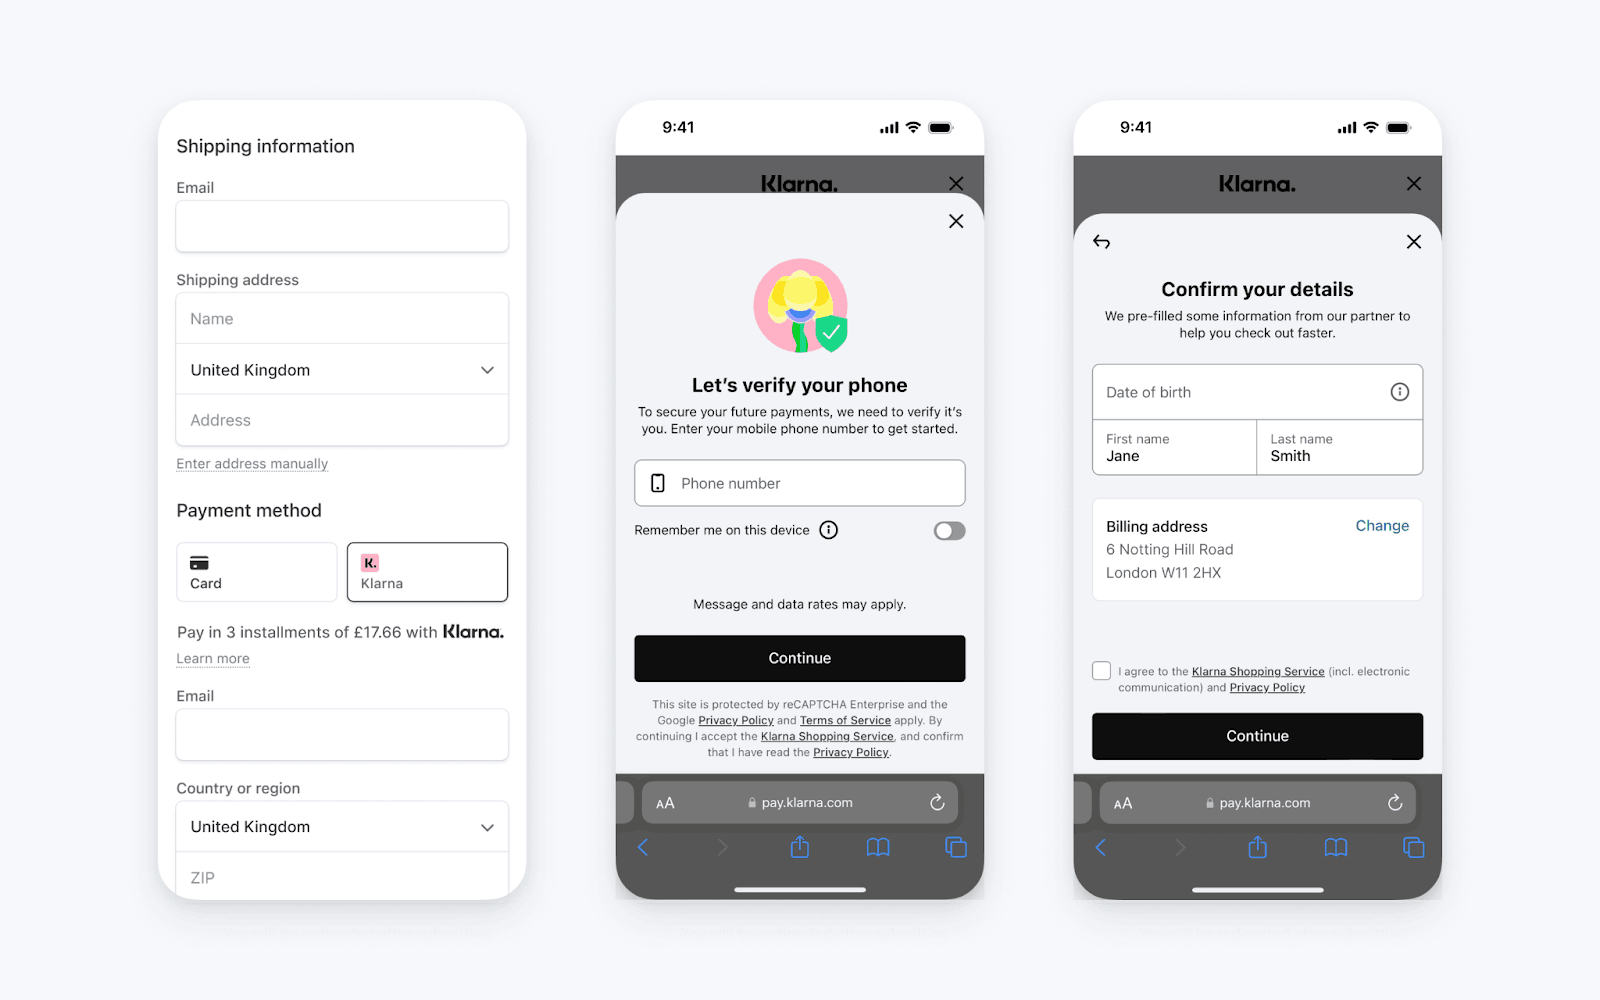
Initiating the Klarna payment on PaymentIntents

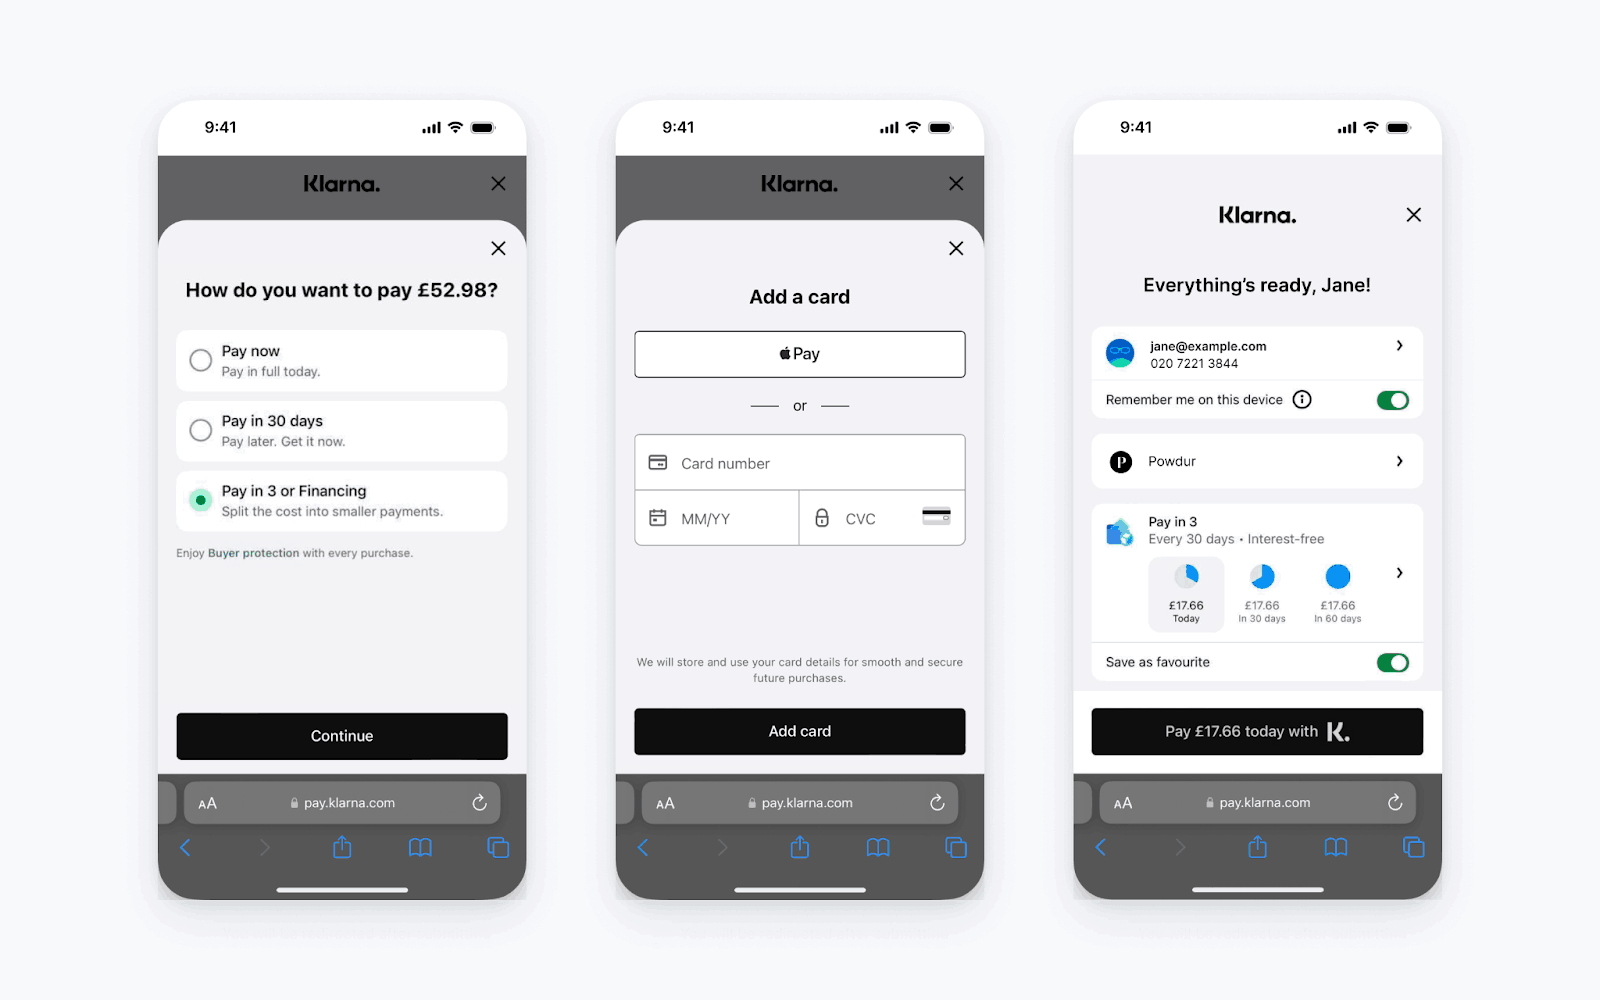
Completing the Klarna payment on PaymentIntents
Notable differences
- Klarna product selection: You don’t need to specify the Klarna product type in your integration. Instead, customers now choose a product on the Klarna redirect page. Don’t include a separate button on your checkout site for each supported Klarna payment option. Only include a single Klarna button.
- Klarna SDK inline display isn’t supported: Customers must now redirect to the Klarna site from your payment page to authorize the payment. As a result, you don’t need to load the Klarna SDK or render any inline components.
- Payment confirmation is synchronous in all markets: Previously, confirmation of a successful payment was asynchronous in some cases. Now, you can detect whether the payment is successful immediately after your customer authorizes it.
Caution
If you currently use a plugin for your Stripe integration, the plugin developer must migrate their plugin to use PaymentMethods and PaymentIntents. Reach out to them to understand if there are any changes you need to make to your Stripe or plugin settings.
Migrate your payment flow
To migrate your Klarna integration for web payments, you need to update your server and frontend to use the PaymentIntents API. There are three typical integration options:
- Redirect to Stripe Checkout for your payment flow.
- Use the Stripe Payment Element on your own payment page.
- Build your own form and use the Stripe JS SDK to complete the payment.
Use Stripe Checkout or the Payment Element to add and manage most payment methods from the Stripe Dashboard without making code changes.
Below is a high level comparison of the old integration steps with the new integrations:
| Old integration | Stripe Checkout | Payment Element | Own form |
|---|---|---|---|
Low complexity | Medium complexity | High complexity | |
| Create a Source on the frontend or on the server | Create a Checkout Session on the server | Create a PaymentIntent on the server | Create a PaymentIntent on the server |
Load the Klarna widget with the Klarna SDK to authorize the payment OR Redirect to Klarna to authorize the payment | Not needed | Pass the client secret to the frontend and use the Stripe JS SDK to render a Payment Element to complete the payment. | Pass the client secret to the frontend. Use your own form to collect additional details from your customer and use the Stripe JS SDK to redirect to Klarna |
| Confirm the source is chargeable and charge the Source | Not needed | Not needed | Not needed |
Confirm the Charge succeeded asynchronously with the charge. webhook | Confirm the Checkout session succeeded with the payment_ webhook | Confirm the PaymentIntent succeeded with the payment_ webhook | Confirm the PaymentIntent succeeded with the payment_ webhook |
Caution
A PaymentIntent is the object that represents a payment in the new integration, and it creates a Charge when you confirm the payment on the frontend. If you previously stored references to the Charge in your databases, you can continue to do so by fetching the Charge ID from the PaymentIntent after the customer completes the payment. However, we also recommend that you store the PaymentIntent ID.
Option 1: Use a Checkout Session
Stripe Checkout is a low-code hosted payment solution that can accept Klarna payments, as well as a variety of other payment methods supported by Stripe. If you currently have a payment page hosted on your site and instead want to use Stripe Checkout, do the following:
- Make sure Klarna is enabled in your Dashboard.
- Create a Checkout Session on your server. You can either explicitly set
klarnaas one of thepayment_, or use dynamic payment methods.method_ types - If you sell physical goods, enable shipping address collection or include the shipping address in the
shipping_hash.details - Redirect to the Session URL when the customer is ready to pay.
Option 2: Use the Payment Element
Stripe Payment Element is a single embedded UI component for your payment page that supports Klarna as well as other payment methods. It provides many of the features of Stripe Checkout, but displayed on your own payment page. To use the Payment Element, do the following:
- Make sure that Klarna is enabled in your Dashboard.
- Create a PaymentIntent on your server.You can explicitly enable Klarna by setting it as one of the payment_method_types.
- Pass the PaymentIntent client secret to the frontend and initialize the Stripe Elements UI library.
- Create a Payment Element and embed it on the page. This element automatically collects any additional fields needed for the payment method selected by the customer.
- Call confirmPayment on the Payment Element when the user submits their payment. Make sure that you pass a
return_.url
Option 3: Build your own form
You can build your own form components and complete a Klarna payment by using the Stripe JS SDK. Read more about the full integration. To integrate in this method, do the following:
- Make sure that Klarna is enabled in your Dashboard.
- Create a PaymentIntent on your server.If you don’t want to manage payment methods through the Dashboard, you can explicitly enable Klarna by setting it as one of the payment_method_types.
- Use a form to collect your customer’s email and billing country.
- Initialize Stripe.JS on your payment page and call
confirmKlarnaPaymentwith the PaymentIntent’s client secret when the customer is ready to authorize the payment. Make sure that their email and billing country are in thebilling_anddetails[email] billing_fields.details[address][country]
Field mapping reference
If you use the Payment Element or your own form, you must remap the fields previously on the Source to the PaymentIntent. The table below is a mapping of the old fields to the new fields. If you sell physical goods, we recommend that you pass shipping details. All other fields are optional, and Klarna collects necessary additional information on their page.
| Old Source field | New PaymentIntent field | Note |
|---|---|---|
| Required fields | ||
type | payment_ | This is an array on PaymentIntents. Set klarna as one of the elements of the array if you manually list payment methods. |
amount | amount | |
currency | currency | |
owner[email] | payment_ | Not required when using the Payment Element. It’s collected automatically. |
owner[address][country] | payment_ | Not required when using the Payment Element. It’s collected automatically. |
| Recommended if you sell physical goods | ||
klarna[shipping_ | shipping[name] | Provide both first and last name as a single whitespace separated string. |
klarna[shipping_ | shipping[name] | Provide both first and last name as a single whitespace separated string. |
order[shipping][address] | shipping[address] | See API reference for components. |
order[shipping][carrier] | shipping[carrier] | |
order[shipping][tracking_ | shipping[tracking_ | |
order[shipping][phone] | shipping[phone] | |
| Other optional fields | ||
klarna[purchase_ | payment_ | |
klarna[first_ | payment_ | Optional. Provide both first and last name as a single whitespace separated string. |
klarna[last_ | payment_ | Optional. Provide both first and last name as a single whitespace separated string. |
| No longer required | ||
klarna[product] | Not applicable on PaymentIntents. Customers choose the Klarna product when they authorize the payment on Klarna’s site. | |
klarna[shipping_ | Not applicable. If you expect a shipping delay, use separate auth and capture to capture the payment only after the product has shipped. | |
source_ | No longer required. | |
Caution
If you currently use the klarna[attachment] parameter or the order[items] parameter on the Source, then we will contact you with details about these parameters.
After the purchase
The following changes are required for any integration points you have after a payment has completed.
Checking payment status
Previously, your integration should have checked both the status of the Source and the status of the Charge after each API call. You no longer need to check two statuses—you only need to check the status of the PaymentIntent or the Checkout Session after you confirm it on the frontend.
| payment_intent.status | Meaning | Note |
|---|---|---|
succeeded | The payment succeeded. | |
requires_ | The payment failed. | |
requires_ | The customer hasn’t completed authorizing the payment on Klarna’s site. | If the customer doesn’t complete the payment within 48 hours, then the PaymentIntent transitions to requires_payment_method and you can retry the confirmation. |
Always confirm the status of the PaymentIntent by fetching it on your server or listening for the webhooks on your server. Don’t rely solely on the user returning to the return_ that’s provided when you confirm the PaymentIntent. Learn more about handling post-payment events.
Refunds
You can continue to call the Refunds API with a Charge that the PaymentIntent creates. The ID of the Charge is accessible on the latest_ parameter. Alternatively, you can provide the PaymentIntent ID to the Refunds API instead of the Charge.
Error handling
Previously, you had to handle errors on the Sources were created. In PaymentIntents, you don’t need to check for errors on a Source, and instead need to check for errors on the PaymentIntent when it’s created and after the customer has authorized the payment. Most errors on the PaymentIntent are on the type field returned in an invalid request.
| Old error code when creating Source | New error type when creating or confirming the PaymentIntent | Note |
|---|---|---|
payment_ | invalid_ | |
processing_ | invalid_ | |
missing_ | Not applicable. You don’t need to provide the items sold when creating the PaymentIntent. | |
country_ | invalid_ | |
country_ | invalid_ | |
invalid_ | invalid_ | |
invalid_ | invalid_ | |
invalid_ | Not applicable. This field isn’t required and is collected by Klarna on their page. | |
invalid_ | Not applicable. This field isn’t required and is collected by Klarna on their page. |
Webhooks
If you previously listened to Source events, you might need to update your integration to listen to new event types. Below is a reference of the new event types to listen for.
| Old webhook | New webhook on Checkout | New webhook on PaymentIntents | Note |
|---|---|---|---|
source. | Not applicable | Not applicable | |
source. | Not applicable | Not applicable | |
source. | Not applicable | Not applicable | |
charge. | checkout. | payment_ | The charge. webhook is also sent, so you don’t have to update your integration to listen to the new webhook. |
charge. | Not applicable - The customer can re-attempt the payment on the same Checkout Session until it expires, at which point you’ll receive a checkout. event | payment_ | The charge. webhook is also sent, so you don’t have to update your integration to listen to the new webhook. |
charge. | charge. | charge. |