直接小売業の対面決済を受け付ける
対面ビジネスのカード決済を受け付ける方法をご紹介します。
このガイドでは、Stripe 導入を設定して、対面 POS システムで決済を受け付ける方法について説明します。
一般的な対面決済では、サーバー主導の導入を使用する Stripe リーダー S700 をお勧めします。このガイドの手順では、このリーダーと導入の組み合わせを使用します。
はじめに
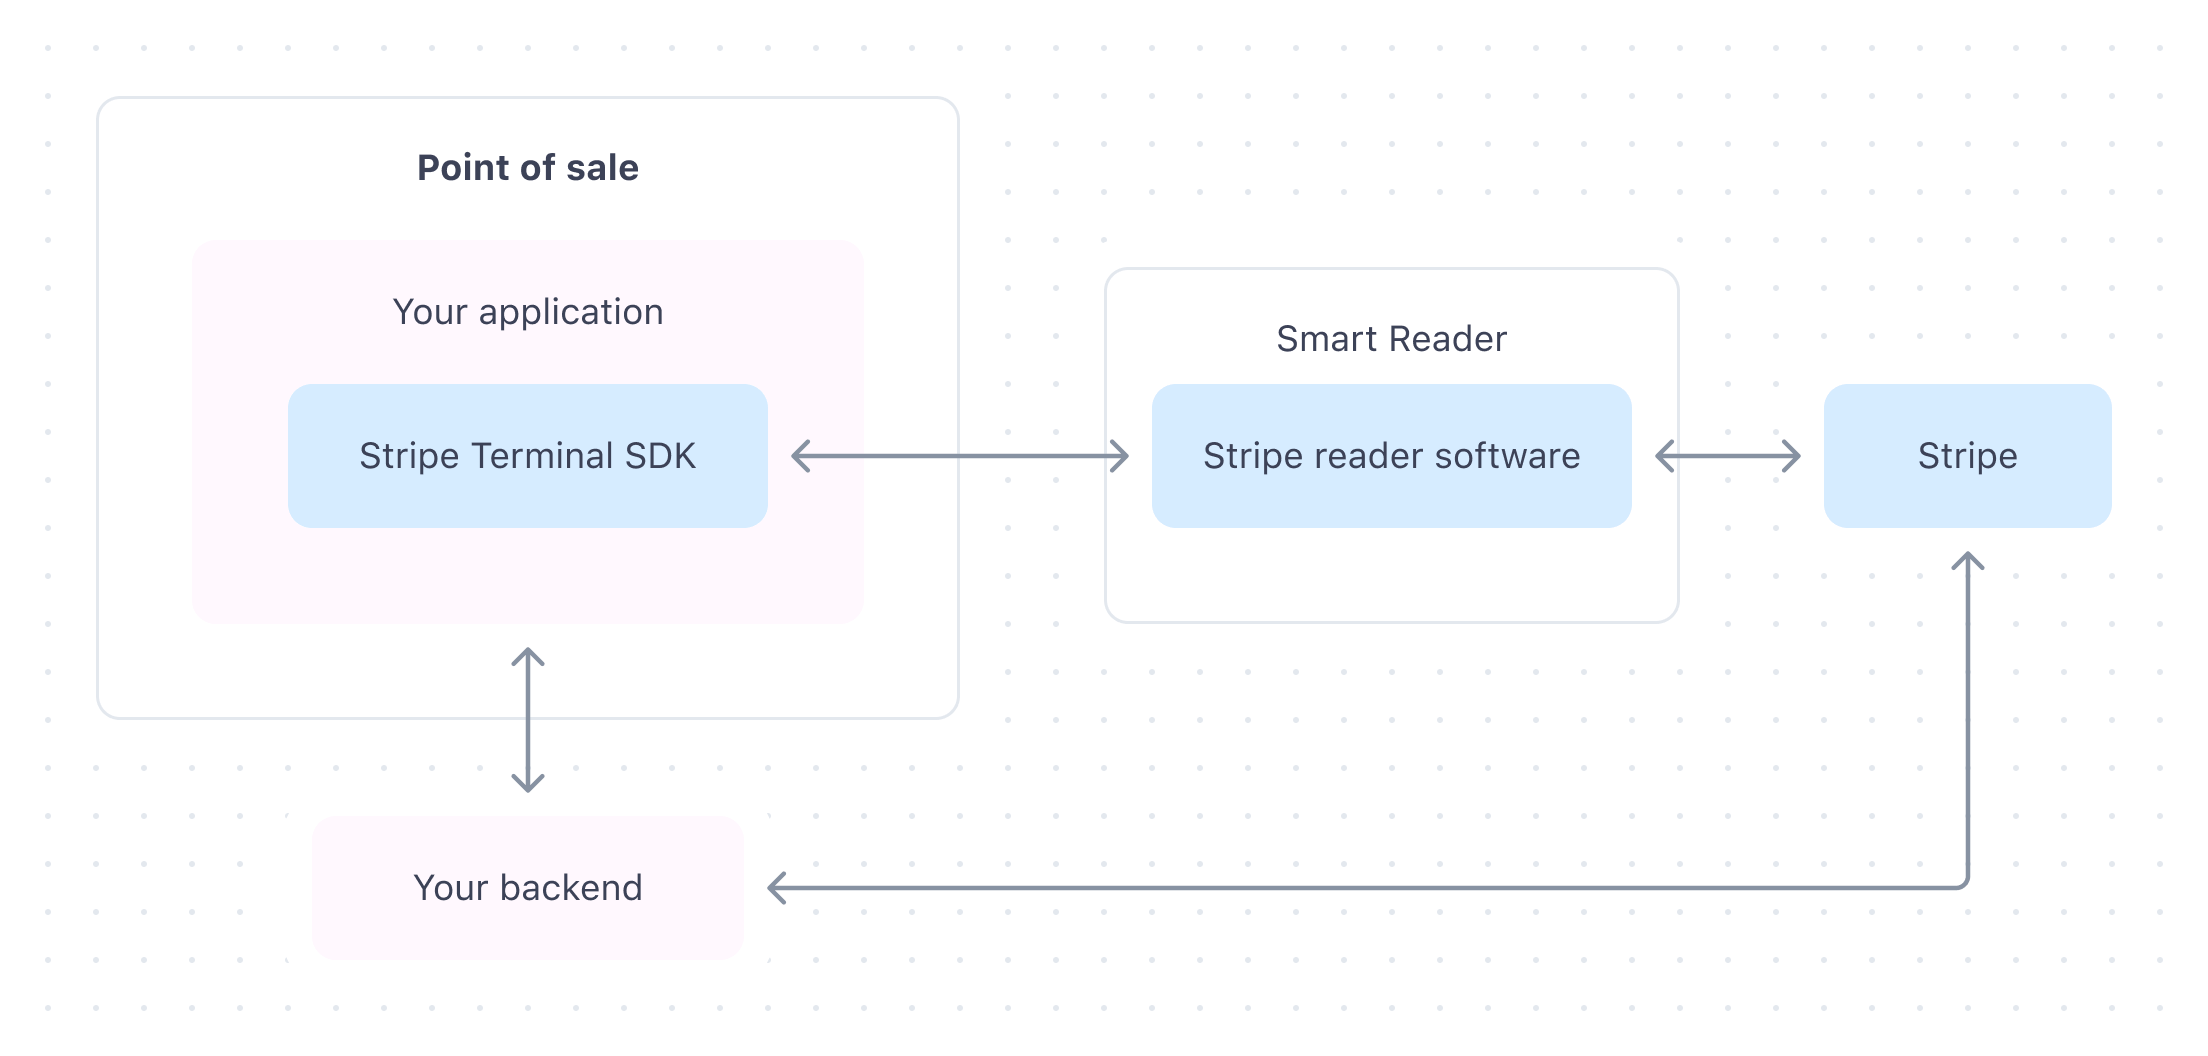
サーバー主導型の導入では、Stripe API を使用してスマートリーダーと直接通信します。バックエンドサーバーが API コールを行い、決済を作成してリーダーを制御します。
導入するには、以下が必要です。
- Stripe アカウント
- Stripe API にリクエストできるバックエンドサーバー
- Stripe S700 リーダー
- (オプション)テスト用のテストカード

リーダーを設定
カードリーダーを受け取ったら、その店舗に登録する必要があります。シリアル番号を使用してリーダーを登録すると、開梱後すぐにリーダーを使用できます。この方法では、リーダーを物理的に登録しなくても、リーダーを再登録してペアリングコードを生成できます。
リーダーを開梱したら、Ethernet (ドックが必要) または WiFi を使用してリーダーをインターネットに接続する必要もあります。接続要件を満たしていることを確認してください。
リーダーを登録する
シリアル番号を見つけたら、ダッシュボードでリーダーを登録します。
- ダッシュボードで、ハードウェア注文ページに移動し、リーダーを選択してリーダーのシリアル番号を確認します。
- リーダーページで、リーダーを登録 をクリックします。
- シリアル番号を入力して、次へ をクリックします。複数のデバイスを一度に登録するには、複数のシリアル番号をカンマで区切って入力します。
- 任意でリーダーの名前を選択します。
- すでに場所を作成している場合は、リーダーの新しい場所を選択します。まだ作成していない場合は、 + 新規追加 をクリックして実際の動作場所を表す場所を作成します。
- 登録する をクリックしてリーダーの登録を完了します。
リーダーを登録したら、サーバー主導型の導入で使用できるようになります。POS からどのリーダーに取引を送信すべきかが分かるように、場所またはリーダーのシリアル ID でフィルタリングして、リーダーをリストするエンドポイントを使用してリーダー ID を取得できます。
決済フローを作成する
Stripe Terminal で決済を回収するには、アプリケーションに決済フローを作成する必要があります。Stripe Terminal SDK を使用して、1 つの Checkout セッションを表すオブジェクトである PaymentIntent を作成して更新します。
- PaymentIntent を作成します。決済を自動キャプチャーするか、手動キャプチャーするかを定義できます。
- 決済処理します。顧客のクレジットカードのオーソリは、リーダーが決済を処理するときに行われます。
- Webhook イベント
terminal.とreader. action_ succeeded terminal.を調べて、決済が回収され、オーソリされたことを確認します。reader. action_ failed - (任意) PaymentIntent をキャプチャーする。
実装内容をテストする
テスト用の法人カード
物理テストクレジットカードを使用して、Stripe Terminal リーダーで Payments をテストします。Stripe ダッシュボードの Terminal タブからリーダーと物理テストカードを購入できます。B2 などのプロバイダーの物理テストカードもサポートしています。
このテスト用の法人カードは、チップ型および非接触型のどちらの決済にも対応しています。Stripe の認証済みリーダーで、サンドボックスの Stripe API に対してのみ機能します。テスト用の法人カードを本番環境で使用しようとすると、Stripe API はエラーを返します。特に記載がない限り、要求された場合は PIN 1234 を使用してください。
テスト用の物理クレジットカードを使用して決済を作成する際は、末尾が以下の値になる金額を使用して特定のレスポンスを生成します。
| 小数 | 結果 |
|---|---|
| 00 | 支払いは承認されます。 |
| 01 | 支払いは call_ コードで拒否されます。 |
| 02 | カード保有者向けの画面を備えたリーダーを使用する場合、テストカードを挿入 (または、サポートされている場合はタップ) します。カードに PIN が必要な場合、支払いは offline_ で拒否され、リーダーがチップ型に対応していれば PIN の入力が要求されます。1234 を入力してテスト支払いを完了します。 |
| 03 | カード保有者向けの画面を備えたリーダーを使用する場合、テストカードを挿入 (または、サポートされている場合はタップ) します。カードで PIN が求められる場合、支払いは online_ で拒否され、PIN の入力が要求されます。任意の 4 桁の PIN を入力してテスト支払いを完了します。 |
| 05 | 支払いは generic_ コードで拒否されます。 |
| 55 | 支払いは incorrect_ コードで拒否されます。 |
| 65 | 支払いは withdrawal_ コードで拒否されます。 |
| 75 | 支払いは pin_ コードで拒否されます。 |
たとえば、物理的なテストカードを使用して処理された「25.00 USD」の支払いは成功しますが、「10.05 USD」の支払いは拒否されます。
Interac テストカード カナダのみ
Interac の導入をテストするには、シミュレーションされた interac テストカード、または 「Interac の物理テストカード」 を使用できます。このカードは、ダッシュボードの Terminal ハードウェアショップで注文できます。Stripe ブランドの物理テストカードは、Interac クレジットカードとして使用できません。
Interac テストカードは、interac_ 支払いと interac_ 返金の両方で機能します。card_ 支払いをテストする際に使用するのと同じテスト金額を使用できます。特に記載がない限り、要求された場合は PIN 1234 を使用してください。拒否された返金をテストするには、末尾が 01、05、55、65 または 75 の金額で一部返金を作成します。
メモ
Interac テストカードは、非接触型決済に対応していません。
eftpos テストカード オーストラリアのみ
eftpos の導入をテストするには、シミュレーションされた eftpos テストカード、または _eftpos の物理テストカード _ を使用できます。このカードは、ダッシュボードの Terminal ハードウェアショップで注文できます。Stripe ブランドの物理テストカードは、eftpos カードとして使用できません。
card_ 支払いをテストする際に使用するのと同じテスト金額を使用できます。特に記載がない限り、要求された場合は PIN 1234 を使用してください。
本番環境へ移行
- ダッシュボードで、アカウント設定を開きます。
- 事業形態、税務情報、ビジネス情報、個人確認情報、顧客向け情報 (明細書表記など) を入力します。
- 銀行口座の詳細を追加して、資金の入金先を確認します。
- アカウントを保護するための二段階認証を設定します。
- オプションで、税金の自動回収や収入ベースの気候変動対策への寄付を追加できます。
- 入力した情報をレビューし、同意して送信する をクリックします。
- プロファイルを有効にすると、Stripe はサンドボックス環境から本番環境に更新します。
Stripe アカウントの本番環境利用の申請についてリンクからご覧ください。
次のステップ
導入を設定したら、次の機能を実装することを推奨します。
- Create physical or digital receipts for your customers.
- リーダーまたは領収書でチップを収集します。