Consolidate your SSO integrations
Consolidate single sign-on (SSO) settings across multiple accounts.
Use Stripe Organisations to create a centralised organisation for managing and operating across multiple Stripe accounts. If you’ve configured single sign-on (SSO) for user authentication, make sure that all your Stripe accounts share the same SSO integration before onboarding into an Organisation. Whether you use Organisations or not, we recommend consolidating SSO integrations.
This guide outlines the process of consolidating SSO integrations across multiple accounts. You must consolidate multiple Okta apps (that each authenticate users to a separate Stripe account) to a single Okta app that authenticates users to multiple Stripe accounts. If you’ve already consolidated your SSO integrations, or initially set up Okta as a single integration with multiple accounts, you don’t need to take any additional steps.
This consolidation doesn’t require any changes to your group assignments or downtime for users that log into Stripe.
Configure one Organisation per identity provider application
When you set up SSO for multiple Organisations, don’t reuse the same identity provider application for each one. Instead, configure one identity provider application for each Organisation.
Example SSO setup prior to consolidation
Follow this guide to learn how to consolidate SSO settings for multiple Stripe accounts that belong to a fictitious company called Acme Inc. Acme Inc has four Stripe accounts, each with a separate Okta app and SSO integration:
- Acme Financial
- Acme Travel
- Acme Insurance
- Acme Consulting
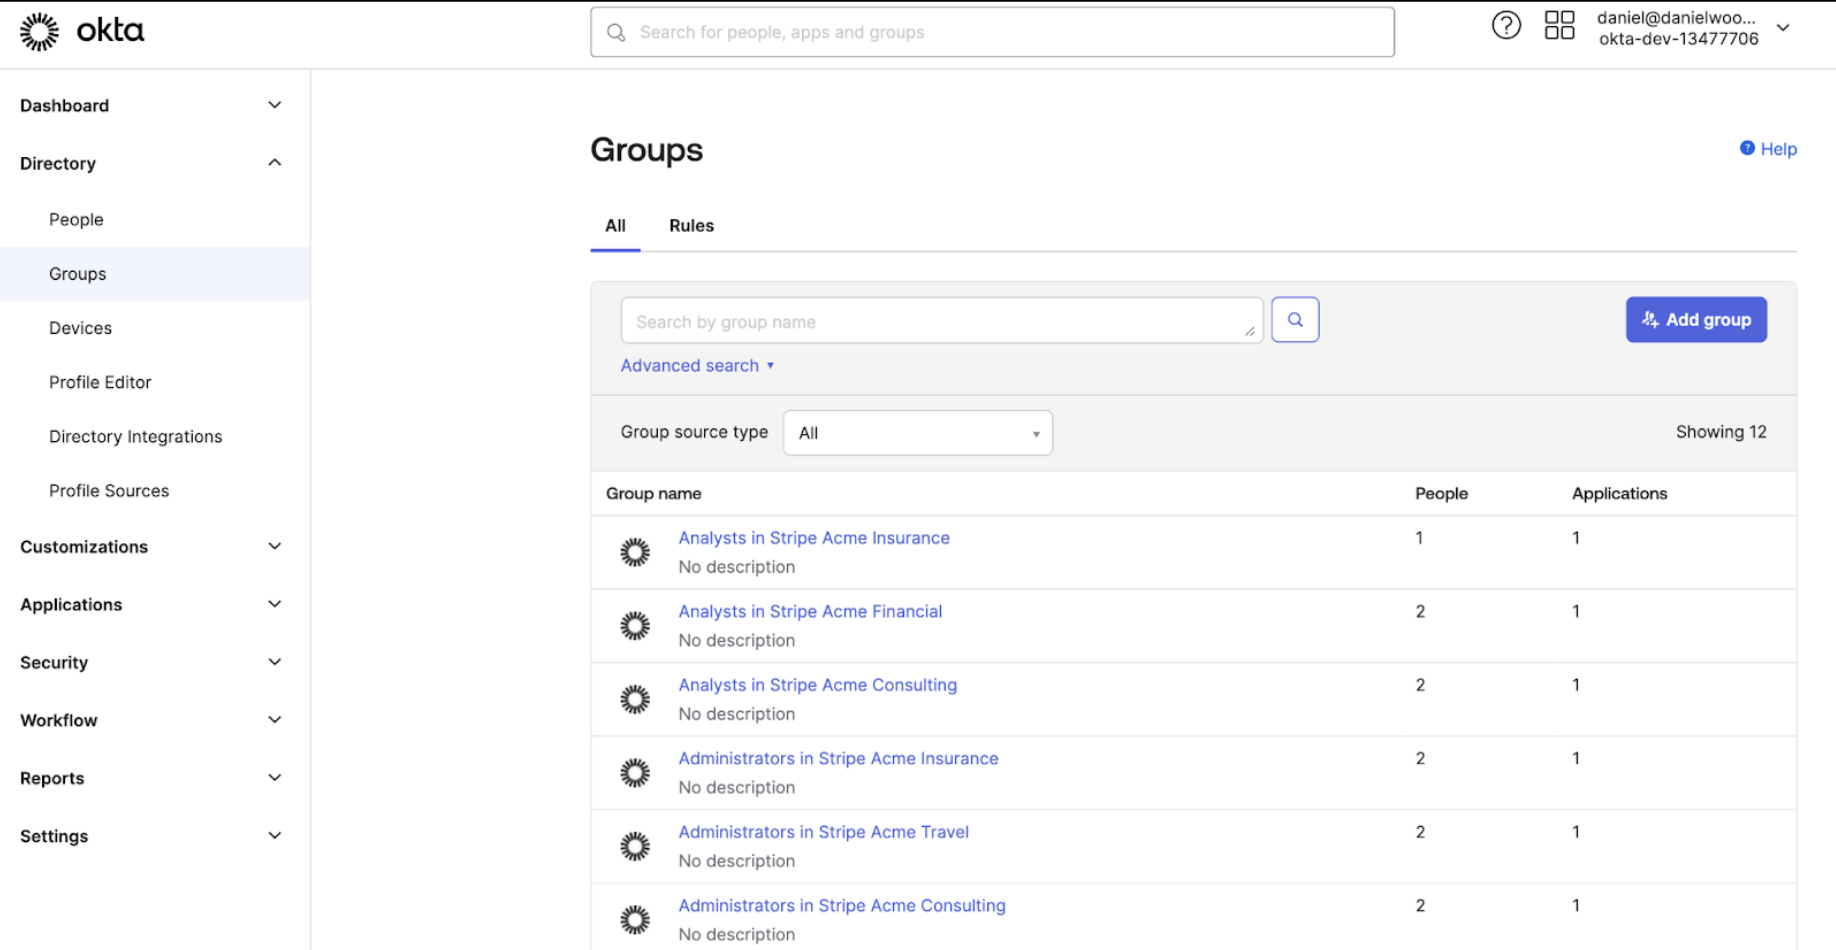
In Okta, Acme set up a separate group for each role users require in each Stripe account. For example:
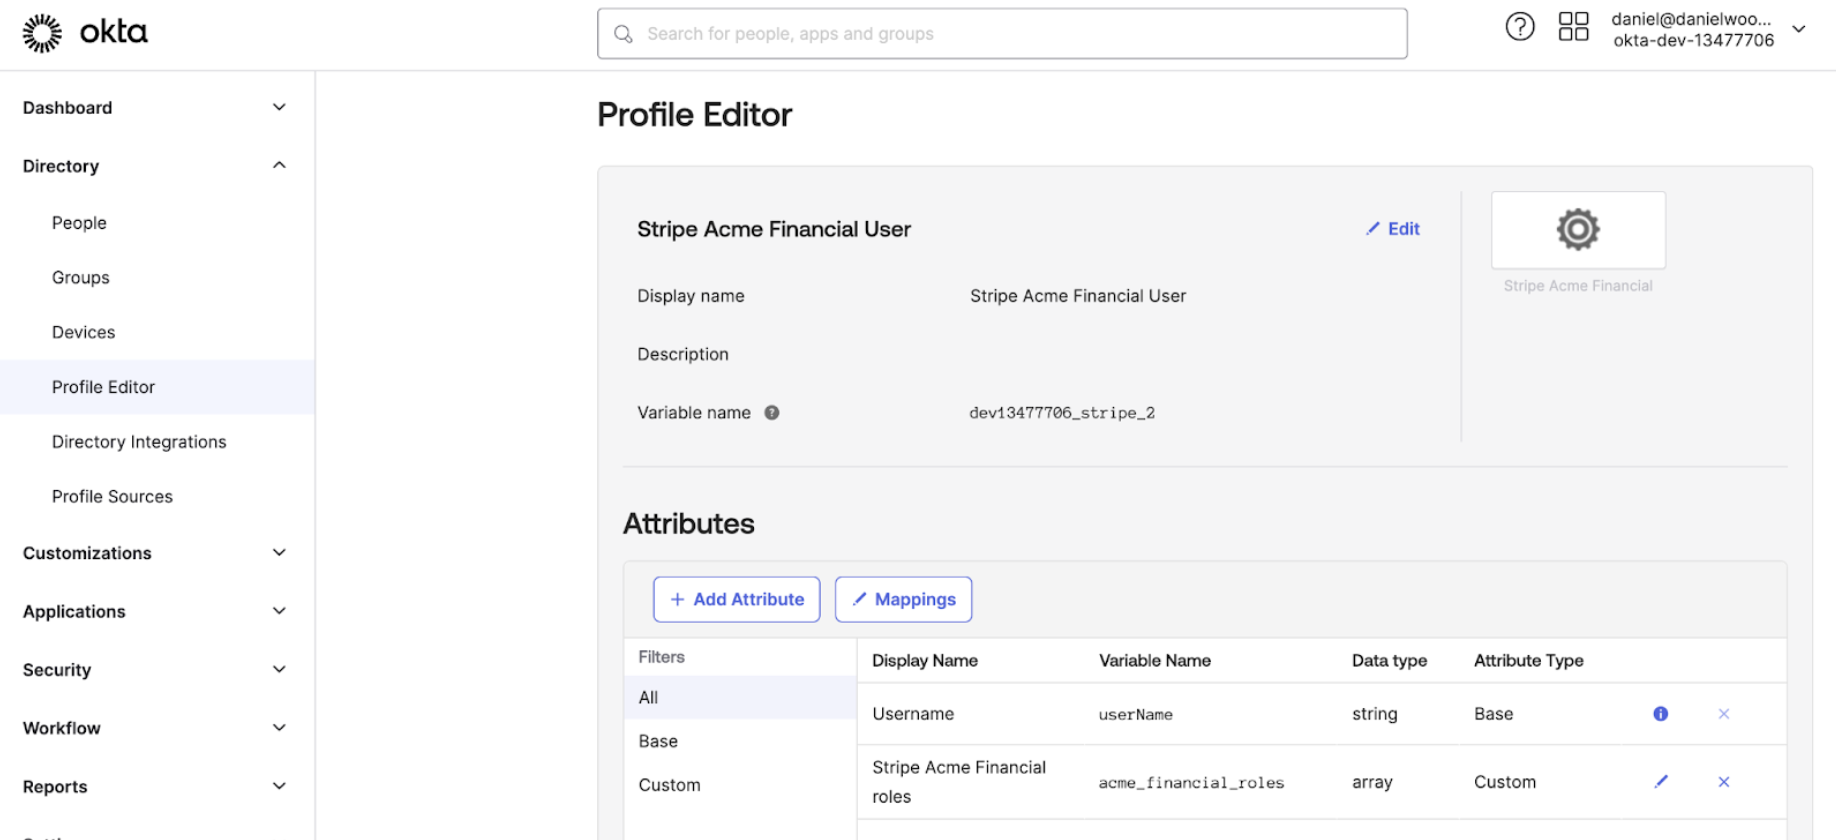
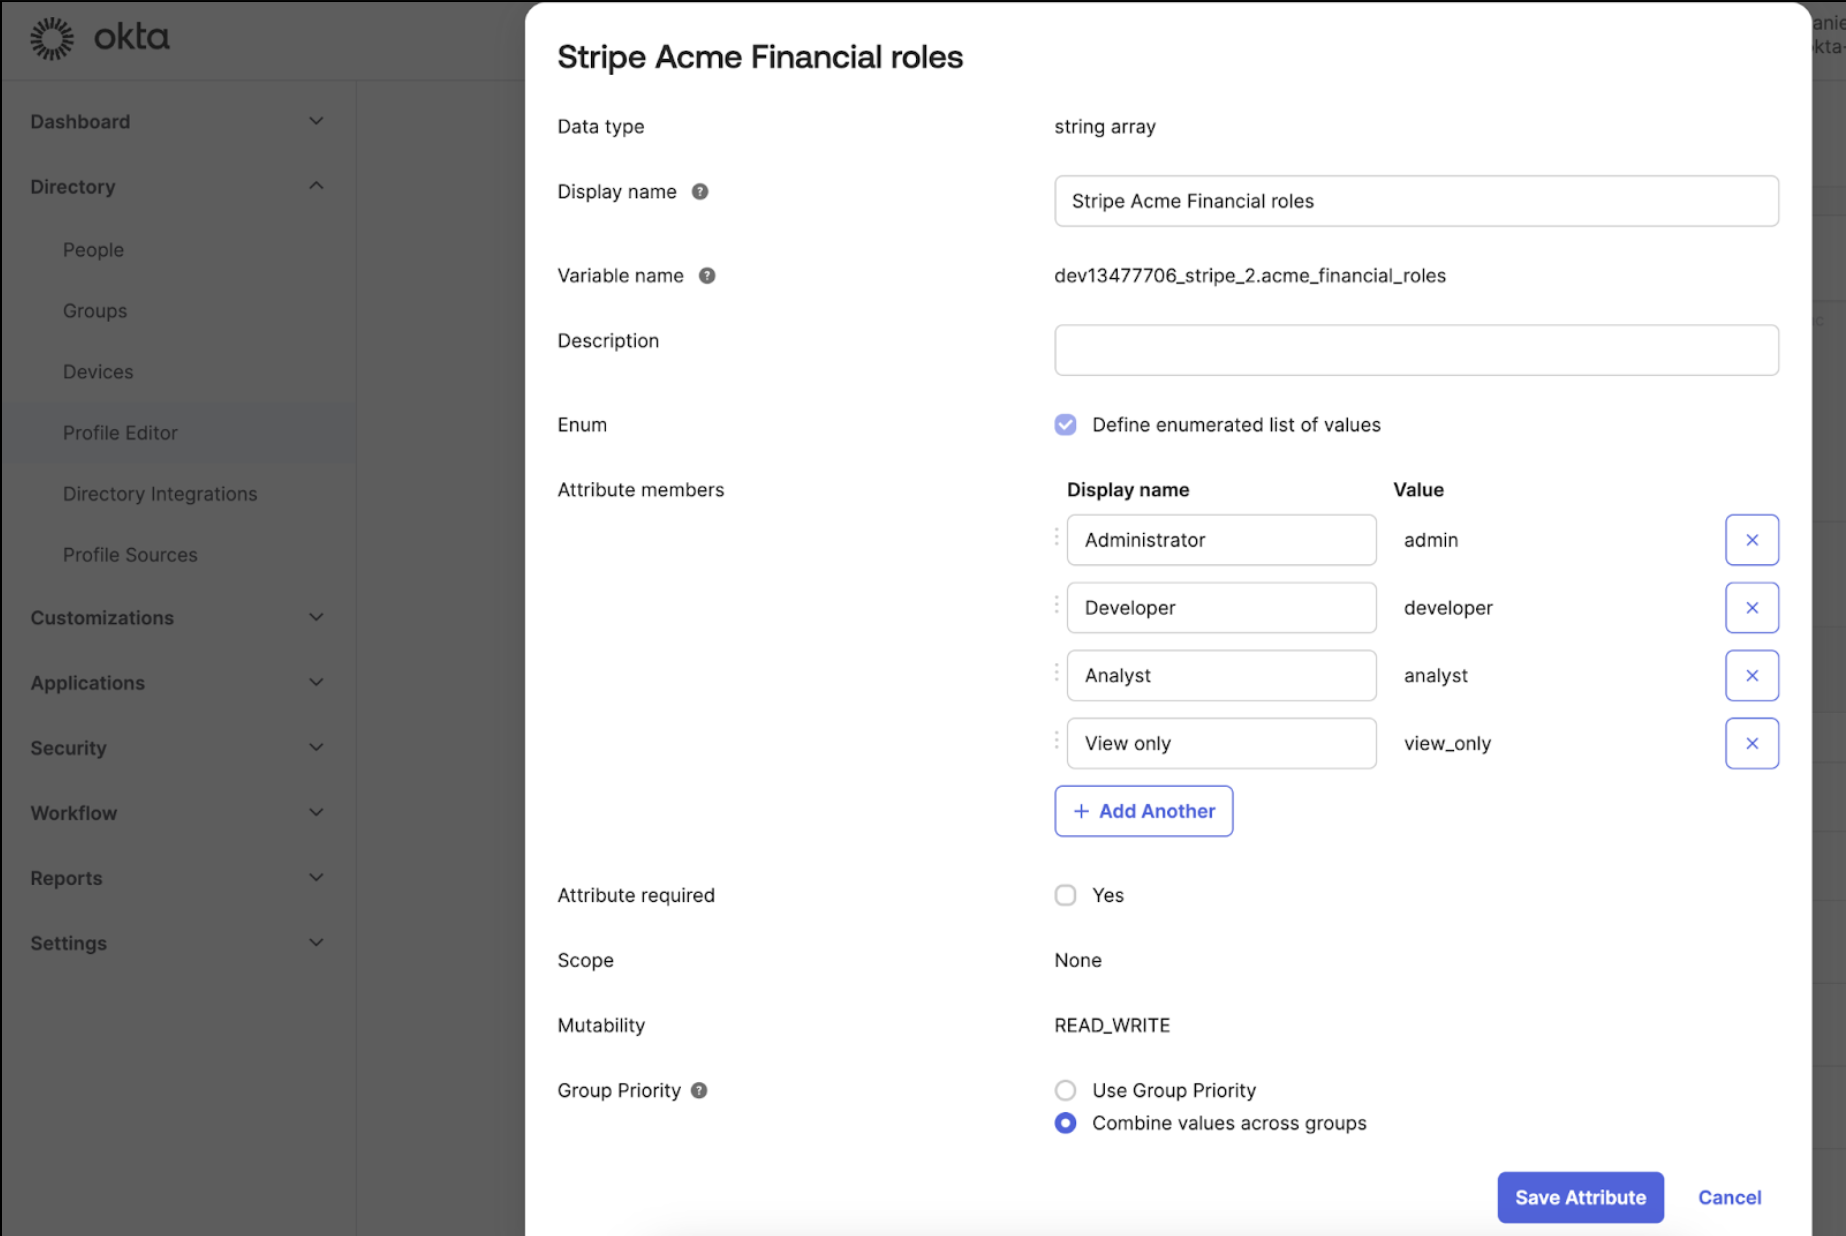
In the Profile Editor for each app, Acme created a mapping for the roles in each Stripe account:
Next, Acme created a separate Okta app for each Stripe account.
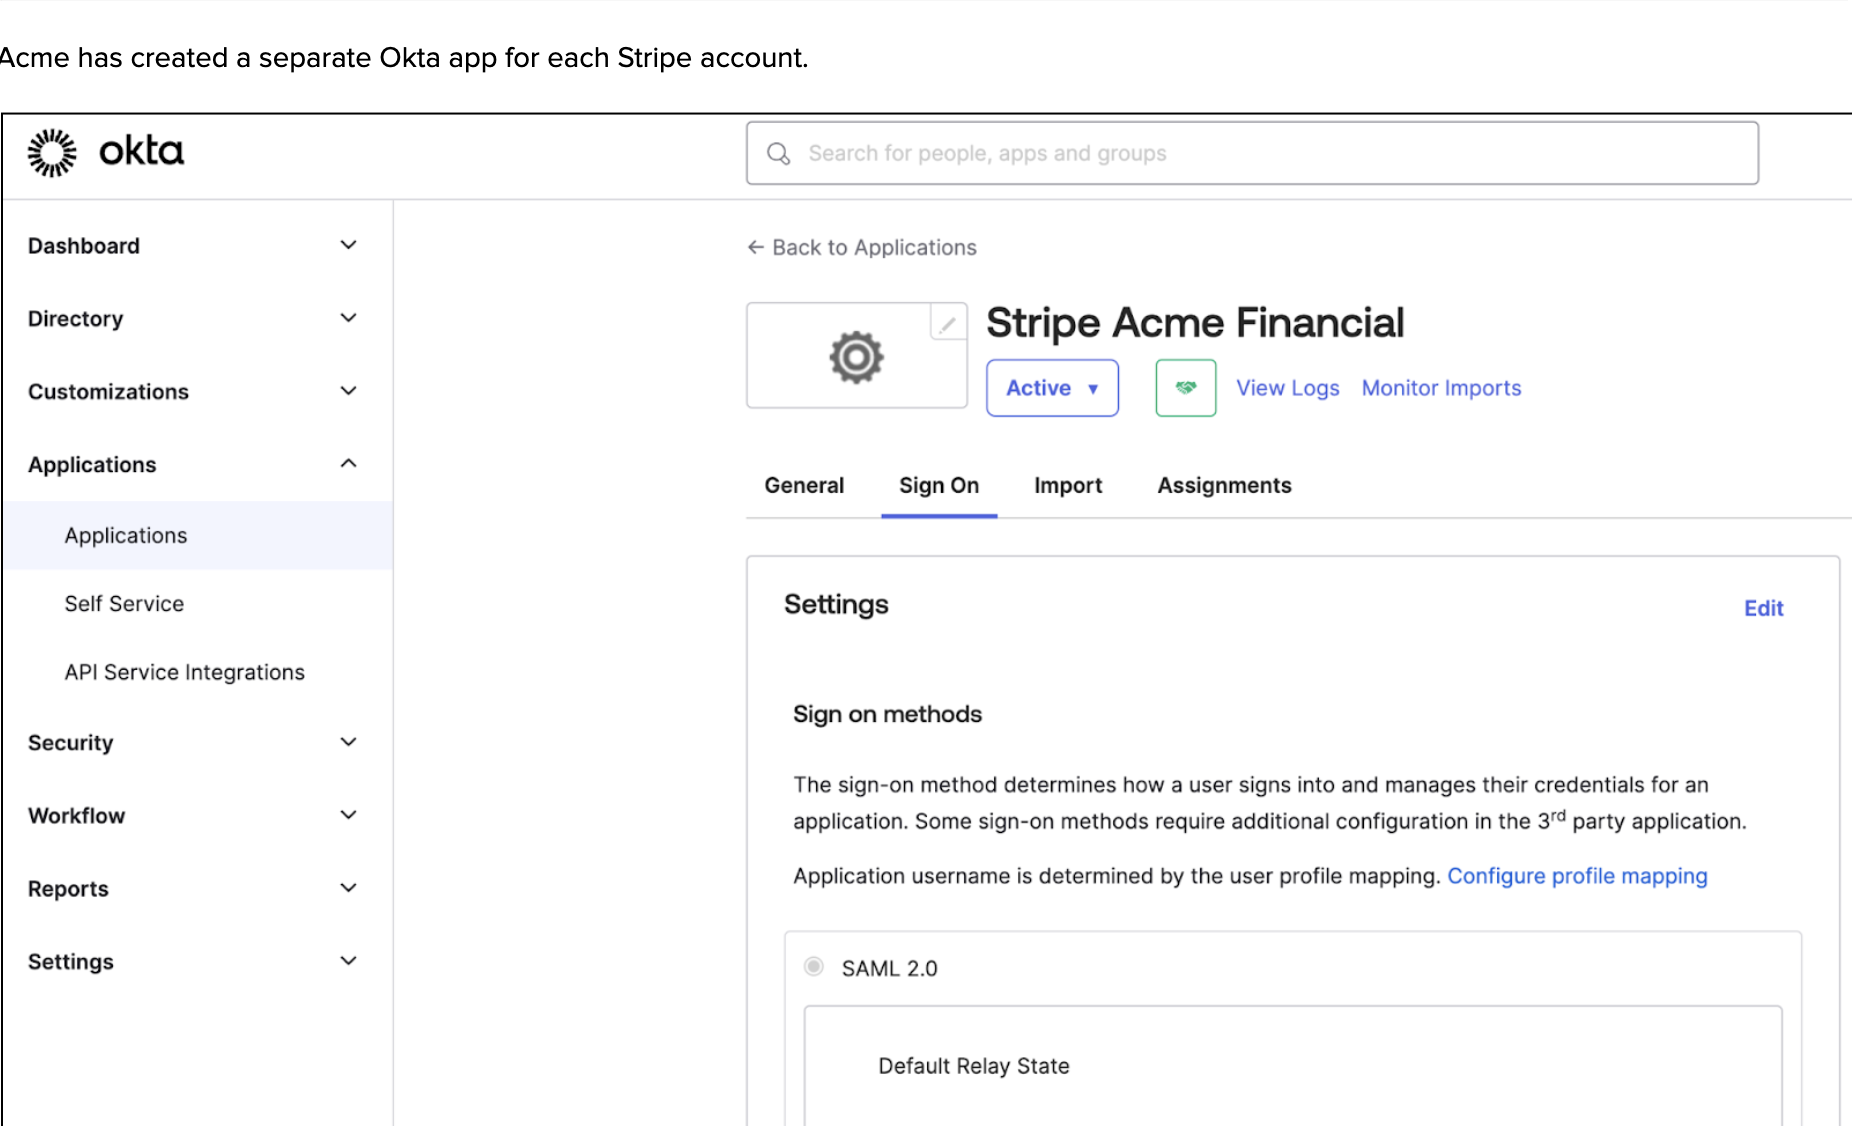
Each account contains one Attribute Statement, which defines the roles users have for that one Stripe account.
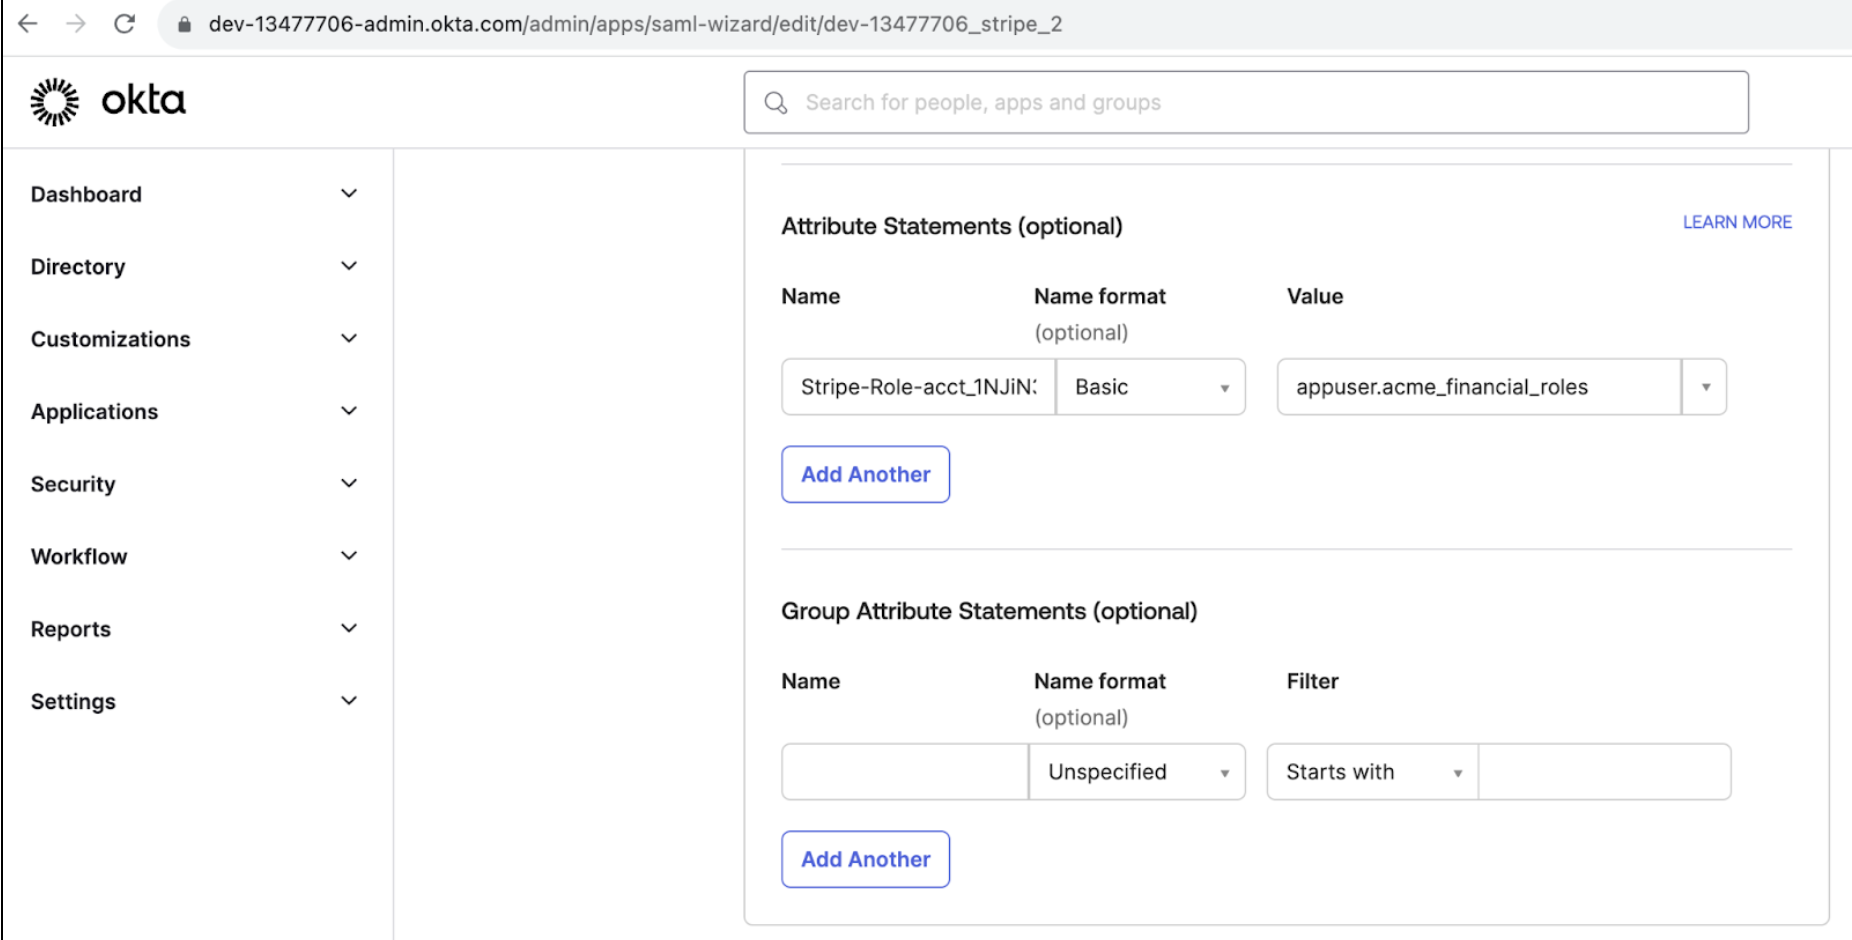
To onboard your accounts to Organisations, you can’t have separate Okta apps and SSO integrations for each Stripe account. You must consolidate these Okta apps into one Okta app for all accounts and preserve granular role assignments so that users can access specific accounts in Stripe.
Designate a primary Okta App
Choose one of your existing Okta apps to be the new primary Okta app.
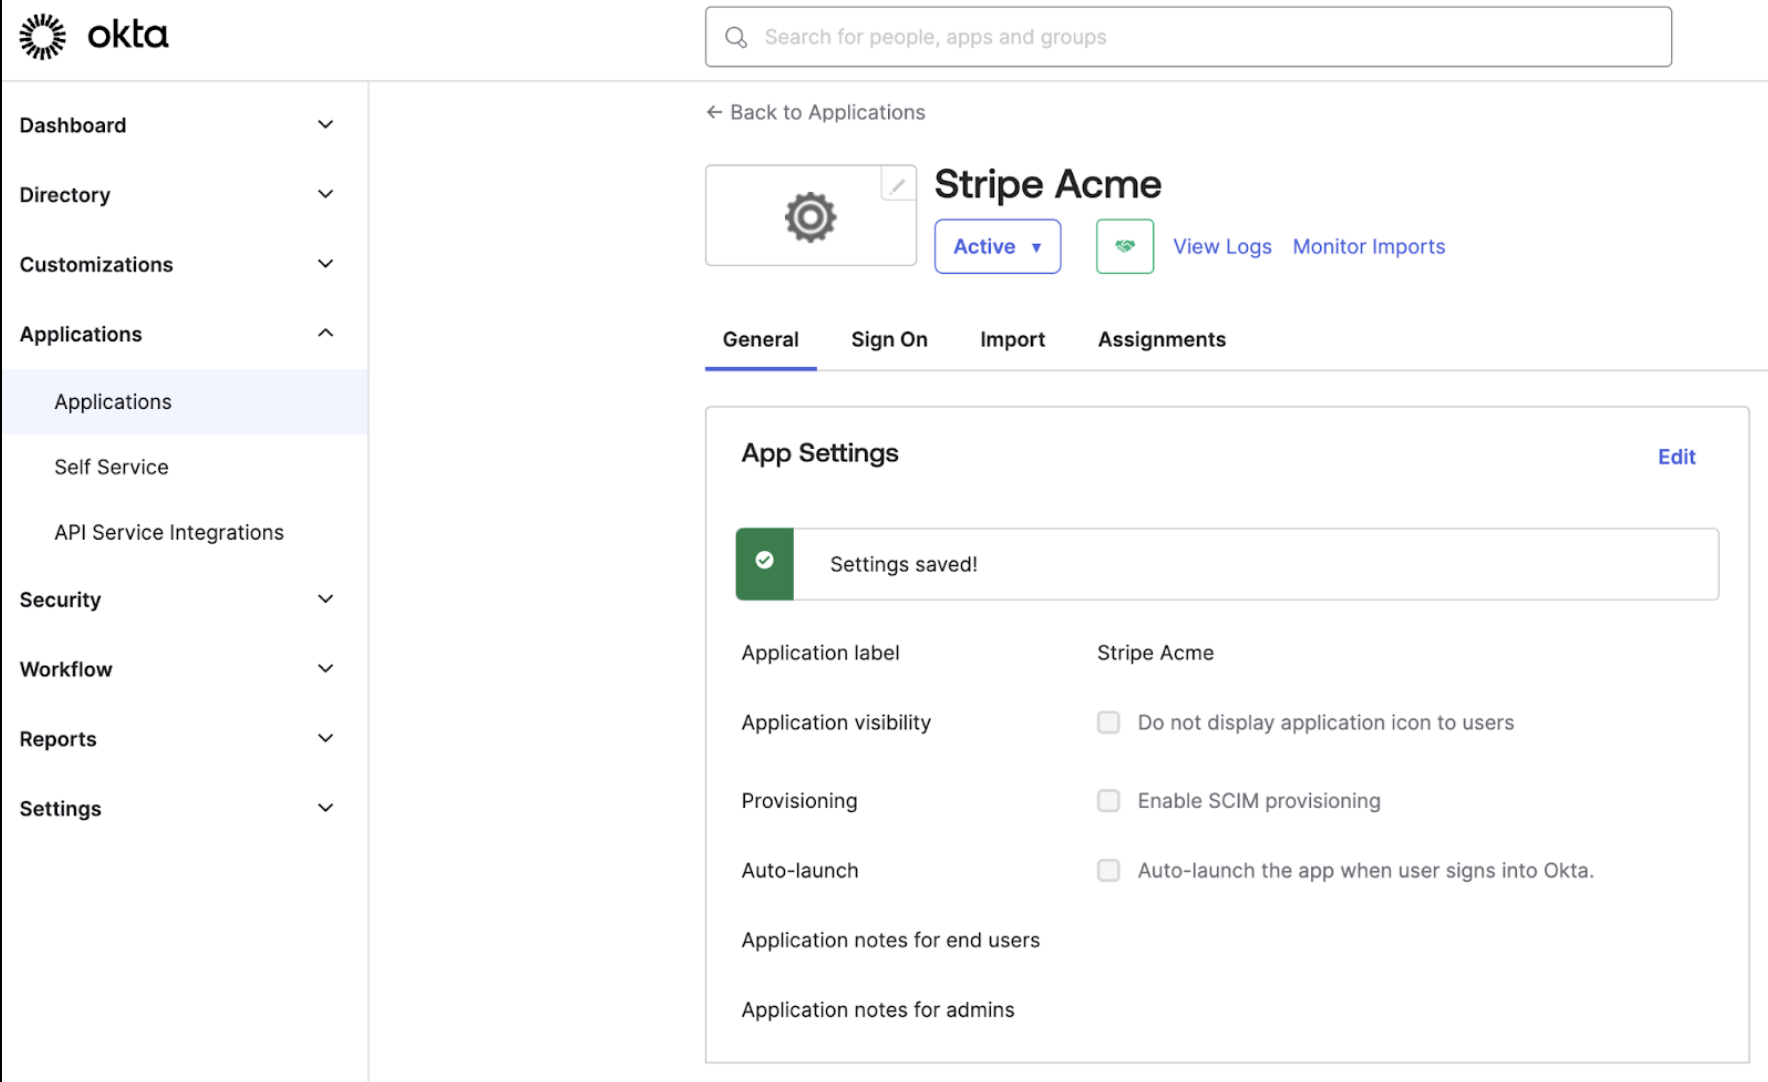
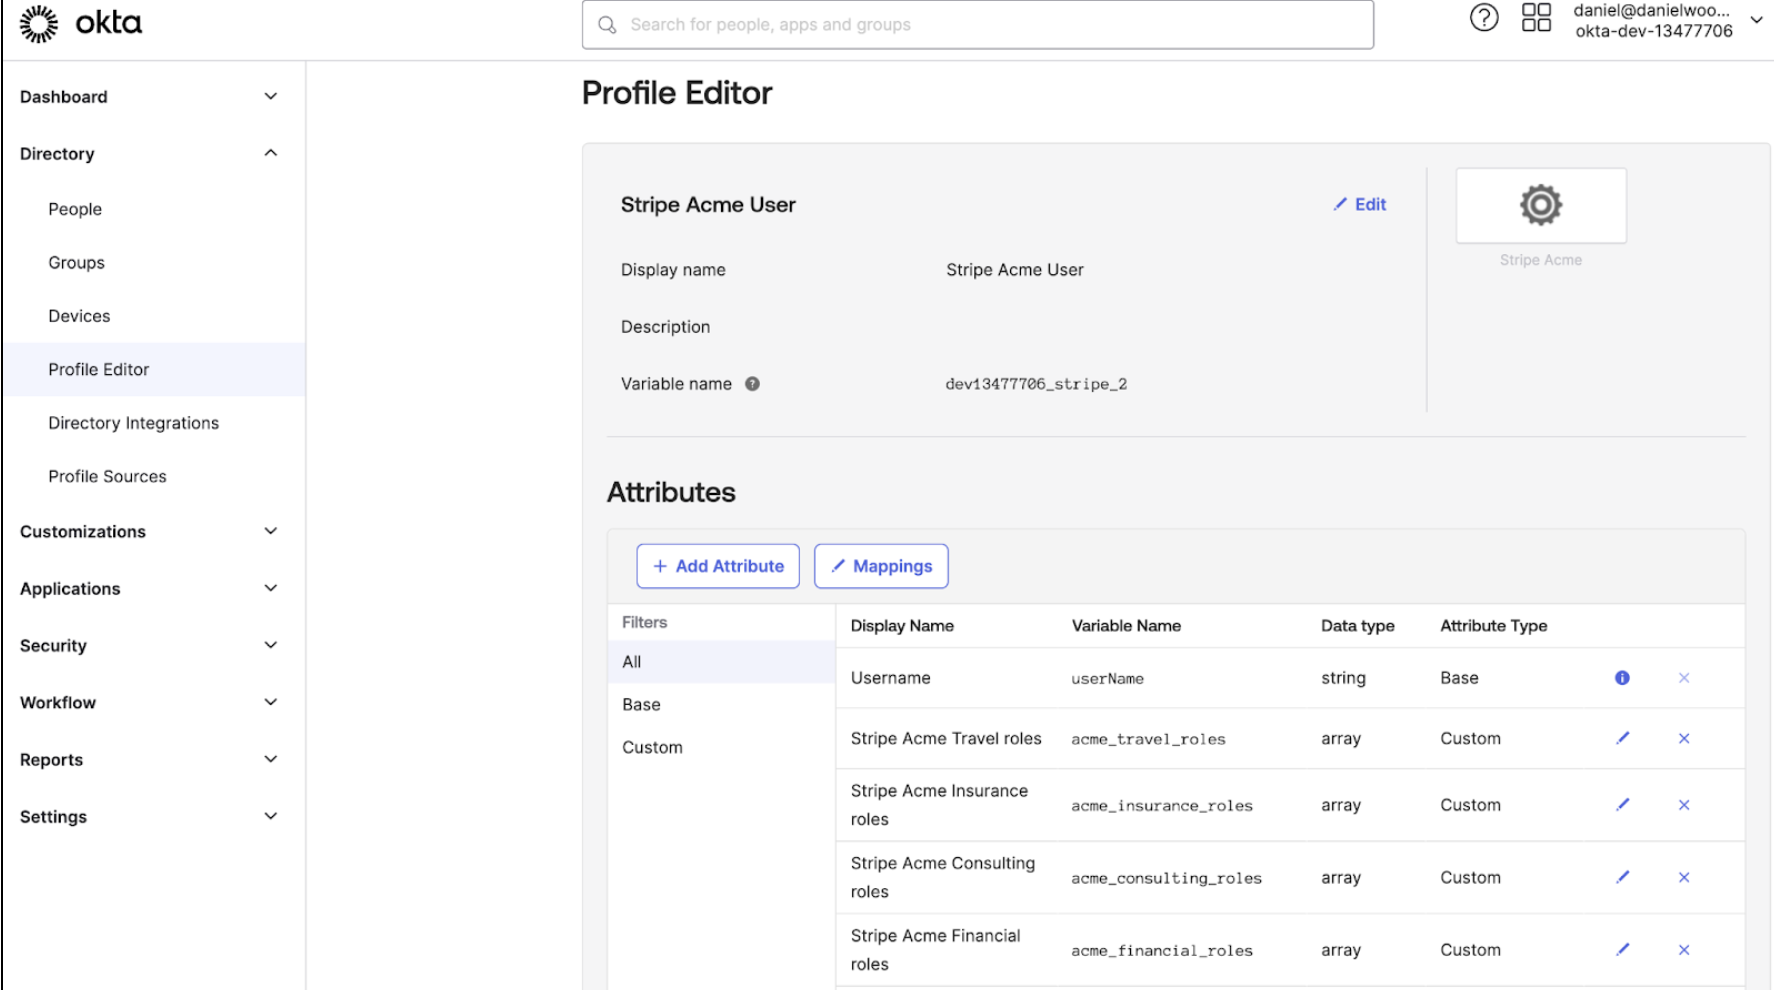
Add a new profile mapping of roles for each Stripe account
Create a new attribute mapping for each of your Stripe accounts. This allows you to choose which Stripe account users have access to when assigning each group to the app.
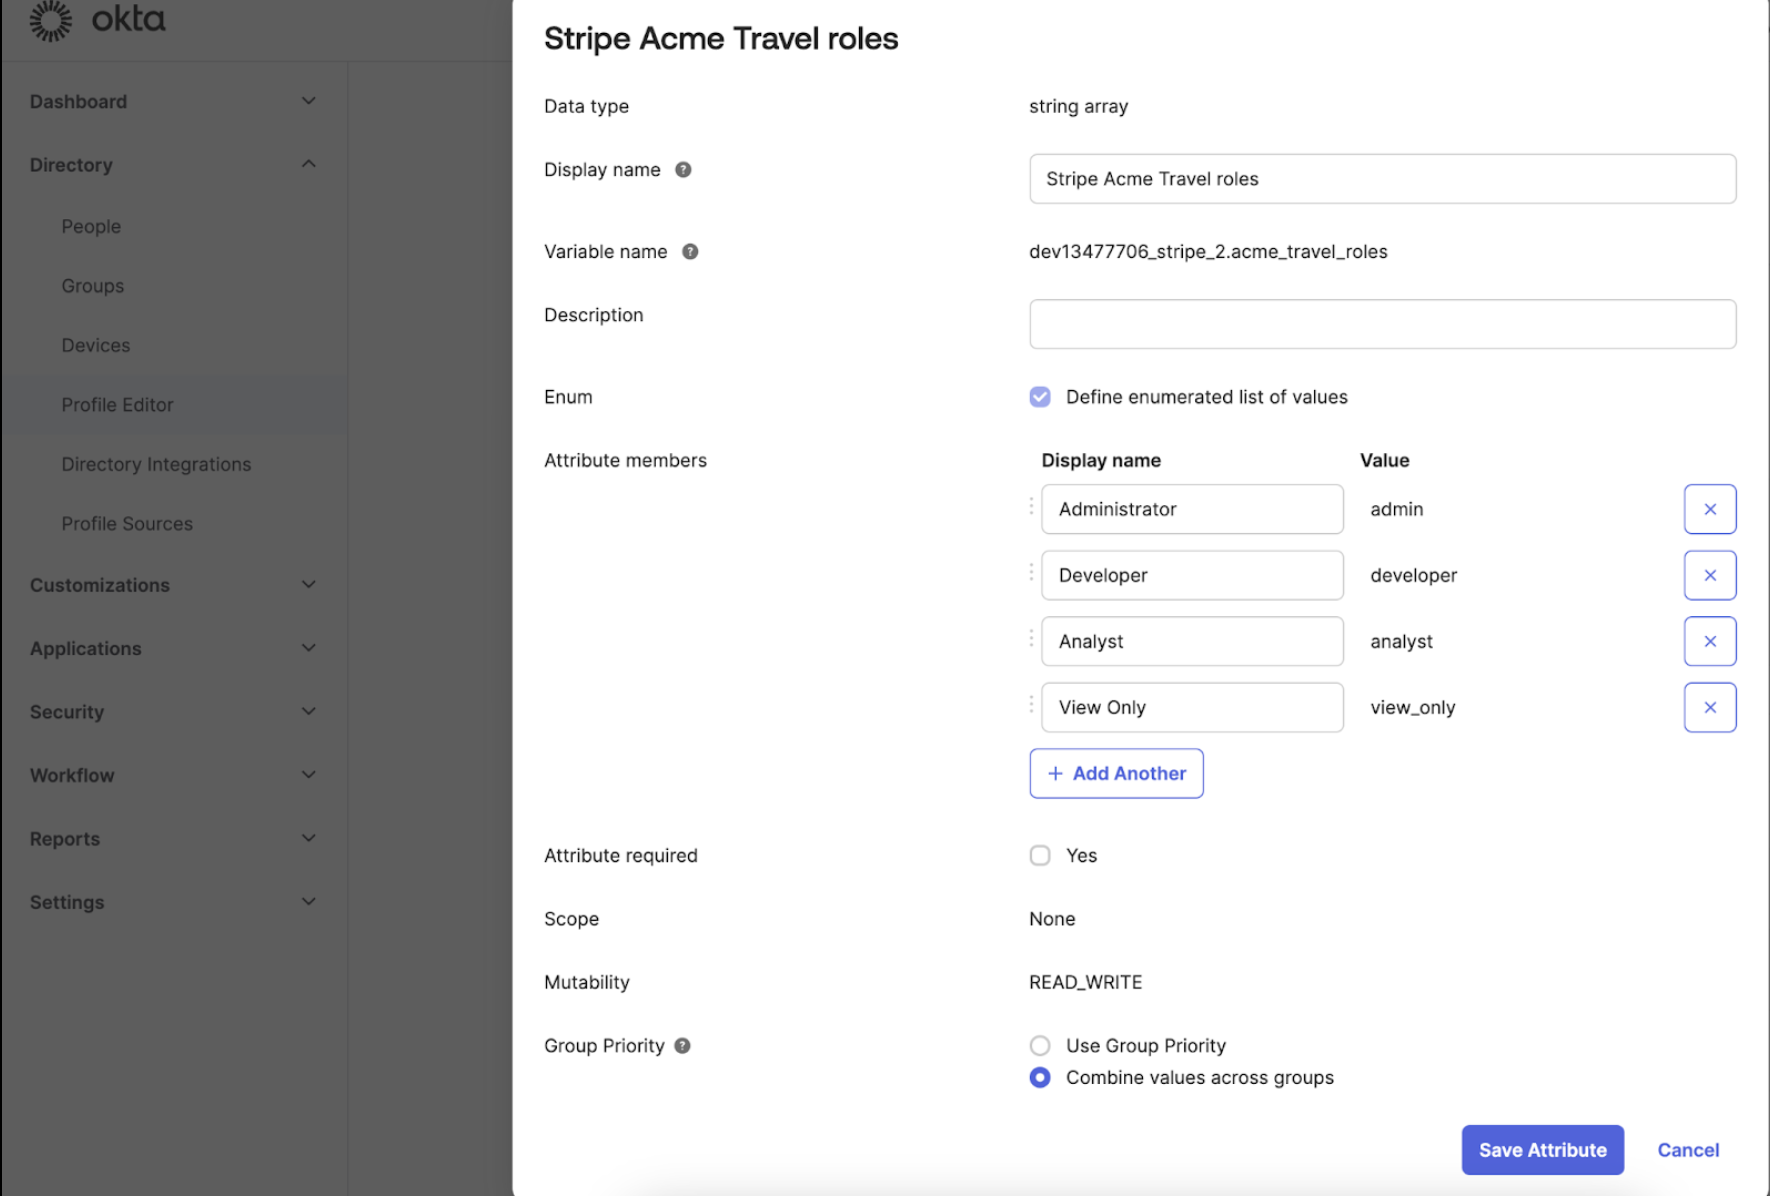
In each profile mapping, you can configure which roles are allowed to be assigned. View the full list of roles and values in the user roles page.
Assign a role in the new primary app
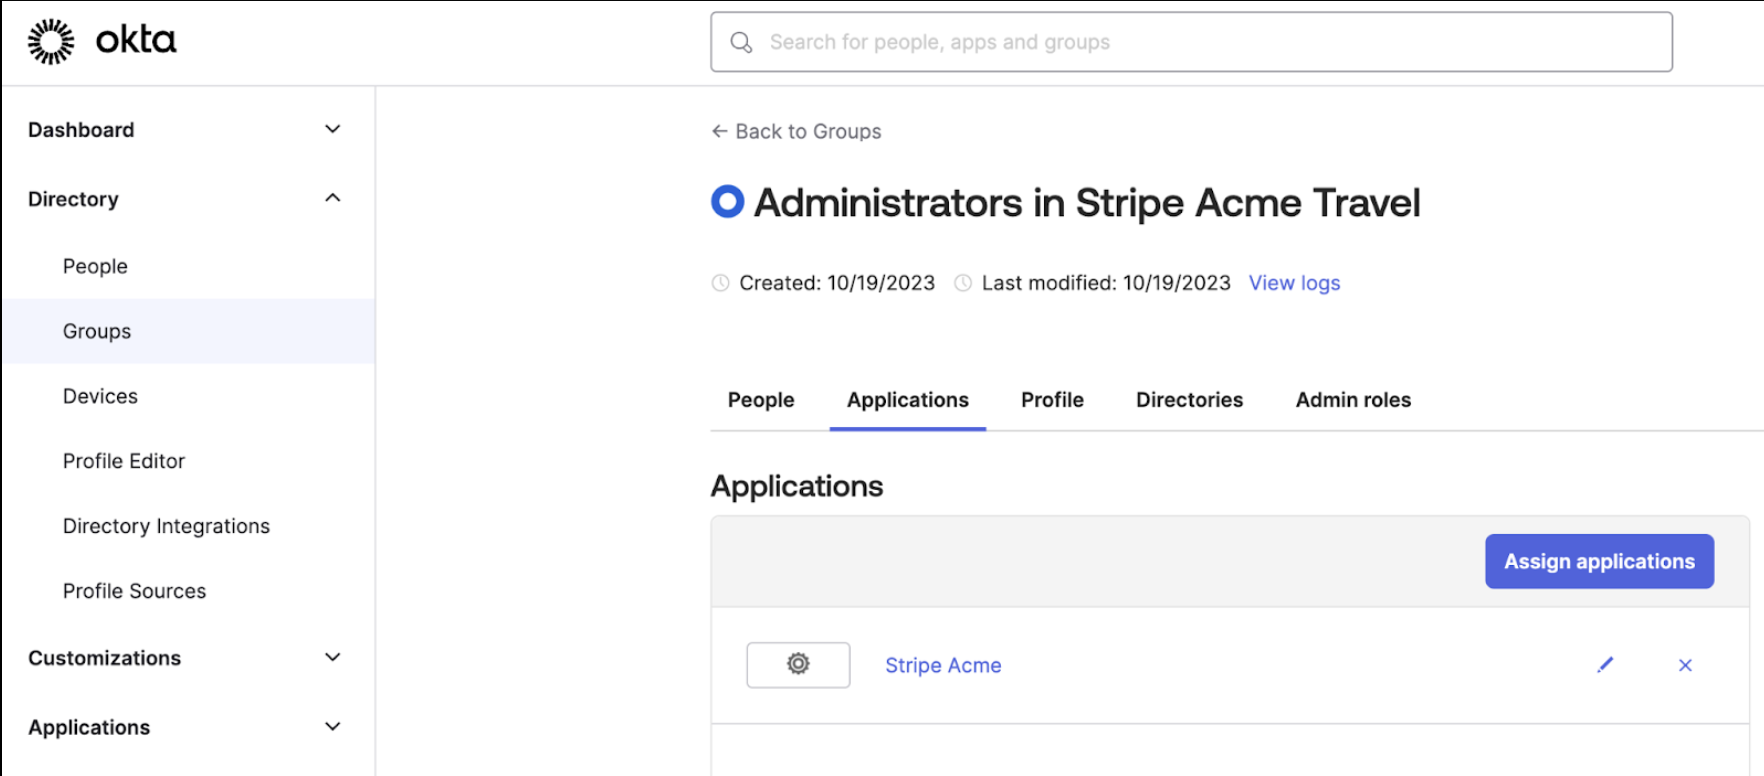
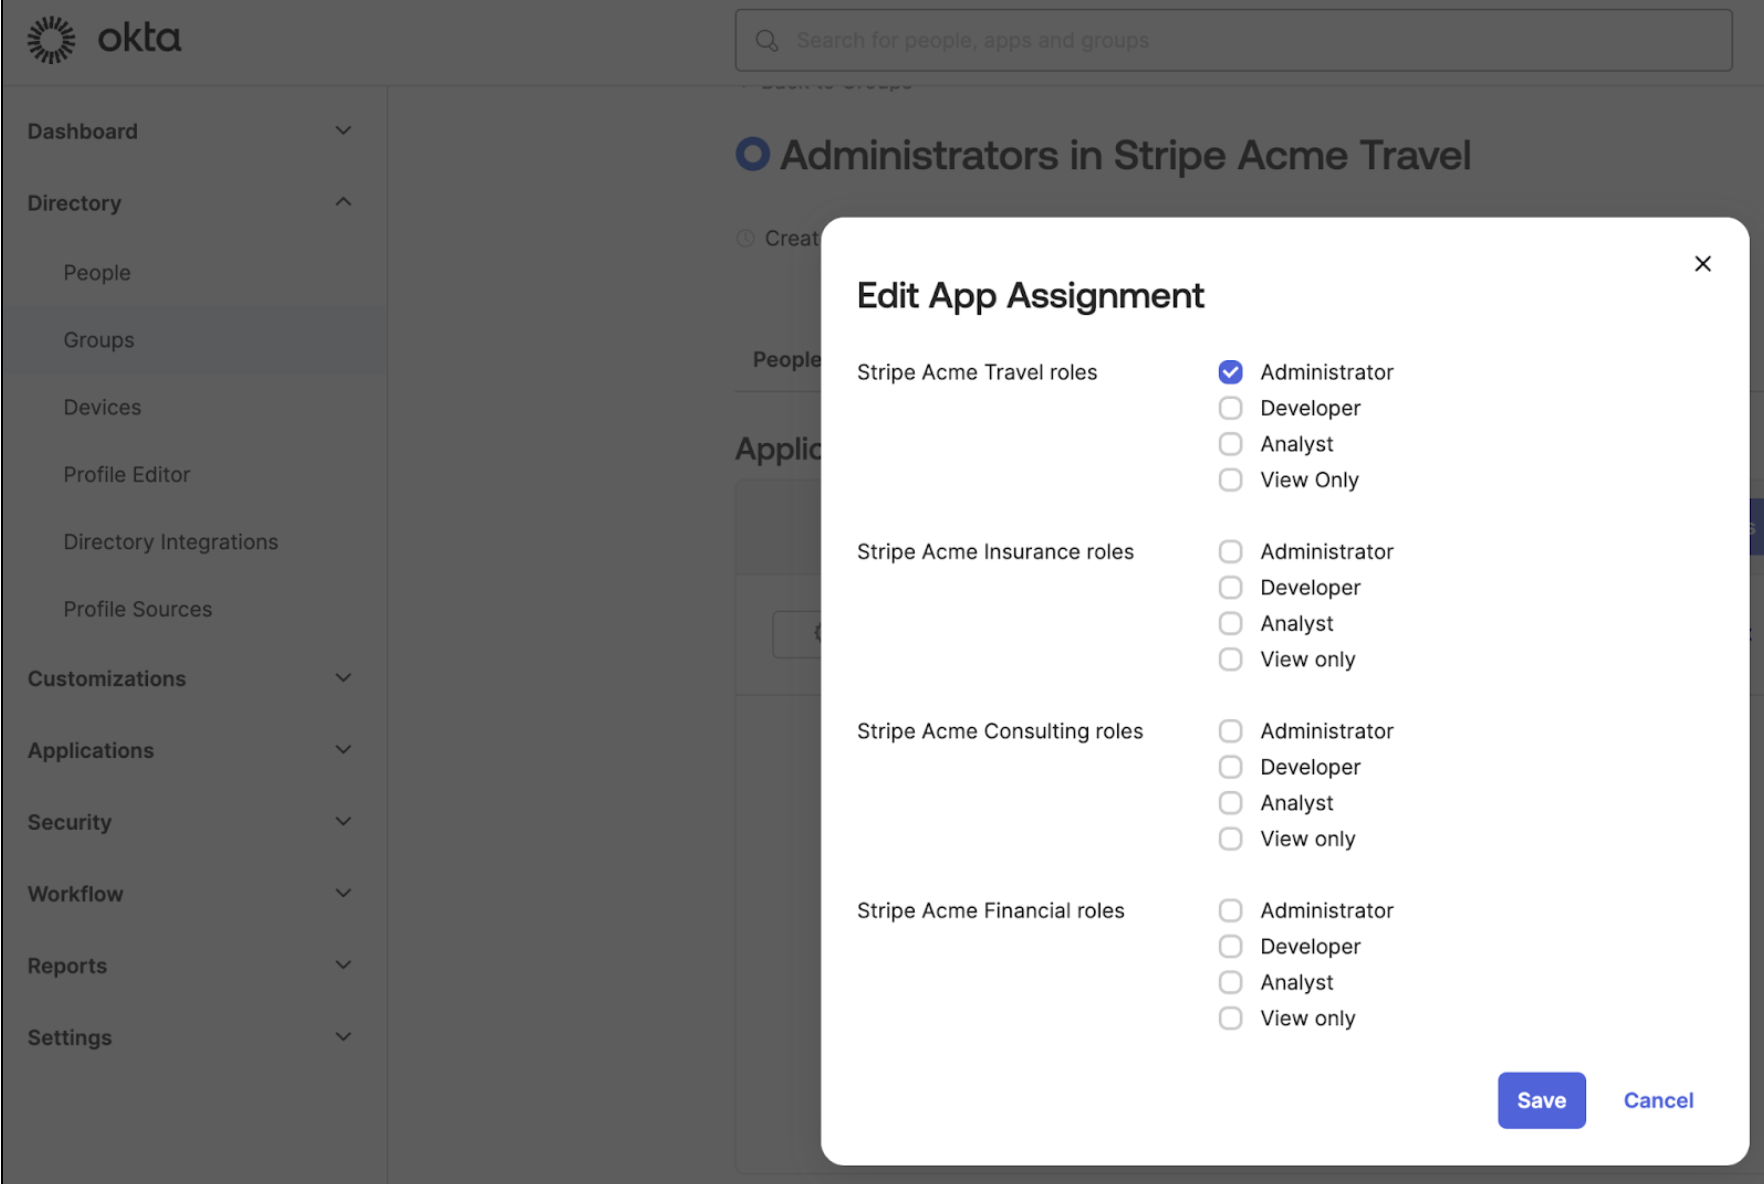
For each of your groups in Okta, assign the group to the primary app, then choose roles and accounts that users in the group have access to.
Add an attribute statement for users’ roles in each Stripe account
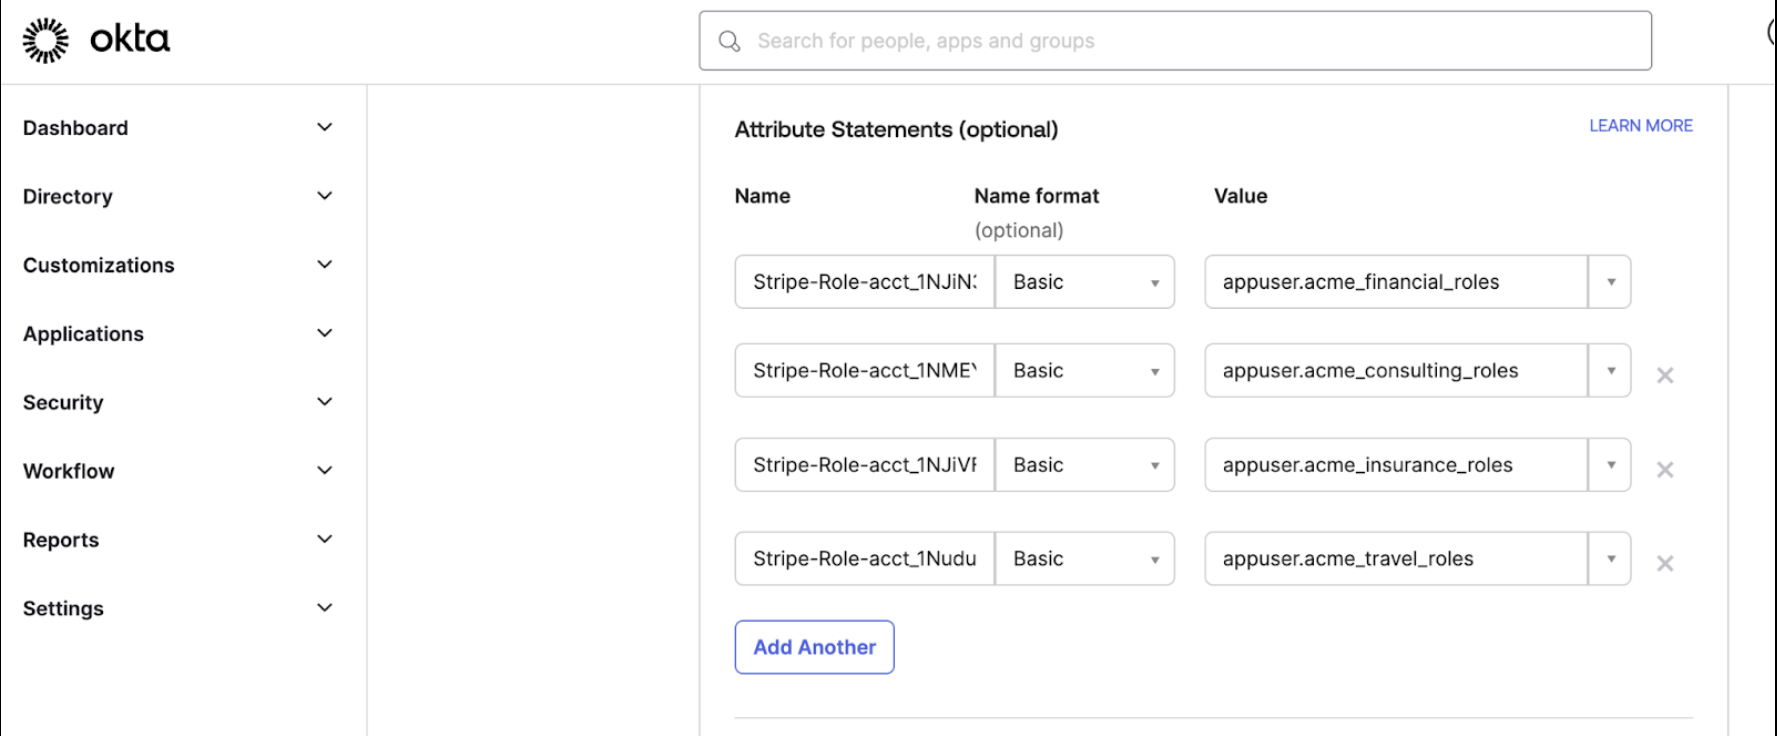
In the SAML settings of your primary Okta app, name each attribute statement either Stripe-Role-acct_ or Stripe-Role-org_. Set the value as the profile mapping that contains users’ roles for that Stripe account or organisation.
Configure SSO for all of your Stripe accounts to redirect users during authentication
Next, we need to make sure that the SSO settings in Stripe for each of your accounts directs to the same primary Okta app. To do this, you can update your SSO settings for each account.
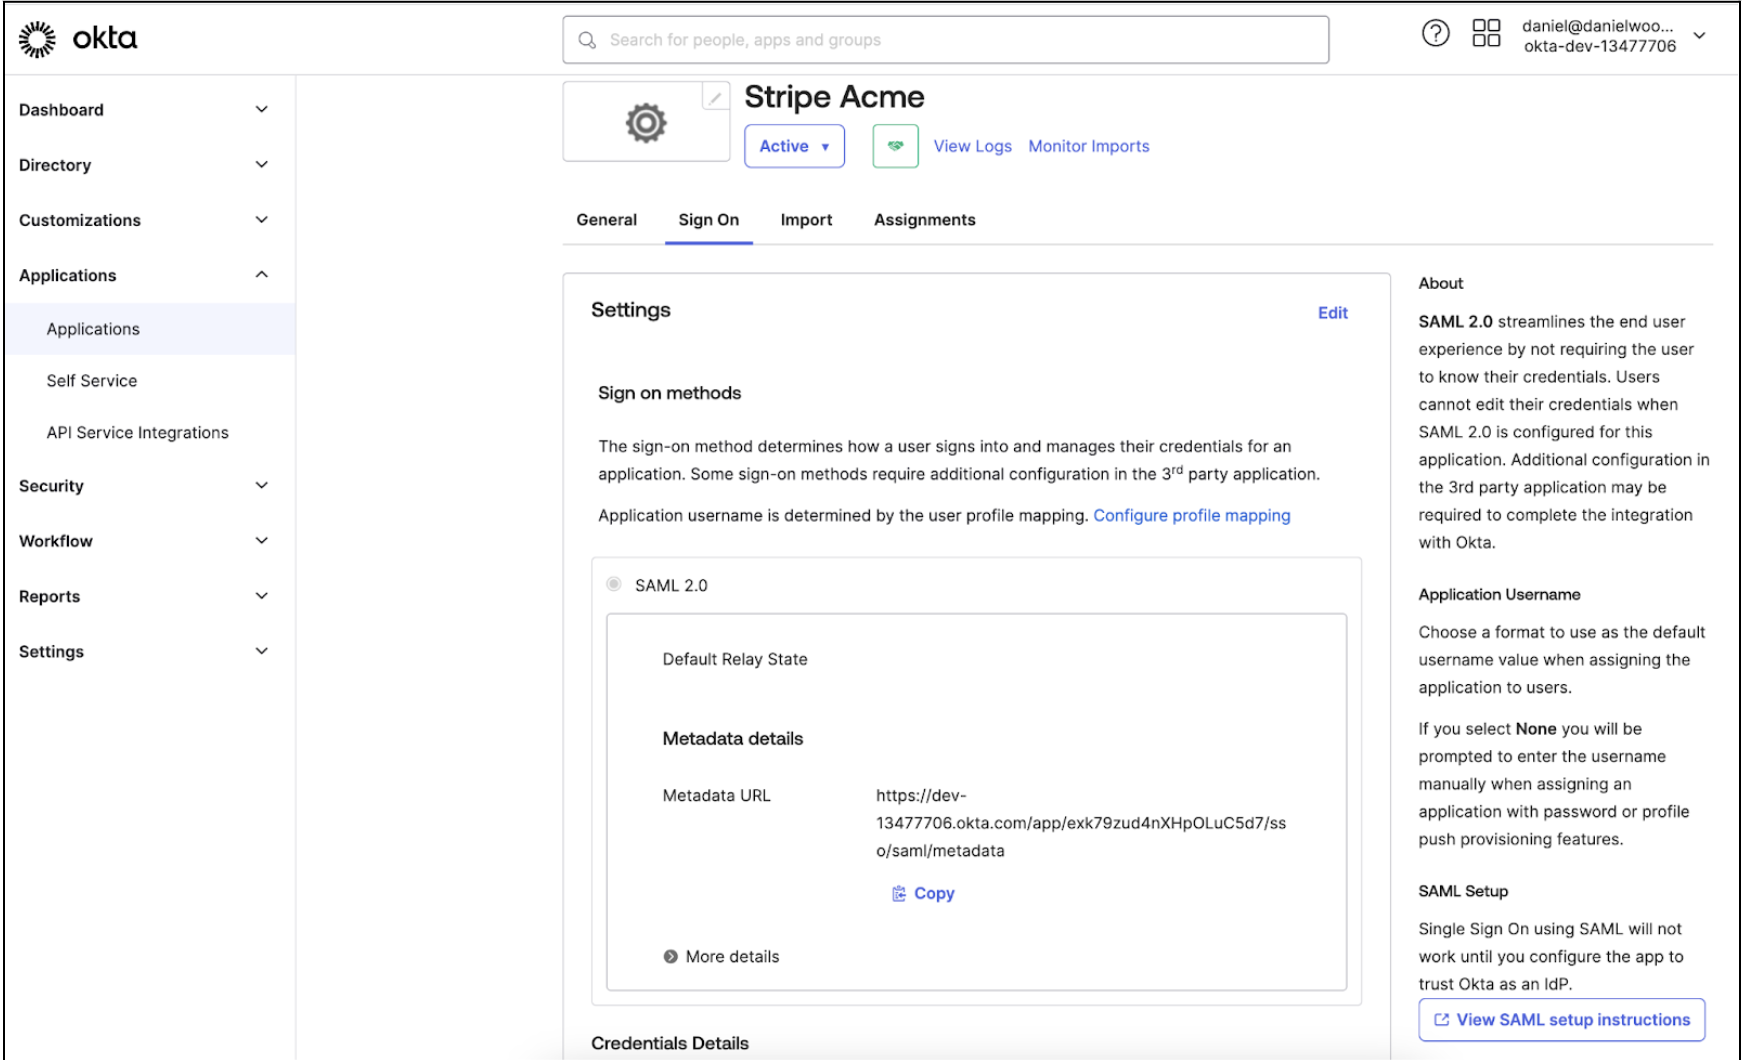
To locate the three pieces of metadata associated with your primary app which are required by Stripe in Okta, go to the Sign On tab of your primary app in Okta. In the bottom right-hand corner of the page, click View SAML Setup Instructions, then copy the metadata.
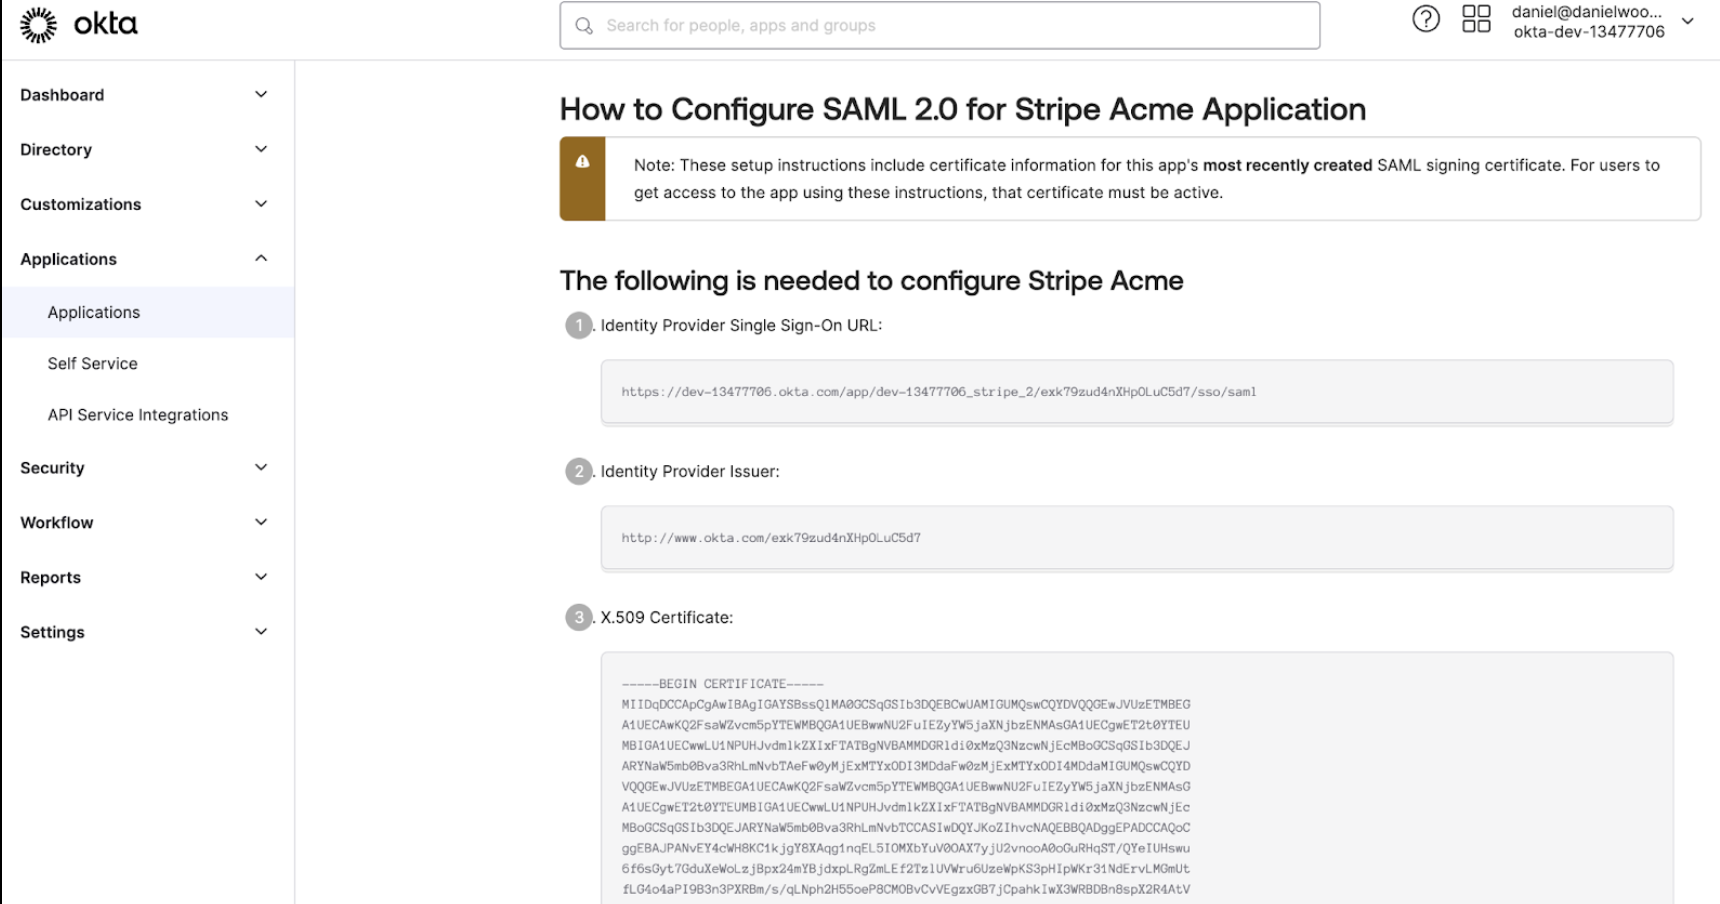
To access your SSO settings in each Stripe account, click Settings > Team and security > User authentication. Open the menu associated with the domain and click Manage SSO settings. Paste the metadata from your primary app in Okta.
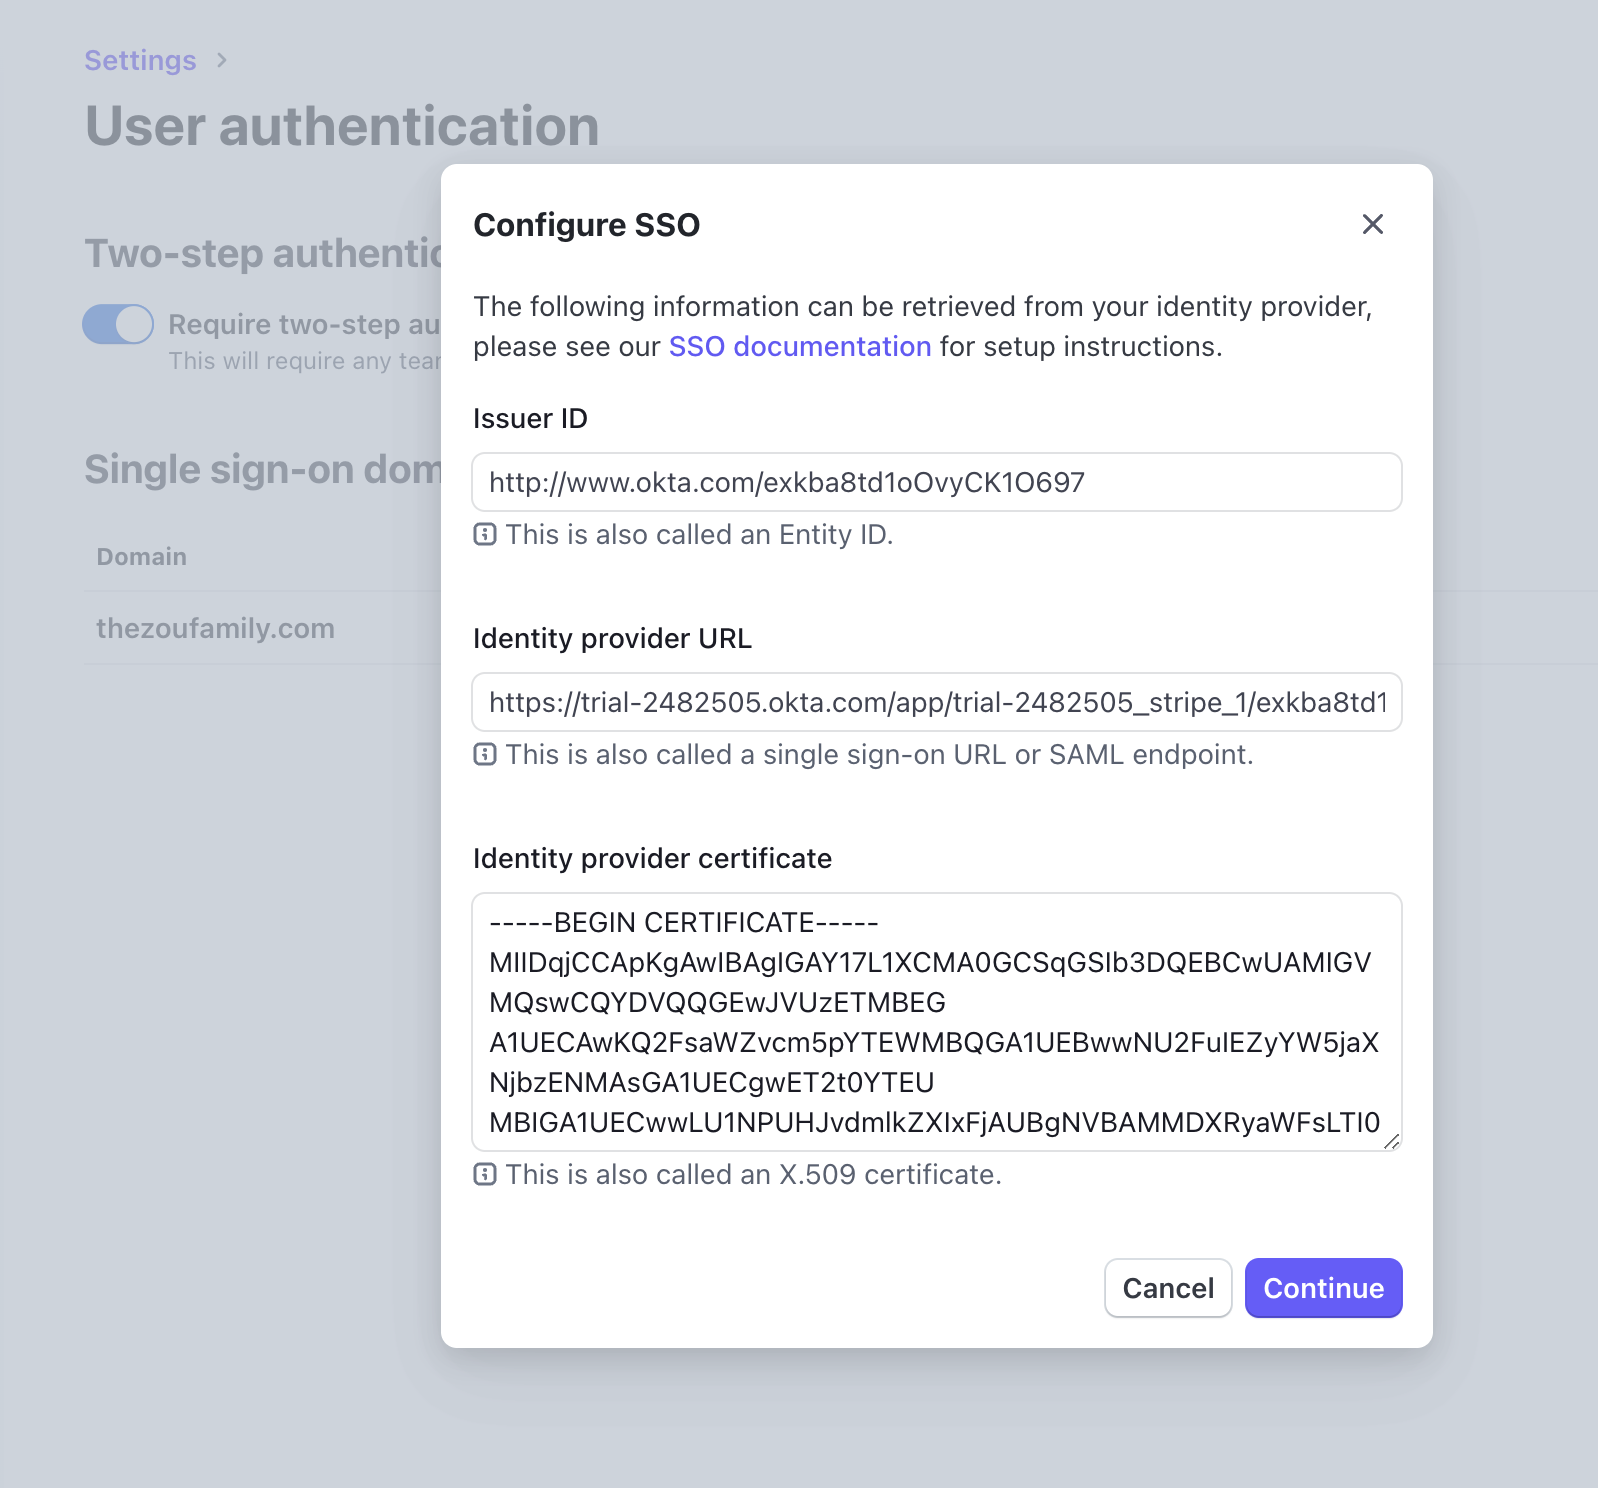
After you paste the metadata and confirm the changes, users can sign in to Stripe by clicking your primary app in Okta. Use the account picker to switch accounts in Stripe.
OptionalSet up bookmarks in Okta to directs users to each Stripe account
If you don’t want users to have to switch Stripe accounts after sign in using the primary Okta app, you can set up a bookmark tile in Okta for each Stripe account. This enables users to automatically log in to a specific Stripe account based on the URL.
View the format of the URL below. You must replace {YOUR_ with your actual domain and {acct_ with the desired account ID:
https://dashboard.