Install the Stripe app for Salesforce Order Management
Set up and configure the Stripe app.
Before installing the Salesforce Order Management App
- Identify the organization and B2C Commerce store in your Salesforce instance where you want to install and map the app.
- Review the entitlements and prerequisites before starting the installation process.
- Note the integration limitations:
- Supports only a single B2C storefront
- Supports one time manual capture only
- Doesn’t support complex scenarios like over-capture and multi-capture
Installation
To learn more about integrating with Salesforce Order Management, contact us using the form at Stripe support.
Make sure Install for Admins Only is selected, then click Install.

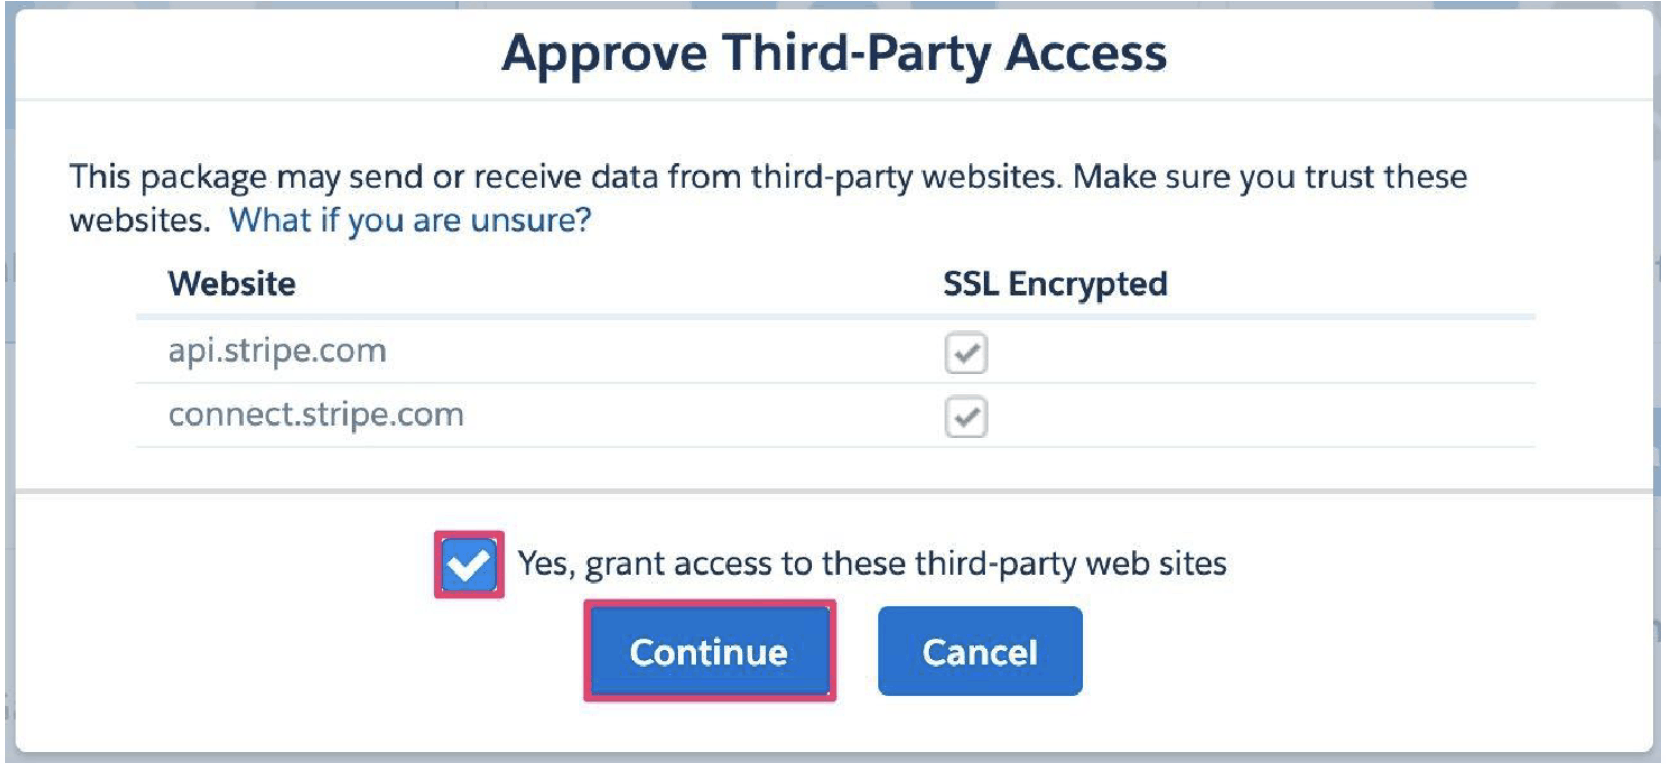
Approve access to and from third-party websites. Check the grant access checkbox and click Continue.

If the installation takes time, you will receive an email telling you the package is installed.
To verify, go to Setup > Apps > Packaging > Installed Packages and make sure the package is installed.
Configuration
Instructions in the following sections detail how to configure your integration.
Configure a Stripe Synchronous Payment Gateway Adapter
Follow the instructions in step 3 of Set Up a Synchronous Payment Gateway Adapter in Salesforce to create a payment gateway provider. Here’s the set of values we recommend for the payload:
{
"ApexAdapterId": "Output of this Query: SELECT Id FROM ApexClass WHERE Name IN ('StripeAdapter')",
"DeveloperName": "StripeProvider",
"MasterLabel": " StripeProvider",
"IdempotencySupported": "No",
"Comments": "Stripe Synchronous Payment Gateway Adapter"
}
Follow the instructions in step 4 of Set Up a Synchronous Payment Gateway Adapter in Salesforce to create a payment gateway record.
Recommended values:
Field Label Value Name SALESFORCE_PAYMENTS Merchant Credential ID Output of this query: SELECT Id FROM NamedCredential WHERE DeveloperName = 'StripeAPI'Payment Gateway Provider Output of the query (modify the query accordingly if your Stripe Synchronous Payment Gateway Provider is different than ‘StripeProvider’): SELECT Id FROM PaymentGatewayProvider WHERE DeveloperName ='StripeProvider'Status Active
Configure a Stripe Asynchronous Payment Gateway Adapter
Follow the instructions in Set Up an Asynchronous Payment Gateway Adapter in Salesforce to configure the Stripe Asynchronous Payment Gateway Adapter (skip step 2 and 3 if you’ve already executed the same for the Stripe Synchronous Payment Gateway Adapter). To create an asynchronous Payment Gateway Provider (follow step 4 from the previously linked instruction). Here is the recommended set of values for the payload:
{
"ApexAdapterId": "Output of this Query: SELECT Id FROM ApexClass WHERE Name IN (‘StripeAsyncAdapter’)",
  "DeveloperName": "StripeAsyncAdapter",
  "MasterLabel": " StripeAsyncAdapterProvider ",
  "IdempotencySupported": "No",
  "Comments": "Stripe Asynchronous Payment Gateway Adapter"
  }
Follow the instruction from step 5 (Create a payment gateway record) in Set Up an Asynchronous Payment Gateway Adapter in Salesforce to register the Stripe Asynchronous Payment Gateway record in Salesforce.
Here are the recommended values for the fields to be inserted (if you’re creating a gateway record for the first time) or updated (if you have already created a gateway record while setting up the synchronous payment gateway adapter)
Field Label Value Name SALESFORCE_PAYMENTS Merchant Credential ID Output of this query: SELECT Id FROM NamedCredential WHERE DeveloperName = 'StripeAPI'Payment Gateway Provider Output of the query (modify the query accordingly if your Stripe Synchronous Payment Gateway Provider is different than ‘StripeProvider’): SELECT Id FROM PaymentGatewayProvider WHERE DeveloperName ='StripeAsyncAdapter'.Status Active Follow the instructions in step 6 to configure the webhook URL for Stripe. The typical format of the webhook URL is a publicly accessible, HTTPS URL. For example: https://mydomainname.my.salesforce-sites.com/subdomain/services/data/v[Replace_ME_version]/commerce/payments/notify%20?provider=<ID>
SELECT Id FROM PaymentGatewayProvider WHERE DeveloperName = ‘StripeAsyncAdapter’[Replace_ME_version] with the API version of your org 49.0 and later
Follow these steps to register your webhooks URL in Stripe:
- Log in to the Stripe Dashboard.
- Go to the Webhooks tab in Workbench.
- Click Create new endpoint.
- Add the following event types:
charge.,refunded charge.,succeeded charge., then click Continue.captured
Enter your webhooks URL, then click Create destination.
Copy your webhook signing secret and save it for later use.

Complete the configurations using Stripe OM Setup
Instructions in the following sections detail how to complete the configuration of your integration.
Authorize the Stripe OMS App with your Stripe Account
In your Salesforce Order Management org, go through the Stripe Setup Assistant to connect your org to your Stripe account.
Click the App Launcher, then click View All.

Click Stripe OM Setup.

Click Get Started.
Toggle live mode. We recommend leaving live mode disabled to test your Stripe integration without affecting your live data, and activating live mode when you’re ready to start processing real transactions with the Stripe Payment Gateway. Come back to this step and reauthorize your connection to switch between test mode and live mode. If you’re in live mode and you want to switch back to test mode, you don’t need to re-authorize.
Click Authorize.

This allows Salesforce to access your Stripe data so you can capture and refund payments. The Stripe website opens to complete the authorization process, which might require you to enter login information or activate your Stripe account. When done, you’re redirected to this page to finish the setup process. After authorization is complete and successful, the following message displays:

Store the webhook signing secret for Stripe asynchronous payment processing.

- Add the webhook signing secret value in Signing secret.
- Click Update.
- A message appears on top to confirm successful insertion. Click Finish.
Modify existing order management flows
The authentication with Stripe is using OAuth, where Stripe is the OAuth provider. Salesforce doesn’t support Stripe as an OAuth provider, therefore the OAuth token is obtained using a custom integration, leveraging an invocable action getAccesToken. This is packaged as part of the Stripe OM app Managed Package.
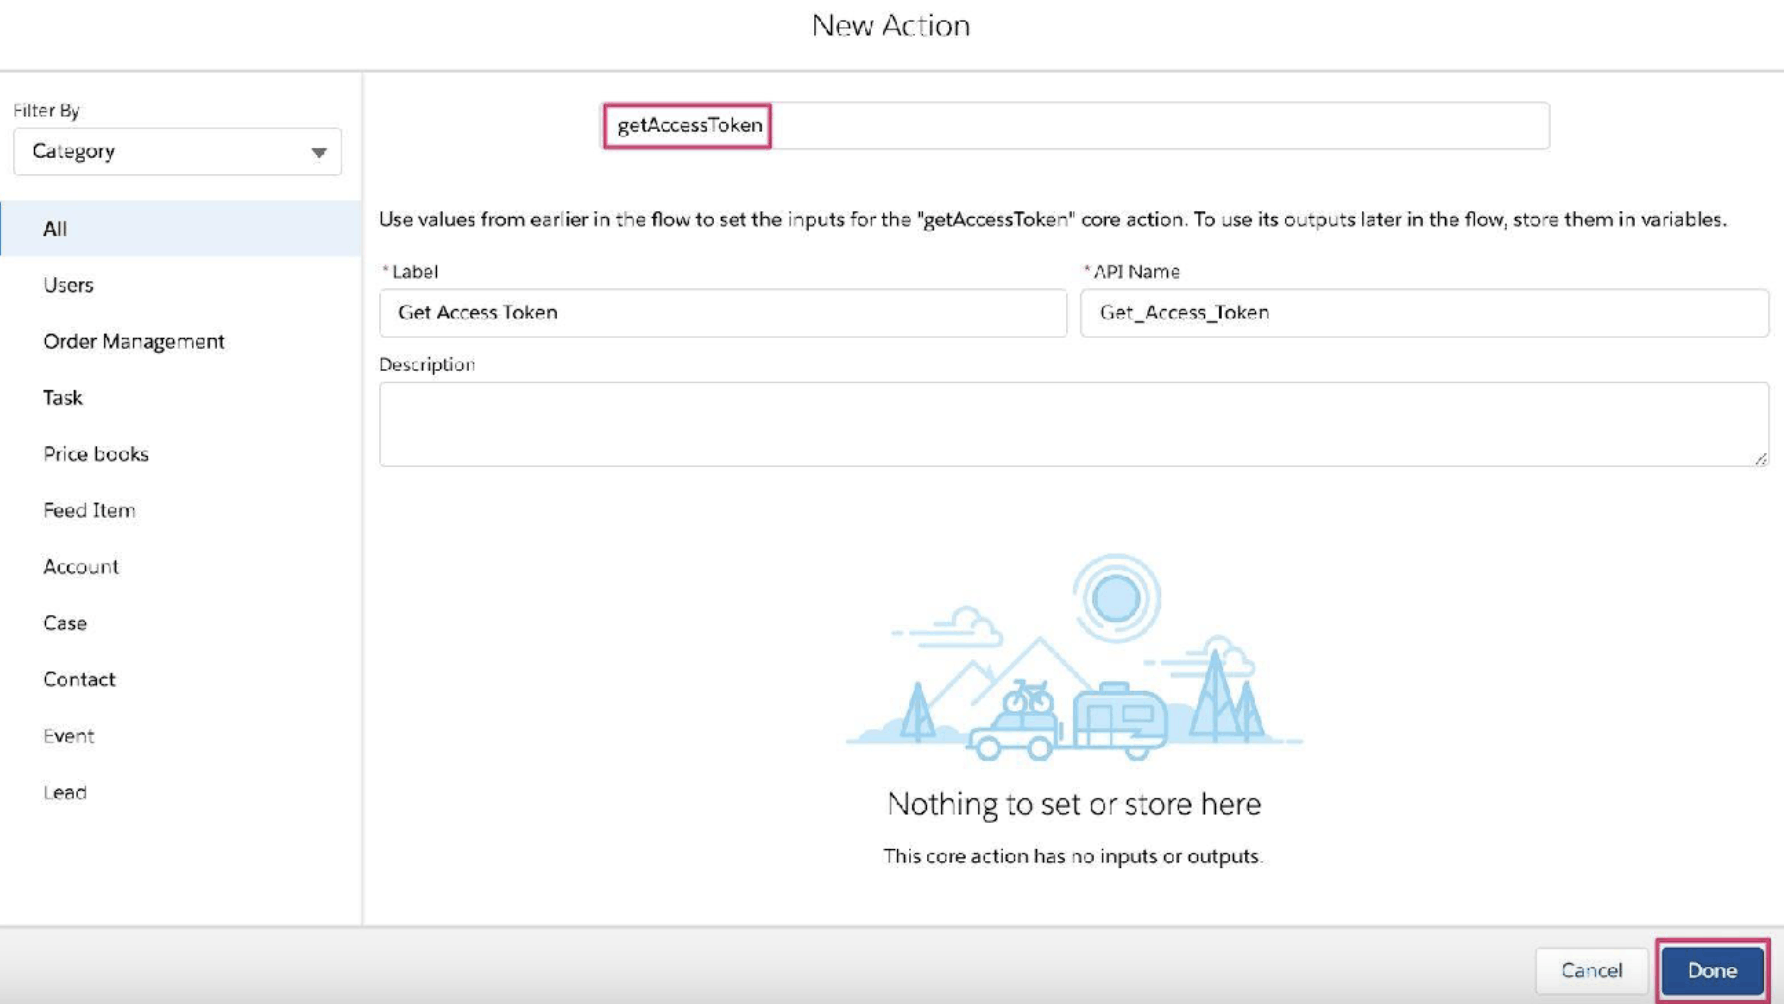
Identify the flow that initiates the payment or refund to Stripe and include the getAccessToken invocable method in an action just before the Ensure Funds action in the flow (as shown in the following example). The flows that you need to modify varies from the one shown in the following example.
- Navigate to Setup > Process Automation > Flows.
- Select the active Flow to use to capture funds.
- Create a new Action that calls the
getAccessTokeninvocable method.

- Make sure that the Get Access Token action occurs before the Capture Funds action. After it completes, save a new version of this Flow to make sure that your processes use the new version.

- You can now use Stripe Payment as a payment method in your Order Management org. You can now place orders from Salesforce B2C Commerce Cloud and complete transactions, such as capture and refund transactions for payment methods that are associated with Salesforce commerce payments.