Configure Stripe app for Salesforce Billing
Learn how to configure Stripe app for Salesforce Billing.
Assign permission sets
This section guides you through setting up the Permission Sets that are necessary to use all three managed packages.
Navigate to Setup > Users > Permission Sets.

The Salesforce Permission Sets top-level view
For all admin users in your org, assign the following permission sets: Salesforce Billing Admin, Salesforce CPQ Admin, and Stripe Payment Gateway Admin.
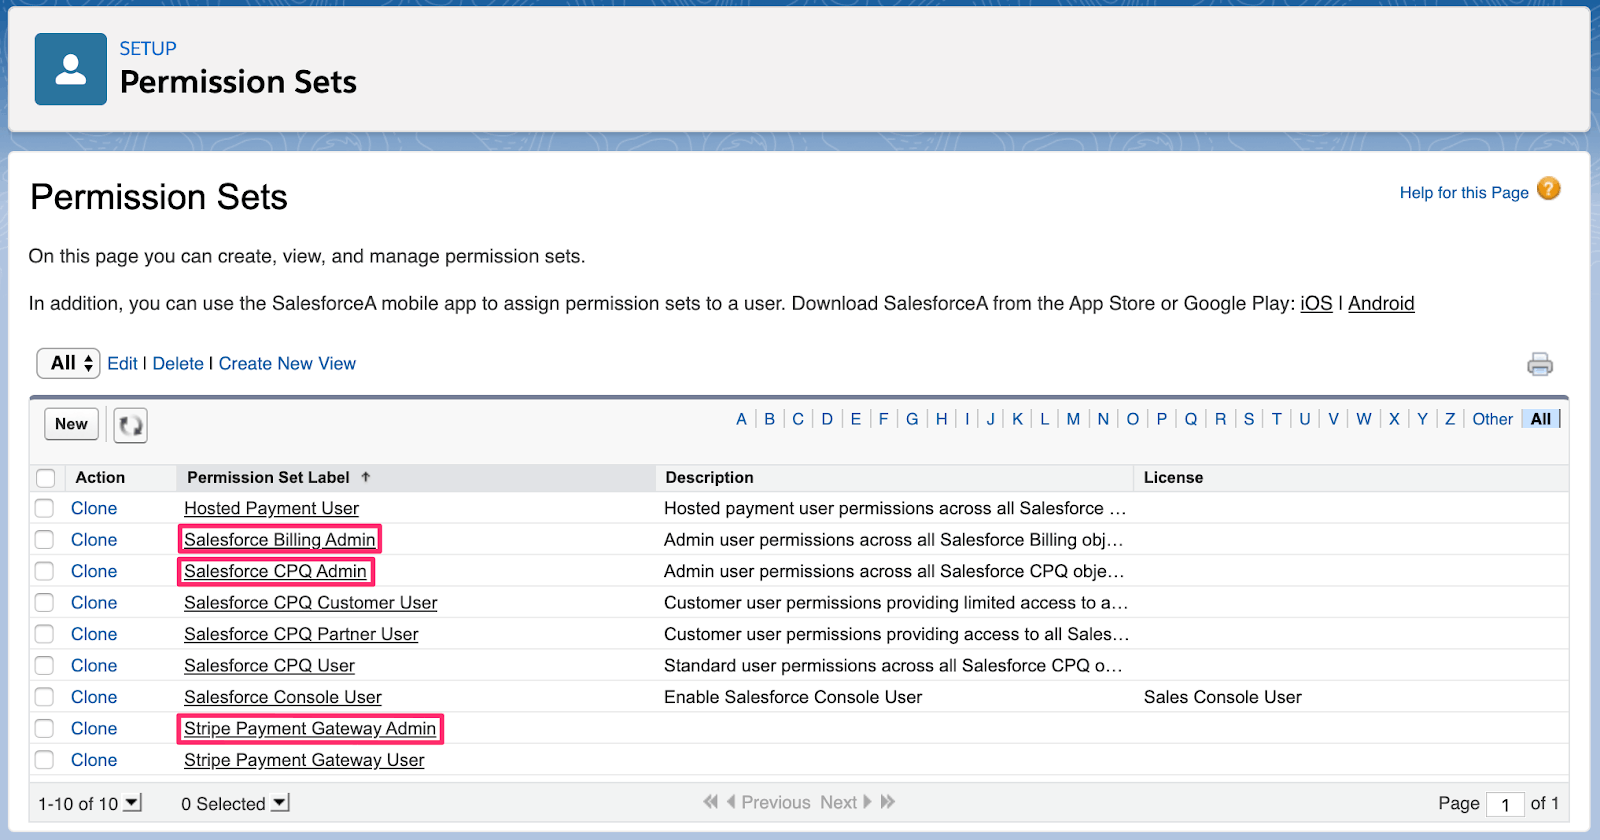
Properly configured Admin Permission Sets
For all standard users that will process payments in your organization, assign the following permission sets: Salesforce CPQ User and Stripe Payment Gateway User. For Salesforce Billing permissions, follow the Salesforce Billing Permissions Requirements documentation to manually provide standard users the permissions they need.
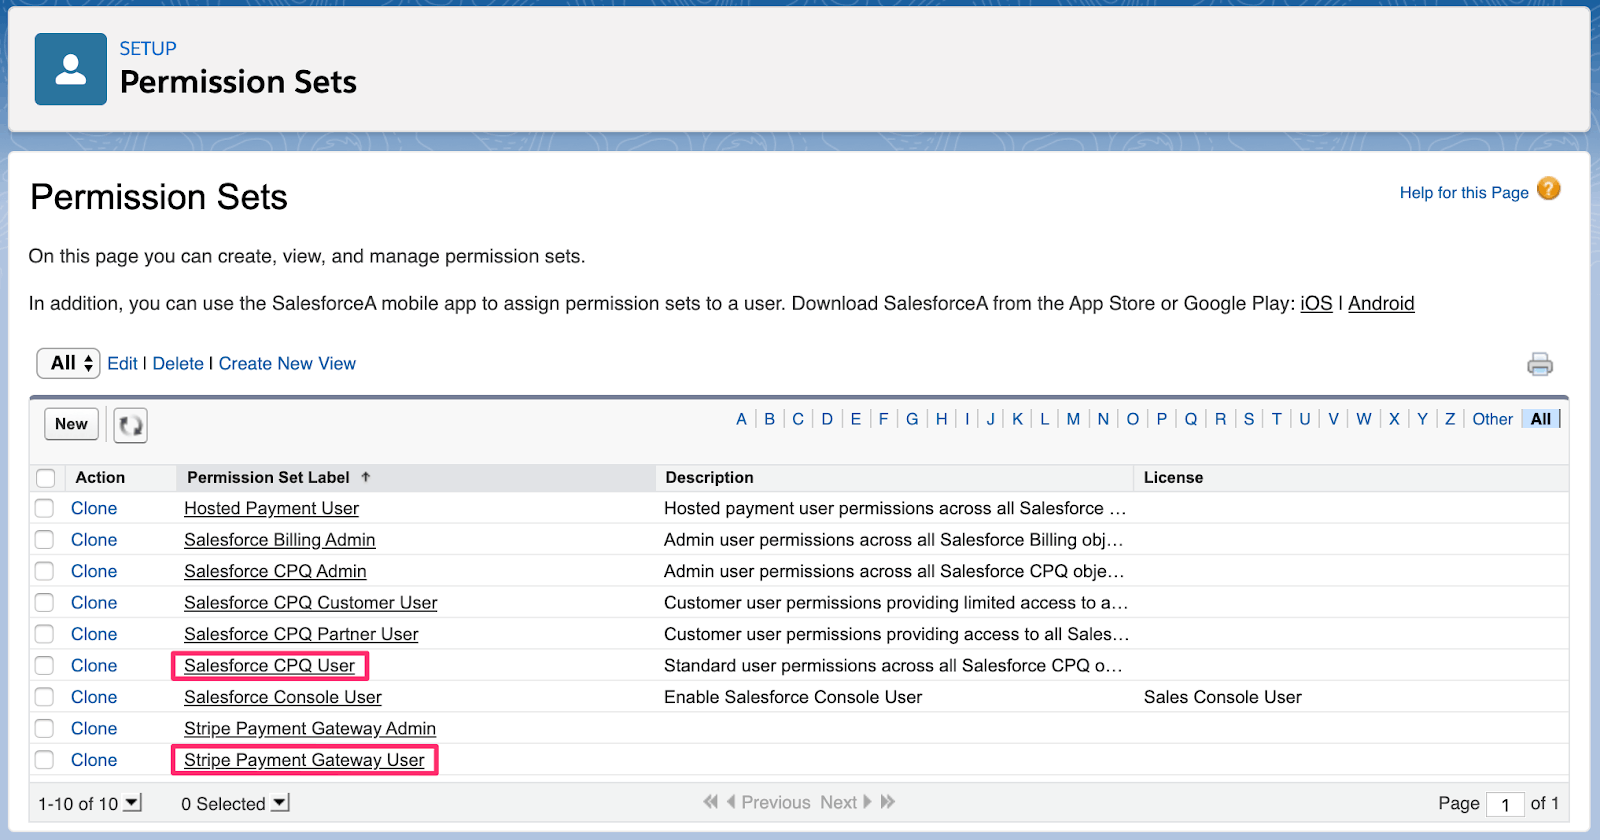
Properly configured User Permission Sets
Assign page layouts
This section shows how to assign the correct Page Layouts for your users. Each page layout must contain all the base information and actions that you will need to go through the payment processing flows.
Opportunity page layout
Navigate to Setup > Object Manager and click the Opportunity object.
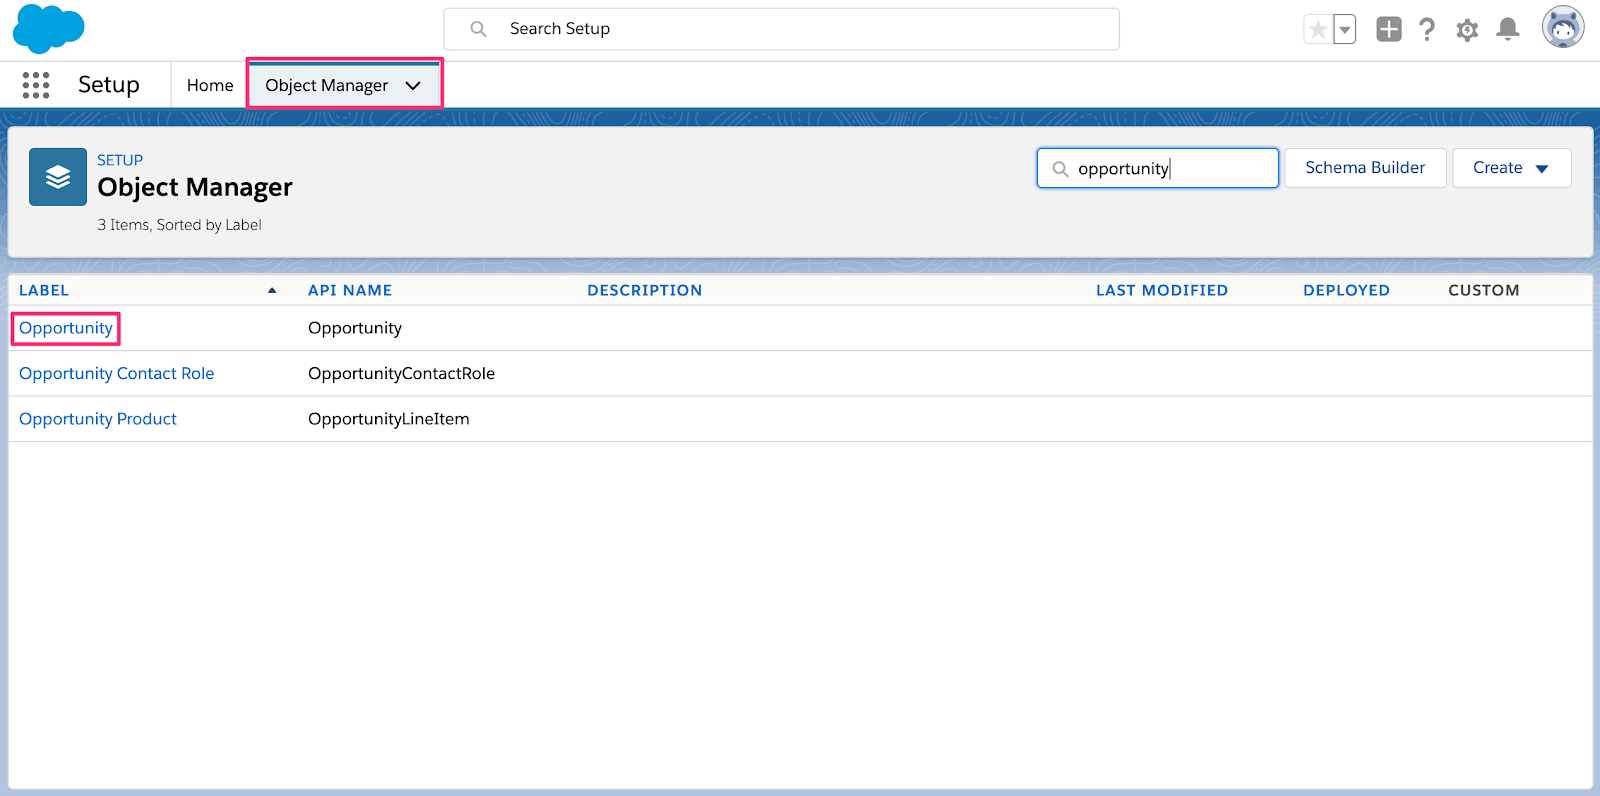
Opportunity in the Salesforce Object Manager
Click the Page Layouts tab and click Page Layout Assignment.
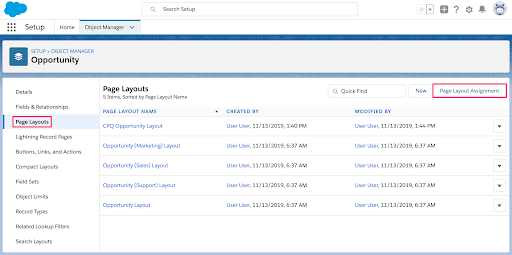
Opportunity object Page Layouts
Click Edit assignment, set the Standard User and System Administrator profiles to view the CPQ Opportunity Layout, and click Save.
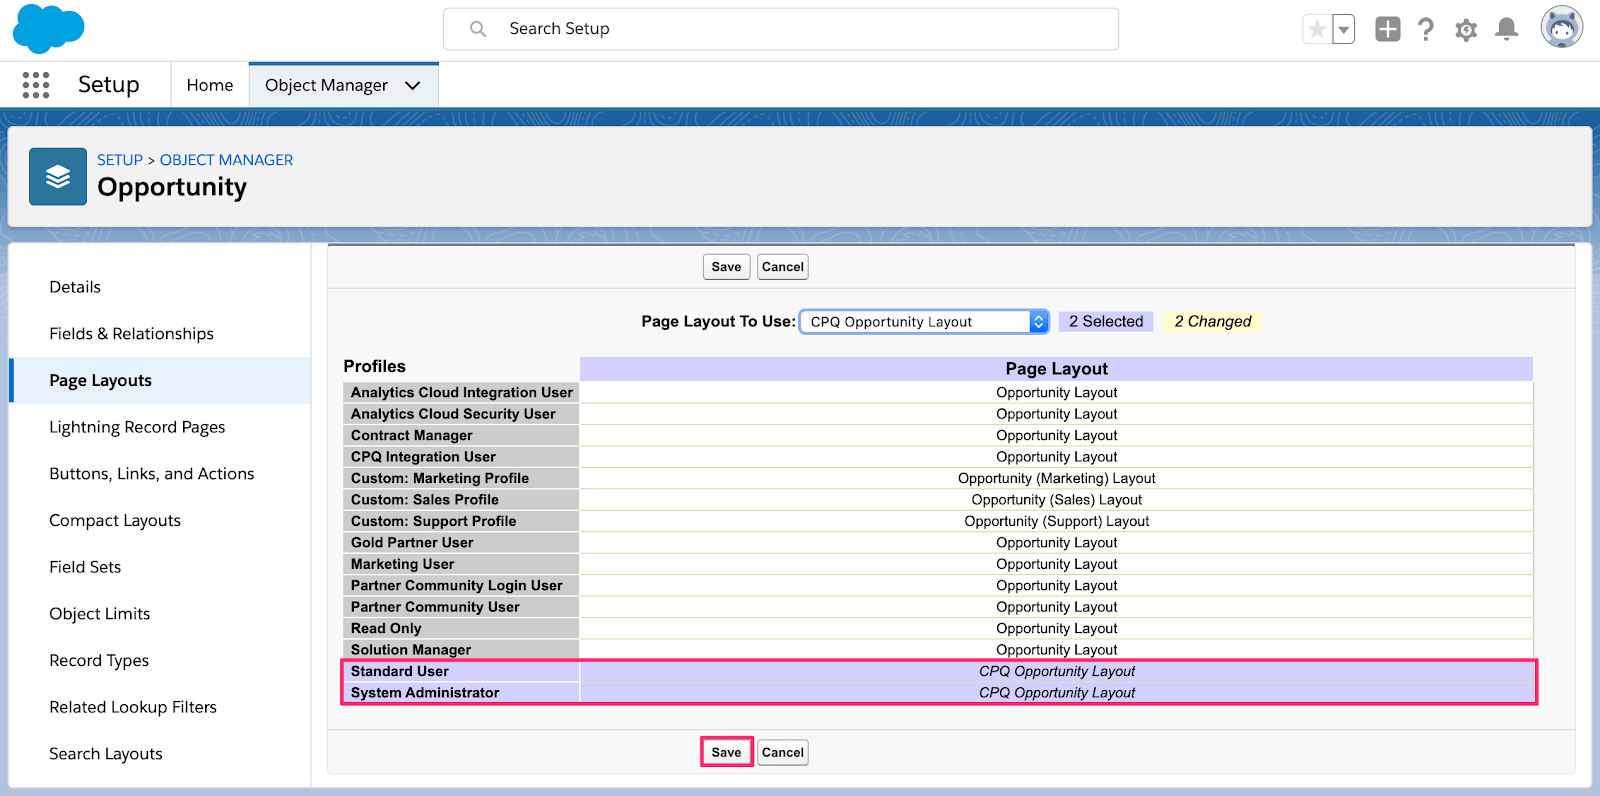
Opportunity object Page Layouts
Account page layout
Navigate to Setup > Object Manager and click the Account object.
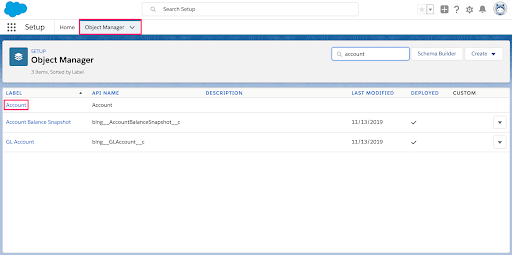
Account in the Salesforce Object Manager
Click the Page Layouts tab and click Page Layout Assignment.
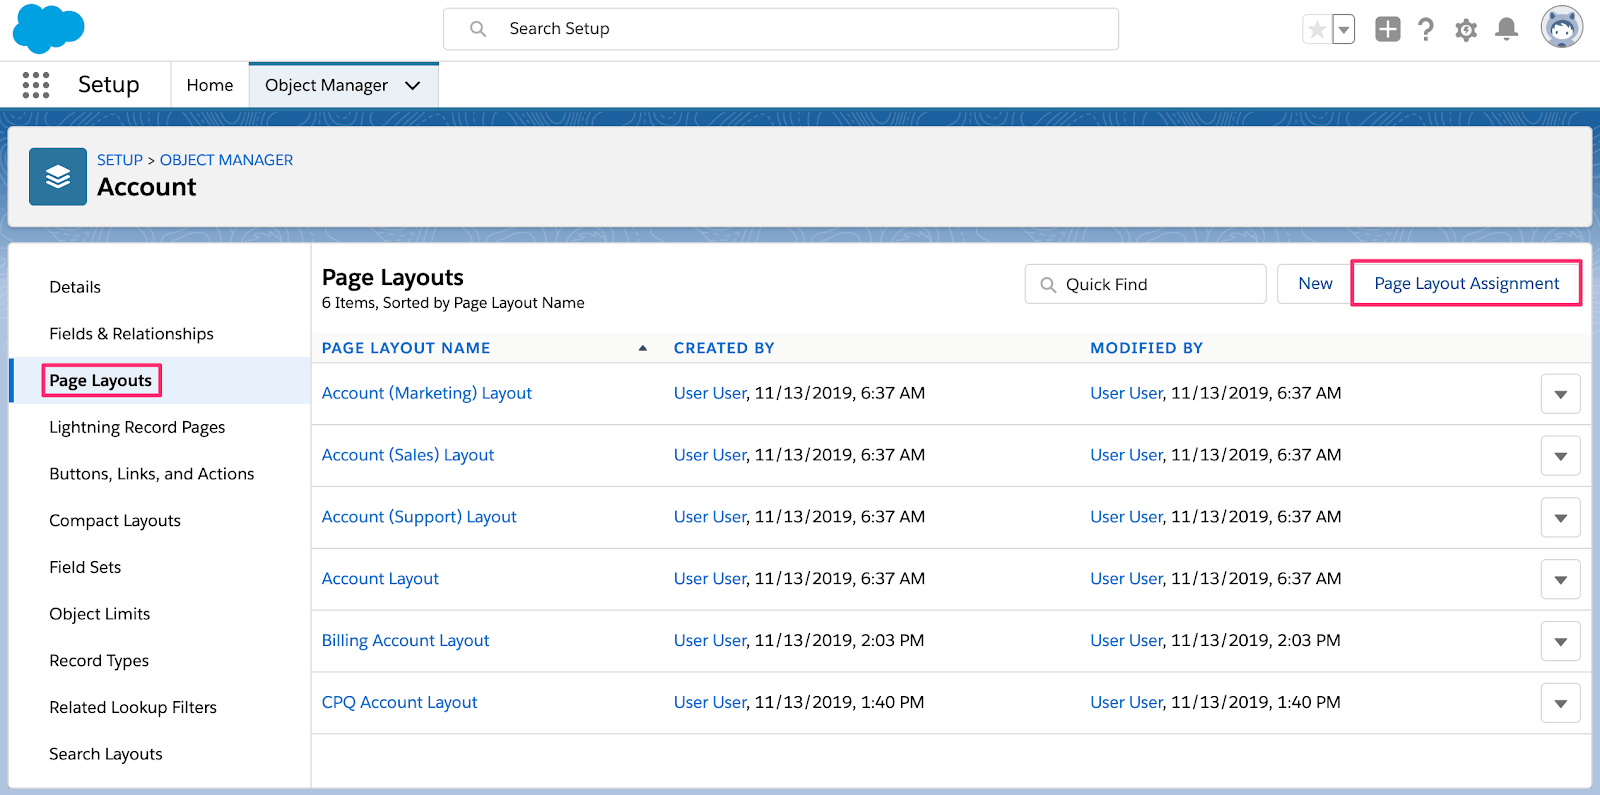
Account object Page Layouts
Click Edit assignment, set the Standard User and System Administrator profiles to view the Billing Account Layout, and click Save.
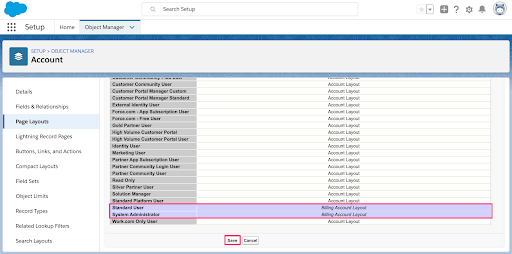
Account object Page Layouts
Order page layout
Navigate to Setup > Object Manager and click the Order object.
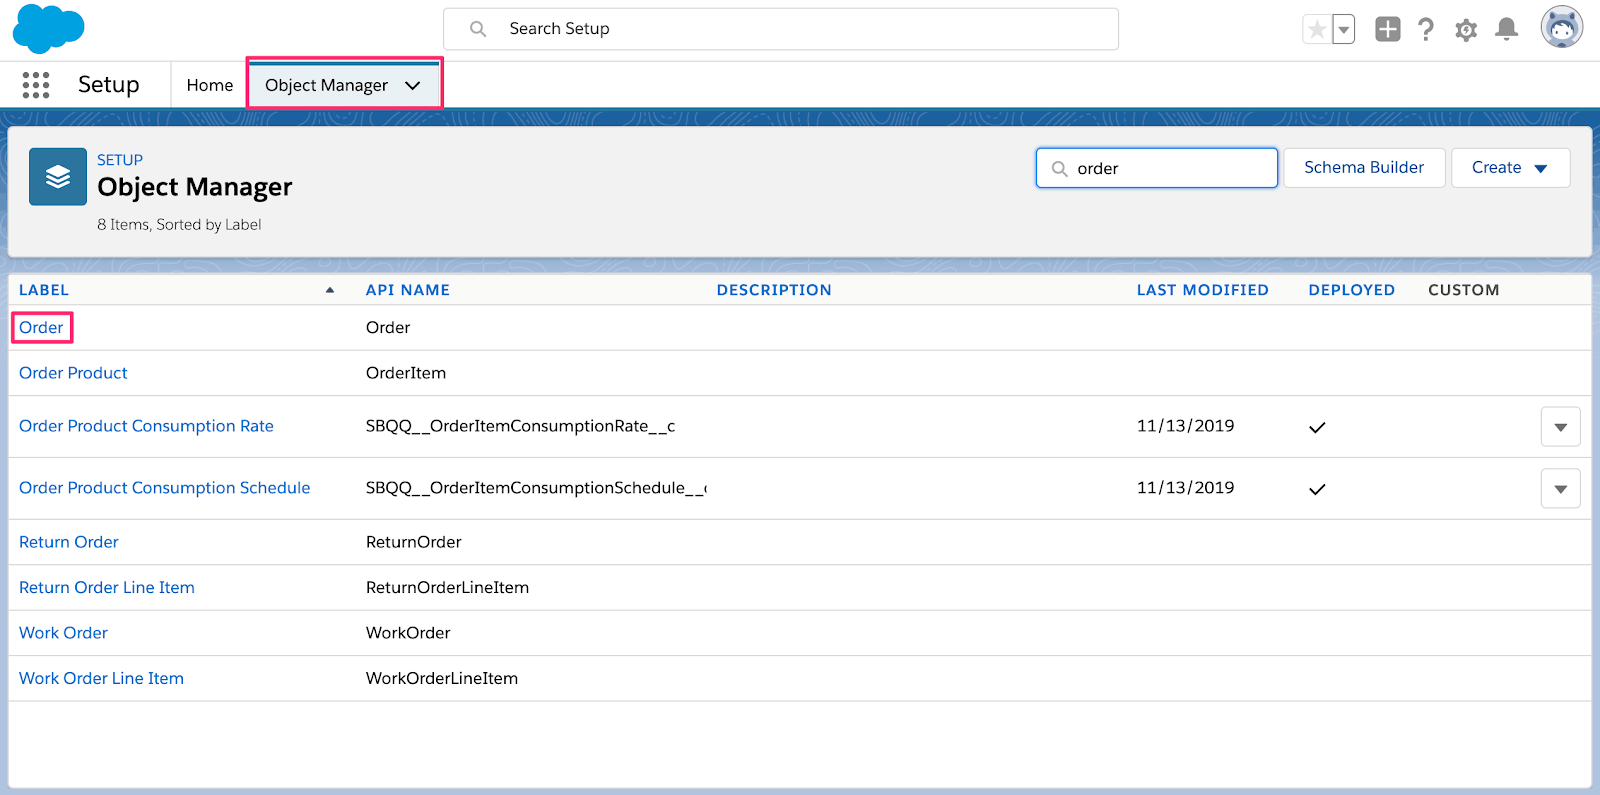
Order in the Salesforce Object Manager
Click the Page Layouts tab, and click Page Layout Assignment.
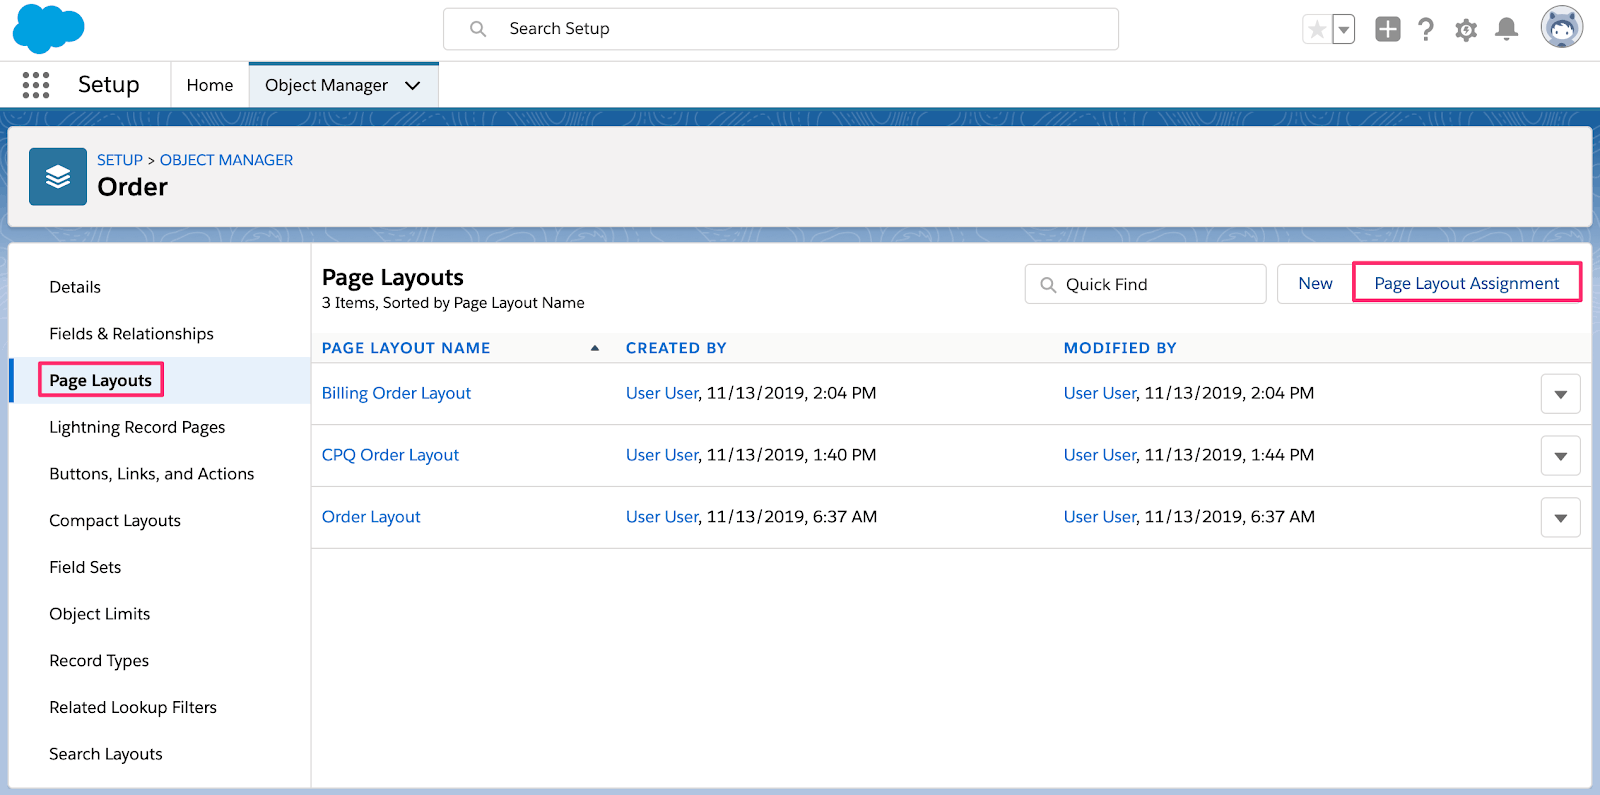
Order object Page Layouts
Click Edit assignment, set the Standard User and System Administrator profiles to view the Billing Order Layout, and click Save.
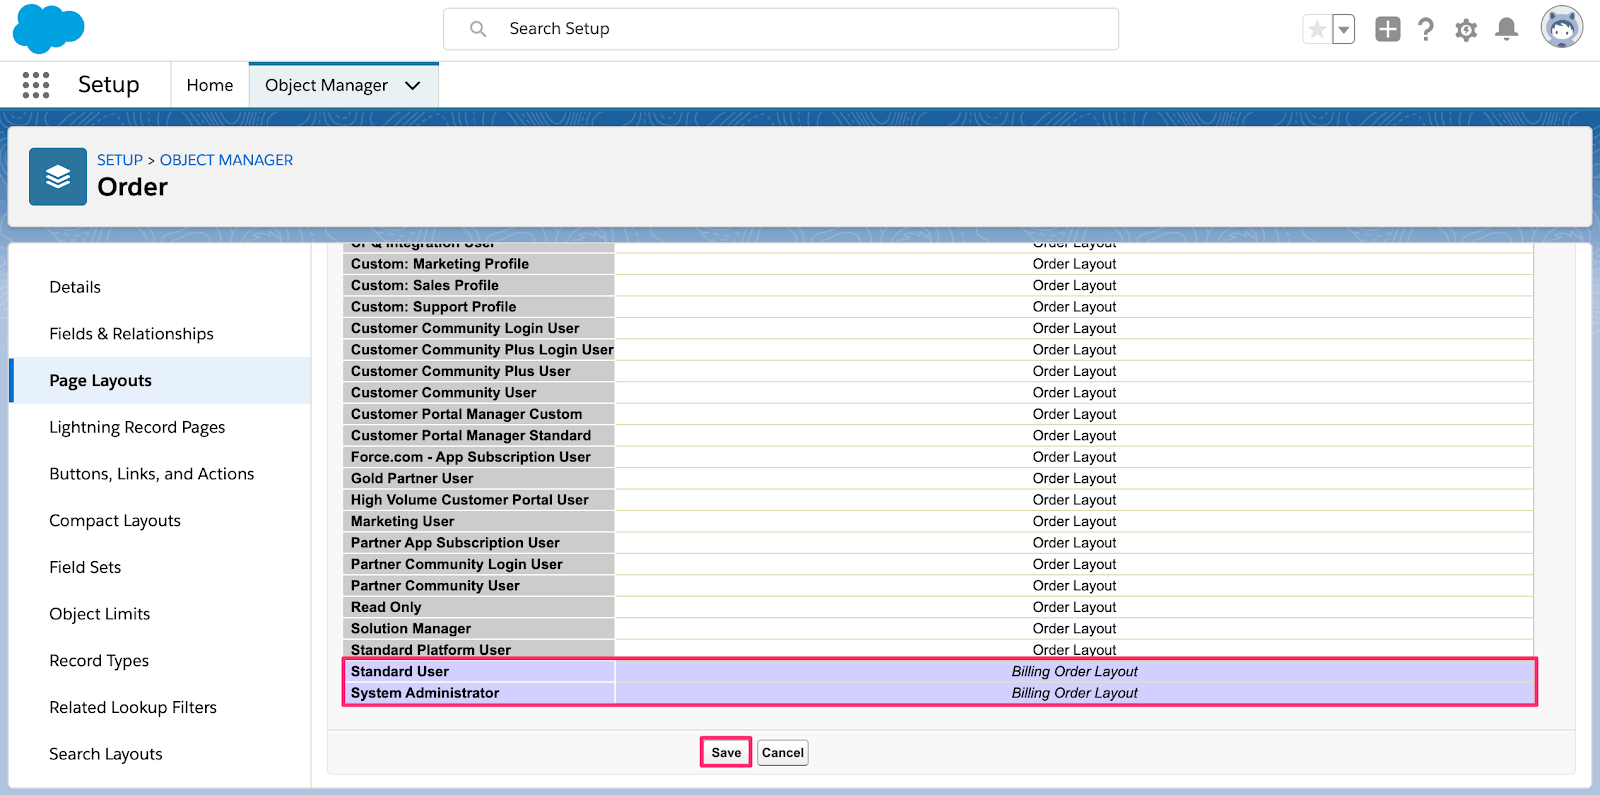
Order object Page Layouts
Order Product page layout
Navigate to Setup > Object Manager and click the Order Product object.
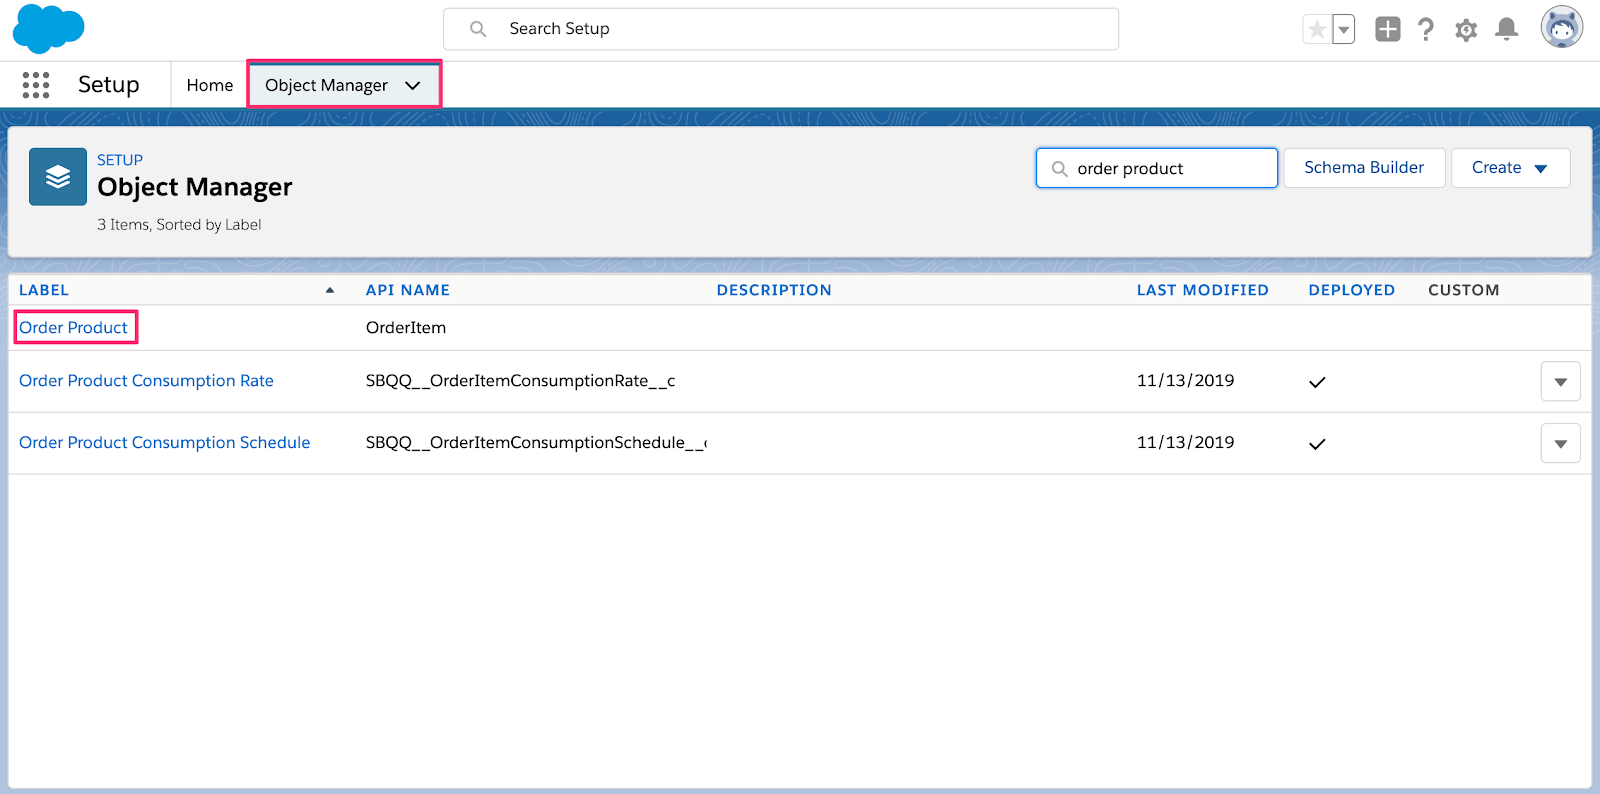
Order Product in the Salesforce Object Manager
Click the Page Layouts tab, and click Page Layout Assignment.
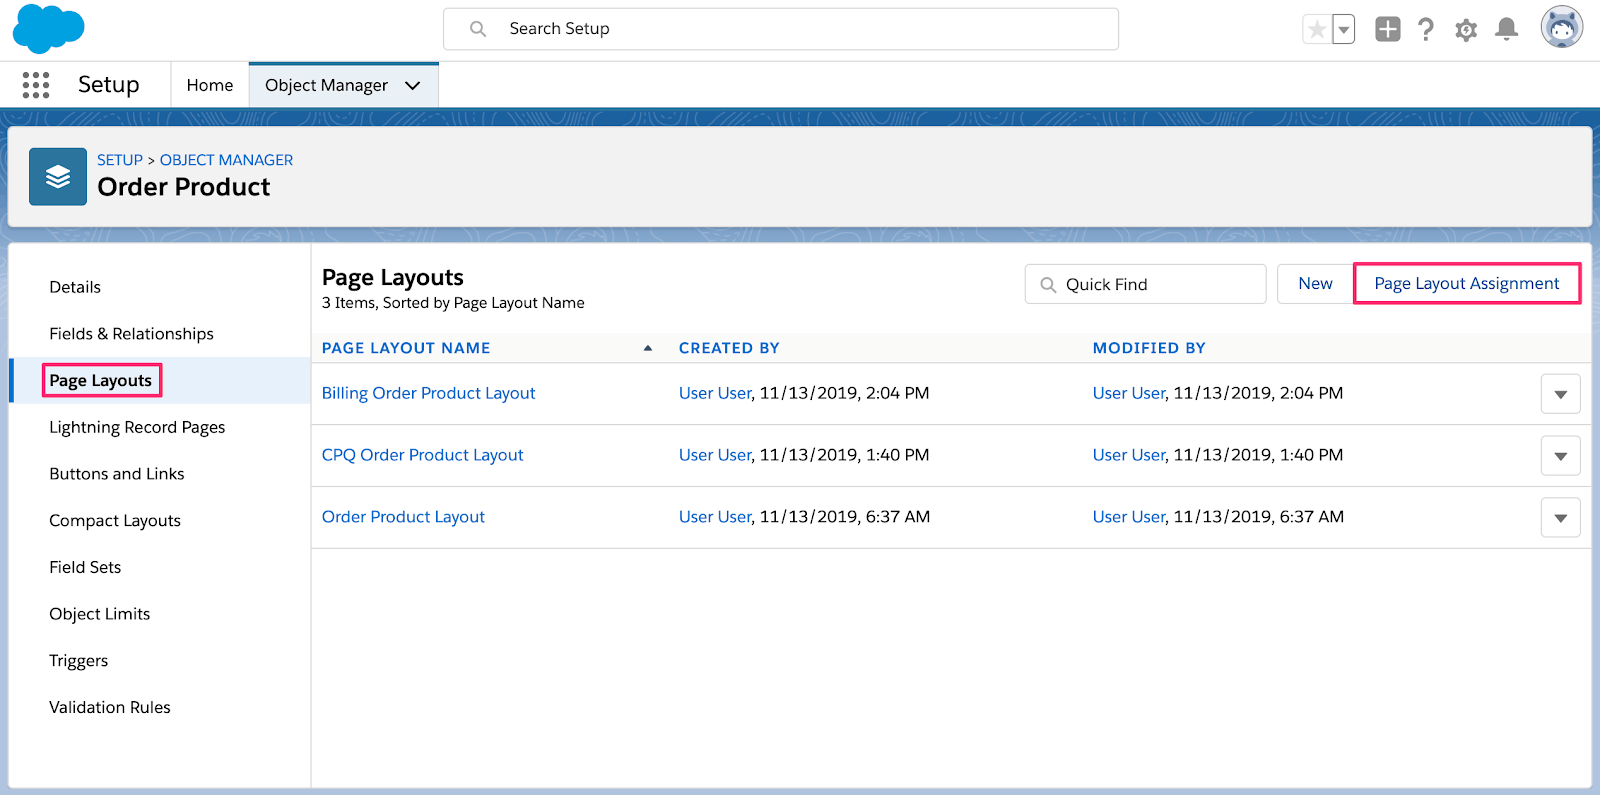
Order Product object Page Layouts
Click Edit assignment, set the Standard User and System Administrator profiles to view the Billing Order Product Layout, and click Save.
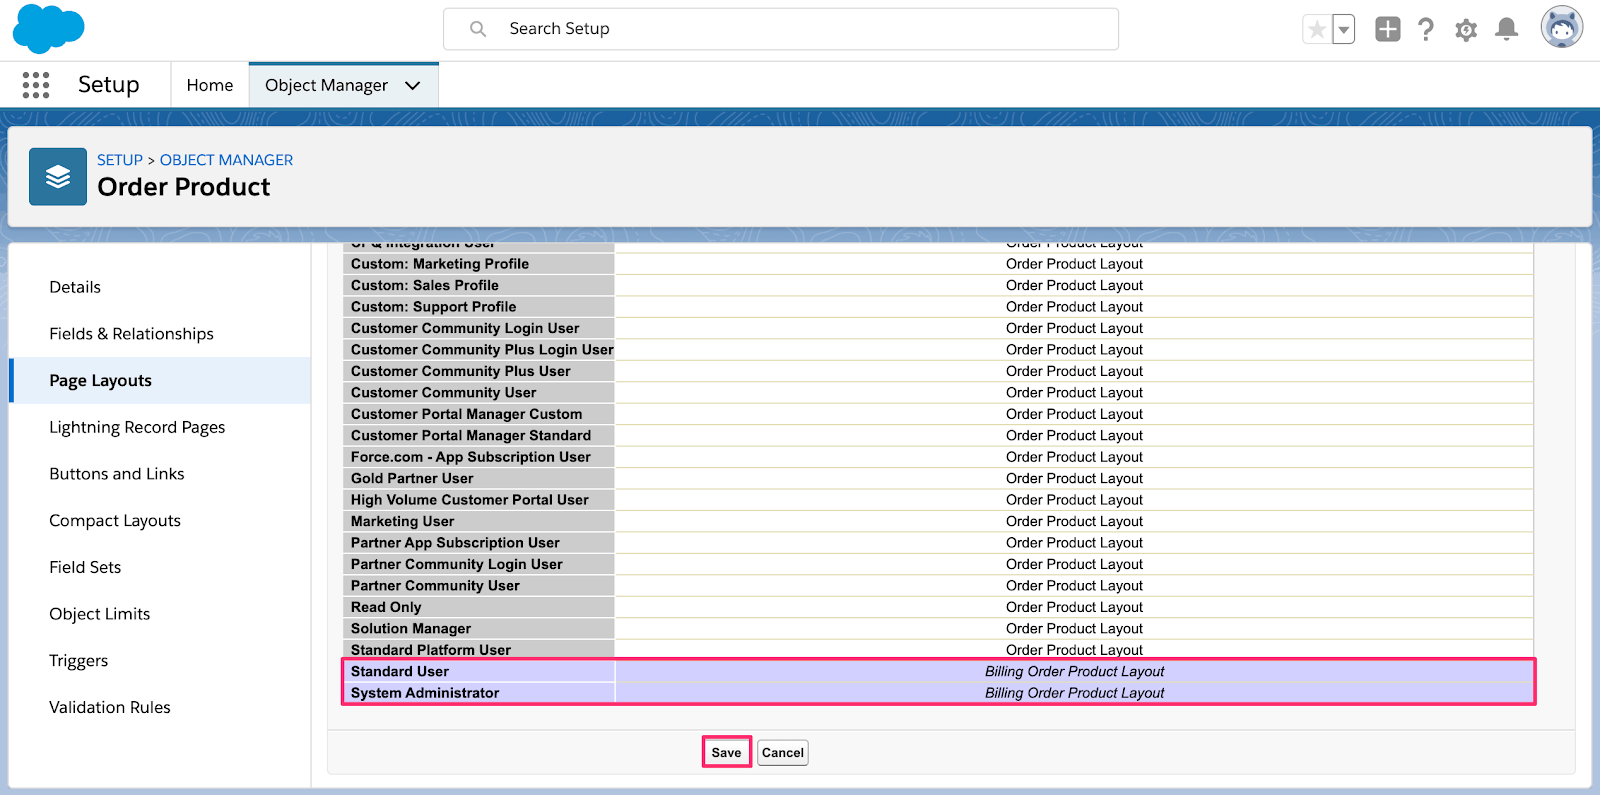
Order Product object Page Layouts
Product page layout
Navigate to Setup > Object Manager and click the Product object.
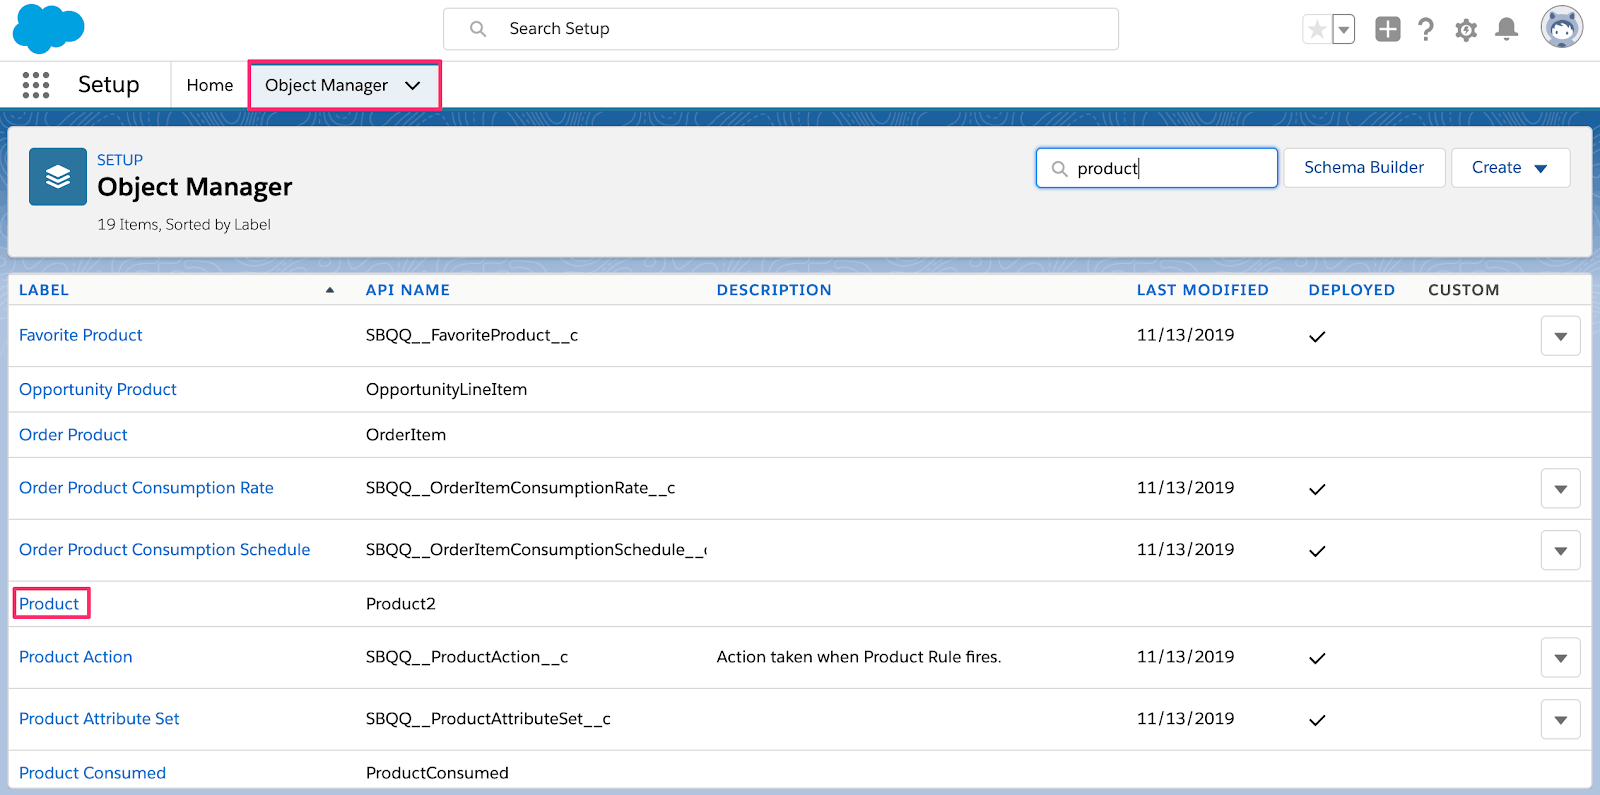
Product in the Salesforce Object Manager
Click the Page Layouts tab, and click Page Layout Assignment.
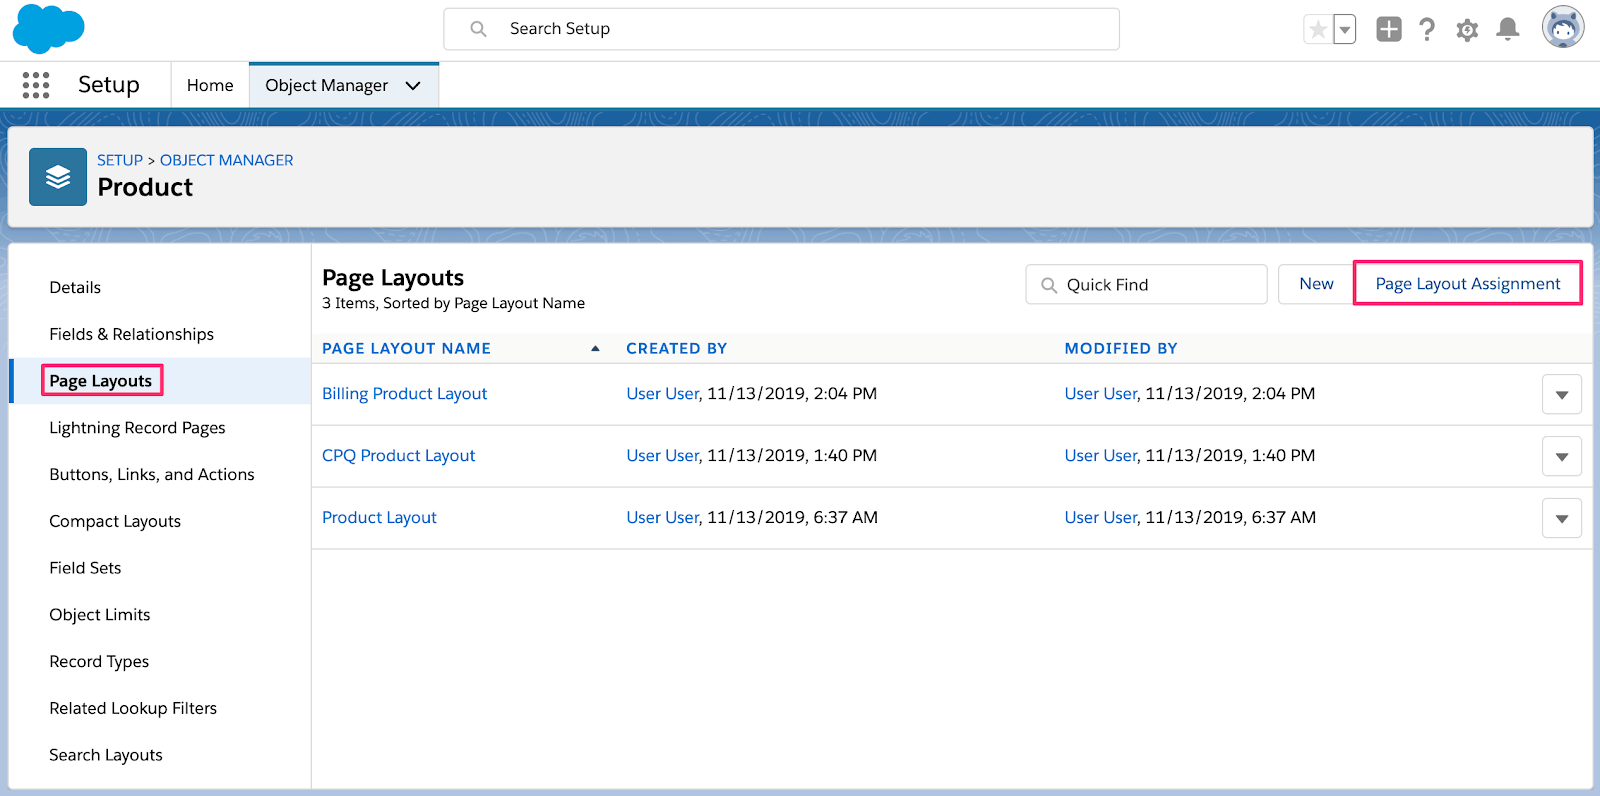
Product object Page Layouts
Click Edit assignment, set the Standard User and System Administrator profiles to view the Billing Product Layout, and click Save.
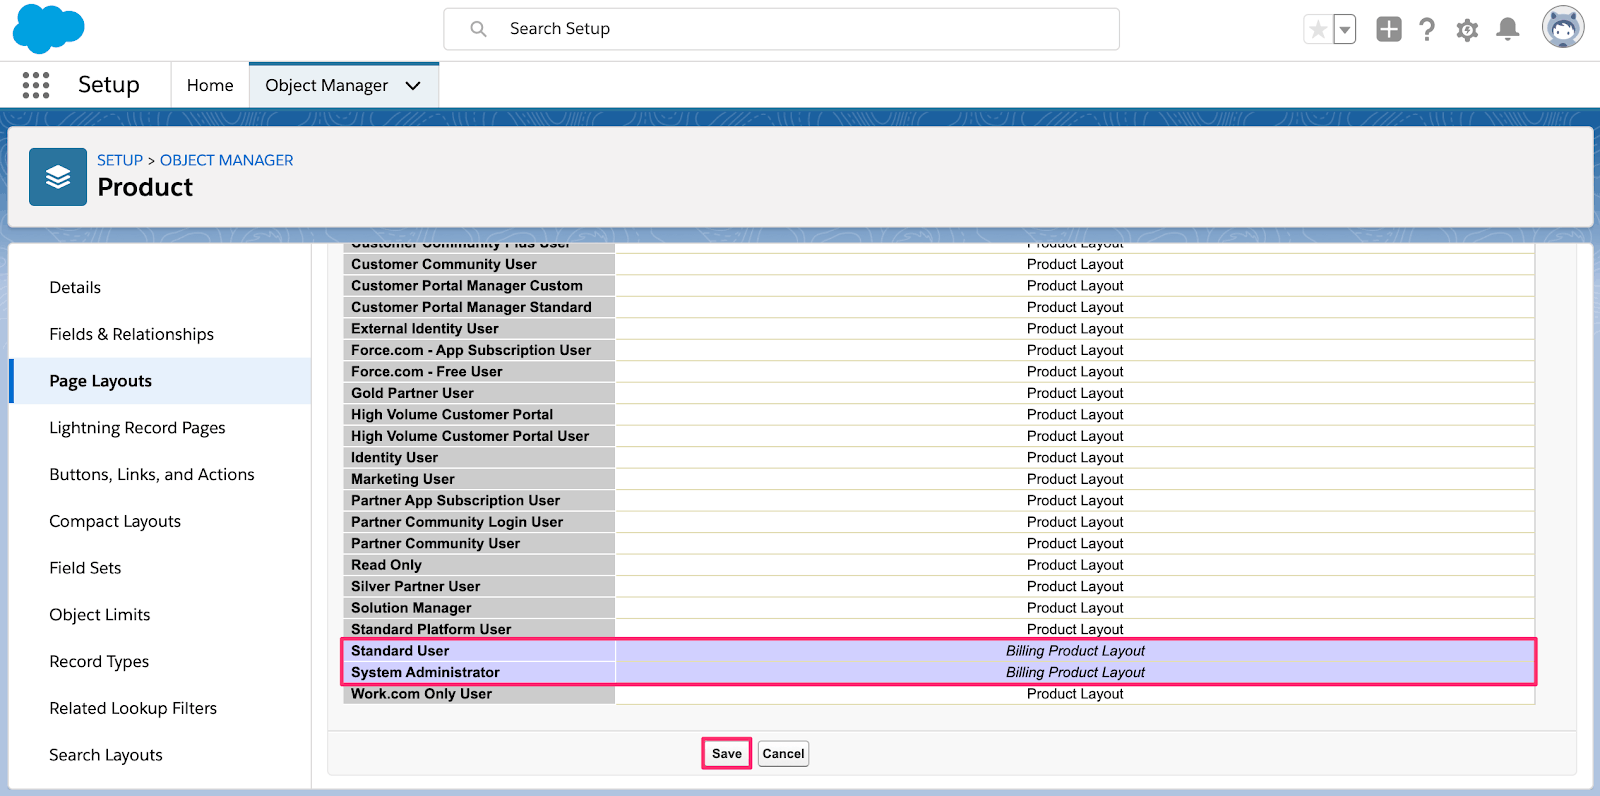
Product object Page Layouts
Additional configuration steps
This section guides you through the final steps for the Stripe app for Salesforce CPQ & Billing to function properly on your organization. It consists of adding a few buttons/actions to page layouts, as well as adding new picklist values to picklist fields.
Add a refund action to Payment Method objects
The Refund UI flow is packaged with Salesforce Billing, but it’s not available in the default configuration. Use the following steps to add the Refund action to the Payment Page Layout.
Navigate to Setup > Object Manager and click the Payment object.
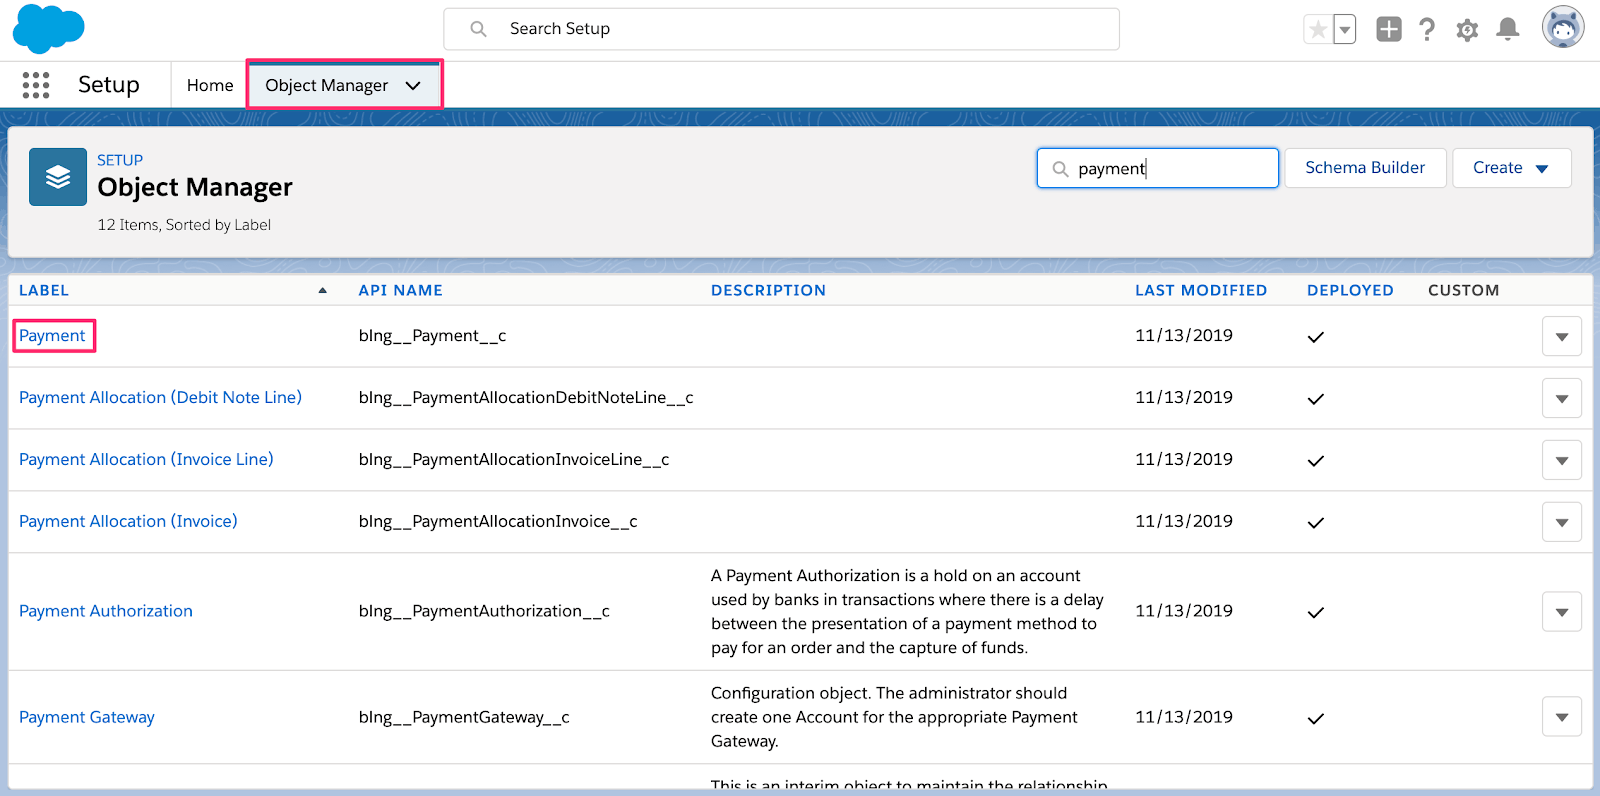
Payment in the Salesforce Object Manager
Click the Page Layouts tab, and click Payment Layout.
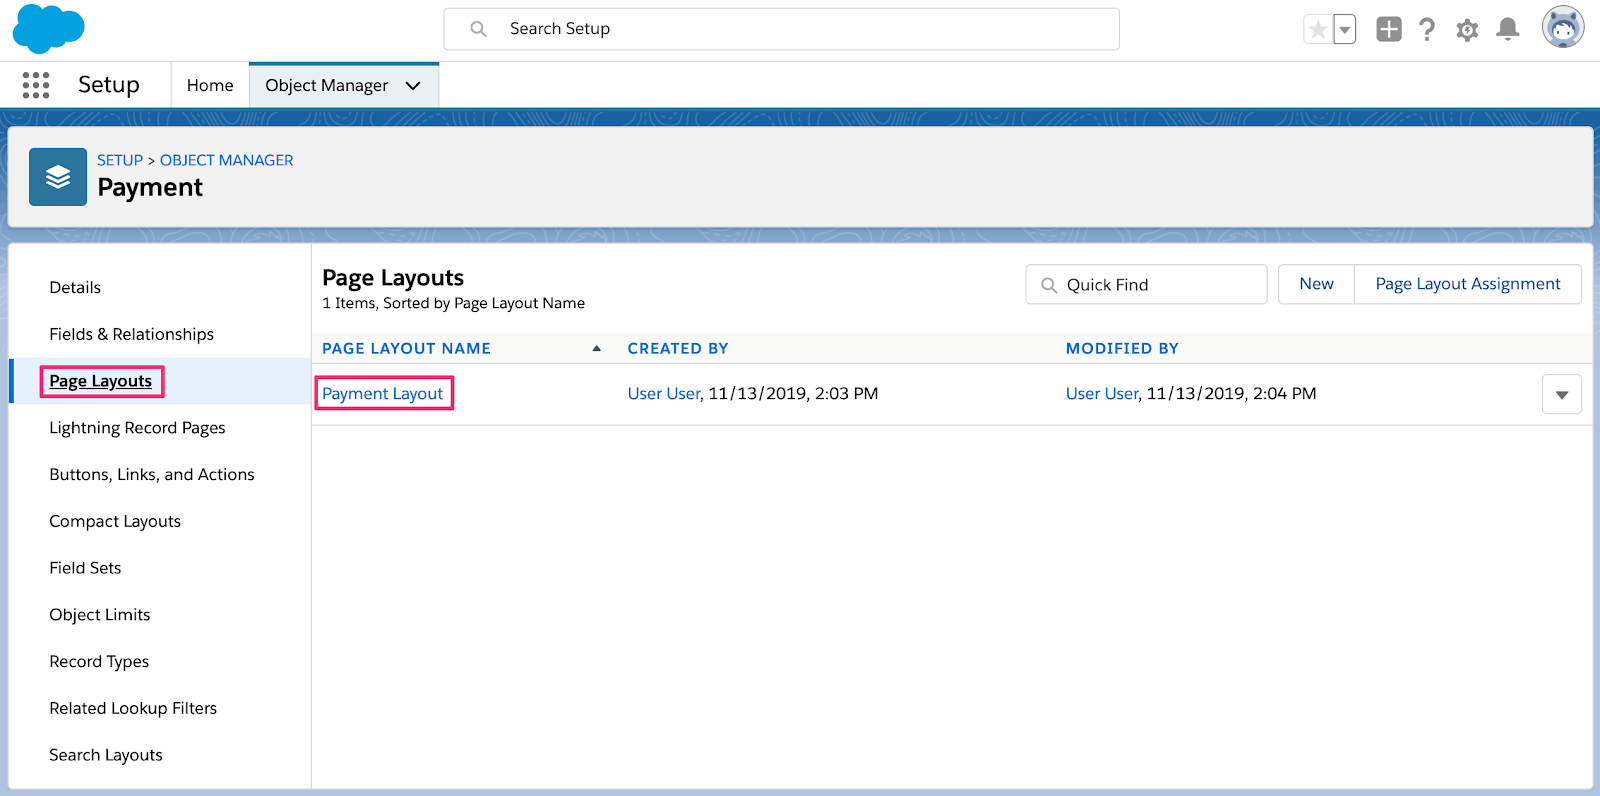
Payment object Page Layouts
In the pallete, click Mobile & Lightning Actions, drag the Refund action to the page layout (under the Salesforce Mobile and Lightning Experience Actions section), and click Save.
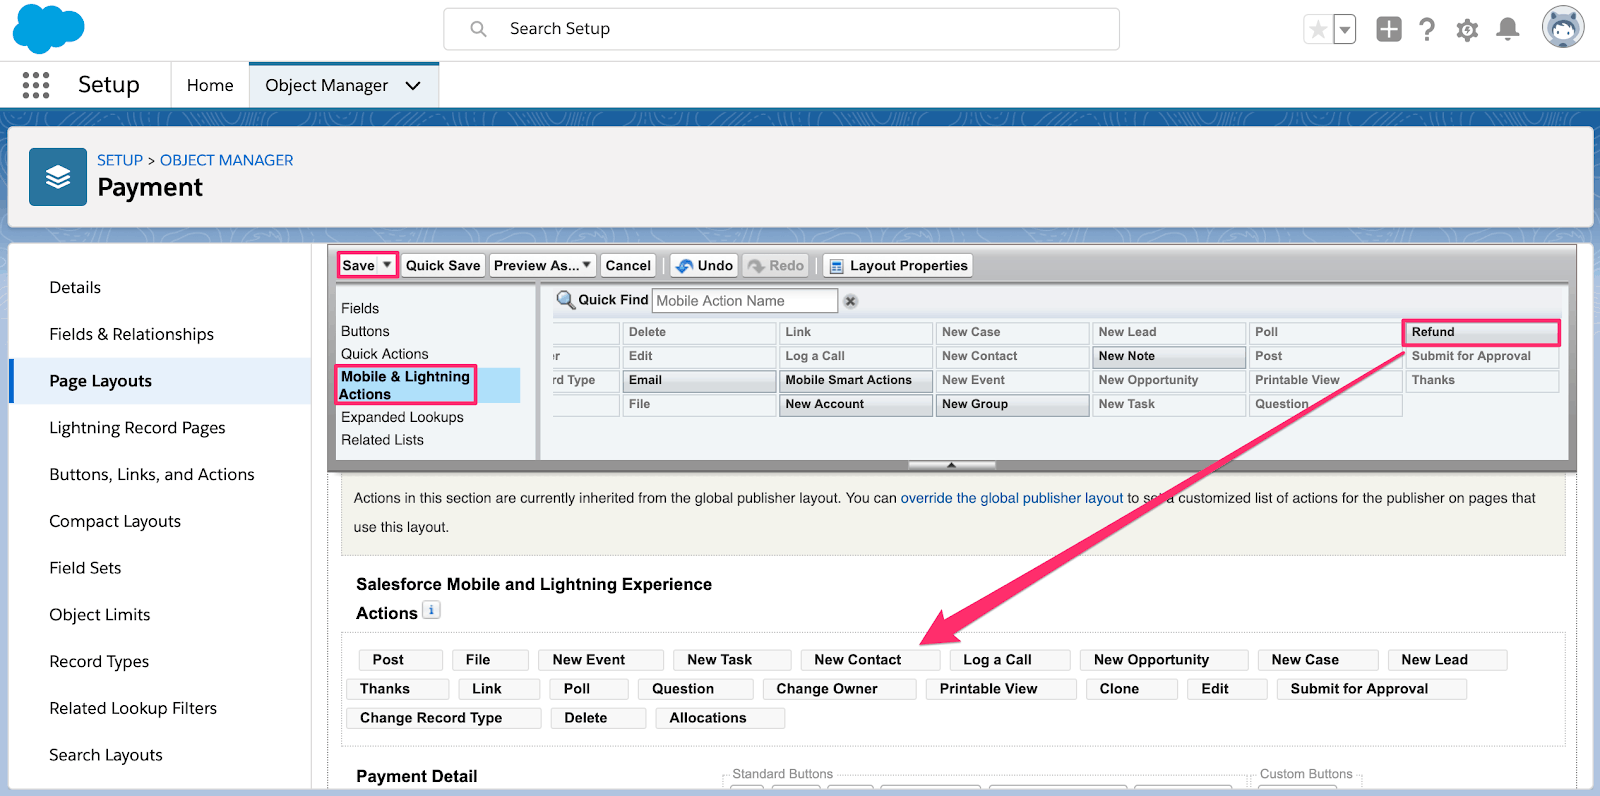
Payment object Page Layouts
Add a verify action to Payment Method objects
ACH payment methods require the extra step of verifying the bank account. Salesforce Billing doesn’t have this capability, but it’s available in the Stripe for Salesforce Billing managed package. Use the following steps to add the Verify action to the Payment Method Page Layout.
Navigate to Setup > Object Manager and click the Payment Method object.
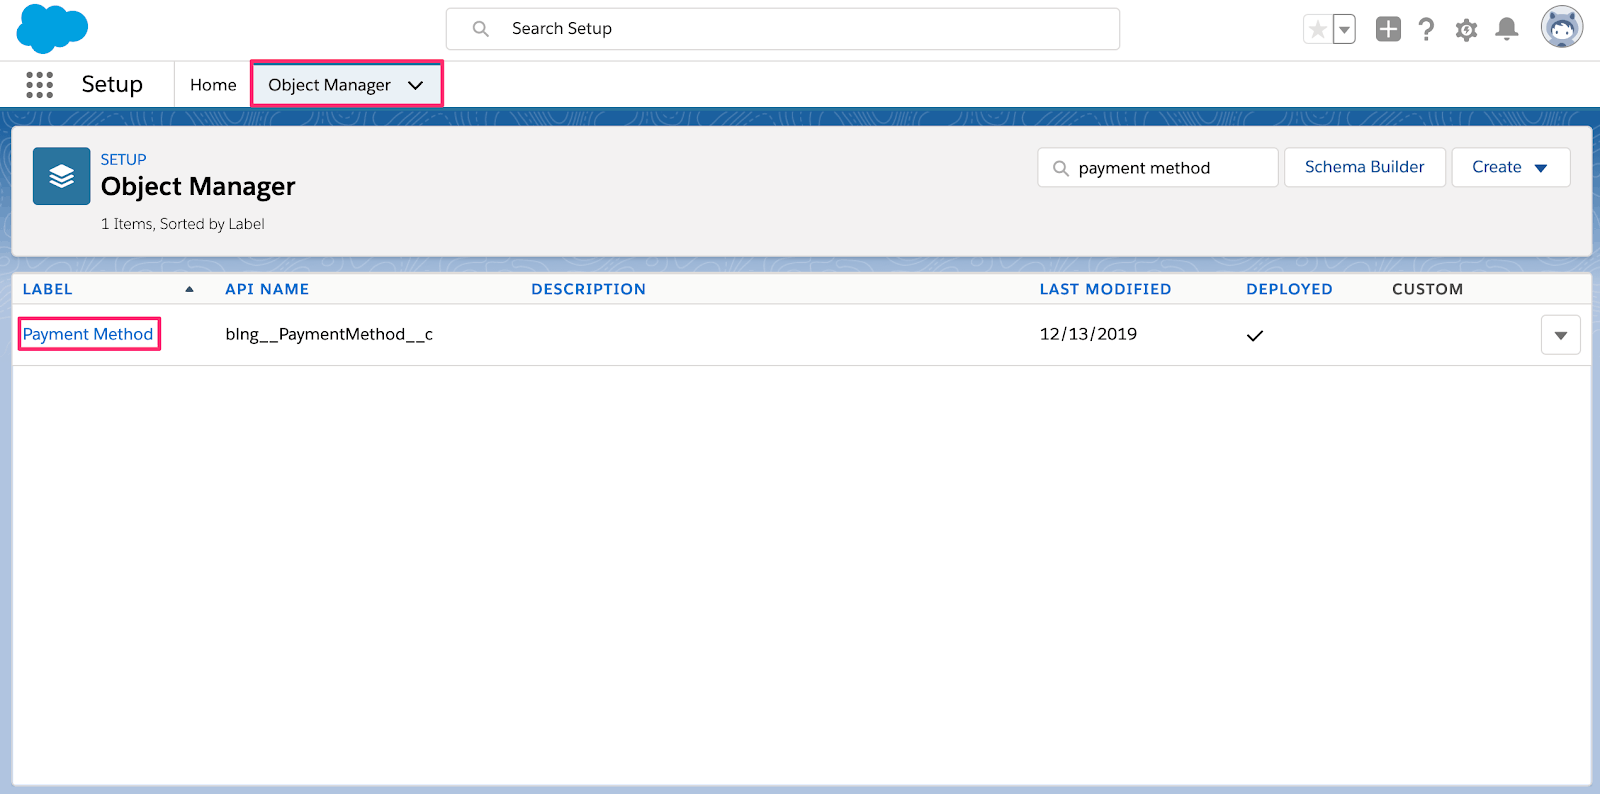
Payment Method in the Salesforce Object Manager
Click the Page Layouts tab, and click Payment Method Layout.
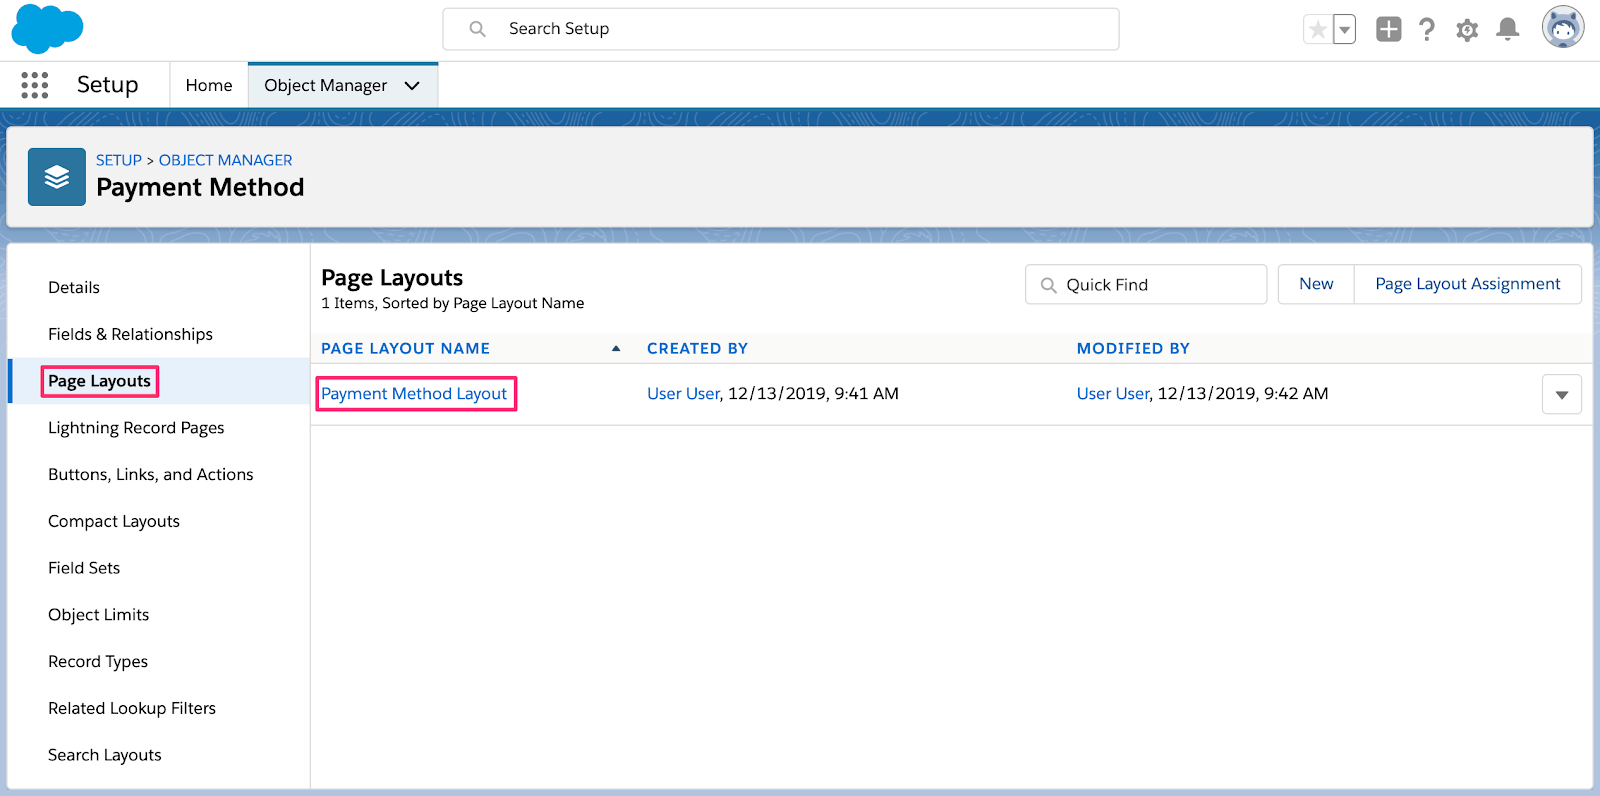
Payment Method object Page Layouts
In the pallete, click Mobile & Lightning Actions, drag the Verify action to the page layout (under the Salesforce Mobile and Lightning Experience Actions section), and click Save.
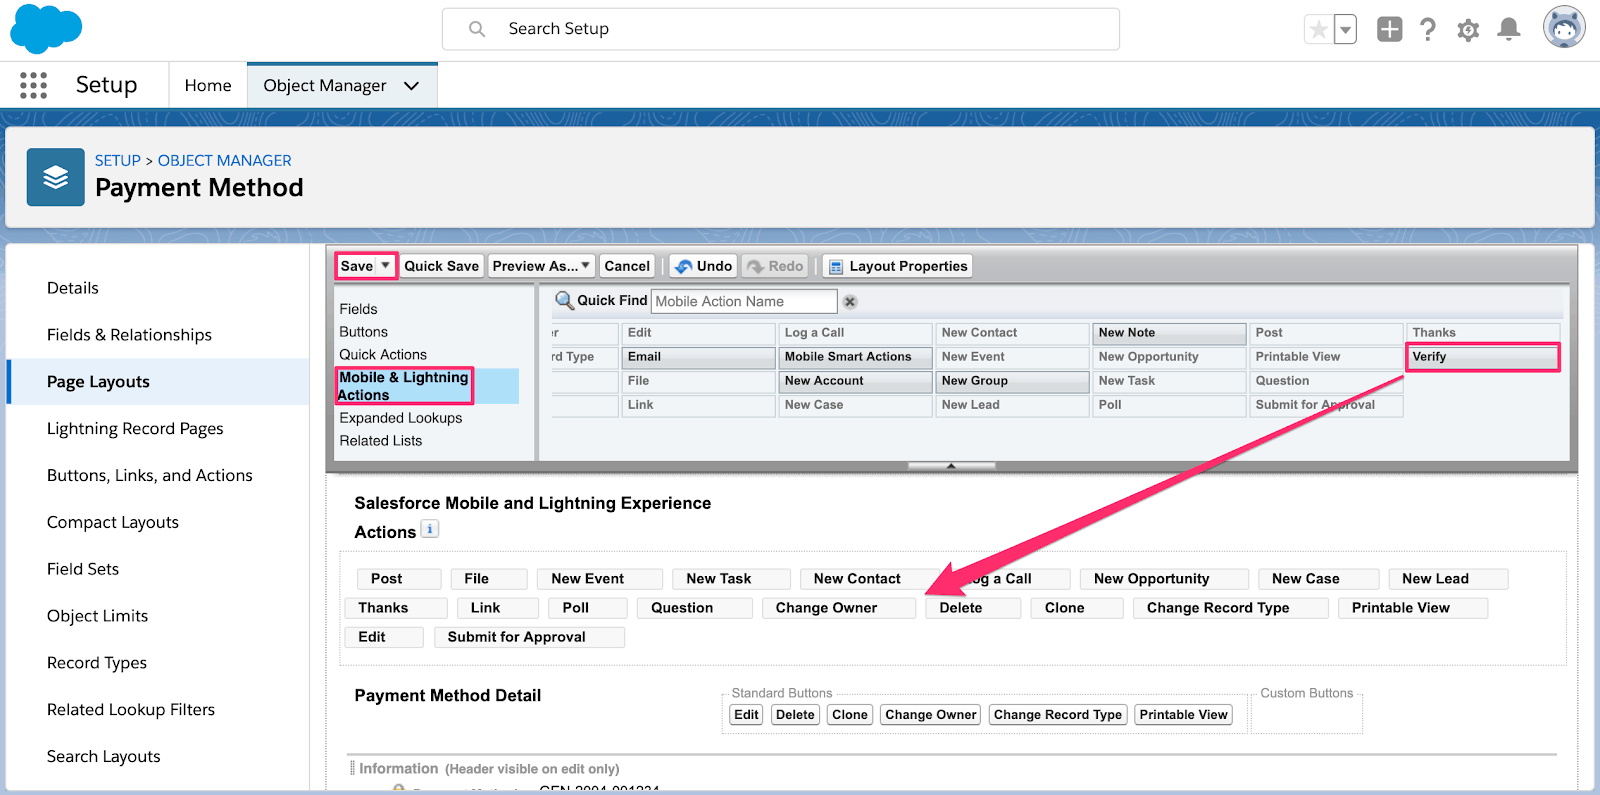
Payment Method object Page Layouts
Add an ACH Payment Method button to the Related list on Account objects
The Stripe app for Salesforce CPQ & Billing comes with its own flow for adding a new ACH Payment Method. The following steps will add the New ACH Payment Method Button to the Billing Account Page Layout.
Navigate to Setup > Object Manager and click the Account object.

Account in the Salesforce Object Manager
Click the Page Layouts tab, then click Billing Account Layout.
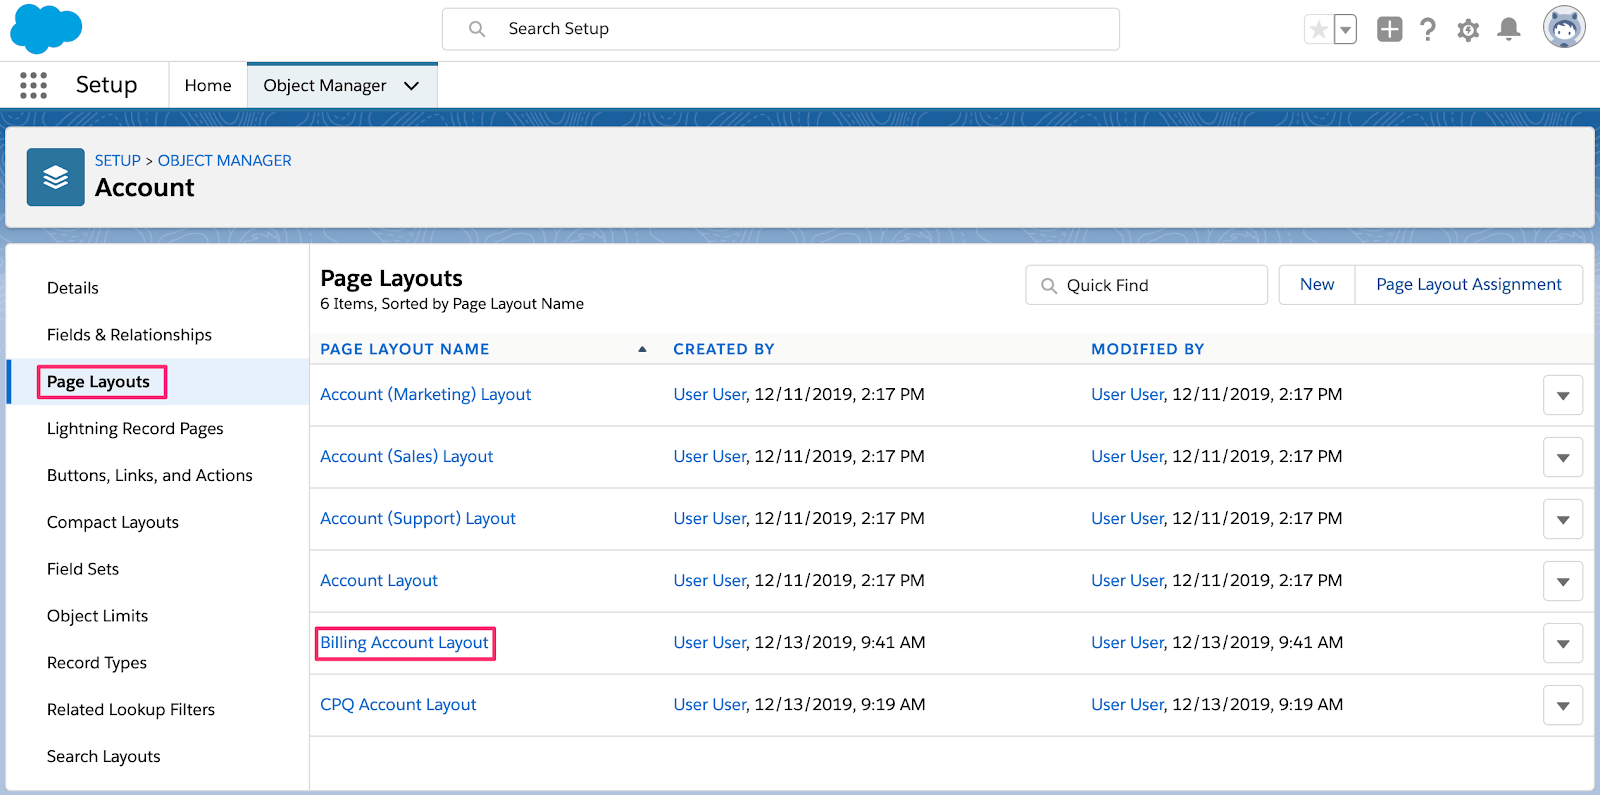
Billing Account object Page Layouts
Scroll down to the Payment Methods Related List and click the wrench icon.
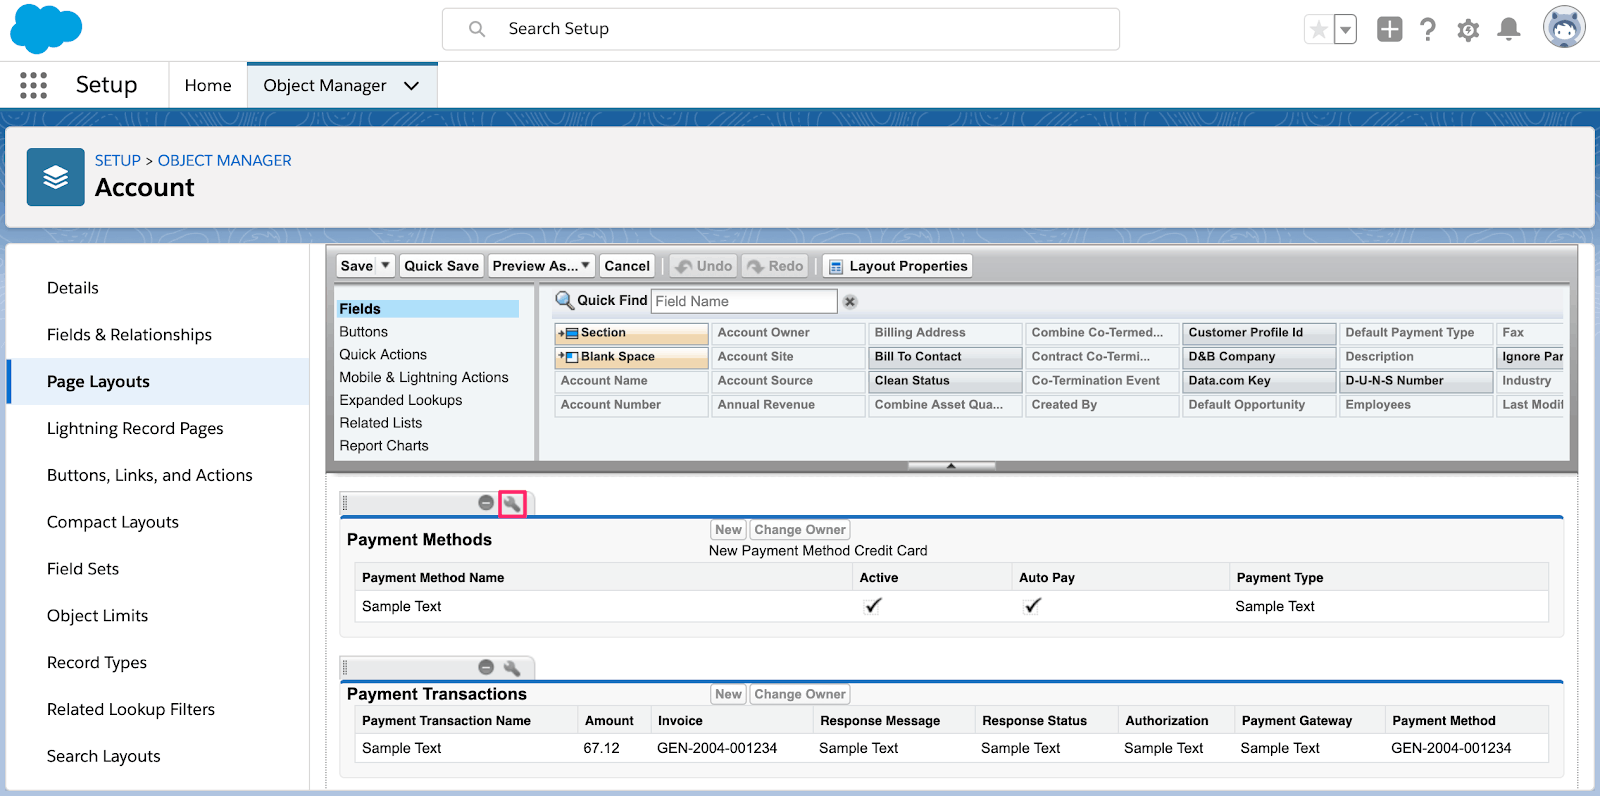
Editing the Billing Account page layout
- In the Buttons section, click the plus icon.
- in the Custom Buttons sub-section, add the New Payment Method ACH to the Selected Buttons side.
- Click OK and Save in the pallet.
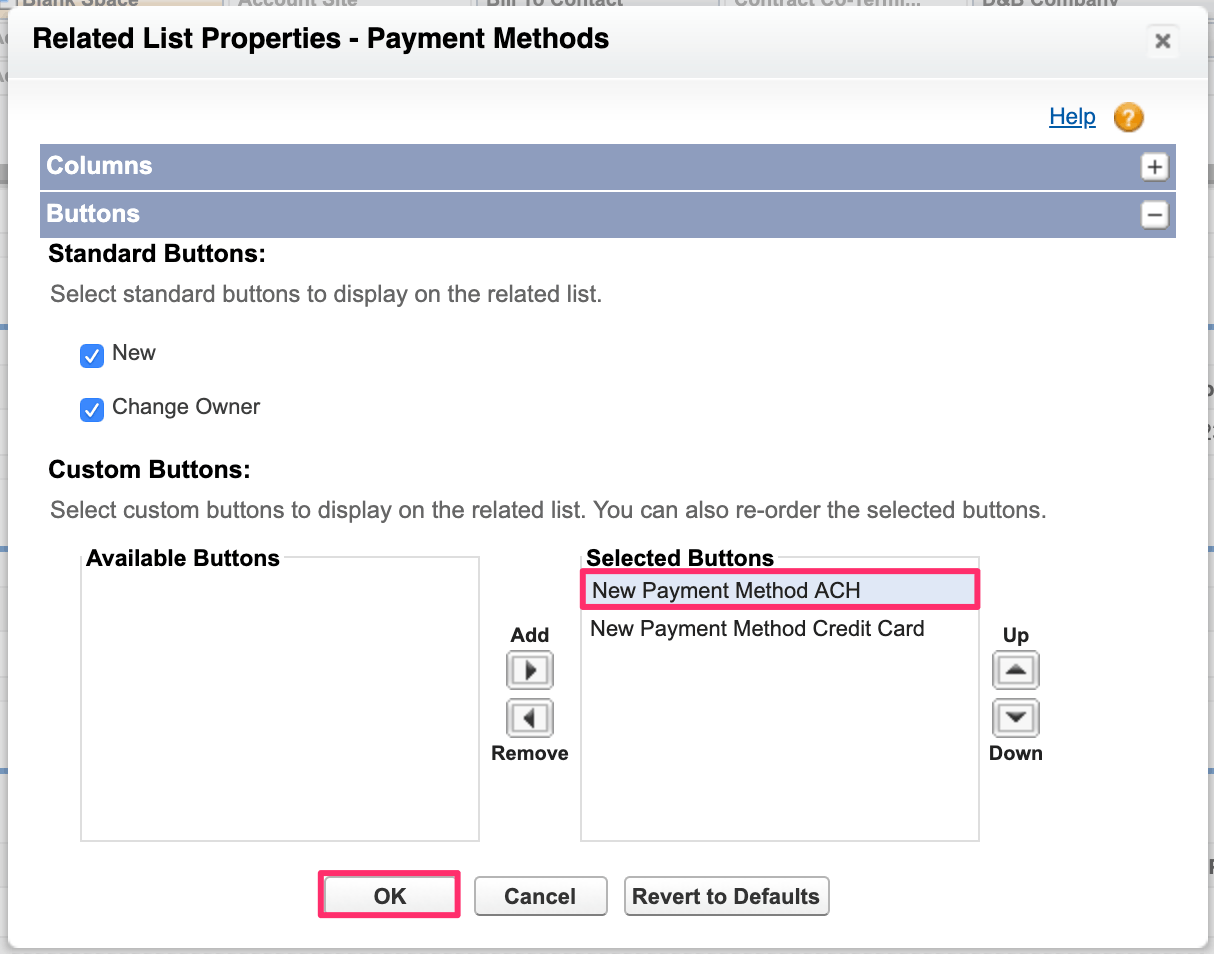
Editing the Billing Account buttons
Add the Individual and Company bank account types on Payment Method objects
The Stripe API requires you to pass a bank account type when creating a new ACH payment method. Use the following steps to add Individual and Company as bank account types in Salesforce.
Navigate to Setup > Object Manager and click the Payment Method object.

Payment Method in the Salesforce Object Manager
Click the Fields & Relationships tab and click Bank Account Type.
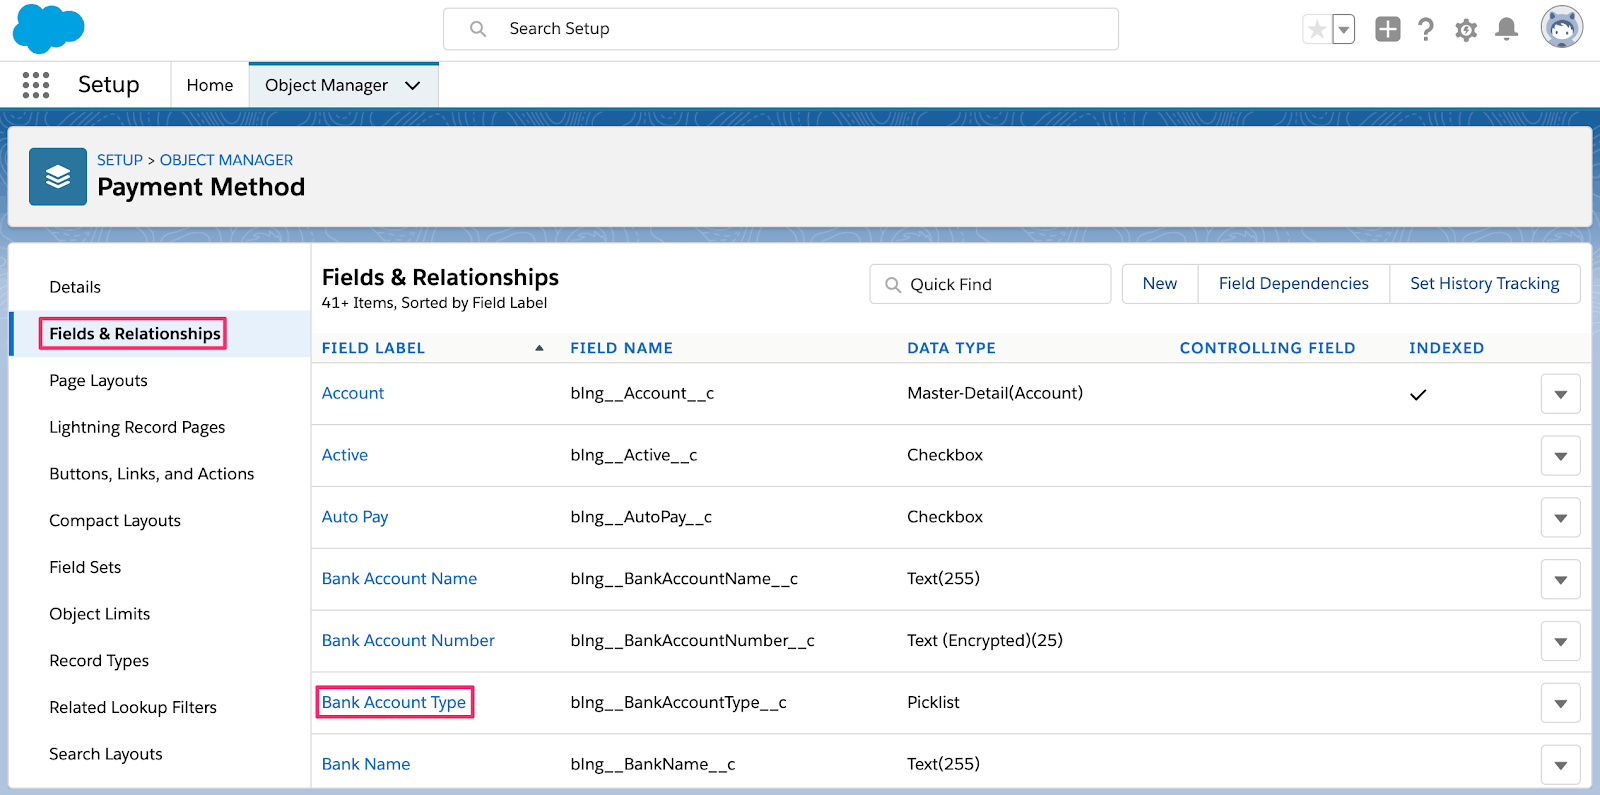
Bank Account types in the Salesforce Object Manager
Scroll down to the Values list and click View Bank Account Type Value Set.
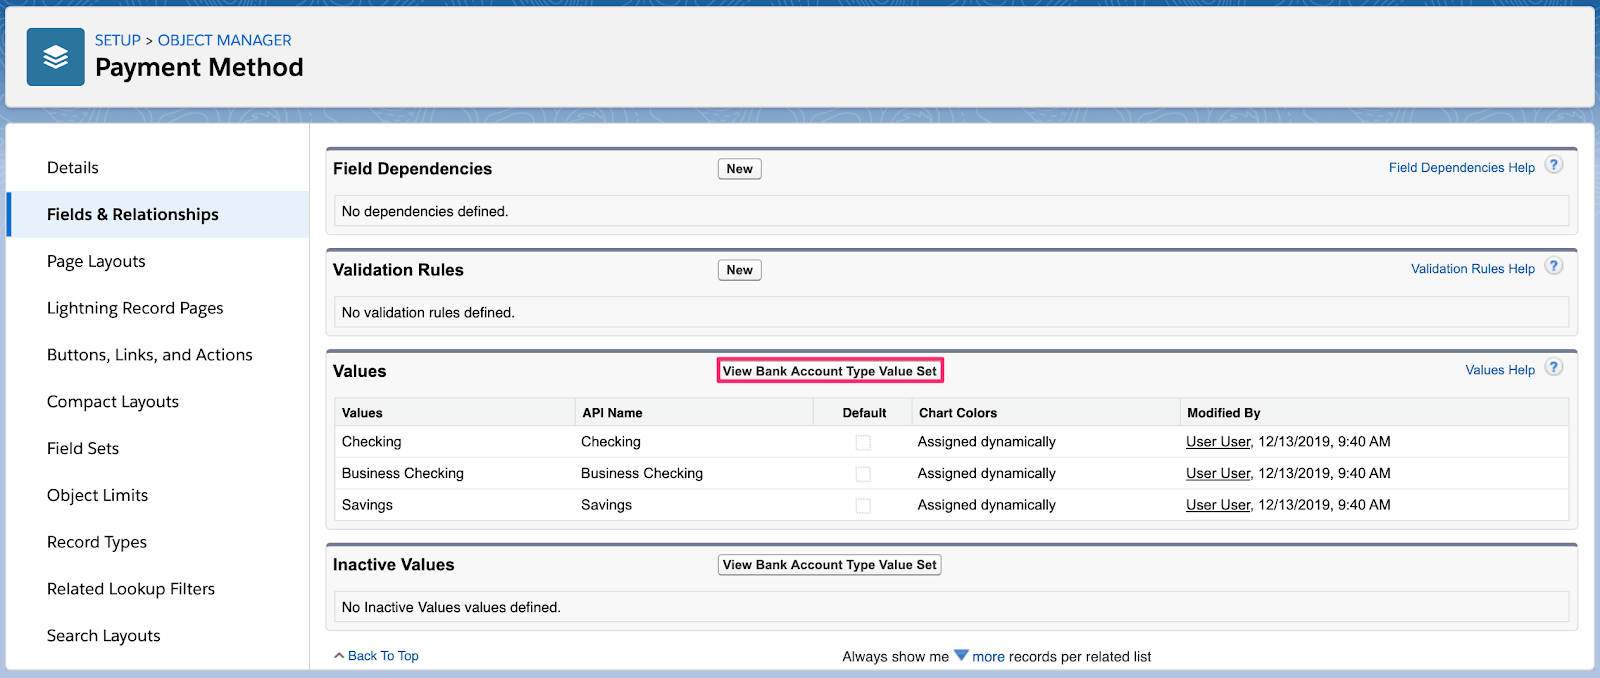
Viewing existing bank account types
Click New
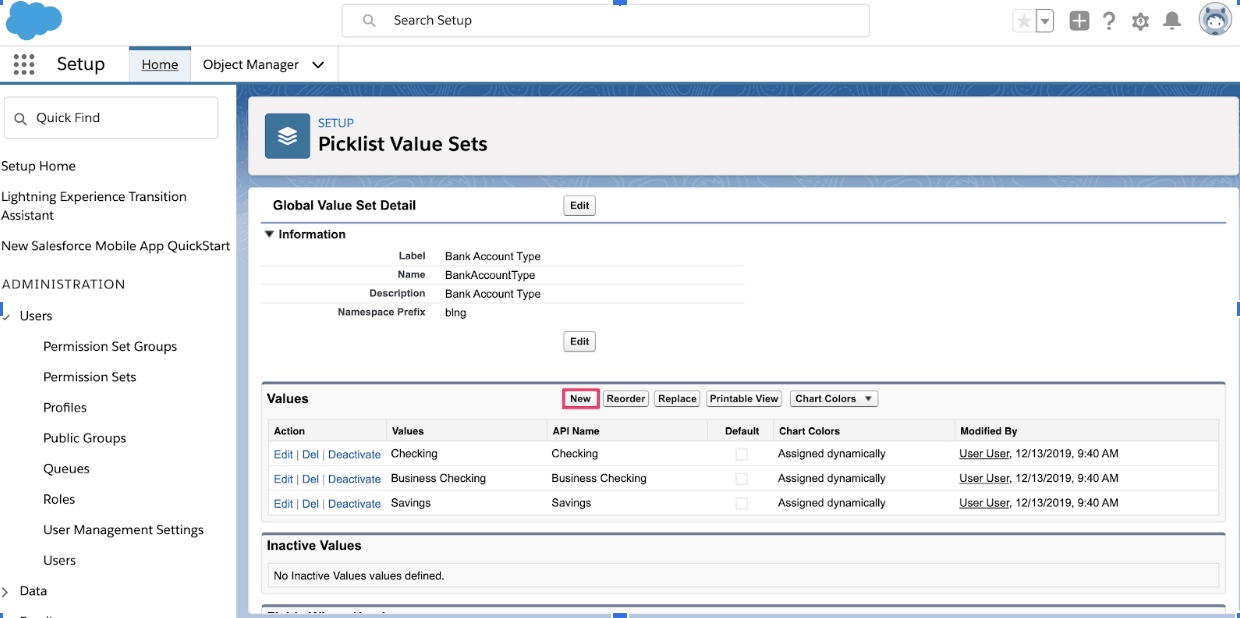
Click New
Add “Individual” and “Company” in the text field, select the Add the new picklist values to all Record Types checkbox, and click Save.
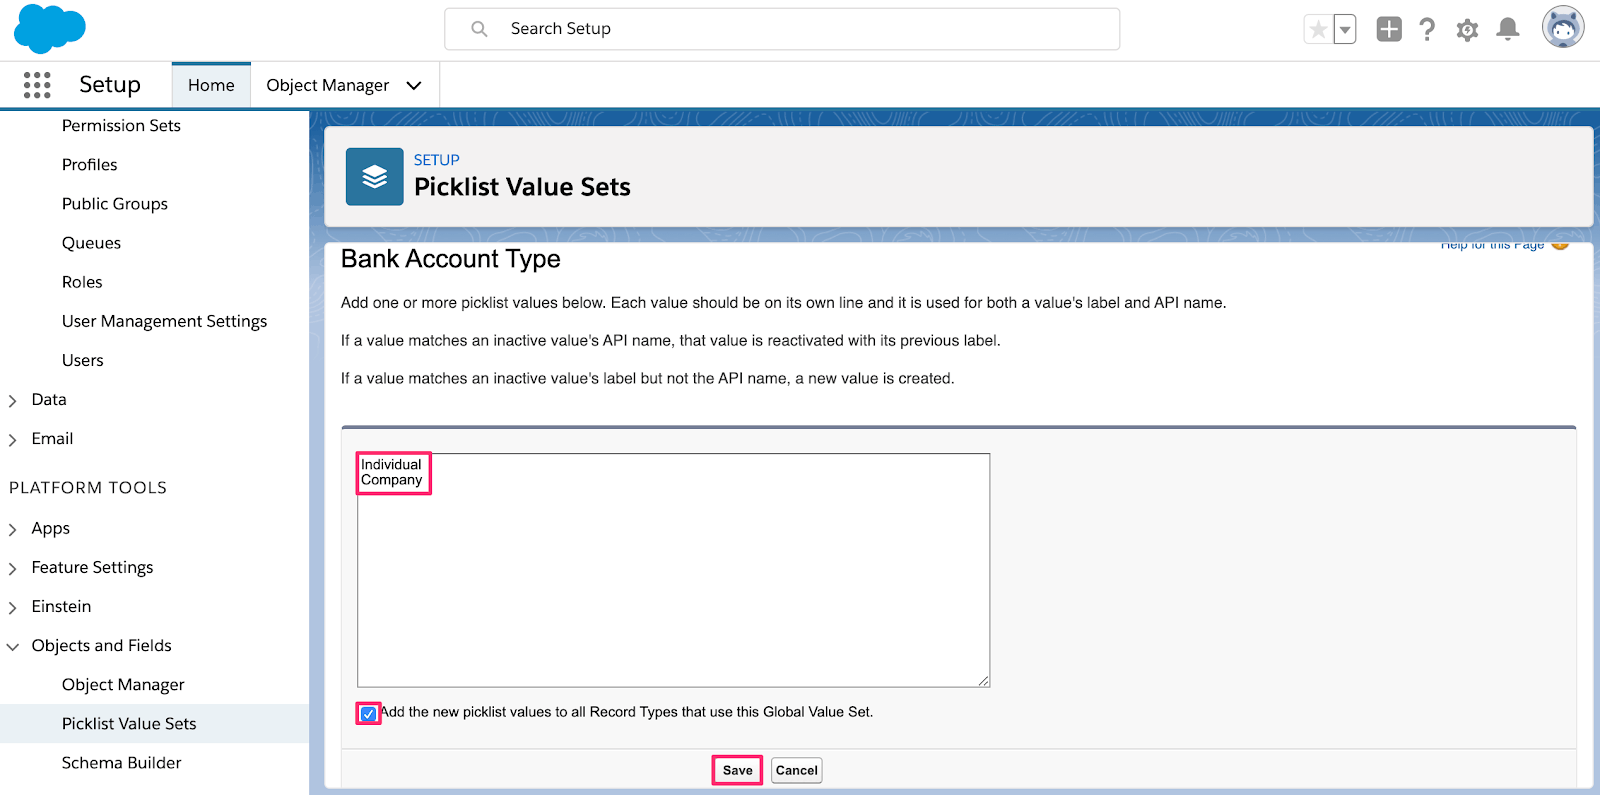
Adding new types of bank accounts
Add Stripe as a Payment Gateway field type picklist value
You need to set up Stripe as a valid payment gateway to be used in Salesforce Billing. The following steps add Stripe as a Gateway Type for the Payment Gateway object.
Navigate to Setup > Object Manager and click the Payment Gateway object.
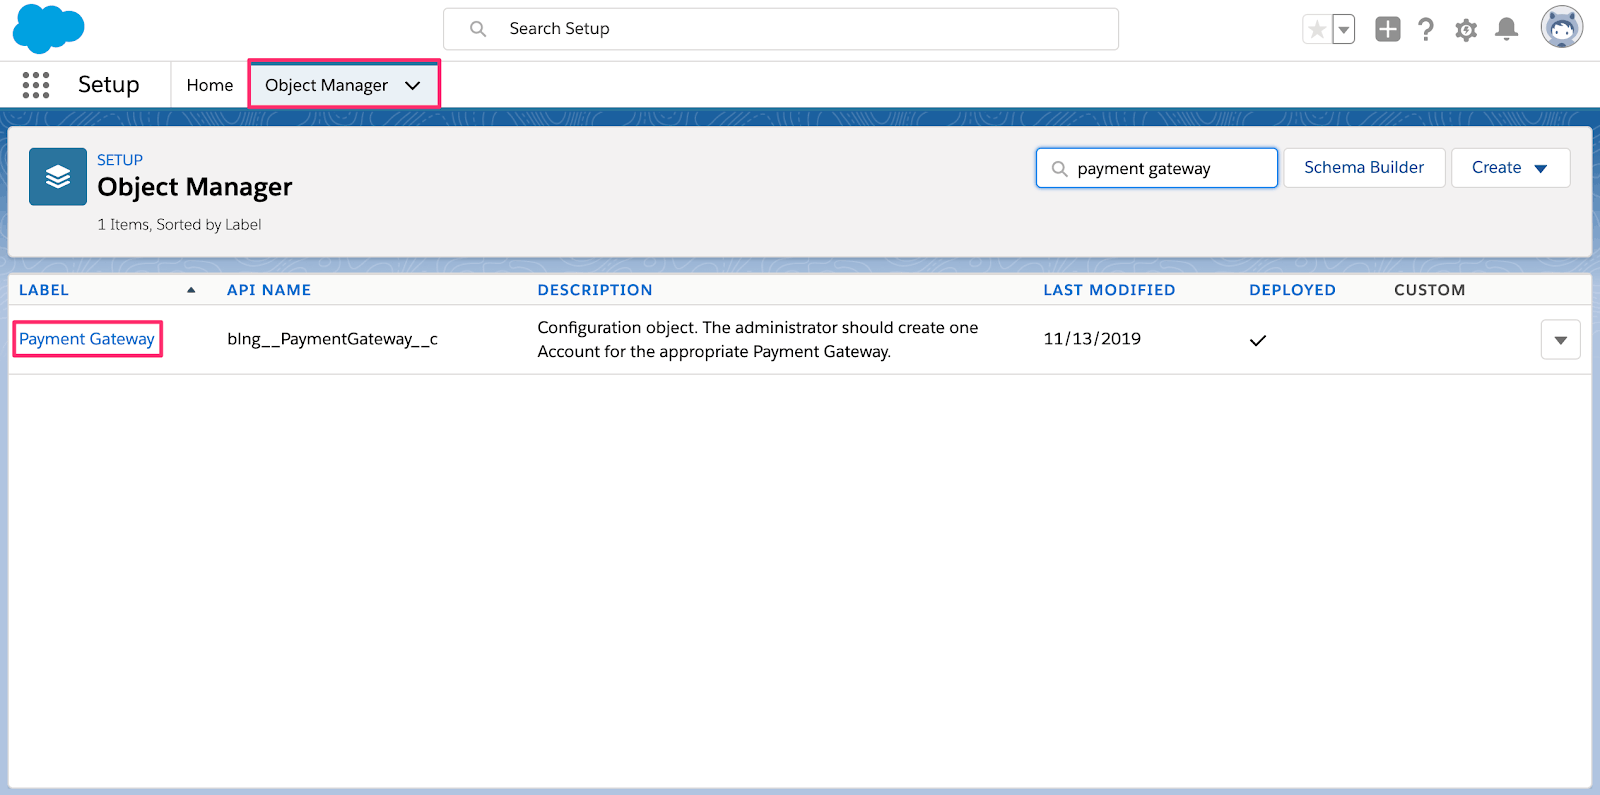
Payment Gateway in the Salesforce Object Manager
Click the Fields & Relationships tab and click Gateway Type.
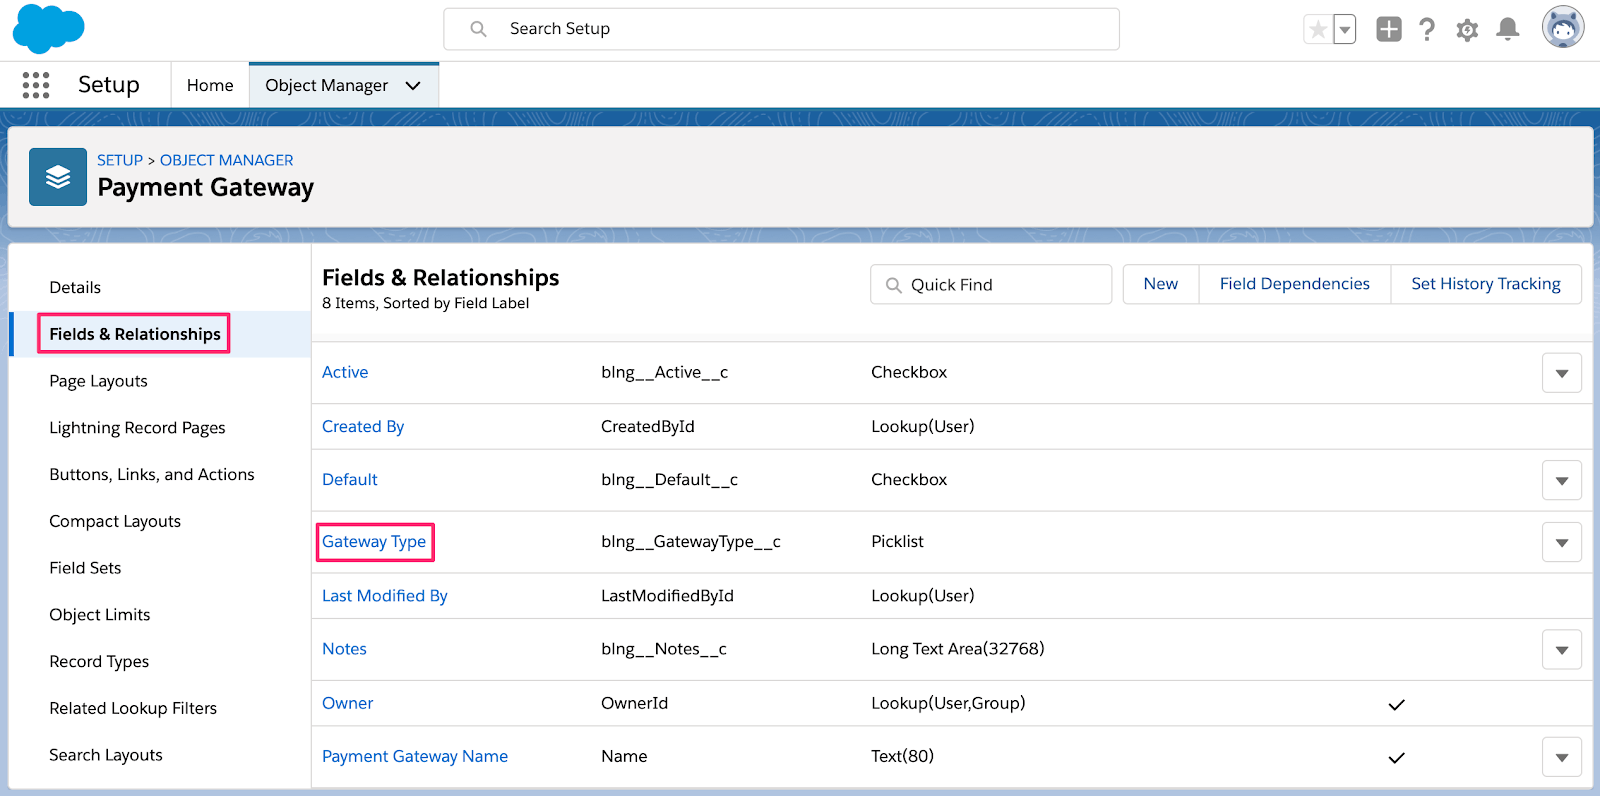
Payment Gateway in the Salesforce Object Manager
Scroll down to the Values list and click View Gateway Type Value Set.
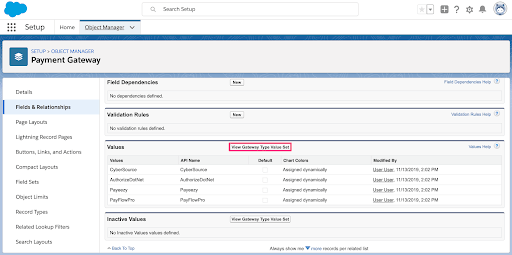
Viewing existing bank account types
Click New
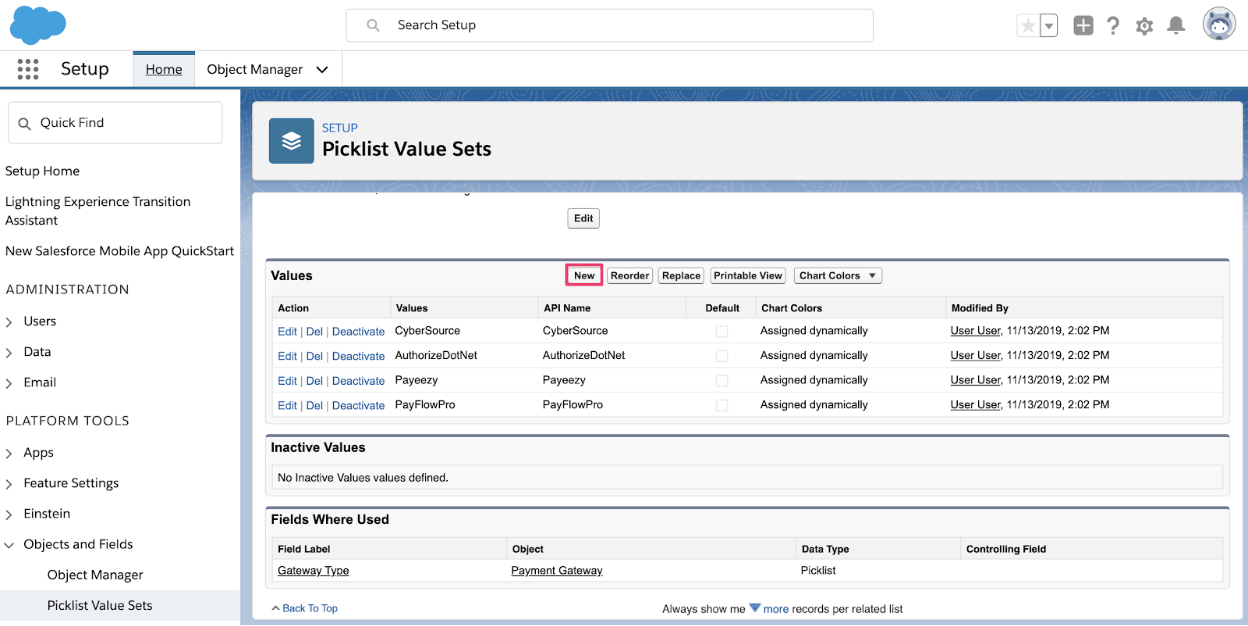
Adding a new payment gateway Click Ok
Add Stripe into the text field, select the Add the new picklist values to all Record Types checkbox, and click Save.
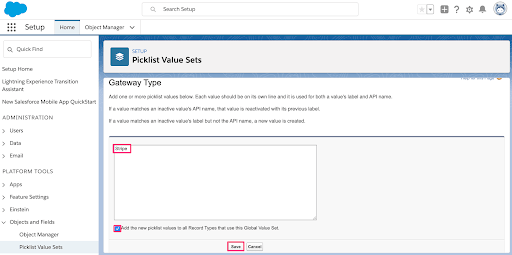
Adding a new payment gateway
Stripe Payment Gateway setup
The final step to configure Stripe app for Salesforce CPQ & Billing is to go through the Setup Assistant. This is an app that comes with the managed package, and authorizes your Salesforce organization to be able to use the Stripe Payment Gateway.
Click the App Launcher icon.
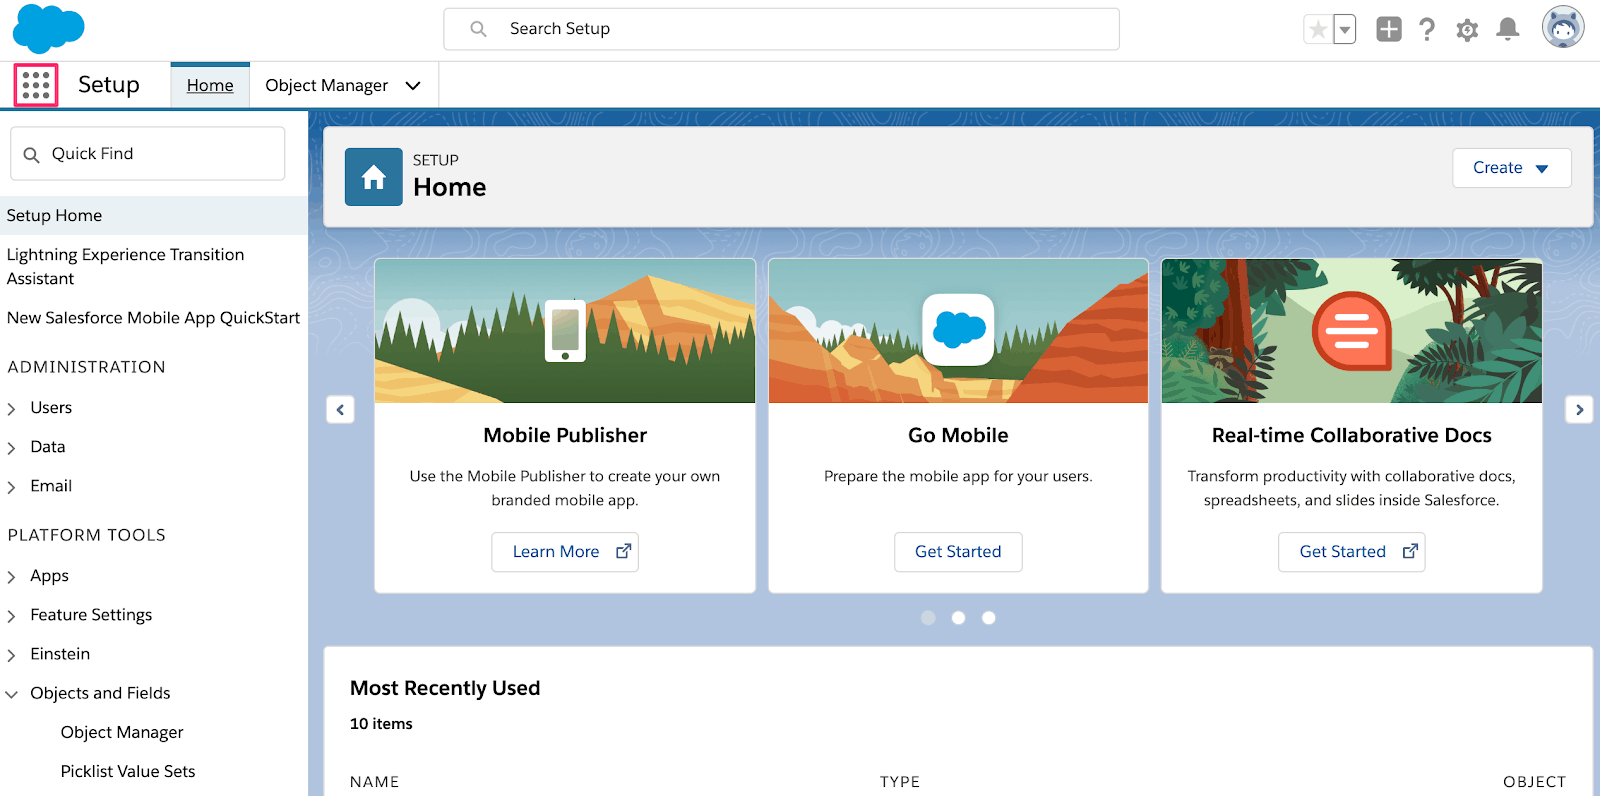
Salesforce App Launcher
In the App Launcher, click the Stripe Payment Gateway Setup app.
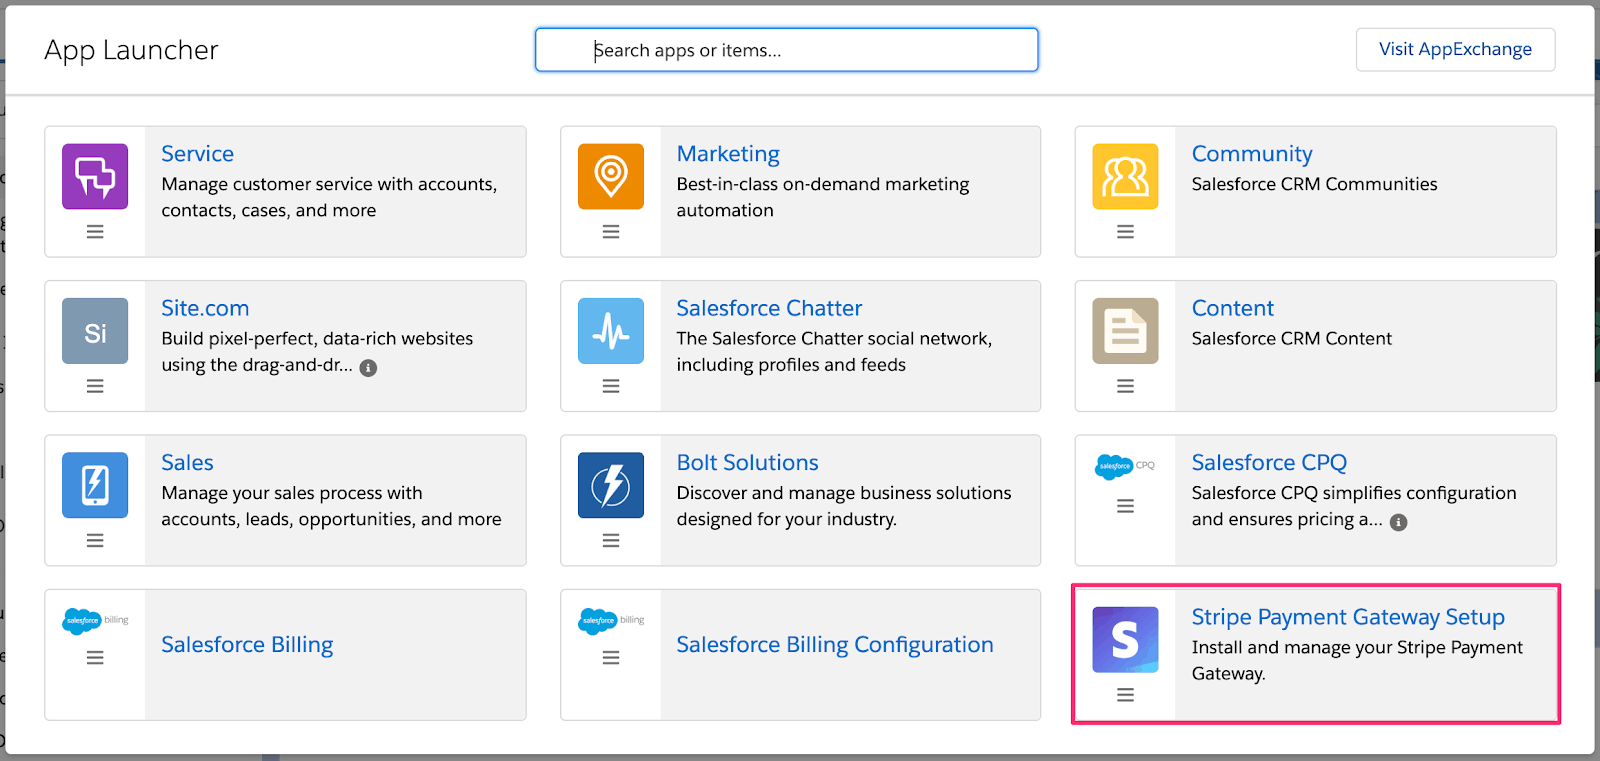
Salesforce App Launcher
Click Get Started
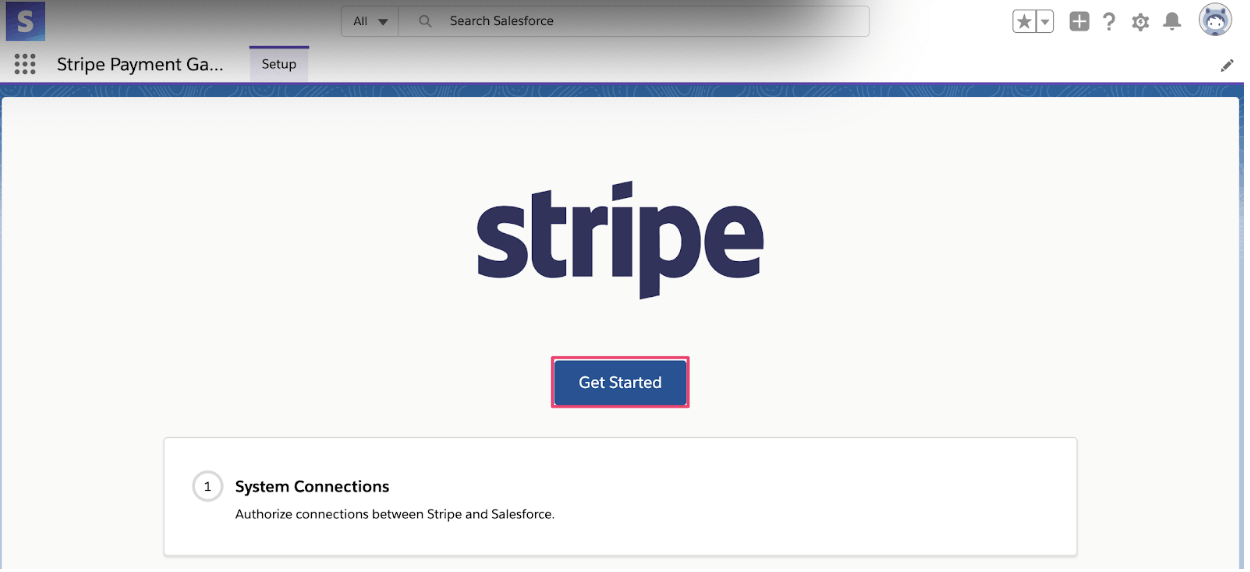
Salesforce App Launcher Get Started
If you’re ready to use Stripe for payment processing, you can toggle Live Mode on. Otherwise, you can stay in Test Mode to test the payment processing. When you make your decision, click Authorize.
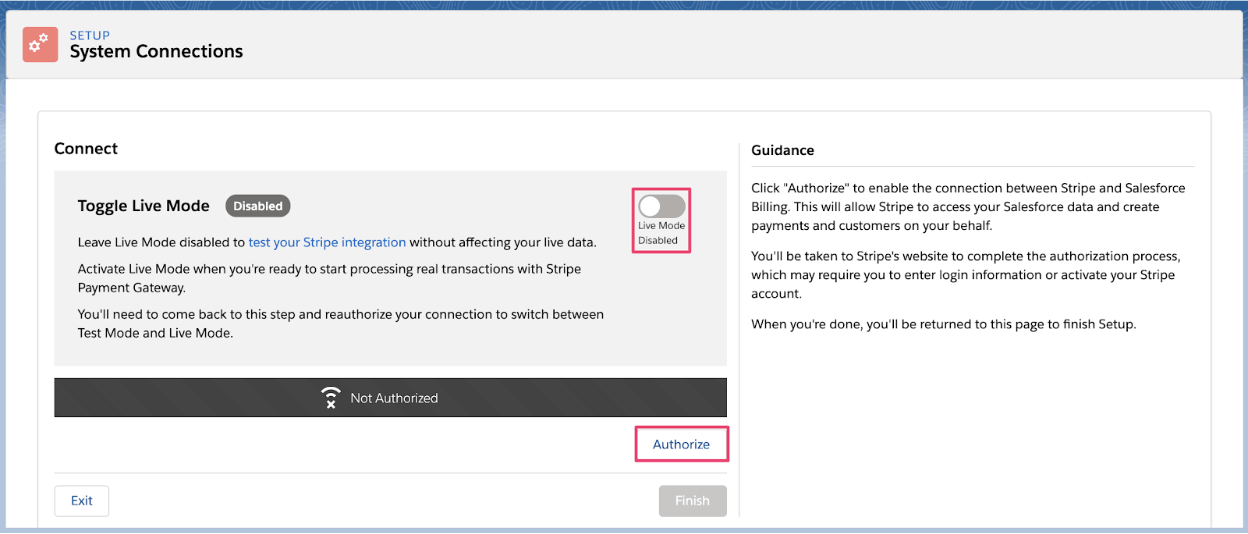
Salesforce App Launcher Authorize
You’ll be prompted to log into your Stripe account. Enter your Stripe credentials and complete the flow. After successfully logging in, you’ll be redirected to the System Connections page. If you’ve successfully authorized, you’ll see the green Authorized message. Click Finish to complete the setup of the Stripe Payment Gateway.
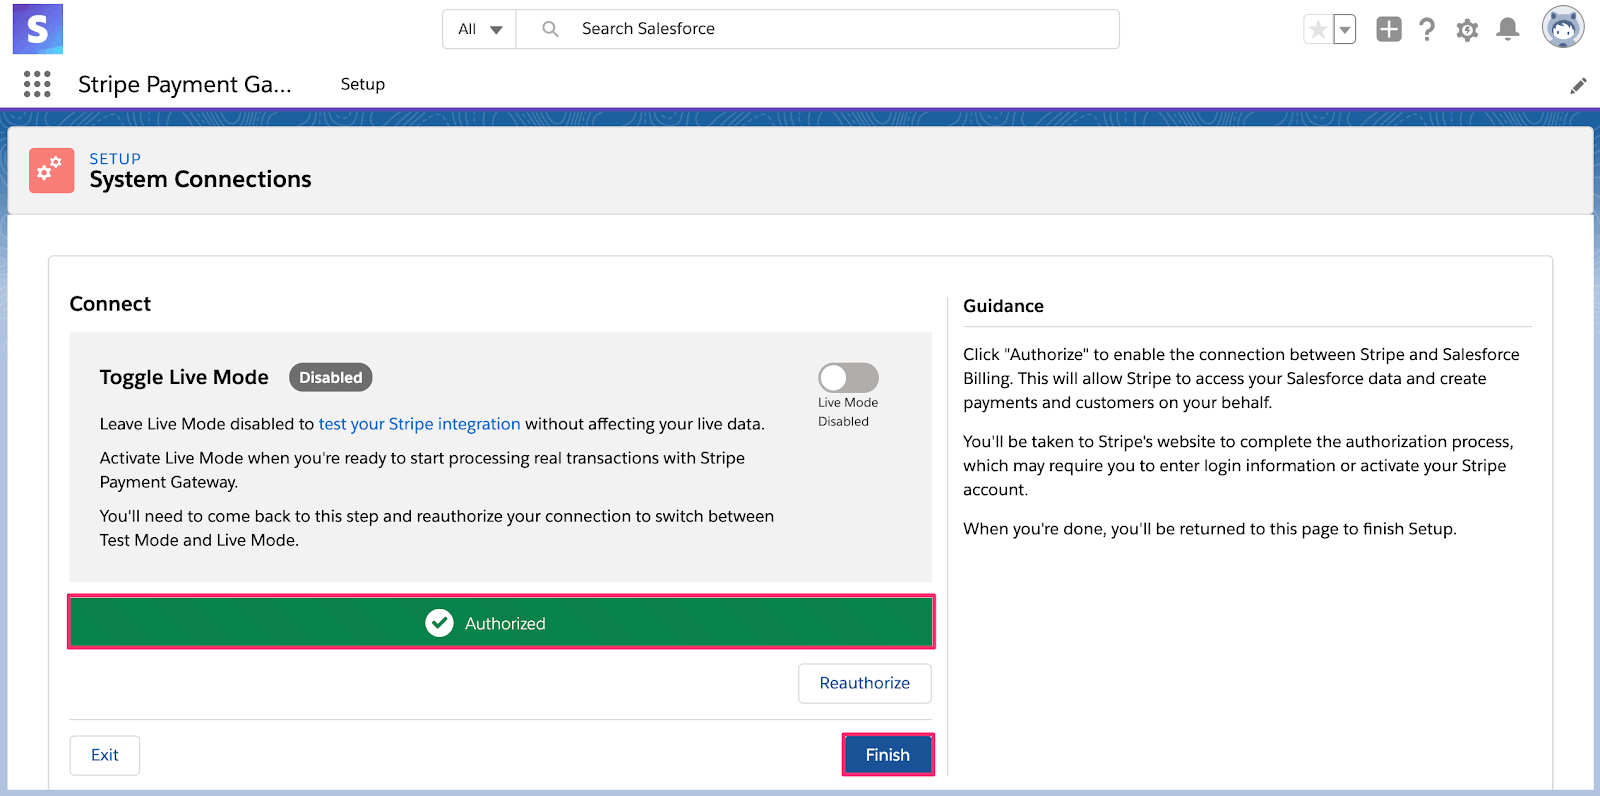
Completed Stripe Payment Gateway setup
You can exit the app and start using the Stripe app for Salesforce CPQ & Billing.